Written by Wes Whitworth and Jess Olson
Advertisement
So your 4X4 needs a bit of a lift, but you don’t want to (or can’t yet afford) a completely new suspension system. Don’t worry, there are options available. One inexpensive way to improve the look of your vehicle is to use spring spacers. They work by levelling it out or allowing the fitment of bigger (taller) tyres.
We’ve shared the ins and outs of spring spacers, including whether they’re legal in Australia, why you might fit them and some of the issues they may cause.
Are spring spacers legal in Australia?Yes, spring spacers are legal in Australia, insofar as there is nothing within VSB14 stating that they’re illegal. If you want to know more about vehicle modifications, then VSB14 is the document for you. LS Section is where you’ll want to go for suspension rules.
However, what you can’t do is use extended shackles on leaf packs. They’re frowned upon by, well, pretty much everyone. Despite the fact they do essentially the same as a coil spacer, the springs just move around a lot more.
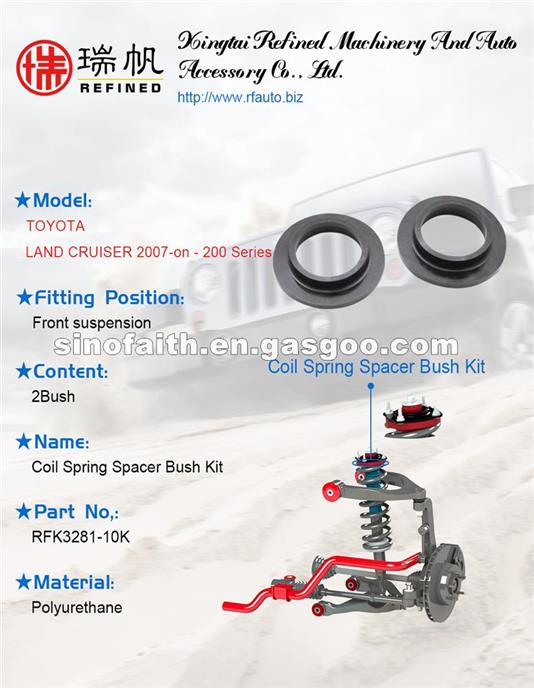
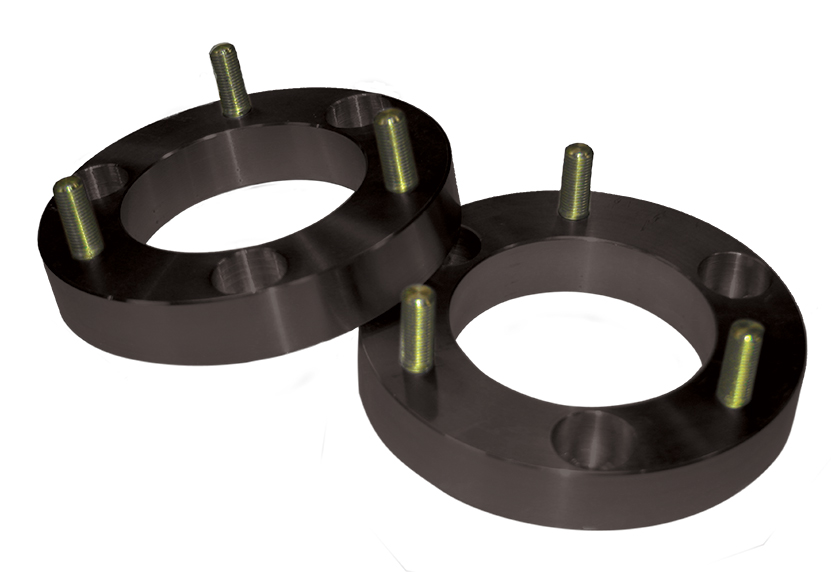
Spring spacers are discs that sit on top of your springs in a coil-equipped vehicle. Whether a solid-axle coil-sprung 4X4 or an IFS rig with coil-over-strut set-ups, they work under the same principle. As the name suggests, they space your spring down a set amount from the spring seat. This equates to lift on your four-wheel drive. They usually come in sizes ranging from 25-50mm, unless you’re in the U.S. and you have 12-inch spring spacers. They’re cheap, easy to fit, and a solid alternative to changing out springs.
Advertisement
They’re usually made from metal, rubber, or polyurethane, with the obvious advantage of each going along with it. Namely that the metal ones are absolutely solid, the rubber ones are a bit squishy but don’t rust, and the polyurethane ones are essentially in between and don’t rust either. Aside from their longevity, the main difference comes down to price.
Spacers are often used to add a touch of lift (say 25mm), and they achieve this without changing the spring rates of your current suspension. What they don’t give you is any extra wheel travel. However, they are useful for levelling your vehicle or if you’re looking for a cheap (first step) in building up your vehicle and have fitted taller tyres and need some extra clearance.
Due to being a pretty solid material, they’re a guaranteed height/lift amount. They’re easy to install, and are rather versatile in how and what you can use them with. Unfortunately, they’re not perfect, and there’s a reason for that. It is true that spacers are generally used as a first step in a vehicle build, but nothing beats a perfectly designed and tailored suspension set-up to suit your vehicle.
Drawbacks of a spring spacerSpring spacers have the same issues as a full suspension upgrade, in that you can bust CV’s, struts, upper control arms (UCA), ball joints and suspension geometry. The whole lot of it, if you don’t do it properly.
Where this becomes an issue is that with a proper high-quality suspension kit, you may well get a diff-drop kit, extended brake lines and adjustable UCAs… the works. This will make sure everything works exactly as it should. But they’re rather expensive, especially when you put them against a set of $100 spacers. So if you are going to throw a set of spacers in, make sure you’re thinking about the accompanying mods to go along with them.
Advertisement
 If you’ve got your springs already dialled in exactly how you want them, rate wise, they offer a bit of lift, while leaving everything else alone.
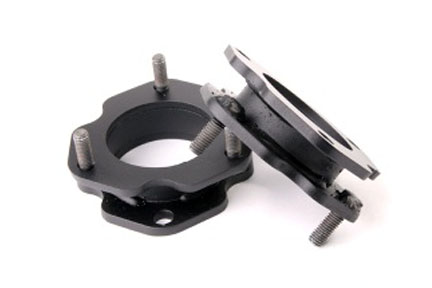 The main issue with spacers is that you’re just increasing height. This will then limit the amount of suspension droop you have. This adds stresses to the suspension, potential fouling issues and more, like the strut bottoming out before it reaches the bump stop. It can also stiffen the on-road ride.
 This can negatively impact wheel travel and reduce the bump stop clearance reducing up travel. It can also potentially force the coil too close to the control arm on some makes of 4X4 (Toyota HiLux we are looking at you).
At the end of the day, which way you go will depend on a few factors like what you’re actually trying to achieve. Think about cost, ride height, use, ride quality and just simply levelling out your four-wheel drive. But you’ll also need to consider the potential risks involved, like damage to other componentry, coils fouling on control arms, CV joints being over-stressed and more.
Essentially, what you’re gaining on one hand (a bit of extra room for taller tyres) you’re taking away with the other because you’re messing with the suspension’s travel. This can upset your vehicle’s ride and handling.
It tends to be a more expensive exercise but there is no substitute to loading up your four-wheel drive as if you’re about to go away. Or having a ‘normal’ load in it, taking it into your local quality suspension mob and sitting down with them to get the right springs and shocks off the bat. Even if you’re not having a full suspension upgrade, it’s worth discussing your vehicle with a reputable suspension mob, on whether spacers will work and the type to buy.
Advertisement
We’re just like you. We spend a lot of time daydreaming about the next part to put on our side-by-side. The first thing we always think of is the almighty lift kit. Tuning up your suspension to make your side-by-side more capable when you’re doing chores, hauling supplies, or checking fences sounds great. And in the back of your mind, you know you’ll look just a little bit cooler when you’re riding around. One thing’s for certain: you’re sick and tired of bottoming out every time you get to a tricky spot. But before ordering one, you always ask, “Is a 2” lift kit worth the money?”
To answer that, we’ll have to take a look at what your lift kit will do for you, the different kinds of lift kits you can get, their cost, and what people say about them.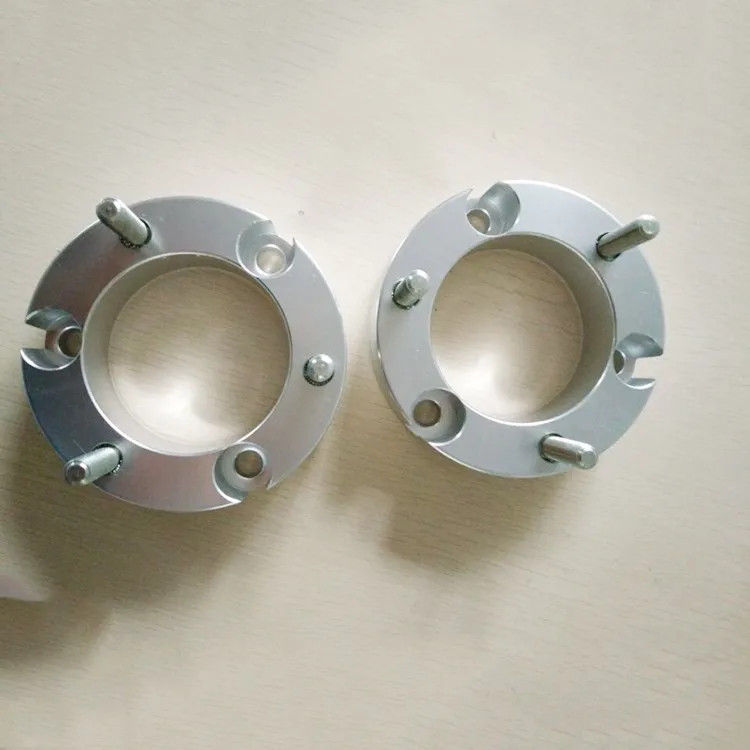
How do you think a lift kit actually gives you more ground clearance? On a 2″ lift kit, there are actually a couple different ways to accomplish this:
They use different mechanisms to increase your ground clearance, each with their own pros and cons. 2″ lifts will often use a combination of spacers and brackets, so make sure to pay attention to how the lift you’re looking at is put together.
Bracket lifts work by repositioning the top of your shocks. The interesting part is that they don’t move the shock down at all—they just move the top of the shock away from the machine.
Moving the shock out causes it to stand more vertically on your suspension, which pushes the suspension down. It’s simple and doesn’t require replacing anything on your suspension. But the factory shocks on your UTV were designed for that specific angle only. Which brings us to our pros and cons.
Pros:
Cons:
Spring spacer lifts work differently and affect your ride in their own way. Let’s take a closer look.
This bracket lift for a Kawasaki Teryx includes big, beefy shock relocation brackets along with an extended brake line. One of the biggest benefits of 2″ lifts is that they’re simple. That means they’re easier to install and tend to be more durable than bigger lift kits. Plus, they’re far more affordable.Spring spacer lifts are even simpler than bracket lifts. They consist of four aluminum spacers that you install directly to the shock between the spring and the collar.
They work by compressing the springs which causes your shocks to extend a little bit. That extra extension pushes down on the suspension and gives you those two inches of lift you want.
But, there are a few drawbacks to this kind of lift. Let’s look at the pros and cons.
Pros:
Cons:
You might be confused why you don’t actually increase your tire clearance. Make no mistake—spring spacers give you more ground clearance. However, because they work by compressing your springs, your suspension can still compress just as much. This can cause your tires to rub. You might be able to enjoy a slightly larger tire most of the time, but a big bump can cause your bigger tires to catch on your fenders.
So, when you put spacer lifts right next to bracket lifts, it’s clear that bracket lifts give you slightly better performance, but tend to cost a little extra too.
Now that you know the difference, it’s time to figure out if a 2″ lift is right for you.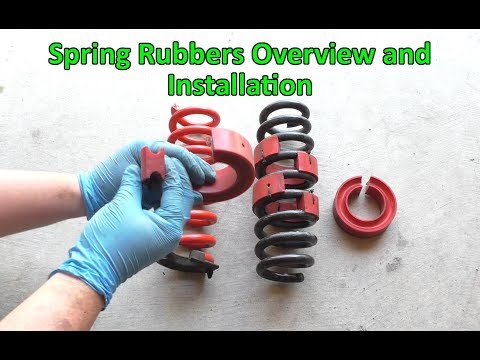
The most obvious benefit of a 2″ lift is that you get two inches of lift. That’s pretty straightforward, but is that enough for you? Is it too much? What effect does a 2″ lift have on your UTV besides lift?
These are all things you need to think about before you drop some cash.
First of all, a 2″ lift is not a big lift, but you will see and feel the difference on your UTV. Those rough trails and sketchy spots on your property will seem a little easier to navigate.
With a bracket lift, you’ll be able to install larger tires, but only about an inch or so. If you ride on really difficult terrain, this gives you the opportunity to upgrade to some more aggressive tires that can handle the rougher stuff easier. Going a little bigger with tires will also raise your ground clearance even more.![]()
The bottom line is that a 2″ lift will make a difference. For better or worse, here’s everything a 2″ lift gets you:
Lets talk more about cost.
CostWhile a 2″ lift costs more than a steak dinner, it’s not that much more. Depending on how they’re put together, you might find one for as little as $80.
Sometimes the materials and brackets required for specific machine fitment cost a little more. The most expensive 2″ lifts are closer to $300 if they require new tie rods or something like that.
You can count on most costing between $150 and $200.
That’s not very expensive by UTV upgrade standards—it really is one of the cheaper modifications you can make to your machine. Going any bigger can raise the cost by hundreds of dollars as more changes like new axles and new A-arms are required to make it work.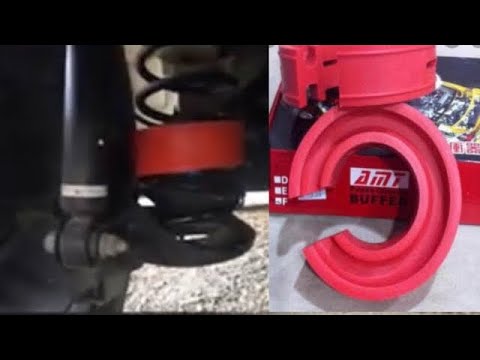
If you want the benefits a 2″ lift can give you and are OK with the minor drawbacks, then, yes, a 2″ lift is definitely worth the price.
A 2″ lift will make getting around your property easier. With fewer bottom outs and hang-ups on obstacles, your ride will feel smoother even if your suspension is a little bit stiffer.There are tons of different 2″ lift kit reviews for lots of different vehicles. We obviously can’t cover everything, but here’s a smattering of reviews.
Ed M’s Polaris Ranger Midsize 2″ Lift Kit Review:
Completely satisfied with my recent addon of the lift kit on my 2019 Ranger 570 Mid-Size. Exceeded my expectations of the beefed up look and performed great on the road and more so off-road in rough country. The kit fit perfectly. Outstanding quality and great service.
Ronald D’s Yamaha Wolverine 2″ Lift Kit Review:
Really like the lift kit.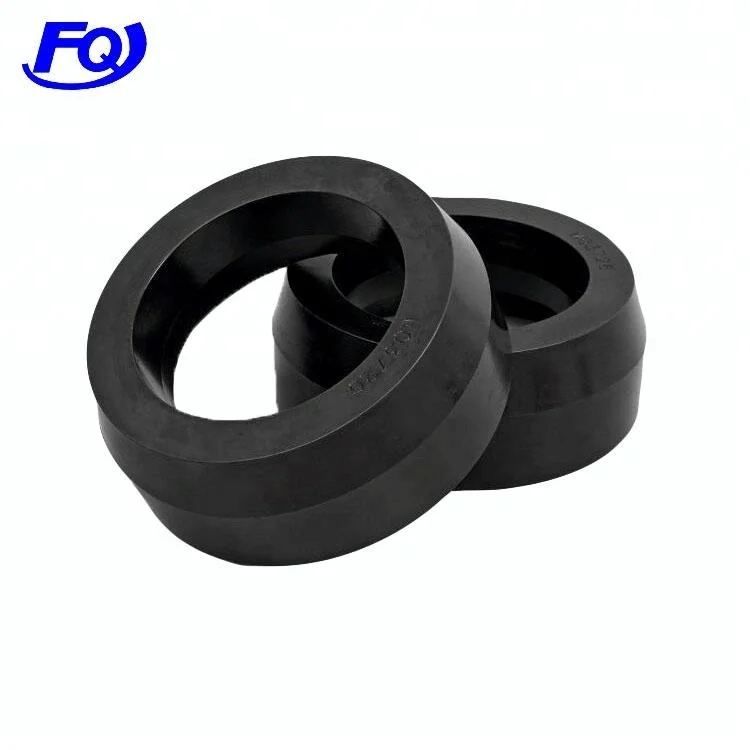 Easy install. Really like the stance. Very nice to not bang on all the rocks while riding now.
Jason S’s Honda Pioneer 700 2″ Lift Kit Review:
Easy, straight-forward install. Parts fitment is spot on with the only exception being a little bit of grinding to the shock sleeve to get in the lift bracket. While not mentioned in the instructions, using a spring compressor on the rear will make install a lot easier. With this lift being a true 2″, it allows me to run 28″ tires. I don’t worry as much about bashing my plow frame when on the trails. If you have a Pioneer, you want this.
Bryan W’s Kawasaki Teryx 2” Lift Kit Review:
Great product! Better built than expected. Installation took a little longer than expected, but well worth the price! Adds more clearance than expected.
Chad P’s John Deere Gator XUV835 2” Lift Kit Review:
Buggy rides the same as factory and the lift gives you all of the 2 inches. 28” tires clear no problem with this lift. Installation is a little tricky but goes faster after the first one.
So, is a 2″ lift worth it? You bet your skid-plate-dragging side-by-side it is.
Price for 2 air bellows and 2 bumpers + instructions For passenger cars and SUVs, there are super-reinforced corded bellows for heavy loads. Pneumocylinders (pneumopillow) with a side or bottom valve 1. Wholesale and retail 2. Delivery across Russia shopping mall: CDEK, Energy, PEK, Russian Post 3. Front and rear spacers are available for springs, struts, shock absorber supports. Air springs Applicability Outlander, Pajero Sport, Colt, Lancer 10, Space Star, Lancer 9, l200, charisma, galant, pajero 3, shariot grandis, diamond, Outlander, Pajero, Colt, Lancer, Space, L200, Carisma, Galant, Chariot Grandis, Diamante, xl, gd1, ge6, rk6, tiggo, t11, amulet, a13, bonus a13, handicap, fl, m11, 210, 124, 212, w204, w203, w211, w212, w210, 202, stratus, hatchback, cobalt, rezzo, epica, tacho 900, srv, fit, civic, chord, 1 2 3 4 5, 2007 2006 2005 2004 2003 2008, freed, stream, rd1, 4d, shuttle, odyssey, pilot, tsv, stepvagon, partner, spike, 5d, jazz, shuttle, airwave, insight, orchia, element, xc90, s60, xc70, s80, 940, 40, 90, 60, 70, 80, x trail, almera, example, laptop, teana, tiida, qashqai, sunny, serena, pathfinder, example p12, xtrail, teanu, patrol, hell, pathfinder r51, elgrand, note, teana j32, terrano, qashqai j10, march, navara, cube, sunny fb15, wingroad, tino, p11, example p11, serena c26, avenir, micra, wingroud, maxima, laptop e12, almera n16, laptop e11, patrol y61, serena c25, liberty, beetle, maxima a33, bodice, rover Rover, Fielder Fielder, Corolla Corolla, Prius Prius, Marina Marea, 244, c4, Berlingo Berlingo, c3, jumper, b9, solano, x60 x60 x 60, smiley, x 60, breeze, solano 2, vesta, granta, cross, largus, viburnum, priora, x ray, x ray, 16, prioru, Vesta, Granta, cross, largus, XRAY, X RAY, Logan Logan, Duster Duster, Megan Megane, Scenic Scenic, Symbol, Laguna Laguna, 4x4 4x4, Sandero Sandero, Kangoo Kangoo, Stepway, Fluence, Koleos, Kaptur, Astra, Vectra, Zafira, Korsa, Astra h, Omega, Mokka, Astra j, Vectra b, Astra n, Omega B, Corsa d, Zafira b, Astra g, Meriva, Antara, Insignia, Cadet, Combo, Astra F, Vectra C, Nexia, Matiz, Gentra, Lanos, Nexia, Matiz , gentra, Lanos, Persona, mk, emgrand, mk cross, emgrand ec7, atlas, emgrand x7, sk, Lacetti, Cruz, Niva, Lanos, Aveo, Orlando, Captiva, wagon, t250, t300, sedan, trailblazer, premium Premio, Vitz Vitz, Voxy Voxy, Raktis, 120, Alfard, Vista Vista, 40, Auris, Hilux, Sienta Sienta, 20, 110, Spacio Spacio, 200, Noah, Funkargo, Raum Raum, Corona Crown, Platz, Karina e e , Aqua Aqua, Harrier, Estima Estima, Highlander, Alfa, Passo Passo, Vish WISH, Rav4 Rav4 RAV4, Corolla, Probox Probox, Avensis Avensis, Camry Camry, Karina Carina, Kaldina Caldina, 150, Ipsum, AI 30 AI30, Tussan, Creta, ix35 ix35, x 35 x35, hd, i30, caravan, caliber , caravan 4, caliber, optima, carens, mojave, picanto, rio, serato, seed, sorento, soul, spectrum, sportage, cerate, 1 2 3 4, td, 2008 20092010 2011 2012 2013 2014 2015 2016 2017 2018 2019 Albea Albea, Ducato, Doblo Doblo, 250, Hayes Hiace, 30, Tundra, Verso, Yaris, Prado 150 Prado, East Ist, Sprinter, Crown, T25 T 25 T25 T25, Sai, V50 V 50 V50, Fortuner, Vitara Vitara, Grand Vitara, Liana Liana, Escudo Escudo, Jimny Jimny, Swift Sx4, sx4, Splash 2009 2010 2011 2012 2013, Pacifica, Voyager, 300c, Pacifica, Voyager, 300c, 308, 307, 206, 407, partner , 406, 207, 107, 408, Boxer, Boxer 3, Tipi Partner, 3008, 4007, 607, B5, Jetta Jetta, Polo Polo, B3 Passat Passat, Bora Golf Golf, Sharan Sharan, Touareg, T4 Transporter, B6, Turan, Tiguan, 5, a3, a4, a5, a6, b3, b4, b5, c3, c4, c6, a3, a4, a5, a6, b3, b4, b5, c3, c4, c6, Kyron Kyron, fx 35 FX, fx, qx80 qx 80, Focus Focus, Mondeo Mondeo, Fiesta Fiesta, Fusion Fusion, Transit Transit, Explorer Explorer, Fusion n, kuga Kuga, s max C-Max C Max, ranger Ranger, s max, Maverick Maverick, mk5, escape Escape, escort, 3, 6, demio, 5, surname, gh, gg, premasi, bk, mpv, 626 bl 323 dw3w , Kodiak, Felicia, Superb, Roomster, Yeti, Forester Forester, Legacy Legacy, Impreza Impreza, Outback Outback, sg5, sh, Tribeca Tribeca, sj, bp5, Vibe vibe, Be46, e36, e39, e90, e70, e34, e30, e60, e46, e36, e39, e90, 5, e70, e34, e30, Solaris Solaris, Elantra Elantra, Accent accent, Santa Fe Santa Fe, Getz Getz, Matrix matrix, Sonata Sonata, tagaz, tucson, terracan skoda subaru audi peugeot volkswagen
auto parts
When the car moves smoothly on the road, the driver and passengers feel comfortable and confident. Therefore, it is very important to take care of high-quality depreciation. And if you are thinking about how to increase the cross-country ability of your vehicle, you should know what car buffers are and what they are for. We are talking about inter-turn spacers that are installed in car springs. By choosing them correctly, you will ensure your safety and comfort on the road.
Before choosing and installing interturn spacers, it is important to understand what the essence of autobuffers is. Understand how they work and how to choose the right ones for your car. These "gum bands" are made of durable and resilient transparent urethane. They are able to withstand high loads and therefore they are installed in the suspension springs to dampen the vibrations created by the wheels. That is, it is very simple to understand why autobuffers are needed - they perform a cushioning function. That is why this type of tuning is so popular today.
Many car owners who are interested in why interturn spacers are needed for springs, how to choose and install them correctly, think about the wear resistance of products.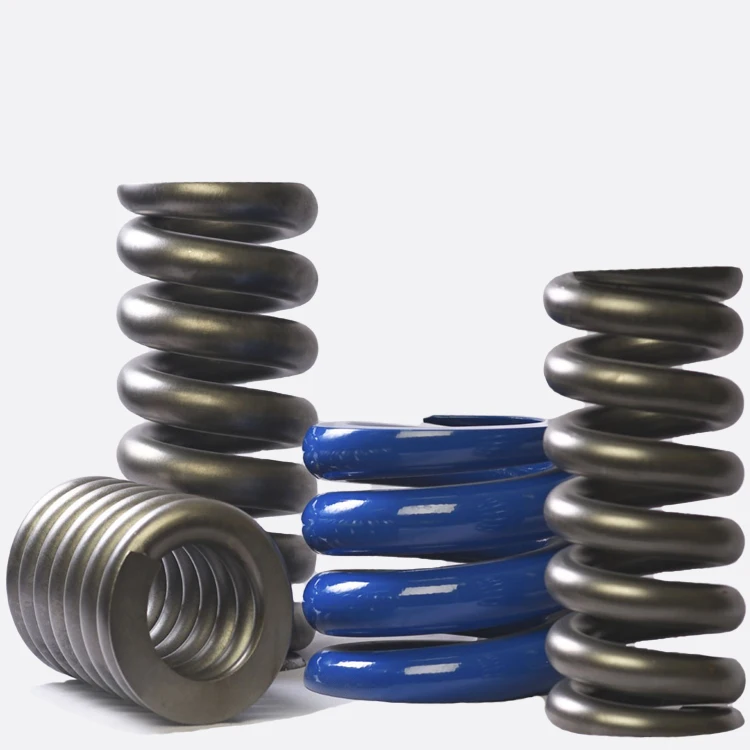 Note that the ability to quickly return to its original shape is one of their main advantages. This is true even in the case of prolonged deformation.
Now you know why interturn spacers are needed and can appreciate their many benefits. Such products can be installed in the suspension springs of a car, truck, ATV. This is one of the most common types of tuning today. And if you have already decided for yourself whether spacers are needed in car springs, and answered yes to this question, remember that it is important to choose and install them correctly.
Having first appeared on the market, this type of tuning caused different feelings among the owners of trucks and cars. Someone took the inter-turn urethane products with enthusiasm, and someone - with distrust. Let's take a look at the pros and cons of autobuffers so that you can form your own opinion about them and, if necessary, choose and install them correctly.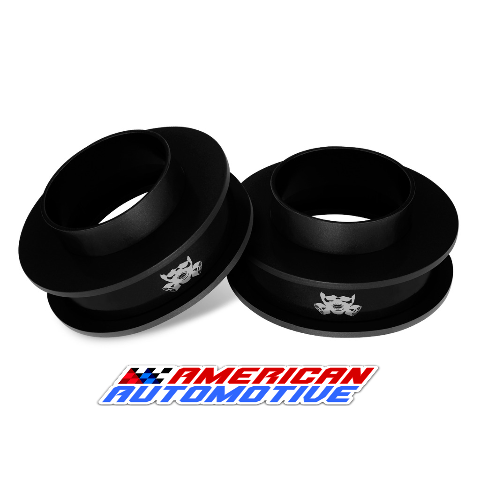
The main advantage of autobuffers in suspension springs is that they are very effective. If you can choose and install them correctly on your car, then you will appreciate the following product advantages:
1. The ability to stiffen a worn suspension.
2. Ability to ride comfortably on rough roads.
3. The ability to reduce rolls, improve traffic safety.
4. Stem protection in case of strong shocks.
5. The ability to provide maximum driving comfort.
Next, considering the pros and cons of inter-turn spacers, it is necessary to talk about their shortcomings. These include:
1. Suspension rigidity, which creates an additional load on the chassis of the car.
2. Difficulty in choosing autobuffers (relevant if you don't know how to choose them correctly).
3. Mounting specifics (if the interturn spacer is incorrectly installed in the spring, it may fall out, since it is not firmly fixed).
Practice shows that the advantages of products outweigh the disadvantages.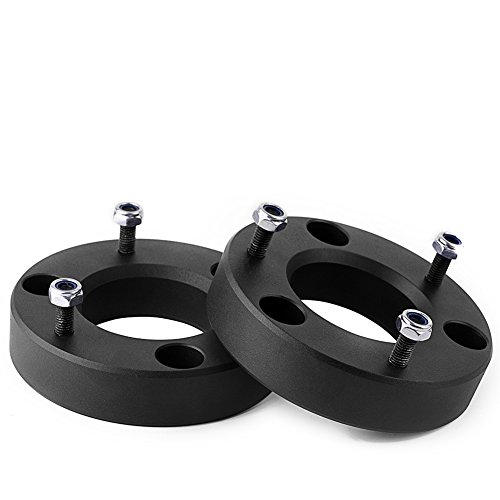 Therefore, this type of tuning is becoming more and more popular.
If you are going to install intercoil spacers in the suspension springs, find out in advance how to choose the size of the autobuffers. In order not to be mistaken, you can use the catalog, which indicates what sizes of products are suitable for cars of a particular brand. And if the documentation does not contain information about your car, you will have to take some measurements. Load the rear of the vehicle, and then determine the distance between the turns and their diameter. These parameters should be followed if you select suitable product models.
If you have already chosen the right product model, it will not be difficult to cope with the installation. The main thing is to know how to properly install autobuffers. Proceed in steps:
1. Use a jack to take the load off the springs.
2. Clean the car's suspension parts from dirt.
3. Dip the interturn spacers in soapy water to loosen them.
4. Install and secure the products with plastic ties (if the elastic takes more than one turn, it must be carefully trimmed).
Now you know how to correctly install the intercoil spacers in the springs. This means that you can easily pick up and install autobuffers made of durable urethane on your car. They will give you a smooth ride, protect the suspension from wear, guarantee you comfort and safety.
How to choose the size of buffers
Posted on 12/26/2016 | Updated on 02/26/2021 | Posted in Chassis |
How to choose the size of car buffers: To get the most correct size for your car, you need to measure the interturn distance in the middle of the spring. Turn-to-turn spacing is the minimum distance between two adjacent coils of a spring. Measurement must be done on a lowered car! If access to the springs is difficult, then you can measure it on a posted car, while the resulting value must be reduced by 5-10 mm. For convenience, use folded paper. Umm..
More
Why put rubber spacers under the springs?
Posted on 04/29/2017 | Updated on 03/05/2021 | Posted in Operation |
Have you ever had a situation when the fender liner, due to the load, touched the rear wheels? And there were ways to solve this problem: 1. Remove everything from the trunk - but if the springs and shock absorbers are worn to the limit, then this may not help. 2. Replace the shock absorbers with tighter and stiffer ones so that the car does not “fall down”. But there is a simpler solution - buy and install interturn spacers in the springs (buffers). Due to this addition, the clearance of the car will noticeably increase (.