Jeff Benjamin
- Mar. 31st 2016 2:20 pm PT
@JeffBenjam
If you have a jailbroken Apple TV 4, and are wondering what you can do with it, then look no further than Kevin Bradley’s NitoTV 1.0. The just-released utility is an all-in-one tool for those of you who have jailbroken their Apple TV 4. NitoTV 1.0 lets you install packages, and is sort of like the Cydia equivalent for tvOS. Check out the full how-to guide inside.
Step 1: Jailbreak your Apple TV 4 using our step-by-step guide
Step 2: SSH into your Apple TV
ssh [email protected]
The password will be alpine but we recommend changing that password to something unique by using the passwd command.
Step 3: Type the following in the terminal window while logged in to your Apple TV 4:
wget http://nitosoft.com/ATV4/installNTV.sh chmod +x installNTV.sh ./installNTV.sh
Step 4: Your Apple TV will restart, and when it boots back up, you’ll see the NitoTV app. With the NitoTV app, you can do things like install a web browser, Provenance emulator, and a MAME emulator. Although all of the aforementioned apps can be sideloaded on a non-jailbroken Apple TV 4 with a free Apple developer account, NitoTV makes the process easier.
Be sure to watch our step-by-step Apple TV jailbreak tutorial above if you’re curious about doing so with your Apple TV 4. Remember, the Apple TV will need to be running tvOS 9.0 or tvOS 9.0.1 to be susceptible to the Pangu jailbreak tool.
This is likely just the start for the Apple TV 4. Stay tuned for more tutorials and how-tos in the near future, and special thanks to Kevin Bradley for the awesome new utility.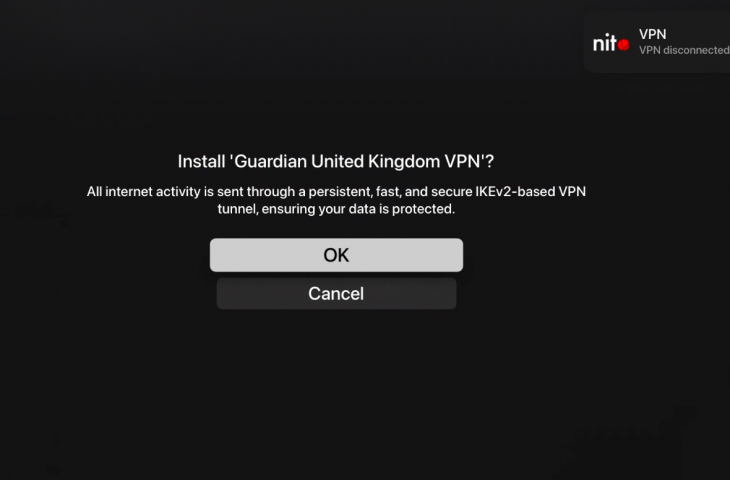 You can find more details on Kevin’s work here.
FTC: We use income earning auto affiliate links. More.
Check out 9to5Mac on YouTube for more Apple news:
You’re reading 9to5Mac — experts who break news about Apple and its surrounding ecosystem, day after day. Be sure to check out our homepage for all the latest news, and follow 9to5Mac on Twitter, Facebook, and LinkedIn to stay in the loop. Don’t know where to start? Check out our exclusive stories, reviews, how-tos, and subscribe to our YouTube channel
@JeffBenjam
Jeff produces videos, walkthroughs, how-tos, written tutorials and reviews. He takes pride in being able to explain things in a simple, clear and concise manner.
The best wireless headphones for Apple users.
The best wireless mechanical keyboard for Apple users.
A few days ago we wrote about the release of nitoTV, Kevin Bradley’s package manager for jailbroken Apple TVs. Today, we’ll give you an in-depth look at the interface and functionality, as well as our comments on where it could go in the future.
nitoTV allows users to install tweaks and unsigned apps to their Apple TVs, much like Cydia does on iOS. It requires a jailbreak to work, and currently supports the Apple TV 4 on tvOS 9 (through Pangu), tvOS 10 (through LiberTV10), and tvOS 10.2.2 (through greeng0blin). Support for the Apple TV 4K on tvOS 11. 0-11.1 is due to arrive in a future update to nitoTV. To find out if you can jailbreak your device, check our advice on the subject.
To jailbreak tvOS 10.2.2 with greeng0blin, follow our guide. To jailbreak any other supported firmwares, use the Mac installer from the nitoTV website.
Upon launching nitoTV on your Apple TV you’ll be greeted by the Featured Packages page, a curated selection of apps. Favourites such as Kodi can be found here, as well as various games and media solutions which Apple would not accept on the App Store.
The layout is much the same as the App Store itself, featuring Top Shelf images for each app and individual information pages which can be viewed when selecting an app. With luck, this page will become increasingly populated as developers start to build for the platform.
By scrolling across the tabs at the top of the view you can reach other sections of the app. Below is the About page which displays developer credits, current installed version, and a useful change-log:
The adjacent tab is Settings, housing several useful options. Here you can update nitoTV itself, prevent your Apple TV from updating (a very handy feature given the device’s propensity for unwanted updates), respring and reboot your device, and more. In my testing, all of these options worked flawlessly, not bad for an initial release.
Next up is a Search tab, and then a page which will be familiar to all Cydia users: Sources. This is where third-party repositories will be added, in order to download packages from other developers. This is one of the few parts of nitoTV which did not seem fully functional yet, but there is a good reason for that: there aren’t yet any other developers, packages, or repositories made for the Apple TV/nitoTV, so we’ll have to give it some time.
The final tab is Installed, which lists all the current packages on your device. The same as Cydia’s Installed (Expert) listing, it shows required system packages too. Many of the packages, such as Cydia Substrate and dpkg, will be familiar to iOS jailbreakers, as they are essential to both platforms’ infrastructure.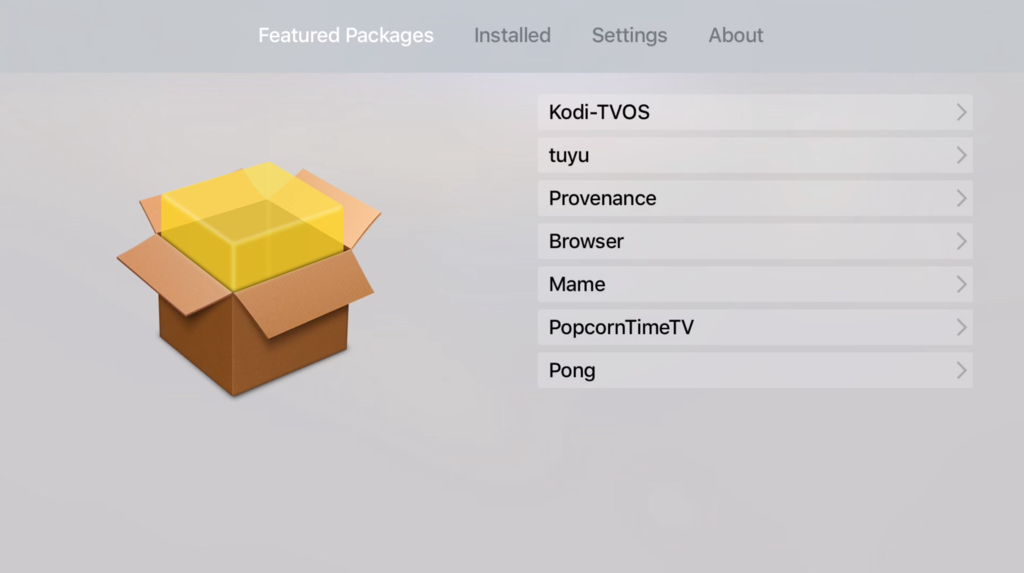
By selecting a package from either the Installed list, the Search results, or the Featured Packages homepage, users can view its description and information, as well as Install, Uninstall, or Update it. Below you can see the package page for another widely-used package, RocketBootstrap:
Selecting Install, Uninstall or Update takes you to a loading screen as in Cydia where the progress of the installation is shown, as well as a helpful summation of the number of packages added, altered, and removed.
I didn’t have any trouble in my testing with any of these features. All of my installations and uninstallations completed smoothly with helpful readout.
This is very self-explanatory, but for illustrative purposes I’ll show the app installation process for a much-loved app, Kodi. Simply select it on the Featured Packages page and you’ll be taken to a well-tooled product page, from which you can install it. Hit install to begin:
You’ll be told how much storage the installation will require. Barring any problems (of which I had none), after installation the app will be waiting for you on your Home Screen:
All apps installed by nitoTV are not subject to Apple’s signing restrictions, which means they do NOT need re-installing every seven days. This is a massive upside to having an Apple TV jailbreak, though please note that the apps will only launch when in jailbroken mode.
My initial impressions of nitoTV have been very favourable. It’s clear that the long delays to its release were not in vain, and that stability has been a key priority for the developer throughout. The range of firmwares supported for an initial release is also broad and helps the userbase by excluding almost nobody.
There have been some reports of the Mac installer failing to work for users on tvOS 10.1, though I do not have a matching device to test this. It’s been added to the developer’s to-do list.
Although stability is very good, it will take a while to populate the platform more heavily with tweaks and apps. The current offerings include several classics (such as Provenance, tvOS Browser, Flappy Bird, and Kodi), but lack the range of system tweaks which Cydia users are accustomed to. Only time will tell if they will spring up.
The future functionality of nitoTV is interesting, as unlike Cydia it is in its infancy and could be shaped by anyone with an inclination. Possible future features which have occurred to me during my short usage of it include:

There are doubtless many more possibilities that I haven’t touched on here; let me know in the comments if you have more suggestions. With the features above, a few more key apps, and the upcoming support for tvOS 11.0-11.1, nitoTV looks capable of turning into a powerful and useful addition to the tvOS, and jailbreaking, experience.
Here is a guide on how to jailbreak ATV 3 (thanks u/tihmstar) and how to successfully install XBMC build 12. 2-0.
2-0.
You must have an Apple TV 3.2 model A1469, this is an updated guide as I spent a whole day troubleshooting and successfully installed XBMC 3 times on 3 new restores/hacks. I tried to install Kodi builds, but the Apple TV gives me an out of memory error. If anyone manages to install Kodi, please share thanks.
Step 1. Jailbreak your Apple TV 3. Jailbreak your Apple TV 3. To do this: go to settings and select your network, click your Wi-Fi name until you get to the Wi-Fi configuration page, and manually change your DNS to 046.166.144.059.
Next, go to Send Data to Apple and press the play button on the remote control. Click Add Profile and add http://trailers.apple.com/trailers.cer.
Then go to trailer app on home screen and press #etason and it will jailbreak your apple tv, after restart you will see computer and settings. in settings And change the DNS settings back to the original from manual to automatic. Installing XBMC Ssh on a jailbroken Apple TV 3 with whatever terminal you use.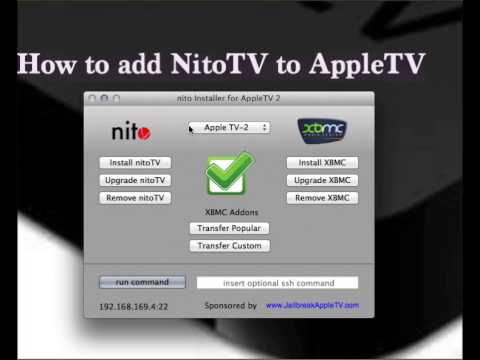 Enter the following commands: ssh root @ (your IP address) Enter the password (default is alpine) EDIT: once you have ssh access to your ATV, run the following command to get an untethered jailbreak: dpkg -i untether.deb Can't do much with XBMC yet, but will update if I can get anywhere.
Jailbreak allows ssh access to your Apple TV. 3. Follow developers like tihmstar or developer NitoTv to see what they have achieved with this jailbreak. Update!
Follow my new guide to install Kodi 14.2 on your ATV 3 custom storage space! https://reddit.com/r/jailbreak/comments/eyp8hu/tutorial_apple_tv_3_kodi_142_install_guide_to/
You then want to make sure you enter the commands exactly as written by hitting enter after each line (see image if any appears) either an error in any of the commands, as should be written exactly the same as I gave)
apt-get update apt-get install wget wget -O- http://apt.awkwardtv.org/awkwardtv.pub |
apt-key add - echo "deb http://apt. awkwardtv.org/stable main"> /etc/apt/sources.list.d/awkwardtv.list apt-get update wget http://mirrors.kodi .tv /apt/atv2/deb/old/org.xbmc.xbmc-atv2_12.2-0_iphoneos-arm.deb wget http://mirrors.kodi.tv/apt/atv2/deb/org.xbmc.xbmc-seatbeltunlock_1 .0 -5_iphoneos-arm.deb * dpkg -i xbmc.deb (IMPORTANT: add another asterisk after xmbc, it must have an asterisk before and at the end of xbmc, mobile posting, format it in italics)
People are confused about the above command, so it should be:
dpkg -i space star xbmc star dot deb
Now you need to run: apt-get -f install Your Apple TV should reboot and you should see XBMC on main screen, configure XBMC as you wish. Enjoy ! Do not forget to like and subscribe, joking that this is not YouTube, laughs.
January 20, 2009 Tips
Don Joe
Share
0 Apple TV has a modified version of OS X Tiger installed, which allows you to perform a number of manipulations with the set-top box. For example, add new codecs or enable support for external drives and network "shares". The disadvantages of this approach are obvious: some decrease in stability and performance due to the addition of garbage. Whether you need it or not - decide for yourself.
Fans of extreme sports (read hacks), and just the curious can be recommended as a basic source of Awkward TV wiki. This is perhaps the most complete collection of information about the prefix.
The most painless way to "hack" Apple TV is to install a patch from a flash drive created with ATV USB Creator. It is also not recommended for owners of crooked hands, although the probability of “killing” the prefix with the help of “left” patches or attempts to self-assemble them is even higher.
An interesting point: the patchstick, that is, the flash drive used to patch the Apple TV, is essentially a Linux distribution. However, porn lovers can try to put the “real” Linux on the console, having answered the question “why” beforehand. If you wish, however, you can try to install a full-fledged “makos” on Apple TV, turning it into an inexpensive mac. Although personally I would advise for these purposes to take a used "minicom".
What does the patchstick do? Access to the file system of the set-top box via SSH plus the ability to download plugins. By the way, about SSH. If you are not good friends with the command line (did you still climb the prefix to patch? take a ruler and beat your hands, saying “you don’t have to go where you shouldn’t”) Fugu or the MacFUSE / Macfusion bundle is perfect for file manipulations.
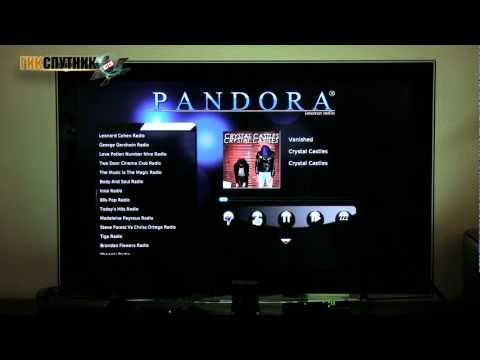
By and large, having a network connection and SSH access to the set-top box, it is enough to install NitoTV, the rest of the manipulations can be performed directly from the Apple TV interface. What gives NitoTV (almost all of this is downloaded and installed from the NitoTV menu item): at least a set of Perian, MPlayer codecs, support for USB drives. Theoretically, the functionality is much more, but not the fact that everything will work.