Below are the applications fitments for Honda WARN Mounting Kits. Please pay special attention to any Footnotes included with Part Numbers to ensure you select the proper part for your application. If you have any questions please contact WARN Customer Service.
BumpersWinch Mounts and Snow Plow Mounts
| Model | Year | Bumper | Compatible Winches | Notes |
|---|---|---|---|---|
| Honda UTV Applications | ||||
| Pioneer 700 (Deluxe) | 2014-2022 | 101698 | VRX 45 | Axon 45 | Axon 55 | |
| Pioneer 1000 (EPS) (LE) (Deluxe) | 2016-2022 | 101700 | VRX 45 | Axon 45 | Axon 55 | |
| Talon | 2018-2022 | 104300 | VRX 45 | Axon 45 | Axon 55 | |
| Model | Year | Winch Mount [O] | Center Plow Mount [F] | Front Plow Mount [G] | Compatible Winches |
|---|---|---|---|---|---|
| Honda ATV Applications | |||||
| Foreman TRX500 | 2014-2019 | 100380 | 93901 | 93515 | VRX 25 | VRX 35 |
| Foreman TRX520 (Excluding 2014 IRS model) | 2020-2022 | 100380 | 93901 | 93515 | VRX 25 | VRX 35 |
| Rancher TRX420 (Excluding 2014 IRS model) | 2014-2022 | 100380 | 93901 | 93515 | VRX 25 | VRX 35 |
| Rubicon TRX500 | 2015-2019 | 100380 | 93901 | 93515 | VRX 25 | VRX 35 |
| Rubicon TRX520 | 2020-2022 | 100380 | 93901 | 93515 | VRX 25 | VRX 35 |
| Rubicon TRX680 | 2006-2022 | 84706 | 65070 | 79673 Not Compatible with VRX. | VRX 25 | VRX 35 |
| Honda UTV Applications | |||||
| Pioneer 500 | 2015-2022 | 93720 | 93730[H] | VRX 25[L] | VRX 35[L] | |
| Pioneer 520 | 2021-2022 | 93720 | 93730[H] | VRX 25[L] | VRX 35[L] | |
| Pioneer 700 | 2014-2022 | 101260[B] | 93954[C] | VRX 45 | Axon 45 | Axon 55 | |
| Pioneer 1000 | 2016-2022 | 93790[B] | 93820[C] | VRX 45 | Axon 45[J] | Axon 55[J] Short drum winches require 107335 fairlead adaptor. 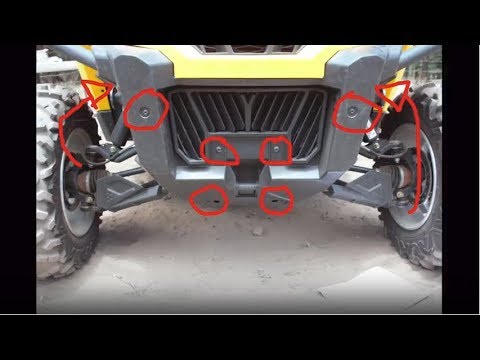 | |
| Talon 1000 | 2019-2022 | 102600 | 104126 | VRX 25[L] | VRX 35[L] | VRX 45 | Axon 35 | Axon 45 | Axon 55 | Axon 45RC | |
FOOTNOTES:
[B]. Winch mounts not compatible with OEM plow mount
[C]. Plow mount not compatible with OEM winch mount
[F]. Compatible with 78100 and 86528 plow bases
[G]. ATV applications will use push tubes 92100 and Side X Side applications will use 79805 push tubes unless otherwise noted.
[H]. Plow mount must use Front Mount ATV base/tube assembly (Warn PN 92100) and ATV blade
[J]. Some models may require grinding or modification of the stock skid plate to fit winch
[L]. WARN PN 99897 Dash Rocker Switch Kit is recommended for UTV applications using VRX 25 and VRX 35 models.
[O]. All Factory installed mounts require fairlead plate. For VRX 25, VRX 35, Axon 35, and Axon 45RC use fairlead plate 102857. For VRX 45, Axon 45, and Axon 55 use 69646.
Length: 25:22
Created: October 6, 2020
[0:00] Hey everybody! Today I’ll show you how to install SuperATV’s winch mount and winch on this Honda Talon 1000, so let’s jump right in.
The first step to installing the winch and mount is to remove the bumper from our machine. We’ll need to remove this bolt here, these two Allen-headed screws here, and the two bolts right here. Then we’ll repeat those steps for the opposite side.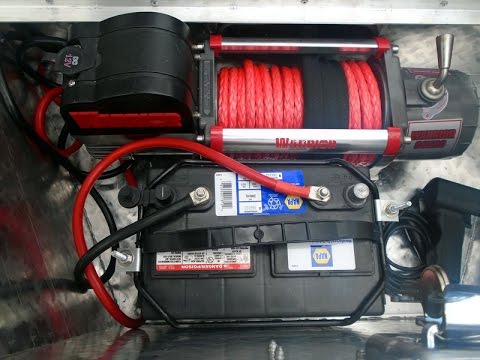
Once all of our hardware is removed, we’ll grab hold of our bumper and wiggle it straight out from the machine. Once our bumper is removed and on the table, we’ll grab a tape measure and measure half an inch off of this front bar. This is a SuperATV bumper but the installation will be exactly the same if you have a factory bumper.
We have our factory bumper here. We’ve already drilled holes, but essentially we’re going to measure half an inch and make a mark. Then grab our bracket and line it up. Do the same thing on the opposite side.
[1:16] Now that we’ve made our marks, we’ll continue this mark around the side. If you have a flat piece of metal, you can use that to guide our line.
Now our line is on here. We’ll take our bracket and line it up with the line we just made. Then trace around this, and trace around the hole, too. I’ll fill the hole in with the marker so that way, when we put this on here, we know it needs to line up just like that.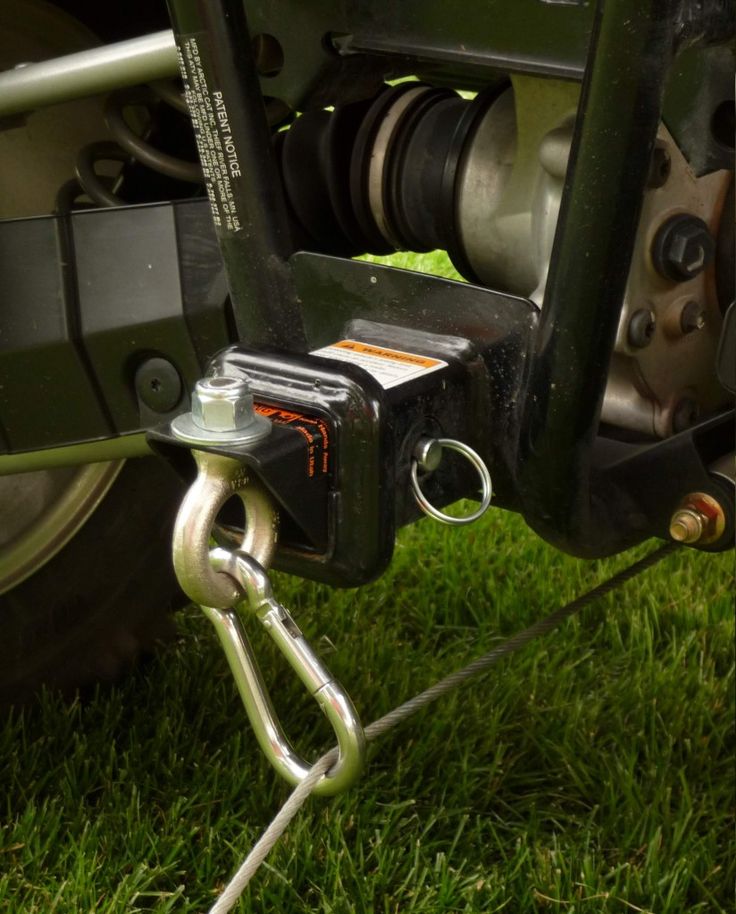
Next we’ll drill straight through. Once the initial hole is drilled, we want to make sure we can keep our drill as straight as we can. Drill through the opposite side. Make sure the bracket is going to line up well with the hole.
It lines up good there, so we’ll repeat these steps over on the opposite side.
[2:18] Once our holes are drilled and all of our marker or paint marker is cleaned up, another thing you want to do is make sure you blow out these tubes from wherever you drill through. There will be metal shavings down in there and you don’t want to leave them. Over time, they’ll rust and cause issues, so we blew everything out and cleaned it up really nicely.
Now we’ll grab our brackets that we used to mark our holes. Grab one of the long M8 bolts and slide it straight through. We’ll do this on both sides, then grab our fairlead bracket. Slide them onto the bolts, just like that.
Grab our M8 nuts and the Nyloc nuts that are provided in the hardware kit.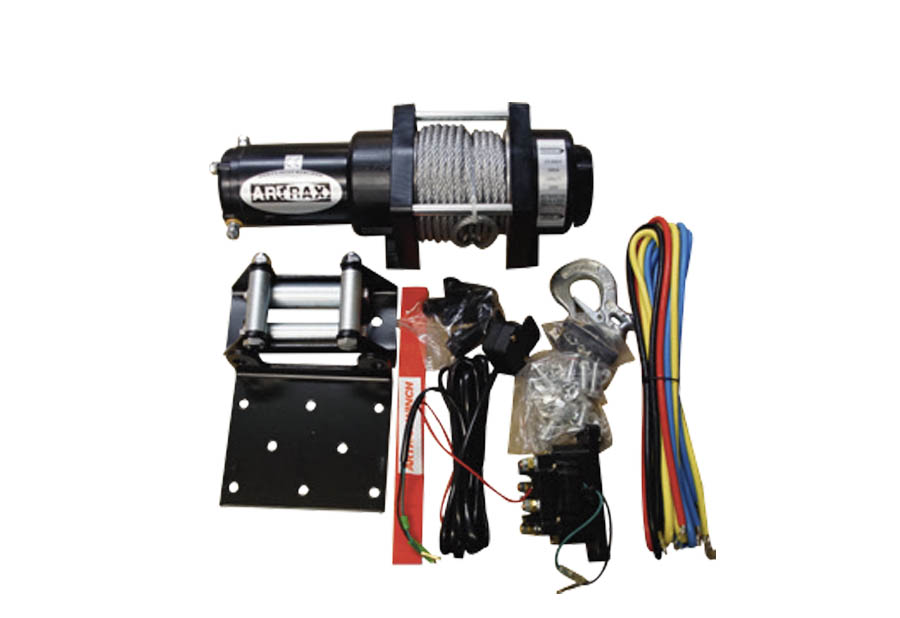 Thread these on, but don’t fully tighten anything just yet. We’ll just get everything put together here.
Grab our M8 x 20 mm hardware—two for each side—and line up our bracket with the fairlead mount. These will actually just thread right into the mount, and they are adjustable. They do have cutouts so you can move them around.
I’ll run these in by hand. Then we’ll flip it up and take a look to make sure it looks good and straight.
[3:29] Now we’ll grab our Allen-headed hardware and install our fairlead plate. Let’s take the Allen-headed screw and slide it through the front, just like that, on both sides. We’ll put our nuts on the bottom.
If you’re running a 4500 lb. or 5000 lb. winch, you’ll just bolt this directly to the fairlead bracket. If you’re running a 3500 lb. winch, you’ll have to use the adapter, which will be in the kit with your winch.
Now we’ll go through and fully tighten all this hardware. Then take our bumper and reinstall it.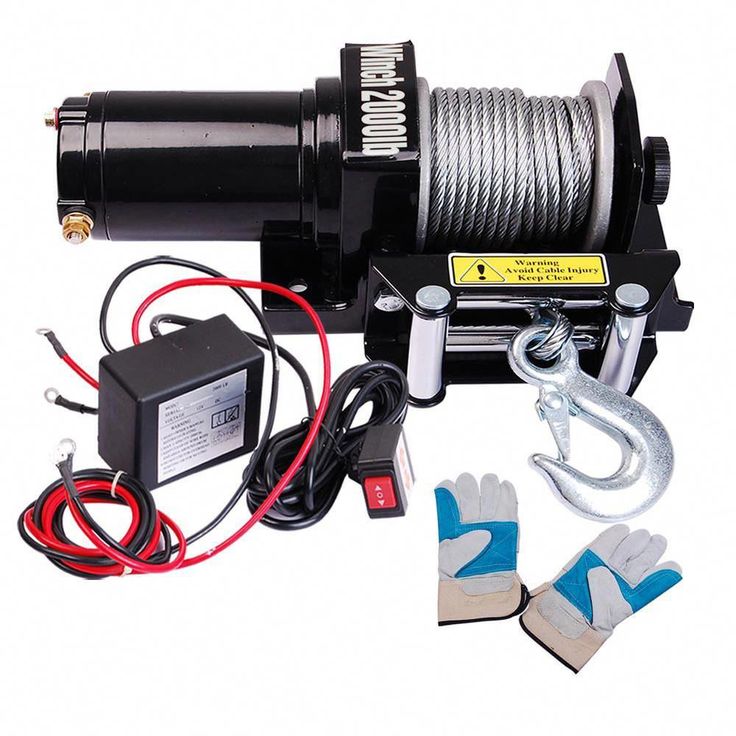 Just grab the tabs of your fascia and slide them out of the way.
Next, we’ll install our winch mounting plate. You want to angle this portion of the mount toward the front of the machine, and once you get the mount in, just slide it right up to where the factory bolts are lined up. But we’re not going to use our factory bolts—we’re going to use the provided M8 bolts that came in the hardware kit.
Don’t fully tighten them yet. You just want to make sure the holes on your mount are lined up and start the bolts.
[4:38] At this time we’ll go through and start all of the hardware securing our bumper to the machine. Don’t tighten anything yet—we’re just going to start a couple threads on all of the bolts.
Next, we’ll grab our tube clamps and the rest of our M8 hardware. It’ll be the last bit of hardware left in the hardware kit. I’ll install it just like this, right around the cage of the machine. Go through and start all of the screws, then we’ll do the same thing for the opposite side.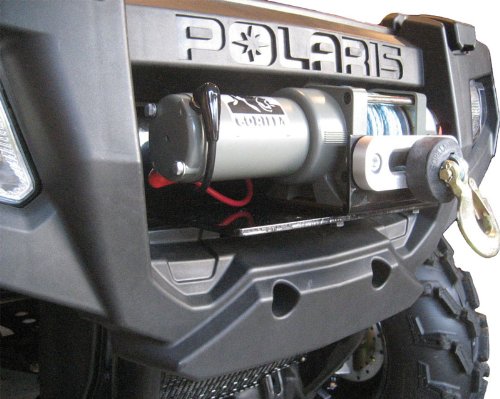
Once all of our hardware is started, we’ll go through and fully tighten it all.
[5:24] Now we have our new SuperATV 4500 Lb. Black Ops Winch and we’re ready to install it on our Honda Talon. First, we’ll put the winch in free spool mode. Pull some of the rope out while it’s nice and easy, and not mounted up yet.
Run the winch rope through the fairlead. Then take the winch and slide it in sideways. We’ll line it up to the outer holes because we’re running a 4500 lb. winch today. If you’re running a 3500 lb. winch, go to the innermost holes.
Once our holes are lined up, install the hardware—a lock washer and a washer. Make sure your lock washer is first, and then your washer.
Pick up the winch and stick the bolt through. Kind of feel around to get it right in there by hand. Do the lower bolt as welll.
Once all of the hardware is started, we’ll fully tighten it.
[6:32] Now that the winch is fully tightened and we’ve pulled the rope through our fairlead, we’ll remove the clevis hook and take the pin out of it.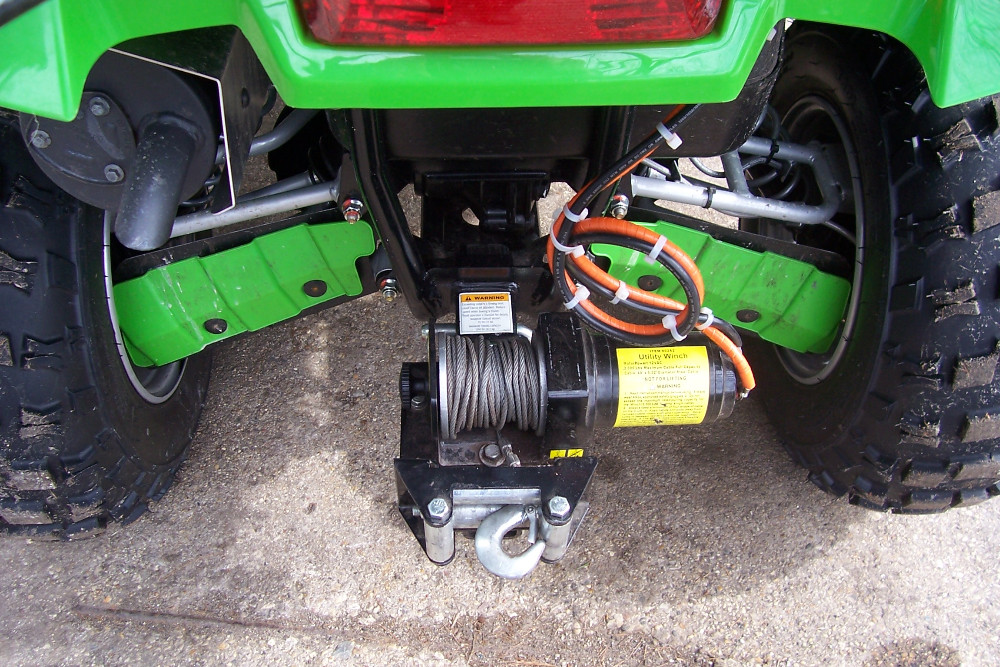 Slide the pin right back through the clevis, onto the winch rope.
Now install the cotter pin by bending it away from itself. Grab the pull strap and slide it right into the clevis hook, then take the stop block and make it so the flat portion is going toward the machine, at the side with the opening. Put it right over the rope, just like that.
Grab the provided hardware. In the kit, you’ll have a long Allen-headed screw and washers and lock nuts. Put the washer on the screw, then take your Nyloc nut and start it.
[7:24] Once your hardware is started, slide the stop block all the way down to the end of the winch rope. Then go through and fully tighten the hardware, then it’s time to wire the winch.
Now that our winch is installed, we’ll come up to the hood. Pick up on each of these tabs, rotate them, and remove the hood from the machine. Grab the solenoid out of the kit. I like to mount the solenoid right here on the crossbar of the frame, so it’ll sit like this.
We’ll still have plenty of clearance for the hood, which is the only thing that we’d make contact with. So we’ll drop it down as low as we can and then take a paint marker. Mark our holes.
This one will be a little harder to mark. As you can see, there’s a little rubber covering here. It kind of slides over a couple different tabs. Go ahead and pick that up and slide it down, out of the way. That way we can have enough room to get in there and drill the holes.
[8:49] Now I’ll make sure my holes are lined up good. I’ll take this side where all of the studs are, put my screw through it, and slide it through the previously drilled hole. Then take the paint marker and mark the other side. Again, double check that the holes are in the right position.
Once the other hole is exactly where it needs to be, let’s drill it. Grab another piece of hardware, another screw—these will be the small ones provided in the winch kit. Let’s take it and line our holes up.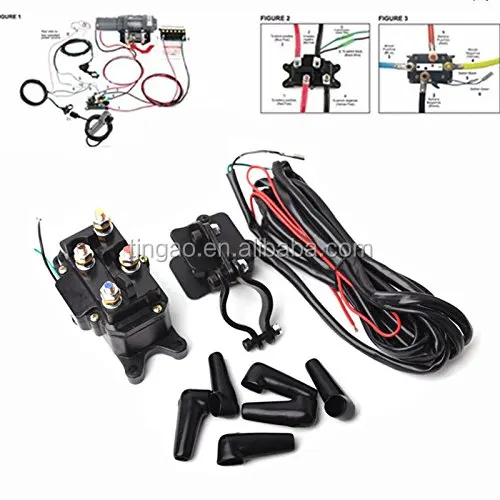
Now we’ll slide a lock washer and washer on. You have to reach in and find the easiest way for you. Go ahead and start it all the way down, as far as you can get it by hand. Then do the exact same thing for the opposite side.
[9:57] Once both sides are started, go through and fully tighten all hardware.
Next, we’ll remove the following push pins from the inner fender well panel—this one, this one, that one, and then there will be one here on top as well.
We’ve already pulled all the centers out of our push pins, just to make it go a little faster. So now we’ll go through and remove the ones that we’ve pointed to. We’ll remove this panel.
Inside this panel, right by the power steering unit, you’ll see that you have a hot and a ground wire. These will absolutely be acceptable to use as the hot and the ground on our winch. Obviously, black is going to be the ground, so we can go ahead and feed it to the black stud on our solenoid.
Remove the nut off the black stud.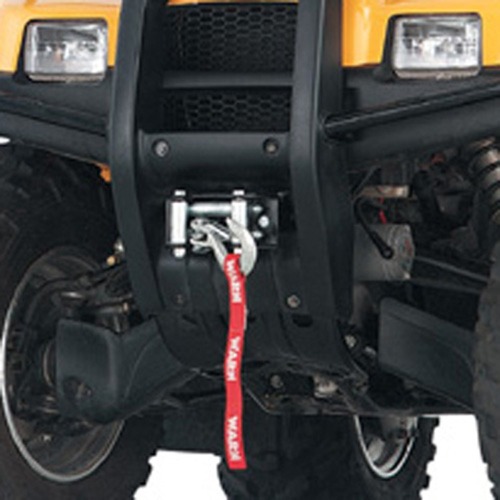 You’ll see that you have a lock washer, as well as a regular washer. Go ahead and pull the lock washer off and take this. You can probably run it back behind here, just to make it look a little cleaner. Slide it onto the black stud. Put your lock washer back on.
Then we’ll take our red wire and run it through here as well. We went ahead and taped ours up because it’s already plugged in the rear, and we’ll show you how to do that.
Then we’ll do the same thing with our red wire. I’ll slide it onto our red terminal here, put our lock washer on, and then our nut. Just make sure this red wire is powered up already on our machine, and that you’re keeping it separated from either of the two studs. That way you don’t get zapped.
[12:17] We’ll come back to the driver’s side, right next to your shock. You’ll see a battery box that has three holders on it. Grab hold of each of them and pop all three loose. Pop this cover off. This is where the battery is on the Talon.
As you can see, you’ll have some red wires running up to this solenoid. You’ll also have a ground wire. These wires will not be hooked up on your specific machine unless someone’s already hooked them up.
To get in there a little easier, you can take your battery and hold down “off.” It’ll just flip down and off. You can then grab hold of your battery, wiggle it out, and then you’ll see your wires running up to the top. But they won’t be hooked in, obviously. You’ll have to hook them on.
[13:19] You’ll have a little 10 mm nut right here on top, and then a little 10 mm nut up here. Make sure you ground the black wire and hook the red wire to the hot side, or the red side. Again, these wires will not be hooked up. They’ll just be hanging out back here in the back of the battery box.
You’ll have to undo this nut, as well as this nut. Wire them in and then tighten them back down.
Once you’ve done that, your red wire that’s running up to the front, that’s wired into the solenoid, will be directly powered to the battery.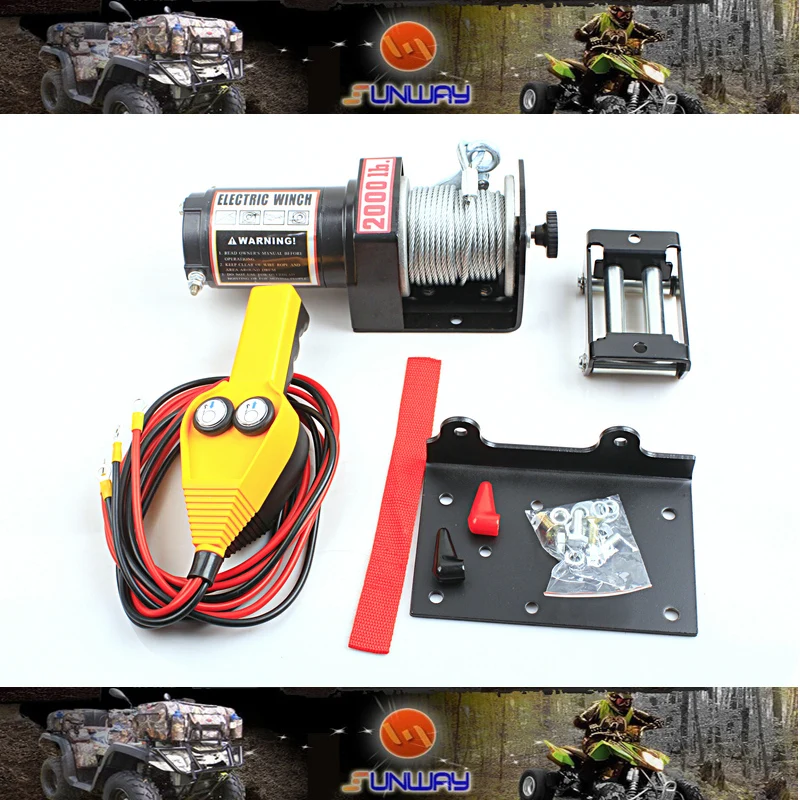 Once you have those hooked in, put your battery strapped back on, as well as your battery box cover.
Don’t forget to put your snaps back on.
[14:13] Now we’ll get our yellow and blue wires out of the kit. Cut the zip ties and unravel them, then we’ll feed them down. On your top stud, it’ll be yellow, and on your bottom stud, it’ll be blue.
Obviously we have a yellow and a blue wire. We’ll start with the yellow because it’s on top. Feed it straight down underneath here, next to the coolant jug beside your radiator hose, and then right to the top of your winch.
I’ll attach it down here just to mock it up for now. That way we have a good reference of how long our wires need to be. We’ll take our blue wire, since we’re already down here. I’ll feed it back up and through.
I like to make sure my wires take the same route, so we’ll do the same thing with our blue wire. Just get it mocked up and in position, like it will be when it’s completely wired in. It’ll look something like that. Obviously it will look a bit cleaner once we’re done.
Then, lay this wire up here. I like to leave a little bit of slack. That way, if I do make a mistake, I have a little bit of room to where I can make another connection. We laid it up there for the blue.
[15:44] Now we’ll do the yellow. Grab the wires and pull them back down and through. Remove them from the winch. We’ll get in our kit and as you can see, there’s heat shrink in there. There are connectors and everything we need.
When you make these connections, make sure to slide the heat shrink on first and then make your connection. Crimp it down and heat shrink it.
Next we’ll take our wires and route them down, just like we did previously when we’re mocking everything up. Once we get them down here, we’ll come up top and make the connections on our solenoid. Take your nut off, then your lock washer. Install your wire, lock washer, and nut.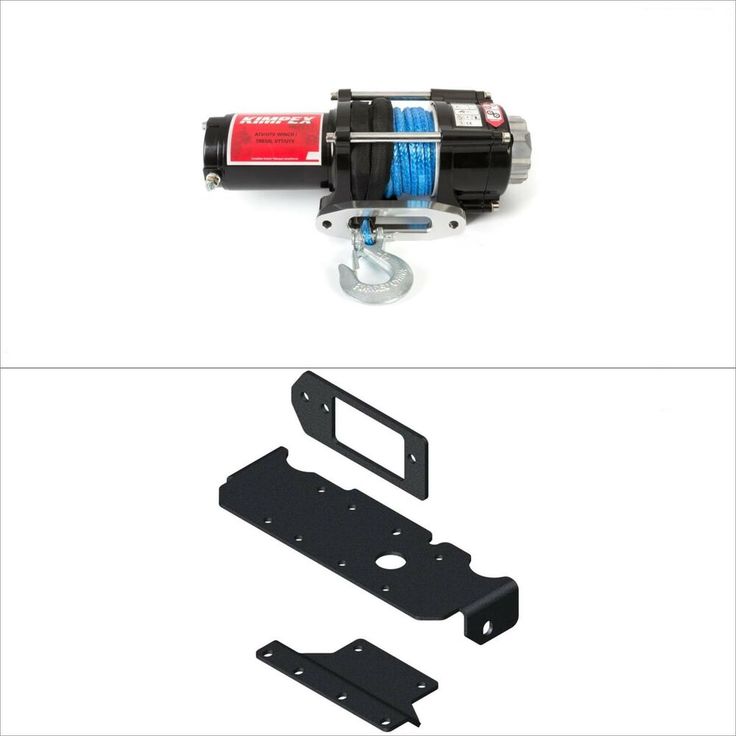 It’s the same process, nothing has changed.
We’ll do the same thing for the other wire. Lay it down in position, then come down here and hand snug those.
Then we’ll come over here. We already got the terminal covers out of the wiring kit. We’ll slide one of those on each of our connections going into the winch. Remove a washer and slide the wire on. Reinstall the washer, as well as the nut. Do the same thing for the lower wire, the blue wire.
[17:33] Slide your washer on. Then we’ll go through and fully tighten all the hardware on the solenoid, as well as the winch.
Once your hardware is tightened on the winch, make sure to pull your coverings over top of the connections. Then you’ll see right down here, there is a plug. It’ll come apart and look just like this.
This wire on the left, the white one with the black stripe, that’s a keyed-on power source. We already probed it and checked it all out. We unplugged the dummy plug off of it. To get the plug off the frame, there’s a little tab right here on the back side. Just pull up on that and you can slide it off the actual tab on the frame.
There are two spots back here where a hot and a ground pin could go. Obviously, we went ahead and unpinned the hot side. We found the correct pin and installed it.
[18:47] This is the best way to do it, but you don’t have to do it this way. You could just tap into this white wire that we just showed you. That’ll be the keyed-on power source. You could crimp it or you could cut it and then crimp a connection to it. Use Scotch Lock or anything that you can use to get the power from that wire right there.
This just seemed to be the best option for us. We had pins on hand and just found out what size pin it was. We put it in the connector and now when we plug it up, plug it in, and turn the key on, this wire right here gets hot. So we’ve located our keyed-on power source.
We told you where the power source is.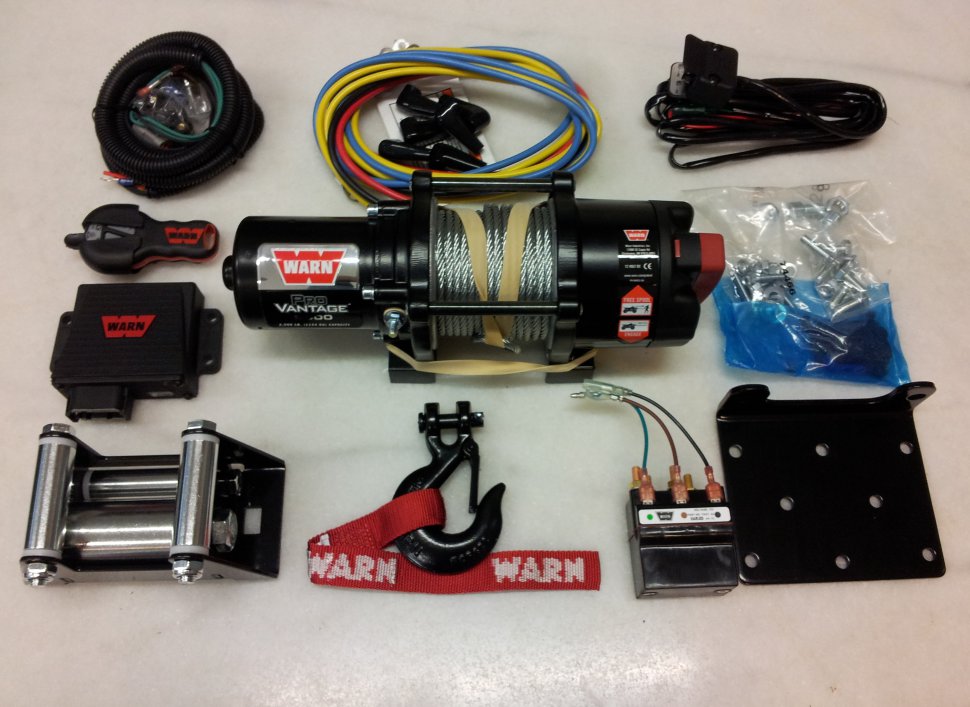 However you decide to wire it up is completely up to you. Just make sure you’ve got a good connection and it’s functioning properly.
[19:32] We’ll go ahead and plug this back in where it was. We’ll go inside and show you how to install the rocker switch panel, as well as the dash-mounted rocker switch.
Obviously, on the Talons, there isn’t a very good spot to mount a rocker switch. That’s what we’ll be using for this install, is our dash-mounted rocker switch.
With that being said and there not really being a good place to mount it, we came up with a rocker switch panel. I highly advise that you pick one up if you don’t already have one. It’s very easy to mount, nice and easy, and a great product to use.
In each corner here inside the cubby, you’ll see a little hole. We drilled that hole out, big enough for this plug right here to fit through. Take your rocker switch panel and install it. Lay it up where it looks good.
[20:39] You can get a screw gun or just line it up using a Phillips-head screwdriver.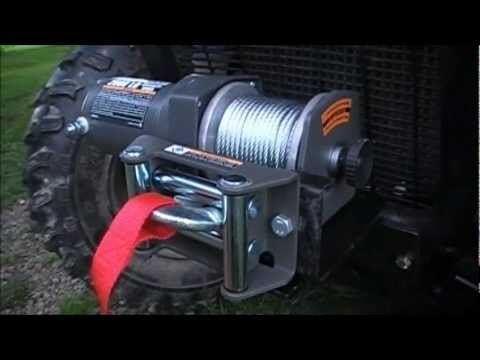 I’ll put these in. You don’t have to use a screw gun or drill or anything like that. Just make sure you get it straight.
We didn’t have to countersink any holes. We just lined it up and pushed on the screws a little bit while we were installing them, and they go right into position with no problem.
[21:15] That’s how simple it is to install the rocker switch panel! It’s a very easy install, nothing to it. If you already had the rocker switch panel installed, you just want to pop it apart really quick.
Now we have our holes lined up, so it goes together nice and easy. Just pull all four of your screws out. Take one of your rocker switch plugs, which will be these right here, and snap them out.
We have one of our rocker switch knockouts knocked out. I’m just going to run our wiring right through here. Then we’ll go down through the hole we created previously. We’ll feed all of our harness through there. That way we can get a hold of it on the outside.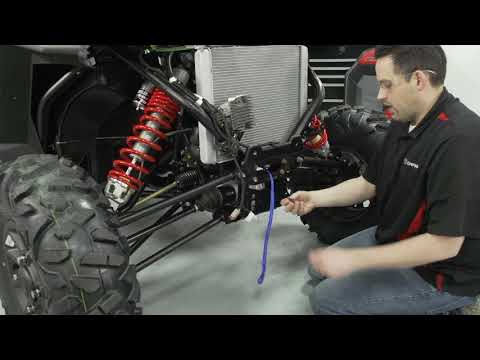
Lay our panel back up into position. We’ll set the hardware aside for the time being.
[22:14] Now we’ll head back to the front and make some connections. For all of our excess, we’ll just bundle it up behind the panel here.
Now reach up underneath the dash and grab hold of the wires that we previously fed through. One of them will go right to this connection here, on the bottom of the solenoid. This other one will go to our keyed-on power source, which, like we talked about earlier, is this right here.
Now we can take our bullet connector, or any style of connector that you’d like to utilize. Make sure the keyed-on power source is attached and has a good connection. Then we can start feeding our harness and everything back toward the machine.
Once we have it all pulled through, we’ll come out here and make sure our wires are tied up nice and clean. Then we’ll check the winch. We’ll go ahead and pop our switch into the panel, just like that.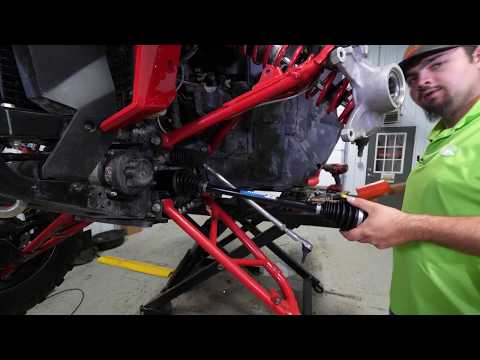 Then we’ll bundle up our wiring just like it was when it was packaged up.
Lay it in the cubby, like that, and then double check to make sure everything’s working. The winch is working good, so now we’ll screw our panel back down.
In your kit, you’ll have a remote. On this remote is a pull tab. Grab hold of it and wiggle it right out. Once it’s removed, you can hold down both buttons on your winch controller and with the key on, you can control your winch.
To power this off, hold both buttons down and the red light will shut off.
[24:38] Now everything is wired up on this machine. The last thing we need to do is go through and tidy up our wiring as best as we possibly can. Make it look nice and use some of the zip ties to tie everything up out of the way. Reinstall a few panels.
Once you’ve done that, that’s all there is to installing SuperATV’s 4500 Lb. Black Ops Winch and Winch Mount on this Honda Talon 1000! For more information on this winch, the mount, or any of SuperATV’s great products, feel free to give us a call at 855-743-3427, or check us out online at SuperATV.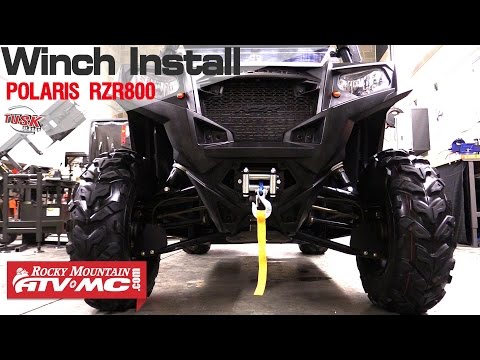 com. Thanks for watching and we’ll catch you next time.
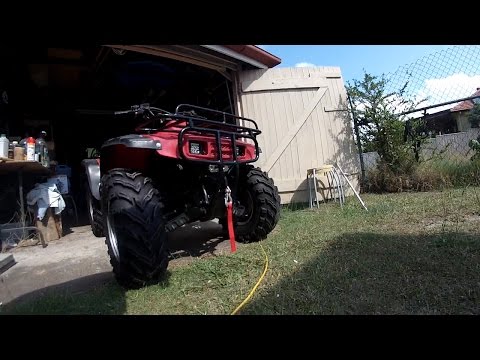
If you are used to using an ATV, as they say "to the fullest", if you cannot imagine existence without measuring deep puddles and swamps, overcoming hilly terrain, and the thirst for extreme sports was born faster than you, then installing a good powerful winch is just what you need. what you need.
Installing a winch on an ATV is a simple process, but responsible and requires certain skills and care.
You can read an article on the correct use of a winch on an ATV here.
Winch platform.
Suppose you have already decided on the choice of a winch, then you should pay attention to the mounting of the platform. You can make the platform yourself or purchase it specifically for your ATV model (although you will most likely still have to grind and finish).
It must be said that the attachment of the winch platform to the frame must be reliable and thoughtful, because all the weight under load will fall on this particular unit.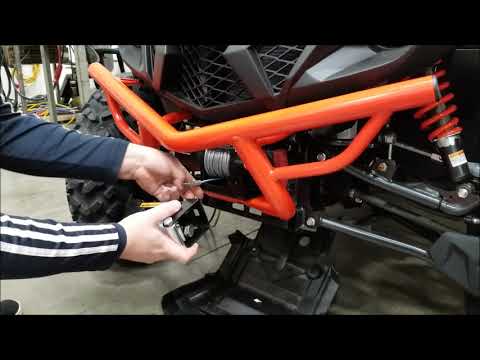
Winch wiring harness.
For easy cable routing, we recommend that you remove the ATV plastic, this will make your job much easier.
When laying wires, try to keep the power cables as short as possible, this will avoid current loss when the winch is running. If the wires are too long, they should be shortened after laying near the battery and put new terminals in place of the cut.
Cables should be tucked into the corrugation to avoid short circuits and direct contact with the ATV frame.
Attention! Wiring should be carried out with the battery terminals disconnected.
Wiring diagrams for the winch and control panels.
Connection for control unit, winch and battery.
Scheme for connecting the winch console to the solenoid.
Winch radio control connections to dual solenoids.
After installing the winch and wiring, check the winch and control panels for proper operation.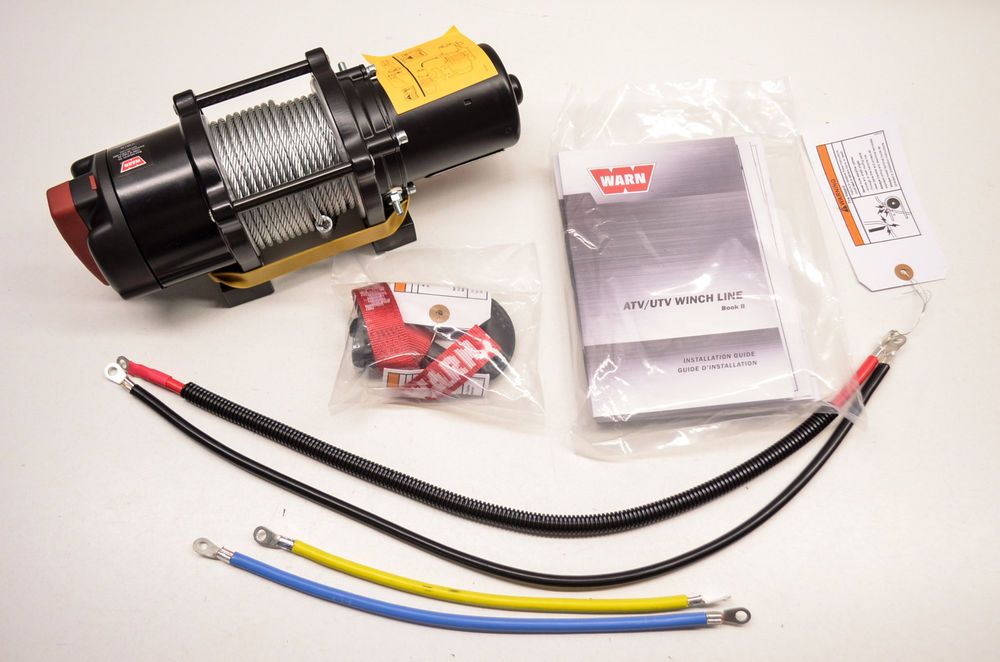
A video that shows in detail the entire process of installing a winch on an ATV:
you can always ask a question or make a suggestion in the comments. I wish you a successful installation of the winch on your ATV, and fewer situations in which you have to use it.
"...
Arch extensions for a flat..."
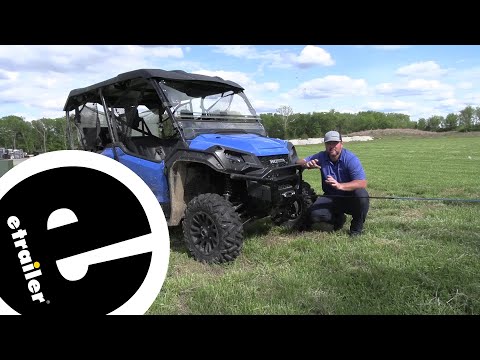
A winch is a must have for off-road riding. It allows you to pull a stuck ATV out of mud, water or deep ruts. Many models of CFMOTO ATVs and ATVs have a winch from the factory, for others it needs to be purchased separately. In this article, we will tell you how the winch works, what to look for when choosing, and also give useful tips on how to use it.
ATV winch is a drum with a cable. An electric motor is located on one side of the drum, and a gearbox on the other. Rotation from the electric motor to the gearbox transmits a shaft that passes inside the drum. The gears of the planetary mechanism are located in the gearbox.
Reducer reduces speed and increases traction. The rotation from the gearbox is transmitted to the drum, which winds the cable, creating traction and gradually pulling out the stuck equipment.
One of the key parameters to consider when choosing a winch is traction. It determines the maximum weight of the load that can be torn off the surface. With each skein of the drum, the winch force decreases.
Thrust is measured in pounds (labeled on winches as lbs), 1 lb = 0.45 kg.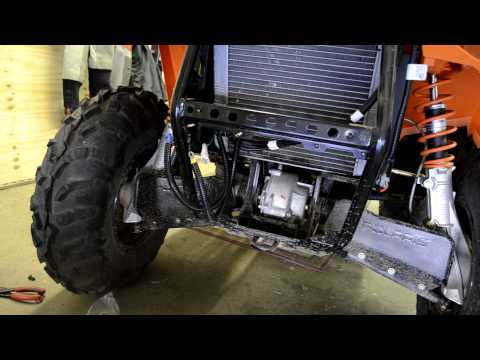 The force depends on a number of features: the diameter of the drum, the number of wound turns, the power of the electric motor, as well as the gear ratio of the gearbox.
It is not always necessary to choose the most powerful and fastest winch: the more powerful the mechanism, the more difficult it is to handle. Beginners can harm equipment and even their health - it is not uncommon for a broken cable or a broken hook to cause injury.
Fits ATV cubic capacity:
Steel - cheap and easy. Requires work with gloves, not repairable. May cause injury if mishandled.
Synthetic - requires maintenance but is easy to use. It does not "shoot", and if the cable is damaged or torn, it can be braided on the spot.
Most experts believe that material choice should be based on personal preference: some riders lean towards steel over time, others towards synthetics.
The winch is installed on a special platform on the ATV frame. If there is no platform, you need to buy it and install it according to the instructions. The site has standard anchor points that fit classic winches up to 3,500 feet of pull.
When choosing a winch, pay attention to the width of the drum:
With certain skills, you can modify the fasteners and install almost any winch - the main thing is not to make the fasteners "break" and not to strengthen weak points. If the ATV is under warranty, it is advisable not to touch the frame and buy a regular winch.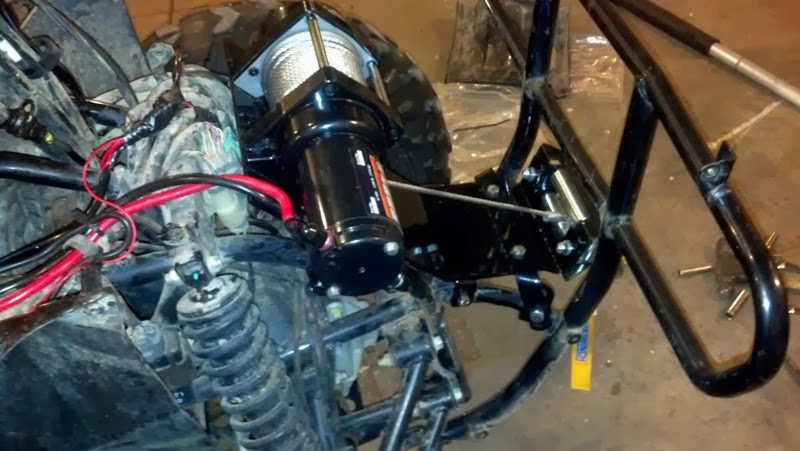
Installing the winch is easy, but the connection will have to be tricky. To lay the wiring, it is advisable to remove the plastic from the ATV. The winch must be connected to the control unit and battery. It is recommended to keep the power cable as short as possible to avoid current loss. All wires must be hidden in the corrugation so that they do not come into contact with the frame and are protected from moisture.