Open Hours: Mon-Fri 10-6, Sat 10-5. Closed Sundays. (See footer for annual closed holidays)
The easiest way to keep your bicycle running well is regularly checking tire pressure. Properly inflated rubber rides best, lasts longest and resists flats. For high-pressure skinny road tires, check before every ride. For fatter rubber, such as what's on most off-road bikes, once a week is about right. But DON'T head to a service station and use the car-tire compressor! (They can explode a bike tire in seconds.)Do it with your "floor" (home) pump. Here's how:
What kind of pump you buy depends on what you need it for. Pumps fall into two categories: Floor pumps for home use, and bike-mount pumps to carry with you on the road in case you have a flat. Floor pumps are much larger, pump more air per stroke, and take fewer strokes to inflate your tires. They are much faster and easier to use than the smaller bike-mount pumps, but of course, you can't take them with you on a ride. A bike-mount (or road pump) on the other hand, is designed specifically to be taken with you. Being very small, it takes a lot more work to inflate your tires with one, but if you have a flat on the road, which is why you take a pump, that's a secondary concern. So, the answer as to what kind of pump to buy is, buy a floor pump for home use, it's a lot less work to pump your tires, and buy a bike mount pump to take with you in case you flat on the road. Oh, and by the way, just about all our pumps are capable to inflate either Schraeder or those skinny little metal vales (Presta)!
Shop our pumps
On most tires, the recommended pressure is printed on the sidewall. It's often written as a range, such as "90 to 120 psi (pounds per square inch)," which appears on some high-pressure road tires. Less pressure offers a more comfortable ride and more air means less rolling resistance. If you're inflating 26-inch tires (common on comfort and off-road bikes), you may find that the pressure range is wider, say "35 to 60 psi." This is because these tires can be used on and off road. For the former, 60 psi is about right because it rolls optimally on pavement. Off road, however, 35 to 40 psi is much more appropriate because it absorbs the bumps, rocks and roots better and offers greater traction for control and handling. For the fastest, most efficient riding, inflate your tires to the max pressure listed. But feel free to experiment within this range to find what feels best for you.
The easiest way to keep your bicycle running well and preventing flat tires is to keep your tires properly inflated. Properly inflated tires ride best, last longer, and resist punctures.
You should check your tires before every ride. Why? Your tires lose air over time, even overnight. How does this happen? The little molecules of air wiggle their way out between the molecules of rubber in the inner tubes and tires. The same thing happnes to your car tires, but it's not as critical because the amount of air lost is so small compared to the large volume of air in a car's tire. But with bicycle tires, a little bit of air makes a big difference. A bicycle tire can lose as much as 10% to 20% of its air in one day.
What happens when there's not enough air in your tires? Besides making your bike not as efficient as it should be, the biggest danger is what's called a "pinch flat." Suppose you run over a pothole, curb, rock, stick, or other sharp obstable. If the air pressure in your tires is too low, the inner tube gets pinched between the tire and the rim, and the edges of the rim cut two side-by-side holes into the inner tube, which is called a "snake bite."
For fatter rubber, such as what's on most off-road bikes, once a week is about right. But DON'T head to a service station and use the car-tire compressor! (They can explode a bike tire in seconds.) Do it with your "floor" (home) pump. Here's how.
Get a "floor" pump with built-in gauge for checking inflation.
Carry a portable pump for fixing flats on rides.
You need to know your tube's valve type to ensure that you purchase the correct tubes as replacements. And, so you know how to set up your pump, how to attach the pump to the valve and inflate the tire.
To add or let air out of Presta valves, you must first unscrew the tip by turning it counterclockwise. To let air out, press down on the tip, which opens the valve. Also, before inflation, press down to make sure the valve is open.
For Schrader valves, to release air, press something into the valve to depress the valve core (the little pin inside the valve). To inflate, simply attach the pump and get to work.
Tips

There are many different types of pumps and the best way to guarantee using yours correctly is carefully reading the directions. Many modern pumps feature a head that fits both valve types. You simply use the hole that fits on the valve (skinny one for Presta and larger for Schrader).
Some pumps have convertible heads on which you must reassemble the parts when you want to pump up a different valve. If you have this type, set it up for the valves on your bicycle and keep the directions handy so you'll remember how to adapt it when necessary.
It's easy enough to attach the pump to the valve. Be sure to open a Presta valve first by unscrewing and briefly pressing on the tip. And, press the pump head on far enough (cover about one to two thirds of the valve).
If the pump head has a "lever lock," flip it to attach the head to the valve and start pumping (photo).
Tip: Don't pump too vigorously. Slow and steady gets the job done quickly and prevents pump damage (it's possible to harm the gauge by pumping too quickly).
How much tire pressure should you run? A practical approach is to use the manufacturer's recommended pressure, which you'll find printed on the tire sidewall (it's often on a small label but it might be molded into the casing, too, so look closely). This suggested inflation range is a good starting point.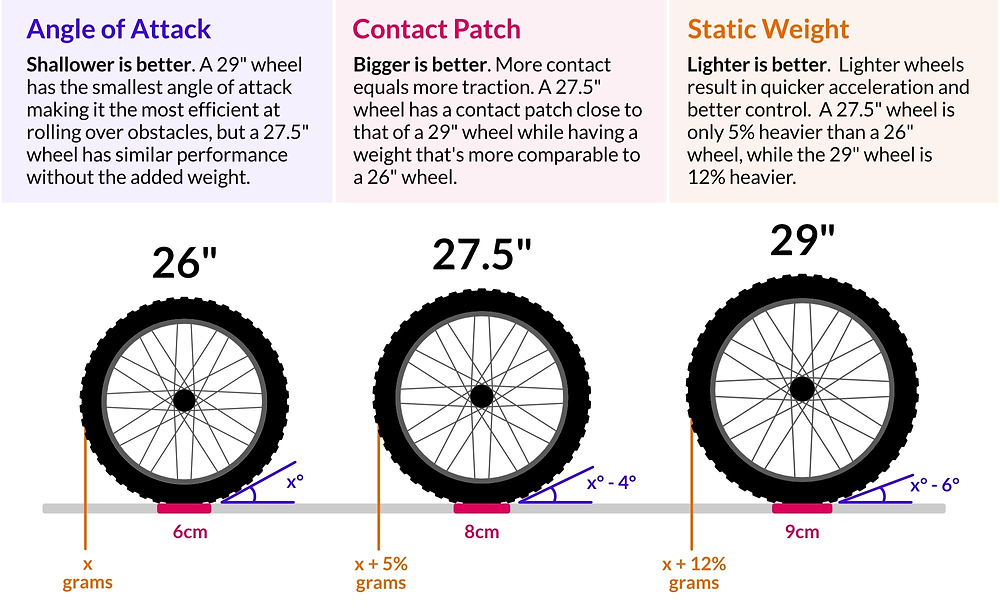 If it's a wide range, for example 40 to 60 psi, experiment to find which pressure works and feels best.
How the tires feel depends on rider weight, too. Check our chart for recommended pressures.
Tips
Who would have thought that inflating road bike tires would be such a nerve-wracking affair?
I swear it wasn't that hard when I was a kid.
You see, after a long break from cycling, I decided to take my bike to work last week. I noticed my tires were low and opened up my new pump for the first time.
Unfortunately, I was not able to remove the inner screw with my fingers, and with pliers it seemed that I would break it out. I know that many cyclists can understand. nine0003
The good news is that my son was there to lend a helping hand before the surgery.
And here are the steps we took to pump up my road bike;
1) The correct choice of bicycle pump
2) Determination of the correct pressure in the tires of the bicycle
9000 9000 3) 9) 9) 9) 9) 9) 9) 9) 9)0002 8) Verification of inflation
9) CLAP CLAPE
As you can see, you are not so difficult, especially if you have suitable equipment and equipment all that.
I have been training successfully for the past few days and if you have been struggling to inflate your road bike tires, I will share my experience in the guide below. nine0003
Read more!
Here are some of the basic items you need to know about bike pumping.
Valves are ports or connections between the bike's inner tube and the pump. They provide air inlet and outlet.
There are several different types of valves, but the main ones are:
Presta valves are narrower than Schrader valves with a narrow rim bore.
They are also generally longer, making it easier to install the pump.
However, their extra length and lightweight design make them a bit brittle and easier to break.
They are less reliable than Schrader valves and in my years of cycling I have broken a couple of Preston valves more than Schrader valves. nine0003
In addition, they are not compatible with car tire pumps or air pumps at gas stations. For pumping you need an adapter.
But they make up for their short life and incompatibility with gas station pumps by their ease of use.
I prefer the Presta valve to the Schrader valve because it allows for quick and easy opening of the valve.
They do not have a spring in the valve so they are also easier to lower with more positive action. This is especially useful with small capacity hand pumps, as they do not require a built-in spring compressor in the pump. nine0003
Schrader valves are wider and stronger than Presta valves.
They are less likely to break than Presta valves and will last a long time.
They are not as easy to fill as Presta valves. Sure, you can open the valve on the Schrader to let the air out using the tip of a key or your fingernail, but that's just inconvenient.
The smartest part of the Schrader valve is that it has a spring mechanism that keeps the valve closed and air inside. nine0003
This is different from the screw valve on the Presta valve, which means that there is no need to re-screw the valve after inflation because it will not let air out unless it is pressed down.
What else? Another great benefit of the Schrader valve is compatibility with automotive pumps.
Schrader valves do not require special bicycle pumps. This is useful, especially for beginners who do not yet have a complete set of equipment. nine0003
Both the Schrader valve and the Presta valve have their strengths and weaknesses.
They are also designed to be used on different bike tires, so it's not a question of which is better than the other.
The main thing to remember is that the valves have different widths, so it is not easy to replace one with another.
One wheel can only accept one type of valve.
For example, Schrader valves are thick and difficult to fit into the tube hole on a road bike rim. Conversely, the Presta valve is too thin to fit the tube hole on a mountain bike. nine0003
The Presta valve usually requires an adapter to mount to the MTB rim. But there may not be enough room for a larger Schrader valve to fit on very narrow tires.
The difference in valve types means that the pump heads will also be different.
Simply put, you cannot use Schrader pump heads to fill a Presta valve and vice versa.
You can still use a different pump head for a different valve if you have an adapter. nine0003
Another workaround is to purchase double mount pump heads.
Two nozzle pump heads have a Presta bike tire pump and a Schrader head in one unit.
I'm a big fan of dual mount pump heads considering I have both a road bike and a mountain bike.
This saves me the trouble of having two pump heads or buying an extra adapter.
Finally, we have pump types. They will complete our discussion of the basics of inflating bicycle tires.
As the name suggests, bicycle pumps are tools for pumping air into bicycle tires.
We have different options, but the most popular bicycle pumps:
1) caterpillar pump
2) mini pump
3) Air compressor
4) mini inflator
Husenic pump , also known as a floor pump, is the most popular bicycle tire pump. nine0003
This is the basic pump that every cyclist should own.
However, floor pumps are bulky, reaching 2 feet in height. The good news is that they have a high inflation capacity, making the task of inflating easier and effortless.
Caterpillar Pump Bike Tires take the hassle out of using smaller pumps.
And as if that weren't enough, the floor pumps come with great features to make pumping easier. nine0003
For example, mine can support both types of valves. Accessible pump heads can also lock onto the valve so there is no need to worry about air escaping.
In addition, the best bicycle tire pump has an accurate pressure gauge, so it's easy to read the tire pressure.
The only downside to track pumps is that they are bulky and not portable. They are usually stored in the garage and are ideal for those who stay at home.
Mini pumps are a smaller version of track pumps.
These are portable pumps, ideal for those who need to take the pumps with them on their bike rides.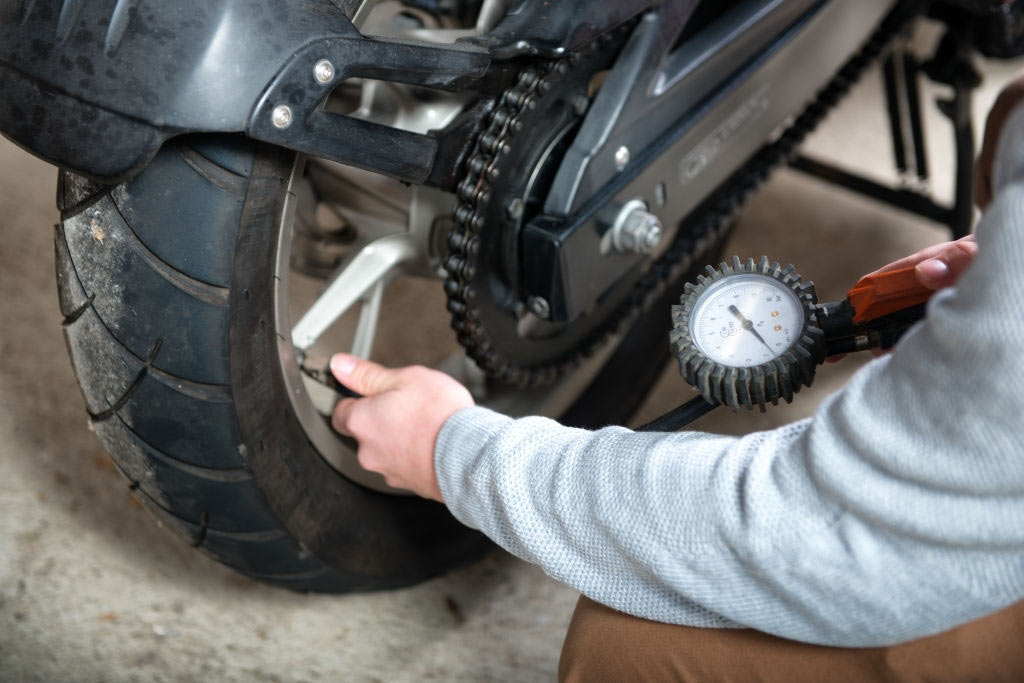
Mini pumps, also known as compact pumps, are small enough to fit in your pocket and come in handy in the event of a flat tire while on the road.
These compact pumps ensure you get home with a puncture rather than being stuck miles away with a puncture and no way to inflate your tires. nine0003
Mini pumps can inflate bicycle tires at high enough pressures, but they are as good as track pumps.
It takes some elbow grease to use the mini pump, but in my opinion I'd rather inflate a tire more than be stuck with a flat tire miles from home.
Our third type of pump is not strictly a bicycle pump.
Mini pump, also known as CO2 pump, uses a CO2 canister to inflate bicycle tires. nine0003
C02 cartridges are typically filled with compressed carbon dioxide for quick, easy and efficient filling.
The main advantage of mini inflatables is that they are ultra-light, so they won't weigh you down on long road bike rides.
Secondly, they are effective at filling bicycle tires and require only a fraction of the effort and time compared to a mini pump or a floor pump.
The biggest disadvantage of mini inflators is that they are disposable and disposable. nine0003
So it only allows you to refill your tires depending on the number of CO2 cartridges you have prepared.
Our final option, the compressor, is rare among casual road cyclists.
Air compressors are expensive and often used exclusively by professional cyclists or team mechanics.
The biggest advantage of compressors is that they make the inflation process quite easy, especially if you plan to inflate to the desired pressure. nine0003
This air pump saves time and makes it easier to inflate multiple bike tires.
Now that we've covered the basics of inflating a bike, let's look at the exact step-by-step details of inflating road bike tires.
The first step is to determine the type of valve that is used on your bike's rim. nine0003
The two main types are Presta and Schrader valves.
Once you have identified your bicycle pump, the next step is to select a pump that is compatible with your bicycle valve.
If your pump is not compatible with a particular valve, consider purchasing an adapter.
After confirming the compatibility of the bicycle pump, the next step is to determine the ideal bicycle pressure. nine0003
Proper bicycle tire pressure is critical to avoid bumpy/stiff riding or hard cycling.
I would recommend choosing a bicycle pump that shows accurate tire pressure. This avoids over- or under-inflating your bike.
It is usually easy to determine the correct pressure because most tires have the correct pressure marked on the sidewall. If not, check the exact pressure in the user manual.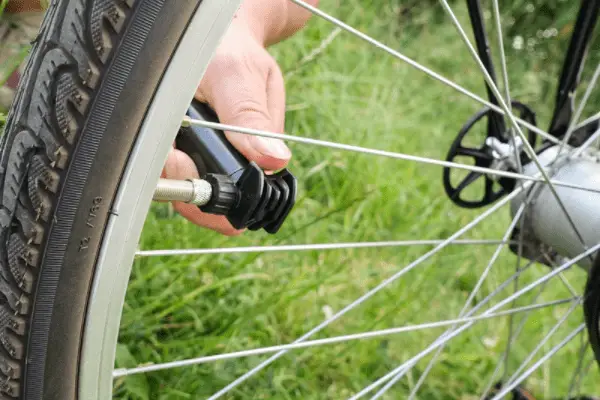 nine0003
But generally road bikes require higher pressure than mountain bikes. Road bikes need to be stiff enough and minimize ground contact to reduce rolling resistance.
On the other hand, mountain bikes need more ground contact for better traction and overcoming obstacles.
Generally, the recommended pressure range for road bikes is 80-130 psi and mountain bikes require 25-35 psi. nine0003
The dust cap is a convenient addition to the valve port that prevents dirt and debris from entering the valve.
Presta Valve and Schrader have the same plastic cap design.
You just need to unscrew the lock nut and remove the cap.
Be sure to keep your hat in a safe place so you don't lose it. I usually prefer to keep mine in my back pocket. nine0003
After you remove the cap, the next step is to tighten the pump head over the open head.
This is more than just putting it on top, but you will need to turn it clockwise until it fits snugly. A good way to know if it's blocked is to feel the resistance.
However, be careful not to overtighten as you may break the valve.
It is also necessary to re-confirm the correct nozzle (Presta or Schrader valve) by pressing the valve. nine0003
Once the pump head is firmly and securely screwed to the bicycle tire valve, it's time to start pumping.
But not now.
Most bicycle tire pumps have a lever that initiates the inflation or inflation process.
The mechanism and instructions will depend on the type of pump.
But usually most track pumps require you to turn the handle 90 degrees and then push the lever on the top of the pump. nine0003
Then you can start to inflate the tire.
But, as I said, specific instructions will depend on the pump model.
This step is the actual inflation.
Normally the inflation action is to move the lever up and down until the tire is full.
You just need to put the pump between your legs, grab the lever with both hands and start pumping the track pumps. nine0003
Conversely, for a hand pump, small pumps or air compressors, hold the nozzle with one hand, pointing it at the nozzle, and pump with the other hand.
If your bicycle tire pump has a pressure gauge, it's easy to determine the correct pressure for your tire.
If not, you can test inflation using your thumbs.
As soon as you inflate and feel that your thumbs can no longer press, the tire is sufficiently inflated. nine0003
However, this is usually not the best method because it can sometimes be misleading. In addition, it will also depend on your physical fitness.
Another thing is that different tires have different pressures. What works for a road bike may not work for a mountain bike.
After pumping is complete, remove the pump from the valve.
Removal is the opposite of pump installation. For example, if you have a pull-up lever, you just need to press it. Plunger pumps may require a few pushes to remove the pump. nine0003
Remove the valve stem from there.
You may also hear a hiss when the tire is removed. It's excess air, usually in the pump, so it's normal. This will not affect the overall PSI of your tire.
It is easy to check the exact level of tire pressure if you use a digital pressure gauge.
Checking the correct tire pressure and correct tire inflation is especially useful for cyclists who are looking for comfort and excellent driving performance. nine0003
However, it is important to note that different bicycle tire pumps have different scales, so you need to be especially careful.
Another precaution to consider is that dirt and debris on the valve and pressure may affect the accuracy of the dial.
Now, if your bike tire is overinflated, you can relieve the air pressure a little by opening the valve.
If you have a Schrader valve, you just need to press it with a wrench or fingernail to release the air. In the case of a Presta valve, simply open the plastic caps and press the nut. nine0003
Once you've made sure your tire is inflated to the correct pressure, the next step is to close the valve to prevent air leakage.
If you have a Presta valve, start by screwing in the lock nut until it is tight, then put the cap back on.
With the Schrader valve, you just need to put on the dust cap. It doesn't matter if you leave it open because Schrader pumps don't lose air until the valve spring is pressed. nine0003
But it's always good to have a cap to prevent accidental pressure or getting dirt and other debris on the valve.
Inflating a Presta valve is no different from a Schrader valve.
However, you will need a Presta valved pump.
The key to inflating a Presta valve is the pump head insert.
You start by removing the valve cover and unscrewing the lock nut. The next step is to position and insert the pump head. nine0003
The hand pump is one of the traditional and popular ways to inflate road bike tires.
It offers a simple and fairly easy way to inflate a tire.
Here is a step by step guide to using the hand pump:
1) The first step is to find a flat and level surface. The tires should be straight and vertical away from you.
2) Attach the pump head to the valve. Make sure the nozzle is securely attached. nine0003
3) Place your hands on the pump handles and start pumping.
Tubeless tires differ from conventional tires in that they do not have inner tubes.
They also don't use traditional bicycle pumps, but instead use air pressure. The inner tube is filled with sealant to prevent punctures while riding.
Here is a step-by-step guide to inflating a tubeless bicycle tire:
1) Purchase an air compressor with an appropriately sized blower head. The inflator head should also have a valve core remover to easily remove the valve stem core.
2) Position the inflator head over the valve of the inner tube. Make sure it is properly aligned for easy screwing in and out of the stem core.
3) Apply pressure to draw enough air.
4) If you feel that the tire has become hard and you can squeeze it more, remove the valve stem core and then remove the pump while holding the compressor firmly with your other hand. nine0003
If you don't have a valve stem remover, a coin or small key can be an ideal replacement.
Proper tire inflation is essential to keep tires from feeling hard or bouncy.
Ideal tire pressure should be between hard rock and spring pressure for optimal performance and comfort.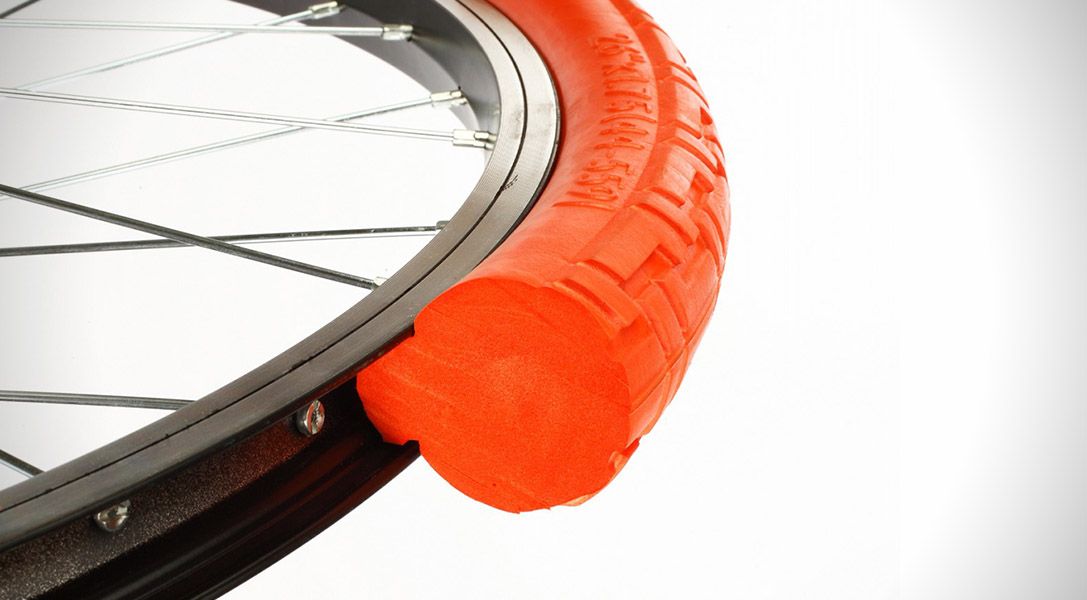
There are several ways to determine the ideal pressure or how much air you need for your tires. nine0003
You can check the manufacturer's manual. Alternatively, check the pressure with the pump gauge.
The last option is crude and involves reading tire pressure with your thumbs.
I am not a big fan of the latter method and I would advise you to find a positive pressure pump with a pressure gauge for accurate pressure readings.
If your tire is under-inflated, you can add enough air until it reaches the correct pressure. nine0003
This will depend on the frequency of use.
However, for most casual riders, you can inflate tires every two weeks.
Proper tire pressure will save you from pinching from time to time.
Proper bike pressure is even more important for racing bikes because it can affect comfort and speed.
The last thing to consider when choosing tire pressure is temperature and environmental conditions. Tire pressure will increase or decrease depending on available temperatures. nine0003
Therefore, always check the pressure after driving for a couple of hours.
This is everything you need to know about inflating a road bike tire.
Make sure all equipment is ready before starting the process. More importantly, make sure your equipment is compatible with your bike system.
Finally, keep your tires inflated correctly. Properly inflated tires are comfortable to ride and optimized for performance. nine0003
Sharing care!
I am an assistant editor from South East Asia who has traveled all over the world. I mainly cover LATAM timezones by managing the content here. On weekends, you'll see me watching Grey's Anatomy and lots of Netflix sentimental dramas, or munching on the dishes I'd pass out from MasterChef.
First and last name nine0003
Email the address
Text of the appeal
FINANCIAL AND MEDICAL DISCLOSURES
HobbyKraze is a member of the Amazon Services LLC Affiliate Program, an advertising affiliate program designed to provide website owners with the means to earn any advertising fees through advertising and links to amazon. uk a website that may be linked to the Amazon Service. Affiliate Program Ltd. As their partner, we earn on eligible purchases. nine0003
The information contained on this website does not constitute medical advice and is not endorsed by medical professionals. All content on this site is for informational purposes only.
We are an independent property and the views expressed here are our own.
Let's talk
Facebook Twitter Instagram pinterest
st. Lavaca, 1401, PMB 40510
Austin, TX 78701
Subscribe to updates
Explore the world, unleash smart hobbies and awaken the joy of life in yourself!
Full name
Email the address
© 2023 Hobbycraze. All rights reserved.
Contents
Flat tires do not bode well for a cyclist.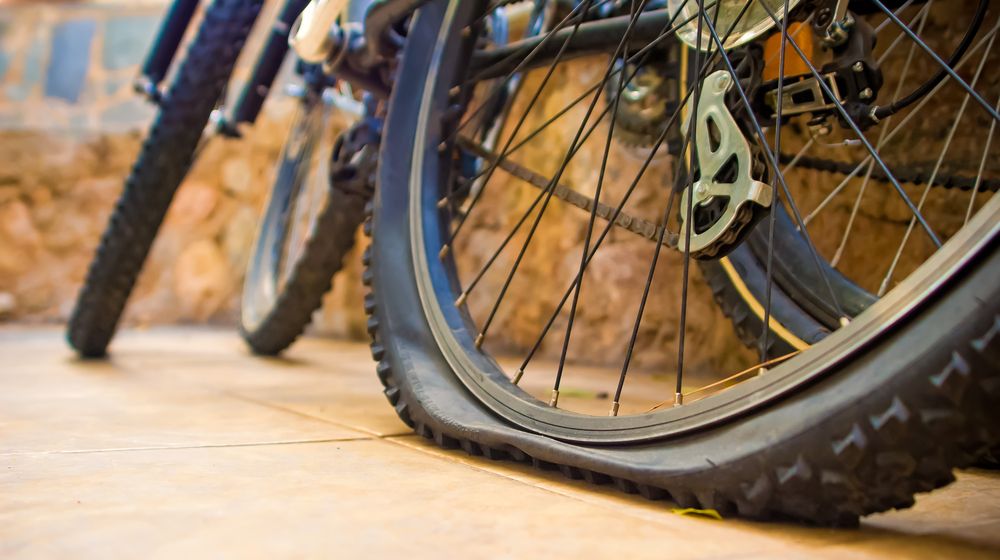 The situation must be resolved immediately, otherwise you will have to become a pedestrian for a while. What should be done? That's right, pump up the camera and calmly continue moving. Consider how to pump up a bicycle wheel with a pump, what subtleties are available when using an autocompressor, and whether it is possible to do without a pump.
Tire pressure is the main parameter that is responsible for the speed of movement, grip on the roadway and the safety of the cyclist. The average minimum indicator for bicycles is 2 atmospheres. For driving on asphalt, the recommended value is within 3.5 atm., For primers - 2.6 - 2.8 atm.
It is easy and simple to determine the pressure inside the bicycle chamber using a pressure gauge - separate or built into the pump:

Another method: feel around the entire circumference of the tire with your fingers. If the rubber does not flex, then you can ride. It should be noted that this method will only give accurate results for thin slicks on road bikes and tires on city bikes.
Effects of underinflated tyres:
On the contrary, an excess of air in the chambers threatens the following:
Maintaining the recommended pressure will eliminate all these shortcomings and allow you to get the most out of your trips. Below is a table of values depending on the weight of the cyclist:
*1 atm = 14. 696 Psi
In general, a bicycle pump is a necessary thing for every cyclist. With the help of this simple device, it will be possible to inflate the wheels on your own, and not roll your bike to a service or gas station.
Hand pumps are divided into two types: simple and with a recording device (pressure gauge). It is recommended to purchase the second option, however, if a separate pressure gauge was lying around in the cabinet, you can buy a cheaper pump. nine0003
Universal hand pump with dial gauge
For ease of pumping with a conventional hand pump, you can immediately count the number of air inlets until the optimum pressure is reached and then pump exactly like this, even without additional use of a pressure gauge.
How to inflate the chambers correctly:
 nine0599
 Pressure tracking:
By the way, the latter will not be superfluous to do with a pressure gauge, since the pressure inside the pump can increase during pumping, but air does not enter the chamber (the valve is not completely closed) or exit through a hole in it.
Common bicycle nipples are automotive and Dunlop. For thin wheels, a Presta nipple with a valve is used. It requires cleanliness and accuracy in handling.
Presta tubes fitted to road bikes and select hybrids
A special small volume pump is matched to it. A regular bike pump may not fit or you may need to use an adapter.
Most bicycles have a "schrader" or car valve. The standard option allows you to inflate tires at gas stations and public bike pumps (of which there are only a few in our cities so far) directly.
How to inflate simple wheels with a car pump:
How to inflate your Presta with a compressor at a gas station:
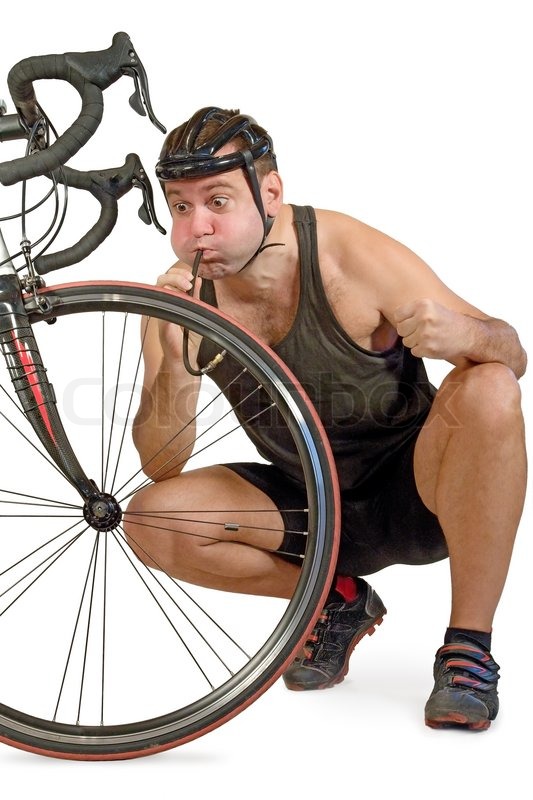
In this case, it is very important to know exactly how many atmospheres it is necessary to let air into the chambers. With increasing pressure, it can quickly burst.
The last option left is Dunlop. It is identical in size to an automobile nipple, but in terms of design features it is similar to the French one (aka Presta). When inflating a wheel, you should follow the rules for a sports analogue. nine0003
Is it possible to inflate bicycle inner tubes without a pump? It is unlikely to reach the recommended pressure, since a regular supply of pressurized air is required, but you can reach the minimum values. Let's consider several methods of pumping chambers, which can be resorted to without using a pump:
Vacuum cleaner. Many models are equipped with a blower mode that blows air out when switched to. A thin hose can be used to connect the wheel nipple. The result directly depends on the tightness of the connection between the hose and the nipple. Here you can use rubber pads, clamps and even rags. nine0003
Bottle pump. You will need two plastic bottles. One of them will serve as a cylinder, the other as a rod. Cut off the bottom of the first bottle and connect its neck through a thin hose to the chamber outlet. Next, insert the second bottle into it and with translational movements pump air through the cylinder into the hose. For tightness, grease the connection of the neck and the hose with sealant or lay a rubber pad. High pressure cannot be created, but it is possible to ride the N-th distance on a bicycle. nine0003
Bottle pump schematic: 1 - "stem", 2 - cylinder, 3 - cylinder neck, 4 - hose
The third way is to remove the nipple and inflate like a balloon. The method is fraught with difficulties in its removal and installation in its rightful place.