| How-To - Wheels and Tires
We usually carry spares. Tires that is. We hope they always remain spares and that we never have to use them. However, there's always the chance you have no spare or already damaged one tire, and now have a tire that's jumped off its wheel bead. It's rapidly lost all air and you have to find a way to get it reseated on the wheel and re-inflated.
If you stick to running street pressures in the dirt, it's highly unlikely you'll push a tire off the wheel bead. But airing down is an off-road necessity in many cases and without beadlocks there is some risk of popping a tire bead. When bead retention fails it almost always occurs on the outside wheel bead and very often on the downhill side of the vehicle where the weight of the vehicle is pressing the hardest on the tire sidewall. Other times, when bouncing laterally in deep ruts, a tire can be slammed sideways hard enough to blow the tire off the wheel bead.
A tire that's been knocked off the outer wheel bead can often be reseated, re-inflated, and then you can be on your way again. If the tire has come unseated from both the inner and outer wheel beads, you've got a bit more work on your hands to get both sides sealed again. In this situation, a large ratchet strap tightened around the middle circumference of the tire may help get the tire beads pushed outward a bit for a better chance of seating. Wider wheels also make reseating more challenging.
Getting the tire completely back on the wheel and re-inflated requires cleaning the bead surfaces on the tire and wheel, getting them pulled together, and getting sufficient air inside to inflate and seal the tire back on the wheel. It can be done in the boonies with a little technique and a good shot of air.
The first thing you must do is get the tire fully off the ground and high enough so it has room to be inflated without touching the ground. Short of this, there's no way to get the tire pulled back out towards the wheel bead for reseating. In most cases, it's easier to work with the wheel on the vehicle, using the rig as a solid anchor to hold it while you pull on the tire.
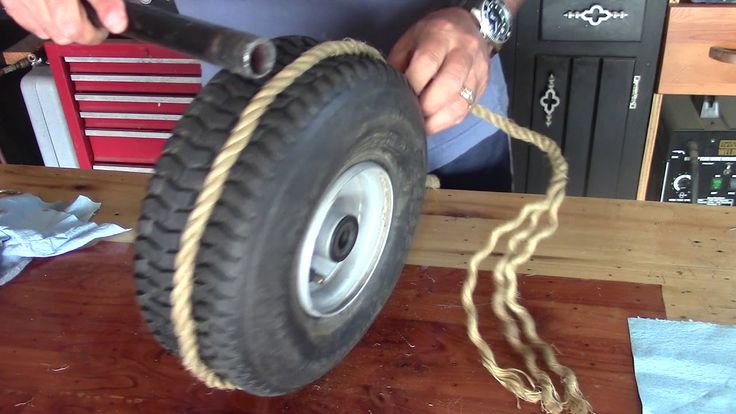
When the tire popped off the wheel, there's a good chance dirt or mud got inside it. We're not overly concerned with what got all the way inside, but we do care about debris on the tire and wheel bead areas. Always clean these surfaces before attempting to reseat the tire as debris here can keep the tire from fully sealing and holding air well. Feel free to wash down the bead areas with water which will clean and help the tire slide back on the wheel easier.
The final step of getting the tire back to a serviceable condition is to inflate it. If the backside bead is still in place on the wheel, that's a huge plus. In many cases, a couple pairs of hands pulling the tire towards the outside can get the outer tire bead out where it can start to seal again. Shoot the valve stem with air to attempt to inflate. You'll hear air hissing in locations that are not sealing. Shift your pull to try to get those spots to seal. Once the seal begins, further inflation will cause the tire to pop rapidly back onto the bead seat.
A voluminous shot of air helps greatly when trying to reseat a tire. A CO2 tank, or large air pump with reservoir, works best to get air rapidly back into the tire while trying to get the bead to reseat. A small pump often has trouble getting sufficient airflow into the tire to seat it. We've seen the starter fluid trick help reseat tire beads effectively. It involves shooting a few squirts of starter fluid inside the carcass, then tossing in a match to ignite the flammable material. Once the tire expands onto the wheel from the heated gases, one has to get to the valve stem quickly to get air into the tire for inflation. Often removing the valve core helps get the air inside quicker, but be cautious of hot gases coming back out of the stem.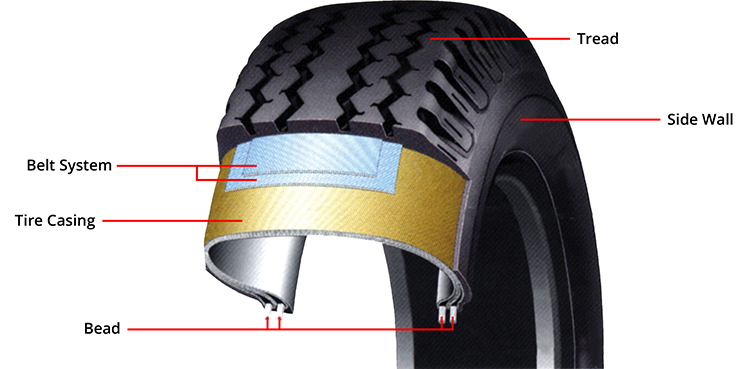
Getting trash and rubbish inside tires happens quite a lot, especially with vehicle owners having many off-road trips. To be more specific, the trash will make its way onto and into the tire. And this is the reason why we need to break a tire bead.
Tire bead is the innermost diameter of the tire that connects with the wheel rim. Most people think that breaking a tire bead is common knowledge for every driver. However, not that many car owners know how to break a tire bead. As long as the bead stays intact, there is no gap to form between the rim and the outer edge of the tire. Basically, there is no way to fix the tire from the inside, which is another reason to learn how to break a tire bead. In this article, our car experts will tell you what tool you need to break the tire, as well as how to do it.
Bead BreakersBefore getting to know how to break a tire bead, it is essential to acknowledge your best tool. Bead breaker is the car tool with the purpose of separating tires from their rims. Different types of bead breakers have different ways of using.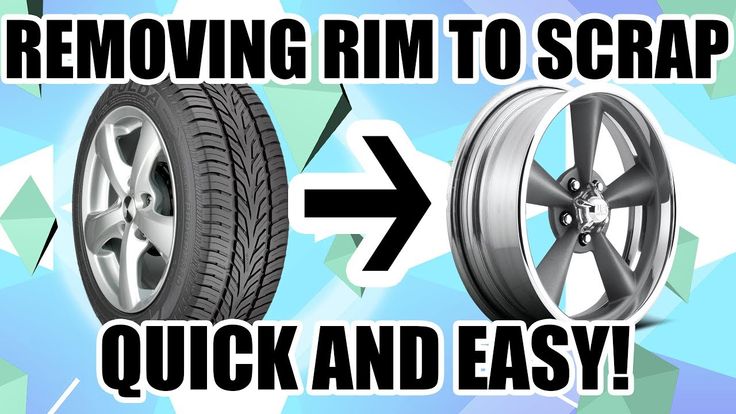 So let’s jump right into answering the question “how to break a bead on a tire“:
This bead breaker uses a plier-type tool in order to apply force between the bead and the rim’s lip. The tool has a spike to perform this task. To be more precise, this spike imposes a force on the bead and the sidewall of the tire to separate them. Therefore, it weakens and removes their connection. This plier type mechanism is amazingly effective and can get the job done very fast. However, it has its disadvantages. The spike is like a double-edge knife that might leave scratches on the surface and on the wheels themselves. Not to mention, this plier type mechanism is very heavy and big, which requires your full body weight in order to get the results.
Shoe and Lever MechanismJust like the name said, the shoe and lever mechanism has a shoe-shaped tool which can apply pressure on the sidewall of the tire. In order to break the connection between the bead and the rim, car owners must push the sidewall. This is, without a doubt, the most popular bead breaker among all, since it works amazingly well on motorcycle tires, new passenger vehicle tires, as well as trailers’ tires. The benefits of this bead breakers are quite a lot: First of all, it is very low cost, so anyone can purchase one for their vehicle. Second of all, the way to use it is quite simple and easy to follow. Last of all, it is made for passenger cars’ tires.
On the other hand, it does not work very well with old and hard-to-change tires. Since the shoe and lever mechanism is also large and bulky, this breaker can only be used on some particular types of tires.
Clamp and Ram MechanismLast but not least, the quickest and most efficient break beads of all time: Clamp and Ram Mechanism. If the first two mechanisms cannot solve the problem with difficult-to-replace tires, this bead breaker can deal with all of them. In order to make it work, this machine uses a pointed foot tool with the purpose of exploiting the space between the bead and the rim’s lip. Not to mention, this bead breaker also has a padded clamp. The part can go inside the sidewall with little effort. Long story short, not only this machine works with all types of tires with minimal human effort, it also causes no harm to the sidewall or to the tires. However, it is quite costly.
Knowing that you are already familiar with all the tools, let’s answer the question of “How to break a Tire Bead?”. In order to perform this task, car owners need to follow these steps:
Step 1: Prepare the ToolNo warrior goes barehand into the war. Here is the tool list that you need:
In order to start breaking tire bead, car owners need to be taken off the valve core to release air pressure out. This step needs to perform before and during the first stages.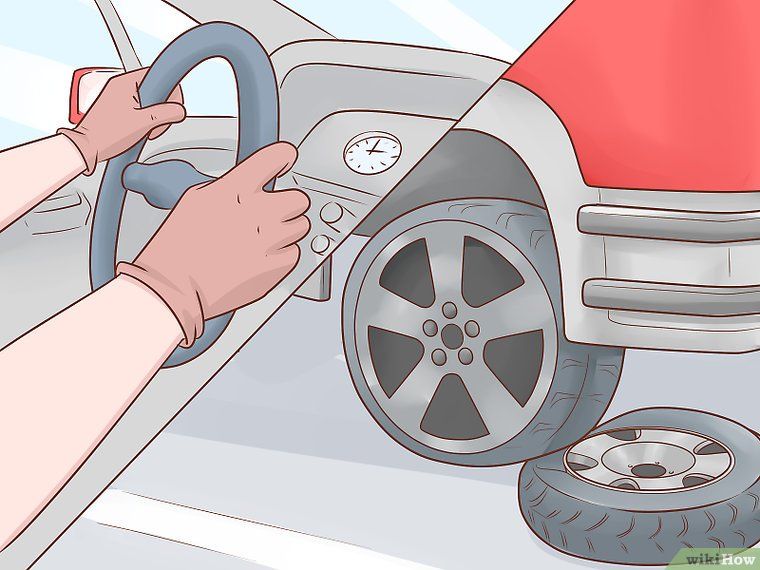
When the valve core is removed, car owners need to put the wheel under the brace. By performing this, the air will be pushed out and we can easily take the wheel off the rim. Just remember to wait until all the air pressure is lost in order to remove the wheel. A little tip to check the tire is to press your hands against the tire’s surface.
Step 3: Place Tire on a SurfaceIn this step, car owners need to lay the tire on a hard surface. After that, you should position the breaker bar between the rim and tire. Before proceeding to the following step, it is suggested to check if the tapered edge of the breaker bar is aimed toward the tire, not the rim.
Also, a solid surface is the necessary factor in this step, since it is capable of handling the pressure you are going to apply on.
SEE MORE
Inner Tire Wear: Causes And Fixes
Must Have Tools For Garage: A Comprehensive List
The next step of “How to break a tire bead” is to slide the breaker bar between the rim and the tire. It is essential to check if the pointed edge of the breaker bar points away from the tire’s rim. The reason for this is that the edge is highly sharp and might create scratches inside. For that reason, car owners might want to aim the bar to the tire, not the rim.
When the breaker is already steadying in the distance between the rim and the tire, it is time to hit it with a hammer with the purpose of breaking tire bead. Wait, we are not telling you to destroy the tire! The purpose of doing this is to drive the breaker inside. So keep hitting it and pushing the breaker bar toward the ground until the bead is broken and we can tell by a small pop sound.
Just take time with this, breaking a tire bead is no joke (Photo Source: bendpak)Step 6: Rotate Around the Tire’s InsideLast step of how to break a tire bead is to remove the tire of the rim. Car owners are recommended to rotate the breaker around the tire’s inside while continuing hammering from above. Keep doing that until the tire is off the rim, then turn around and do the same with the opposite side of the tire.
Many people might be wondering, why do drivers need to learn how to break a tire bead? One of the reasons is that the process is simple to follow, even with beginning car owners. All drivers need is thirty minutes and this instruction. Another reason that it provides a great help in cleaning up debris and dirt inside the tire. By breaking the bead, vehicle owners can remove the rubbish inside and reduce the future problems. The last reason is to save the cost of paying a car repairman, since you can remove the tire from its rim by yourself.
You got it: the tire is flat, but there is no spare tire. Modern tires are tubeless - if you managed to block a small leak with a sealing compound, pouring it into the valve, you can not look for a puncture. Effectively - plug the hole with a rubber band. It is injected from the outside with a special device (such kits are inexpensive on the market). But now we are talking about an extreme case - when a careless driver has nothing at hand to quickly repair a puncture. nine0005
The technique is not new, but effective: we move the tire bead using the weight of the car and the force of the jack.
The technique is not new, but effective: we move the bead of the tire using the weight of the car and the force of the jack.
A small hole can be plugged by screwing a self-tapping screw into it. You can take it, for example, from the trunk lining. Another option, if the puncture is small: pour half a liter of water into the tire (with a pump through the valve) so that it slows down the air outlet. But periodically you will have to pump up the wheel. nine0005
Approximately ten cubes of gasoline, a torch, an explosion - and the board sits still!
Approximately ten cubes of gasoline, a torch, an explosion - and the board sits still!
To seal a large hole, the tire will have to be removed from the rim, at least on one side. But first, move both tire beads deep into the rim groove. Experienced people carry a piece of steel angle and a heavy hammer for such a case. Or they move it with a jack, resting its heel against the sidewall of the tire, and the shelf against the threshold of the car. Next, installers need to drag the desired bead over the rim flange, and only after that you can take on repair fungi, glue and patches. nine0005
The puncture has been repaired - but how to return the tire to the rim shelves? Not everyone has a high-performance electric compressor with them. And in order to use a conventional pump, you will have to seal the gaps as much as possible - for example, pull the tire around the circumference with ropes. If the sides hit the hump and the pressure began to rise, the problem is solved. In practice, these methods require manual dexterity. It's easier to land the tire with a light blast. This requires 10–15 g of gasoline. Pour a few milliliters of fuel inside the tire, then, so that it evaporates better, we roll the wheel. We put it on its side and, pressing on the sidewall, bring the flame to the gap. But not a match, but a torch! There will be a pop - and the tire is in place. A typical mistake is to pour too much gasoline: instead of popping, a fire will break out. We extinguish, we air ...
“Inflate” the tire with a watering hose. The matter requires patience, but on such a wheel you will reach the place of repair.
"Inflate" the tire with a garden hose. The matter requires patience, but on such a wheel you will reach the place of repair.
When the hole is in the knuckle, the tire cannot be salvaged. Unless you insert a camera into the tire. From the inside, it is useful to cover the hole with a "coat" of a couple of layers of rubber or with a bandage cut from the sidewall of a tire lying on the side of the road - there is a lot of this goodness along the roads. This will protect the chamber from sand and reduce the chance of further tearing. And if it's not far from the purpose of the trip? On a flat tire, you can drive 15–20 km on asphalt at speeds up to 40 km/h before it finally falls apart. We talked about this experiment in ZR, 2009, No. 7.
But what if there is no camera? Then turn on the fantasy. Someone "fills" the tire with a watering hose; all sorts of rags, sponge rubber from old seats, plastic film, linoleum strips, sidewalls cut from old tires, etc. will be used. With such stuffing, tires will wrinkle less on the go. But forget about driving in normal mode - slowly, extremely carefully, we drive to the nearest tire shop.
Travel kit: wedges, jack, pry bars, wheel wrench, hammer, gloves, corners, compressor. Do not forget repair fungi, self-vulcanizing patches and, of course, a valve cap with a head that is used to unscrew the spool. There are usually no such caps on the wheels of modern cars, but if you look, it may come in handy. nine0005
Travel set: stop wedges, jack, pry bars, wheel wrench, hammer, gloves, corners, compressor. Do not forget repair fungi, self-vulcanizing patches and, of course, a valve cap with a head that is used to unscrew the spool. There are usually no such caps on the wheels of modern cars, but if you look, it may come in handy.
CARE OF THE WHEELS, RULES OF DISMANTLING AND ASSEMBLY
— Not all tire damage can be repaired without loss of its qualities. Drive in such a way that the risk of fatal injury is minimized. On a long journey, take a camera in reserve - it can come in handy. nine0005
- Monitor the condition of the wheelbrace and jack. Cracks or metal extrusion, heavily worn threads, tight rotation despite lubrication are unacceptable!
— Before jacking up the vehicle, secure the wheels on the opposite side. Stoppers under the support wheels - wedges, stones, etc. - should not slip along the road. To prevent the machine from sliding to the side, it is better to place the support wheels in shallow ruts or pavement potholes.
- If you have to work on soft ground or snow, place a wider support under the heel of the jack - for example, a piece of durable board. When turning the screw, do not adjust the jack with your other hand, especially do not stick your fingers into it. After lifting the car, for insurance, place a reliable additional support under the threshold (spare wheel, stable block of wood, etc.). nine0005
- When installing the wheel, the bolts (nuts) of the fastening must be tightened still on the weight - so it will be correctly centered on the hub.
- The threads of mounting bolts (nuts) will last longer if you lightly grease them before tightening them.
Roadside tire service
Tire fitting on the side of the road
In the process of using the tire, a variety of damages can occur, most of which are to blame for the driver himself. As a result, rubber is wasted, and since the law prohibits the use of different tire models on the same axle, you have to spend money on replacing the second tire.
The most common damage is puncture . This is the most harmless type of damage, but only if you notice it in time and repair it right away. It is absolutely impossible to drive on a flat tire, even a couple of meters! The damage caused by running on a flat tire or with low pressure is catastrophic. This causes the sidewalls to deform more than they should, which causes the tire to overheat, delaminate, and the carcass becomes unusable due to broken cords. As a result, the tire will have to be thrown away. In addition, the edge of the rim can also be damaged. nine0005
Punctures are of two types: with and without cord damage. To determine this, it is necessary to remove what pierced it. If the edges of the puncture tightly converge, then the cord is not damaged and it will be possible to repair the tire without removing it from the disk. Otherwise, if the edges do not converge, you will have to disassemble the wheel and make repairs with strengthening the frame from the inside.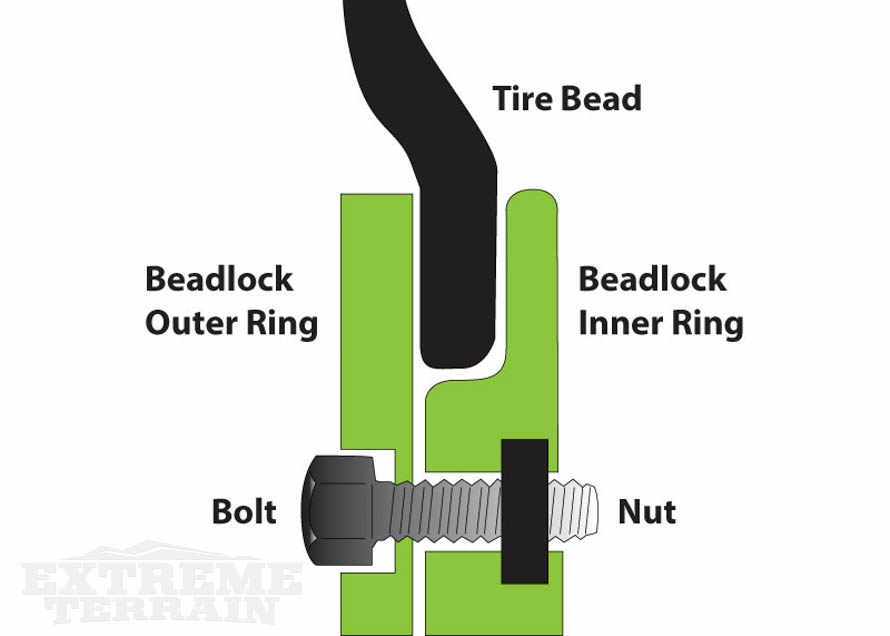 Alternatively, in the field and in the absence of a spare wheel, such a puncture can be repaired without removing the tire from the rim, after which you can carefully drive to a tire fitting or garage and make a full repair. nine0005
Related materials
Is it possible to pump up a wheel without a compressor - the experiment "Behind the wheel"
When repairing, the puncture site should be cleaned and marked. Further, it all depends on what kind of repair kit you have - as a rule, instructions are attached to them. There are sealants that are poured into the tire through the nipple, after which the wheel turns with the puncture down and the substance seals the hole. Repair using a tourniquet or insert is somewhat more complicated, but also more durable: the edges of the hole are polished with a special tool, after which the tourniquet treated with a special compound must be inserted into the tire through a puncture with a special awl, pulled out (not completely) out and cut flush with the surface. nine0005
In case of cord damage due to a puncture, the tire must be removed from the rim in order to install a reinforced patch with additional cord on its inner surface. One of the sides of such patches has an adhesive layer that promotes cold vulcanization. After such a repair, wheel balancing will be required. To seal punctures from the inside, patches in the form of a mushroom are also used, with a leg that goes into the puncture. Such patches are also covered with a special adhesive for cold vulcanization. nine0005
Cuts or holes , unlike punctures, are not repairable, as they violate the integrity of the frame, which can no longer be strengthened. In addition, breakdowns are always sudden and occur on the go: the tire abruptly loses pressure and before the car comes to a complete stop it has time to make several revolutions “on the rims”, which breaks the cord and destroys the layers. It is not recommended to use such a weakened tire, even if it was possible to repair and strengthen the place of the rupture or cut, in the future.
Related materials
8 tire storage rules - do you follow them all?
Incorrect storage of tires can cause cracks . The danger of such damage is that moisture enters the cord through cracks, which renders the frame unusable. In addition, air can escape through cracks. Unfortunately, cracks are not repairable, and tires with them will not last long: sooner or later they will deform, become covered with swellings due to rusted and torn cord or because of driving with pressure below the recommended one. nine0005
Blisters or bulges can appear on a tire for a variety of reasons - it always happens due to a broken cord or delamination in the carcass. In the first case, an obstacle was hit and the impact broke the cord or the cord was cut through with a sharp object. In the second case, there is no damage on or near the hernia, which means that it appeared either due to a factory defect, or due to frequent driving with pressure below the recommended one. The danger of hernias is that they can explode at any moment and provoke a skid, which will lead to an accident. If there is nothing to replace a tire with a hernia, then it is better to rearrange it to the rear axle and drive very carefully. Like cracks, a hernia cannot be repaired. Sometimes small blisters resulting from impacts or cuts are reinforced with reinforced patches, but there is no guarantee that the tire will not explode. Therefore, tires with hernias are recommended to be replaced immediately. nine0005
Related materials
Tire blackening - 6 ways to polish. Inexpensive!
Tire sidewalls can be damaged by rubbing against curbs or the asphalt edge when pulling over. If you are prone to such a driving style, then it is recommended to inspect the inner and outer sidewalls from time to time and, if abrasion is found, swap the wheels in order to prevent the cord from being exposed - the rubber thickness on the sidewalls is small (1. 5–3 mm), and it can be rubbed to the frame very quickly. nine0005
Often the cause of tire damage can be poor-quality tire fitting , during which the bead ring was damaged. In this case, the tire loses its geometry and “sits” crookedly on the disk - it writes out “eights” during rotation, and lateral vibration appears during the ride. It is impossible to repair such a tire - you need to replace it with a serviceable one as soon as possible before it damages the suspension: rods, hubs and bearings.
You can find out whether you are using tires correctly and what invisible damage they have received by the characteristic wear of the tread, the varieties of which are collected in the table for convenience:
Double side shoulder wear
Driving with less than recommended tire pressure.
Inflate the tires to the pressure recommended by the automaker (a plate with recommendations is attached in the driver's door opening) and find the cause of the fall: puncture, cracks, hernia, nipple, rust on the rim of the disc in the place where the tire fits, etc.