Off-road vehicles are versatile machines that are often associated with recreational fun. However, instead of hitting the trails with your four-wheeler, you can also use off-road vehicles for work. ATVs and UTVs can perform several functions on residential lawns, public property, and private grounds, especially with the addition of handy accessories. Whether you’re using your unit for work full time, for a part-time job on the weekends, or to care for your own yard in your free time, ATV Trader has provided nine ways to use ATVs and UTVs for landscaping and groundskeeping.
1. Hauling and TowingOff-road vehicles can get around terrain easier than a truck and are less likely to cause damage to the land. There are a variety of ATV and UTV models with large cargo beds and towing power that can improve production in any working environment. With your off-road vehicle, you can haul heavy loads of soil to a garden or tow materials needed to build a deck.
And you can haul more than cargo. Transport crew members to different worksite locations using UTV or even golf carts. Current full-size ATV models can tow between 500 and 1,650 pounds with a trailer, while a standard UTV can tow about 2,000 pounds.
Turn your ATV or UTV into a riding lawn mower by adding a pull-behind mowing attachment. These work well in wide grassy areas or lawns and fields with high grass and brush. Pull-behind mowers can often work faster and maneuver better than traditional lawn tractors.
3. RakingPull-behind rakes can be attached to your ATV or UTV. These tools allow you to finish grading and leveling lawn topsoil, sports fields, and more. With a wide reach, rake attachments can spread out ground coverings, mix compost or mulch into soil, and pull up roots and small rocks.
4. LiftingSave yourself from the back-breaking work of lifting heavy objects by utilizing a pallet lifter. These attachments are perfect for picking up planter pots, shrubs, and garden supplies and moving them across a property.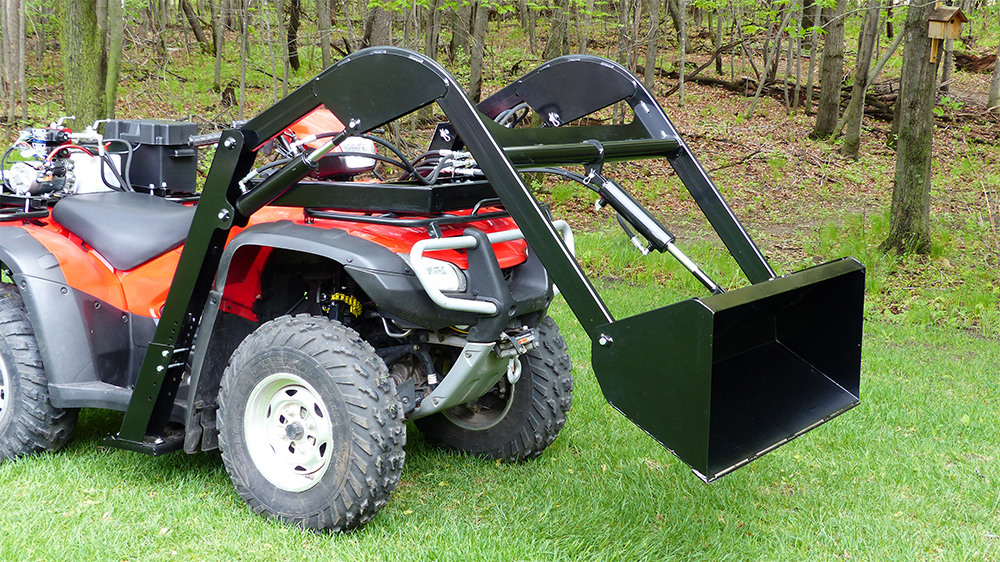
Achieve a lush lawn with an ATV and UTV aerator attachment. These tow behind your off-road vehicle, pulling plugs to break up compacted soil and letting grass roots get the air and water needed for healthier growth.
6. SpreadingSpread seed and fertilizer with an ATV and UTV tow-behind spreader. The spreader’s automatic shut off can even help reduce waste by regulating how much product is being distributed across the lawn.
7. SprayingSpray properties faster with an ATV and UTV sprayer. These can be mounted on the back of an off-road vehicle to cover much more land, compared to a traditional spraying backpack. Sprayers feature various tank sizes that you can fill with water, fertilizer, or pesticides.
8. PlowingIf you live in an area that gets a lot of snow, consider using a plow blade for snow removal. When attached to your four-wheeler or side-by-side, these can remove snow much faster than shoveling. Plow blades can also be used to push dirt, gravel, and sand.
After a day of landscaping and groundskeeping, make the clean up process easy with a tow-behind sweeper attachment. High-speed brushes spin, allowing you to collect grass clippings, twigs, fallen leaves, and more faster than manual labor. Similar to sweepers, rotary brooms can be used to clean large, flat surfaces. Brush dust and debris off sidewalks and driveways to leave the property in pristine condition.
Using your ATV or UTV for groundskeeping and landscaping is a great alternative to big trucks or pieces of heavy machinery. With the addition of accessories, your off-road vehicle can help you accomplish any job, almost anywhere. Once the hard work is finished, you can plan how you’ll use your off-roader for fun.
When you’re ready to buy your next ATV or UTV, for work or play, shop the nationwide selection of new and used units at ATVTrader.com.
By Ian Kelly
Whether you’re leveling an existing dirt driveway or cutting a new one, a tractor-drawn box blade – also known as a box scraper – is the right implement to use. There are two options available depending on the size of your driveway. If you have a small, narrow driveway and access to a lawn tractor or a quad -- four-wheel drive -- ATV, you can rent or buy a 42-inch unit; alternatively, for larger projects, you can rent a 6- or 8-foot landscaping model together with a suitable tractor equipped with a three-point hydraulic hitch, provided there is an equipment rental outlet in your area.
Couple the box blade onto the hitch on your lawn tractor or ATV if applicable. Adjust the box blade shanks so that the points are above the scraper blade and adjust the wheels on the scraper to raise the unit enough to clear the ground until you reach the starting point on your driveway.
Attach the three-point hitch to the two lower arms on a large tractor. Attach the adjustable upper link and rotate the adjuster threads clockwise or counterclockwise until the box blade is level fore and aft with the ground. If necessary, adjust the lower lift arm individual heights to level the box blade crosswise across the width of the driveway. Lift the box blade with the hydraulic hitch and drive the tractor to the starting point.
Evaluate the driveway. If there are substantially higher areas, you must lower the box blade shanks to loosen the top soil on the humps while grading. On relatively level driveways with dips and low areas, estimate the amount of filling material required, and have a suitable heap of soil or gravel delivered and placed at the beginning of the driveway.
Walk the driveway and look for obstructing large rocks or tree roots. Tie a ribbon onto stakes and drive them into the ground to mark immovable obstacles. Smaller rocks and roots can be removed or cut away by lowering the box blade shanks during operation; however, if you have nearby heritage trees, you may want to mark the roots to avoid damaging them while grading.
Lower the box blade shanks evenly to a cutting depth of 2 to 3 inches. Lower the implement onto the ground at the start of substantially higher areas on the driveway. Start the tractor, engage the lowest gear, and cut away the tops of the humps by moving slowly over the area; keep going until you pass over a dip. As the shanks cut through the surface, the body of the box blade will scoop up the loosened material and deposit it evenly onto the lower areas.
Repeat Step 6 until the high points are cut away while leveling the lower areas; pay attention to the driveway’s drainage characteristics and try to slope the residence end of the driveway away from the house while scraping away high areas and filling low spots.
Reverse the tractor and use the lower cutting edge on the back of the box blade as a bulldozer while spreading loose imported soil or gravel onto substantially lower areas. Do not start at the top of the pile, but start at grade level on the sides and gradually spread the filler into low areas while working your way to the middle of the pile.
Lower the box blade shanks a half to three quarters of an inch below the rear edge of the interior blade. Drag the box blade from the house end to the driveway entrance several times for initial grading until the driveway is smooth and level. If applicable, use the hydraulic lift control to maintain a constant grade while working back and forth; you may have to manually adjust the box blade wheel height several times if you’re using a garden tractor and smaller box blade.
Raise the shanks entirely and drag the box blade from the house side to the driveway entrance several times for final grading. Once satisfied, remove the box blade, hitch a heavy roller to the tractor and roll the driveway back and forth several times until the surface is smooth and compacted.
References
Tips

Writer Bio
After graduating from the University of the Witwatersrand and qualifying as an aircraft engineer, Ian Kelly joined a Kitchen remodeling company and qualified as a Certified Kitchen Designer (CKD). Kelly then established an organization specializing in home improvement, including repair and maintenance of household appliances, garden equipment and lawn mowers.
Stels ATVs have long conquered the expanses of Russian off-road. If you ask any quad rider what he likes most about this sport, you will most likely baffle him, it is so difficult to choose one from the whole host of sensations. Someone will remember the indescribable feeling of speed, someone likes riding in the mud, and someone loves to fly over the dunes. However, for many, jumping on a quad bike is the most exciting experience. ATV jumps vary from taking off a little on a random bump to flying off a springboard, but it's definitely one of those hard-to-forget-feelings, just as hard to forget any feeling of free-flying. After all, the heart stops even for those who simply watch the flight from the side. nine0003
However, in order for the thrills not to have tragic consequences, it is necessary to prepare not only yourself, but also your device before flying. How to ensure your safety when jumping?
Of course, you shouldn't do extreme sports without protective equipment, make sure that your body is protected as much as possible and at the same time the equipment must be of high quality to provide sufficient freedom of action. Try to get a complete set from boots to a helmet and goggles and be sure to protect your body well, because you will be in the air with a device weighing several centners, in case something goes wrong you will need reliable protection. nine0003
First of all, you need to remember the basics of jumping, which is that when taking off and landing, your front wheels should be slightly higher than the rear ones, and you need to keep the ATV in the air in such a position during the entire flight. Then the rear wheels will touch the ground on landing earlier than the front wheels, which will soften the impact when touching the ground. Landing on the front or all four wheels takes most of the impact on the ground, which is enough energy to throw you out of the saddle. nine0003
The second rule of extreme jumping is not to sit while jumping. You have to stand in the ATV, or at least raise yourself in the saddle, only then your legs will act as an additional shock absorber, helping to soften the impact. Otherwise, having taken a hit on the fulcrum, you can easily fly out of the saddle at the moment when, after compression, the shock absorbers are again unclenched. Allow the craft to move under you in flight, and by lifting yourself off the seat, you will have more freedom to move your body and balance, which will allow you to adjust the angle of the entire craft-racer system. nine0003
There are two ways to achieve the desired angle, controlling the position of the body and using the accelerator. When approaching the liftoff point, lean back to lighten the load on the front wheels, control the throttle smoothly, preventing the ATV from tilting forward after the liftoff. If you understand that the speed for the jump is too high, slow down slightly, and just before the takeoff, release the brakes and squeeze the gas. It is important to choose the right acceleration so that it is not too large and at the same time too small. In general, the choice is determined by many parameters and is usually selected individually by the rider for his ATV. That is why you can move on to ski jumping only after preliminary training on small jumps. This is especially important if you are riding this ATV for the first time, before going into sharp turns, experiment on small obstacles. nine0003
When jumping on a quad bike, you may find that not everything goes as it was originally intended, and you usually notice this when you take off from the ground. Your ski jump might actually be steeper than you thought, you might yank the handlebars too hard or add too much throttle and the quad will become vertical in the air.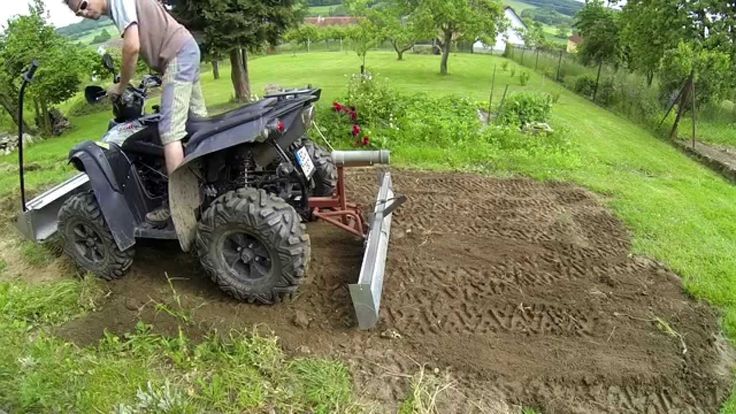 In this case, begin to shift your body weight forward by pushing down on the handlebars to lower the front wheels down. Release the gas and apply the rear brakes. Oddly enough, they can help you even if the wheels are no longer touching the ground. The fact is, stopping the rotation of the rear wheels causes inertia to lower the front wheels down. In order not to cut off the engine, do not forget about the traction when braking in the air. If you land with your front wheels up, slow down, shift your body weight forward, and be prepared for a sharp rudder jolt. One of the dangers in this case is to fly forward and get under the wheels of your own ATV. nine0003
If the rear wheels are up, shift the weight back and press the gas, this is one of the most dangerous situations that should be avoided as much as possible. However, if you do not get confused, you will be able to level the ATV in the air.
Remember that while jumping on an ATV is similar to jumping on a motorcycle, one of the main differences is the need to watch four wheels instead of two. Do not allow the ATV to skew, otherwise you run the risk of simply breaking the rear axle when landing. Remember that the wheels should touch the ground at the same time, if you feel the ATV lean to one side, you need to shift the weight to the opposite leg and try to straighten it in the air - this is another reason to stand rather than sit in the saddle when jumping. nine0003
So, in a rut, the steering wheel rips out of your hands, when driving straight the ATV goes to the right or left, you notice uneven wear on the rubber or you see that one or both wheels sharply go to the side with the steering wheel set straight - all these are clear signs that that it's time for toe and camber adjustment .
It should be noted that on some ATVs only toe-in is regulated, and camber is set by the manufacturer. nine0031
Getting rid of the problem.
There are many ways, we will try to talk about the most obvious and intuitive.
Which nuts to turn?
#1 Loosen nuts; No. 2 Toe adjustment (turn the steering rod itself with a wrench; No. 3 camber adjustment;
Attention! You do not need to hang the ATV, adjust it on a flat surface without holes and hills, set the steering wheel straight.
Visually we try to evaluate the wheels in front, look at the eye, it will immediately become clear which wheel goes to the side more and which one less. Sometimes adjusting by eye is enough, if we want everything according to science, then we move on.
Method 1
On the rim, on the very edge from the inside, on both sides of each wheel, near the shoulder, we make marks with a marker so that the marks are parallel to the ground.
With the help of a simple ruler, we set the convergence, rest the ruler against the marks and measure the front and back along the marks. nine0003
A ruler is a pipe inserted into a pipe of a larger diameter, at its ends there are L-shaped stops (curved so that the bottom of the ATV does not interfere), with which we will rest against the marks.
For convenience, we fasten the tape measure onto the ruler and look at the numbers, the shiny bolt is the lock, rested on the marks in front and fixed it, looked at the numbers and repeated the procedure on the back of the wheels.
We loosen the locking nuts on the steering rods, turn the rods in one direction or another, twisted and measured a bit, realized that there was little or a lot, we turn further. Wheel alignment is measured between the edges of the rim. The wheels should be as in the figure below, the difference between A and B should be 0-3mm (less in front and more in the back). Universal convergence is made 0 mm. nine0003
After we lock the nuts and try to drive, perhaps the steering wheel will be a little crooked, and the quad will drive smoothly. We loosen the lock nuts again and turn the rods for the same number of revolutions, thereby aligning the steering wheel, but without touching the convergence.
Nothing needs to be adjusted on the rear suspension.
Method 2
1. Set the steering wheel to straight ahead.
2. Place the stands in front of the ATV perpendicular to the rear wheels as shown. nine0072 3. Stretch the elastic band around the ATV legs so that it just touches the rear wheels lightly.
4. Measure the distance between the tensioned tape and the front and rear points on the front wheel rim. The distance to the far point on the rim should be 2 - 3 mm greater than the distance to the near point on the same rim.
You could see for yourself that there is nothing complicated in adjusting toe and camber on an ATV, and you yourself are quite capable of doing it without resorting to the services of a car service. So we put the saved money in our pocket and happy and satisfied we go for a ride. nine0003
"Carburet setting...
Wheel chains..."
