So you’re already convinced that tubeless is the way to go? Great choice! While running tubeless can have its own advantages, there are few things you need to know before making the change. One of the most important things to know is, how to maintain tubeless tires.
Similar to a normal setup, maintaining a tubeless tire requires that you monitor tire pressure and manage leaks. Tubeless tires also require that you maintain appropriate levels of sealant, knowing how it can change over time. Let’s discuss further how you can get the most out of your tubeless tires and examine what it really takes to maintain them.
Before we get into it, there are a few things you may need to maintain your tubeless tires.
• Tubeless wheel (or tubeless-converted wheel)
• Tubeless tire
• Tire sealant
• Sealant injector
• Valve core removal tool
• Track pump
• Tubeless inflator
If you’re new to biking or even just new to tubeless tires, you may be wondering what tubeless is and how it works.
Fortunately, it is actually quite simple to understand and implement. I will give you a basic rundown and also answer a few commonly asked questions about tubeless tires, and what it takes to maintain them.
Tubeless tires are different than regular pneumatic tires in the main sense that they don’t use a tube. So how do they keep air in your tire? By adding a special sealant that prevents air from escaping the tire bead.
While that can sound a little complex, it is actually really simple to implement. If you can seat a regular tubed tire, you can manage a tubeless tire.
If the initial setup and maintenance sounds intimidating, you may be wondering if tubeless is even worth the conversion.
While I can’t tell you how you’d feel going tubeless, I can give you a few pros and cons of running tubeless tires.
Fewer Flats – Virtually no more pinch flats. Plus, smaller punctures are sealed almost instantly.
Better Ride – Although this is objective, it is pretty easy to see why the ride is better. When your riding tubeless, you’re able to run lower psi in your tires, taking full advantage of your tire’s traction. As well, the extra room that your tire has to deform, allows you to roll over bigger objects faster and easier.
Lighter weight – you actually save a bit of weight losing the tube in a tire, the weight is minimal, but worth it if you’re looking to save weight as much as possible.
Kind of Costly – Tubeless ready tires and rims can be pricey compared to a standard setup. As well, the conversion kits can run anywhere from $70-100. If you’re a dedicated rider, this may be worth the money.
Involving Mounting Process – Mounting tubeless tires can be a bit of a challenge. Once you’ve done it a few times, you will start to get the hang of it.
Sealant is Messy
– This one speaks for itself.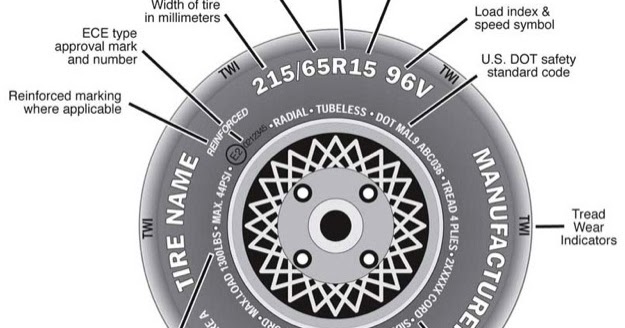 If you’re new to tubeless tires, prepare to clean up sealant quite often.
Yes. The tubeless sealant plays a vital role in keeping air in your tire and also makes it possible to inflate the tire in the first place.
Though it can be a pain to deal with, you will definitely appreciate the sealant after a long ride when you see how well it helps your tire hold up.
Tubeless tire sealant is much more than a sticky liquid that fills cracks.
There are actually two types of tubeless tire sealant, latex-based and fiber-based – and they work differently to get the same result.
In general, both sealants use the escaping air, tire rotation, and gravity to seal the tire when punctured. However, their chemical make-up gets the job done in two different ways.
With Fiber-based sealants, the internal tire pressure forces the sealant into a cavity, blocking any escaping air. The fibers and particles in the sealant then form a bond with the rubber, effectively blocking the hole. Fiber-based sealants work better with tubeless ready tires and rims.
Latex-based sealants are much simpler, as they are already made from a rubber based synthetic. This time, when the tire pressure forces the mixture into a leak, the compressed air helps the sealant solidify, forming another solid bond with the tire. Latex-based sealants make it possible for you to convert your non-tubeless tires to tubeless.
Latex sealants are much more popular since they are inexpensive to manufacturer and very effective in plugging leaks, however, there are certain reasons you will want to limit their use.
Regardless of which type you use; it will always be more effective to plug a hole with tubeless sealant than with a regular patch.
Traditional plugs, patched from the outside, can further expand the puncture and even damage the rubber. A tire plugged with sealant is a more natural repair, as it forms a self-healing skin from inside the tire.
If the idea of a self-healing tire sounds too good to be true, it’s because it is. Unfortunately, there will come a time where you must change your sealant.
Depending on the type you use, your sealant may have a certain lifespan. So, how long does tubeless sealant last?
Latex-based sealants last around 9000 miles and fiber-based sealants can virtually last for the life of the tire. Plus, fiber-based sealants tend to be easier to maintain.
That is why we recommend fiber-based sealants if possible. Although latex sealants can be cheaper and more effective, they can also develop some nasty properties over time.
Latex-based sealants start to dry over time, especially as you reach closer to 9000 miles. Once dried, it can stick to the rim and tire, making it hard to remove, and even harder to clean. If you leave it long enough, it can even cause corrosion to your rim and tire, prompting an even more costly repair.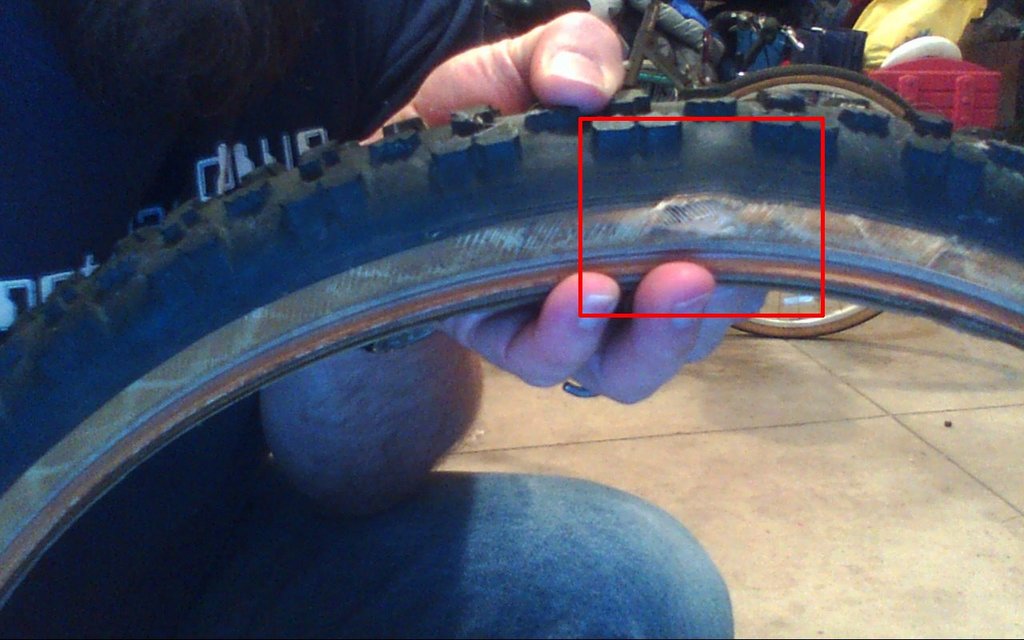
Fiber-based sealants are typically water based and retain their soluble properties for a long time. This makes cleanup a lot easier and helps keep you mind at ease as to what’s rolling around in your tire.
In general, the first thing to know when learning how to maintain tubeless tires, is when to replace your sealant. That leads to our next question.
You should aim to replace your sealant every 3 to 6 months, although, you may want to replace it more often than that.
Since your tire is healing itself, you may not even notice how many punctures you’ve accumulated over time or how much fluid you’ve lost. In addition to adding sealant regularly, you should clean and replace the old sealant in your tire.
Over time, sealant continues to dry and become less effective. As well, latex-based sealants can leave clumps of mixture that distribute weight unevenly through the tire.
Though the chances of you doing any actual damage is small, it’s still good practice to replace your sealant regularly.
All in all, tubeless tires aren’t all that different than regular tires. You should only have to replace your tubeless tire when it’s worn down or no longer holds air.
To get a good idea of how long you can expect your tires to last, check out this article, “How long do mountain bike tires last?”.
You may find yourself needing to replace your tubeless tire a little early still. If the punctures are too severe to be patched or if the bead of the tire no longer seals in the rim.
Since tubeless tires rely heavily on that seal, any damage to those vital areas could mean a new tire is needed.
Something a lot of people struggle with initially, is adding the sealant and getting the tire aired up. Understandably so, as airing up a tubeless tire can be something of an art.
But don’t worry too much, you can still get the job done, and there are two separate ways for you to add sealant.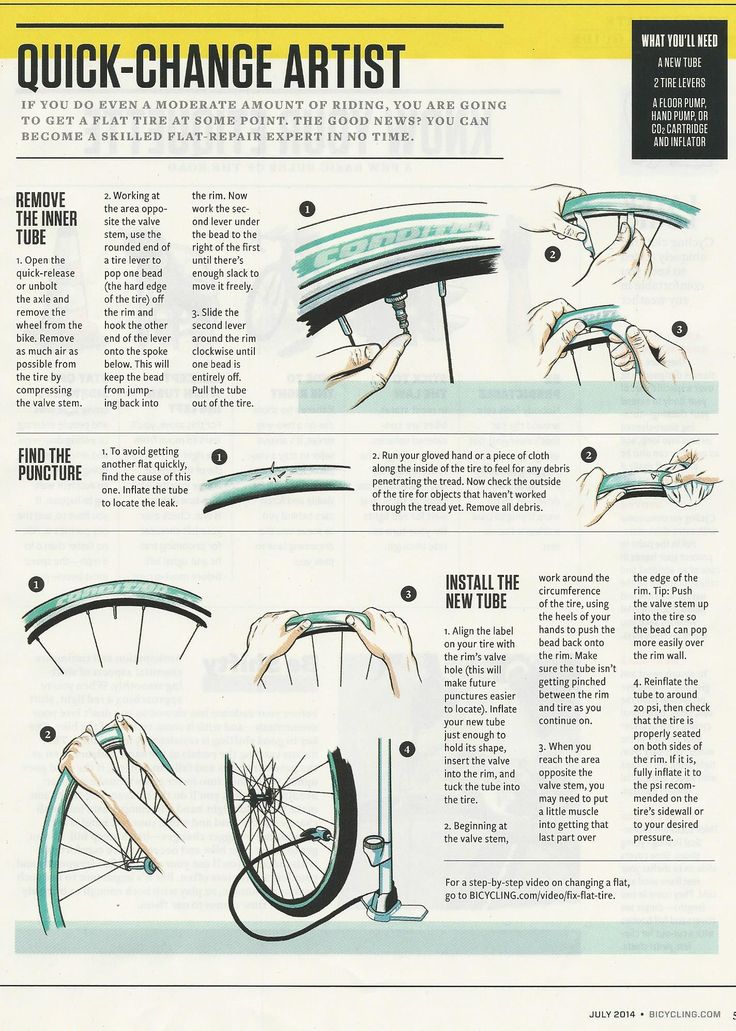 Since both methods require that you quickly inflate the tire, it is recommended that you have an air compressor. For further instruction, there is no better teacher than ParkTools.
Check out this video from ParkTools for a visual guide to adding tubeless sealant.
For tubeless ready rims and tires, the sealing process is fairly simple. However, if you are converting non-tubeless rims and tires, there are a few steps you must complete before adding sealant. Always remember to add enough rim tape to prevent the sealant from escaping the spoke holes.
Other than the initial setup, the air pressure and sealant will do the rest of the work for keeping the tire sealed.
Just like when you setup the tires, sealing will involve inflating the tire to the least maximum psi and making sure the bead is seated on both sides of the tire.
From there, you just want to watch out for any obstructions that could get lodged in the tire bead or sidewall, as this can make the sealant ineffective in sealing the tire.
It can be devastating getting your tubeless tires all setup, just to see it start to leak out. Or even worse, what if you spring a leak while riding on the trail?
Unfortunately, leaks are a common issue when you run tubeless tires. On the road to learning how to maintain tubeless tires, you will also learn how to manage leaks.
Since there’s not that many places for sealant to escape, you will run into 2 types of leaks. I will list them here, with a brief summary of how to stop a tubeless tire from leaking.
 If you are still getting leaks, you may need to lower the air pressure in the tire. Sometimes, high air pressure can prevent sealant from drying enough to seal any gaps.
 Tubeless tires are known for their versatility and resilience to the same pinch flats that would stop a standard tire in its tracks. So can a tubeless tire go flat?
Yes, tubeless tires can still go flat.
If you have low, old, or even bad sealant in your tire, you can find it hard to keep a seal, making your tubeless tire go flat.
If you rip a hole in your tubeless tire that’s too big to seal, even a tire full of sealant won’t stop it from going flat.
And of course, if the bead is not properly seated, you can lose air and sealant in a massive leak.
But don’t worry, learning how to maintain tubeless tires prevents these issues.
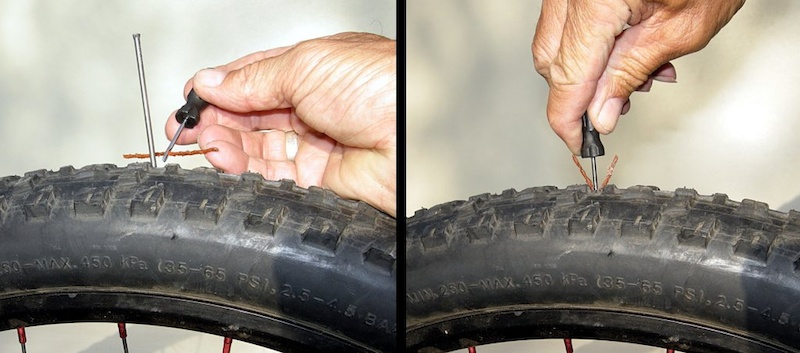
In general, punctures in tubeless tires cannot be repaired and it is often not recommended to try and do so.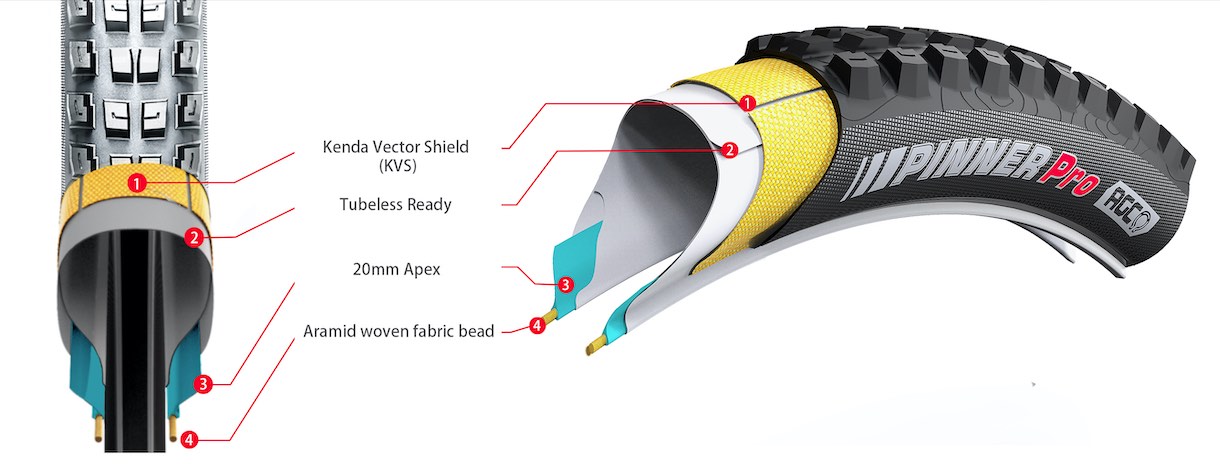 Although it can be a bit of an expense, it is always safest to buy a new tire.
The last step in learning how to maintain tubeless tires, is being able to remove the tire.
Whether you’re replacing the sealant or replacing the tire all-together, there will come a time when you have to remove the tire from the rim. This can be a bit of a challenge.
Similar to a standard tire, removing a tubeless tire consists of deflating the air and using your hands to push the bead off the rim. Only with tubeless tires, you have to be aware of the sealant that could make a mess during the whole process. Again, check out ParkTools for a visual representation of the process.
Now that you have a firm understanding how to maintain tubeless tires, you probably already realized what type of sealant you want to use. For those still looking for a little direction, you may still be wondering what is the best tubeless tire sealant?
Knowing what we know about the different types of sealant and their properties over time, we recommend a sealant that gives you the benefits of both, without most of the drawbacks.
That is why we recommend the No Puncture Hassle Tubeless Sealant from Muc-Off.
Check Amazon for Latest Pricing and Reviews
In conclusion, it is really simple to learn how to maintain tubeless tires. Just like any other maintenance on your bike, it can be a challenge at first, however, once you get the hang of it, it can be a rewarding task.
If you find the task particularly daunting, see if you can watch as your LBS does the work. The price you pay will be worth the knowledge and tips.
Tubeless technology has revolutionised the mountain bike world in recent years, allowing us to get more performance from our tires, enjoy increased puncture resistance and save weight. This article is a one-stop-shop for anyone who is interested in going tubeless and contains everything you need to know about tubeless setup, valves, sealant, rim tape and more!
As the name suggests, setting up your MTB to run tubeless allows you to ditch the inner tubes and instead, run a system where the air is sealed inside the tire, not a tube. This brings a number of important benefits, not least of which are increased grip and better puncture resistance. If you are considering switching to a tubeless setup, you will probably already have come across the term ‘tubeless-ready’. Tubeless-ready (sometimes denoted TR or TC) means that the components labelled as such (tires or wheels) have been designed to work with or without a tube. For example, a tubeless-ready tire will have a specially designed bead to help it seal to the rim, but you may need some additional accessories such as valves, rim tape and sealant to actually convert to tubeless.
Here are some quick definitions of the most common tubeless terms:
Tubeless setup – A sealed system allowing you to run your wheels without inner tubes
Tire sealant – Tubeless sealant seals small punctures in a tubeless system. It also coats the inside of the tire and seals the tyre bead/rim interface to prevent air loss.
Tubeless valves – Tubeless valves are essential for your tubeless setup. They are simply installed through the rim’s valve hole and secured by a threaded lock-nut.
Tubeless rim tape – Rim tape plays a vital role in a tubeless system and ensures the rim bed is sealed, preventing air loss through the spoke holes.
Tubeless-ready – A term signifying that a product has been designed to work with or without tubes and is ready for a tubeless conversion.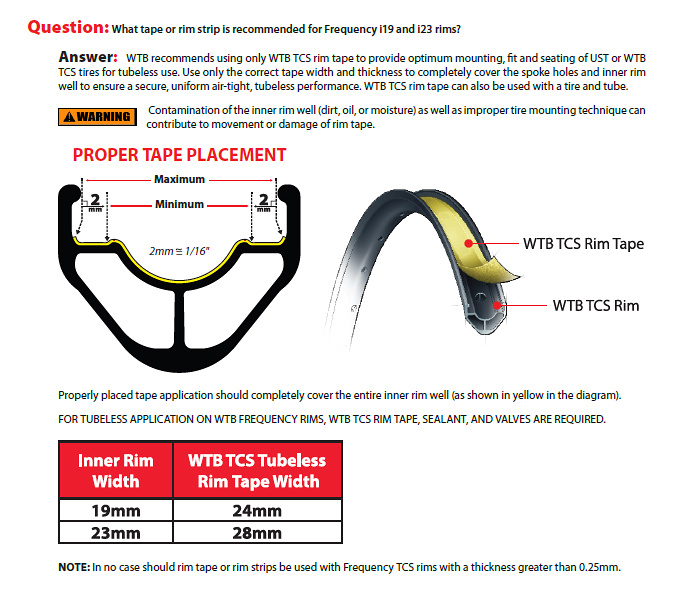
Tire bead – The tire bead is the edge of the tire that sits on the rim and seals the tire to the rim in a tubeless system.
Tire sidewall – The sidewall is the smooth area of the tire between the edge of the tread and the bead. Some sidewalls are a little porous and need sealant in order to hold the air, while others are almost air-tight out of the box
Tire casing – The backbone of every tire. It gives the tire its shape and structure and significantly influences cornering stability, puncture protection and weight
Here at ENDURO, all our editors are big fans of their tubeless setup. We highly recommend tubeless as the cheapest and most effective upgrade for the vast majority of riders. However, a select few riders may still be better off with tubes. Read on for the pros and cons of tubeless and find out if you should set your mountain bike up to run without inner tubes!
There are both pros and cons to tubeless. However, the advantages definitely outweigh the negatives for our editorial team and testers!
It’s true, tubeless comes with pros and cons. However, for most riders, the advantages of tubeless greatly outweigh the drawbacks. Should you go for tubeless, or is there a reason not to go for tires without tubes? Here are the pros and cons of a tubeless setup:
A tubeless setup allows you to get the maximum performance from your tires. Tubeless allows you to run your tires at lower pressures, resulting in more grip and comfort. A tubeless system is also less likely to puncture (even when running lower pressures) than a tubed tire as there is no tube to pinch between an obstacle and the rim – the cause of the dreaded snakebite. Tubes are expensive and if snakebites are a common occurrence on your rides, it is probably cheaper to run tubeless in the long term.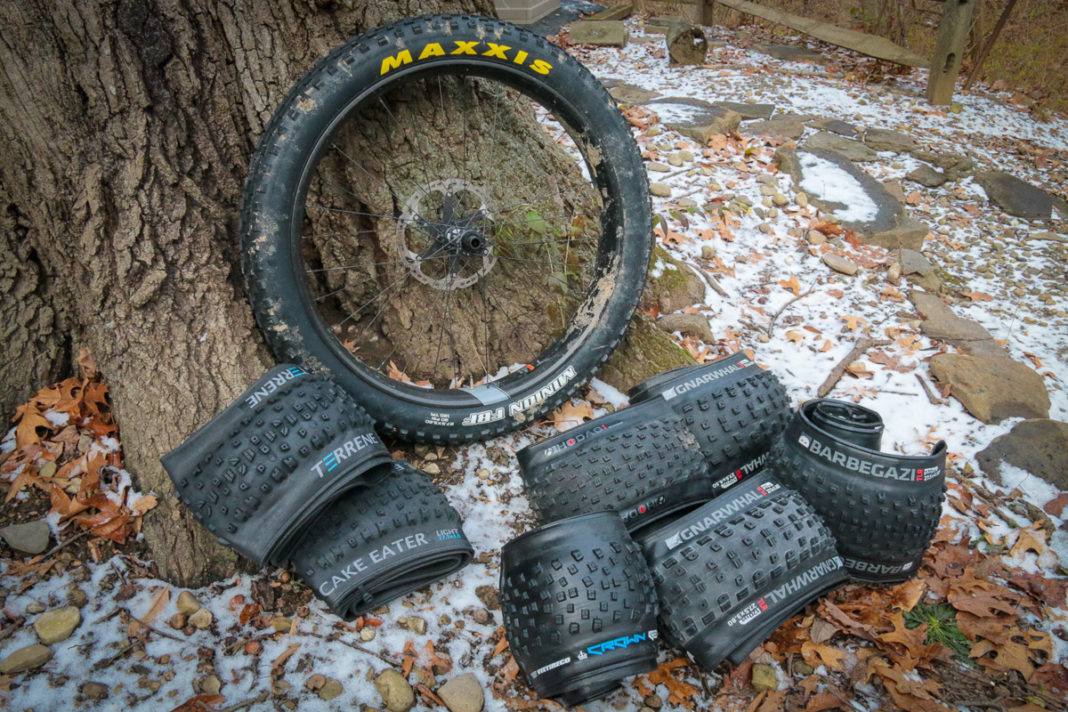 Any small punctures that do occur are immediately sealed by the sealant. In fact, as well as being less prone to punctures, setting your MTB up tubeless can also reduce your rolling resistance. With less pressure the tire can deform better around obstacles, allowing the tire to deflect and roll over them more easily, compared to higher (tubed) tire pressures where the bike has to move up and over the obstacle, saving you a little bit of energy.
The benefits of tubeless at a glance:
The main downside of a tubeless system is the increased complexity of setup and service. While the initial cost for valves, tape and sealant is not very high, the overall cost will quickly skyrocket if you do not already have tubeless-ready tires and rims on your bike. As with any part on your bike, a tubeless setup needs to be serviced regularly. Lack of servicing can lead to the sealant drying up and the valves getting clogged and will result in less efficient performance and sealing. Some tire and rim combinations will require a special tubeless inflator pump or compressor for the initial installation. Tubeless setups also tend to leak a bit of air between the rides, so you should check your MTB’s tire pressure before every ride. To find out what the perfect pressure is we’ve created this guide.
The downsides of tubeless at a glance:
We recommend tubeless to anyone who frequently rides their mountain bike off-road. The benefits of tubeless are invaluable for riders who push their limits and want maximum performance from their bike. If you only use your bike infrequently and don’t need the performance benefits of tubeless, a tubed system is easier to set up and requires little to no servicing.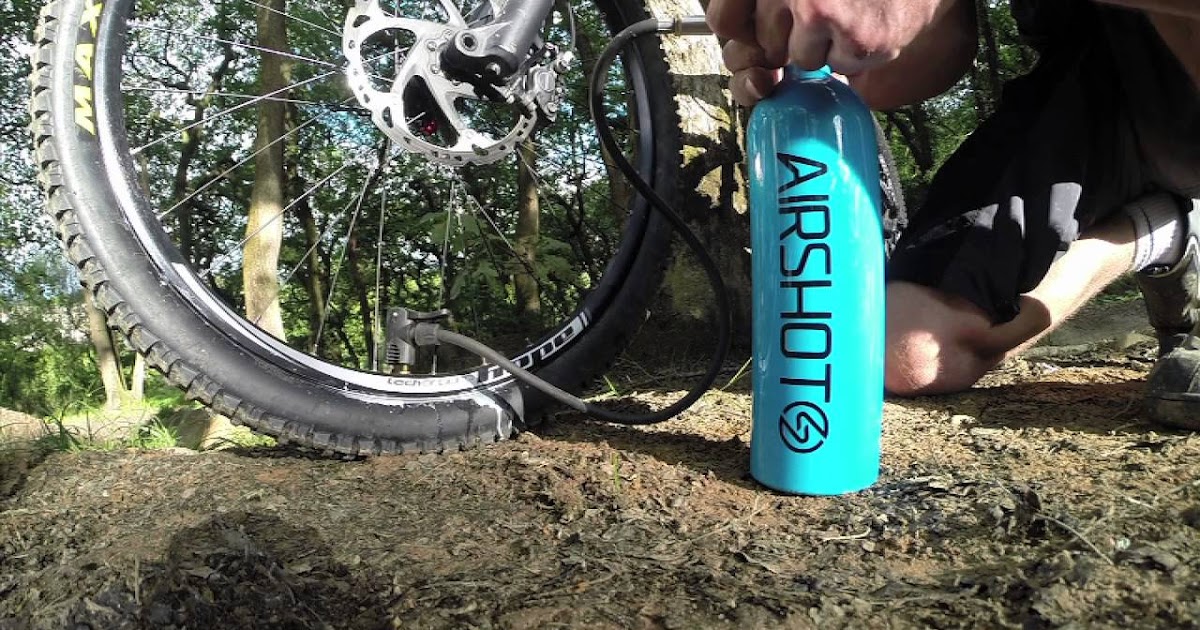
Before you attempt to set up your tubeless system, you should make sure you have the necessary parts and equipment ready. You will need tubeless-ready rims and tires (check out our tire group test to find the best tubeless tire for you), sealant and a pair of tubeless valves. If your rims are not pre-taped, you will need to install tubeless-specific rim tape as otherwise, the rim bed won’t be airtight. To inflate the tire, you may need a tubeless inflator pump. The process of installing the tubeless system is quite straightforward, but small complications can make it a lot more tricky. Check out our step-by-step tubeless installation guide for everything you need to know! The process should take no longer than 20 minutes per wheel and is mess-free if you do it right. Make sure to check out our guide for useful tips and tricks!
Quick checklist – here’s what you need for a tubeless setup
A tubeless system allows you to run a lower tire pressure than a tubed setup, without compromising the overall puncture resistance of your setup. This is because there is no tube to pinch between an obstacle and the rim – the cause of the dreaded snakebite. The ability to run lower tire pressures is a great benefit of tubeless and allows you to get more performance, grip and comfort from your tires. To fully take advantage of these benefits, you have to find the perfect tubeless tire pressure for you. Check out our in-depth guide on how to find the perfect tire pressure for your MTB to find out what pressures you should be running in your tubeless tires! It’s important to remember that while you may need a special tubeless inflator pump for the initial setup, you can use any standard pump for the regular pressure check or top-up.
While a tubeless system is a lot more puncture resistant than a tubed tire, there is still the possibility of things going wrong on the trail. The most common issue is a small puncture (which is too big to be sealed by sealant alone) in the tread or sidewall, often caused by a thorn or pointy rock. These punctures can be fixed quickly and easily with a tire plug. Another common issue is ‘burping’ the tire. This happens when the tire is rolled across the rim in a hard compression (like a tight berm), pulling the bead away from the rim flange momentarily and allowing air to escape before resealing. If you burp your tire all you have to do is re-inflate it to your desired pressure. Big tears in the sidewall and air loss caused by rim damage are a lot harder to repair on the trail. We recommend you install a tube and fix the issue at home. Check our tubeless repair guide for detailed instructions on how to repair any issues you may come across.
Just like any system on your bike, a tubeless setup requires maintenance to ensure maximum performance and efficiency. Luckily, maintaining a tubeless system is straightforward and not very labour intensive. Here are the main things to keep in mind:
It is important to keep an eye on the condition of your tubeless valve. Make sure the valve core isn’t bent and that air can flow through it properly. Valve cores can become gunked up with sealant, limiting their airflow. If this happens, carefully remove the valve core (this will release all the air from the tire) and clean it out or replace if necessary.
If you leave your mountain bike stationary for extended periods of time (or sometimes just overnight!), you may notice that your tubeless system loses some air. Do not panic, this is perfectly normal! Just make sure to check your tire pressure before you ride!
Tubeless sealant can dry out over time, reducing its effectiveness. How fast it dries out depends on a number of factors, including how often you ride and how hot the climate is. While it is impossible to determine a precise service interval, we recommend topping up your sealant at least every six months. To check your sealant levels, pick up the wheel and shake it. If you hear a sloshing sound, you should have plenty of sealant left. If you can’t hear any sealant moving inside the tire, deflate your tire and pop off a small section of the bead at the bottom of the rim and check if you can see any sealant.
We recommend checking and topping up your tubeless sealant regularly to ensure maximum performanceThere are two ways to add tubeless sealant to your tire.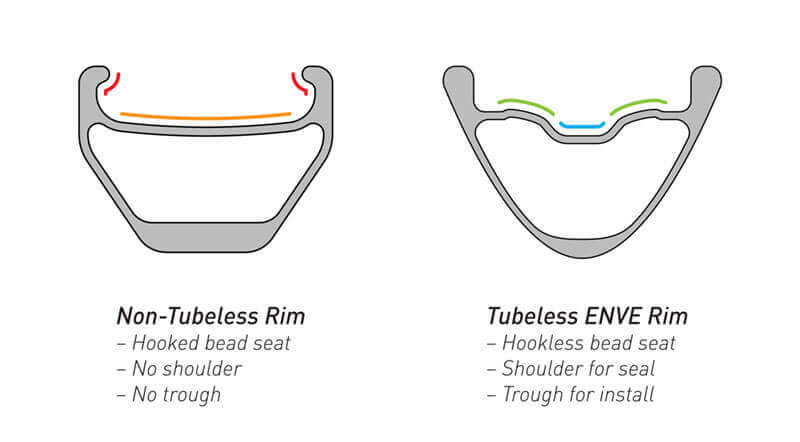 The first method involves deflating your tire and popping a section of the tire bead off the rim. You can then pour the sealant into the bottom of the tire, before re-seating the bead and inflating the tire. The second method is easier, quicker and cleaner but requires a syringe or sealant injector. Top tip – most small (around 100 ml) sealant containers have a spout that easily fits into the valve stem for easy refills.To refill using this method, de-inflate the tire fully and remove the valve core. Then, using a syringe or sealant injector, add the sealant straight through the valve. Once you have topped up the sealant, simply replace the valve core and re-inflate the tire.
If left unchecked, sealant can dry up and seemingly disappear by forming a skin along the inside of the tire or turning into spiky sealant balls. If this happens, it is no use and needs to be replaced.
Tubeless inserts are currently a craze in the mountain bike world and there are countless options and designs available on the market. These foam inserts are designed to provide a cushioning layer of protection for the rim, absorbing impacts from rocks or roots that bottom out the tire. While it is very hard to test and comment on their effectiveness, there are some pros and cons to running a tubeless tire insert.
The main advantage of running a tubeless insert is improved pinch flat protection, as the insert will effectively cushion both the rim and tire. The best inserts also help to increase sidewall stability and reduce the chances of burping a tire. They allow you to run even lower pressures, protecting the rim and tire equally. If you do manage to puncture with an insert installed, you can roll back on the flat tire if needed.
The disadvantages are also numerous. Inserts add more weight than upgrading to a tire with a heavier casing and are often a pain to install and remove (the better they are the harder they are to fit), making trailside tire repairs very hard.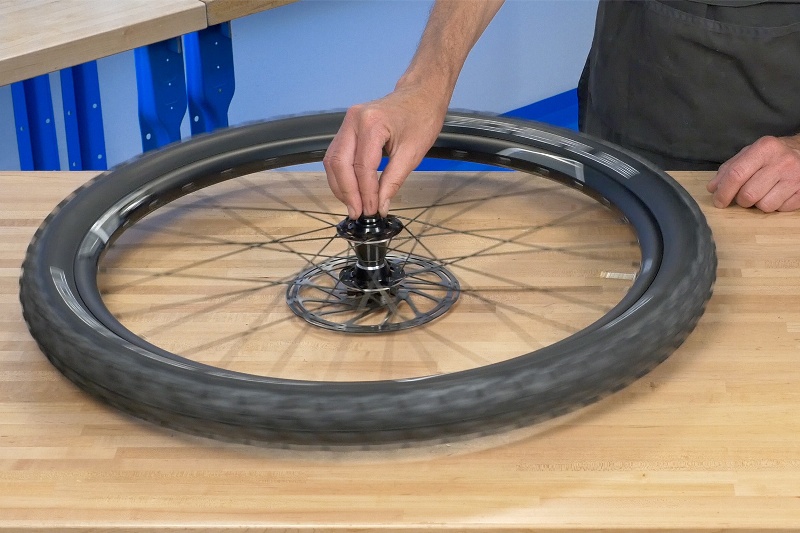 Inserts also consume a lot of sealant, as, despite being made of closed-cell foam, the sealant coats their large surface area, rendering it useless in the event of a puncture. Inserts are also very expensive. While some will jump at the added protection and improved tire stability that inserts claim to offer, we think the extra cost, weight and tricky installation make them an unnecessary upgrade for most riders.
While CO2 does help to re-inflate your tire in a pinch, it can also have negative long-term effects on your sealant. When CO2 is released from its pressured canister into the much bigger tire volume, a drastic drop in temperature occurs. This temperature drop activates the coagulant of some sealants, causing them to freeze and forming large balls of latex inside the tire.
Most tubeless sealants are based on natural or synthetic latex, which is degradable.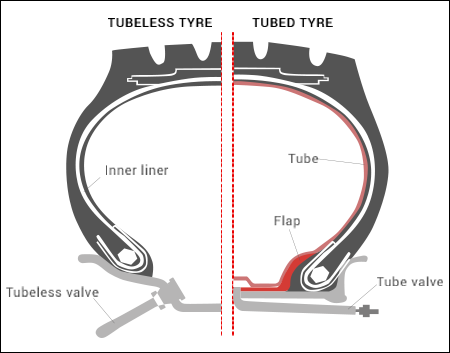 However, each brand adds different additives and particles to their sealant to improve its performance. Therefore it is impossible to determine exactly how eco-friendly sealants are as it varies from brand to brand.
Tubeless sealant loses its effectiveness over time, making it useless. This process is sped up if the bike is not used for an extended period. Therefore, bike manufacturers don’t ship tubeless setup bikes, as by the time the bike gets to the customer the sealant may have already dried out. Nowadays, some brands, a notable example being Giant, install valves and tires, leaving you with just adding sealant. Most other brands will provide you with everything you need to set up the bike tubeless when you buy it.
We do not recommend mixing tubeless sealants, even if both sealants are latex-based. This is because different manufacturers use different additives and particles, which can cause coagulation and degradation of performance if mixed.
If you already have tubeless-ready rims and tires, converting to tubeless is relatively affordable. All you need is a pair of valves (around € 15) and sealant (around € 20 for a big bottle, or € 5 for a small single-use bottle). You may also need to invest in some rim tape, which costs around € 8.
It is possible to bodge a tubeless setup without paying for the proper components by making a DIY inflator, using Gorilla tape to seal the rims and cutting valves out of an old tube. However, we do not recommend it as it can cause extra problems and isn’t tested or safe.
Did you enjoy this article? If so, we would be stoked if you decide to support us with a monthly contribution. By becoming a supporter of ENDURO, you will help secure a sustainable future for high-quality mountain bike journalism. Click here to learn more.
Words: Finlay Anderson Photos: ENDURO Team
Tubeless tires can hardly be called the know-how of the bicycle industry, however, they still raise questions for many. The topic itself, as a rule, is surrounded by a lot of skepticism and distrust, which are more often explained by a lack of understanding of basic things and a lack of experience in riding such wheels. To dispel all these doubts, we answer the main questions related to tubeless technologies.
These are bicycle tires that do not have a tube. At the same time, tubeless technology is not only about tires. We are talking about a whole wheel system, which also includes a special rim and a sealant that gives the wheel anti-puncture properties. The tubeless concept makes the bike more comfortable to use and improves its riding performance, which will be discussed in order.
How long ago did this technology appear and can it be trusted?
Those who hear about bicycle tubeless for the first time usually tend to be suspicious of them. You can dislike this technology for subjective reasons, but you definitely shouldn’t distrust it. Tubeless tubes have been massively used for cars and motorcycles for several decades, and during this time they have not given reason to doubt their reliability.
The first tubeless systems for bicycles appeared in 1999, when the French rim brand MAVIC, in collaboration with tire manufacturer Hutchinson, presented their concept of a simple and effective tubeless wheel. In the 2000s, this technology remained the prerogative of mainly professional athletes, who quickly appreciated its main advantages: lighter weight, more air in the wheel, good "traction" and durability.
In recent years, tubeless has finally ceased to be perceived as something exotic. For example, today a significant part of the MTB and almost all touring cars come with such wheels as standard. A wide variety of sealants are also available on the market, and the number of those who are discovering the benefits of tubeless technology is steadily increasing.
The tubeless system provides a special rim and tires that are labeled tubeless ready or TR. However, the rims themselves are easy to distinguish visually - they have a low side and characteristic walls with recesses, forming a kind of lock in which the tire cord is wedged when air is injected.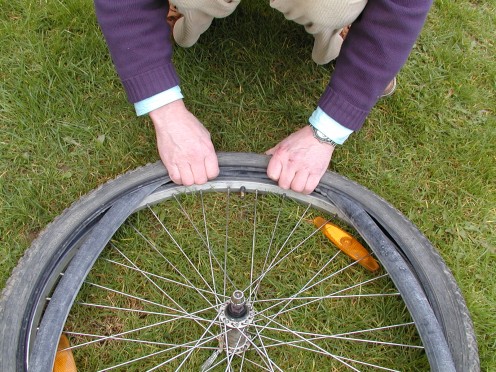 Due to this, in the inflated state, the rubber reliably and hermetically “sits” on the rim, without breaking off the wheel even at low pressure. The rim itself is additionally glued with a sealing tape, after which the nipples are installed separately.
The benefits of tubeless wheels are revealed no matter how often and what kind of bike you ride: whether it's weekend trips, extreme downhill or long-distance touring. Nevertheless, for certain categories of cyclists tubeless still open up more opportunities: first of all, we are talking about those who are seriously passionate about off-road.
When actively driving off-road with tubeless tubes, you can ride on lowered wheels and at the same time not be afraid of such an unpleasant type of puncture as a snake bite. Low tire pressure, in turn, gives better handling, dampens vibrations more effectively and generally provides more comfort on difficult tracks. If we are talking about cyclists, then they appreciate tubeless for their anti-puncture qualities.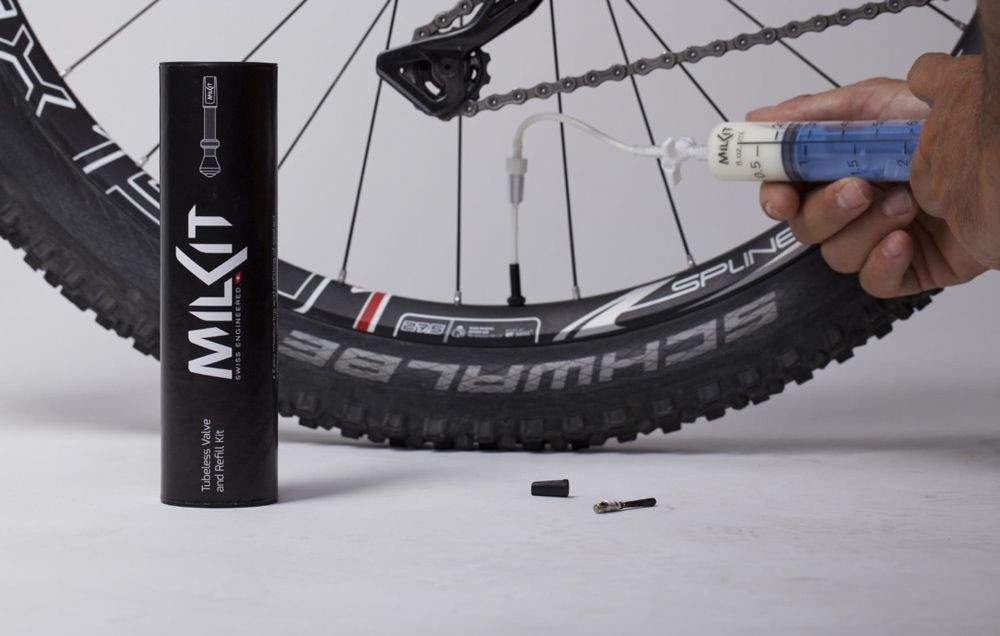
Road bikes also use tubeless wheels. Moreover, they are the pioneers of this technology. But road tubeless tubes are a different story: they are designed for different operating pressures and have tangible design differences. Therefore, further we will talk mainly about those tires that are put on mountain, touring and city bikes.
These are the two rim formats that define the features of a tubeless wheel assembly. BST is a standard that involves the installation of a special sealing tape that prevents air from leaking through the holes in the spokes. This is the most common version of tubeless systems.
UST is a blind rim in which an additional bridge isolates the spoke holes. Thus, there is no need for laying a sealing tape. In practice, this greatly simplifies life, because when installing a tire (especially without proper experience), the tape tends to crush, which is why you have to reassemble the wheel. It is easy to guess that such rims also have a drawback - their price.
The tubeless system in the form in which we wrote it above is already a full-fledged wheel, it can be installed on a bicycle and hit the road. But there is an important nuance. First of all, tubeless tubes are valued for their anti-puncture qualities: for this, a small amount of a special liquid, a sealant, is poured inside the tire.
Yes, you can. But you should not do this. Firstly, this is illogical: for no reason you are depriving yourself of the main advantage of tubeless - the anti-puncture effect. But more importantly, it is very difficult (or even impossible) to inflate such a tire in a completely flat state with a portable pump: to do this, you need either a strong floor pump or a booster. Naturally, no one will take such bulky things with them on the road. Filled with sealant 95% of punctures "seal" without a critical loss of pressure, and in most cases there is no need for even light pumping. Thus, the probability of being with a flat tire is very low.
So, if you put tubeless, sealant is still needed. Such fluids are easy to find in any bike shop, they are inexpensive and require replacement on average once every three to four months, so there is no need to talk about any inconvenience. Yes, in order to cope with the fill, you need to acquire a certain skill, but this is much easier than constantly changing broken cameras. In addition, sealant can be replaced once a season in a specialized service.
Bicycle sealants are based on fine particles (rubber or polymer fibers) suspended in a liquid carrier. Inside the wheel, the sealant does not polymerize: it is in a liquid state and is distributed along the inside of the tire during movement. When a puncture occurs, the air flow begins to push the solution out. A fine suspension clogs the hole, and the sealant dries quickly. Thus, there is a reliable "sealing" of the puncture.
If we talk about typical punctures - collisions with thorns, wires, small glasses - such damage is self-healing without a noticeable loss of pressure.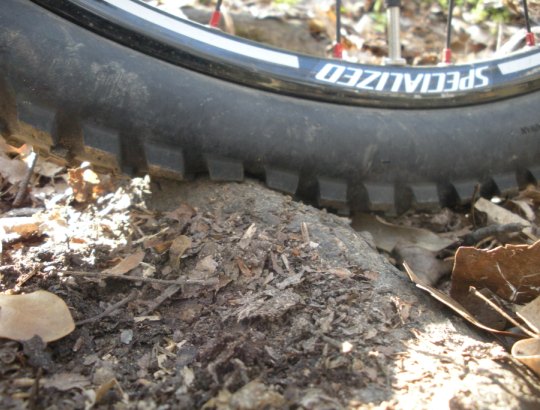 Usually, a puncture can only be guessed from a small spot on the surface of the tire. Naturally, the sealant works with more complex damage. You can count on it even if you pierce the wheel with a thick nail, 4-5 mm in diameter. If you don't understand how a liquid can seal such holes, you can watch numerous crash tests on YouTube that demonstrate the miraculous properties of sealants.
The consumption per tire is from 50 to 100 ml. If we are talking about standard MTV tires, the golden mean is about 60 ml per wheel. The exact dosage will always be written on the bottle. It is difficult to get confused even for those who do not like to read instructions: most sealants have measuring containers or a dosage scale on the bottle itself.
Here, too, everything is conditional and depends on the characteristics of the specific composition and intensity of punctures.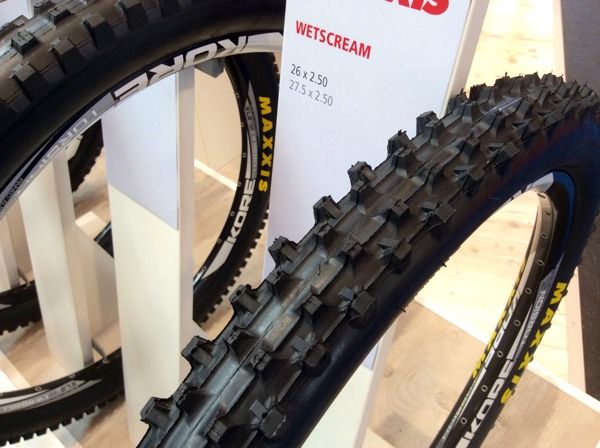 In the absence of serious damage that entails the leakage of a large volume of sealant, you can easily skate a whole season on one fill. Some cyclists prefer to do an incomplete start-up gas station and gradually add 20-30 ml of fluid every two to three months. You can also navigate by how effectively the sealant works: if you see that small punctures are sealed with a strong deflation of the wheel, it may be that the composition is no longer enough and it needs to be added. Be that as it may, sealant is a very economical thing that lasts for a long time.
The sealant inside the tubeless tends to dry out, forming a characteristic film. Whether or not to clean the tire cavity is up to you. This is a purely aesthetic moment, which does not affect the operation of the anti-puncture fluid. The sealant can simply be added as it dries and not bother with unnecessary worries. It is more likely that the tire will completely wear out than it will have time to completely clog with dried filler.
Serious damage - large diameter punctures, small cuts, run over nails with subsequent tire rupture - are repaired using special repair worms. These are rubber or fibrous bands that are inserted into the hole to reduce its area and allow the sealant to seal the puncture.
With long longitudinal cuts it is more difficult. Here you need to either sew up the dissection with nylon threads, or stick a patch on the inside of the tire. You don’t have to worry about the tightness of the repair site - the sealant will do this work, of course, if it does not have time to leak out. But being able to inflate a completely flat tire with only a portable pump will require skill.
In fairness, we note that such complex injuries are rare for most cyclists. But for those who are seriously passionate about off-road, it is better to play it safe with a spare camera. In this case, having caught a cut, you can always drain the sealant, unscrew the nipple from the rim and install a regular camera.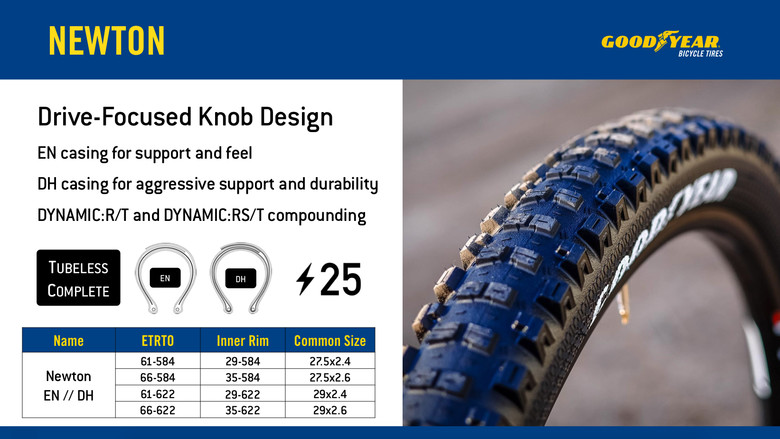 And in order not to drive with a “hernia” protruding outward, we recommend placing, for example, a bill folded in half under the cut on the tire.
Tubeless allows you to forget about such an unpleasant form of damage as a "snake bite" forever. It usually happens when at full speed you catch a pothole in the pavement, unsuccessfully jump onto a curb or run into a stone on a downhill. Hitting the edge of a hard object, the tire is crushed, and the rim walls work like incisors, damaging the chamber in two places. In tubeless wheels, this scenario is excluded, because. there is nothing to break through here. Of course, it can be assumed that the rim will cut the tire itself, but this should be a blow of enormous force, which is almost never encountered in practice.
Rejection of the chamber increases the volume of air in the wheel. This changes the contact patch (it becomes flatter) and allows the wheels to better absorb off-road bumps. Add here the ability to ride at low pressure, without being afraid of a snake bite, and it becomes completely clear why tubeless lovers of hard off-road riding so idolize. Soft tires with a large contact patch "fit" all the bumps in the road, giving excellent traction on rocks, forest primers and other off-road.
In addition to traction, tubeless tires improve shock absorption, dampen vibrations better, and generally provide more off-road comfort. At the same time, to get the most out of this rubber, you need to experiment a lot with tire pressure, trying to find the indicators that will best suit your individual riding style.
Finally, the camera is extra grams. By refusing them, you can save an average of 70-100 g of weight on each wheel. For some, this may seem like a formality, but it is worth considering the fact that extra grams on the periphery of the wheel have a stronger effect on driving performance. This difference is especially felt on road bikes: road bikes, gravel, touring.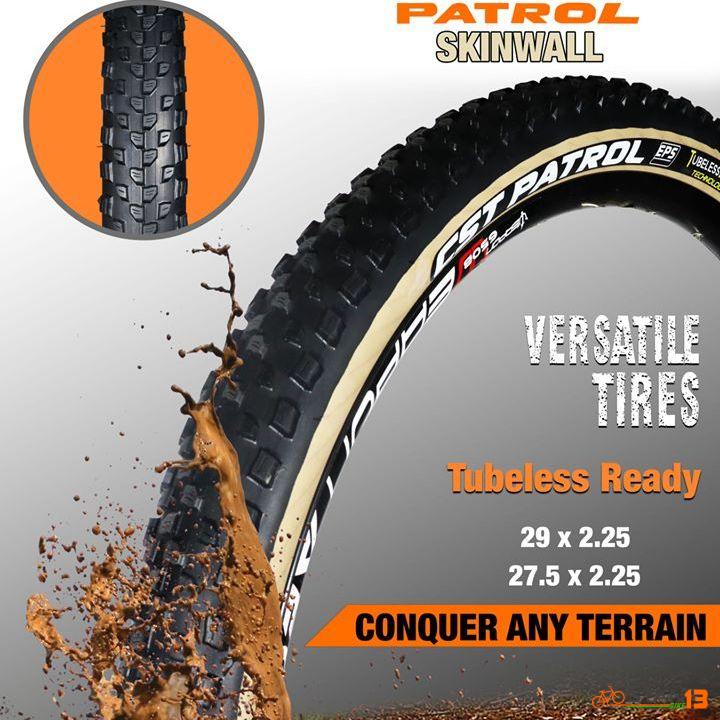
They also exist. Moreover, it is far from formal. First, it's the price. The difference becomes especially noticeable when you buy tubeless systems separately: rims, tires + small things (tape, removable nipples, sealant). For tubeless you will have to pay an average of one and a half times more than for ordinary wheels, plus or minus the same class. And if we are talking about more advanced UST rims, then this means another + 30-40% to the cost.
With tubeless by default, everything is more difficult in terms of installation (here we are talking about conventional BST systems). You need to learn how to properly glue the tape, accurately insert the nipples, carefully install tight rubber, making sure not to displace the tape and not fill everything with sealant. On the other hand, all this comes with experience, but what you will always have to put up with is the difficulty with pumping a completely flat tire.
A tubeless tube cannot be inflated until its landing board snaps into place on the rim.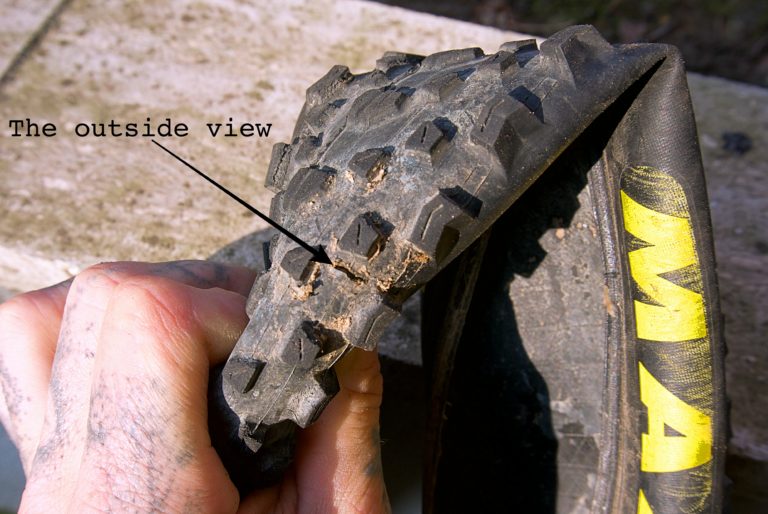 To do this, you need to sharply introduce air into the tire. The tire should straighten up and fall into the grooves with a characteristic click - then it can be safely pumped further. This all sounds simple if there is a compressor in the garage. Putting a tubeless tube into the grooves by pumping air with an ordinary floor pump is quite difficult, and almost impossible with a portable bicycle pump.
All this makes life much more difficult. But there are solutions. In the field, a compact can of compressed air can help out. At home, installing tubeless tubes greatly simplifies the booster. This is a cylinder into which a high pressure is pumped with a pump, then it is connected to a nipple, the valve is lowered - and the air from the reservoir pumps up the wheel sharply.
As you can see, tubeless cameras also have enough disadvantages, but it is wrong to consider them in isolation from the advantages. For example, the probability of being with a completely flat tire away from home is very low, due to the anti-puncture qualities.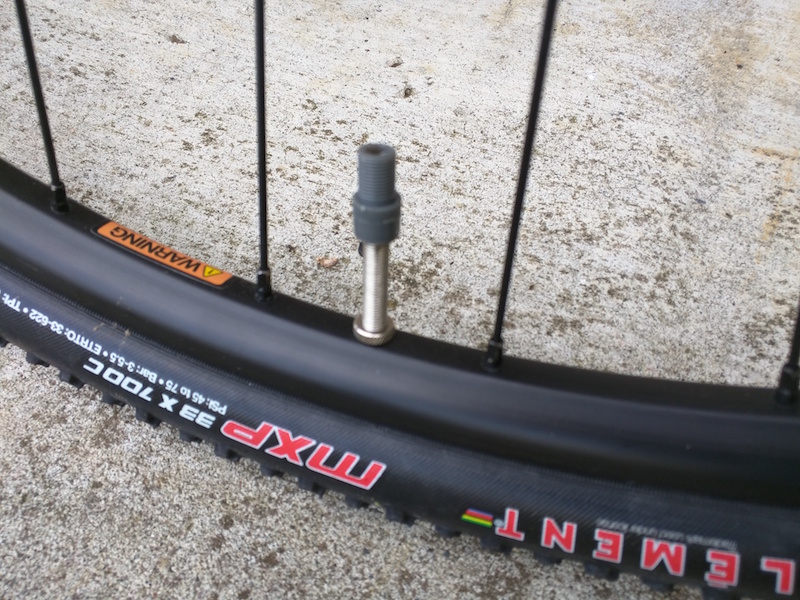 Complicated installation is offset by the lack of punctures and roadside repairs. And by overpaying in price, you save on interchangeable cameras, and, of course, win as a roll on off-road.
TIRE SIDEWALL MARKING
Indicates the type of rim the tire is compatible with. Unless otherwise noted, should be used on rims with hooks.
Nominal profile width and suitable wheel diameter in millimeters according to ETRTO.
Country of manufacture.
Minimum and maximum pressure in bar and psi. inch.
Specifies the direction in which the tread pattern should be directed when the wheel is rotated forward.
Specifies that the tire should be installed with an inner tube only, not tubeless or otherwise.
TIRE TYPES
TUBE TYPE: A tire for use with an inner tube only.
TUBELESS: A tire for use on tubeless rims only, which can be fitted without an inner tube. Can be used with internal chamber.
TUBELESS READY: A special type of tubeless tire that requires a sealant inside to maintain pressure. Can be used with internal chamber.
TUBULAR: A fully enclosed, stitched or vulcanised, tire construction (tube) that requires a special tubular rim and is glued to it when mounted.
TIRE INFLATION RECOMMENDATIONS
Never exceed the recommended tire pressure.
Proper pressure affects the load, speed and handling of a bike and is vital to performance and safety performance such as braking, maximum traction and tire life.
Inflate tires "cold", that is, not warmed up on the road.
Do not exceed the maximum pressure indicated on the tire sidewall.
Insufficient tire pressure causes excessive creasing and rapid wear.
Excessive pressure causes discomfort when driving and reduces the contact area of the tire with the road surface, which impairs handling and traction.
Before every ride, it is essential to check and maintain the correct tire pressure (while the tires are “cold”), especially on tubeless systems, which are more prone to sudden pressure loss.
WARNING: Driving on tires with improper air pressure is dangerous! This can lead to an accident, accident, serious injury or even death.
TIRE CHECK
The condition of the tires and the air pressure in them should be checked before each trip, and also, and even more carefully, after hitting any object on the road. If the tread is worn and the body material (cord) becomes visible, bulges, cracks, cuts, holes, uneven wear appear on the tire, or the tire shows signs of any other damage, it is recommended to replace it immediately.
Over time, the condition of the tire will in any case deteriorate under the influence of external forces, such as contact with the road, punctures, improper repairs, mounting-dismantling, inflation-deflation, heating-cooling, excessive exposure to ozone, improper storage conditions, etc., etc. . To reduce the impact, tire manufacturers add anti-ozonants and antioxidants to their products.
Since it is not possible to accurately predict what external forces a tire will be subjected to, there are no scientifically based limits on the life that a tire can be given. It is recommended that the condition of the tires (as well as tubes and rim tapes) be checked regularly by a bicycle specialist who can assess their suitability for further use.
As for tubeless systems with liquid sealant inside, it is necessary to check the condition of the sealant itself and change it regularly in accordance with the instructions.
To avoid cosmetic damage, use low-pressure tap water to clean and wash the tire sidewalls. Never use cleaners to improve the appearance of the sidewall, otherwise you will remove antioxidants, which can degrade the quality of the rubber and lead to cracking of the sidewalls. Using hydraulic sprayers with high water pressure can also cause damage to the sidewall.
Avoid excessive mechanical stress on tires and tubes (for example, do not brake by blocking the wheel, do not run into sharp objects, do not drive with insufficient or excessive tire pressure, etc.).
If your bike has rim brakes, the rim is subject to constant wear and tear, which over time can lead to tube failure and puncture. In any case, if you have any doubts about the condition of the tires, consult a bicycle specialist.
High tire pressure can damage the rim, so check the maximum pressure allowed for the specific rim before installing the tire (check with the wheel dealer or rim manufacturer for information on whether the rim can withstand tire pressure).
CHANGING TIRES
PREPARATION
1. Before installing or removing a wheel, read the bike manufacturer's instructions and make sure you know how to handle the wheel mounting mechanism.
2. Verify that the rim, tire, and tube are compatible with each other by checking the instructions for each component manufacturer. A mismatch between tire and rim can cause the tire bead to come off the rim or damage to the inner tube, resulting in a rapid loss of air pressure. If you're unsure, be sure to check with a bike specialist.
3. Make sure that the mounting area of the tire is clean and that foreign objects do not get into the tire, as they can damage the tube, rim tape, the tire itself, or contaminate the sealant (in the case of a tubeless tire).
4. Make sure the rim is in good condition. If it is damaged, then it must be replaced.
5. Check the condition of the rim tape, if used. If it is damaged or does not completely cover the spoke holes in the rim, it must be replaced. Poor quality rim tape is very often the cause of a sudden loss of air pressure.
6. Check the maximum allowable pressure for the given rim type. It must be equal to or higher than the tire. Tires that allow a pressure reduction equal to or greater than 3 bar (43 psi) must be mounted on lug rims.
7. A tire capable of inflating more than 5 bar (73 psi) must be mounted on a lug rim. Hooked rims are marked with a "C" in the size label. If you have any questions, please contact a bicycle specialist.
8. In the case of installing a tire with a tube, talc helps to properly place it in the tire. For latex cameras, its use is mandatory, but it is also recommended for butyl cameras. It is also recommended to install a new tube each time a new tire is fitted or after a puncture.
9. When installing a tubeless tire (Tubless), always check the condition of the valve (nipple) and change it if it looks damaged or if air pressure is lost.
10. When installing a Tubeless Ready tire, always check the sealant and change it if it is dry. Also read the sealant manufacturer's instructions carefully to make sure it's right for your tire.
TIRE REMOVAL PROCEDURE
1. Unscrew the valve cap (nipple) and locknut, completely deflate the tire.
2. Peel off one side of the tire all around from the edge of the rim by applying pressure starting from the area opposite the valve. Tubeless tires may require more effort for this.
3. Position the tire pryer next to the valve and carefully insert it between the tire and rim, being careful not to pinch the inner tube (if any). Then, using a lever, lift the sidewall of the tire off the rim. To make the job easier, always make sure that the other bead is in the rim bed.
4. While holding the first rig in this position, insert the second rig about 10 cm from the first and repeat the above operation. Then run the pliers around the circumference of the tire to completely separate one bead from the rim.
5. Remove the inner tube, if present, or liquid sealant, if present and still liquid, and then remove the second tire bead from the rim with your hands.
TIRE INSTALLATION PROCEDURE
1. If installing a tubeless tyre, make sure the rim is sealed, tubeless tyre-compatible, or tubeless-compatible. If the rim is tubeless compatible, you will also need a tubeless rim tape that will completely cover the spoke holes. It is possible to lubricate the entire circumference of the rim with a special tubeless lubricant (do not use oil or grease) - this will facilitate the installation procedure and the correct positioning of the tire on the rim.
2. Insert the first bead of the tire into the rim, observing the direction of rotation of the tire indicated on its sidewall, starting opposite the valve.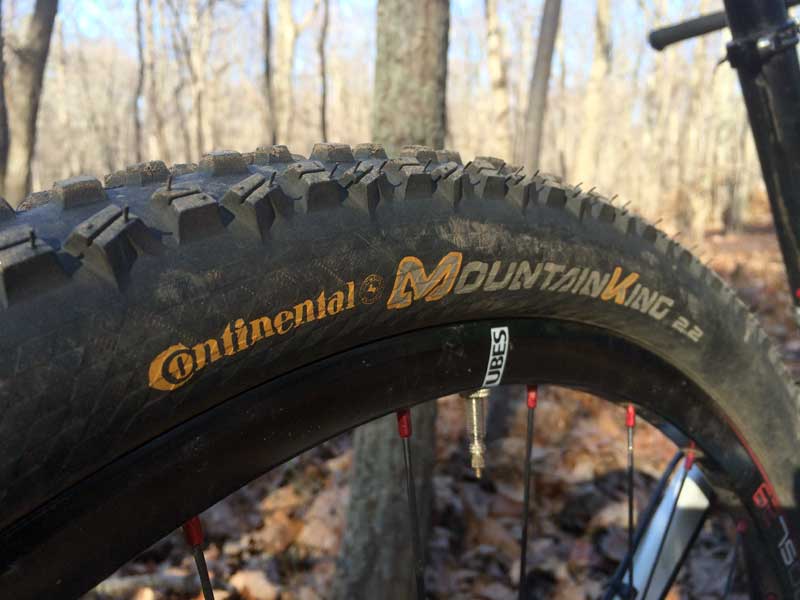
3. If installing a tire with a tube, slightly inflate the tube, but only so that it becomes rounded, and gently insert into the tire, starting at the valve and completely carefully placing it in the rim.
4. Starting on the side opposite the valve, press the other bead of the tire into the rim and push it around the rim in both directions until it fits properly in the rim. For tubeless installations, add the recommended amount of sealant before inserting the last bead piece. If the tire bead becomes difficult to push into the rim, or the last part of the bead does not snap into place, make sure that the bead around the entire circumference of the rim is in place. If necessary, squeeze the sidewalls of the tire into the rim with your hands.
5. If fitted with a tube, make sure it is not pinched between the tire and the rim or valve, and then secure the valve to the rim with a locknut.
6. Inflate the tire to the maximum allowable pressure using a pressure gauge pump so that the beads are properly seated on the rim.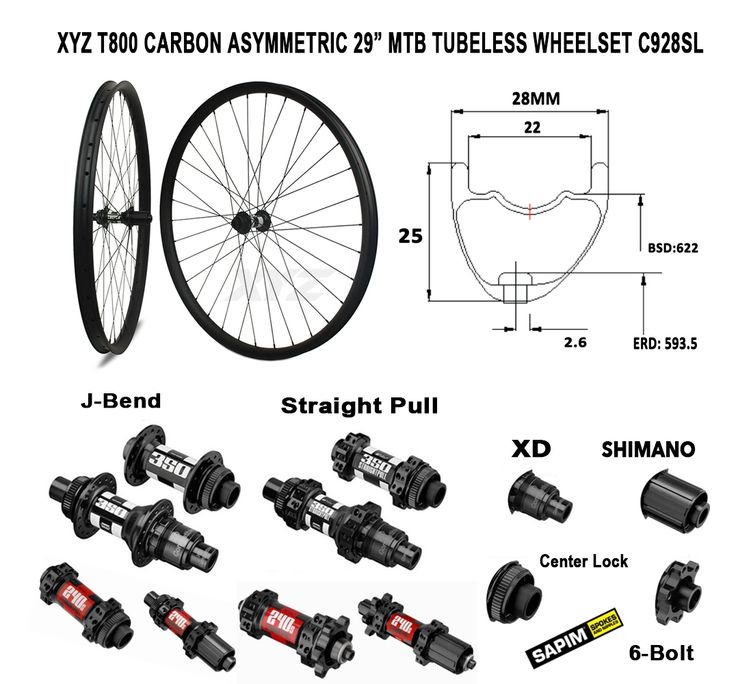 Tubeless tires click into place with a characteristic popping sound. Rotate the wheel by hand at low speed and at an angle to check that the beads are correctly positioned and also that the liquid sealant is spread inside (if the installation is tubeless).
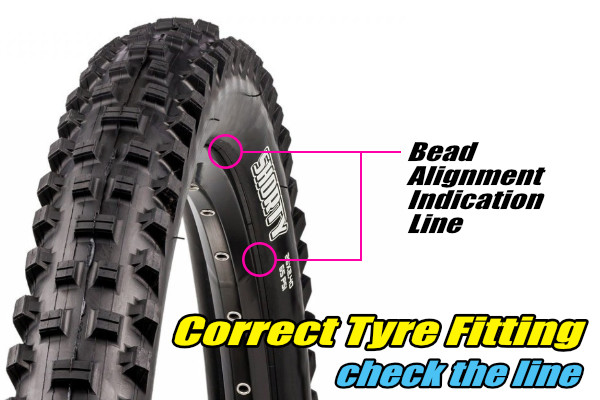
7. The tire is properly seated when the thin line above the side of the rim is equidistant from the edge of the rim all around. Then reduce the pressure to your preference (within the markings on the sidewall of the tire) and close the valve. Do not exceed the manufacturer's maximum pressure for tire, rim and rim tape.
8. When inflating a tubeless tire for the first time, a strong jet of air is required, so you may need a compressor.
9. Before each ride, check the air pressure, tire bead fit, wheel-to-hub attachment, and brake pads (disc or rim).
10. Before using newly installed tires, be sure to first brake test and do a few test maneuvers.
USING TIRES WITH FULLY SEALED CARBON AND ALUMINUM CLINCHER RIM WITHOUT RIM TAPE
Fully sealed carbon and aluminum rims, such as tubeless rims, usually don't have spoke holes in the rim, so manufacturers don't mandate the use of rim tape.
However, keep in mind that in the case of bikes equipped with rim brakes, the heat generated during braking directly enters the tire system, significantly increasing the thermal load on all components, such as the tire, the inner tube (if any) and the rim itself. In the event of prolonged braking, riding without a rim tape can cause the tires to deflate quickly, with the risk of losing control of the bike.
This becomes even more relevant in the case of latex and lightweight tubes, as well as tubeless installations. In order to minimize the chance of failure due to overheating, it is recommended to use rim tape for any installation, and to avoid continuous, prolonged braking when descending a mountain, if possible.
USING CLINCHER TIRES WITH CARBON RIM
Carbon rims sometimes pose a risk of tire edge damage due to sharp rim edges. Therefore, before mounting the tire, it is recommended to make sure that there are no sharp edges on the rim hooks. To verify this, carefully run your finger along both edges of the rim - there should be no nicks, sharp protrusions or excessive roughness on it. If there are, then the rim needs to be replaced.
If in doubt, please consult a bicycle specialist.
TIRE STORAGE
Tires should be stored in a cool, dry place at 10°C - 21°C, avoiding contact with heaters.
Storage temperatures that are too low are not harmful in and of themselves, but can cause tire stiffness. In this case, before unfolding the folded tire and mounting, it is necessary to keep it for several hours at a temperature of about 16°C.
Do not park your bike in direct sunlight or in very hot places for a long time.
When the bike is not in use and is on wheels, keep the tires inflated and rotate the wheels periodically to avoid flat spots, especially if tubeless tires with liquid sealant are installed.