by Mary
Knowing how to replace a back wheel on a bike is a useful skill to have you use your bike regularly. You may need to change an inner tube or tyre and being able to replace the wheel is an important part of this. Cycle Maintenance Academy have put this guide together on how to put back wheel on bike yourself, hopefully making it easier for you.
Step 1.
The first step is to check that you are fitting it the correct way around. The direction of the rear wheel is easy. You have cogs on the back wheel and they fit with the chain.
Step 2.
Now lean the wheel against your leg or in easy reaching distance. If the bike is upside down and you are standing behind it, then the derailleur is on your left.
Step 3.
Next, pull back the body of the derailleur with your left hand, or both hands if necessary and hold it. The chain will be in a loop.
Step 4.
Hold the derailleur with your left hand and pick up the wheel with your right hand. Put the wheel into the loop with the smallest cog on the chain
and guide the wheel into the dropouts.
Step 5.
When it’s nearly there, let go of the derailleur and your wheel should be in position.
Step 6.
Make sure that the wheel is located in the dropouts correctly. Once all of the above steps are complete, tighten the wheel. if you have a nut on each side then do each side a little at a time.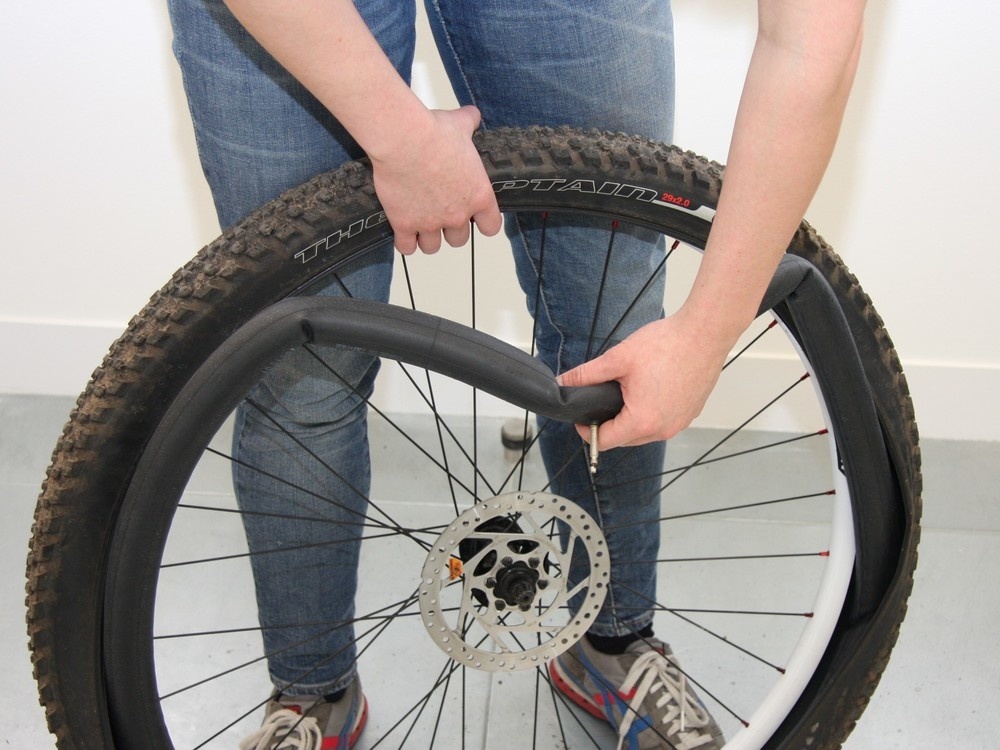 Roughly 1 rotation of the spanner at a time. This will stop the wheel slipping before the final tighten.
How to put back wheel on bike with horizontal dropouts or track ends?
These steps only work if you have vertical dropouts. This means that there is no adjustment where your wheel sits in the frame. The axle on the wheel drops into place and can’t go anywhere else. The position of the drop out is more or less vertical.
Horizontal dropouts mean that you have to feed your wheel in from the front of the bike and track ends look very similar, but you feed your wheel from the back of the bike. The dropouts are now slots and your wheel can be positioned and tightened anywhere along the left and right side slots.
Use steps 1-4 in the same way.
Once your wheel is in position, let go of the derailleur, but keep hold of the wheel. Slide the axle on the right hand side (gear side with the derailleur) as far back as it can go.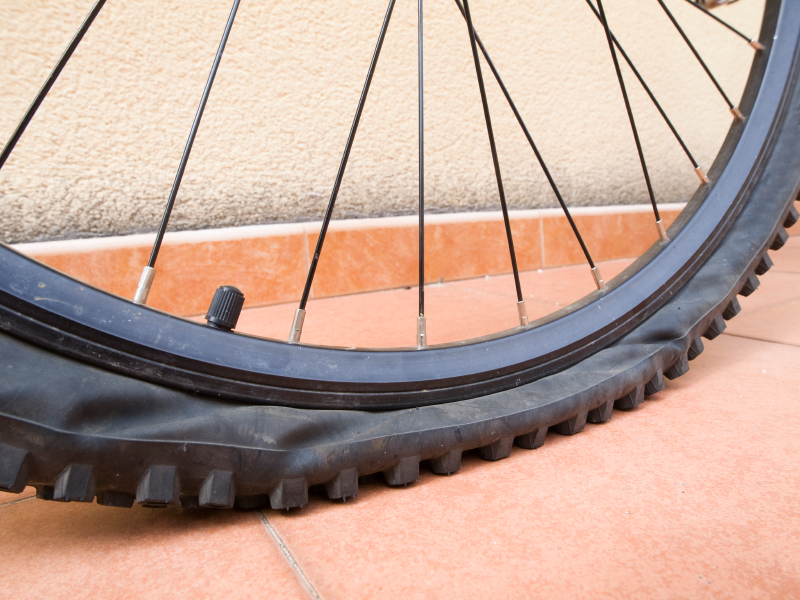 If you have wheel nuts and not a quick release lever, tighten the wheel nut so that it grips the frame
but is not fully tightened. Now slide the left hand side back and forth while watching the position of the wheel in the frame. You need to be looking at the position of the wheel between the chain stays near to where they join the seat tube. Try not to focus on the tyre as this is unlikely to shoe the wheel sitting centrally. Instead look at the rim. If you have someone to help you, then let them position the wheel centrally and you can concentrate on tightening the wheel nuts or tightening the quick release skewer.
Now you should know how to put a back wheel on bike.
| Afraid to take off your rear wheel to fix a flat tire (or when taking off both wheels to put a bike in a car trunk)? Worried that you'll mess up the chain or shifting; or that you'll get all greasy? Think you'll never get the rear wheel back on right? We have good news: Anyone can remove and install a rear wheel and it won't affect the shifting or the chain. Here's how it's done on any bicycle with derailleurs, from road bikes, to mountain bikes and any 2-wheelers in between. Watch the videos and review the step-by-step photos and text. We're also happy to demonstrate in person, too, so please let us know if you'd like a quick lesson. We've covered all the tips and tricks, so you'll be an expert in no time! |
WHEEL REMOVAL 1, 2, 3!
1. Shift onto the small cog and small chainring.
Shifting the chain down onto the smallest cog on the rear wheel and the smallest chainring on the crankset, creates slack in the chain, which makes rear wheel removal much easier. It also makes wheel installation easier because it gives you an accurate way to line up the wheel (on the smallest cog) so that it slips right into the bicycle frame.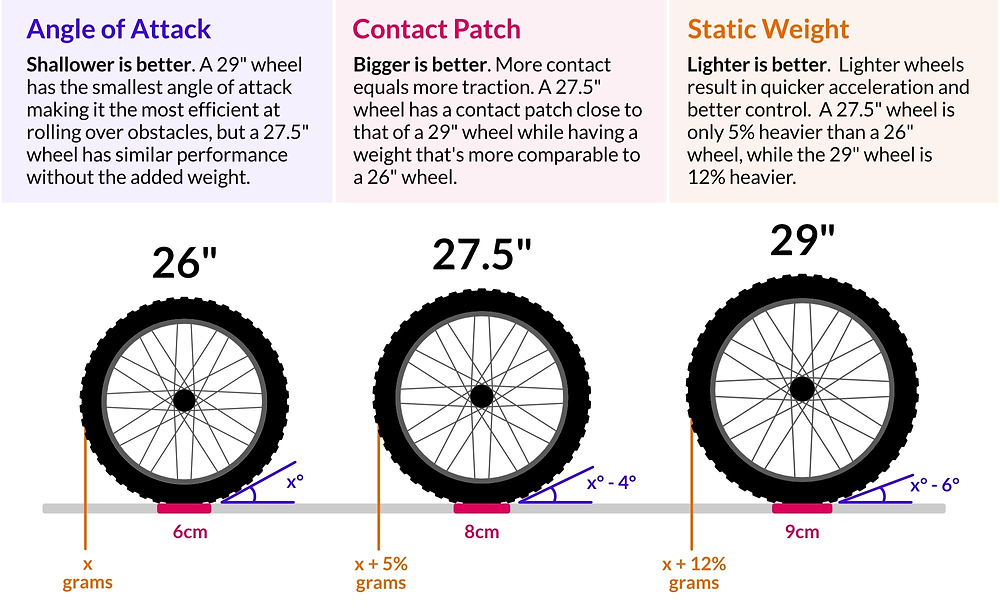
If you're riding and feel the rear tire becoming soft slowly from a puncture, you may have time to make the shifts to the smallest cog and ring as you're slowing to a stop.
If you're not riding, or have already stopped, operate the right shift lever, lift the bike by the seat and pedal by hand and the chain will move down the cogs in the back. Depending on the type of shift lever, you may need to move the lever a couple of times to move the chain onto the smallest cog.
Now, do the same with the left shift lever and pedal by hand and get the chain onto the smallest chainring in front, too.
2. Open the brake
Note: If you're fixing a flat tire, you needn't worry about this step because when the air is all out of the tire it will fit through the brake easily. Also, if your bike has disc brakes, you too can skip this step because you don't need to touch disc brakes to remove wheels.
On most bikes with rim brakes, when you try to remove the wheel, the tire bumps into the brake pads. This is because the brake needs to be adjusted close to the rim, while the fully inflated tire is significantly wider than the rim.
To prevent the tire bumping into the brake pads, you can open sidepull brakes by fully rotating the little lever on the brake upwards (photo a). This little lever is called the brake quick release for the way it lets you quickly release (open) the brake pads. For linear-pulls (also called "direct-pulls," and "V-brakes") lift/pull the end of the "noodle" out of its holder (photo b).
Some sidepulls are opened by pressing a button on the lever. Look for this if there's no lever on the brake.
Open cantilever brakes (these feature a cable that runs over the top of the tire) by lifting the cable end on one side out of its holder.
Workarounds: If you can't find a way to open a brake, you can also let air out of the tire until you can pinch it enough to squeeze it through the brake pads. Another trick - though it requires tools and time - is to remove one brake pad which will often provide sufficient clearance. If not, you can remove both pads. Just be sure to remount them carefully so that they contact the rim squarely and don't touch any part of the tire.
3. Pull the derailleur back and remove the wheel
Now you're ready to remove the wheel. Most bicycle wheels have quick releases holding them in the frame (the red parts in the photo). To open the quick release and loosen the wheel, simply pull and fully open the lever, which is usually on the opposite side of the chain. Don't twist the lever. Just pull it out/away from the frame.
When the quick release is open, the wheel is ready to come out. To remove it, lift the bike by the seat so that gravity will help you. On some bikes the wheel will drop right out at this point (don't let it roll down the road and escape!). Or, if it doesn't fall out on its own, give it a slight blow with your hand and that might knock it right out.
Don't force anything though. If the wheel doesn't come out right away, it's because the derailleur and chain are blocking it. To get them out of the way, keep holding the rear end of your bike off the ground by lifting the bike by the seat. Reach down with your free hand and pull back the derailleur with your hand to get it, and the chain, out of the way.
Now, the wheel should fall out or drop out if you shake the bike. If the chain gets in the way still, just grip the wheel and shake it so that it's free of the chain and fully off the bike (that way you never touch the chain and stay clean). Good job!
Note: To clearly show the desired derailleur position, we locked it in place. You must pull it back by hand when removing wheels because it won't stay in place on its own.
How to put the rear wheel back on
| As you guessed, installing the rear wheel is the same as removal only in the reverse order! You just place the wheel back in the frame being careful to get the chain on the right cog, close the quick release to lock the wheel in, and close the brake so your brakes are working again. The video shows front and rear wheel installation in that order. We go over the step-by-step below and explain some of the things that can go wrong and how to deal with them. It can be frustrating if the wheel won't go in easily. But there's always a mechanical reason. So, look at what you're doing carefully and read our instructions a few times and you should be able to find the problem and address it so that the rear wheels goes right back where it belongs. |
If your wheel won't go in easily, check these things:
Did you get the chain on the cog right? Remember that you shifted the chain onto the smallest rear cog before you removed the wheel. So, you must put the wheel back on by first lining that smallest cog up just right so that the chain is on it. Also, pay attention to how the chain rests on the cog. The chain is a closed loop. The cog should be inside the loop (see the photo in Step 3).
Note: If the wheel has been off the bicycle for some time, it's possible that someone might operate the shift levers. This can move the derailleur so that when you line up the wheel with the smallest cog the wheel won't go into the frame. Instead it bumps into the frame. To remedy this and get the wheel in, simply operate the shift lever as if you're shifting onto the smallest cog. This will move the rear derailleur back where it needs to be so that the wheel will line up right with the frame and go in.
Did the chain come off the derailleur pulley? Another glitch that can prevent the wheel going right into the frame is if the chain happens to come off the top pulley on the derailleur (photo). This is hard to see but it has a similar effect to someone shifting the derailleur into the wrong position and it makes the wheel run into the frame and not want to go in. To fix it, just push the chain back onto the pulley and make sure it stays there as you install the wheel. Tip: Use a stick to push it on or wrap your finger in a rag and you'll stay grease-free.
Is your quick release still open? Sometimes when the wheel is separate from the bike, the quick release lever gets bumped and flipped over and closed. When this happens the wheel won't fit in the frame anymore because the quick release is closed and in the way. Open it and the wheel will fit.
Now that you know how it's done, you may want to practice removing and installing your rear wheel a few times to become expert at it so that when you have to do it, it's a breeze. And, so you can dazzle your friends by helping them remove/install their wheels! Have fun and let us know if you'd like a demo.
TABLE OF CONTENTS:
This article will cover the removal and installation of front and rear bicycle wheels.
Related: How to choose wheels for a bicycle?
Start with the bike if possible. It should be installed on the left side when removing the rear wheel. Do not stand the bike in an upright position without a rear wheel as this may damage the rear derailleur.
1. Rear wheels : set the switch to the outer gear and inner front wheel chain. This will loosen the chain and make the wheel easier to remove.
2. Disconnect the brake rim, if equipped. Typical MTB and road brake release mechanisms are shown below.
Note : No release shoes required with disc brakes. Also, with hydraulic disc brakes, do not depress the brake lever when removing the disc from the bike. Otherwise, the pads will close and it will be very difficult for you to put the wheel back on the bike. Use a specially designed spacer such as PP-1.2 if necessary.
3. Remove the wheel from the frame :
4. On the front wheel - simply guide the wheel down and out of the fork. For rear wheels - pull rear shifter to clear chain screws. Lower the wheel down through the brake pads and forward to clean the chain and shift mechanism.
Some shifters have a clutch mechanism that makes them difficult to turn. They have features that make it easy to remove the wheel.
The wheels must be properly installed on the bike frame. Skew can lead to problems with shifting and adjusting the bike. If the wheel is not securely fastened, it may fall off while riding and injure the cyclist.
Solid axle bushings use nuts on the axle on the outside of the trim on the frame. The axle nut has a washer built into it or a separate washer. If the washer has teeth or knurling, then they are connected to the recess to secure the wheel. Lubricate the threads on the axle when the wheel is mounted on the bike.
It is often easier to install the front wheel when the bike is on the ground. When placing the bike on the ground, the axle must be completely in the pad on the frame.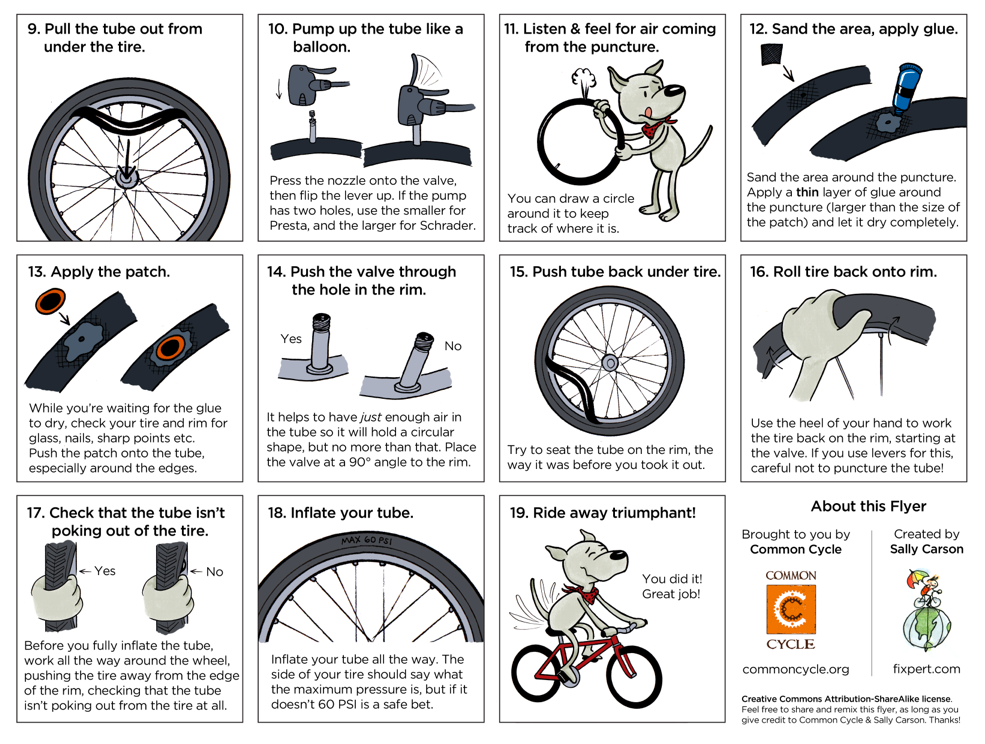
1. Make sure the cam lock lever is in the open position and that its brake mechanism is open.
2. Fit the wheel into the trim on the frame. Make sure the hub is fully seated in the frame or fork.
3. Tighten the wheel:
4. Determine the closing end position of the lever. Turn the front arm and adjusting nut so that the arm ends up at the front of the fork only. Install the rear arm between the chain support and the seat. Reposition the lever as needed if it is not fully closed.
5. Remove the brake mechanism again, if applicable.
6. Make sure the wheel is in the center of the frame or fork. Loosen the nuts on the axle and, if necessary, adjust the center of the wheel in the frame and tighten again.
7. Make sure the rim of the brake shoes is centered on the wheel and adjust as needed.
The eccentric mechanism for securing the wheel axles uses a hollow hub axle provided with a shaft, a lever that acts as a cam mechanism, and an adjusting nut. The cam forms tension on the shaft and pulls, and the adjusting nut is pressed tightly against the lining on the frame. This tension securely holds the wheel on the frame.
The adjusting nut determines the amount of tension on the lever of the eccentric mechanism for fixing the wheel axles and the cam.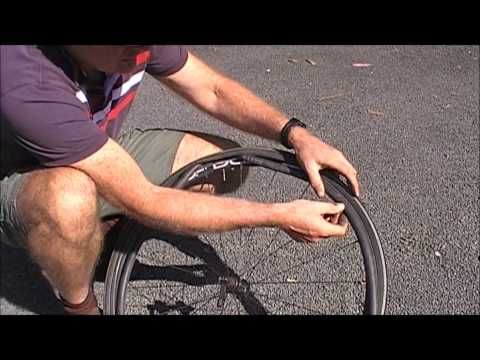 Lubricate the cam mechanism if it is sticky or dry.
The eccentric mechanism for fixing the wheel axles is equipped with two conical springs. The small end of the spring faces the axis, and the large end surfaces outward. These springs make it easier to install the wheel. If one or both springs are twisted or damaged, they can be removed. They don't matter once the wheel is firmly attached to the bike.
The so-called "open cam" may require more tension. These levers have a cam mechanism and must be lubricated frequently.
Bicycles using disc brakes on the hub need special attention. Wheel disc brake systems (Dual Pivot, Linear Pull, Cantilever, Sidepull, etc.) generally do not use significant axle pressure. Disc brake systems are fork mounted and apply load to a rotor that is attached to the hub.
There is an external load on the hub axle that tends to push the axle out of the frame pad. It is especially important to secure the pin properly in disc brake systems.
The rear pad on the frame in the solid axle can also have a gear change mechanism that is bolted on. There should be a bolt and nut holding it in place. The wheel is mounted on a suspension. The axle should be located on the back side of this bracket, with which the right side moves forward. Adjust the wheel and check the nuts.
For more interesting things about bicycles and everything related to them, look at bikepedia.ru.
03/05/2013
Probably the most common breakdown in a cyclist is a tire puncture, especially if he rides in an aggressive style. Either he hit the glass, then a nail, and sometimes he just ran into the curb at speed.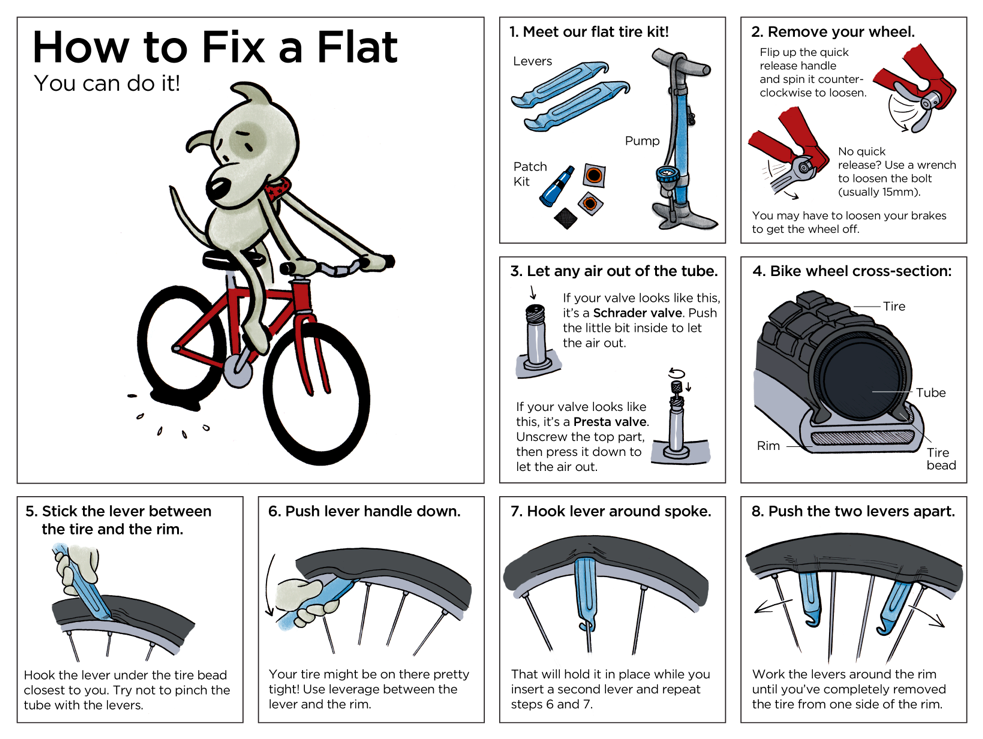 Experienced cyclists can change the camera in the bike with your eyes closed, but what about a beginner who can’t even remove the wheel, let alone change the camera. The main thing is not to despair! If you are traveling a long distance (and always better), take a pump with you, a spare tube, or, in extreme cases, a "bike first aid kit" for the wheel. Someday she will save you from the fate of pulling the bike "on yourself".
So, if you punctured the wheel , first you need to get off the bike, in no case continue to move on a flat tire . Firstly, you will tear the tube even more, and secondly, you can ruin the tire, and in the worst case, the rim.
How to change the tube on a bicycle
1) If the wheel has not completely deflated - deflate it to the end, to do this, unscrew the nipple (spool) cap. If you have a nipple (spool) the same as in the car, press something sharp on the small button in the middle and hold until the tire is flat. If you have a cap with a key for the spool, then just unscrew it. If you have a nipple (spool) like in old bicycles, unscrew the lamb and take it out.
2) Remove the wheel. If the wheel is on an eccentric, removal will not cause difficulties, if not, then keys will be needed (depending on the bike and wheel - 13-17).
3) If you have pliers, use them to remove the rim from the wheel, if there are no pliers, you can use an improvised tool (wrenches, etc.), but it is advisable not to use objects with a sharp edge - this can lead to damage to the tube or rim. Tear the tire with your tool and, resting it against the rim, press down until the edge of the tire comes out of the rim, then take the second key or mount and do this action again, while NOT removing the first key. When you feel that the keys do not lean back when you release them - just try to move the second key in a circle away from the first key.
4) Remove the camera by simply grasping it with your fingers. Grasp the opposite side of the nipple (spool).
5) In principle, it is possible to insert a new tube, but I recommend removing the tire completely (this can be done by hand or with tools (wrenches)).
Check the condition of the rim: there are no metal burrs inside, check the condition of the rim tape, look inside the tire. This should be done if you change cameras frequently and don't know where you might have blown a tire.
How to install a tube in a bicycle wheel
1) Take a new tube or a sealed tube (how to glue a tube), squeeze it with one hand and move it around - this will help to clean it of unwanted foreign objects (pieces of rubber, metal chips, etc.) .d.)
2) Lightly inflate it, if you removed the tire completely, put it on one rib (if the rubber is directional - make sure you install it correctly (you can peek at the rear wheel if the treads are the same)). Roughly mark where the hole from the nipple (spool) is, put the chamber into the tire without twisting or breaking it.