By J. Wayne Fears
You finally have a tract of land to manage for deer hunting, and you can’t wait to locate and plant food plots. However, you must wait because you don’t have the budget to buy a farm tractor and the needed implements.
Hold on. Don’t give up yet. If you have an ATV or side-by-side, chances are you can still do some of the same things on your property you could accomplish with a tractor. Plus, you can get the ATV into remote places a tractor can’t go. All you need to do is to shop for ATV farm implements that can turn your ATV or side-by-side into a workhorse. Many used models are available at reasonable prices.
The ATV as a Tractor
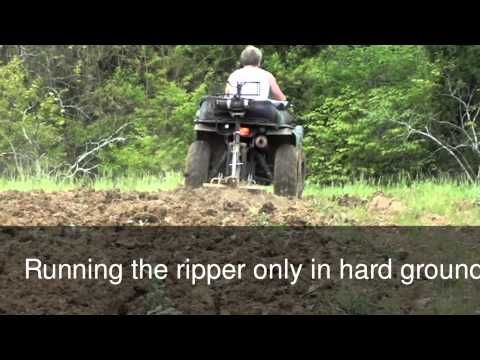
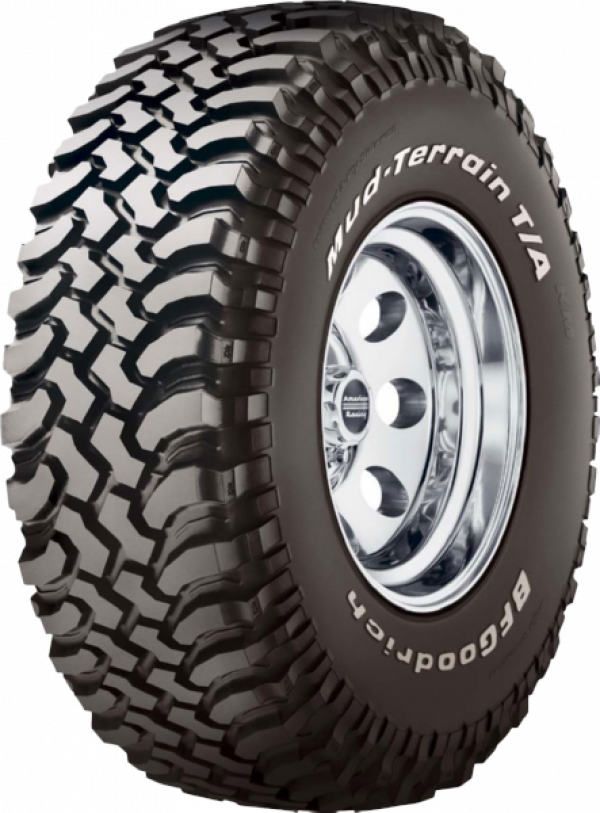
A new generation of deer hunters is discovering the year-round fun of managing habitat, including creating and planting food plots that will attract and nourish deer. Many of those hunters are buying or leasing land to manage for hunting, have inherited a farm or have family land to manage, or are joining hunting clubs that lease land they can manage. However, few of the new generation of hunters/deer managers have a farming background or have ever driven a tractor. Because of that lack of experience, there’s a lot of confusion about the steps to take in developing and planting a food plot using an ATV. Experts agree that for an ATV to be suitable for working a food plot, it must have at least a 450cc engine. Larger is better. It needs to be equipped with a low gear range, aggressive tire treads, four-wheel drive and a strong hitch mount. It requires a lot of horsepower to pull a long-tooth harrow or a set of discs through the soil while occasionally hitting roots or rocks. Also, ATV discs can weigh up to 300 pounds, and pulling that weight through the soil can require a lot of muscle. You want enough strength in your ATV so it can do the job without being strained — that usually requires being in four-wheel drive and running in low gear — and you do not want the ATV to overheat.
 I recently planted a half-acre remote food plot in Imperial No-Plow using a 4-by-4 that had an 812cc engine, a low-range transmission, aggressive tires and a strong hitch system. Using the appropriate implements, it performed like a small farm tractor. Here’s a brief guide to the steps necessary to develop and plant a food plot using an ATV as a tractor.
1. Select Good Plot Locations
Many deer management plans call for at least one percent of the total acreage to be planted in managed food plots. (three to five percent is even better) It’s preferable that the plots not be in one block or just one section of the property. In fact, the food plots should be as equally distributed throughout the property as possible. That offers food to a higher percentage of animals. The best way to locate food plot sites is to travel the property slowly on your ATV and view the area, looking for natural openings such as old fields, utility right-of-ways, log loading areas and small clearcuts. Study each potential site carefully. The more isolated the location, the better. Give a high priority to areas where the soil is rich and moisture is good, but not a wetland. Ideal food plot sites have an irregular tree line. Use a GPS and mark the locations on a topo map, and record the sites in your wildlife management plan.
2. Prepare to Till the Plot
After you’ve selected food plot sites, it’s time to clean the sites and prepare to till the soil. The first rule of tilling is to clean a new or existing food plot site as much as possible so you can better evaluate what type machinery will be required to break and prepare the seedbed. This needs to be done a couple of months before the planting season. Using your side-by-side or ATV with a trailer is a convenient way to remove ground litter by hand. The trailer or a side-by-side with a bed can be kept close to the workers, minimizing cleanup time. Pick up everything you can, including rocks, limbs and logs. You want to evaluate the bare ground. If weeds and other vegetation cover the plot, you can use the ATV with a herbicide sprayer attached to quickly kill the competing plants. When dead, they can be plowed under or removed by hand.
ATV vs. Tractor
After the food plot is cleared, it will be easy to see what you’re facing to get the plot tilled and the seedbed prepared. Can it be done with an ATV, or will it require a tractor? Ask these questions:
• Is the food plot site new?
• Is it in an old logging road or log landing?
• Is the site an old, overgrown field?
• Are there lots of stumps and roots in the plot?
• Are rocks as large as a grapefruit or larger present at the plot site?
• Is the soil a tight soil, such as red clay?
• Is the plot larger than three acres?
If you answered yes to any of these questions, you had better plan to use a tractor with at least 30 horsepower and heavy discs, or contract with a local farmer to break the plot with a strong farm tractor and discs. Trying to use an ATV in most of those situations can be dangerous, frustrating and hard on equipment, resulting in a less than- desirable crop. It’s simply more than an ATV was designed to do. However, if the plot is established and has been broken annually and planted in annual crops, or is in an area free of roots, stumps and large rocks, and the ground is a loose soil, such as a sandy loam, and has not been compacted by heavy truck traffic, you can probably use your ATV. That assumes the ATV meets the requirements to pull a heavy set of ATV-designed discs to break the ground and a harrow to prepare the seedbed.
3. Tilling a Seedbed
I’ve written many times that one of the most common mistakes food plotters make is not preparing a good seedbed. I consider poor seedbed preparation the No. 2 reason food plots fail, right after not following the recommendations of a soil test. Tilling a food plot should not be rushed. It will take several passes with the cutting disc to establish a good seedbed, but with patience, you can do it properly. Remember to break the field when the soil is dry, and take your time. Using an ATV, you’ll typically have to go over the field several times. Good seed-to-soil contact is essential for a productive food plot, and you want a level, fine-textured seedbed. When the soil is broken up, the next step is to level and smooth the seedbed.
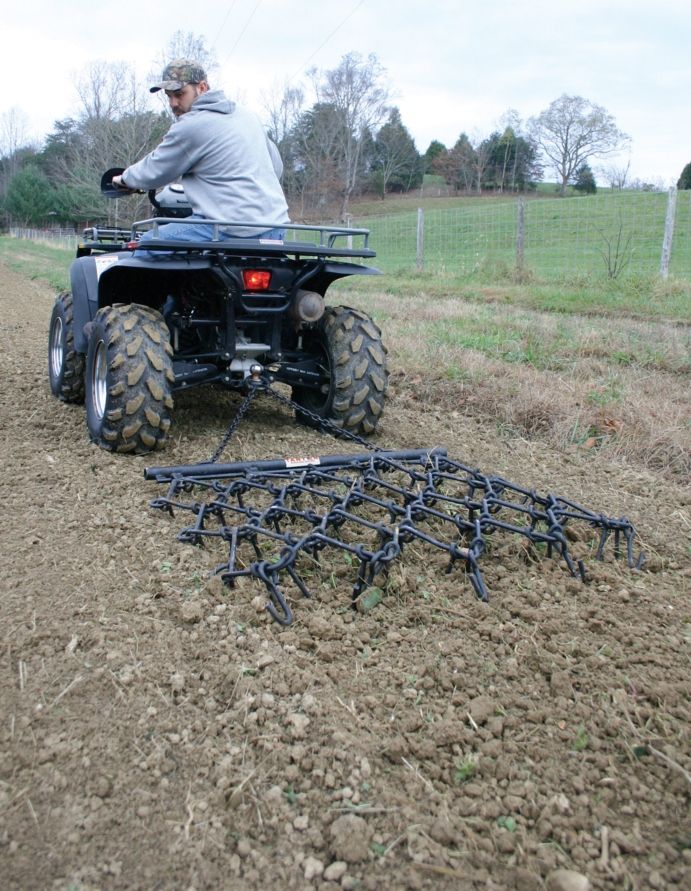
4. Smoothing the Seedbed
Using a drag-type harrow, sometimes called a chain harrow, attached to your ATV, drag the food plot several times with the longer tines down to break up small clods and remove weeds, rocks and other natural debris. This dragging will also help level the plot. Next, turn the harrow over, and use the short-tine or tine-less side, to drag the field several times to level it for seeding. It’s often necessary to make three to four passes in various directions to harrow a plot properly. Using a drag harrow takes time in a new food plot, as the tines will need to be cleaned of weeds, grass, rocks and sticks from time to time. However, when you have completed the seedbed preparation, you can look at a clean, level, fine-textured field and know your seed has the best bed possible. If you don’t have access to a drag harrow, a section of chain-link fence attached to a heavy wooden timber can make a homemade harrow, sometimes called a drag.
5. Always Soil Test
The next step in planting a food plot can be where the greatest errors occur. During the many years I’ve spent working with landowners and hunting clubs, I’ve seen many food plots where the seedbed was properly prepared, but when it came time to fertilize and plant seeds, folks took shortcuts that resulted in a poor crop. The result was low usage by deer. The best seeds and the best seedbed preparation will not create a quality food plot if you don’t lime and fertilize according to a soil test. Several months before you’re ready to plant your food plots, visit your cooperative extension service agent and get soil tests kits for your food plots or get professional soil test kits directly from the Whitetail Institute. Then, take your ATV and visit each food plot. Take a soil sample, following the instructions with the kit. Send the sample to the designated soils lab for analysis. The report you will receive from the lab will tell you exactly how much and what kind of fertilizer — and possibly lime — you will need on each food plot for the crop you intend to plant.
6. Lime and Fertilize According to Soil Test Results
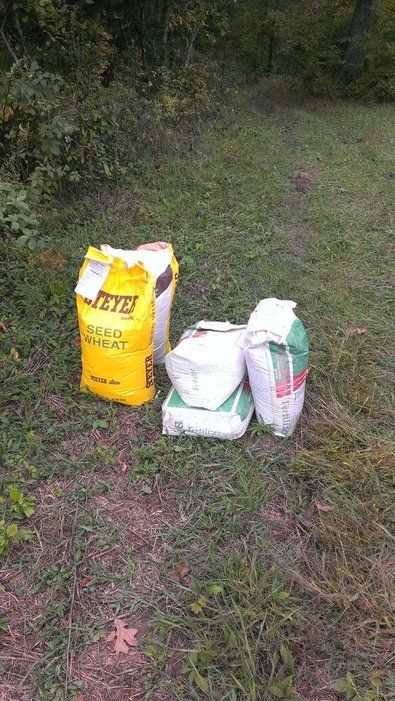
After your seedbed is prepared, equip your ATV with a seeder/spreader mounted on the unit, or use a pull-behind seeder/spreader. These seeders can be used to not only spread seed but also to lime and fertilize the field. Lime, if necessary, and fertilize the plot following the soil test results and recommendations.
7. Plant According to the Recommended Rate
When a plot has been fertilized, wash out the seeder thoroughly, as lime and fertilizer residue can corrode a seeder quickly. Then, calibrate the seeder following the manufacturer’s instructions so it will distribute the seed at the company’s recommended rate. Too few or too many seeds per acre can result in a poor-quality food plot. Take your time to do it right.
8. Cover Seed Carefully
Using a cultipacker or homemade drag pulled behind your ATV, cover the seed according to the seed company’s recommendation. Small seeds covered too deeply may not come up. Seed not covered enough can be eaten by crows, turkeys and other critters. Good seed to- soil contact is essential for a high germination rate. If you’re using a cultipacker and planting small seed like clover or brassica, it’s usually best to cultipack before and after spreading the seeds. Finally, pray for rain. Remember, you do not have to be a farmer to have good food plots, and much of the work can be done with an ATV and some basic equipment.
How-To Guide
Updated on: July 20th, 2021
Get a leg up on your 2021 hunting season by using your ATV to plant a simple food plot this August. Food plots provide supplemental feeding areas to local game, and encourage shy deer out of the woods so that you have better visibility on your prey. Creating a lush, fertile food plot is easier than you think when you use your ATV to do all the heavy lifting.
By planting your crops and cover in early August, you’ll allow for plenty of time for vegetation to grow in. Before planting, take some time to decide where and what to plant, and account for the time it will take to get your soil ready. Here is the step-by-step guide to creating a food plot using your ATV:
Choose a plot that is .25 to .5 acres – any smaller and deer might destroy your plot before it develops. Any bigger and it will require a lot of work to tend and hunt. Choose a spot near a wooded area, or one that’s surrounded by woods or brush. Deer prefer to frequent plots that are close to cover. Try to pick a plot that longer and skinnier – this will offer a better sightline and make deer feel more comfortable.
Take a sample of the soil to your local USDA office or agriculture supply store. Ideally you want pH levels in the 6-7 range. If the pH is lower, mix up crushed lime into your plot. You’ll get detailed instructions of what needs to be done with your soil sample results.
Focus on areas where you will be planting and use your ATV to do the heavy lifting by hauling away fallen branches and debris.
Hook your ATV up with an attachment like a disk harrow or disc plow to really churn up the earth, and follow it up with a drag harrow (or a section of weighted chain link fence) to grade the dirt out. A tine plow attachment will also help with furrowing in preparation for seeding.
To help draw deer out from the denser bedding areas on the edges of your plot, use your ATV to haul in vegetation like brush and fallen tree limbs to create coverage.
Use an ATV spreader to fling seed across your plot.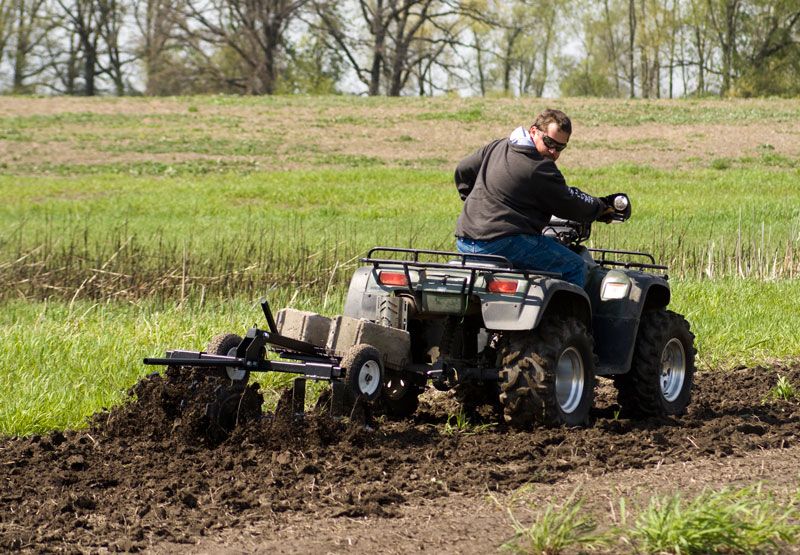 Deer corn planted in the center of the plot can be an attractive draw for shy game. Perennials like alfalfa and clover are hardy year-round ground cover that won’t require a lot of upkeep. Annuals like turnips, kale and beets can be planted in late summer, and in early fall wheat and oats will ensure a nice crop for hungry deer to seek out. Fruit trees are another option.
Use your ATV to bring in bags of fertilizer, brush clippings and other resources that will help you maintain the natural image and lush growth of your food plot. Be sure to weed regularly to ensure healthy crop growth, and conduct pest maintenance if needed.
Finally, time to reap your rewards! After all the hard work prepping and planting your plot, you should have a nice area that’s very respectable and appealing to deer – not to mention easier to hunt than the dense woods. Set up tree stands and ground blinds in optimal viewing areas, and make adjustments to your plot wherever you see fit, including using your ATV to haul in more “junk” fixtures to create perceived cover for deer.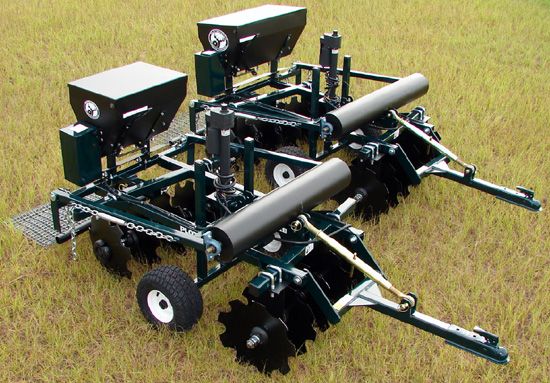
Spending the time this August will pay off in November, and with the right maintenance and tools, you can repurpose a well-groomed food plot year after year. Happy hunting!
Share This Article
Top Related Articles
More How-to Guides and Articles
ATV plow will be an excellent solution for those who have suburban household plots, access to which the tractor is difficult or impossible at all, or if there is not enough space on the plot for the tractor driver to make the necessary maneuvers.
Recently, readers of our site very often turn to us with a request to place materials on attachments for an ATV, and we decided to open a whole series of articles on this topic with the topic of making a plow for an ATV with our own hands.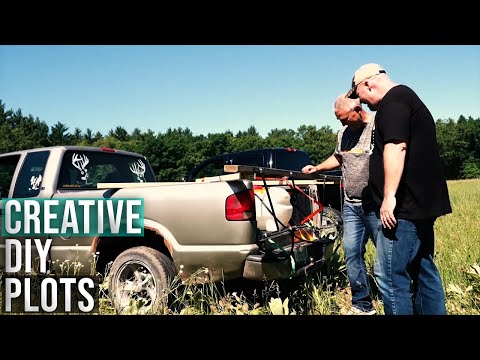
Visually, there is nothing complicated in the design of the plow, but everything is not as simple as it seems at first glance, since the plow is a very thin agricultural tool and the quality of arable land will directly depend on the accuracy of its design and correct adjustment.
When plowing a site, it is necessary to achieve a complete turnover of the earth layer. All cut layers should be approximately the same in width and depth, and you should also aim for full coverage of fertilizer and weed seeds.
The design of the plow should provide for the ability to adjust to different conditions and soils, because the adjustment of the plow will determine the uniformity of the plowing depth, the width of the grip and the durability of the structure as a whole. So, for example, incorrect installation of the plow in height will lead to digging or, on the contrary, to deepening of the plowshare (plow body).
Let's see how the body of the plow or, as it is also called, the plowshare is arranged.
So, we decided that a plow for an ATV must have a height adjustment, it must also be easily and quickly attached to an ATV, preferably by means of a tow ball, and, of course, the plow must have a lifting mechanism for transportation and making maneuvers when plowing the site.
All these characteristics are satisfied by the author's plow, created on the basis of the device of the well-known plow "Truzhenik". The author greatly facilitated the design for ease of manufacture and improved the prototype, based on the fact that the plow will be used in conjunction with an ATV.
Let's look at the construction drawing of the Truzhenik plow:
As you can see, the plow has a massive structure and is designed to be used with a tractor, but nothing prevents us from lightening and improving it to our needs.
Do-it-yourself plow for an ATV.
The plow is made of a profile pipe with a section of 50x50 mm. Hulls pu-00. 000-01 with a working width of 25 cm were used (these are well-known shares from the plow for the MTZ motoblock), the plow is also equipped with two disc knives (they are needed on virgin soil and eventually lengthen the plow, if they are not needed, from the design they can be excluded).
The size of the plow is calculated based on the dimensions of the grip of the hull, in our case - two hulls of 25 cm each, the lifting mechanism is implemented using a winch installed on the rear trunk of the ATV, wheels 260 and 400 mm are taken from cargo carts, the coupling is standard on the ball hitch. The weight of the plow in running order is 70 kg.
To adjust the depth and position of the frame, the following was done:
As you can see, the mechanism is easy to set up and easy to manufacture.
An adjustable field wheel stroke of 4 cm has been implemented.
The furrow wheel has the same adjustment.
The attachment of the lifting mechanism, in our case it is an electric winch, looks like this:
The long side of the plow frame is 1200 mm.
Frame short side 760 mm.
Field wheel offset - 240 mm.
Furrow wheel offset - 240 mm.
As you can see, the design of this plow fully satisfies the basic necessary characteristics of a working plow, and tests in the field once again proved the thoughtfulness and coherence of the design. You can evaluate the work of the plow by watching the video clip below.
It is more expedient to use a plow (especially on virgin soil) in conjunction with an ATV, which has an engine capacity of at least 500 cubic centimeters, in order to avoid excessive load on the ATV frame, as well as on the variator belt and gearbox.
We hope that the provided material was useful for you, and next spring you will go to your site not with a shovel, but with a plow made by yourself and get real pleasure from the work done.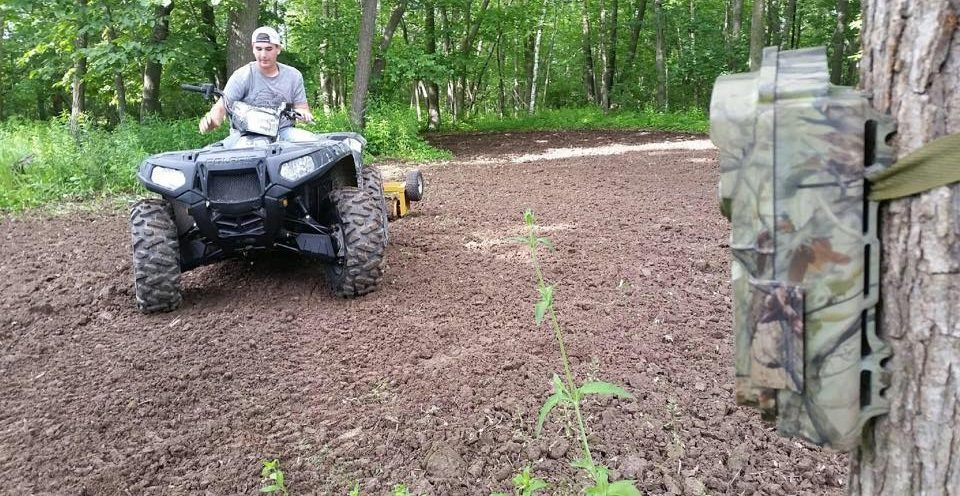 We will be grateful if you share your developments on this topic with us in the comments to the article.
Good luck in the fields and stay with us!
Author of the modernized plow design: CH.SERGEI
Contents
Do you need an ATV blade? If yes, then why? Will a snow plow be useful for an ATV and be able to handle heavy snow drifts?
In the northern regions, concepts such as snow, blizzard, snow drifts are very common.
In winter, in the outback, in the villages, and even in underdeveloped towns, you often go out into the street, look, and there the devil is. Everywhere there is a snowfield, you can’t get through. You have to wait half a day for a tractor or some other snowplow to drive by.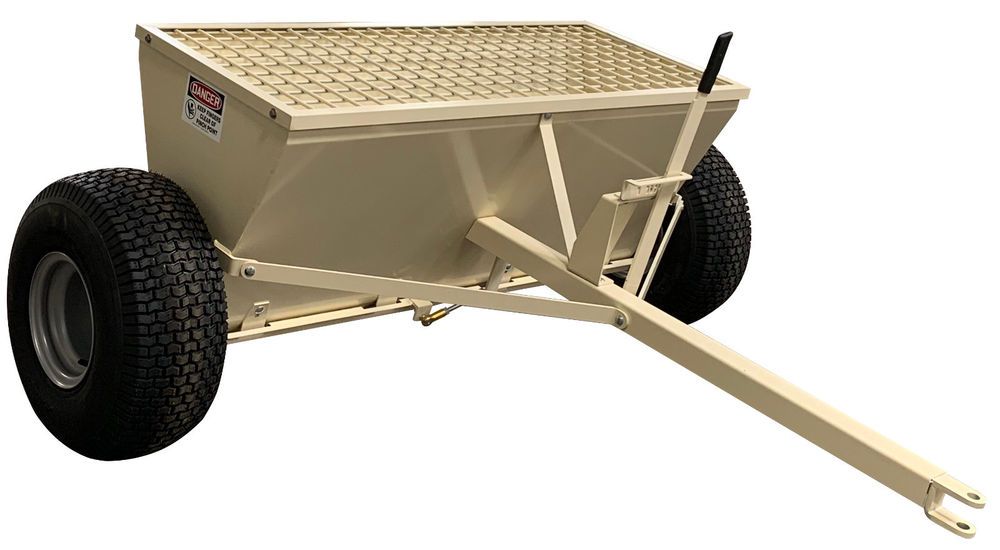 Many have large areas in the yard on the plot, summer cottages, which are also covered with snow. But the difference is this: no one will clean your snow there. And you have to turn back such volumes yourself.
Of course, for some people it is only for joy, but for others, snow removal brings certain inconveniences, because it will take a lot of time and effort. And so if you have an ATV in your possessions, and preferably on tracks and large areas of personal plots, I advise you to purchase a blade for an ATV.
This thing or an additional component of the quadric is simply necessary, and its purchase will make life more fun and free in time, and your paths, paths, parking lots, skating rinks will be clean. Who is not afraid of the cold, you can also get children's ATV and give the child the opportunity to frolic in the winter)).
Snow plow for ATV - quite simple and quick to install. Its main components :
 Thanks to him, you can easily remove and install the dozer in a short time alone;
 The blade for the ATV is made of steel, the thickness of which is from 2 to 6 mm.
When choosing a snowplough for your ATV, it is worth considering the necessary requirements. Judge the following: dumps differ in height and width. The width should slightly exceed the width of the ATV. This is explained by the following: during cleaning, the bucket must free the road from snow directly to the ATV itself, it is necessary in order to better grip the wheels with the road surface, and snow chains .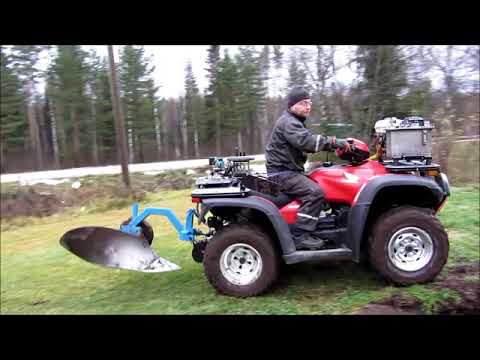 Otherwise, the movement will be difficult for the quadra, and if there is a lot of snow, you will not be able to clean the required area.
Depending on the control and method of lifting, plows can be divided into three types:
here is a video of the pneumatically controlled blade option, we look interesting
The first way speaks for itself. But here you have to sweat a little, but such a snow plow for an ATV is the most affordable and cheapest option. The second way is a little better - maneuvers with a bucket are performed by a winch pre-installed on the machine, the third case is an electric motor. This method is the most technologically advanced, but also expensive.
Remember, not every quad can clear snow.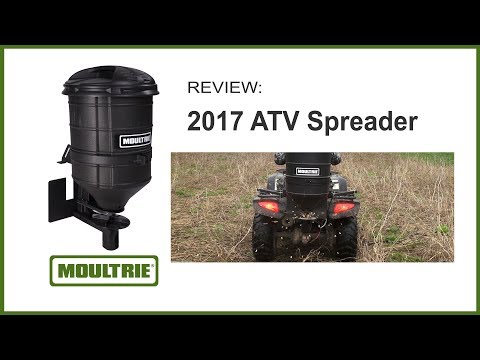 Power should not be less than 300 cubes. Otherwise, the efficiency will be small.
Snow plow from China - plus it has one - availability. In terms of quality, of course, not very good. The fastening of the bucket to the frame is weak, it is welded with a single point of poor quality. Most of the proposals have a width of 1.25 m, which is not enough for the production of high-quality cleaning. In operation, the bucket must have a rotation angle, and a width of 1.25 will not allow this. Also cheap low-quality components, simple design. Well, respectively, agree yourself, what price, such quality.
Snow plow WARN - I will immediately note that the workmanship is quite good, the design is well thought out. The width allows you to do quality work in a short time. Reliable adjustment and control mechanisms. Accordingly, a good quality product cannot be without a good price. I note the high cost, a snow plow of this brand has a limited number of copies, due to delivery from America.
Snow blade ATV STAR - also high quality. High-quality paint - will protect against corrosion. Pretty good accessibility in Moscow. The difference from the American counterpart is an affordable price. They are much cheaper. As a result, in my opinion, it is worth looking at this particular model.
This video shows a homemade blade with dimensions of all parts, fasteners
And so, do-it-yourself blade - what is required?
Firstly: iron sheet, springs, grinder, welding machine, ruler, pencil (chalk), metal profiles, and of course various components in the form of nuts, bolts .