By Meagan Fikes Leave a Comment
Some links on this site are affiliate links which means that if you make a purchase at one of these links, I may receive a small commission at no additional cost to you. Additionally, I am a participant in the Amazon Services LLC Associates Program, an affiliate advertising program designed to provide a means for sites to earn fees by linking to Amazon.com and affiliated sites. I only link to products and services I personally recommend and believe will benefit my readers. These links help to cover some of my blogging expenses. I appreciate your support!
I've missed decorating cakes so much! You may have seen me mention or read in my bio that my passion for cooking began with cake decorating. After being diagnosed with gluten intolerance, I gave up cake decorating for a while because 1) I had to start cooking all my own meals so there was no extra time to make cakes, 2) I was unsure if certain decorating ingredients were safe for me, 3) I had my doubts that a cake without gluten would be sturdy enough to hold multiple layers and heavy decorations, and 4) I had to replace all my decorating equipment that had touched gluten which is so expensive! The idea of picking it up again was overwhelming.
I took care of my urge to bake by re-learning how to bake, this time using unfamiliar gluten free flours and other ingredients. I stopped sharing large cakes with people and started a blog to share my own original recipes. I also switched my creative outlet from cake decorating to food styling and food photography for the blog. All of this kept me happy but I still had the itch to make more cakes.
My son's first birthday was in December and I decided to just go for it! He's obsessed with cars and wheels (and anything that kind of looks like it might be a wheel) so I started thinking of how I could make a cake look like a car or the simpler shape - a tire.
I was at a loss on how to make the tread so I started searching Pinterest and yes, this had been done many, many times before. I really liked the tread pattern used on the website "Yes It's Cake" so I tried to imitate that pattern.
Now, keep in mind, I wasn't great at cake decorating before this and it's been about seven years since I last tried! I took a few shortcuts that I knew better than to take and unfortunately, it shows.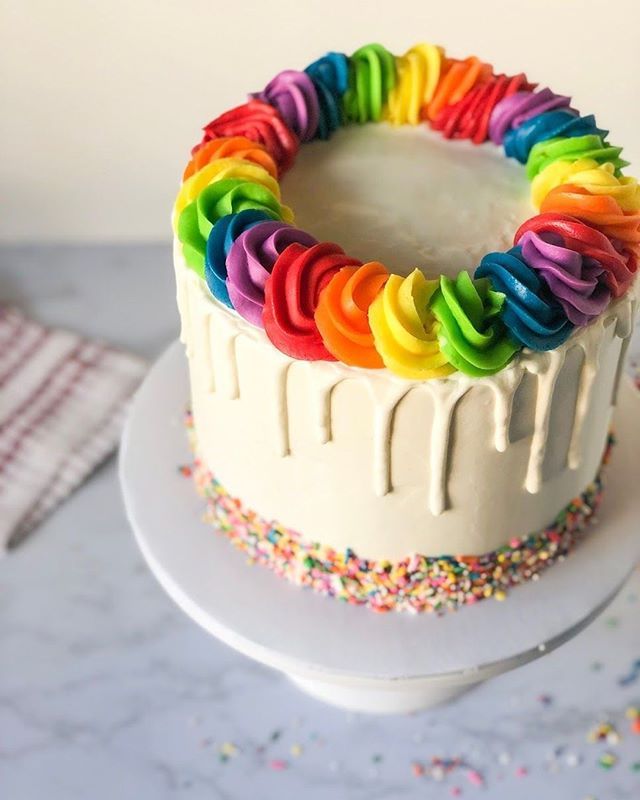 And those "shortcuts" really only saved a few minutes over the span of a nine hour project so it wasn't worth it. I'll tell you where I cut corners and what I would do different next time.
I think the most obvious mistake was the piping icing. I couldn't find my recipe for the icing I usually make (which wouldn't have even taken 10 minutes) so I just used the store bought stuff and figured I'd add powdered sugar to stiffen it. Except I lost my patience and didn't add the powdered sugar. Since the icing was too runny, the grass didn't hold a nice shape and many strands were too long. Thankfully, I found my icing recipe so I could at least include it in this post.
The other negative outcome from not making my own icing was that I also used it as my crumb coat and it was too wet. This caused my fondant to moisten and pull away from the cake. It actually developed a hole and slid partway off which has never happened to me before! I'll admit, I was a little horrified ;) I patched it up but you can see what I mean about it sliding/pulling away in the photo right where the light hits the side.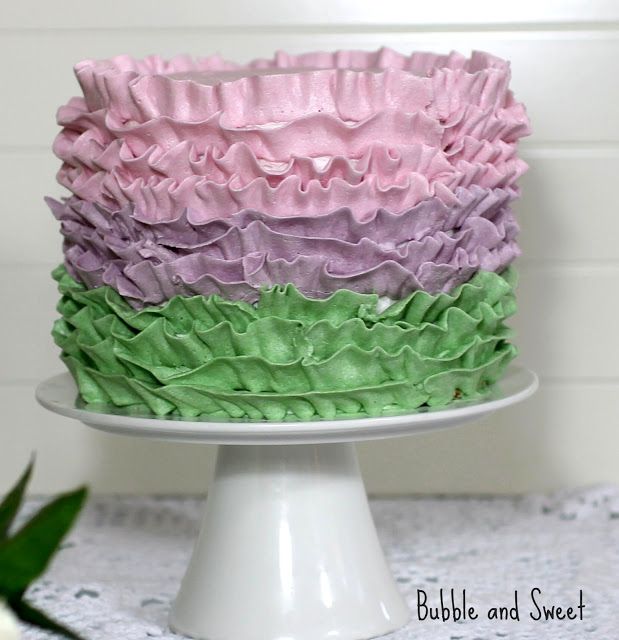
I thought maybe I didn't use enough powdered sugar in my fondant because it was a little wet after I rolled it out on the shortening greased countertop. I really forgot what it was supposed to feel like and just kind of guessed. However, now I think it was wet because I used regular food coloring instead of gel. I know you're supposed to use gel coloring for fondant but I didn't even think to check for gluten free gel food coloring. Turns out, it exists! (Update: I used it in the frosting on my son's 2nd birthday cake and it seems to works well!) The wet fondant combined with the wetter crumb coat contributed to that hole I mentioned. I tried to let the fondant dry out a little by leaving the lid off the cake carrier as long as possible but there was no saving it.
I also wish I would have replaced my fondant rolling pin. Oh man, that was tough to get the fondant over the cake without one! I literally wrapped it over my forearm to lift it up without it tearing. Seriously, get a fondant rolling pin.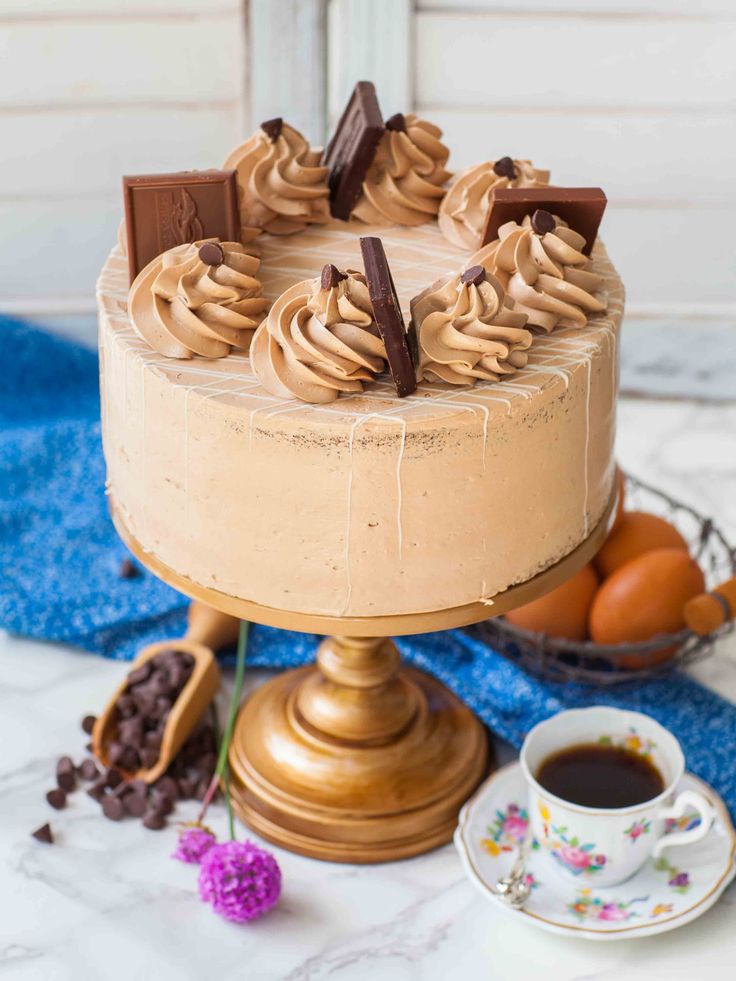 And a lazy susan - I wasn't able to find mine until about a week after I made the cake. Thankfully I was able to hide most of the bumps in my fondant with the tire tread pieces.
There was actually one area I cut corners on and it probably turned out better! I typically only decorate my cake with edible ingredients and planned on making sugar cookie cars but they probably would have been too big. I asked Lenny to pick up a red or blue toy car so he picked those and I love the way they look on the cake. He even found a CRX which he used to drive so that was a really neat addition!
Learn how to decorate a cake using only gluten free ingredients.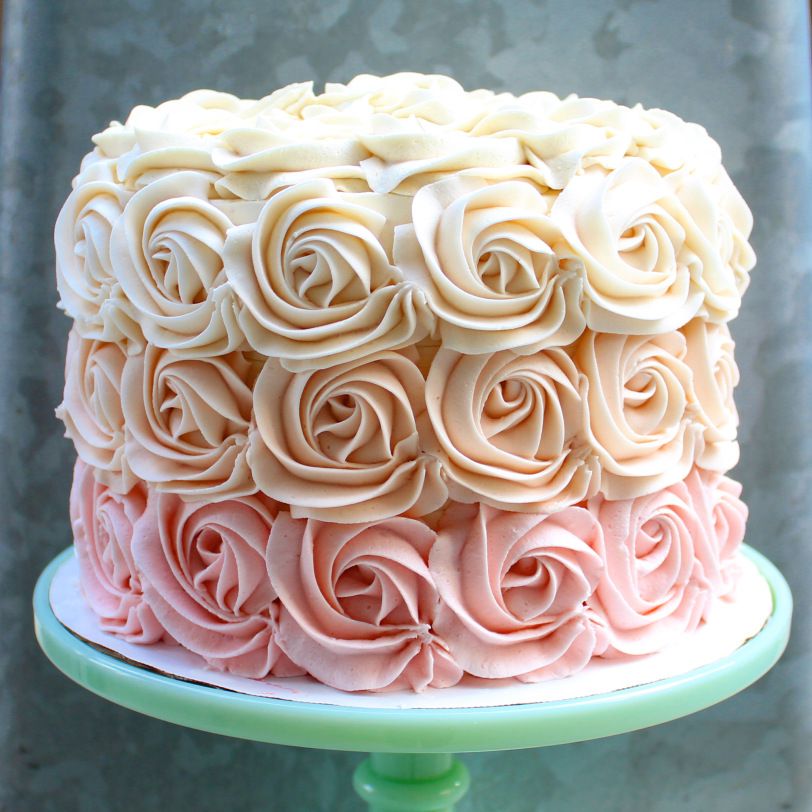 I made this vanilla cake decorated in a tire tread pattern for my son's first birthday.
*Please see notes section at bottom of recipe first*
 Something like these cardboard cake circles would work too)
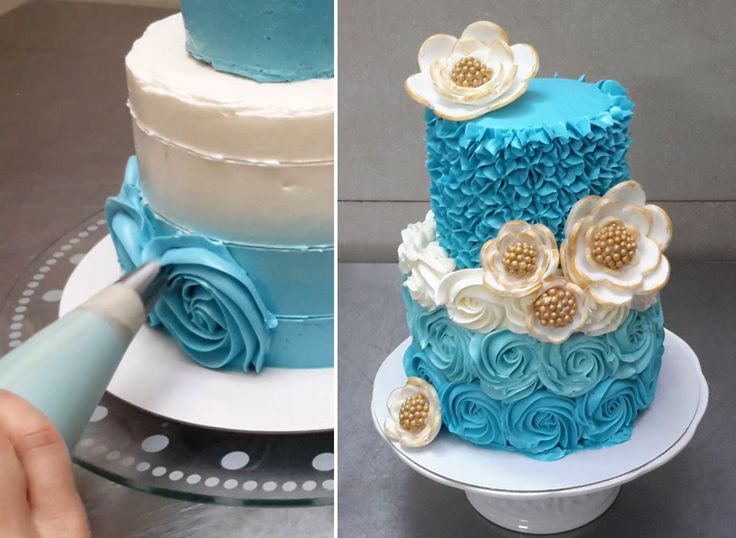 Feel free to add extra flour if needed - any excess flour can be dumped out or saved for the next batch of cake. Just make sure there are no large clumps of flour, especially in the edges of the pan that would create dents in the cake. Set aside.
 Wash and dry the cake pans and prep again as you did in step 3. Repeat the same process to bake, cool, and remove the cake from the pans.
 Place one of your four cake layers in the middle of the cake board so it's secured by the icing smear.
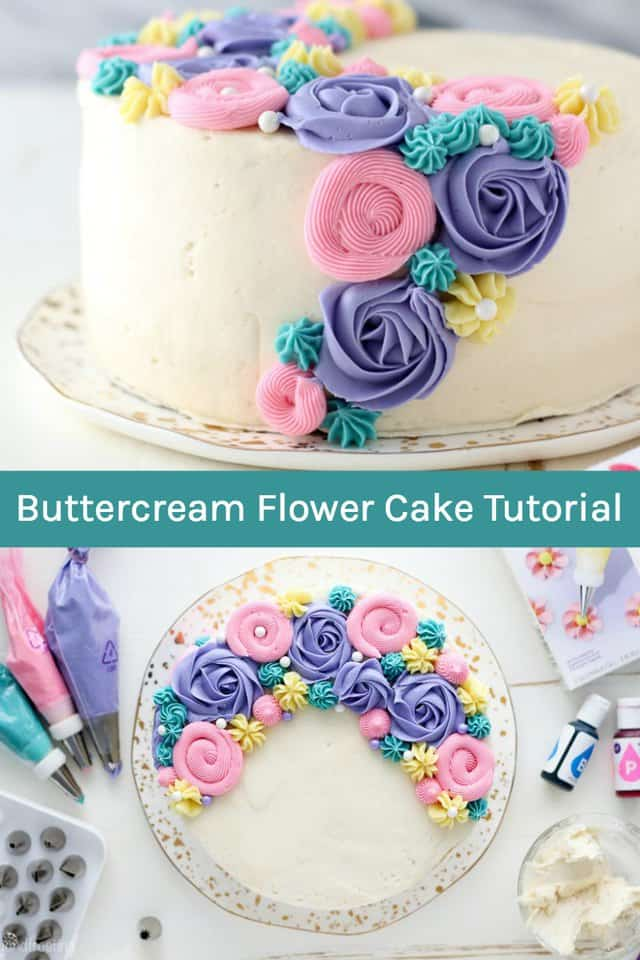 Too thick of a layer can cause the fondant to soften and break. After icing, make sure your cake is still stacked nicely before proceeding. Set the cake aside and store the remaining icing as you did before with plastic wrap and an airtight container.
 Starting at the base of your cake, slowly unroll the fondant up and over the top then back down the other side until it is covered. Grease the fondant smoother with the shortening and gently coax the fondant to lay flat against every surface of the cake, down to the base. Once you work your way down to the base, use a fondant cutter or knife to cut away the excess fondant (save this excess for the next step!). Use a damp paper towel or cotton swabs to clean the exposed area of the cake board. *Tip: If you develop small cracks in the fondant after it's already on the cake, paint in the area with some of the black food coloring.*
 They should stick without needing to add anything.
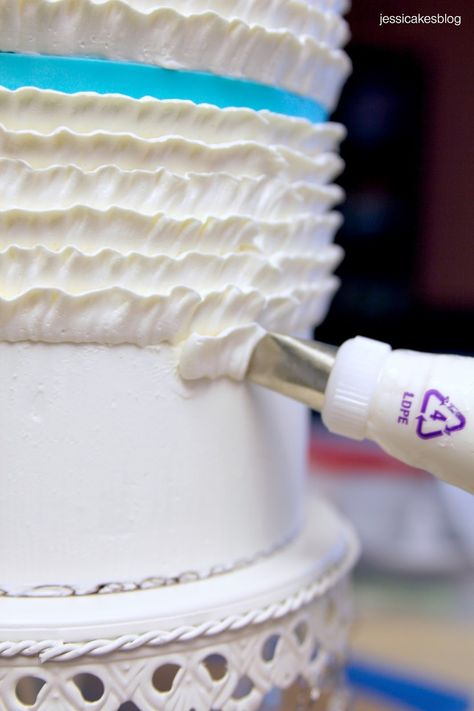
 Put this in a clean piping bag with the Wilton tip #233. Pipe grass all over the top of the cake, staying outside the number you outlined.
I've linked to many of the products I used for this recipe which worked for me (severely gluten intolerant and mild dairy allergy) but if you have food allergies/intolerances or are cooking for someone who does, please thoroughly research the ingredients you buy and follow safe practices to prevent the cross contamination of any problematic allergens while cooking.
Even if you own four of those 8 inch round cake pans, you don't want to put four pans in the oven at the same time unless they all fit on the same rack. If you have some on the top rack and some on the bottom, they won't bake correctly.
Tag @eatsomethingdelicious on Instagram and hashtag it #eatsomethingdelicious
· Modified: by Rose Atwater · This post may contain affiliate links · 7 Comments
This Good Years Tire Cake is the perfect cake for a man (or woman) who loves cars or is in the auto industry! Or in this case, is celebrating a milestone birthday! Ed was celebrating 49 "good years" and loves his cars! His wife ordered this cake for him! Keep reading to find out the details of how I made it.
I don't take a lot of last minute orders. But every now and then I get a request I can't say "no" to. This was one of those times. When the client called, it was Thursday and she wanted to pick up the cake on Saturday afternoon. Talk about last minute!!
But when she sent the pic and it was a tire cake (and I only had one other order that weekend), I knew I had to say yes! I'd had this tire tread impression mat already for quite awhile and I'd only used it once (I think). Plus, my brother owns a tire shop so I thought it would be cool to show him as well.
So, here are the details:
This was an 8" round vanilla bean cake. It was baked in my favorite Magic Line pans, then cooled, filled and frosted with vanilla buttercream.
I'd haved loved to use the diamond plate texture mat with fondant to cover the board (I'd have used silver spray to make it SO cool!) BUT, since it was such short notice, I just wrapped the board in silver paper and used a red ribbon border (tutorial here) to make it pop!
For the center of the tire, I scooped out a small amount of cake in the center of the top to give the tire dimension. I re-frosted that "hole", then I covered the cake in Satin Ice Black Fondant.
Next I rolled out a long piece of black fondant (approximately 25 inches long and 6 inches wide). Then I laid the tire tread impression mat over the fondant and used a rolling pin to press it down evenly. I had to move it a few times to get the texture covering the full length.
After measuring the height of the cake, I trimmed the tread to the correct height. Then rolled it up on a rolling pin and unrolled it around the cake. The soft fondant adhered to the cake pretty easily but if you have trouble with it sticking, you can use a light brush of shortening or water.
For the top of the cake, I used a round cookie cutter to cut out the "hub" from homemade marshmallow fondant, then I used large round piping tips to cut out the smaller circles. Silver edible spray was used to get it the shimmery silver color. After it dried, I centered it in the hole I'd made earlier.
The letters were done with alphabet cutters similar to these and the numbers were cut with cutters similar to these. I used homemade marshmallow fondant for the letters and Satin Ice for the red fondant.
Satin Ice Black Fondant
Buy Now →Fondant Smoother
Buy Now →Xacto
Buy Now →The only other detail for the Good Years Tire Cake is the symbol.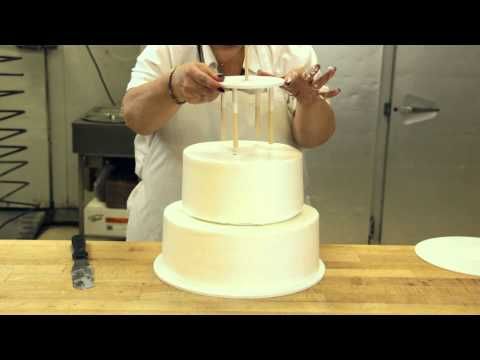 It was a rough hand sketch that I cut out with an xacto blade then used a black food marker to draw the details. Easy-peasy!
And that's it.. I think that's all of the details I can share with you on this cake! If you have questions, leave me a comment!
I do have one more treat for you! Here's another cake I made years ago and never posted... it's an Engine on a Tire Cake:
Rose Atwater is the founder and cake decorator behind Rose Bakes. She is baker, cake decorator, author, wife to Richy and homeschooling mommy to 6 wonderful kiddos! Her work has been featured in American Cake Decorating Magazine, Cakes Decor, Pretty Witty Cakes Magazine, Huffington Post and Cake Geek Magazine. Learn more here...
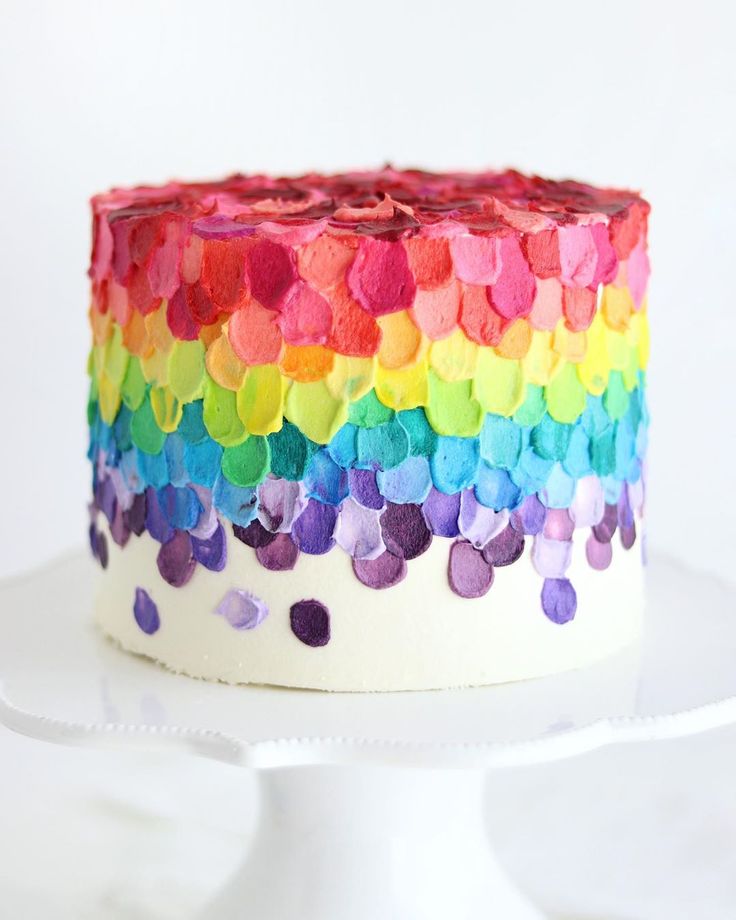
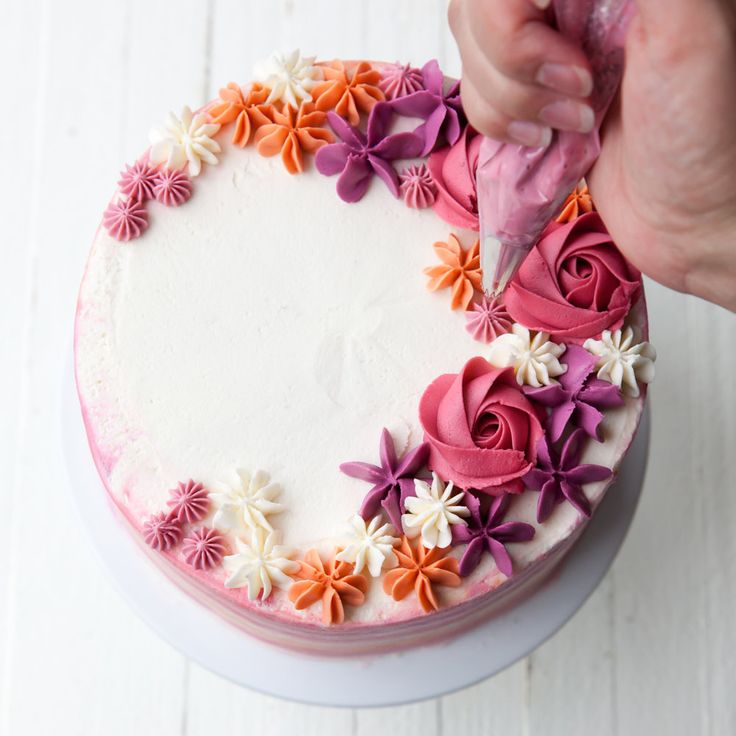
Learn how to make the perfect buttercream! How to make buttercream? How to diversify buttercream? How to work with oil cream? Why didn't the buttercream work? Everything you need to know about butter cream in the article!
Table of contents:
1. How to make buttercream?
1.1. Classic buttercream
1.2. How to cook butter cream with cream and condensed milk?
1.3. How to cook butter cream with sour cream?
1.4. How to prepare a protein-oil cream?
2. Why didn't the butter cream come out?
3. How to diversify buttercream?
4. How to work with oil cream?
5. Everything you need to know about buttercream
Cake Anthill of biscuits with condensed milk Butter cream is very often used by many housewives to prepare various cakes and pastries. Unfortunately, such a cream is not always successful on the first try. Once I decided to make butter cream with sour cream to level and decorate the cake, but, unfortunately, my efforts were in vain - the butter exfoliated and the cream did not work out. After this incident, for a long time I could not dare to make cream with butter again. Of course, it was not worth doing this - after all, you can easily avoid mistakes in cooking by delving a little into the theory. I have collected a lot of information about the intricacies of creating buttercream and now I am happy to use this cream for a variety of desserts! Let's find out together everything you need to know about a successful buttercream: how to avoid cooking mistakes, what to use it for and how to work with it.
It is possible to make buttercream with just butter and powdered sugar, but many people find this cream too thick and thick. Therefore, housewives often add condensed milk, heavy cream, sour cream, whipped proteins to butter. Each variation of butter cream is good in its own way. Try to cook everything to choose the best one for your dessert!
This cream has been familiar to many since childhood. It is very dense and is great for leveling and decorating a cake. Keep in mind that it is very oily and many people prefer lighter creams (for example, with the addition of cream, condensed milk and other ingredients besides butter). We will consider their preparation in the following ways.
For the preparation of classic oil cream you will need:
Oil to room temperature (+-25 degrees).
Important: If the oil can be pressed with a finger, then it is ready for use.
It is better to sift the powdered sugar before preparing the cream. Milk for cream should be used at room temperature or cold, but not hot.
Start whipping the butter with a mixer until fluffy and continuing to beat gradually (partially, not all at once), add milk and powdered sugar.
Cake Napoleon from ready-made puff pastry Optionally, you can add vanillin, dyes, flavors to the cream. If desired, milk is replaced by syrup or strong coffee - for example, you can make coffee buttercream or cream with strawberry syrup. Experiment!
This cream is already much more gentle than the classic oil cream, but it can also be easily used for smoothing.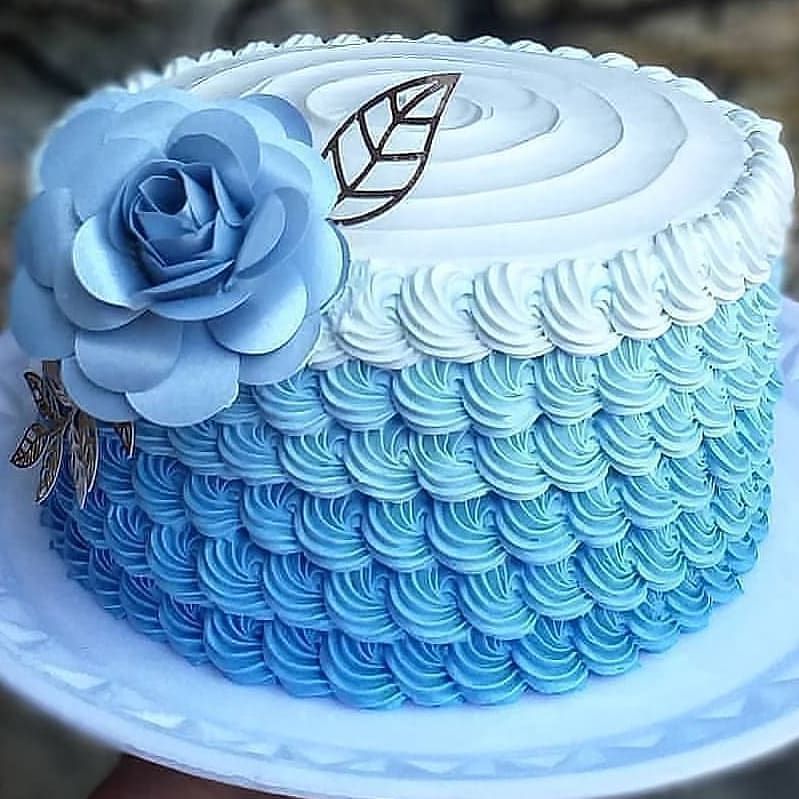
For preparation you will need:
The butter must be brought to room temperature before preparing the cream, but the cream should be used chilled. Condensed milk can be either at room temperature or chilled.
Whip the cream with powdered sugar until whisk marks remain on the surface (but not to stiff peaks, they should be runny). Whip the butter until fluffy and light. Continuing to beat, gently add the condensed milk in a trickle. Carefully transfer the whipped butter to a bowl with cream and beat until smooth.
for the preparation of oil cream with sour cream will be needed:
Oil and sour cream must you need to leave it at room temperature (whipping will turn out only soft enough butter at room temperature, and too cold sour cream can ruin the cream - it can simply exfoliate).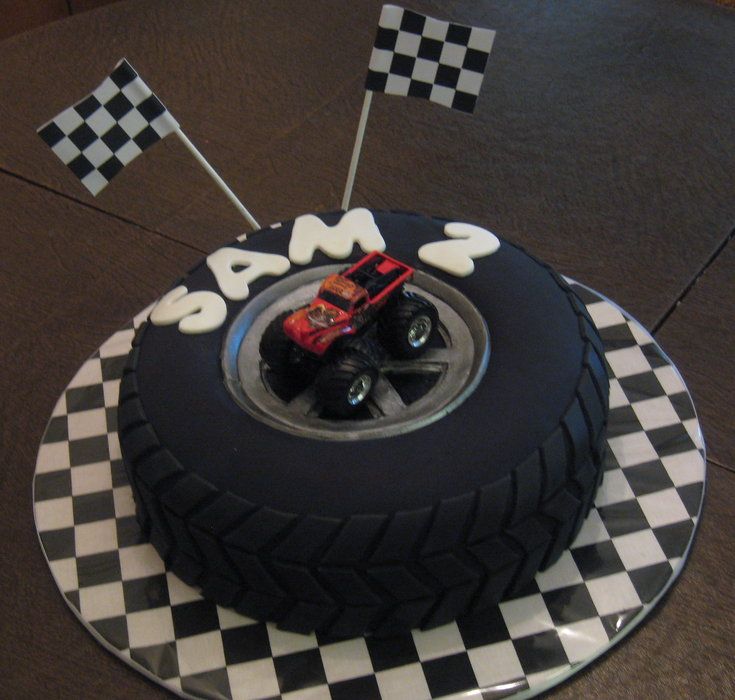
Beat butter with powdered sugar until fluffy and white. Now gradually add sour cream - make sure that the cream does not turn out to be too liquid (it is better not to add all the sour cream at once). The cream must be whipped to a homogeneous consistency, if desired, you can add vanillin or other flavoring.
For the preparation of protein butter cream you will need:
Butter for cream must be brought to room temperature. Proteins with sugar must be mixed in a container and heated in a water bath to 60 degrees, stirring continuously (but not whipping!). Sugar should dissolve at the end of heating. Proteins with sugar must be whipped to firm peaks without removing from the water bath. Remove the meringue from the water bath and continue beating until completely cooled.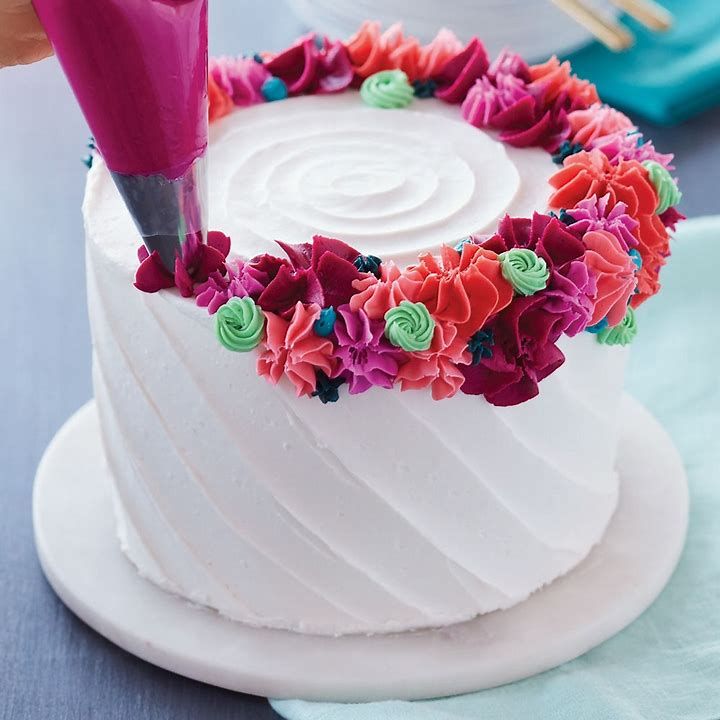 The room temperature softened butter should be gradually added to the meringue - take no more than one teaspoon of butter at a time. The cream will be ready when you beat the cream with all the butter until smooth.
Cake with halva Sometimes our efforts go in vain - the ingredients used, the selected recipes, the products that are too hot or cold for the cream, and many other factors lead to the fact that the finished cream is stratified, it turns out to be liquid, not enough or too sweet ... In general, it turns out completely different from what it would be you wanted to see him. What to do with it? How to avoid common cooking mistakes? Let's take a look at the main causes of spoiled buttercream together.
Unsuccessful ingredients for cream
Of course, it is important to get quality, tasty ingredients for making cream. You can not use oil for dessert that you do not like in itself. Tasty, necessarily natural, sweet butter from a trusted manufacturer with a fat content of 82.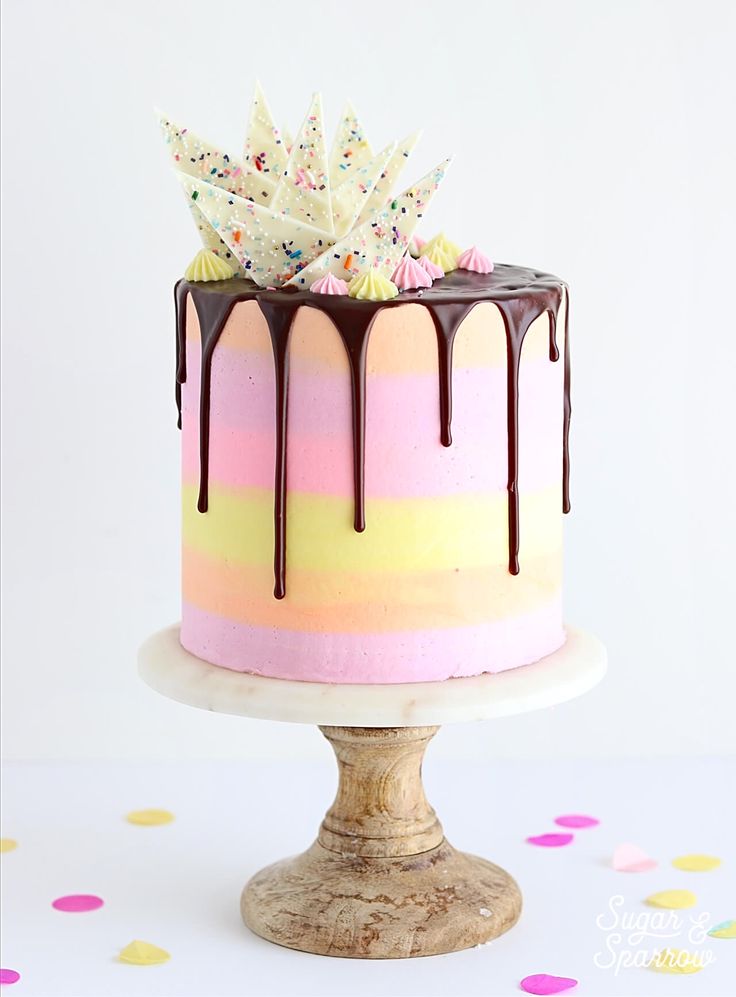 5% is well suited. Choose carefully, because this is the most important ingredient in the cream!
Cream for cream must be of high quality, with a good shelf life, fat content of 30% or more, because. others just don't whip up. Sour cream is suitable for a fat content of at least 20%, preferably higher, because. the fatter the sour cream, the thicker it is (you can also try using thermostatic sour cream, because it is thick on its own, regardless of fat content - even 10%).
An indicator of the quality of condensed milk can be considered the percentage of fat - it should not be higher than 26.5% and not lower than 8.5%. Of course, you should like the taste and texture of the condensed milk chosen for the cream.
Powdered sugar is always better for cream than sugar, as the powder dissolves much faster and better (there will be no undissolved grains of sugar in the cream).
Temperature of cream ingredients
It's not just the ingredients you choose that matters, but the temperature they are! Before making buttercream you need:
If you decide to make buttercream with meringue, be sure to bring the whites whipped with sugar to room temperature, as otherwise, the oil may become liquid, melting in a hot mass.
What happens if you use ingredients at the wrong temperature? The cream will simply separate (because of the difference in temperatures between the ingredients) - you will have to additionally heat the cream and beat it again, and then put it in the refrigerator until it solidifies completely.
Remember: It will be much easier to control the process if you heat the cream in a water bath, stirring all the time until the grains of the separated oil are completely dissolved. Of course, you can use the microwave, but then heat the cream gently, in short pulses, taking it out each time and not forgetting to mix.
It can also separate the cream from the fact that you mix all the ingredients together at once - remember, in recipes it is not just that they ask you to beat the butter separately first, and only then gradually add everything else! The way to save such a cream is the same as for a cream with ingredients that are too different in temperature - heat it in a water bath.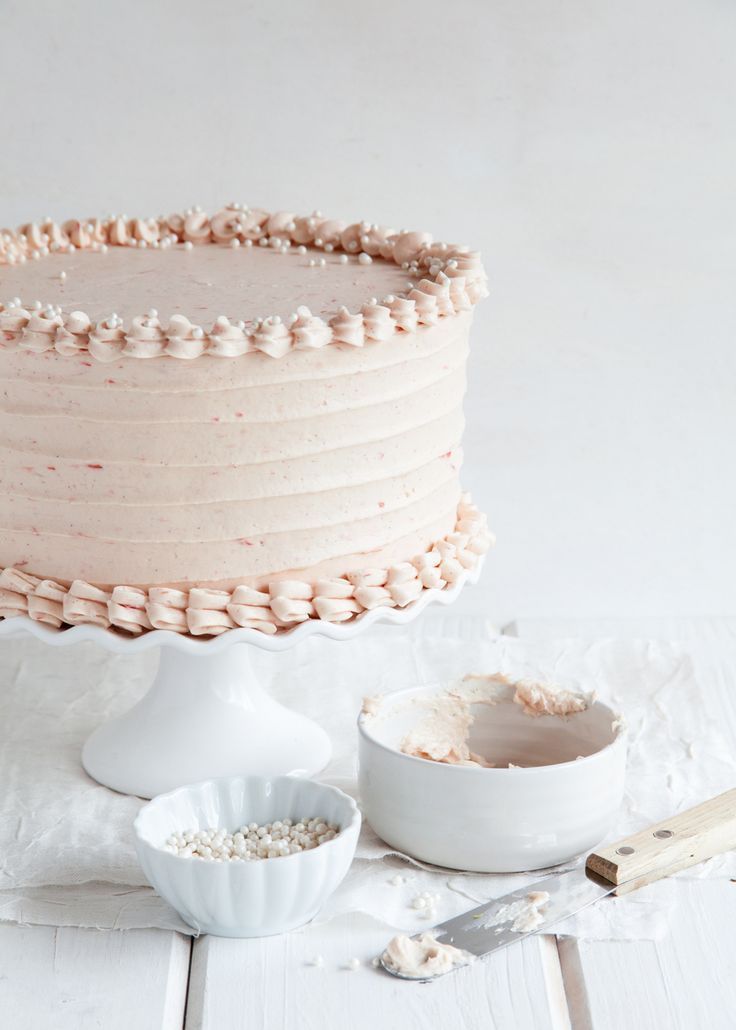
The cream is too runny
If your buttercream is too runny, either the ingredients are too warm or too much liquid ingredients, such as condensed milk.
Protein butter cream for cake and pastries In the first case (when the ingredients were too warm), the butter melted and now you need to put the cream in the refrigerator - after a while the butter will harden again and the cream will thicken. In the second case (when there are too many liquid ingredients like condensed milk, cream ...), you need to add more butter at room temperature and beat the cream until smooth. You may also want to add more powdered sugar - see to taste.
Advice: You can try to save the cream by using thickener bags - for cream or sour cream, but this method will not help when the cream is too thin.
Sometimes cream is runny due to sour cream or cream with too low fat content. The lower the percentage of fat content, the less thick sour cream - not less than 20% is used for cream. And cream of low fat content (below 30%) simply does not whip and, as a result, remains liquid.
Let's look at ideas for how you can complement your buttercream and spice up your desserts:
 You may need a little more liquid ingredients.
 Surely you can come up with even more ways to diversify your usual buttercream! Experiment and try!
Butter cream is very stable, it is good both as a filling for cakes, pastries, other desserts, and as a cream for making decorative items. With the help of butter cream, you can easily decorate the cake with various patterns, drawings, inscriptions, roses.
ERR_RECIPE_UNAVAILABLE (#46586)
Remember : Buttercream softens at room temperature. It is better not to get the finished cake out of the refrigerator too early, because. your patterns on the cake may simply “blur”. This is especially true if the room is hot. Take the cake out of the refrigerator just a few minutes before serving.
You will need a pastry bag (fabric, polyethylene, silicone) and various nozzles (slotted, round, shaped, etc.). If you do not have a special pastry bag, then you can use a cornet - a miniature pastry bag rolled up from parchment.
How to make a cornet?
Fold a square sheet of parchment diagonally. Putting the triangle with the base towards you, tuck the sharp corners of the triangle to its top: first one, then wrap the second around the first. Having combined all the corners, wrap them inside the bag several times to secure.
How to deposit the cream?
With your left hand, grasp the nozzle on the piping bag, and with your right hand, press on the top of the bag, pushing the cream towards the nozzle. Now you can deposit the cream! When you're done, rip the piping bag away from the cream decoration with a quick motion.
Note to the hostess: Butter cream suitable for covering with mastic or velor.
We have covered everything related to buttercream - preparation methods, possible mistakes, features of use ... To consolidate knowledge, let's recall all the most important things to know about buttercream:
 If it can be pressed with a finger, then it is ready for work.
So we remembered all the most important things related to the preparation of such a delicious cream. It's time to put the acquired knowledge into practice! Cooking a cake? Decorate a cake? Add cream to the trifle? Experiment! Think of each new recipe as a field for creativity, try it in small portions and change any recipe for yourself.
[[[QUIZ No. 109]]]
linoleum, you should think about the aesthetics and practicality of parquet floors.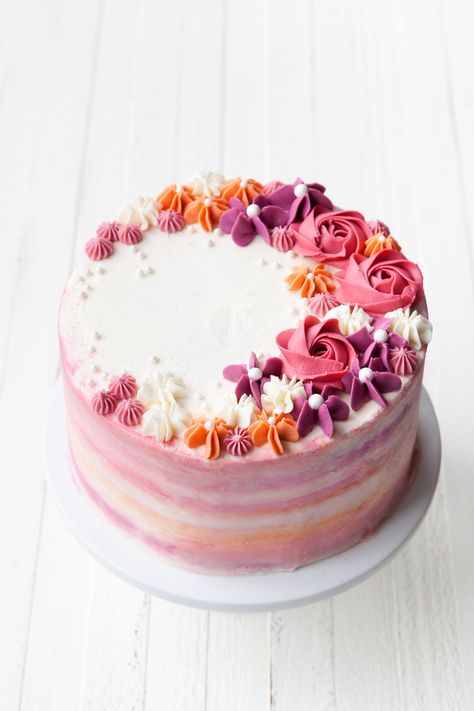 Such a coating, like any other, has undeniable advantages. The material has a natural wood texture and is available for sale in a variety of colors.
This flooring could be the best solution for any room. The consumer can choose the right shade of hardwood to match the design of the kitchen. Another advantage of hardwood floors is that they are much warmer and nicer than tiles. There are a few things you need to know before you contact a flooring professional or place an order. If you do not take into account some shortcomings, over time you can regret an expensive purchase, but also face unforeseen expenses for repairs or the purchase of a new floor covering.
Parquet flooring is usually made from hardwood, which determines the durability of the material. The choice of one of the types of wood will indicate the hardness of the floors. By choosing a quality coating, you can be sure that it will look great and last a very long time.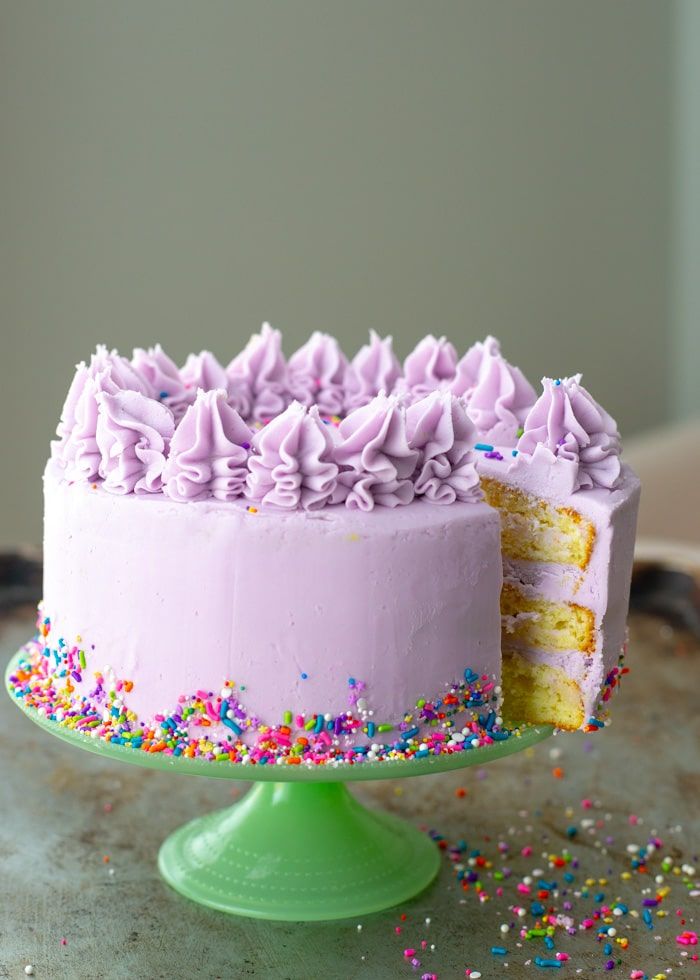
Where you should definitely not go by car. In Russia, drivers were warned about fines
Not Agutin. Why the famous singer's daughters don't have his last name0003
From potatoes to Disneyland: a selection of rare photos of Viktor Tsoi
In addition, parquet cleaning is relatively easy. Every week you can remove debris and dirt with a vacuum cleaner and a mop. That's all it takes to keep your flooring at its best. This distinguishes parquet from tiles, the latter of which is hard and cold.
Parquet is comfortable to the touch and stays warm even in the cold season. Hardwood floors can also improve the air quality in your home. They are allergen-free, so you can achieve a more sustainable kitchen after switching from another less sustainable flooring.
Another advantage of parquet floors is their beauty. On sale you can find many different shades of wood, each of which is able to improve the appearance of the kitchen and give the interior a special look. If you choose the right coating, you can visually make the kitchen area larger. Laying the boards lengthwise will give the impression of a longer and more voluminous space than it actually is. Finally, hardwood floors can even add value to your home. Potential buyers can appreciate the beauty, durability and practicality of flooring.
Cones confused: a passenger had to drive a drone in Arizona
Strange things happen to people after staying on the lake: the mysticism of Baikal
Changes are coming: pasta will soon be packed in small boxes (video)
Although installing parquet floors in the kitchen does not provide many benefits, there are some disadvantages to be aware of. By weighing the pros and cons, you can make an informed decision that you won't regret later on.
Parquet floors are not waterproof. If stains remain on the surface that have not been removed in a timely manner, this can lead to deformation, splitting or swelling of the wood. If there is a water leak in the kitchen that is not detected in a timely manner, it can lead to serious floor damage and the need for further repairs. When cleaning hardwood floors, it is best to use a dry mop rather than a damp cloth. Water during wet cleaning can penetrate between the boards and cause damage to the coating.
Dietitians gave advice on nutrition in the heat
A certain category of people will be given an additional two weeks of vacation
"Something for the soul": the astronaut's wife told what gifts she sends to orbit
Cost is one of the potential disadvantages of parquet floors. Installation can be quite costly compared to laying vinyl floors. If the budget is limited, it is best to make a vinyl or tile flooring that can imitate wood, which is a great compromise.
When it comes to durability, not all wood floors are created equal.