Home » DIY » DIY Used Tire Snowman
As an Amazon Associate and affiliate with other networks, I may earn a commission from purchases made through links within this post. For more information read my disclosure page here.
Published by Lauren on .
Share With Friends!
5 shares
I like getting creative with things that are old, not that it surprises any of you since my love for trash picking is no secret. When Discount Tire Direct reached out to me and said they wanted to partner up and have me take some old tires and make them into something new I was on it. The look on the FedEx guy’s face when he delivered my tires was priceless, but I didn’t waste anytime getting started on my project once they arrived.
These DIY Used Tire Snowman are really easy to make and you can get all your crafting supplies at the local craft store and then take those used tires when you get your new tires off your car to make these!
Set your tires down on the ground and spray paint them white. You will want to do two coats, spray one and let dry for about 20 minutes and then spray the next coat.
Once your spray paint is dry use the Black acrylic paint and on the smaller tire draw 2 eyes and a mouth so they look like coal.
Then on the medium sized tire using your black paint draw 3 buttons that look like coal.
Once the black paint is dry use the orange paint to draw a triangle for his nose.
Let the paint dry completely. Once it is dry stack your tires, large one on the bottom, then the medium sized on in the middle and then the smaller one on the top.
If you are looking for deals on tires, you can head on over to Discount Tire Direct and order them! They are an is a mail order tire and wheel retailer, that has all the name brand tires that you need, from Michelin, Yokohomo, GoodYear and more.
Hey There! I am Lauren, a short mom (4 foot 10 to be exact!) who has a passion for helping others and always has a cup of coffee in hand.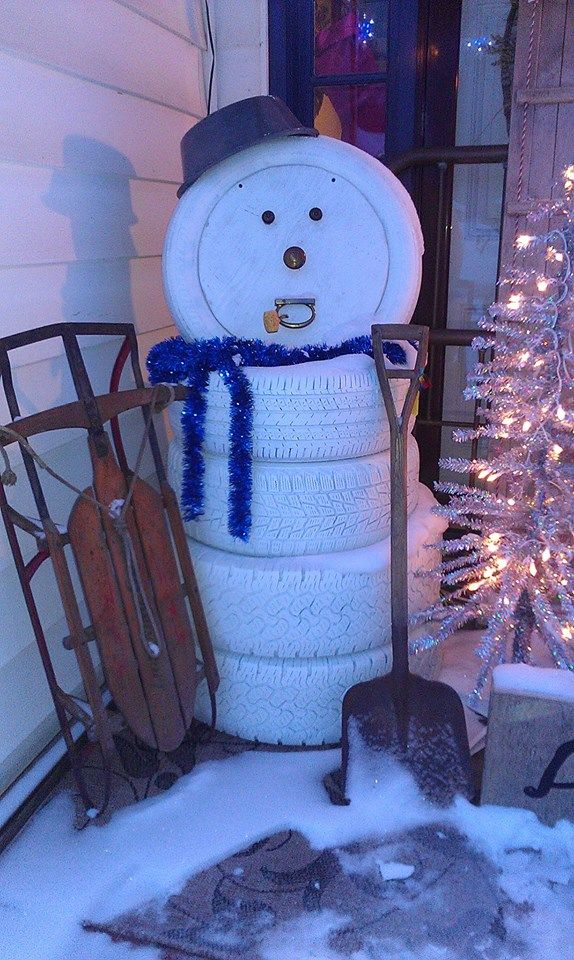 With amazing recipes to help the home cook become a home chef, along with fun family travel, fun crafts and More! Grab a cup of coffee and join me! Read more...
Share With Friends!
5 shares
Get recipes, crafts, travel tips, and more straight to your inbox!
Midget Momma is licensed under a Creative Commons Attribution-NonCommercial-ShareAlike 3.0 Unported License.
What to do if it’s almost winter in the yard and snowit hasn’t fallen out yet or even melted away, but you want to mold a snowman, since the soul requires a winter holiday? DIY Christmas snowman crafts can also be made from many other materials that you already have on hand, or which you can easily find.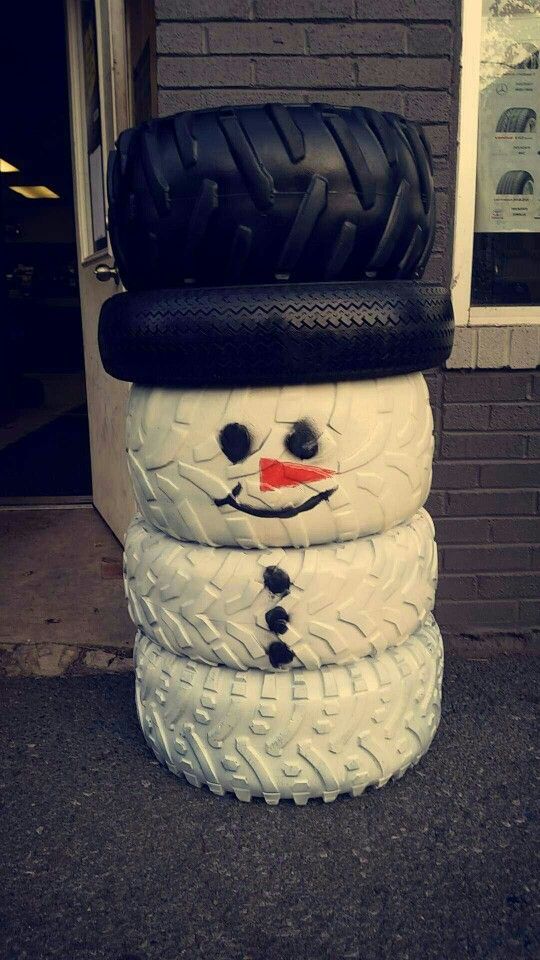 Why not do needlework? And when the snow falls, the article “” - ideas for non-standard forms of this winter street decoration will come in handy for you. Craft a snowman from improvised materials
Video: original ideas of what to make a snowman with your own hands
Snowman made of tires is a fun idea for decor.garden, an article that will stand all winter, is not afraid of the plus temperature and can decorate not only the garden, but also the house inside. There are many interesting and creative and interesting ways to remake old tires into some useful items, such as furniture, a mini-pond in the garden or flower beds. Here is the main article about, videos, ideas and step-by-step workshops on how to do these or other things, and today we have a small New Year workshop: a snowman out of car tires with our own hands. DIY snowman from tiresa house with a family is probably one of the most interesting things to do during the New Year holidays.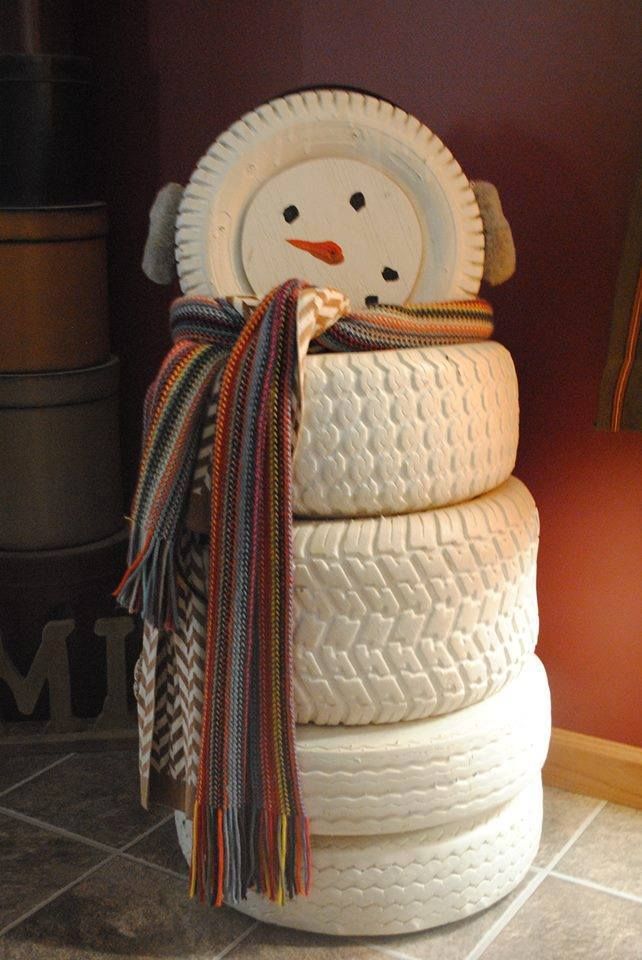 Again, we can turn old tires into funny cute snowmen to decorate our home. What a creative idea - to make snowmen without snow, especially in those places where snow has not yet fallen at all, which is not uncommon in Russia! That should be fun! You can place them indoors or outdoors. In any case, these snowmen from tires will be a great addition to your New Year holiday! And here you will find more ideas for - also with photos and videos. Making a snowman out of tires is easy. We will need:
Instruction: Paint the tires with white paint and let it dry. After that, we add the future snowman, gluing the tires together. There can be several ways, for example, you can lay tires on top of each other both vertically and horizontally - see the photo in the gallery above to choose which snowman of the tires you like best.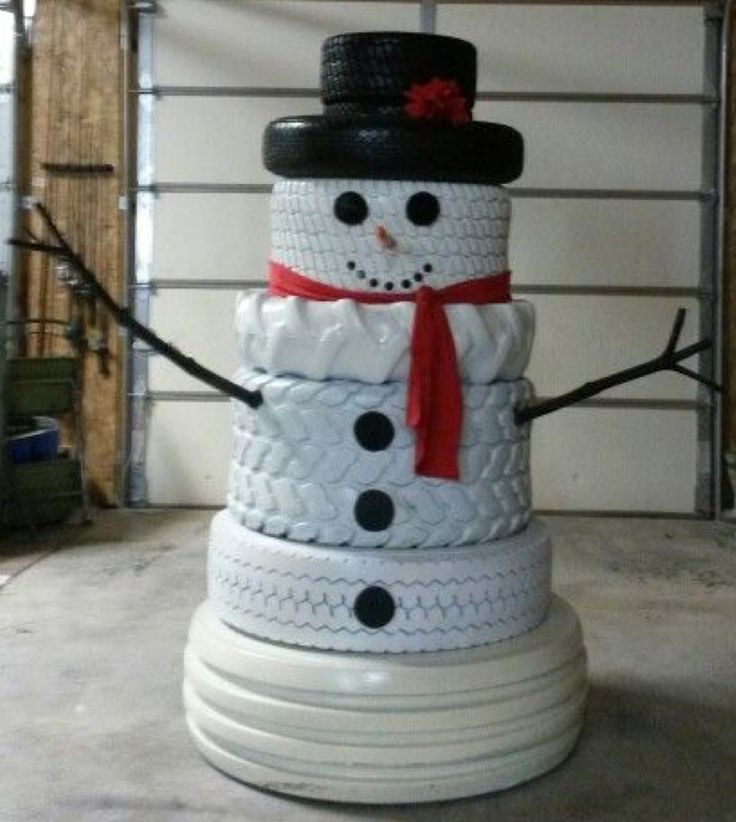 At the very end we draw a face - eyes, a mouth and a carrot nose, and add decor elements. You can put on a bright bucket on the snowman’s head, wrap a neck with a scarf, make hands out of twigs, decorate them with mittens and insert a broom or ski poles into them - you should already show your own imagination.
A snowman from a ball and thread - why are you not sweet anda simple idea to make a snowman without using snow! Using your own imagination and following this simple instruction, you can make a charming snowman using balloons, glue and some yarn or thread. This will be a great addition to your New Year home decor! This is very easy to do. DIY snowman made of balls of thread. We need:
Instruction: You just need to inflate the balloons, wrap the thread around them and apply glue throughout the yarn. After the glue has completely dried, it remains only to burst and pull out the balloons - and you will still have white balls no one can already use as a snowman's body. It remains only to glue the balls with each other with glue, and then use your creativity to make the eyes, nose and mouth of a snowman. You can also add any jewelry you like, such as hats, a scarf and even ski poles. You can come up with a lot of ideas, here's a photo of snowmen from balls and threads that have already been made by other needlewomen:
Another popular material for crafts -these are plastic bottles. We already told you what you can, but today we offer to use them already for winter crafts. We will make a snowman. Moreover, we offer you not even one, but two ways to use bottles for such a toy. Method 1. A large figure of a snowman from bottles for street decor Chic big snowman made of plastic bottlesYou will have to learn how to do this craft yourself. For children, it is too complicated, but in order to decorate the garden or the space in front of the house for the new year, it fits perfectly. We will need:
Instruction: Insert the bottles into the wire frame tomake a big snowman In fact, everything is not as complicated as it seems. We simply make a wire frame from two or three wire balls and insert our bottles into the grooves with their bottoms outward, forming the body and head of a snowman from plastic bottles. It is better to paint the bottles in advance in white, red or any other color - our craft can be any color that you like best. We put the frame on a stick with a cross at the bottom (just like how often a Christmas tree is placed at home). It remains to tie a scarf, make a nose, mouth and eyes, put on a hat or a bright bucket on the head, and you can decorate the place in front of the house with this figure. Here is what you should get: Method 2. A snowman from a bottle: crafts with children Snowman from a plastic bottle: a simple hack for the school You will need:
Instruction: This snowman out of the bottle is even simpler, so you can make it with your children to decorate the house or use it as a New Year’s crafts at school or kindergarten. All you need to do is draw the eyes and mouth on the bottle, pre-painted it white or stuffed with cotton, if it was transparent, attach the nose and decorate to your liking. Scarves and mittens, a hat and other decorative elements can be made of shreds. You can also make clothes for him from an old multi-colored sock. Here are a few options for such crafts:
Master Class: snowman made of plastic cups Another easy way to craft a child is a snowman made of plastic cups. At the same time, you will get a fairly large figure - a child’s height and even taller, which will be definitely appreciated at the competition at school and kindergarten, and which can later also be used to decorate the garden. We will need:
Instruction: Everything is nowhere easier - we take plastic cups and fasten them together with a stapler. The first circle is the diameter of your ball. Then, with the help of a stapler, add the cups above and below in a circle, each time reducing the diameter, forming a ball. It is enough to make two such balls to make a beautiful snowman. By the way, the glasses do not have to be used only white - you can dilute with blue, red, green or any other color. We tie a scarf, make a face - the crafts for the school are ready. We place a small lamp at the bottom - and now you have a funny New Year's lamp that you can.
Funny snowmen from socks will decorate yourwindow sill for the New Year And the last master class on making a snowman from improvised materials in simple ways is the use of old unnecessary socks. Who says leaky socks need to be thrown away? They are still useful to you for various crafts. We already told you how to make socks and, and today we’ll look at how to make such a simple Christmas decoration. We will need:
Instruction: Master Class: a snowman from socks with our own hands We take a sock and stuff it with cotton wool, forming the contour of a snowman. We wind the sock with threads, creating the "balls" of which his body usually consists. We simply tie the top - it will be a pompom on the head of the figure. From the patches we sew a hat and make a scarf. If you still have colorful old socks, you can also make clothes for our toys from them.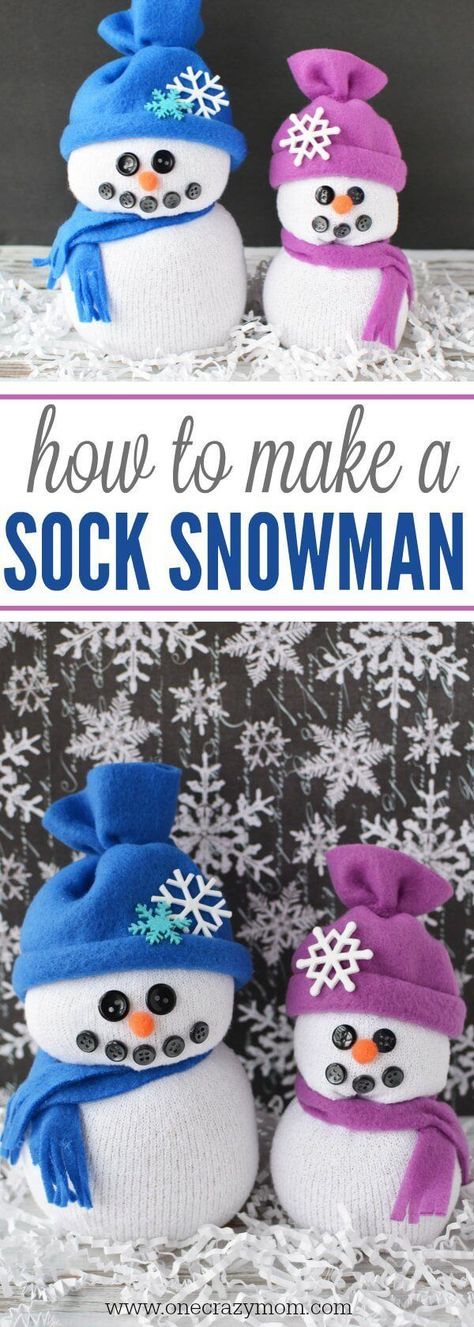 Sew on buttons - make eyes and nose out of them. A snowman from socks is ready - it will take you quite a bit of time, and look what a cute and funny toy you will get - it will be suitable for New Year's decor at home, and for children's crafts to school and for a cute birthday celebration for friends:
We examined the five most popular ways.make a snowman from various materials at hand and unnecessary things. But there are other options that you can use. For example, it is very simple to make it from corks from bottles - with such figures you can decorate the walls in the house or make a garland. From paper and snowflakes - these are already options for crafts for children. A snowman skiing from pine cones is also a fairly popular craft. Someone uses very unusual materials. How do you like, for example, a snowman made of gloves, paper palms, plastic spoons and forks and other disposable tableware? Someone makes a snowman with their own hands from cardboard, packages from milk and juice, from homemade pompons, plasticine, vegetables and fruits, salt dough and other materials. There are options, chestnuts, acorns and other natural material and other things - you just need to show imagination or spy on ideas in the photo gallery, which we have collected for you: We also recommend viewing:
Do you like the article? Share on social networks!
comments
Winter means snow fortresses, ice slides and snowmen in fluffy scarves. If the snow never poured, and there is nothing to sculpt a snowman from, there is only one way out - to make it from improvised materials.
A few medium to large pumpkins are great substitutes for snowballs. Connect them together with construction putty, cover with white acrylic paint in several layers so that the orange color does not shine through, draw a face and dress it up in a scarf and top hat. Such a snowman will decorate the yard or porch of your house. Another undoubted plus is that it will not melt when warming or during rain. nine0003
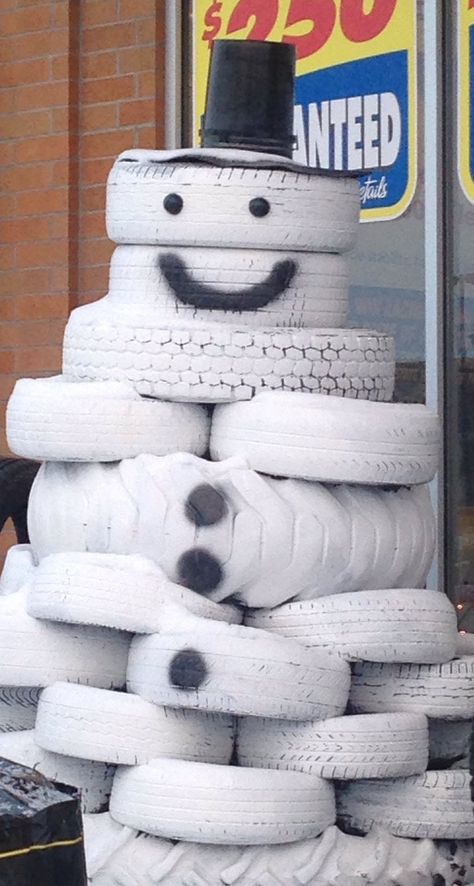
Some craftsmen make snowmen from old car tires. To do this, take several tires of different sizes, paint them white, and then install them on top of each other. The head is made either from two smaller tires, or one is placed on edge and the hole is closed with a plywood disk, on which the face is then drawn.
Coal eyes and buttons on the torso are drawn with black paint, the nose is made from a toy carrot, and the cylinder for the head is also constructed from tires. Make such a snowman for the playground - not only children, but also adults will smile when they look at it. nine0003
From deep disposable plates glued together, you will get a wonderful voluminous snowman for the room. Stick buttons on his body, tie a scarf around his neck, and put a plastic bucket or flower pot on his head.
Even easier to make a flat "mini" snowman from plates. Fasten three plates together and draw a face and outfit on the convex side. Add a scarf and a hat made of colored paper, mittens on your stick hands and put the artwork on a chest of drawers in a room or on a windowsill for passers-by to admire. nine0003
Very unusual crafts are made from plastic disposable cups. For one large snowman of two balls, they will need about 300 pieces. Cups fastened together form beautiful spheres, which are then fastened together. Well, then the snowman is dressed in a traditional outfit, decorated with tinsel or garlands and installed in the room - for the street, he, like a snowman from plates, is too light.
A snow fairy-tale hero made of cups can be put instead of a Christmas tree if there are small children in the house. It won't hurt anyone even if it gets dropped. nine0003
In the yard you can build a snowman from wooden saw cuts. Three round pieces are connected together, slightly cut off at the edges, sanded, painted and dressed up.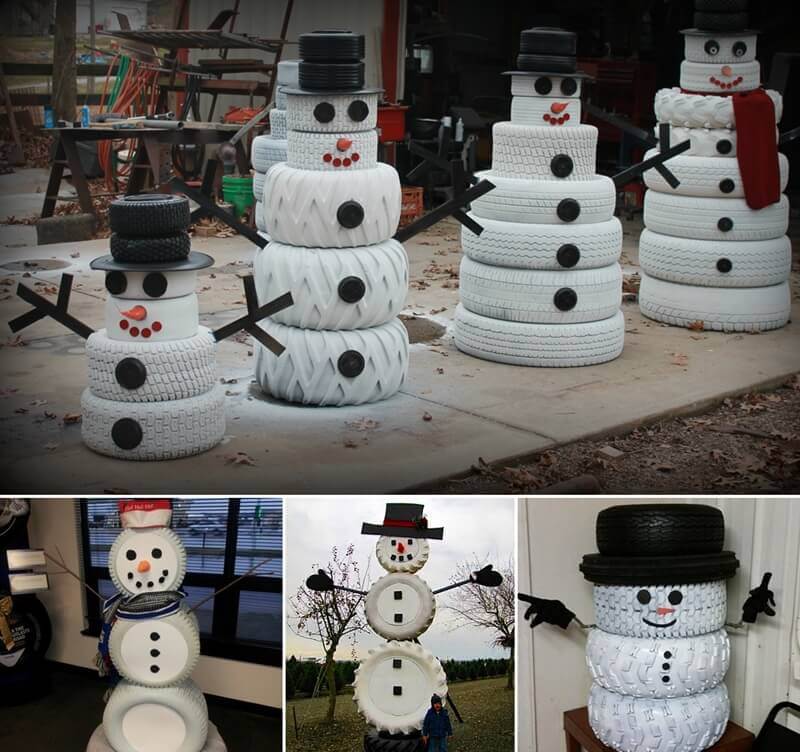 A kind of snowman-goblin is obtained from a tree - a very colorful craft.
Even if there are snowdrifts on the street and real snowmen decorate the yard, it never hurts to make one or two more for the house. Created from any improvised materials, they will be an excellent decor and give the New Year mood to the whole family. nine0003
Rate this article:
(0 votes, average: 0 out of 5)
Share with friends!
New Year's Eve is a premonition of fairy tales and magic. So it's time to make a snowman craft with your own hands. This is a favorite time for children of both school age and those who go to kindergarten.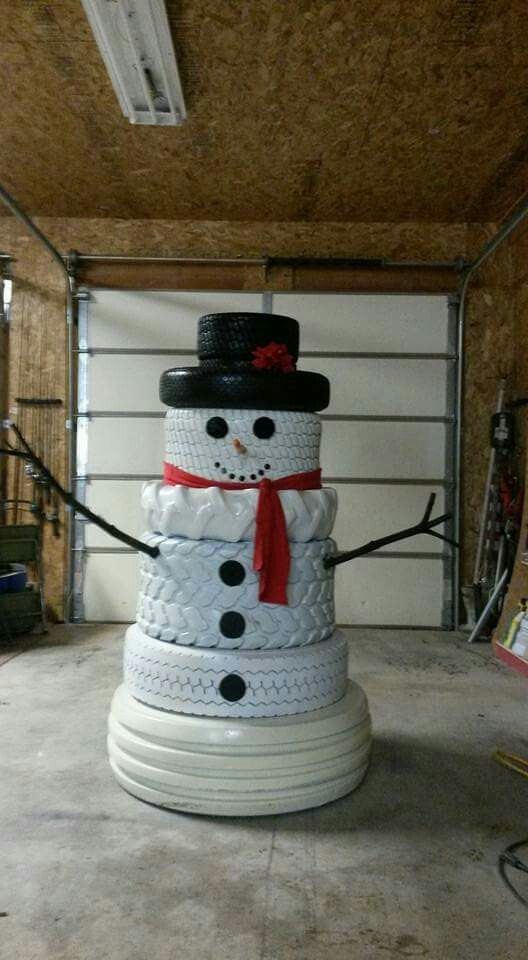 Therefore, they, as well as mothers, are interested in learning how to make a snowman out of thread. The result of a simple and fun activity will be an original holiday snowman craft that family members will be delighted with.
Table of contents:
One of the favorite Christmas characters of adults and children is a snowman. The modeling of snow figures has been known since ancient times. In Rus', snowmen were held in high esteem, as they were considered winter spirits. That is why a broom was usually placed next to them - so that they could “fly away” into the sky, and the cold would stop as soon as possible. And today the snowman remains one of the favorite symbols of the New Year and Christmas. nine0003
Children make them in the yard, and adults buy figurines and Christmas decorations in the form of snowmen. But what could be better than handmade crafts?
Contents:
A merry New Year's snowman is made from a variety of improvised materials. Cotton pads, landscape paper, cardboard, fabric, plastic, socks will do! The toy is hung on the Christmas tree, to give to close friends. The main thing will be the feeling that the snowman is made with love, with his own hands. Of course, it is the children who will enjoy the joint needlework. nine0003
A fake made from the simplest materials, like threads and stationery glue, will become quite original. It will take a couple of hours to create a snowman, and he will decorate the house beautifully.
You will need white and orange yarn (yarn), colorless stationery glue, beads or seed beads, paper, clear acrylic lacquer, needles, some balloons and wrapping paper.
The exact number of balloons depends on the snowman's handles.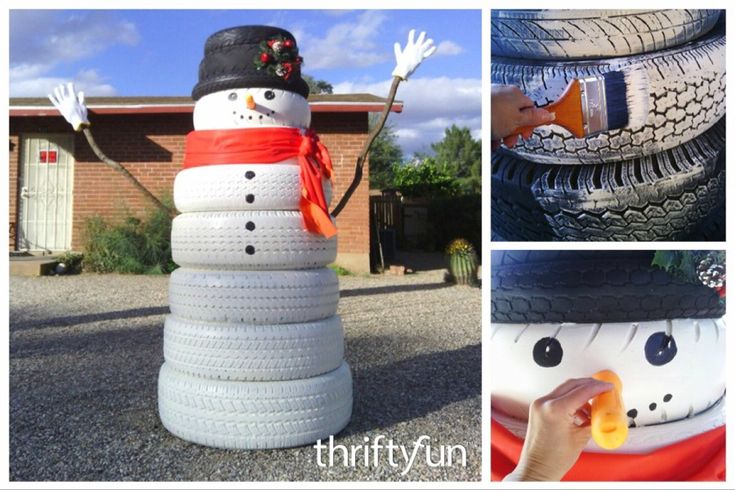 Stationery glue can be replaced with PVA. In addition, scissors are also needed. nine0003
Begin shaping the snowman by inflating balloons. For the torso, you will need one large ball, and another smaller one.
By the same principle, the size of the ball for the snowman's head (if desired, for the hands) is selected. Fingertips of the appropriate size will also fit - the main thing is that when inflated, they take on a spherical shape. The ends are tightly tied with threads.
The next step is to lightly grease the balls with vegetable oil to make the threads move away from the ball more easily, or with cream. The main thing is not to overdo it, because the threads can slip off when winding. nine0003
The next stage is quite predictable. The thread is well smeared with glue. In this case, you can use a sewing needle.
Balls are evenly wrapped with white thread, being careful not to leave too much gaps. A sense of proportion is required here, because if the winding is too tight, the balls can burst, and if the thread is too loose, they simply will not take the desired shape.
Wrapped balloons or fingertips are left until completely dry. nine0003
As a rule, children can't wait to start making the craft itself early, but you need to explain to them that patience is necessary, otherwise the snowman simply won't turn out. The recommended time for complete drying is one day. It is possible to speed up the process by using a hair dryer, but it is better not to risk it, otherwise you will have to start doing it again.
The balloons or fingertips are now pierced and carefully removed from under the threads, being careful not to deform the frame itself. A small oblong and blunt object is perfect for this. nine0003
The snowman's nose is also made of thread, but this time it is orange. Such threads are wound on a special paper blank in the form of a sharp cone, wrapped in a plastic bag.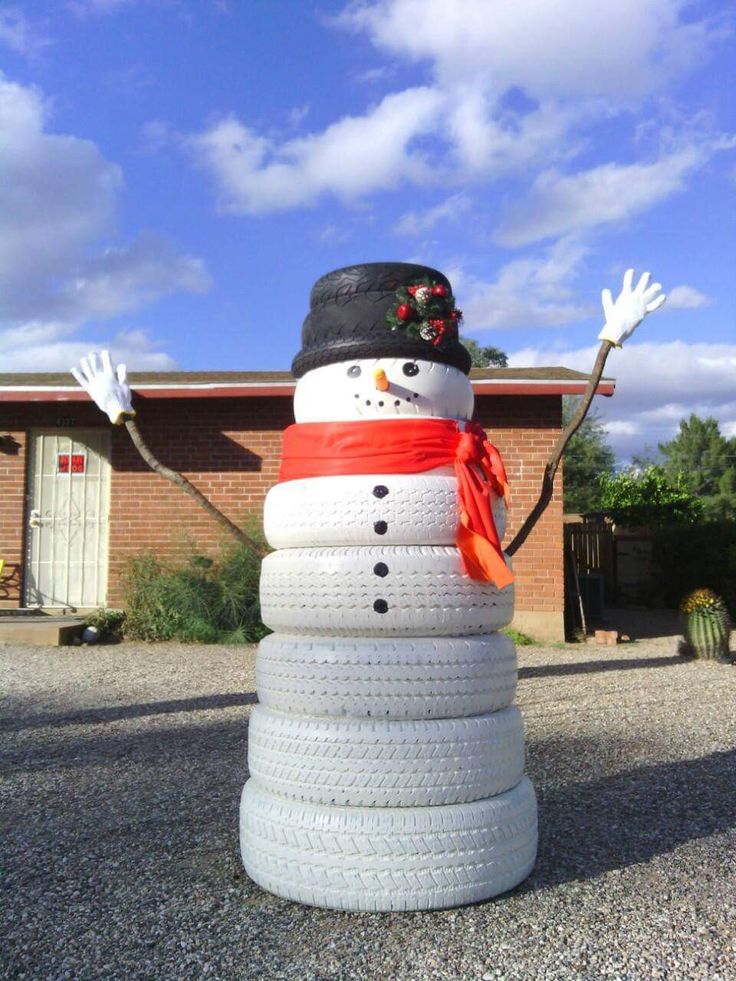 Pay special attention to the tip of the nose.
The nose can be made together with the rest of the frame, since it will also take time to dry completely.
After removing the blank, the nose of the orange threads is cut to the desired size. It is carefully sewn to a spherical blank intended for the head. nine0003
The eyes are embroidered with black thread, or beads (dark beads) are glued on. Of course, here you can dream up - come up with a mouth for a snowman, blush it with a makeup brush, etc.
The balls are connected to each other by threads in the most rigid areas. If they want to hang the craft, do not forget to also make a thread loop at the top. If desired, the snowman can come up with a hat and a scarf. Small twigs are suitable as hands, although this is absolutely not necessary. nine0003
When the craft is ready, it is sprayed with varnish. It can be either matte or with sparkles - at your own discretion. This will make the snowman even more solid.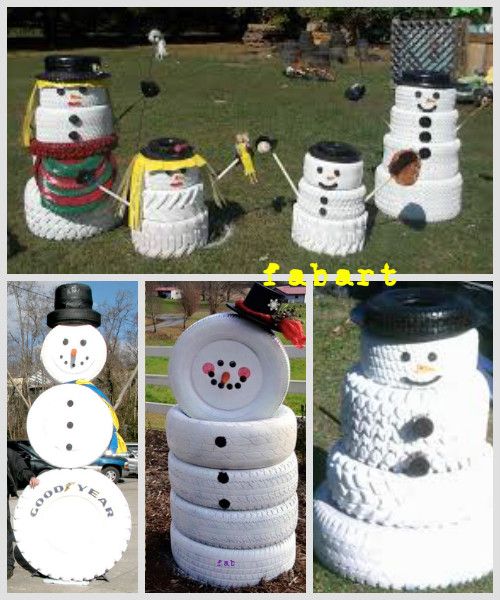
If the craft is not suspended, but placed, the bottom ball can be glued inside with cotton wool, or a cardboard disk (paper disk) sufficiently smeared with PVA glue can be glued to the bottom.
Helpful Hint: when connecting different parts of the body, you can make small indentations in the places of such connections, first spraying the area with a spray bottle. If the craft will be hung, it is better to do without it. The stitching points can also be smeared with glue so that they hold better. Leave the snowman for another day until completely dry. nine0003
The process of making crafts is quite exciting, and children of school and preschool age will certainly take part in it with pleasure. You should not be limited to the above recommendations, because you can come up with a whole costume for a snowman!
Any other one will be a worthy alternative to a snowman from threads - for example, crocheted and stuffed with cotton wool or padding polyester.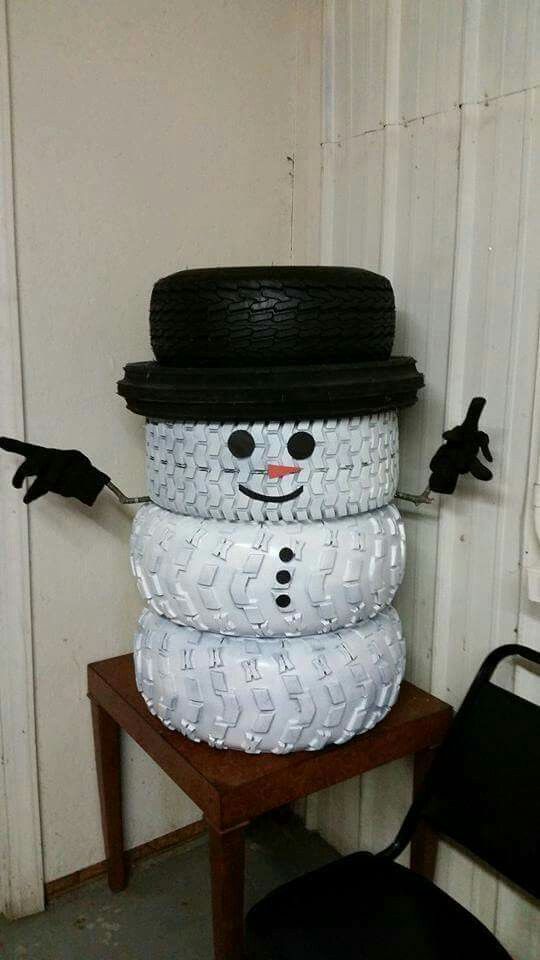 To do this, use a white buckle and a hook of 0.85 millimeters. nine0003
An interesting craft will be a snowman sewn from a white sock and stuffed with cotton. A headdress is sewn from colored fabric, you can also have a caftan. Black beads are perfect for eyes. A scarf will also look on such a snowman.
This craft looks good as a Christmas decoration. It can also be placed under the Christmas tree along with gifts.
As you can see, plastic cups can be used to make a snowman with your own hands and not only. nine0003
An example of plastic bottle snowmen. The technology is not complicated, so it makes no sense to describe it step by step. If there is, let me know in the comments.
There is nothing special to explain here, the photo shows what and how to do.