Your ATV is a beast of the outdoors, seldom spending much of its life inside. The plastic body of ATVs becomes faded from the sun’s rays, and thrashing around in dirt, mud, snow, and water doesn’t help. Plastics get scuffed by boots or passing debris, and cracks can appear in the body or windshield.
There are a few options for restoring your ATV’s faded plastic so it looks like a showroom model again. These options vary in cost and difficulty. In this guide, we’ll look at all the common ways to restore the luster of your ATV’s plastic body.
Image from www.can-amtalk.com
Linseed oil can restore faded plastic, but it takes ages to dry. You want boiled linseed oil, instead. Note—this doesn’t mean you boil the linseed oil yourself! It means that the linseed oil has been pre-treated to dry faster.
To speed things along, choose boiled linseed oil and mix it with paint thinner. We recommend a 40/60 ratio of linseed oil and paint thinner.
Start by cleaning your ATV thoroughly. For best results, you’ll want to remove the rack and any other parts of the machine that are covering the plastics.
Apply the mixture to your plastics using a dry cloth. You’ll notice the linseed oil will remove the oxidization that’s causing fading. After you’ve applied the mixture to all the plastic, allow it a full day to dry.
If you keep your ATV covered and don’t use it every day, this fix will last for a few months. If you constantly use your ATV outdoors, this treatment may be required to be performed again in 4-6 weeks.
Off-road are the core piece of riding gear for ATV & UTV riders
Find out the best look for you
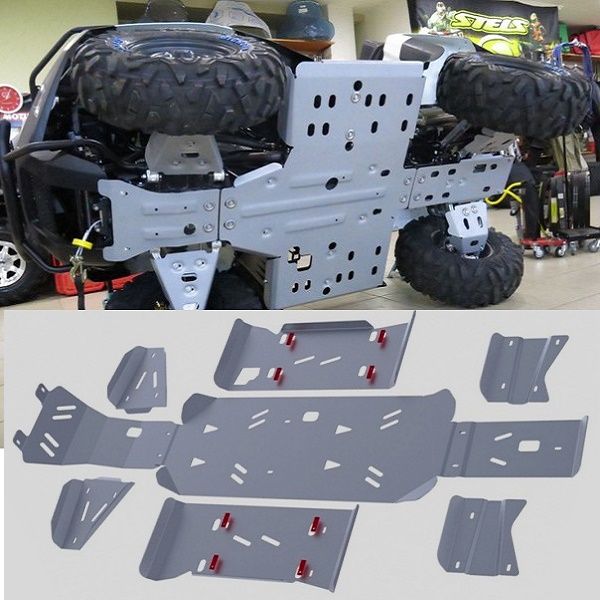
You’ll need good access to your ATV’s plastics, so remove the skid plates and racks. If they are severely damaged in any way, you may want to replace them completely. To complement your better-looking new plastics, you may want to strip or sand your racks and paint them with a spray-on bedliner.
Next up, give the ATV a good clean overall. A mixture of dishwashing liquid and water will remove all the grease and oils from the surfaces.
Now it’s time to prepare the plastic for waxing. This means sanding the plastic with fine sandpaper, working your way up from the lowest number of sandpaper up to the highest. You can use an oscillating tool to speed up the process. Make sure you’re wearing safe gloves, and finish up by sanding with steel wool.
Apply a vinyl floor liquid wax to the plastic using a car wax applicator. Using thin coats, you can work on one section of the plastic while another section dries. You will need to apply several coats, buffing out the plastic after each application.
After the final coat is complete and bone dry, finish up with an automotive wax for an extra layer of sheen.
This process is more involved than the linseed oil and paint thinner fix, but it typically has a longer-lasting result.
Image from www. atvhonda.com
Instead of a linseed oil and paint thinner mixture or vinyl liquid wax, you can use a dedicated plastic restorer product. While most of these products work very well, they are basically just variations of our above options with slightly different chemical compositions.
Image from Lea Arnold YouTube channel
Using a heat gun does work to make plastics look new, but it has downsides.
To perform the procedure, you use a heat gun set to a low setting and blow it from a few inches above the problem plastic. Voila—the plastic looks as good as new.
But it’s not really an option that we recommend. It works by melting the top layer of the plastic, which in turn makes the plastic more brittle. Every time you perform a heat gun restoration, your plastics lose some strength.
Where we would suggest using a heat gun is to work out small cracks in the plastic. Severe cracks necessitate replacement, though.
These are the top ways to restore your ATV plastic. Another option is to cover your faded plastic with a new lick of paint from a spray paint that’s specifically suitable for plastic. Whatever option you choose, with just a little bit of elbow grease you can have your ATV back in showroom condition.
SPORTSMAN Black
36 EUR
ENDURO LIGHT Graphite
the most durable
458 EUR
ENDURO Camogrey
the most durable
657 EUR
ENDURO Graphite
the most durable
279 EUR
ENDURO Graphite
the most durable
657 EUR
AQUAMASTER-ZIP LIGHT Camogrey
with central zipper
598 EUR
472.30 EUR
ENDURO LIGHT Camogrey
the most durable
458 EUR
AQUAMASTER LIGHT Red
reliability & comfort
438 EUR
360. 30 EUR
NEODRY Black
17 EUR
ENDURO Camogrey
the most durable
279 EUR
AQUAMASTER Blue
reliability & comfort
647 EUR
-30%
HIT
AQUAMASTER Red
reliability & comfort
259 EUR
181.30 EUR
-30%
HIT
AQUAMASTER Orange
reliability & comfort
259 EUR
181.30 EUR
AQUAMASTER Red
reliability & comfort
677 EUR
-30%
HIT
AQUAMASTER Camogreen
reliability & comfort
259 EUR
181.30 EUR
BELT
9 EUR
ENDURO BF Camogrey
bootfoot waders
528 EUR
ENDURO BF Camogreen
bootfoot waders
289 EUR
202. 30 EUR
ALL SEASON Black
62 EUR
ENDURO BF Camogrey
bootfoot waders
329 EUR
Explore all
Since ATVs invest the majority of their time outdoors, their plastic body ends up being discolored from the sunlight's rays, as well as surging around in dirt, mud, snow, and also water does not help. Plastics get messed up by boots or passing particles, and also splits can appear in the body or windshield.
There are a few choices for restoring your ATV's faded plastic so it appears like a showroom model once more. These alternatives differ in price as well as problem.
In this guide, we clarify exactly how to make your ATV resemble new. We provide you with some suggestions on exactly how to restore ATV plastic.
Table of Contents
Now that you understand what creates your ATV plastic to fade allow's take a look at the various ways you can recover your vehicle to its previous glory.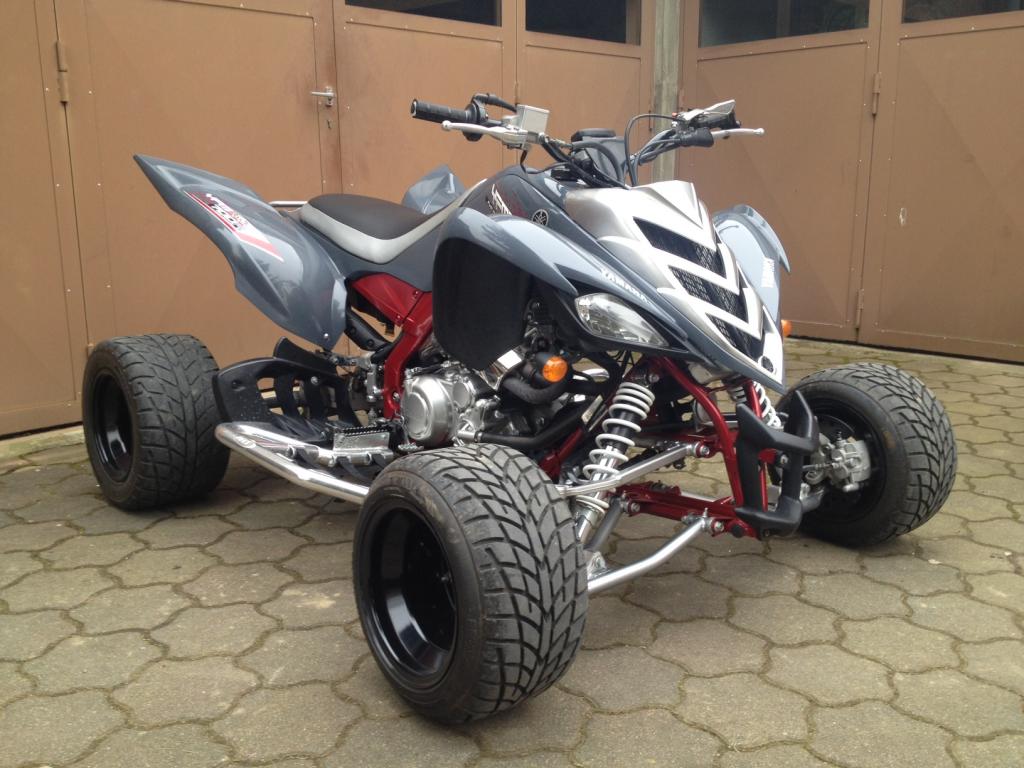
When it concerns restoring your ATV, there are many methods that can be made use of to take on discolored plastic, with everyone delivering different outcomes. So to help you at the same time, we have actually detailed the various techniques down below.
Before you restore your ATV plastic, you should keep your ATV clear. Wash the ATV completely using Dawn dishwashing fluid. Dawn helps get rid of oils and grease from the surface area. And afterward, completely dry the maker totally. If there are scratches, you will also require to sand its plastic surface.
Linseed oil can recover discolored plastic, however, it takes ages to dry. You need boiled linseed oil, rather. Note-- this does not imply you steam the linseed oil on your own! It implies that the linseed oil has actually been pre-treated to completely dry faster.
To speed up points along, choose boiled linseed oil and mix it with paint thinner. We advise a 40/60 proportion of linseed oil as well as paint thinner.
Begin by cleaning your ATV extensively. For best results, you'll intend to eliminate the rack as well as any other parts of the device that are covering the plastics.
Apply the mix to your plastics using a completely dry cloth. You'll discover the linseed oil will remove the oxidization that's causing fading. After you have actually used the blend to all the plastic, allow it a full day to dry.
If you maintain your ATV covered and do not use it on a daily basis, this restore will certainly last for a couple of months. If you continuously use your ATV outdoors, this treatment might be called for to be done again in 4-6 weeks.
The following video shows you how to restore ATV plastic with boiled linseed oil.
There are plenty of products in stores that declare to recover plastic. One of the most preferred is Solution Finish and CAR GUYS Plastic Restorer.
A look through customer testimonials shows that they work. How much time the remediation lasts differs from item to item, and just how well you protect your ATV. Yet most appear to last for a number of months.
When using a certain restorer, inspect the instructions of the application on the label. Also, the majority of these items are likewise helpful for plastic. If your ATV seat has a plastic cover, you can make use of these restorers to reverse fading.
First, you should remove the skid plates and racks. If they are drastically damaged whatsoever, you might intend to replace them totally. To enhance your better-looking new plastics, you may intend to strip or sand your racks and repaint them with a spray-on bed liner.
Next up, offer the ATV a good clean overall. Now, it's time to prepare the plastic for waxing. This means fining sand the plastic with fine sandpaper, working your way up from the lowest amount of sandpaper to the highest. You can also use an oscillating device to quicken the process. Make certain you're wearing risk-free gloves, and finish up by fining sand with steel wool.
Use a vinyl flooring liquid wax to the plastic using a car and truck wax applicator. Using thin layers, you can service one area of the plastic while one more section dries. You will need to apply a number of coats, and polish the plastic after each application.
After the last layer is full and also bone dry, end up with an automotive wax for an added layer of luster.
This process is more complex than linseed oil and paints thinner restoration, but it usually has longer-lasting results.
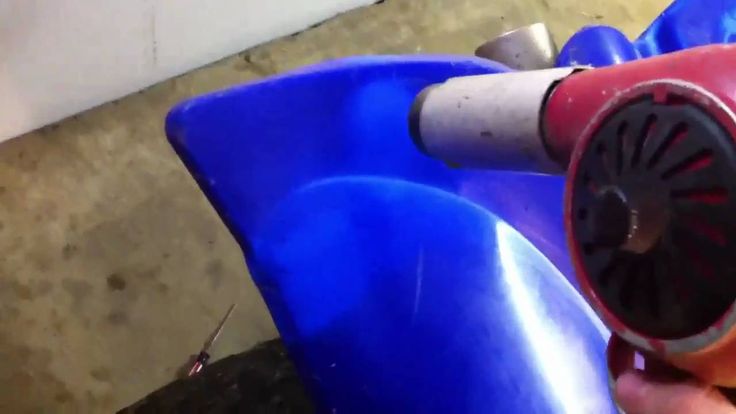
This is the debatable one that we don't advise. It works such as this: you set the heat gun to the lowest setting and blow it a few inches away from the plastic, moving slowly over the discolored areas.
This approach generates instant outcomes. The faded plastic instantly appears new and also glossy.
While it functions, how it works is the issue. The heat partially thaws the top layer of the plastic, making it show up new.
Comparable to various other plastic restore methods, the heat gun method does not last forever. Oxidation as well as fading will certainly return after a number of weeks or months. So you need to duplicate the treatment.
The trouble is that every time you use a heat gun, the plastic gets more brittle as well as more probable to crack as you set about your riding.
So we do not suggest making use of a heat gun. Use linseed oil or a plastic restorer. If you want long-term remediation, see the last method below. You can watch the following video to learn how to restore ATV plastic with the heat gun.
 Paint
PaintFor the last approach, we are going to go over; we have selected an option that is arguably one of the most efficient when it comes to restoring ATV plastic. If you see that your ATV has actually begun to discolor, you can constantly battle the issue by repainting it.
You can do this by using spray paints ideal for ATV plastic, although you will need to apply a primer coat and a safety top layer for the best outcomes.
Like the majority of recovering approaches, paint is not permanent as well as will certainly start to fade with time. Nevertheless, it can last much longer than various other repair choices and can be quickly reapplied whenever the plastic begins to discolor.
If you want to learn more about paint, you can click here to get a guide for painting your ATV step-by-step.
Broken plastic is a little bit a lot more challenging to fix. If a piece of the plastic has come off, not simply a basic fracture, you may be much better off changing the whole plastic part.
However, if it's just a crack, there's hope. We discovered numerous feasible means to repair broken ATV plastic. Nonetheless, most of them, such as using epoxy or superglue do not work well. As quickly as you go out with the ATV once again, the sealed cracks are then loosened
The solution that appears to work ideal is melting the plastic. You can use a plastic welder, heat gun, soldering iron, or some other source of heat to melt the plastic along the crack. You'll require to apply stress on both sides of the plastic up until the melted plastic remedies and holds.
For larger fractures, you may need to thaw an exterior plastic to fill the fracture. You can also get plastic welding rods or reinforcement plastic mesh.
When it comes to the windshield, because it is likely acrylic, an acrylic solvent concrete or an acrylic adhesive is the best option.
Adhere to the directions on the label. Keep in mind to clean the windshield before using any item.
Plastic burs very easy as well as wet fining sand will prevent that. With the 180 grit just sand the actually bad areas as well as get the deep scratches, nothing even more. After they have gone away, Use 220 on the overall vehicle. Sand up until the shade is also all over and the scratches are gone.
Brightening with Toothpaste or Sodium Bicarbonate Toothpaste and baking soda are both light abrasives that you can make use of to brighten plastic. For deeply etched or blemished plastic, capture non-gel toothpaste straight onto the surface and also buff it in a circular movement with a microfiber or cotton cloth.
WD-40 Multi-use product is excellent for most plastic surfaces that have actually had a great deal of exterior direct exposure, so it's great for garden furniture. It is very important to note that Polycarbonate and clear polystyrene plastics are among the very few surfaces where WD-40 multi-purpose products can be avoided.
The very best method I have actually located for removing light scrapes is to choose some 1500 Grit Wet Sandpaper. Just utilize the sandpaper over the locations with scrapes and also enthusiast it out when you're done. You can end up with a coat of the plastic restorer I discussed above to make it look new.
To restore the shine, apply a small amount of plastic or metal polish just enough to cover the dull areas, then apply it in a circular motion with a clean, dry cloth. You may need to repeat the process a few times, but eventually, the plastic will shine like new again.
The Most Comprehensive Motorcycle Camping Gear Checklist (Ultimate guide for you)
Rodney L Herron
Rodney L is a technical writer and product consultant with over a decade of experience in the motor industry. Rodney is a fan of performance machines that run fast and loud and an expert in all things custom. His numerous articles and write-ups are available at our knowledge base. Whether it’s something wrong with your motorcycle or you are building a custom bike, you can trust Rodney’s experience.
Plastic polishing on ATVs
We know from advertising: “if your TV screen has lost its former brightness, just wipe the dust off the screen.” Something similar can be done with the details of the ATV.
If the plastic lining of your ATV has a lot of small scratches (this method is not suitable for deep scratches) and began to look unpresentable, do not rush to run to the store, you can try to polish it. This process is long, tedious and painstaking, if done correctly, the place of cloudy abrasions will be taken by an even gloss. Similar technologies are used to remove scratches from mobile phones and laptops, polishing car headlights. The plastic of the vast majority of ATVs acquires its color already at the stage of its production, and not during painting, thus it is an ideal candidate for "resurrection". nine0003
Before starting work, the plastic element must be degreased and removed as much as possible from stickers and fasteners. It is important to maintain cleanliness during all stages of restoration and to prevent dirt from entering the restored area.
Estimate the depth and nature of the scratches by eye, you will need this when choosing the appropriate sanding paper (the deeper the scratches, the “angrier” the sanding paper should be). nine0003
The sanding process takes place in several iterations with a gradual change in the grain size of the sandpaper according to the principle from larger to smaller. For the best effect, water the "sandpaper" and plastic with water. The last few approaches are performed with a gentle "zero". The surface of the plastic will become smooth, but still cloudy.
This is where polish comes into play. A specialized polish for motorcycles on the domestic market cannot be found in the afternoon with fire. The loss is not great - automobile and other analogues are no worse and much cheaper. Apply polish to a soft non-abrasive rag, sponge, napkin or piece of felt (all this can be found in an ordinary car shop), rub the substance over the surface of the plastic in a circular motion with light pressure. After 10-15 minutes (the polish should dry and absorb), apply another layer. The procedure must be repeated until an even gloss appears on the entire surface of the part. nine0003
Sanding and polishing can be done both manually and with the use of a special tool (polishing machine or nozzle on a drill), this will significantly speed up the execution, but it is important not to overdo it - when overheated, dull areas and bubbles may appear on the surface. At the exit, after 4–5 hours of work, the old and worn ATV linings will acquire an almost pristine factory shine, while your wallet will not be empty for an amount equivalent to the cost of the original part in the salon of an authorized dealer. nine0003
Ice Redoubt > 26 February 2013 10:09 Mikhail Pimus
Share:
The kenguryatnik is a structure made of metal pipes, the purpose of which is not only to make the car look better, but also to protect it. Initially, such a device was installed mainly on SUVs. Indeed, when driving over rough terrain, additional protection is clearly not superfluous. nine0003
Now the bars can be installed on almost any type of car. True, they are not intended for any model of car by the manufacturer. And if you order them in special tuning studios, it will turn out to be too expensive. Therefore, it will be useful for amateurs to know how to make a protective boot for the front bumper so that the car looks good and is reliable enough.
Power bumper is a structure in the form of a lattice, which is attached to the front of the car and protects it from damage. With a direct impact, the optics, bumper, radiator grille will not be damaged - this is the main purpose of such a product. It looks quite simple - it is a system of pipes, curved and welded in such a way as to repeat the relief of the front of the car as much as possible. nine0003
The invention of the power bumper belongs to the Australians - he helped protect the car from collisions with kangaroos that jumped out onto the road and often became the culprits of serious damage. In our area today, the power bumper is also quite widespread - motorists put a kenguryatnik on UAZ, Niva, Oka and other car brands.
Drivers who ask questions about how to make a kenguryatnik with their own hands should understand that this is not an easy job. For this, you will need the talent of a designer, skills in processing materials and owning a welding machine, as well as a specially equipped box with tools. nine0003
Earlier than others, Australian farmers began to use a car radiator protection device from a collision with animals that suddenly jumped out onto the road. Often these animals were kangaroos, so we call such protection a kenguryatnik or kengurin. The first such protective devices were made from wooden bars. They could even protect the radiator of the engine cooling system from damage in a collision with a piece of fence. Today, it is unlikely that anyone would think of making a kenguryatnik with their own hands using an ax, hammer and nails. nine0003
Kengurin is most often installed on a modern car in order to stand out from the crowd and to prevent the bumper from breaking during a frontal impact.
Protecting a part designed to deform and soften the impact in collisions - albeit a lot of illogical, but still justified solution.
In this case, the question arises of how to make a kenguryatnik with your own hands. The easiest option is to take the drawings of any kenguryatnik you like from the Internet, slightly adjust the dimensions of the attachment point in accordance with the design of your car and perform protection according to them. nine0003
Stainless steel bull bar will look great on any color car. But stainless steel is much more expensive than regular steel. A logical question arises - what will you cook it with? Therefore, it would be better to weld a structure from segments of an ordinary steel pipe using a semi-automatic device. If you paint it with a “snow queen” and cover it with car varnish on top, it will look good too. If this option is suitable, you need to have the following materials and tools. nine0003
Many people know that when bending a steel pipe without special tools, it can flatten or even break at the bend.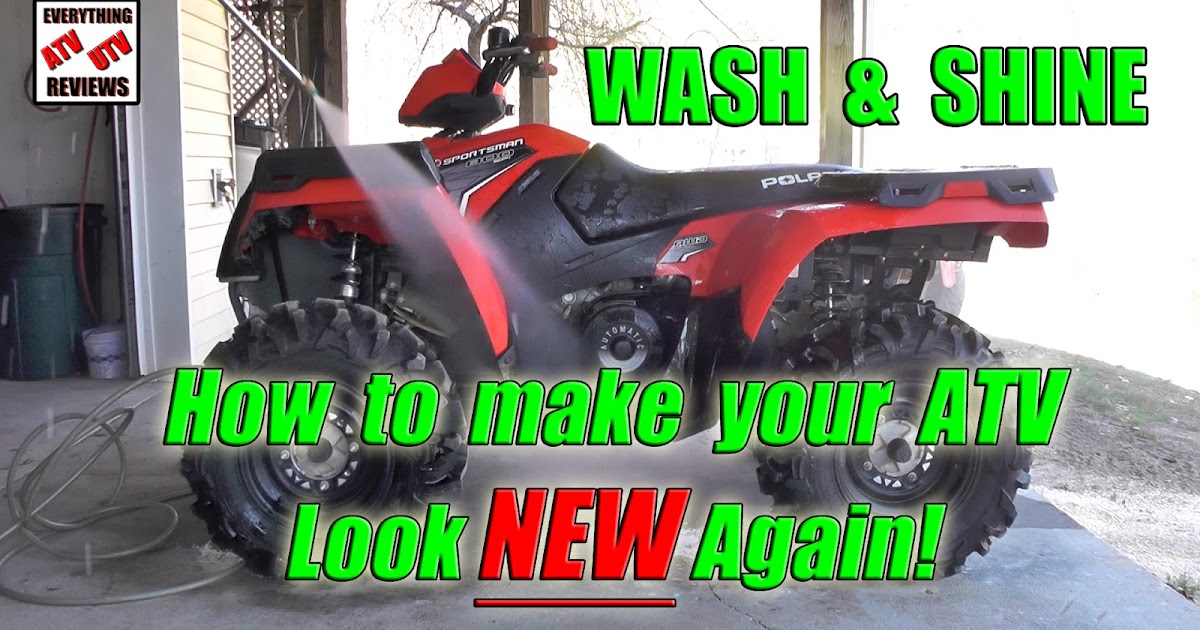 Of course, you can buy several corners from a pipe of the desired diameter. But this will increase the number of welds, and their processing is very laborious. There is an easy way to bend a metal pipe, avoiding unnecessary costs and unnecessary processing. You can carefully bend the steel pipe as follows. nine0003
To make the process easier and the product turn out better, you need to follow this sequence of actions.

Some craftsmen advise using a level for a more even installation of the structure. The kenguryatnik should not stand horizontally with an accuracy of a degree. So that a person who looks at the fruits of your labor does not have the question “why is it so uneven?” it is not necessary to use any complicated devices. To do this, it is enough to set the top tube of the yoke parallel to the front end of the hood. If you do not hope, use a regular ruler for your eye. Since the structure often turns out to be quite weighty, and it needs to be fixed from the bottom of the pit, it is better to install the kenguryatnik together. nine0003
autolirika.ru
At this stage, you should draw the design of your future product. You must clearly depict in detail and provide dimensions for the product that you are going to make. If you do not feel a design talent in yourself, use the help of the Internet.
In many cases, kenguryatniks are self-made, because for many brands of cars they are not provided by manufacturers
On special forums, you can easily find anything - a project of a power bumper for a UAZ Hunter or instructions on how to make a kenguryatnik for a Gazelle with your own hands. At the same time, you must be aware that the make and model of the car are of decisive importance. nine0003
Until now, many are arguing about the usefulness of this part for a city car, and some already even know how to make a kengurin with their own hands. We will try to help you figure this out, and also talk about what kind of miracle it is and whether it is really so necessary on the road.
For those who do not yet know what kind of accessory this is, let us explain that this is the same product made of bent pipes that is attached to the front of the car, sometimes additional anti-fog lights are also fixed on it. Most often we see this attribute on jeeps, in principle, it is conceived there by design, just as a kengurin is familiar to an ATV. After all, these are SUVs, and on rough terrain, a kenguryatnik (aka kengurin or protective grill) is very useful to protect the headlights and the nose of the body. nine0003
For the existence of the grille, the aerodynamics of such cars are also calculated already at the design stage, but for those who fit the kenguryatnik on a car where such a system is not provided, some subsequent habits of the car may be a surprise.

Protection of this kind is attached not just to the bumper, but to the spars. In the event of a collision, a good quality kenguryatnik takes the blow and distributes it to the spars, while bad metal does not save in an accident, but can only increase the damage, supplementing them with injuries from its own fragments. In addition, the behavior of a car is unpredictable, the design of which does not provide for such an addition to the body. In case of accidents, you can not only damage the exterior of the car, but also damage the insides, spars and parts in contact with them. So it is not always necessary to follow in the footsteps of fashion. nine0003
For beauty, of course, many tend to own a prominent and threatening kenguryatnik on the entire nose of the car, like in jeeps. In addition, it protects well from microdamage from an accidental “kiss” with the car in front, as is often the case at traffic lights. He will save your car, but not the rear bumper of the second participant, you still have to figure it out and pay. But this is all poetry, those who strive for some kind of functionality of this type of protection and do not want big problems with technical inspection, choose more mundane options, for example, curb protection. This is an inconspicuous rounded pipe attached at the level of the front bumper, or rather a little lower, to take the impact of the curbstone and protect the bumper. nine0003
Today, if you are afraid to park without front protection or you do not estimate the distance well, then instead of prohibited measures, it is better to install car parking sensors (by the way, just a couple of years ago, kenguryatnik was completely prohibited on some types of cars). The categories on which a kenguryatnik cannot be installed, as well as the requirements for it in cases where it is nevertheless installed, are spelled out in government decree No. 706 for 2010. One thing can be said for sure, if the manufacturer does not provide for such an improvement in your model, then it is better not to compromise with the state inspection .
Once the design and fitting phase has been completed, work can begin. Before you make a kenguryatnik on UAZ, Oka or Niva with your own hands, stock up on materials - you will need a pipe with a diameter of 51 mm or 76 mm and sheet steel 3 mm thick.
Then proceed according to the following algorithm:
At this work on the power bumper can be considered complete - now you are not afraid of obstacles and off-road.
To make a bumper yourself, you will need to create the necessary drawings. You can get technical documentation in the following ways:
After creating the product drawing, proceed to the selection of the appropriate material. nine0003
Very often there are questions about whether it is possible to put a kenguryatnik on a car. Until recently, legislation forbade the installation of structures on a car that were not provided by the manufacturer.
Now the situation has changed somewhat. If you decide to make a kenguryatnik on the Niva on your own, then you can do it without fear of fines. However, you will need to go through the registration procedure and obtain the appropriate permission to do so. You can find the list and samples of required documents on thematic forums on the Internet. nine0003
Author: Viktor Semin
Education: Samara Road College. Telecommunications and electronics engineer. Driver of the second category / car mechanic. Skills in repairing domestically produced cars, running gear repair, brake system repair, gearbox repair, bodywork…
The choice of material should be discussed in more detail. The ideal option is to use stainless, pre-polished steel. It not only looks great, but is also more practical in practice. If such material is too expensive or not available at all, rolled steel pipe is also suitable. It is worth noting that the painted elements after each off-road trip will need to be tinted. There are no such problems with stainless steel, but it is much more expensive. nine0003
For off-road vehicles such as the Niva, a pipe with a diameter of 50 or 60 mm is mainly used. Not only the appearance, but also the ability to perform the assigned tasks will depend on the type of material.
The Russian SUV "Niva", among the few domestic cars, has long and firmly won the love of motorists around the world. Of course, the "Niva 2121 and 21214" does not have the legendary cross-country ability of the discontinued "LUAZ" or the remaining in service, but heavier "UAZ", but among the SUVs on the market, the "Niva" is one of the most inexpensive. nine0003
This car is often used in extreme conditions, it helps out fishermen and hunters, unpretentious in repair due to the simplicity of design and the availability of spare parts. It is often chosen for cross-country riding, wallowing in the mud, riding on marshy soil. The Niva 2131 is also deservedly loved in the countryside, VAZ 21214 is the VAZ 21214, and it is not difficult to repair it in the middle of the forest with a screwdriver, pliers and a coil of electrical tape.
The domestic auto industry has never spoiled car owners with a variety of tuning, and operating experience shows that there is a need for it. Often, after buying a VAZ 2121 car, many car owners look at additional protective and decorative elements - body kits, which not only give a brutal appearance to an SUV, but also carry a safe mission. We are talking, of course, about arches, thresholds, kengurins, towbars, power front and rear bumpers and other protective accessories. nine0003
Body kits can be conditionally divided into two types - power and plastic. The first not only protects the body of the Niva 2121 in difficult harsh conditions from damage and chips, but also has an auxiliary function. Most protective body kits are made of metal. The second type of body kit is plastic, it is installed mostly for beauty. And now about each in more detail.
It was born almost half a century ago, representing a simple channel. Many motorists easily cooked it in their garage with their own hands. With the advent of foreign SUVs, the appearance of the power bumper began to change. Now the power bumper is front and rear. Modifications of the models on the market meet the various needs of the Niva 2131 car owner. nine0003
Types of bumpers:

However, the presence of a variety of bumper models does not mean that auto mechanics have stopped cooking body kits with their own hands. Although, such reinforced devices, not provided for by the factory design of the vehicle, can do their owner a disservice. nine0003
The law does not directly prohibit their use, however, during the MOT, the car "VAZ 2121" is likely to be "wrapped", and in the event of an accident, the fault of the driver with a handicraft bumper will be in doubt. In any case, when installing the power bumper , make changes about vehicles in the TCP.
Rear bumper also has its own features and variations.

Rear body kits are installed, rather, to protect the city from unexpected actions of drivers from behind.
In everyday life, thresholds serve for the convenience of the owner and passengers, allowing women and children to sit in the interior of the VAZ 2131. They are made of metal pipes, on which a rubberized gasket is worn. nine0003
Active lovers of "rides" in the thickets and windbreaks noted that the thresholds become a fulcrum when leaving the car, when the Niva 2121, plunging its wheels into a ton of mud, sits askew on its belly. Particularly "advanced" jeepers are able to deftly turn the car ninety degrees around its axis on a tiny penny in the forest thanks to power thresholds. To do this, you need to drive sideways to a thick tree, rest the center of the threshold against it, and then turn the wheels all the way in the right direction to sharply give gas. nine0003
Minus. After installing the thresholds on the VAZ 2131, 21214 models, the purchase of a hydraulic jack follows, since the standard one cannot be used. Plus. Thresholds can become an additional protective frame, for which you can hook a hi-jack if they are welded to the spars. To do this, the side members must be drilled through and welded with pipes on both sides to the thresholds.
The ladder is made of metal and welded to the rear door. With its help, you can reach the roof, stack and secure cargo and carry out work with the trunk. And also climb it if the car plunged somewhere. This body kit can withstand weight up to 100 kg. In addition, a ladder to the roof will be appreciated at a car wash, when a Niva 2121 car, stained up to its ears, arrives at them after rides. nine0003
A must have for Jeepers who love to travel and not just wallow in the mud. Allows you to take with you much more luggage than the regular trunk of the Niva 2131 can accommodate.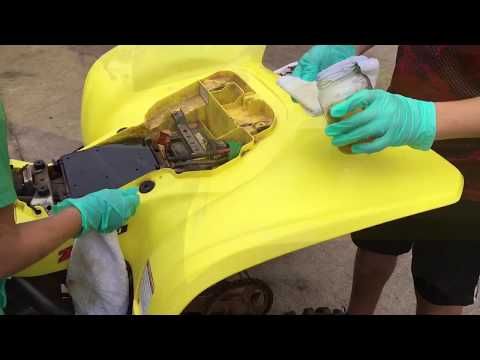 In addition, it is convenient to mount a “working” light on the “basket”, both in front and behind.
Cons: the center of gravity changes, the VAZ 2131 becomes more rolled. With a good combination of circumstances, it can even “lie down to rest” - fall on its side, for example, in a rut. In addition, things immersed in the body kit are open to rain and snow. nine0003
If you don't want to pay money for a ready-made body kit, it's easy to make it yourself. This will require only material, tools and straight hands.
When starting to weld a bumper, you need to know exactly how to weld. If the seam is uneven, it will be a shame for the damaged material.
What you need:
Before you start welding, you need to make a model out of cardboard. So it will be even more convenient to try on the future bumper. Cut out pattern pieces from metal. We use a grinder and discs for metal. We bend the metal with a torch, protect the face and hands.
We remove everything attached from the front of the VAZ 2131, install the base for the winch and fix the bumper with bolts. Reinforcement of the spars will be required, we use metal plates. After installation, we treat the bumper with an anti-corrosion compound and paint it. nine0003
This type of body kit is installed on the Niva 21214 rather for beauty and to satisfy the ambitions of its owner. Used as an opportunity to personalize the car. Off-road, a plastic body kit is not only useless, but also ridiculous in the eyes of experienced jeepers. Bushes and trees rip off linings from doors, plastic bumpers crumble and scatter into pieces upon contact with solid objects.
In addition, the clay, which "washed" the wheels and clogged the wheel arches, easily tears off the plastic bumpers. It is traditionally believed that plastic adds aerodynamics to the car, but of course it is possible to imagine Niva 2121 and 21214 rushing along the highway at a speed of 150 km / h, but the car is not intended for such speeds. That is why the manufacturer made it angular, not streamlined. nine0003
Opinions about the installation of a plastic body kit among field growers are very different. Some advocate its installation, arguing that the plastic protects the Niva 2131 metal from excessive moisture. Other owners of VAZ 21214, and not without reason, are convinced that plastic just contributes to the appearance of rust.
The body kit installation procedure often takes place in the garage, with your own hands, and after a year and a half, car owners are faced with rust and even through corrosion on the body. This is due to the fact that dirt is clogged in the gap between the metal and plastic, which, under the influence of moisture, remains wet for a long time, and, in contact with the metal of the body, rots and blooms. nine0003
The metal is damaged and the moisture does its job. Before installing the body kit, the craftsmen try to carefully treat the body with an anti-corrosion agent or mastic. The body kit is mounted on double-sided tape, liquid nails and caps, bumpers are planted on self-tapping screws. The price range is lower than that of a metal body kit.
Plastic body kits break into small pieces during an accident, not protecting the Niva 2131, but also not injuring pedestrians and other vehicles.
The front part of the VAZ 21214 is its main part, because the engine of the vast majority of cars is located in front, so here you need to look at the quality and thickness of the plastic. Although, with a good hit, nothing will save him.
One of the useful body kits is arch extensions . Thanks to them, from under the installed wheels of a larger diameter and with “evil” off-road tires, dirt does not fly onto the body.