Published: · Modified: by Allison · This post may contain affiliate links · This blog generates income via ads
So, it’s that time of the year when every nook and cranny is covered with snow, to create a path for yourself, you need a snowplow, in this article I have compiled a list of 20 homemade snow plow projects completed by various persons.
Here you will find homemade snow plow plans for SUVs, tractors, bicycles, and more. At the end of this guide, your snowplow needs would most likely be met.
Click for more details
If you have a tractor I would highly recommend making this homemade snow plow. The plow is wide enough to get a good amount of snow out of the way. In this DIY guide, you will learn how to make this low-budget snowplow, it is way cheaper than spending 500 dollars on a snowplow. For the making process, you are going to need wood, a rod, and a couple of other tools.
Click for more details
While doing my research, I found yet another amazing homemade snow plow, the making process involves the use of welding tools. This snow is made of metal, the making process will require you to build the blade frame and thereafter attach the plate. This homemade snow plow can be used for years without getting bad.
Click for more details
Here’s another snowplow I found, this one is ideal for a 4-wheel drive car. In this DIY tutorial, you will learn how to make a homemade snow plow and attach it to your 4-wheel drive car. Although this tutorial doesn’t go in-depth in explaining the process of putting this plow together, if you are a handyman, you would not have a hard time understanding the instructions.
Click for more details
I found this cute idea and thought I’d share it. It is a great hack for people that live in areas where the snow is unbearable.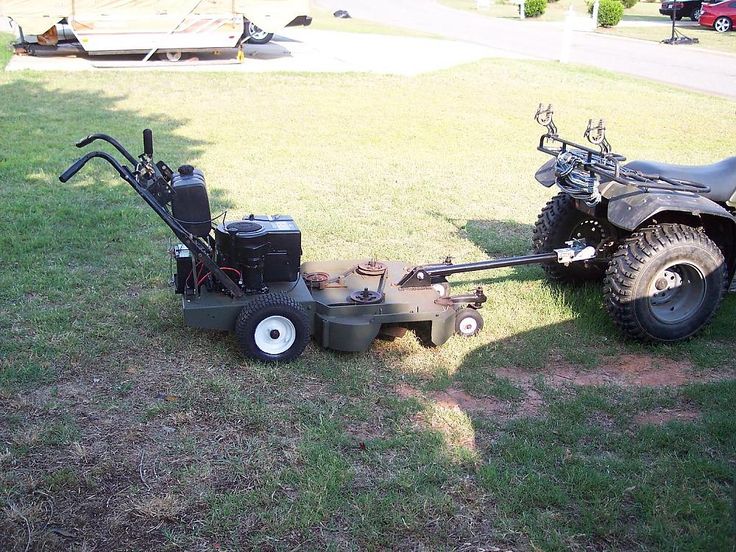 With this plow, you can walk with your heels or shoes and create a path for yourself. After reading this DIY guide, you should be able to make a toe plow for your shoes. The making process is quite easy to understand.
Click for more details
Here’s another homemade wooden snow plow I was able to find in the course of my research. With this wooden snowplow, you will be plowing backward, so you will need a vehicle with a Class III back hitch. The vehicle also needs to have a backup camera. This tutorial would not require using a pickup truck.
Click for more details
This guide is for people who own tractors and are looking for tips on how to have a homemade snow plow. The tips in the guide will show you all you need to know to have a homemade snow plow, from mounting the blade to tightening the parts.
Click for more details
I love the build of this DIY snow plow, the plow is built narrowly to save weight and keep it from taking up a lot of snow when lifted.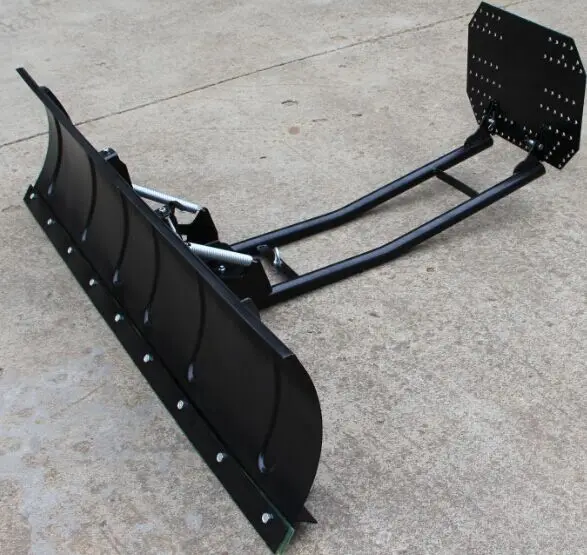 This guide is ideal for people who are looking at building a snow plow for their tractor. This is one that would cost less than $10 to build. If you are a handyman, building this shouldn’t be a difficult task.
Click for more details
This is ideal for people who have amazingly outstanding reverse driving skills. You should make this homemade snow plow if your reverse driving isn’t up to par. For the making, you will need an old bench press, roof sheets, old planks, and a few other materials.
Click for more details
I found this ideal to be pretty fantastic. You do not need to have a tractor or car to make a homemade snow plow. This guide will show you how to make a homemade snow plow using a bicycle and a few other materials. The making process will take a while to complete but it will be worth it in the end.
Click for more details
While doing my research, I also stumbled upon this remote-controlled snowplow. The cost of making this mini snow plow is about $389. This is ideal for people who do not want to go through the stress of using a shovel to clear the sidewalk. The making process is not so easy, it is time consuming but will most definitely be worth it in the end.
Do you have a Toyota corolla 4x4? Then this guide is for you. Here, you will see how the creator was able to build a wooden snow plow on his Toyota Corolla. This is one strong snowplow, however, the process will require you to take off the bumper of your car.
Here the creator was able to make a $12 homemade snow plow for his lawnmower using wood. Unfortunately, he doesn’t show the whole making process, however, if you are into woodworking, you’ll get the hang of how he was able to make this low-budget homemade snow plow using wood.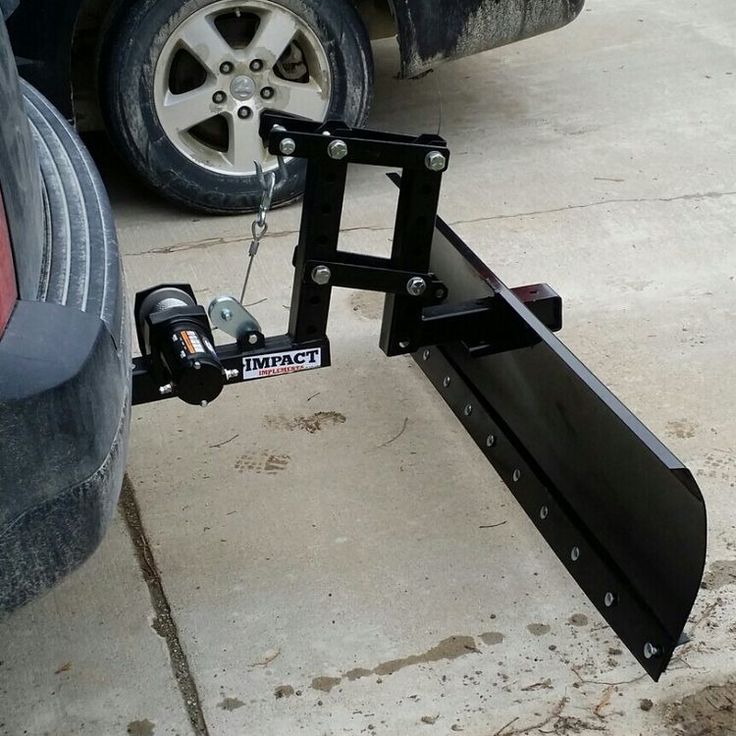
Source: laughingsquid.com
You can create this idea from items that are probably in your home right now. I know this homemade snow plow looks funny, but it works. For the making process, you will need to get an old LED TV case, and then attach it to the front of your tractor. It works like magic. This idea is ideal for people who are looking for a cost-saving snowplow.
Source: 9gag.com
Another thing you can do is to attach wood to your bicycle as seen in the image above. If you are into woodworking, making this shouldn’t be a difficult task to accomplish. It might not get as much snow out of the way as an ATV would but it works, however.
One unique feature that I love about this snowplow is that it can be rotated left/right.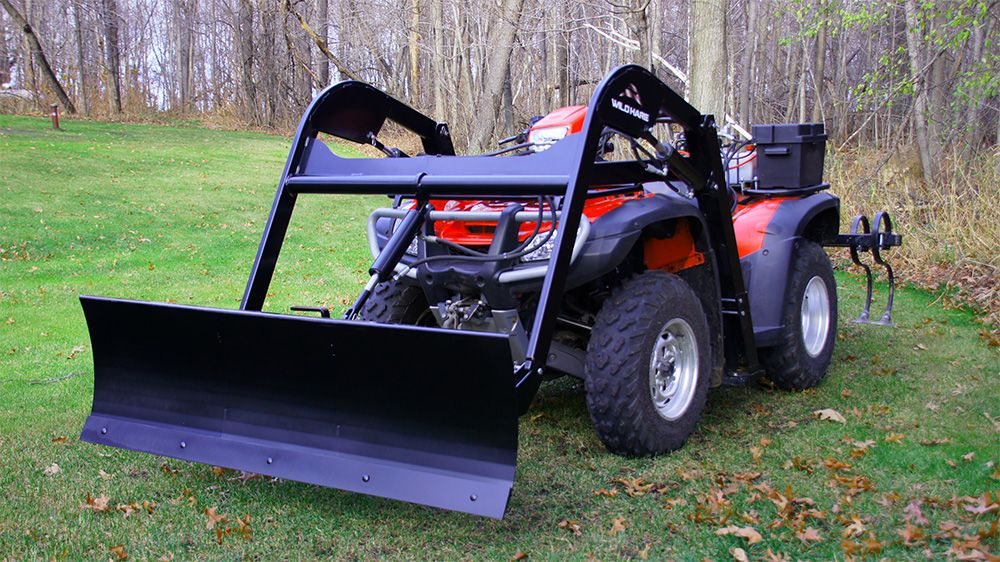 The snowplow is made of metal. In this DIY guide, the creator takes time to explain how he was able to put this snowplow together. It might take a while to complete, but it will be worth it in the end. You shouldn’t have a hard time making this if your handyman skills are top-notch snow plow Homemade Snowplow
Source: carthrottle.com
While this isn’t the best homemade snow plow in the world, it still gets the job done. If you are not planning on ripping apart the bumper of your car, you can consider this homemade snow plow idea. Somehow the creator was able to use a board and some rope to piece this together. I think this is a pretty cool idea.
Source: pinterest.com
This is a homemade snow plow made from a TPO roofing membrane and some wood. I love how the creator used the roofing membrane to cover up the wood. This is a great idea for those looking at having a “one of a kind” snowplow.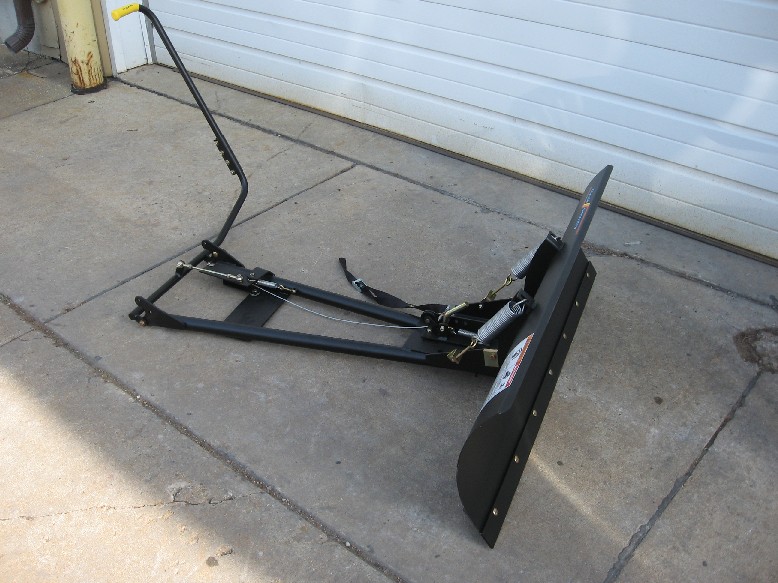
Save yourself from the trouble of building a snow plow from the scratch by getting one of these for your snow plowing needs. This machine is easy to use and also quite affordable if you ask me. I recommend this for people who have zero skill in crafting stuff.
Check Current Price on Amazon
If the previous snow thrower seems a bit too expensive for you, here’s one that would fit your budget. This is a snowplow that would require effort from you, it is not a machine, it is like a shovel that can be used to get snow out of the way.
Check Current Price on Amazon
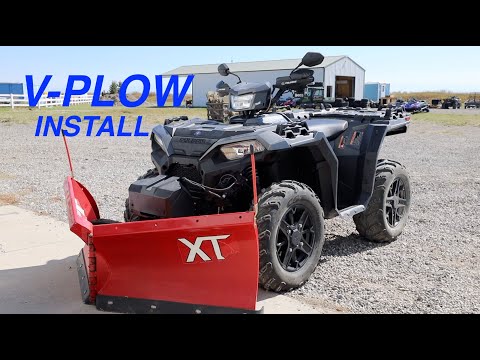
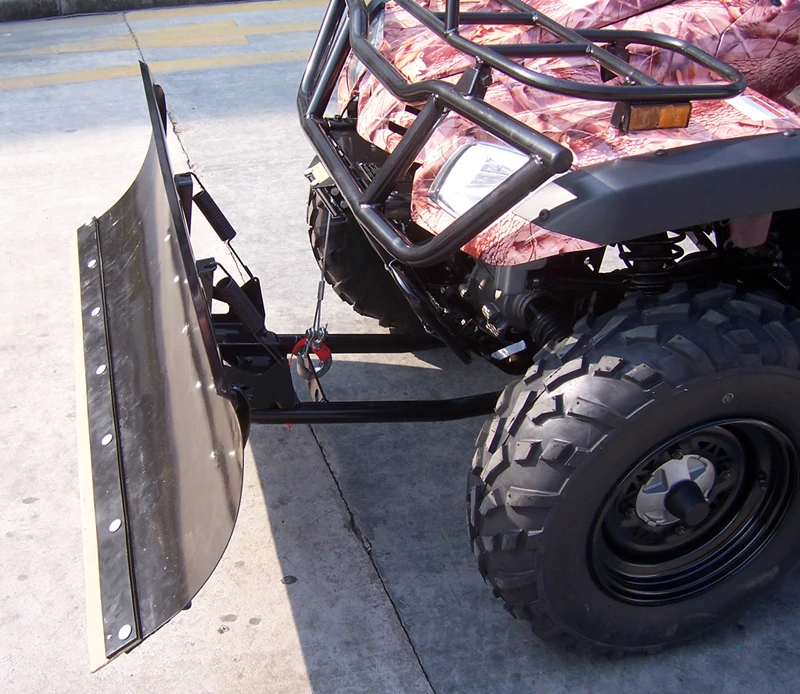
No, you are not buying the complete ATV, what you will be buying is the plow blade attached to the front of this ATV. I decided to include this for people who want to attach a plow to their ATV but do not know how to build one from scratch. This standard ATV plow is quite affordable.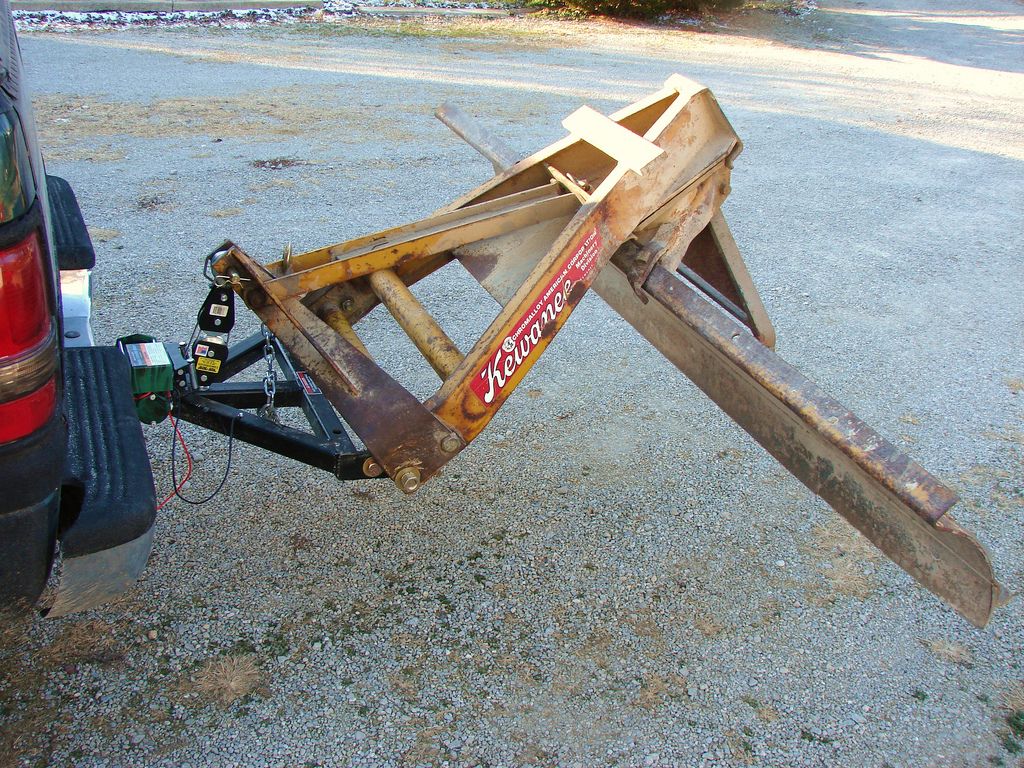 The blade comes in three different sizes. Make your pick!
Check Current Price on Amazon
by Steve Smith
Small All Terrain Vehicle on a beach 2 image by Sergey Sukhorukov from Fotolia.com
Building your own ATV snowplow involves getting the right tools, steel and welding equipment. You'll need to choose a design and style that is right for your needs. Do you want a curved blade that throws snow to one side, or one that throws snow to both sides? You'll also need to buy a raising mechanism and mounting attachment kit, because building one is very involved, and they aren't as expensive as the blade. If you build your own, you are likely to break a brace and give yourself several more wasted hours of repair on the attachment, plow blade and ATV.
Buy several sections of 4-by-4 inch 12-gauge steel that is at least 1/4 inch thick, or one section of 12-gauge steel that is the thickness of the plow blade. You can bend one thick section or bend and layer several sections. Either way, you need enough sheets to match the blade thickness you desire. Steel is sold in sheets at hardware stores, Home Depot and online at various outlets, and can be bought in small quantities.
Cut out the shape of the plow (accounting for the bend curve) from your steel sheet using a metal saw. Be precise on the bottom edge and top edge. A straight-curved blade will simply have a straight edge on the top and bottom, but a shaped blade that throws snow to the side will be much wider on one end.
Build a steel press. Use a large steel roller and the inside of an oil barrel, or anything else that is large enough to form the curve with your blade. Place the steel on the form and apply a heat source, then bend the steel around the form with a heavy iron weight or steel bars. You can also buy a steel press at a hardware supplier.
Cut bracing from your steel sheets for the back side of the plow.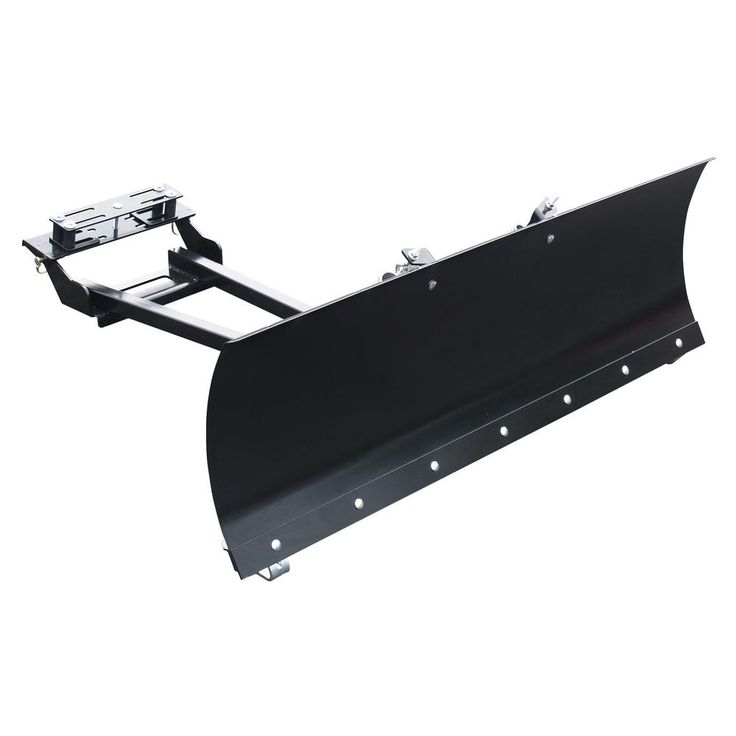 Trace the curve of the blade on the metal and cut them out using a metal saw. Then weld them to the back of the snowplow.
Weld on the attachments for your mounting system and lifting mechanism to the the back of the blade. You will have to consult your mounting mechanism diagrams to see what size and thickness these mounts need to be.
Prime your large blade with a solid, very rust-proof paint. Use several coats of primer until you're satisfied with the rust-proofing. Paint with a final coat of water- and rust-proof paint (usually in yellow, red or orange).
Cut a section from your iron sheet that is as long as the plow and about 4 inches wide. This will be the blade. Sharpen one edge slightly into a dull point. Lay this on the end of the snowplow and drill holes in both about 5 inches apart to prepare to rivet the two together.
Hot rivet the iron blade to the larger steel snowplow blade and let the rivets set. Your snowplow is now ready for use.
Tips
Things You'll Need
Writer Bio
Steve Smith has published articles on a wide range of topics including cars, travel, lifestyle, business, golf, weddings and careers. His articles, features and news stories have appeared in newspapers, consumer magazines and on various websites. Smith holds a Bachelor of Arts in English and journalism from University of New Hampshire Durham.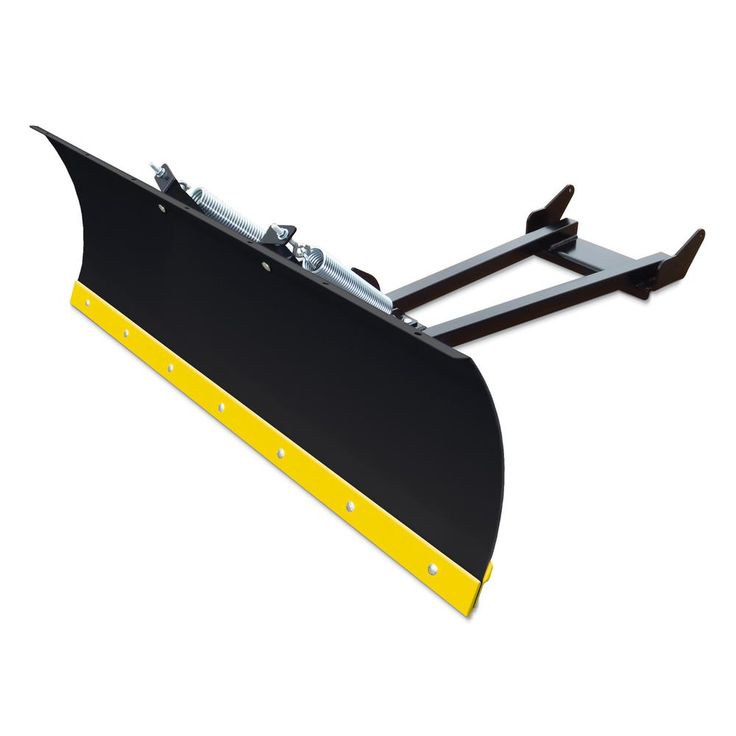
Mini-all-terrain vehicles have recently become increasingly popular among fans of extreme sports. If you also have a plow for an ATV, then this small SUV will not only be a way to get an adrenaline rush, but also an indispensable assistant in cultivating the land of the site where your garden is located.
This technique originally appeared as a means of entertainment, and it served for traveling over rough terrain, overcoming hills, water obstacles and off-road. A wheeled tractor was taken as the basis, only, unlike it, the SUV was already initially created more maneuverable and stable.
The off-road vehicle was calculated not for plowing hectare areas and transporting multi-ton cargo, but specifically for the needs of one person. Even the smallest ATV has a few horsepower.
ATV trailers and attachments easily transform them from off-road racing and overcoming obstacles into conscientious hard workers.
All this will significantly increase the efficiency of processing your site, where a garden house or cottage is built. Having fully understood and mastered all its possibilities, you will no longer be able to imagine how you managed without it before.
ATV, if desired, will not only allow you to have fun while riding it, but also significantly help in the household. It will not only save your labor costs, but also save a lot of money. With the proper trailer and attachments for it, you can perform the following work:
Plowing and harrowing of the earth is required for anyone who has a private plot. Moreover, allotments can be located in places where an ordinary tractor simply cannot climb or cannot fully plow them due to the small area, because it simply has nowhere to turn around. The strength and agility of this machine come to the rescue.
ATV plowing tool is designed as a conventional cultivator for commercial-scale agricultural tractors. Only it is smaller and consists of one knife, a maximum of two.
The blades are mounted on a trailed frame supported by one or two wheels (depending on the chosen design), which can be raised or lowered as required by a winch mounted on the ATV itself. The frame is attached to the ATV. Its connection occurs with the help of a towbar.
ATV plow, like all such earthwork tools, consists of:
ATV plow blade is made of extra strong steel and has different sharpening depending on the chosen angle of deepening and turning of the raised ground.
When the plow moves, the cropped land is lifted by leaning on the working plane, the dimensions of which are selected depending on the desired plowing depth.
The blade is followed by a plowshare that begins to turn the soil layer. It is usually made in a curved shape, especially for turning the turf.
Next comes the blade itself, which is a plate that finally turns the soil by 180°. The whole structure is mounted on a rack attached to the frame. The frame is attached to the ATV.
Special disc coulters can also be attached to this structure to facilitate the plow's entry into the soil and its further loosening. There can be one or two of them, and they can be located in front or on the side directly from the plow itself.
As a rule, organizations selling this equipment immediately offer all additional accessories in the kit, allowing you to make the most of its capabilities. Of course, an ATV plow bought right away is the best solution, but you can make it yourself using just a few steel parts.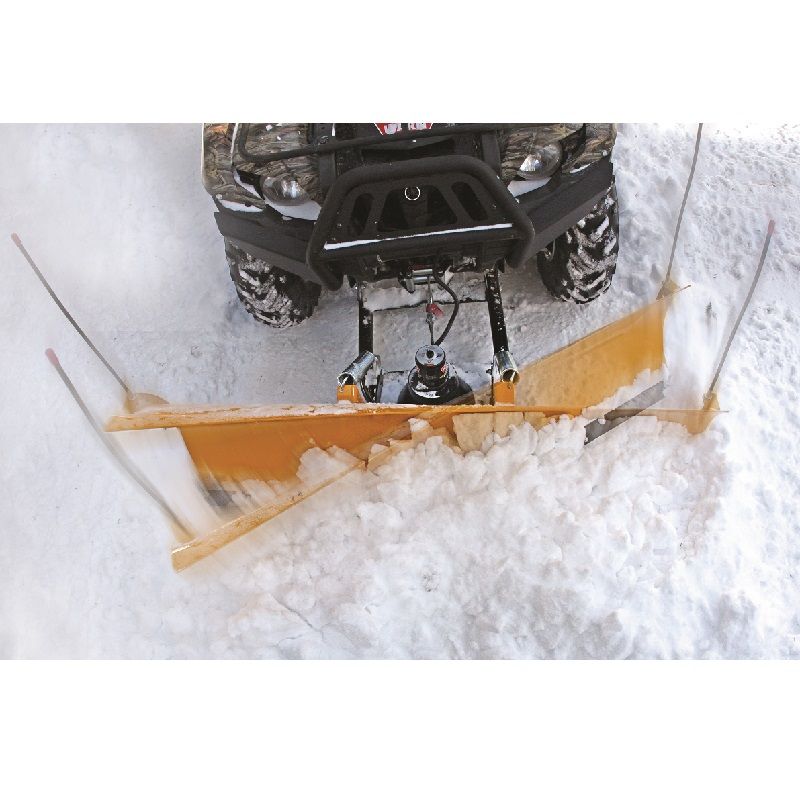
Starting to make a plow for an ATV with your own hands, first of all, you need to take into account the fact that high-quality plowing of the land occurs when the knife is deepened by 20-25 cm in length. In this case, serious loads will fall on the entire structure, including the friction force.
The plow and all its parts in contact with the ground (to maintain the necessary strength) must be made of iron with a thickness of at least 3-5 mm.
Share and knife are removable for timely replacement or sharpening. For their manufacture, it is best to use alloy steel of at least grade 9XC (it is used for the manufacture of circular saw blades). You can also use 45 steel with a hardness of HRC 50-55.
Blade can be made from an iron pipe with a diameter of 500-600 mm:
Remember:
Countersunk screws are used to connect all parts. Holes for them and threading are made in such a way that they provide a tight articulation of the parts, but make it possible to adjust the angles of the structure if necessary.
The exact dimensions, shape and angles of all parts are calculated based on the model and power of the ATV and the characteristics of the soil to be cultivated.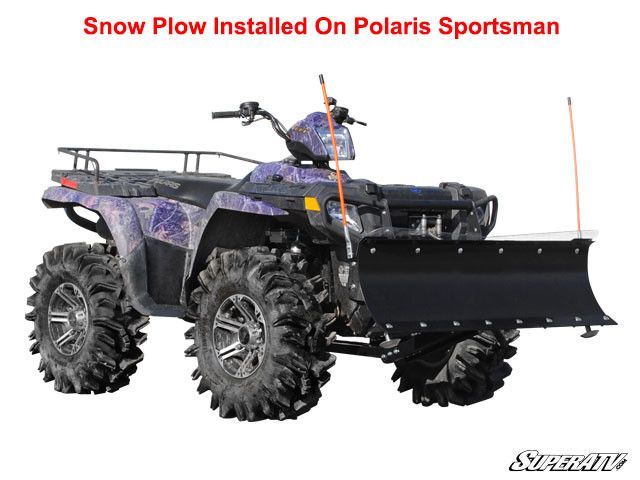 If the power of the all-terrain vehicle allows, then after the plow you can immediately attach a harrow. Then after the passage you will get a ready area for planting horticultural crops.
Tillage with an ATV and a plow, made or bought, is not at all like cultivating with a tractor or walk-behind tractor.
This is an exciting activity comparable only to racing through the fields. You will get a lot of unforgettable sensations and make your life much easier, ennobling your garden at the same time and increasing the productivity of the land.
Reviews and comments on article
Contents
Interested in an ATV plow? Thinking of tilling the soil yourself? Now we will consider the main components and device of the plow, as well as whether it is possible to make a plow for an ATV in the garage with your own hands.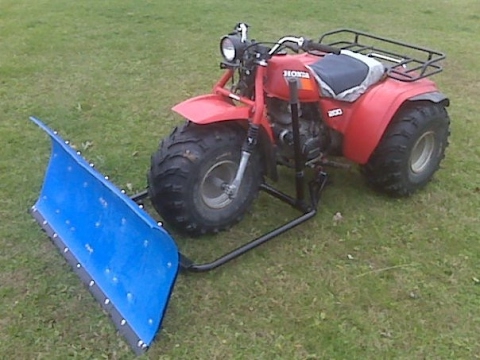
Residents of various quad rides! A variety of trips on these cars, of course, bring a lot of joy and adrenaline, somehow diversify your life. But you need to think about others. Let's take a little break from mental satisfaction and bring a little benefit to ourselves and help our families by using ATVs for agricultural purposes.
After all, a quadric is capable of creating miracles on any surface and even on soft ground. I suggest you that an ATV can easily handle the plowing of your garden in a small amount of time by putting an ATV plow on it .
Many dachas have areas where tractors, in principle, cannot pass, or it is simply inconvenient for them to turn around there, to make some maneuvers. So the ATV in such cases has a colossal superiority over the tractor, having the ability to maneuver in difficult situations.
Just think about how much time and effort you spend in the spring in your gardens to cultivate the soil. Believe me, the ATV will cope with the task of plowing one hundred percent.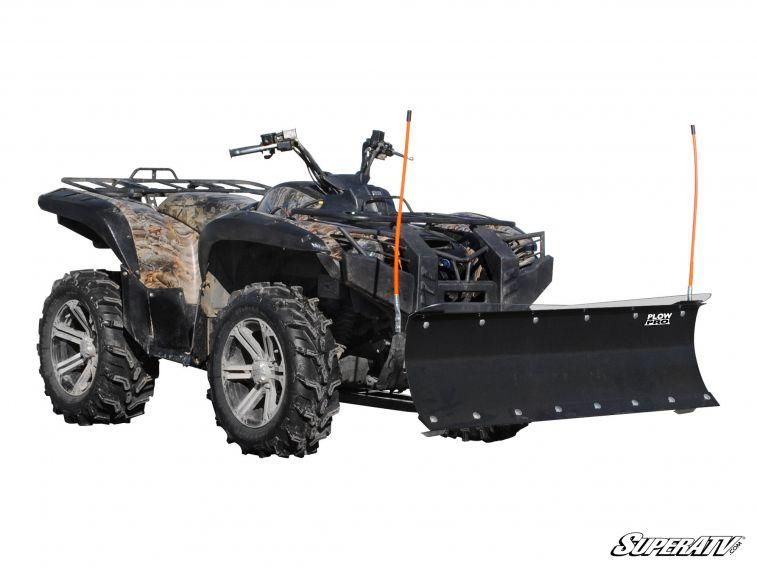 Quadr in its concept is universal and has proven itself in the agricultural industry for many years on the good side, and is an indispensable assistant for farmers. After all, he is able to replace a whole platoon of various agricultural equipment, with the use of the necessary accessories of course.
So, an ATV plow is a device that includes, first of all, a wedge that cuts the soil, a plowshare, a blade and a working surface. The design of the plow is a system of parts correctly matched to each other in order to perform all the functions of proper tillage. Let's analyze the purpose of each individual element, for the most complete representation of the entire process.
Wedge
Simple alpha wedge - under its action, the so-called soil deformation occurs, depending on the structure of the soil itself and the angle alpha α (located in Figure 1).
Dihedral wedge - gamma Fig.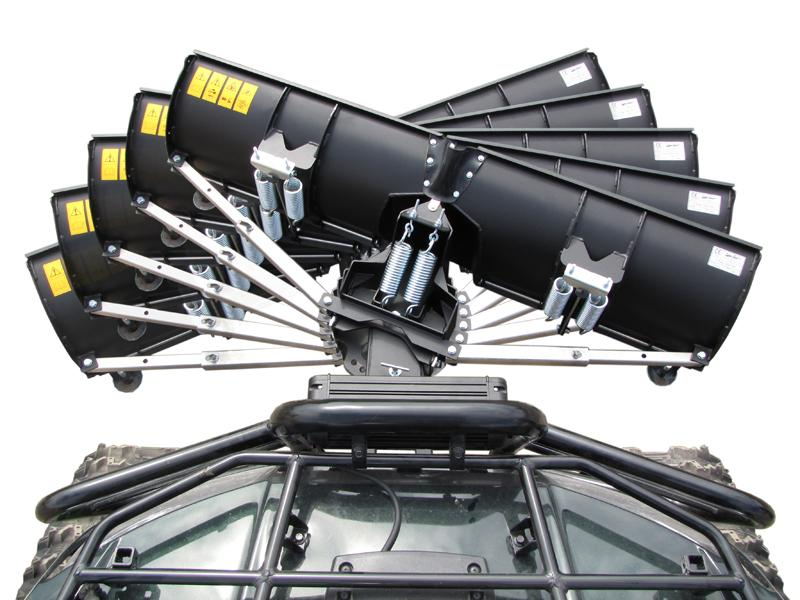 2 - together with the alpha angle, the wedge separates the captured formation from the bottom, lifting it, while compressing it in the vertical plane and splitting it into many separate parts. Note that the larger the alpha angle, the more the formation crumbles. But look, do not go too far, if the angle is increased to 45 degrees, the earth will not slip and will gather in front of the wedge. So the gamma angle is located vertically and separates the wall of the furrow from the formation itself, while taking the earth aside.
Dihedral wedge - beta Fig.3 - deflects the formation in the desired direction and turns it over.
And so, as a result of connecting all three wedges, such a picture should be obtained (trihedral wedge Fig. 4). All this is needed to turn the reservoir from the horizon to an inclined position by changing the angle from 25 to 130 degrees.
Small output : when the wedge moves along the X axis, the rib AB cuts the layer, separating it from the bottom, the rib BM from the wall, the ABM removes, crumbles and turns the layer.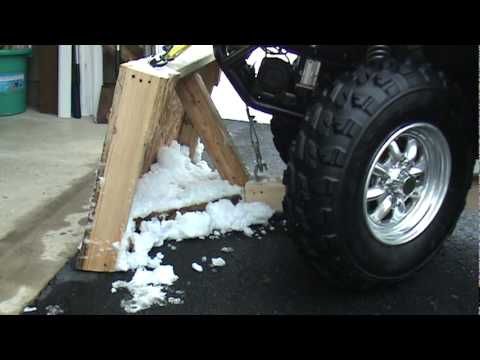
Further, to ensure complete plowing, the wedge is, as it were, built up, and it is transformed into a so-called plowshare.
Share - in turn, is a moldboard, curved surface. The recently listed alpha, beta, and gamma angles are constantly changing in this surface.
Let's take into account that the plow's organs, namely the workers, are the plowshare, as we have already dismantled, consisting of a wedge and a plate extending it; blade wrapping the layer; a support board that serves as a limiter for the depth of plowing, which rests against the bottom of the furrow freed from the ground. These three listed parts and plus a rack for attaching them together make up the plow body.
In conclusion, about the above, we can draw a definite conclusion : from the first drawing to the last, a certain process of earth movement occurs - this body cuts off the layer, lifts, wraps, crumbles the earth and throws it into the previously freed open furrow.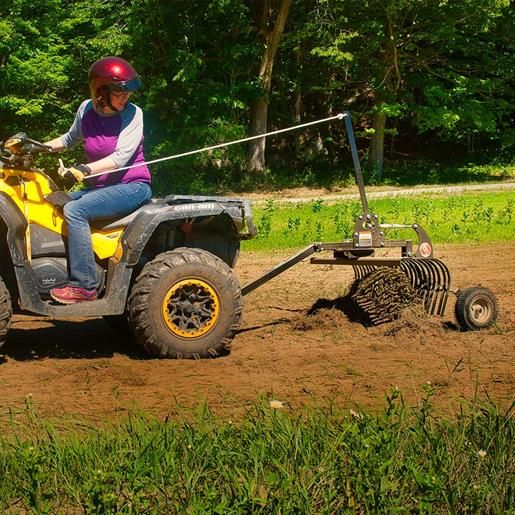 Fig.6
Fig.6
There are quite a lot of people - farmers who prefer to design a plow for an ATV in the garage with their own hands. Why not, because this is a serious money saving, in our time the price of a plow can be about thirty-five or even forty thousand. Well, of course, branded factory plows will differ from home-made plows, clearly everything in size can be done by yourself, but this design requires it. But for plowing your gardens, even such a plow is enough for your eyes.
And so let's consider a homemade plow for an ATV made by hand.
Some plow developers, meaning at home, are trying to copy the design from a tractor plow or, in general, from a horse plow. And you know, not everyone succeeds, not because laziness defeats their bonded mind, but only for a constructive reason, when developing, you need to clearly preserve the geometry of the hull.
Its formation comes from the considerations that when the earth is raised 20-25 centimeters high, the plow experiences quite large loads, and the surface, by the way, also feels significant friction, so we start from the thickness of the working parts of about 3-5 mm.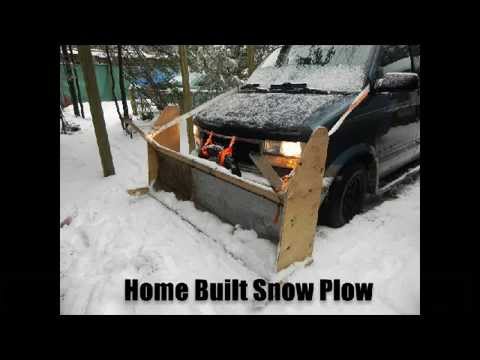
The share must be removable so that it can be removed for sharpening. It is made of 9XC alloy steel, a circular disc is suitable. You can also use steel 45 hardness HRC 50-55.
Consider the option of manufacturing a blade from sheet steel.
If you have bending rolls, drive through them, cut out the workpiece, at an angle of 20 - 23 degrees, to give a cylindrical surface, then finish with a hammer.
If rollers are not available, can be made from steel pipe with an approximate diameter of 550 - 600 mm. And the thickness is 4-5 mm .. Before that, we will make a template from cardboard, put it on the pipe and mark it with chalk on the pipe, cut it out with gas welding, grind the errors on a knife. If necessary, finish with a hammer.
Next, we will act according to the saying: "Measure seven times, cut one." First, we will make elements from cardboard, preferably dense, we will draw up a visual layout of the plow, maintaining all angles.