Changing a bike tire after getting a flat is a relatively easy fix—as long as you know how to handle it. Whether you ride on smooth pavement, rough gravel, or rocky singletrack trails, it’s bound to happen eventually, so you might as well prepare yourself with both the necessary tools and the bike repair knowledge you need address the problem.
Below, we detail everything you need to know about how to change a bike tire, including the bike tire repair tips you need to succeed.
First things first though—for tools, you should always carry tire levers, a correctly-sized spare tube, and an inflation device, be it a mini pump or CO2 cartridge. You may also want to consider a patch kit or tire plug, which can come in handy for certain riders. And if you run tubeless tires, scroll down to skip to the tubeless section. When you’re ready to go, here’s your step-by-step guide.
Start by removing the wheel. Keep your bike upright, and if it’s a rear-wheel flat, shift your drivetrain into the hardest gear. If your bike has rim brakes, which many bikes still do, you may also need to loosen the brake.
Next, position yourself on the non-drive side of your bike (opposite the chain) and either open the quick release or unthread the thru-axle to remove the wheel.
Now you can remove the tire. Hook the rounded end of one tire lever under the bead (the outer edge) of the tire to unseat it. Fix the other end to a spoke to hold the lever in place and keep the unseated tire from popping back into the rim. Then hook the second lever under the bead next to the first, pushing it around the rim clockwise until one side of the tire is off. You don’t need to completely remove the tire.
Once the tire is loose, pull out the old tube (if applicable) and look for the source of the flat, which could be a thorn, piece of glass, or some other sharp object. Carefully run your fingers along the inside of your tire and rim, making sure nothing sharp is left behind; otherwise, you risk getting another flat. Also inspect the outside of the tire, again looking for any foreign object that might still be stuck in the rubber.
If you’re using tubes and want to do a little detective work, pump some air into the old one to find the leak. Two holes side by side indicate a pinch-flat, where the tube gets pinched between the tire and rim. A single hole is a sign that your flat was most likely caused by a sharp object. By lining the tube up with the tire using the valve as a point of reference, you can double check the area where the hole is to ensure the culprit is removed.
If you’re the thrifty type who likes to reuse old tubes, or if you’ve gotten multiple flats on your ride and have no more spares, then you can patch your tube with a patch kit. If you have a new tube, skip to the next section.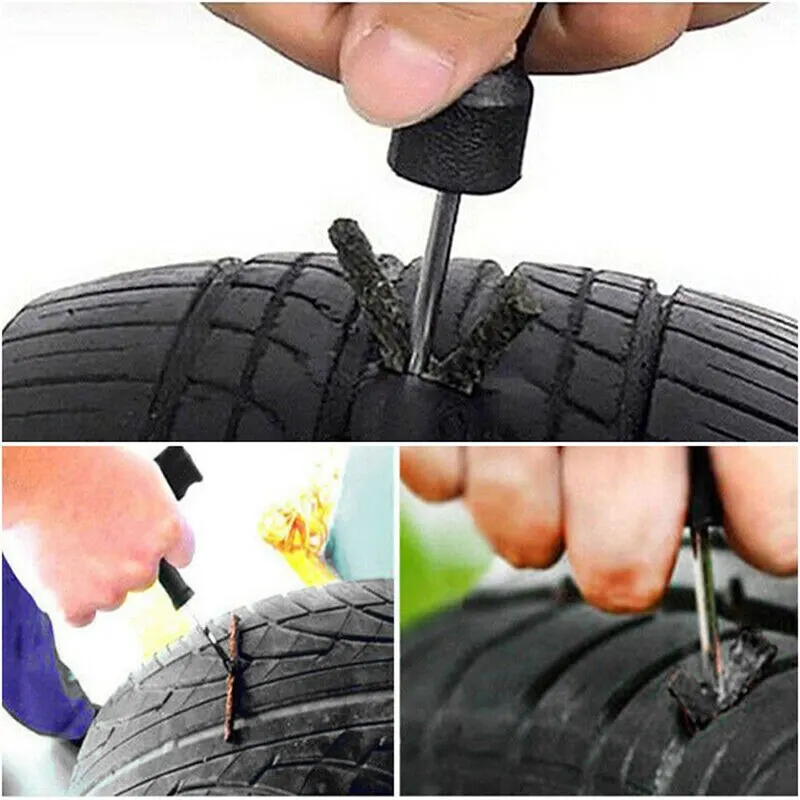
Start by cleaning the punctured area and roughing the surface with an emery cloth. For a glueless patch, simply stick it over the hole and press firmly. For a patch that requires glue, add a thin layer of glue to the tube and patch. Wait for the glue to get tacky, then apply the patch and press firmly until it adheres.
If you prefer to reuse old tubes or ran out of spares, you can try to patch the hole with a patch kit.
Katja Kircher//Getty ImagesNow inflate your new or patched tube just enough so that it holds its shape. This makes it easier to place inside the tire. Next, with the valve stem installed straight through the rim’s valve hole, position the tube inside the tire. Work the tire back onto the rim with your hands by rolling the bead away from yourself. Try not to use levers to reseat the tire, as you could accidentally puncture your new tube. When you get to the valve stem, tuck both sides of the tire bead low into the rim and push upward on the stem to get the tube inside the tire.
Check to make sure the tire bead isn’t pinching the tube by gently pushing the tire to the side as you work your way around the rim. Then inflate to the appropriate PSI and check that the bead is seated correctly.
$50 at Amazon
Credit: Silca$8 at Amazon
$6 at Amazon
Credit: Park Tool$45 at REI
Credit: REIIf everything looks good, reattach your wheel, making sure the quick release or thru-axle lever is on the opposite side of your drivetrain.
If you had a rear-wheel flat, lay the top of the chain around the smallest cog on your cassette and carefully push the wheel back into the frame. Close your quick release (and rim brakes if applicable) or insert the thru-axle back into the frame and hub and thread it closed.
Finally, lift the rear wheel and spin your cranks once to make sure everything is back in place and operating smoothly. If all is good to go, get back on your bike and enjoy the rest of your ride.
Trevor Raab
For tubeless setups—all but standard in mountain biking and becoming increasingly popular on gravel, cyclocross, and even some road bikes—your sealant should do the trick without you even realizing it. Be sure to check your sealant regularly (about every three to six months) to make sure the tire has enough and that it hasn’t dried out.
But in the event of a bigger puncture or side-wall tear, you may need a tire plug to stop air loss. Plug kits come with a small strip of rubber and an insertion device, which allow you to plug the hole without even removing the wheel. Once you find the puncture and insert the rubber plug, re-inflate your tire to the appropriate pressure to see that it’s holding air. If so, start riding again, and check the repair every so often to make sure it’s holding fast. You could also add more sealant, but you’d need to carry a valve core removal tool and a small bottle of sealant.
Trevor Raab
If air loss is coming from a puncture bigger than a plug fix, you could try a patch or a boot on the tire. But fair warning: It’ll likely be difficult to get a patch to adhere to your sealant-coated tire without thoroughly cleaning the area. Adding more sealant or a patch could create another problem, too, by letting all the air out and breaking the seal between the rim and tire. It’ll likely be difficult to reseat the tire bead onto the rim on the spot. The easiest way to ensure your tire holds air at this point is to simply use a spare emergency tube to get through the ride and address it at home or at a bike shop.
$155 at Trek Bikes
$68 at Amazon
Keep It Clean
$10 at notubes.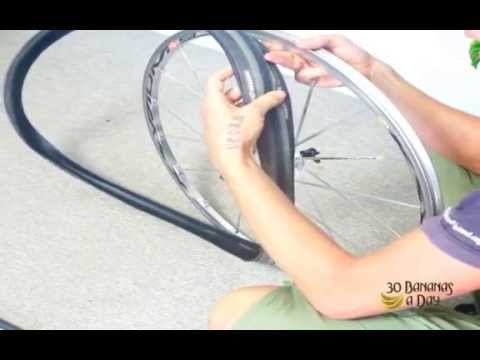 com
com
Precisely measure sealant and install with no mess.
Mid-Ride Repair
$60 at dynaplug.com
Brass-tipped plugs make fixing bigger punctures easy.
Jessica Coulon
Service and News Editor
When she’s not out riding her mountain bike, Jessica is an editor for Popular Mechanics. She was previously an editor for Bicycling magazine.
This content is imported from OpenWeb. You may be able to find the same content in another format, or you may be able to find more information, at their web site.
Tubeless tires are much, much better than the alternative, but that’s not to say they’re perfect. Sometimes, just getting a tubeless tire to hold air can be a challenge, and diagnosing the problem — let alone fixing it — can be frustrating. If you find yourself staring at a flat tire in the garage and muttering “why” over and over again, here are some tips for getting rolling again.
This article won’t cover mounting tubeless tires; we’ll assume the tire has been mounted successfully, but that it won’t hold air for more than a day or so.
No, we’re not celebrating yet, but this will get us closer to our goal by allowing us to zero in on the part that’s leaking.
Fill a spray bottle with water and some dish soap, or really any soap that forms bubbles. Next, inflate the tire to 30psi or so. Spray or just pour the soapy water all around the tire and rim, one section at a time. Note any places where air bubbles appear.
If there is a puncture in the tire itself that is leaking, this is generally an easy fix. Make sure you have plenty of sealant in the tire and move it around until the sealant pools at the puncture. Larger punctures may benefit from a tire plug.
With a sidewall leak, you’re usually better off replacing the tire. It might be possible to patch it, or if you’re really lucky, plug it, but in my experience sidewall repairs rarely last very long.
While rare, some tires have been known to absorb or even weep sealant. Tiny pores in the tire compound fill with sealant when it’s initially added, so you may need to add a bit more liquid to replace what’s been lost. If a tire still leaks through the tread or sidewall in multiple locations despite having good sealant coverage and no punctures, you may want to check with your local bike shop or tire manufacturer to see if the tire should be replaced.
Check to make sure the rim wall isn’t dented. If it is, your tire won’t be able to seal. If you find your rim is slightly bent or dented, it might be possible to get things straightened out enough to hold air. According to Gerow, “a couple of small planks of wood, a vice, and a hammer will get you started.”
Even if the rim wall isn’t visibly dented or misshapen, there could be a small gap between the tire bead and the rim that’s leaking air.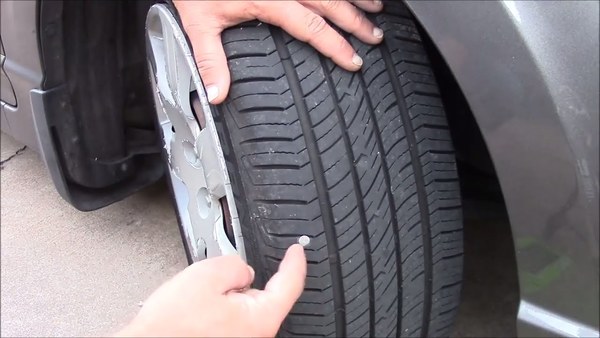 Make sure you have plenty of sealant in the tire, and hold it horizontally and tilted to allow the liquid to pool around the part of the rim where you saw the bubbles forming. Shake the wheel gently for a minute or so to let the sealant do its work.
In some cases, the tire-rim connection may not be tight due to buildup of old sealant. “Older tires can have a buildup of dry and hardened sealant at their bead that will create space between the rim and the rubber, causing air leaks,” says Gerow. “When mounting a tire that has already been mounted previously, be sure to remove as much dried sealant from the bead as possible.”
Sometimes a tire bead may not be fully seated in the rim. Try pumping the tire up to maximum pressure. The loud popping sound you’ll hear is the bead popping into place. If you didn’t hear that noise the first time you mounted the tire, chances are that is the issue.
After running through the checks above, try soaping the tire again and checking the same spot to see if the fix was a success.
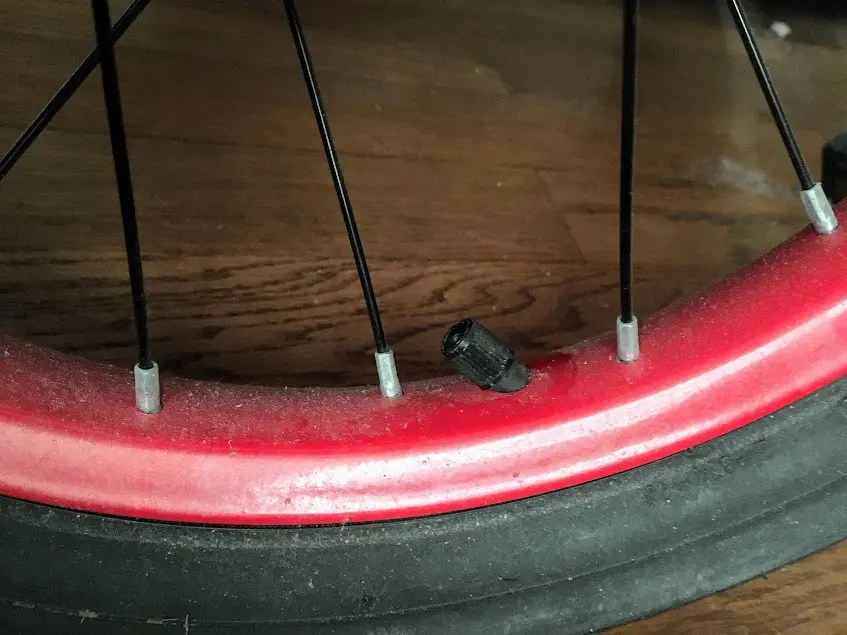
In my experience a leaky valve is often the cause of air pressure losses over time. If the soapy water reveals bubbles at the valve, it’s time to investigate further.
Tubeless valve parts with a valve core remover tool (red, right).First, check the easy stuff: Is the core screwed in tightly? Is the inlet screw loose or bent? A dedicated valve core tool is helpful for proper tightening, and if your fingers aren’t getting the inlet plunger tight enough, needle nose pliers can do the job. Just make sure you don’t over tighten and break the valve, or get it so tight you can’t add air later. If any part of the valve is bent or broken, don’t try to fix it; it’s time to replace it.
If soapy bubbles are forming around the base of the valve, it may not be attached to the rim properly. Most valves have a nut at the base that tightens the valve to the rim. Get this as tight as possible with your fingers, and if necessary give it a slight turn with a wrench. Just be sure to avoid tightening too much because you could damage your rim, especially if it’s carbon fiber, and you may need to be able to remove the nut on the trail in the case of a puncture.
Next, investigate the valve from the other end, which means taking the tire off the rim. Most valves have a soft rubber gasket that forms a seal around the valve hole in the rim, so check to make sure the valve is seated properly in the rim channel. You can also add a bit of teflon tape around the base of the valve to seal things up.
Sometimes sealant can fill in small gaps around the valve. If you notice air leaking while on the trail, try rotating and shaking the tire so the liquid sealant can get to the valve.
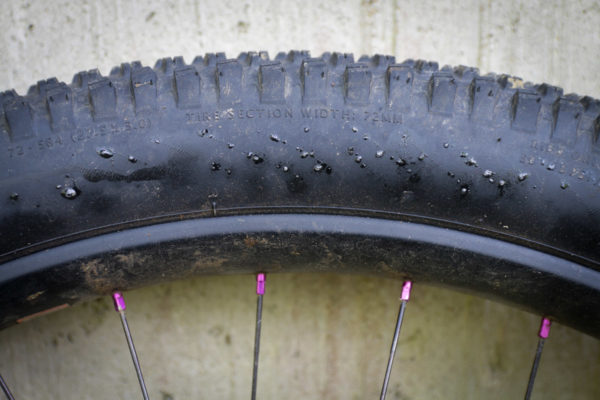
If bubbles form around the spoke nipples, the good news is you’ve found your leak! The bad news is, there isn’t a quick fix. This generally means the rim needs to be re-taped, or at the very least the tape needs to be patched over. If the tape appears wrinkled, ripped, or punctured that’s probably what’s causing the leak. Tire levers can often puncture the tape while installing the bead, causing the tape to leak air through the rim.
There are many tutorials online for taping a tubeless rim, but in general, the idea is to get the rim as clean and as dry as possible before taping all the way around in one go. Be mindful of any gaps where air might be able to leak, keeping the tape flat and taut to avoid blisters or pockets.
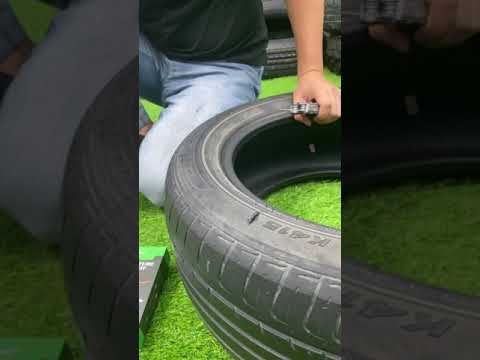
Sometimes, tires can be sneaky leakers. Pump them up and they’ll stay rock solid in the garage for weeks, but as soon as you roll in the parking lot, or take a turn, they go soft. You soap ’em up, and there’s not a bubble in sight. In fact, this has happened to me a couple times in just the past few months.
This is usually due to a small cut that only opens up when there’s weight on the tire, or if the tire is pumped up to a higher pressure. In your garage, you can try to simulate the effect of riding by adding pressure above what you normally ride, or by deforming the tire with your hands and looking for air bubbles as the tire squirms.
Gerow notes, “Some tires need to be ridden immediately after setup in order to hold air properly. A new tire that won’t hold air in the garage might be good to go after a short romp on the trail.”
Once you find the sneaky leak, getting sealant to the right spot can do the trick, though a plug may work even better.
Ultimately, tubeless mountain bike tire systems are pretty straightforward and there are only so many spots where air can escape. Imagine that you’re the air inside the tire, and you’re looking for a way out. How would you do it? That’s exactly the mindset you need to solve this mystery.
Singletracks may receive compensation for purchases made through any affiliate links in this article.
A leak from a metal heating or plumbing pipe can be a real disaster. Puddles, flooded and swearing neighbors, damaged floors and walls ... Leaks need to be fixed urgently, and if there is no time or money to replace pipes, simple but effective methods will do.
A leak can occur for a variety of reasons: the pipe simply wore out, rusted, the welder did not work well, the water was not drained from the system in the country house and the pipes froze ... In any case, you need to act as quickly as possible to prevent a communal disaster.
The first and the easiest and fastest way to temporarily fix a leak, for example, on a metal pipe thread, is to use a medical bandage soaked in water and sprinkled with salt. The bandage is wetted and wrapped tightly around the leak, each turn is accompanied by sprinkling with salt. This is a temporary way! Just to hold out until the arrival of the masters and the opportunity to replace or overhaul the pipe.
The second way to eliminate the leak is also associated with the use of a medical wide bandage. It is necessary to dilute the cement to the state of gruel and soak the bandage in the solution. Then, they wrap the place of leakage tightly, in several layers. The cement will harden in a couple of hours, sealing the leak. If it is decided not to change the pipe yet, you can clean the winding place with sandpaper and paint over. But still, this method of repair cannot be called long-term, although it is a more reliable option than a bandage with water and salt.
Third , one of the more popular options for repairing a crack in a metal pipe is to use a clamp. Factory clamps are sold in different sizes, you need to choose according to the diameter of the pipe. Rubber is placed under the collar, you can cut a piece, for example, from a bicycle tire, the top of a rubber boot, a thick work glove. A harness, rope, hose, flexible wire can replace the factory clamp.
Important! Before starting the repair of a cracked metal pipe, it should be cleaned of rust and old paint, mark the place of the leak and dry it.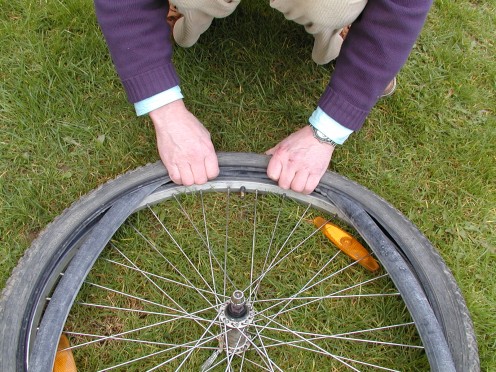
The fourth option is used if the water cannot be turned off, the clamp does not hold, and the cause of the leak is a fistula. In this case, you can cut a small conical wedge out of wood and drive it into the hole. You need to drive the wedges into the place of the leak very carefully, this is a temporary measure, but the owners will have the opportunity to do a thorough repair without a fountain from the pipe.
The fifth method involves the use of adhesive or cold welding. The place of leakage, in this case, must be dried, cut out a piece of rubber, plastic, fiberglass, flexible steel of a suitable size with a margin of two to three centimeters. The material is lubricated with an adhesive, it is better to use epoxy, or cold welding, it is firmly pressed against the leak. You have to wait until the adhesive sets. There are varieties of ready-made cold welding of the consistency of plasticine, with such a composition you can simply cover up, plug a crack or hole. But having a piece of suitable material on top doesn't hurt.
The sixth method, as practice shows, is the most reliable. This is a combination of the use of adhesive and a clamp. In this case, a piece of rubber, metal, plastic, fiberglass lubricated with cold welding or glue is pressed against the cracked pipe with a clamp. It is convenient that you do not have to hold the material while waiting for the glue to harden.
In any case, we strongly advise you to replace the emergency pipe as soon as possible. A crack, a leak is a sign that engineering communications need to be thoroughly dealt with, to replace leaky pipes.
More in this category: « What are the dowels for fixing insulation What is cold welding: types and features of application »
Top
What to do if the heating battery leaks during the cold season? The main thing is not to delay! The flow of water can intensify at any time, ruin floor coverings, walls, furniture and flood neighbors. It is necessary to repair the damage immediately, at the first sign of a leak. 9Ol000 heat-resistant adhesive
pipes are constantly exposed to pressure, high temperature and impurities contained in the coolants. Therefore, over time, materials break down and leaks occur. The longer a radiator is used, the more likely it is to leak.
What causes leaks:
 As a result, microcurrents arise that enhance oxidation. Corrosion is also caused by oxygen gas produced in empty batteries. Therefore, it is not recommended to leave the system unfilled for longer than 15 days.
  Causes leakage at the joints of heating system elements. The faucet on the radiator often leaks also because of the seals.
 There is an opinion among residents that a small radiator leak is not worth attention. They are sure that over time this place will “boil” and the heater will stop flowing.
But often the situation ends badly - at some point the leak increases sharply, the water floods the room and apartments downstairs. Therefore, if the radiator digs even a little, it needs to be urgently repaired.
It is important to take immediate action:

However, the Criminal Codes do not always comply with the laws, and the arrived repairmen often simply block the line, and the owners themselves have to deal with the repair of radiators. It is not always possible to quickly hire specialists, so it is advisable to have an idea of \u200b\u200bhow to fix leaks in batteries yourself. These skills will also be useful to the owners of private houses and summer cottages, who themselves monitor the state of the heating system.
Meet the radiators Teplopribor
Watch video
Benefits of radiators TEPLOPRIBOR
Reliable and durable
- operate at pressures of 16–20 atm. and withstand surges up to 30 atm. Their service life is from 25 years.
Long warranty
- 10 years for aluminum models,
for bimetal models - 15 years.
Composed of 90% Russian materials
- We work with raw materials obtained directly from leading Russian smelters and domestic components.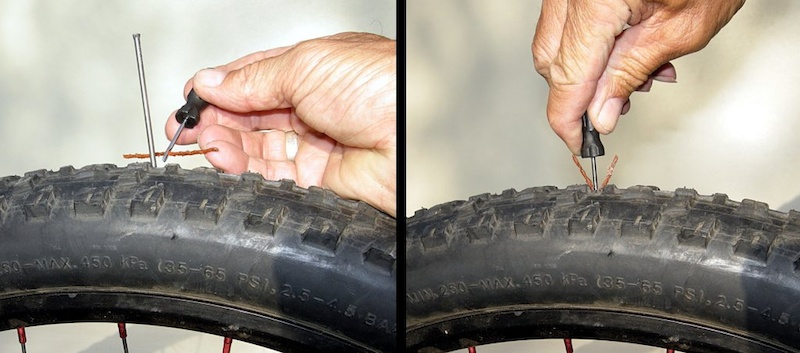
Suitable for various heating systems
- can be installed in one-pipe, two-pipe, independent heating systems with top and bottom connection.
Light and compact
– the company produces
radiators with a mass of one section from 1.06 to 1.94 kg. Their size ranges from 400x80x90 to 567x80x90 mm.
Powerful
- heat dissipation of 500mm products is 185W - 191W,
and 350mm products are 134-138W. According to this indicator, they are not inferior to world brands.
You can fix defects in the radiator housing in different ways:
All these measures have only a temporary effect. A battery that has already dripped is likely to depressurize again. Therefore, it is better to replace the radiator, especially if it has worked for more than a dozen years.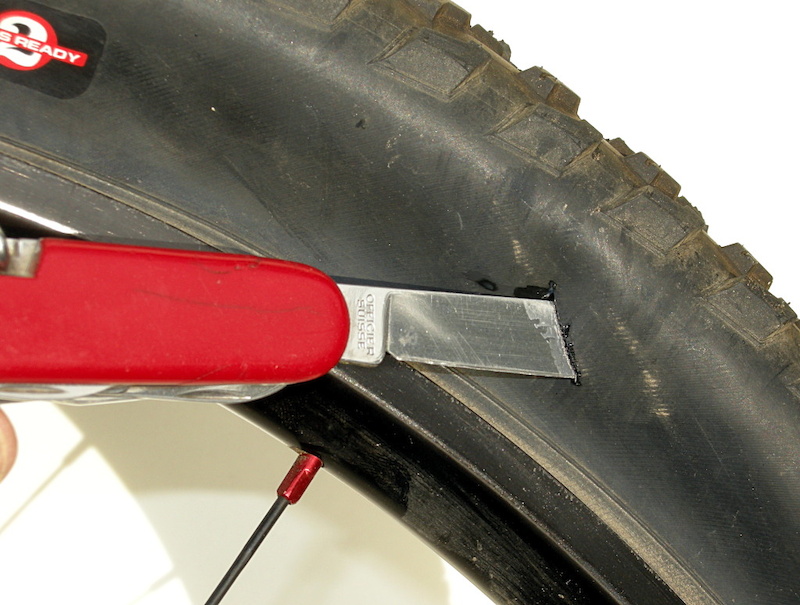
Different sealants can be used to repair batteries:
There are special sealants for the heating system, which can be used to repair even damp radiators and pipes. This is convenient because you do not have to wait for the leak to dry out.
Clean the area around the defect to remove paint and rust before applying an airtight filling. It is convenient to do this with a stone for sharpening knives (whetstone). Degrease the surface and apply a sealant to it so that it completely closes the leak and protrudes slightly beyond it.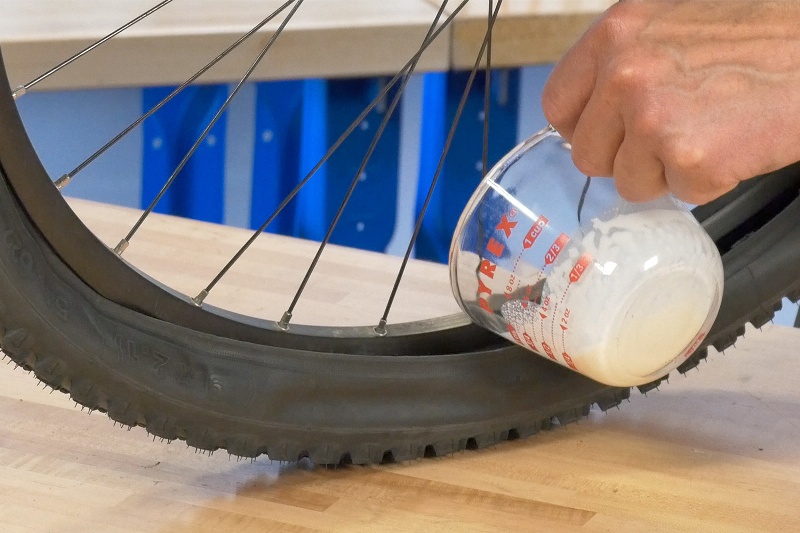
Wait until the adhesive, sealant or cold weld is completely cured. Previously, it was impossible to supply water to the pipes - the liquid would destroy the seal and the radiator would again begin to dig and leak.
This is how pipes that fit into the radiator are repaired. Take a rubber gasket, wrap it around the damaged area and put an aluminum clamp on top.
If no clamp and spacer are available, cut a patch of the correct size from a bicycle tire, wrap it around the pipe and secure it tightly with wire.
This method is also used to seal pipes leading to the battery. Dilute a small amount of cement with room temperature water to make a mixture that looks like thick sour cream. Soak a bandage with the solution and wrap the damaged area with such a bandage. The battery can be used after the solution has hardened.
To speed up the work, you can replace the cement with alabaster, diluted with water to a creamy state.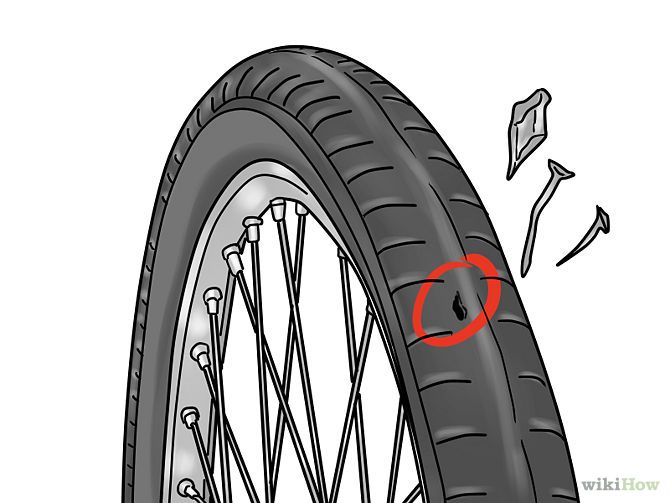 The alabaster solution sets instantly, so you need to close the leak quickly.
Seal leaking joints between battery sections. Take a moisture-resistant glue that is resistant to high temperatures, saturate the fabric with it and place the patch on the defect. Wait until the glue dries, and only then open the supply valve.
The surest way to get rid of a leak is to weld it up. To do this, you need to turn to professional welders who have the tool and the necessary skills. An attempt to do this on your own will end badly - the weld will quickly begin to leak and become unusable.
All proposed measures are temporary. At the first opportunity, you need to invite a craftsman who will weld the defect, or better, replace the heater or a rusted pipe.
First you need to determine where the coolant is leaking from. These can be sections, connections between them, joints between radiators and a pipe, and the pipes themselves.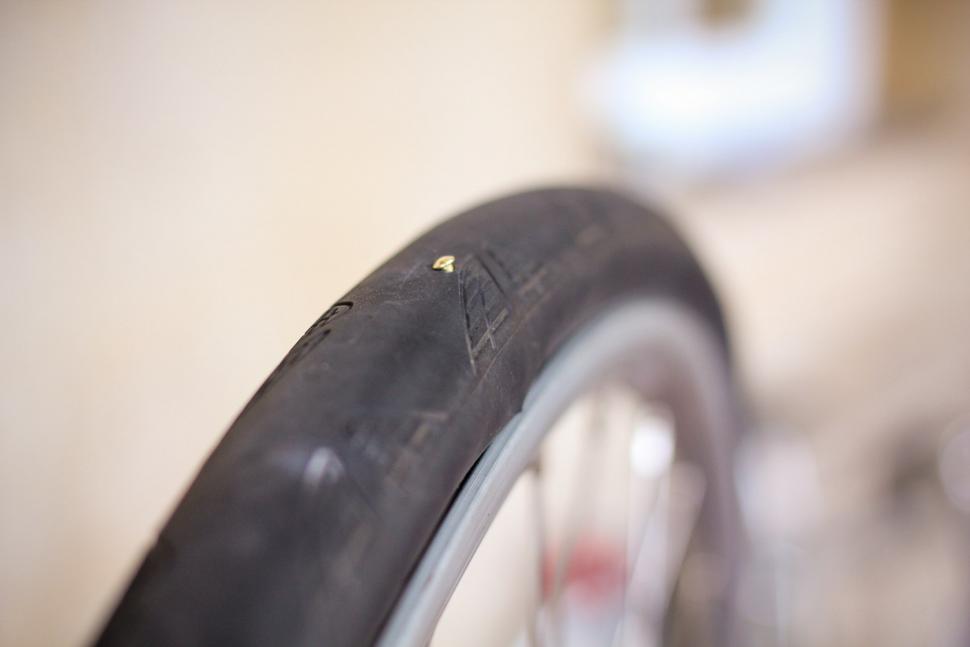 Then repair using one of the methods described below.
Remove paint and rust from damaged area. To do this, you can use tools for grinding, solvents and liquids such as "anti-rust". Be sure to make a small allowance, capturing neighboring areas. Clean the cleaned metal surface with sandpaper or a stiff brush.
Repair the defect with metal epoxy, which cures in five minutes. Cold welding is also suitable - but then you will have to wait 2-3 hours for drying.
Plug small defects with a wooden wedge. Drill the fistula a little into sections and drive a plug into the resulting hole. The wood will swell from the liquid, and the battery will become airtight.
Remove paint and rust from the metal in the damaged area. Prepare the epoxy as instructed and apply it to the defect. You can cover up the leak with cold welding or wrap it with a cloth moistened with moisture-resistant heat-resistant glue. Turn on the batteries only after the patch has completely dried.
Inside such a connection there is a seal - linen tow or fum-tape, which lose their properties over time. To restore the tightness of the joint, the sealing material must be replaced.
Take a wrench and use it to unscrew the connection. Remove the old seal and replace it with a new one. You can use linen tow, lubricated with plumbing sealant, or fum tape. Then screw everything back.
If the failure is caused by corrosion at the joint, the situation cannot be corrected on its own. It is necessary to call a master who will weld the defect or replace rusted elements.
A leak can be sealed with plumbing rubber and a clamp. If they are not available, take a piece of a bicycle tire, wind it around the pipe and tighten it with wire. The water will stop running to the floor.
Can be repaired with cold welding on a wet surface.