Skip to content
Posted on by admin
So you’ve got two jack stands and want to rotate your car tires to extend their lifespan. If that’s what you’re looking for then you’ve landed at the right place. This article will walk you through the method of tire rotation with two jack stands.
You should follow a specific pattern while rotating your car tires. Different vehicles have different tire rotation patterns. You can check your car owner’s manual for that, and this guide will also give you a hand.
After reading this article, you will be able to rotate your car tires with two jack stands by following your car-specific pattern.
So, let’s rotate your car tires.
Quick Navigation
You can rotate front axle tires with each other if your car has non-directional tires. The rotation method is the same for the front and rear axles with two jack stands. Follow the steps below for the front tire rotation.
Before raising your car, free the lug nuts of the front tires so that you can easily remove the tires while the vehicle is in the air.
Jack the right front wheel of your car and place a jack stand underneath the corner. Then raise your car’s left front wheel and place another jack stand under the jack point near the wheel. Jack points are just behind the tires in the case of front wheels.
Now the tires are in their new positions. Place the tires on their studs in their respective locations. Tighten the lug nuts of each tire with your hand.
Lift the right front wheel of the car again to remove the jack stand. Once you’ve displaced the jack stands, then lower the jack.
Remove the jack stand that you’ve placed under the left front end. Then tighten the lug nuts of your car’s front tires using a star pattern.
Now you’ve rotated the front axle tires of your car. Follow the same procedure for turning the rear axle tires of your vehicle. The only difference in rotating the rear axle tires is to lift your car’s rear axle and rotate the rear axle tires with each other in this case. And place the jack stand in front of the back right and left wheels once you’ve lifted each end.
You can rotate your vehicle’s tires by the side rotation pattern if the tires are of the same size and are directional.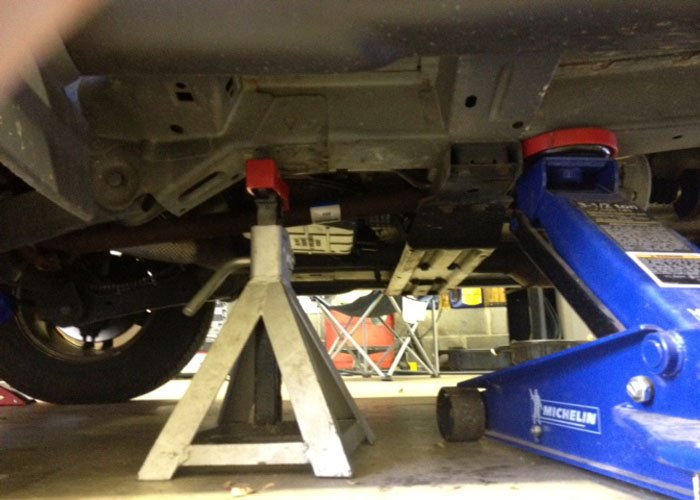 In other words, you can change your passenger-side tires with each other (the left front side tire with the left rear tire and vice versa).
With this pattern, you can also change your driver-side tires with each other (right front tire with right rear tire and vice versa).
Since you got the pattern, let’s rotate your car’s driver-side tires with two jack stands. Follow the below method for right-side tire rotation, and raise your vehicle’s right side for that reason.
Untie the lug nuts before jacking the car up. By doing so, removing the tires will be easier for you then. Consult your owner’s manual for the jack points. In this case, one jack point is just behind the front wheel and another point is ahead of the rear wheel.
Jack the front driver wheel and place one jack stand underneath. Then raise the rear wheel and place the second jack stand under the jack point.
Now is the rotation time. Displace the front tire and roll it toward the rear wheel. Next, remove the rear wheel and move it towards the front wheel.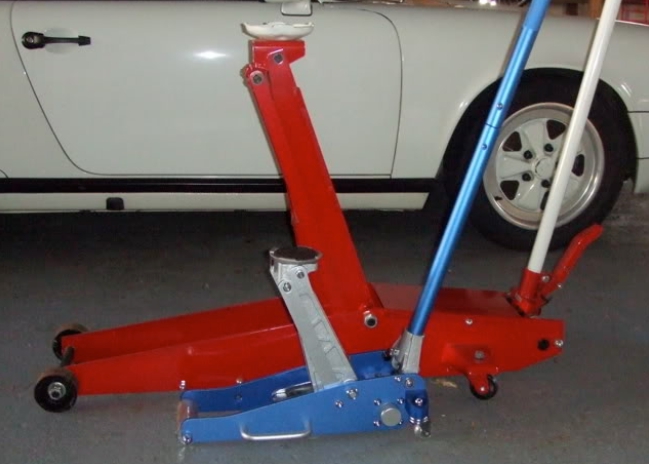 Place the tires in their new positions, tighten the lug nuts, remove the jack stand, and lower your car.
If your car is front-wheel drive, you can rotate the diagonal tires by following the X-pattern or Forward cross pattern. In the case of a diagonal tire rotation, using two jack stands could be dangerous.
You should have at least three jack stands, if not four, because you’ll need to raise the three corners of your car for x-pattern rotation. The best and most secure way is to lift the whole vehicle with four jack stands.
Related: How To Put A Car On 4 Jack Stands [Beginner’s Guide]
You can rotate the diagonal tires with two jack stands and one jack, but this could cause injury because jacks are for lifting purposes, not for holding. You have to do this task carefully.
With that, let’s rotate your vehicle tires by an x-pattern.
You’ve read how to rotate tires with two jack stands in this article. Using two jack stands for rotating tires could be dangerous, especially in the case of x-pattern rotation. It’s recommended to use at least three jack stands for the process.
Rotate your car tires with care and use the pattern which is recommended by your owner’s manual. You should not rotate tires randomly.
This article has covered three specific patterns for tire rotation. If any of the above rotation patterns are specific to your vehicle, follow the method discussed above.
Believe it or not, rotating tires is an important part of car maintenance. Even modern vehicles with all-wheel drive bias most of the power delivered from the engine to one set of wheels most of the time, with the secondary wheels only receiving a large portion of the torque when needed. As such, the primary drive tires will inevitably wear more than the tires that free-spin or receive little torque most of the time. So, to get the longest life out of all tires, the tires should be rotated every 12,000 miles or so. For most modern cars, rotating the tires at every oil change is ideal.
The recommended method for most cars is now to rotate the rears to the front and the fronts to the rear, always on the same side. But, each car is different and yours may call for a different method, like crisscrossing the tires. This is usually noted in the maintenance section of your car’s owner’s manual as well, but if you're unsure, contact your local dealer before attempting this procedure. If you routinely take your car to an oil change shop or your local dealer, they’ll normally rotate the tires free of charge or for a small fee (typically around $10 - $20, depending on your location.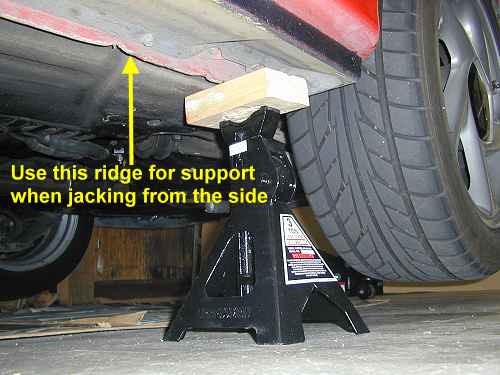 ) But, if you change your oil yourself, it’s also time to tackle the tire rotation too, but don’t worry, it’s much easier than you think and will ultimately save you money in the long run.
With that said, let’s dive on into the basic procedure and what you’ll need to get the job done right.
Each year, make, and model of a vehicle is different, so never assume that the process is the same for your vehicle. This is to serve as a general guide to tire rotation only, and you are responsible to verify lifting points and fastener specs via your owner’s manual, a repair manual, or your local dealer. Working on your own vehicle can be risky, so proceed at your own risk. If you’re ever unsure or uncomfortable, consult a professional before diving into this procedure. Make sure to read this article in its entirety and be sure to understand the process before attempting this procedure.
- Wheel chocks
- Floor jack
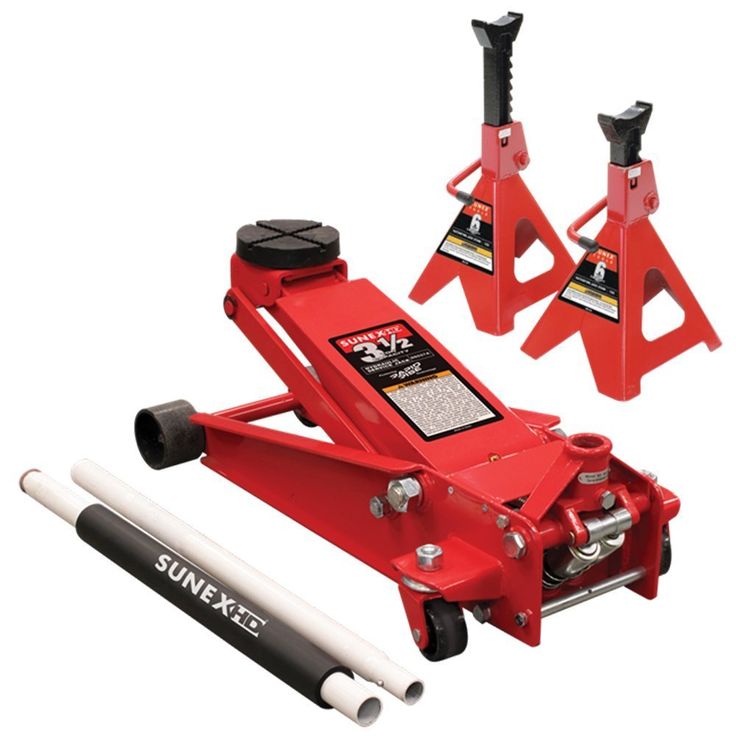
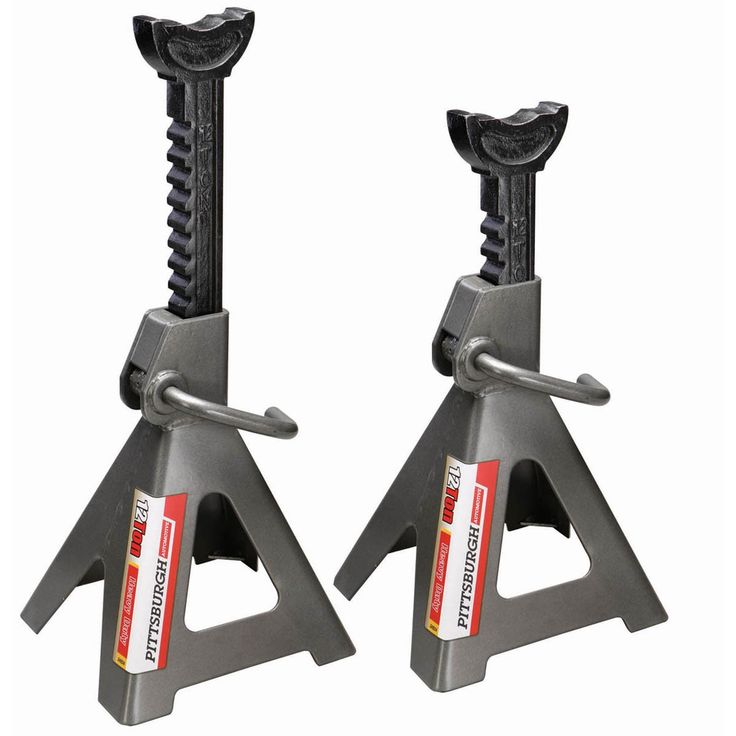
- Jack stands (minimum two, but four is better)
- Lug wrench or tire iron
- Torque wrench
The first thing you need to do is park your vehicle on a level surface, place the transmission into park (if your car is equipped with an automatic transmission) and engage the parking brake. Check your owner’s manual for lift points. On most smaller cars, this will be the pinch welds located just behind the front wheels or just in front of the rear wheels. Break the lug nuts on each wheel loose, but don’t remove them.
If you have four jack stands, place a set of wheel chocks around one of the rear wheels, then lift the front end with a floor jack. Some cars have a central jack point located under the front core support that you can use to lift the whole front end at once. Otherwise, use the pinch weld lift point to lift one corner. Place the jack stand under the subframe rail on that side of the vehicle. The idea is that the jack stand should be located under a flat surface of the frame rail that will support the weight of the vehicle. Slowly lower that corner of the vehicle onto the jack stand. Repeat this step for the other corner. Once the front end is positioned on jack stands, shake the vehicle to make sure that it is safely resting on the stands. It should not move. If it does, lift the vehicle and reposition the stands to a safer point.
Next, move to the rear. If your vehicle has a central jacking point in the rear (commonly the rear differential housing or center mounting point for the suspension) lift the entire rear end with the floor jack. If your vehicle doesn’t have a central lifting point, or if you’re not sure, use the lift points in front of the rear wheels at the pinch welds to lift the rear end one corner at a time. Place each remaining jack stand under the rear control or suspension arm where it mounts to the vehicle. Do not use the middle of the control/suspension arm or anywhere else under the body as this is unsafe and could injure you or damage the vehicle. One the jack stands are in place, lower the rear end onto the jack stands. At this point, the vehicle should be sitting level with the tires off the ground. Shake the vehicle again to make sure it is sitting securely on the stands. If it moves at all, reposition the jack stands accordingly.
If you only have two jack stands, that is ok as well. Place the wheel chocks around the rear wheel opposite of the side you’re working on first. Lift the front corner and secure it on a stand as described above, then do the same for the rear on this side. Shake the vehicle to make sure it is steady. If it moves or seems unstable, lift each corner and readjust the stands as necessary. Now you have one side still firmly on the ground while the side you’re working on is elevated. Never try to lift the entire side of the car in the middle on one go, as this could damage the vehicle and lead to injury. While the vehicle is supported with stands on one side, do not crawl underneath it or place any part of your body under the vehicle.
Remove the lug nuts for the wheels on one side. Remove both wheels. Place the front wheel on the rear hub and the rear wheel on the front hub. Install the lug nuts and snug them for now. If you’ve lifted the whole vehicle (four stand method,) repeat this process for the other side. If you’re using the two stand method, lift the vehicle off of the jack stands and lower it to the ground. Move the wheel chocks to the rear tire of the side you’ve just worked on, then lift the opposite side and secure it safely on jack stands as explained in Step 2. Rotate these tires, then snug the lug nuts and lower the vehicle to the ground.
Now that the tires are rotated, and the vehicle is back on all fours, it’s time to tighten the lug nuts. Most vehicles call for about 100 pound-feet of torque on each nut, however, check your owner’s manual or consult your local dealer if you’re unsure or if it isn’t available in your owners manual. Tighten the lugs on each wheel in a crisscross pattern to the recommended torque with a torque wrench. It’s not recommended to tighten them without a torque wrench, but if you don’t have one, make sure they are nice and tight with a lug wrench, then stop at a local tire shop or dealer to have them check the torque on the lug nuts. Most of the time this is free of charge or will cost you a few bucks. Even if you have to pay a bit, it’s better to be safe than to have your wheel come off while you’re driving.
- Some dealers and tire shops offer free rotation for the lifetime of the tires.
- Some dealers will offer free tire rotation with regular maintenance.
- Some major chain parts stores offer free loaner tools with a deposit. If you don’t have a torque wrench, rent one from one of these stores if possible, then return it to get your deposit back.
- A service manual (usually available from the manufacturer for a fee) or an aftermarket repair manual such as Chiltons or Haynes will have detailed information regarding procedures and tightening specs for fasteners. If you really want to perform your own maintenance, a repair manual is an invaluable source and well worth the money spent.
- Aftermarket manuals are much cheaper and usually, suffice for basic maintenance and repair, but manufacturer service manuals are more in-depth (and ultimately more expensive. ) For basic maintenance and repair, a cheaper aftermarket manual will work just fine.
- A jack, be it a floor jack or scissor jack, is only to be used as a lifting device. Never support any part of your vehicle with a jack. Always use jack stands to support the vehicle while it is in the air.
- Never work on a vehicle that isn’t resting securely on jack stands when it is in the air.
- If you’re not comfortable doing this job yourself, then don’t do it, and take it to a professional.
- Never attempt to drive the vehicle without the lug nuts being tightened first. If a torque wrench is unavailable, tighten them good, and head straight to a shop or dealer to have them torqued properly.
- Never use a floor jack that isn’t rated for the weight of your vehicle. For most trucks and SUV’s, you’ll and a floor jack rated at a minimum of 3 tons or 6,000 pounds. Smaller SUVs, trucks (think S10 and rangers,) as well as most cars, can be lifted safely with a 2 ton, 4,000-pound jack.
- Make sure you jack stands are rated to support the vehicle you’re working on. A good rule of thumb is to use 3-ton jacks for larger vehicles and at least 2-ton jacks for smaller vehicles.
- Some cars require a different rotation pattern, so always check your owner's manual, repair manual, or with your local dealer if you're unsure. Rotating tires incorrectly could lead to premature tire failure.
The reverse side of civilization - some elementary actions suddenly turn out to be well forgotten! Take the same wheel change - what could be easier? In fact, there are enough nuances, but there are plenty of opportunities to do something wrong, especially for beginners and those who, in principle, are not used to dealing with the car themselves.
And now many are just about to "change shoes". In fact, it is still early: at night, the temperature drops to almost zero degrees.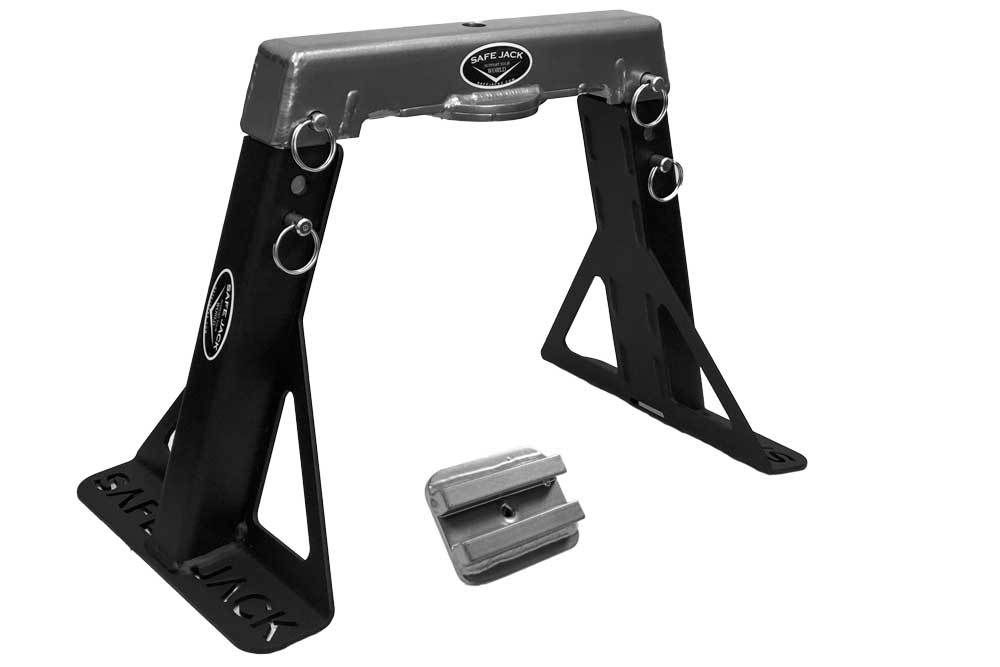 At the same time, it is recommended to switch to summer tires when the thermometer consistently shows above +5 degrees both during the day and at night.
It is clear that everything can be entrusted to specialists. But someone wants to save money on removing and installing wheels on a car (also money!), And someone has a summer set mounted on separate disks - then you can do everything yourself! And even if you do not even consider the topic in the light of seasonal tire changes, then a puncture can happen to everyone, and it is not always possible to call for help. And what's the point - with such a trifling problem?
It seems that if summer tires are already mounted on a separate set of wheels, then all that remains is to install them on the car. So it is - if the wheels are balanced. If not, do not spare the time and money for this operation.
Also, while the wheels are removed, it is very convenient to wash and clean the rims, and get rid of small pebbles from the tire tread itself.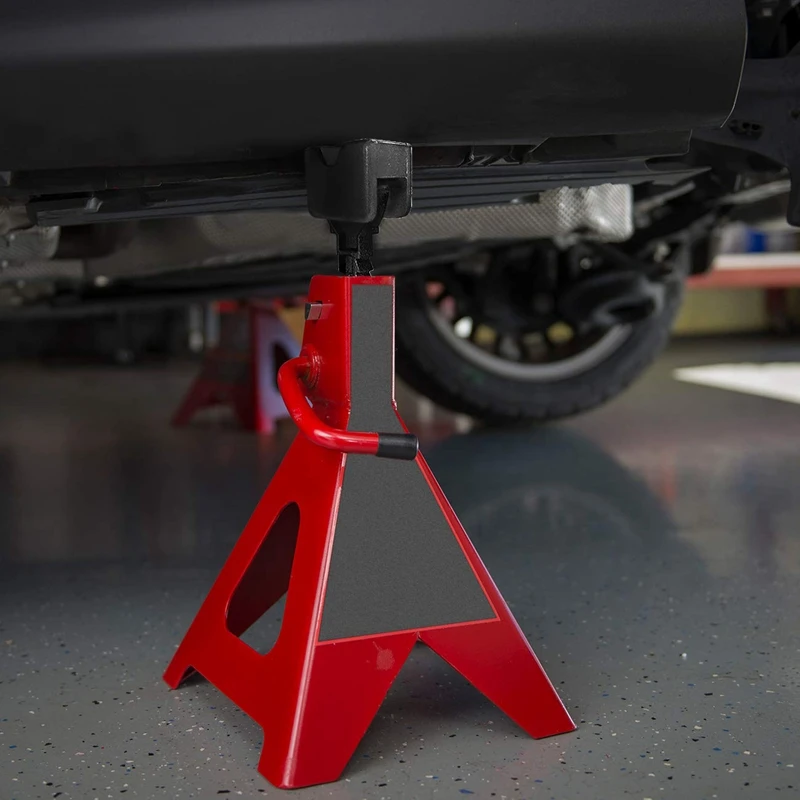 At the same time, check if the self-tapping screw that was caught last season is sticking out somewhere. Set the required pressure (the parameters are indicated on a special plate, which is placed on the gas tank hatch cover or in the driver's door opening, if it is not there, then the information is easy to find on the Internet).
There is such a recommendation: before removing the kit for seasonal storage, mark the wheels (tires) - after six months it will be easier to figure out where everything was. It is clear that when balancing the wheels and checking the residual tread pattern, it will be possible to establish which wheels are better and which are worse at the tire fitting, and yet the marking somewhat simplifies the process of deciding where to put what. Especially if you practice tire rotation.
It's no secret that front and rear tires wear at different rates. To make wear more even, rotation helps - changing wheels diagonally, and if the spare wheel is full-size, then it is also included in the process.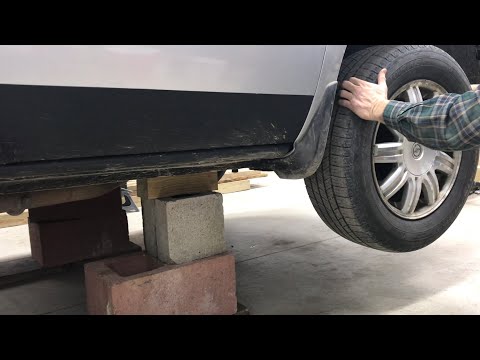
But remember that directional and especially asymmetric tires diagonally cannot be changed just like that, since it is important how they are mounted on the disk. For the same reason, it is important to make sure that the wheels are assembled correctly, and before installation - that everything is correct in terms of direction. Actually, here's another tip: before starting work, lay out the wheels on the sides and axles to reduce the likelihood of an accidental error in the process.
Let's start from the platform. Dirt or gravel will not work: the jack will dig into the soil, in addition, there is a risk of it tipping over, possibly with a subsequent breakdown. If there are no other options, then you can work in such conditions, but then you need to place a supporting surface (for example, a thick board) under the jack that can withstand a lot of weight.
The pavement must be hard, and if a rolling jack is used, which can make a slight movement under the car during operation, it must also be even - asphalt without holes and large cracks is preferable.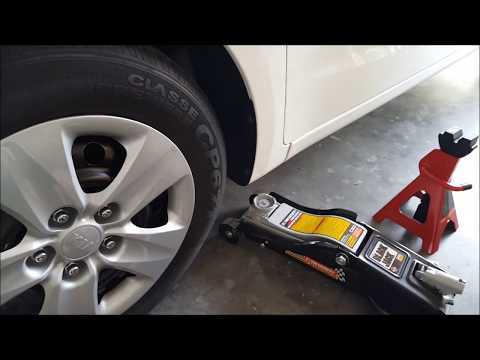 And in general, the site should be without slopes.
It is necessary to exclude the car from rolling - for this we not only put it on the parking brake, but on a car with a manual gearbox we turn on the gear, with an automatic gearbox we use the "P" mode, we put anti-rollbacks under the wheels - a brick, a large stone or another suitable size will do solid object. But before that, we make sure that in the places where the jack is installed, the surface of the site is even.
Again, it is important that the jack is placed evenly, without distortion on the supporting surface. You should use the points of the body provided for by the design (as a rule, they are marked with special signs or hidden behind the plugs of plastic linings). In the case of old cars, where the thresholds are purely nominal, the alternative is the power elements of the body.
It is important to take into account the design features of the jack, as well as the fact that in the process of lifting and lowering the machine, its position relative to the body may change.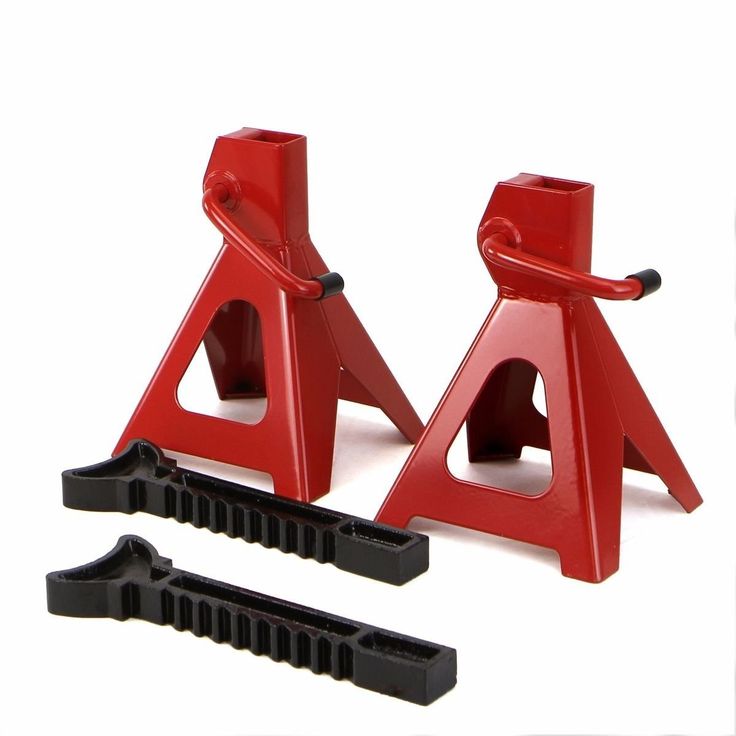 A good recommendation: before removing the wheel, make sure that the body raised above the road is securely supported by a jack.
In a good way, you should unscrew the bolts or nuts on the hung wheel - so as not to put a load on the fasteners (whoever broke the studs knows). The problem is that this is not so easy to do if the threaded connection was pinched during installation or soured over the winter. In this case, a longer lever is usually used - a large knob or pipe for a balloon key.
An alternative is to press the same barrel with your foot. Some frankly jump on the key, but it is important to know when to stop, because it won’t take long to break the thread. If more force does not help, try a liquid wrench or similar.
In general, in an attempt to unscrew the nuts / bolts, you can also drop the car from the jack, plus sometimes there are issues with fixing the wheels (if the drive is rear, the front wheel is not braked by either the gear or the handbrake), so it is still practiced to loosen the fasteners ( remove the nuts) while the wheel is on the ground - and only then raise the car.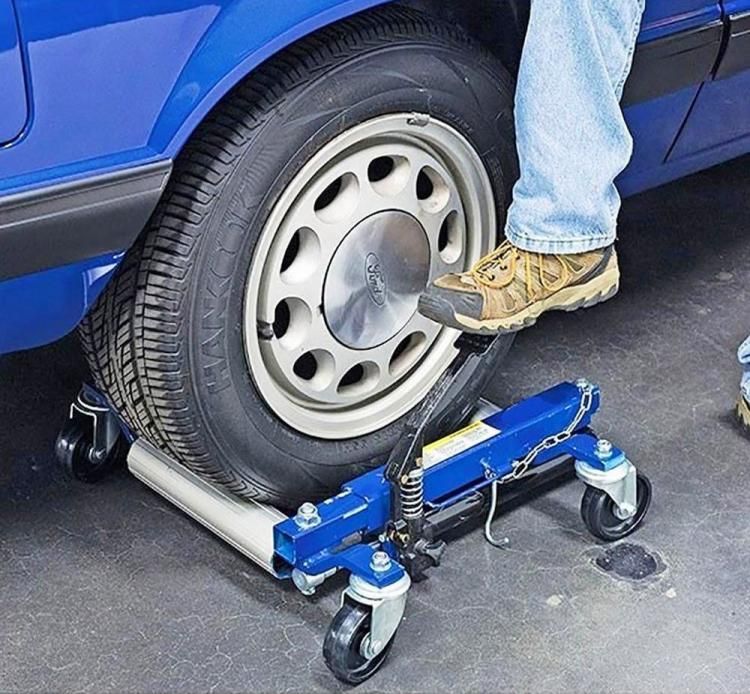 We raise it so that the wheel comes off at least 8-10 centimeters from the ground. The larger the gap, the easier it will be to remove and install a new one.
There can also be problems with removing the wheel: it happens that it sticks to the hub so that nothing can be done with the usual swinging with the help of hands. Then you can try to knock down with a kick, if you have a hammer or a sledgehammer - with a blow from the inside (of course, you should avoid hitting the body and chassis elements).
And this again to the question that the car is securely on the jack. There are doubts about this, but you have to make great efforts to remove the wheel? Put additional support under the car, at least one of the wheels. If the car jumps off the jack, at least it won't fall on the suspension.
After unscrewing the bolts / nuts, do not throw them on the ground so that they collect sand. We put them in a clean, dry place (the bolts can be placed vertically with the thread up).
Do bolts / studs need to be lubricated? There are different points of view on this matter, but the answer is rather negative. Problems with unscrewing later usually arise due to overtightened fasteners, not corrosion, and just lubricated fasteners are easier to tighten even with a torque wrench. So you just have to limit yourself to cleaning the threaded connection, but if you are fundamentally for lubrication, then at least let it be a minimum amount.
Same with hub. Bad wheel? You can clean the surface of the hub and disc, but do not lubricate the surfaces.
If the center hole of the discs is larger than it should be, special adapter rings must be used. We also recall that bolts of different shapes can be used for stamped and alloy wheels.
Now we put the wheel, make sure that the holes on the disk match the holes on the hub (it's good if the positioning is simplified by the studs), and the wheel itself fits snugly to the hub. Next, we will give this advice: start tightening from the top bolt or nut, pressing the wheel from the bottom with your foot - so there is less risk that the still poorly pressed wheel will jump off its position in the process.
It is recommended to tighten bolts / nuts not in order, in a circle, but crosswise (for example, top-bottom-left-right), from the old times the recommendation has been to go through the fasteners several times, gradually increasing the torque.
The main pull is carried out when the wheel is already on the ground. It is important not to overdo it with the moment. As a rule, depending on the brand and model, this value is in the range of 80-140 Nm. This condition can be precisely met with the help of a torque wrench. Don't you have it? Use a regular balloon wrench or grab the knob for the same length of the lever - so you most likely will not overtighten the fasteners.
In any case, after 150-200 km it is worth double-checking the fastening of all wheels, especially if alloy wheels are installed. Follow this rule every time you remove and install wheels, including for repairs. And check fasteners even if specialists were engaged in the car.
Because in fact, even quite a true jeep has there may or may not be a farm jack. Well, indeed, he is not a farmer - why him a twenty-kilogram piece of iron, which has nowhere to go but screw with lambs to another thirty-kilogram piece of iron, screwed to the roof. But what if you have, for example, a small crossover or a Suzuki Jimny in general? In a word, I propose remember what else, besides a rack jack, can be used while traveling in forests and fields, fishing and hunting. Let's start with the obvious.
Standard jack
Standard jack for every car, actually not so helpless. Especially if it's rhombic or lever. Screw ones, such as Zhiguli, are worse because they need to be installed use strictly defined places in which there are special nests, as a rule, tightly clogged with dried mud (to cope with it, although not immediately, usually helps picking with a screwdriver).
Difficulties can also arise with owners of bottle-type and rolling jacks. The first is often nothing rest (except for the towbar), and under the second one you need to dig such a trench, which is easier dig out the car itself ... Nevertheless, in most situations, a regular jack can help you if you help him first. Because the great Archimedes needed only one point of support, but you will need two to work. The top one, the one on the car, should be accessible - dug out and cleaned. The lower one, the one on the ground, is reinforced so that the jack does not fall under the weight car. And believe me, a dozen branches as thick as a pencil will not save. And with a hand thickness will not save. Even three logs will not help.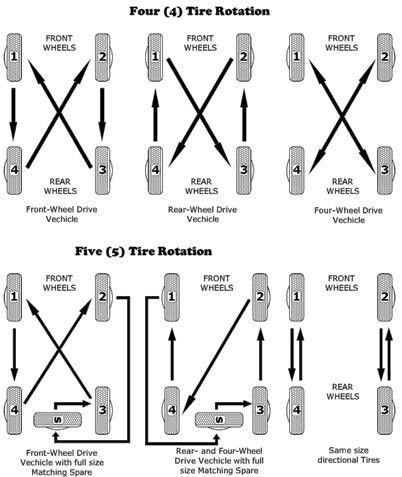 Board only, in a pinch a chock split in half, at least half the size of a regular sheet of paper, if you have a short "Niva"; if not short or not "Niva", then the size of a sheet entirely. The heel of the jack tends not only to sink in what it has already drowned in car, but also slide off the support. It would be superfluous to say that for stable installation of the support, especially if events occur in a rut, you should dig out a small tank caponier on a scale of approximately 1:35. No need to dig deep so that the jack could be slipped under the car (otherwise the lifting height not enough for the depth of the dig). However, if it is possible to substitute jack under the suspension arm or bridge, things will go more fun. Raising the car put everything you can find under the wheels: boards, sticks, branches, stones, soil. After this, you can lower the jack, rearrange it and the support to a place where you do not dug, and try to raise the car higher to put more under the wheels. In a word, in order to successfully use a regular jack, in addition to patience, you need a shovel, a piece of board for support and a piece of board to put under the wheel.
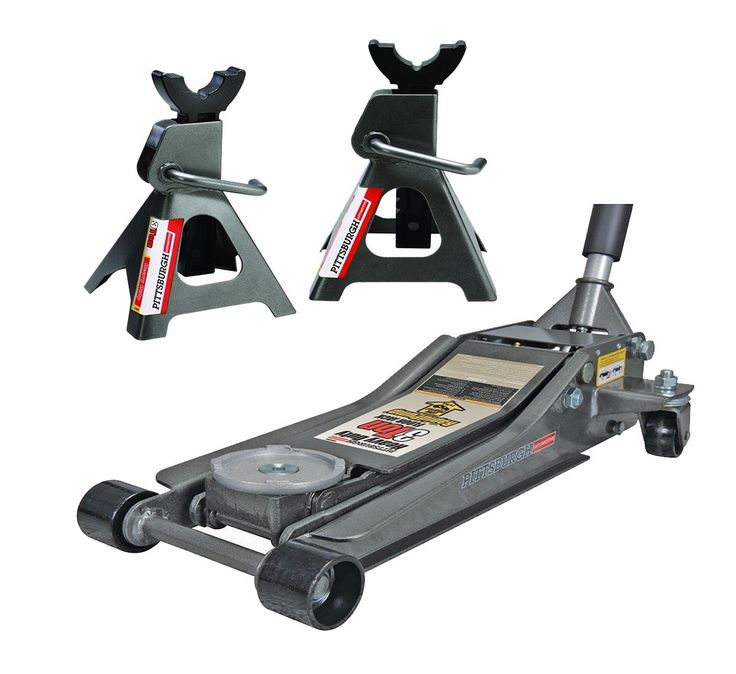 But it happens that the standard jack is not enough or it cannot be installed properly. Yes, and it can easily break, especially a rhombus. Then try using grandfather method.
Vaga
Again we remember the old man Archimedes and his desire to turn Earth. Lever arm! He is waga. A long thick pole, at one end tucked under car, the other sticking up in the air like an anti-aircraft gun. Here, however, there is many questions, no less complex than with a regular jack. Primarily, it is not clear where to rest the vaga so as not to crush the body and so that it does not jump out at work (if you do not have a truck, then I recommend the option with rims immediately brush aside). The ideal option would be the same sills, or frame. It's important not to forget that the conditional axis, that is, a stump or a piece of the trunk, on which the vaga will lie, should be stable and large enough for our lever to have enough swing.
Length shafts and the proportion of working parts can be calculated using the simplest formula, dividing a quarter of the mass of your car by your weight, that is, the effort with which you you will push the lever. Let 500 kg be conditionally a quarter of the weight of your car and 100 kg is your weight. Then, in order to pick it up (considering that it goes under the car about a meter length of the vaga), you will need a lever of five meters.
Work with it’s quite difficult for a vaga alone, and given that it is needed to put something under the wheel, then it’s completely useless (of course, you can use a rope and some kind of "anchor" to which it will be possible to tie the lowered end of the lever, but this already too difficult). In addition, you need at least an ax, although you can dump with your hands, or rather with a pole, resting it higher and swinging the trunk. Thickness Wagi should be at least 10 cm at the thick end, if we are talking about light an SUV, and not about a “two hundred” loaded to the eyeballs. Although it is easier to take bring something more comfortable with you. No, not High Lift...
Inflatable jack
Plastic bag jack, inflated through a hose, can be of two types: powered by an exhaust pipe or from a compressor.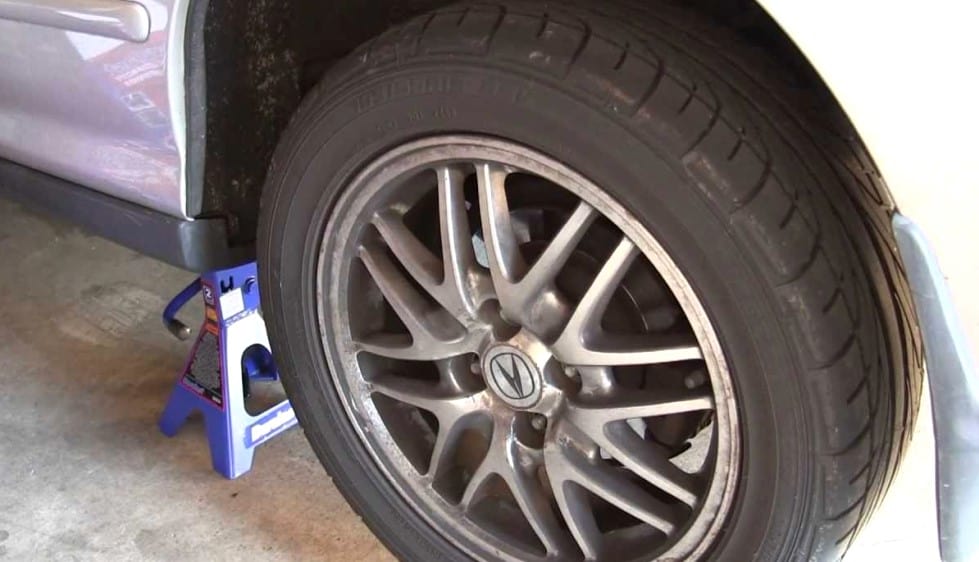 There are also adapters ... So, if you always have a compressor with you or exhaust two, then nothing is better than a pneumatic jack with a hose come up with. There are usually only three problems with it: it pops out from under machine, it can be burned or pierced, there is nowhere to put it after use. But the effectiveness of such a jack so much outweighs the above disadvantages that for unprepared machines it can be a real find. Yes, another unpleasant feature: even when deflated and folded, it is a rather voluminous bag that takes up half the trunk of a Suzuki Jimny or a quarter of the cargo Renault Duster compartment. The inflatable jack works great on any soil, with any machines, especially with those with a load-bearing body or an integrated frame.
Modern air jacks are noticeably different from those that were before. They appeared reinforced parts on the upper and lower ends, they are not torn from knots and protruding bolts, do not immediately melt from contact with the exhaust pipe, they there are even plastic spikes to keep the jack from slipping. To work with inflatable jack no special training, as a rule, is needed, sometimes unless just dig in the place where it will be pushed under the car. Before departure, and preferably before purchasing, you should look under the bottom of the car and assess whether it is possible to use a pneumatic jack. Say, under the tanks, radiator or under the catalyst, I would not stuff even the best, most protected inflatable jack. The rest of the procedure is simple. Finding a place where the jack will not be damaged. If necessary, dig a little. flattened into a pancake carefully slide the jack under the car. Connect the compressor or put on exhaust hose. We wait. Small motors sometimes lack idle move to inflate the jack quickly. Then we ask for an assistant or we rest something in the gas pedal (say, a shovel). Hold onto the exhaust pipe flare the hose must be very tight. Somehow pulling and throwing will not work - it will blow away. If a compressor is used, it must be sufficiently productive. Our experiments show that the Berkut R17 copes in about 4 minutes.