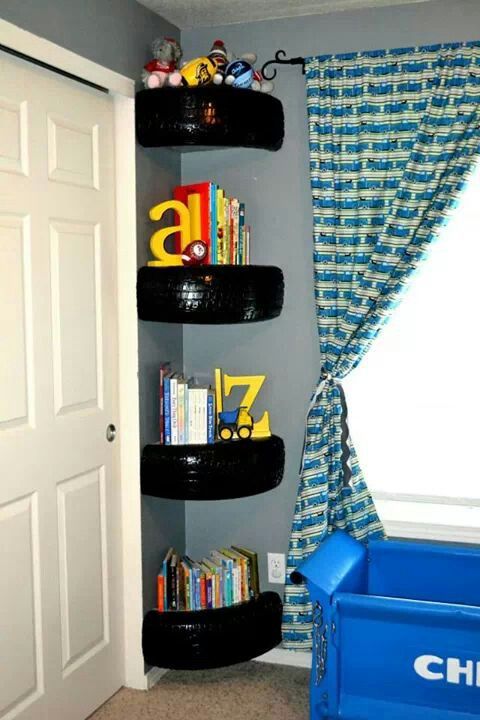
One of the fun projects we did in our Baby Boy’s room was Dirt bike tire shelves. We put his crib on the largest wall with his name above the crib. The wall is so large I didn’t want only his name I thought some type of shelves would look good. We had already decided on the Motocross theme so we decided to give it a try making shelves from old tires.
You can watch the video for the step by step if you are more of a visual person if not, the directions are below.
Supplies Needed:
Step 1- Cut Tire in half
Landon was in charge of cutting the tire. The tire was easy to cut but the wire inside the tire was a bit more difficult. Once you get through all the rubber there is a section with wire running on the inside. This is where we used the pliers and just kept bending them until the wire broke. Once the tire was all cut Landon shined it up with some tire shine so It wasn’t so dirty.
Step 2- Cut half circles
Thankfully, when we moved into our house the owners before us left a ton of scrap wood in the shed. Which has given me multiple opportunities for crafting 🙂 Anyway, you will want to cut the wood in a half circle so it fits inside the tire. Make sure you cut the wood a little bigger than the inside diameter of the tire. That way it will hold and not fall off.
Step 3- Make T shaped brace and attach to wall
We made the brace just big enough to fit under the half circle shelf top. Once you make the brace you will then need to find the studs in the wall so your brace has something to screw into. Just a heads up, we used a rather thin piece of wood for the brace so we pre-drilled all of the holes so that the wood didn’t crack. Don’t attach the brace to the half circle shelf until you are ready to hang the shelf to avoid messing up. (If you watch the video you will see we didn’t have a stud finder so we have multiple holes in our walls. We used a nail and hammer and nailed in multiple places until we found the studs.)
Step 4- Connect half circle to brace
After you have attached the brace to the wall you will want to remove it and nail the half circle to the brace before putting it on the wall permanently. I would recomend using something small like finishing nails. It wont take much to hold them together. This is just to help avoid the two from sliding apart.
Step 5- Paint wood
I didn’t like the color of the plywood with the black tire so I spray painted it black. This just helped tie it all together. Painting it was quick and it didn’t have to look perfect because you really can’t see it that much.
Step 6- Attach Tire
Once your wood is painted you will attach it back to the wall and slide the tire on. Since it is a shelf and we put it high enough that it shouldn’t get bothered we didn’t do anything to attach the tire. It is just hanging there. If you worry that it might slide off, you can run a finish nail our two through the edge of the rubber to hold it to the wood. After that you are done! Then, you have a fun Dirt Bike Tire Shelf!
~Now Let’s See What You Can Do~
~Bailie
Etsy is no longer supporting older versions of your web browser in order to ensure that user data remains secure. Please update to the latest version.
Take full advantage of our site features by enabling JavaScript.
( 64 relevant results, with Ads Sellers looking to grow their business and reach more interested buyers can use Etsy’s advertising platform to promote their items. You’ll see ad results based on factors like relevancy, and the amount sellers pay per click. Learn more. )
We tell you how to make a place to store car tires with your own hands in a workshop or garage. For example, winter tires can be stored in summer, and summer tires in winter.
Contents
To make a self-made folding shelf, the author uses a profile pipe 25 * 25 mm with a wall thickness of 2 mm. Although for reliability it is better to use a professional pipe 30 * 30 mm.
If done wisely, instead of a profile pipe, it is better to use a round one so that the rubber does not deform.
One of the advantages is the ease of manufacture of this design - you can do without welding, since all joints are hinged.
But it is not at all necessary to make a folding structure, because automobile tires will always be on the shelf: in winter - summer, in summer - winter. But here everyone decides for himself what is best for him.
First of all, you will need to cut blanks from a profile pipe 25 * 25 mm: two - 1 m long, two - 650 mm each and two - 600 mm each. You will also need four strips 10 cm long.
At the next stage, it is necessary to make markings and drill mounting holes in the profile pipe. In blanks with a length of 650 mm and 600 mm, additional slots must be made.
Mounting holes must also be drilled in the metal plates. Then we clean the blanks with a grinder (if necessary) and paint. We select bolts and nuts of a suitable diameter, and you can proceed with the assembly.
We assemble two side parts of the future shelf from a profile pipe 650 mm and 600 mm long. We connect the upper and lower parts with a chain.
After that, it remains only to connect the side parts to each other using two profile pipes 1 m long. We fasten the structure to the wall.
You can watch the video on our website for details on how to make a wall-mounted folding shelf for storing car tires.
GORGEOUS HOME-MADE FROM A CHAIN AND A PROFILE PIPE!!! I did not expect so much BENEFITS from this HOMEMADE!!! For more convenient storage of car tires, the author decided to make a simple mobile rack with his own hands. The design itself turned out to be quite compact, lightweight and, most importantly, mobile.
With this rack, you no longer have to carry one wheel back and forth. They just rolled the rack to the car and changed the wheels. Fast, simple and convenient.
Required materials and tools:
First of all, it will be necessary to cut the blank from the profile pipe to size. In total, 4 long and 2 short blanks are required to make the rack. After that, the master makes markings and drills mounting holes for the bolts.
A piece of metal strip will need to be cut into eight pieces of suitable length. They need to drill two holes.
In the next step, the author cuts four pieces of round pipe. Two plates will need to be welded to each workpiece. We clean the welds with a grinder.
After that, we assemble the two side walls of the future rack - we fasten the structural elements to the bolts and nuts. Then we weld the side walls to the two remaining pieces of the profile pipe.
Next, you will need to paint the resulting structure. The author fastens swivel wheels to the bottom of the rack.
In this review, the author shares the idea of how to conveniently and compactly store a set of seasonal tires in the garage. To do this, you need to make a rack.
Homemade is very simple and requires a minimum of materials to make it. In this case, the author makes a rack from round pipes, a steel cross from a chair, and four car hubs.
First of all, it is necessary to cut a piece of pipe with a diameter of 20 mm and a length of 90 cm. Next, we make a markup: four holes with a diameter of 9 mm will need to be drilled in the pipe (they must be on the same line).
We retreat from the edge of the pipe 150 mm, and then drill holes with a pitch of 220 mm. After that, the pipe must be cleaned of dirt and rust.
At the next stage, the author cuts off pieces of pipes of different diameters (they must fit into each other).
We cut the cut pieces of the pipe lengthwise with the help of a grinder and put them on each other. We press them into the central hole in the cross from the computer chair.
Using electric arc welding, the master makes the entire structure (cross and bushings inside it) non-separable. Welded seams will need to be cleaned with a grinder.
After that, we clean four automobile hubs from rust. Next, all parts must be degreased, primed and painted. The author uses anchor bolts as locking fingers.
For details on how to make a rack of car hubs for storing wheels, see the video on the website.
Cool DIY idea! Storage of wheels in the garage!
Andrey Vasiliev
Ask a question
Storing seasonal and spare tires is not only a matter of finding the right place, but above all your safety on the road .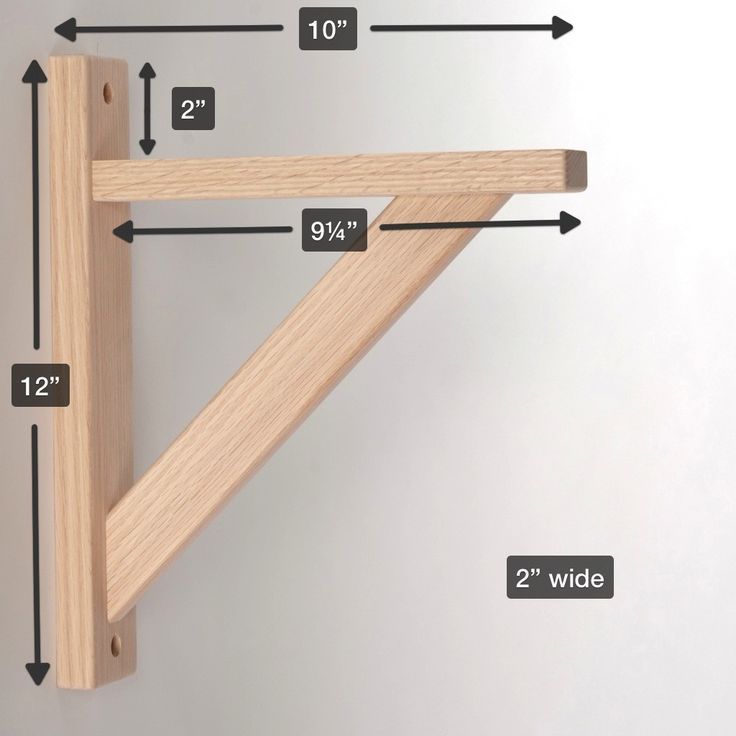
Carelessly thrown into the corner of a garage, tires inevitably deform over time and lose their main qualities - elasticity, strength and even shape.
Content
- Wheel racks in the garage: complete storage
- Corner rack
- Tire storage
- From the world along the thread of experience
Therefore, let's figure out how to make rack for tires in the garage and wheels yourself.
Convenient simple shelving for compact storage of inflated wheels on rims is four wide shelves on which the wheels will lie horizontally on top of each other. Such a rack, assembled to the size of the rubber from a wooden beam and sheets of chipboard or boards, can be installed in the far corner of the garage .
To save space, we will complicate the design and mount shelves under the desktop or workbench. Here it is more convenient to place individual shelves for wheels in two floors, in pairs.
However, you can completely exclude the storage of inflated rubber assembly from the lower volume of the garage space. This opportunity is provided by hanging corner shelving fixed to converging walls with strong brackets.
An even more tempting space saver is to hang wheel shelves from the ceiling along wall . This is possible if the construction of the garage allows - high enough and covered with reinforced concrete slabs, into which the suspension dowels will be screwed.
But with all the space-saving advantages, this design has a fat minus. Heavy wheels will not be easy to lift up stairs and remove from hanging shelves. The only consolation is that the need for this inconvenient procedure will arise only twice a year, with a seasonal change of tires.
Read how to store a PVC boat in the garage under the ceiling in winter in the article.
We also make shelves in the garage with our own hands.
Let's take a closer look at the compromise option - hanging corner rack for storing wheels in the garage from a steel angle and chipboard (Fibreboard).
The size of the shelf will dictate the diameter and tread width of your wheels.
The first shelf will serve as template for making the next four. One of them will cover the rack, and serve as a shelf for something else useful.
To create a strong welded frame, you will need steel angle 5x5 cm .
This is easy if you make a cut on the inside bottom of the corner and gradually bend it to the desired shape. Cuts after can be brewed and polished.
 For reliability, we do not use dowels, but drive deeper into the wall pointed trimmings of 10 mm steel reinforcement and weld the frame of the rack to them.
 Garage racks for tire storage must required as they are not recommended to be stored flat . Especially in a stack. So they are quickly deformed, especially the lower one will suffer.
The tires removed from the rims must be stored vertically in row . Their stability will be provided by a simple design and light thin steel pipes or fittings, similar to street parking for bicycles.
Tires will not take up space on the floor if placed on a wall free of shelves. It is important that here the rubber does not hang on hooks, deforming under its own weight, but rests on brackets attached to the wall.
In the photo below rack for storing tires in the garage:
Before you start designing the rack, go to the shops selling tires, look at the warehouses of service stations, tire shops. Take a closer look at the conditions of professional storage of rubber, the designs of racks and shelves in storage facilities, make sketches in a notebook, and talk to specialists.
Many ideas can be found on the Internet , motorist blogs, which often proudly accompany descriptions of their own made wheel storage racks with photographs and video illustrations.
Register on the crowded forums of car enthusiasts and garage owners. Here you will find both tips and already implemented practical solutions .