By Amelia Allonsy
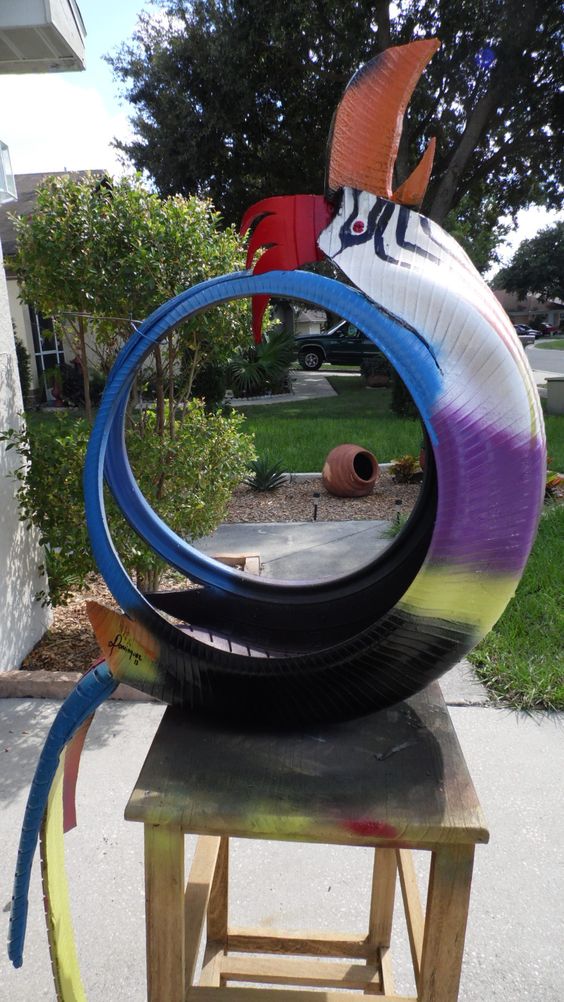
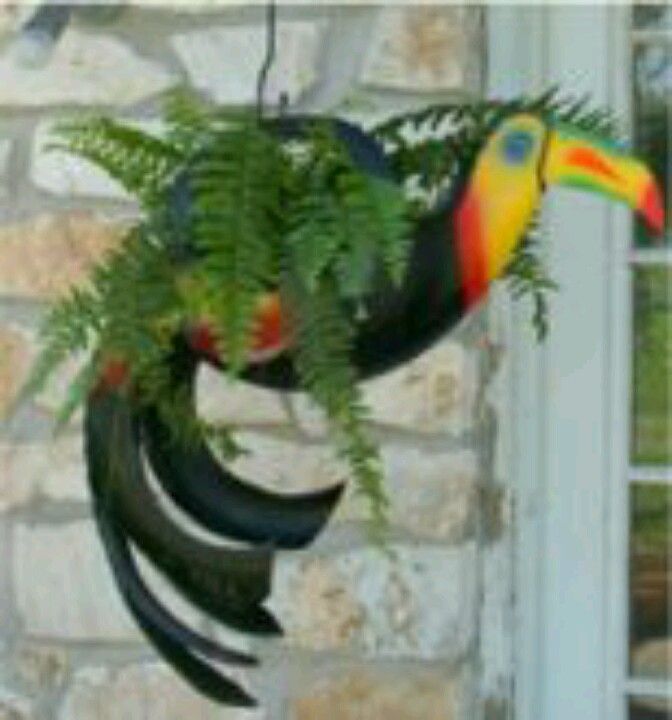
A tropical bird planter made from worn tires adds color to your garden and gives you a way to avoid costly tire recycling fees. The bird planter design includes a head, beak and long tail feathers, complete with a small basin in the center to hold plants or a flowerpot. The planter handles can be slipped over a hook or tied to a branch with rope to resemble a colorful bird flying in the yard.
Wash the tire thoroughly with mild dish detergent to remove any dirt and debris. This makes the job less messy for you, and also rids the tire of any accumulated oils and chemicals that might contaminate the soil.
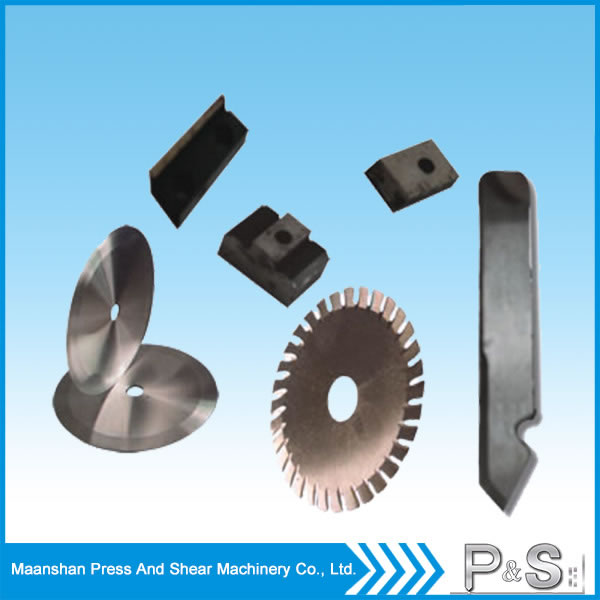
Puncture the tire at a point where the sidewall meets the tire tread, using a punch tool or screwdriver. Insert a sharp, serrated knife or a small handsaw -- such as a keyhole saw or compass saw -- in the hole. Cut along the sidewall-tread seam about three-fourths of the way around the tire.
Repeat this process on the other sidewall-tread seam on the opposite side of the tread.
Cut the tire across the tread -- from sidewall to sidewall -- about two-thirds of the way along the cut portion of the circle. This separates the cut portion of the circle to allow one-third for the head and two-thirds of the cut portion for the dramatic tail feathers. You might need wire cutters to cut through the thin wires embedded in the tire treads.
Turn the tire inside out. This can prove a bit difficult, but is much easier to do after you've made the major cuts in the tire. This step is optional, but results in the treads being visible to add texture to the tropical bird's tail feathers.
Cut the treads on the longer, two-thirds side into strips about 2 inches wide to make the individual tail feathers. If desired, cut a wedge shape out of the end of each feather, the same as you might cut at the end of a ribbon, to make it look more like a tail.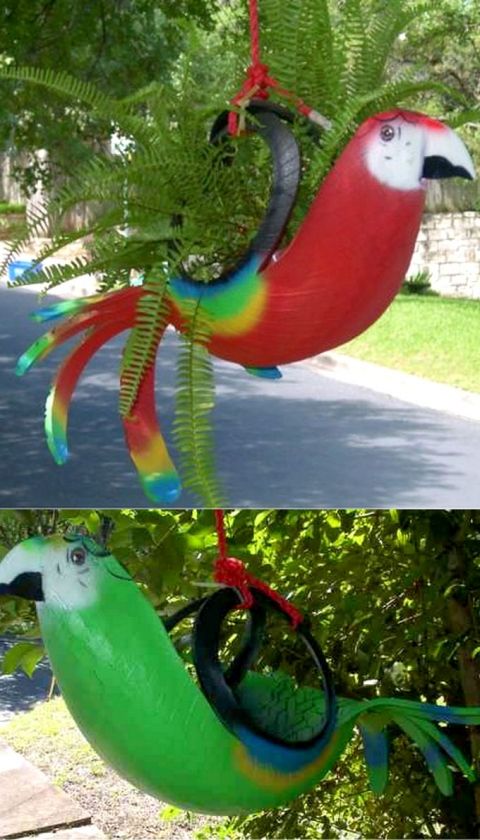
Bend the thin feather strips back so the treads face out and curve downward.
Cut the end of the one-third portion of the tire so the edges are rounded to resemble a bird's head. Cut a beak shape from this cut piece or from scrap from another tire. The size and shape of the beak is up to you. For example, cut a wide, rounded, downward-curving beak shape if you want to make a parrot. Cut a slit in the one-third portion of the tire to the same length as the beak height. Turn the pieces of tire on each side of the slit back, sandwiching the beak in between them. Apply a bead of construction adhesive along the joints where the beak meets the tire slit to help hold it in place. Tape the pieces together with duct tape until the adhesive dries.
Paint the bird your choice of colors with acrylic paint or a similar general purpose paint. The color scheme is up to you, but try to stick with three to four colors, using one as the main color and the other colors as accents.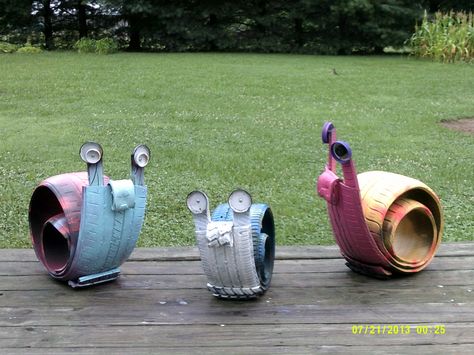 For example, to make a parrot, paint the body and head of the tire bird bright red, using colors such as blue, green and yellow in the tail feathers and along the sides -- where you didn't cut -- to give the illusion of wings. Paint a bit of white on the head with black circles for the eyes. Paint the beak yellow or orange. Spray a protective clear coat or polyurethane to protect the paint.
Poke a few drain holes in the well inside the tire so potting soil can drain. Fill the well with potting soil or a mix of peat moss, compost and vermiculite. Alternatively, place a potted plant inside the well -- this option works well if you want to change the plants with the seasons.
Gather the sidewalls together at the top just as you would bring together handles on a bag. Place these over a hook, or tie them together with a rope to hang the tropical bird planter. These sidewall handles are what's left around three-fourths of the tire after you separated them from the treads.
References
Tips
Warnings
Writer Bio
A former cake decorator and competitive horticulturist, Amelia Allonsy is most at home in the kitchen or with her hands in the dirt. She received her Bachelor's degree from West Virginia University. Her work has been published in the San Francisco Chronicle and on other websites.
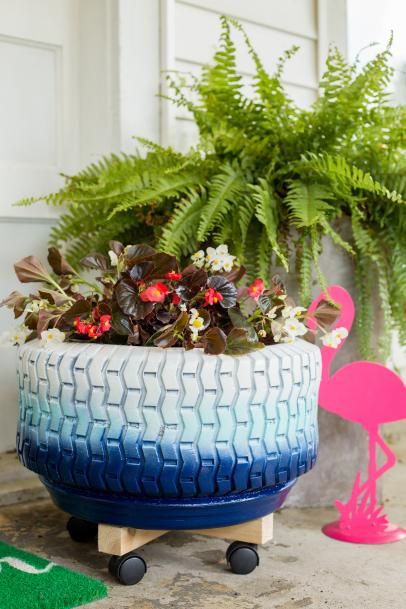
Spring is finally here! If you’re anything like me, that means it’s time to get out in the sunshine and play around in your garden.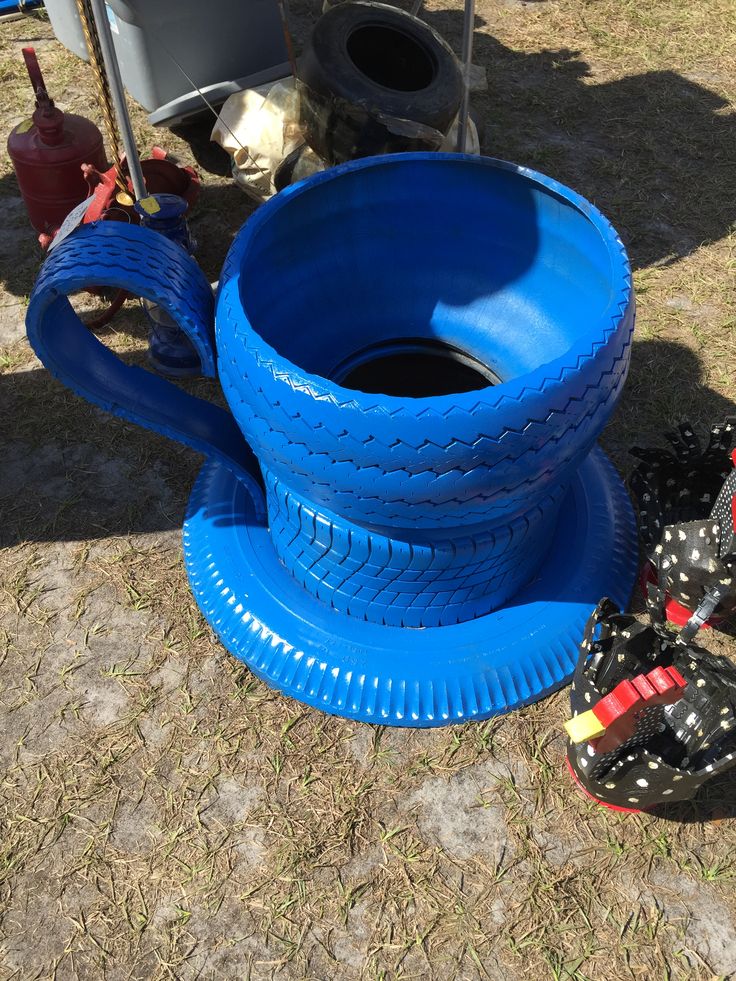 The season is all about making old things new, so follow along with me as I turn “trash into treasure” with the cutest DIY tire planter.
This post contains affiliate links, and I will be compensated if you make a purchase after clicking on my links. For more information, please see my disclosures.
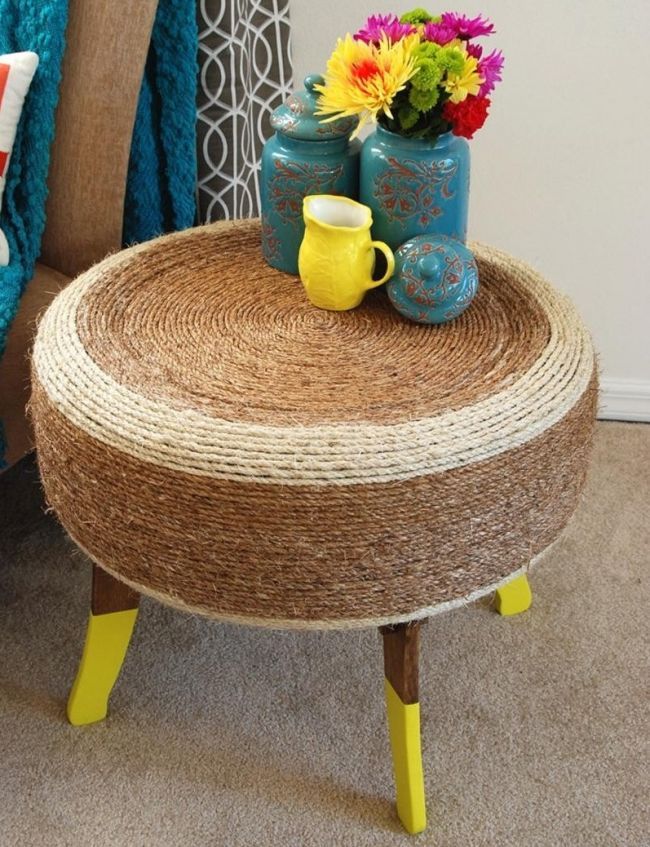
This is a great project that not only upcycles old tires but also adds a dose of whimsy to your outdoor decorating style.
I chose to hang my tire planter from a tree so my family and I can enjoy the vibrant flowers from a distance. However, you can easily lay your tire planter on the ground, hang it on your patio, or nail it to the wall for a floating planter aesthetic.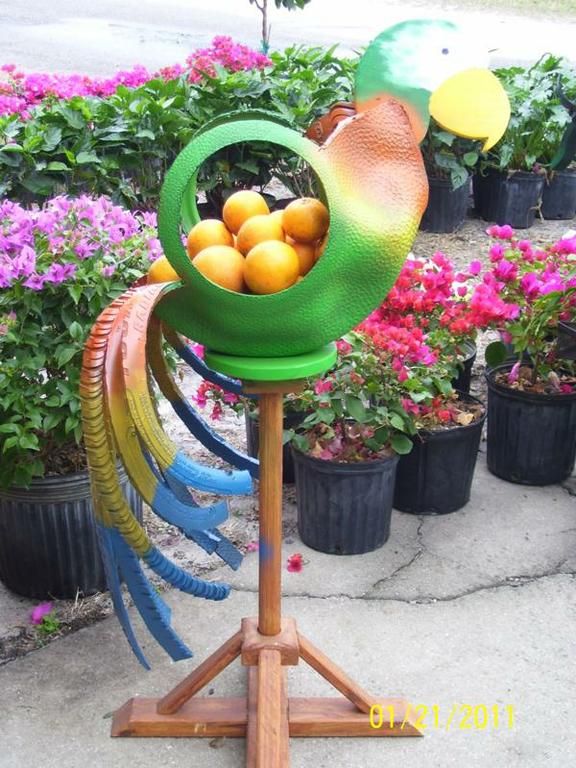
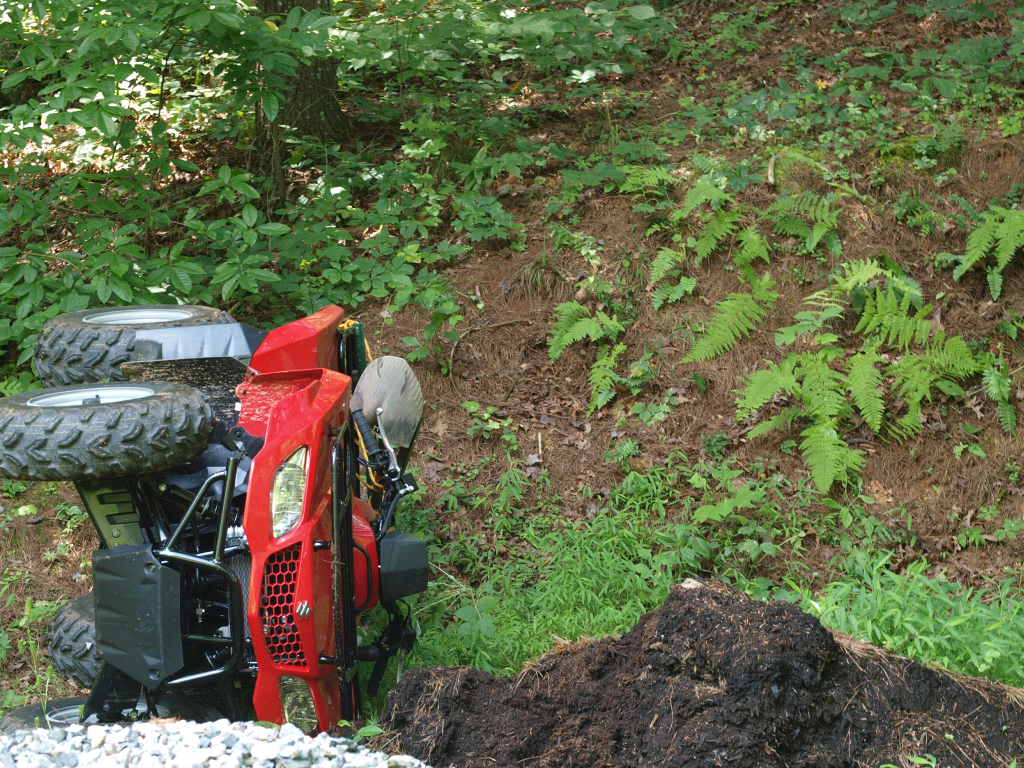
If you don’t have a used tire just lying around, no problem! I called a local auto repair shop to ask for my tire. Discount Tire or other tire shops may have spare black tires to donate. You can also try repurposing an old tire swing your kids have outgrown.
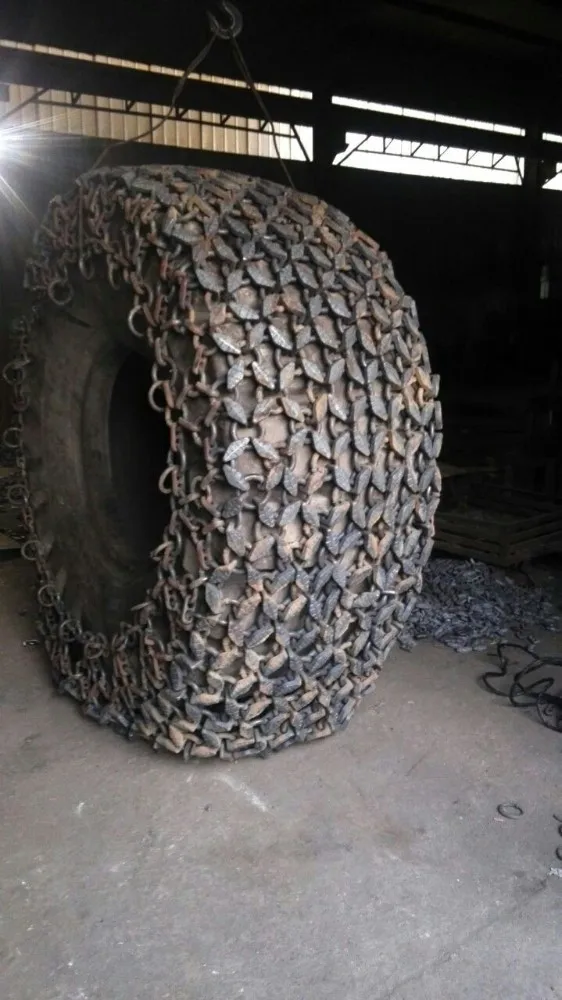
Whatever tire you use, make sure it’s durable enough to hold your plants and soil. Some people say that large tractor tires are the most sturdy for a DIY planter, but I’ve found regular car tires work just fine!
Before painting your tire, you’ll want to start with a good cleaning. If you’re repurposing an old tire, it’s likely to be caked with dust and dirt. I suggest wearing gardening gloves!
Rubber tire after cleaningTo clean the tire, you can use any heavy-duty washcloth or rag and soapy water. If necessary, you can use a degreaser to remove any oily spots.
Scrub the outside of the tire until all debris is removed. This will help the paint to adhere.
Next, you’ll need to add drainage holes to your tire planter.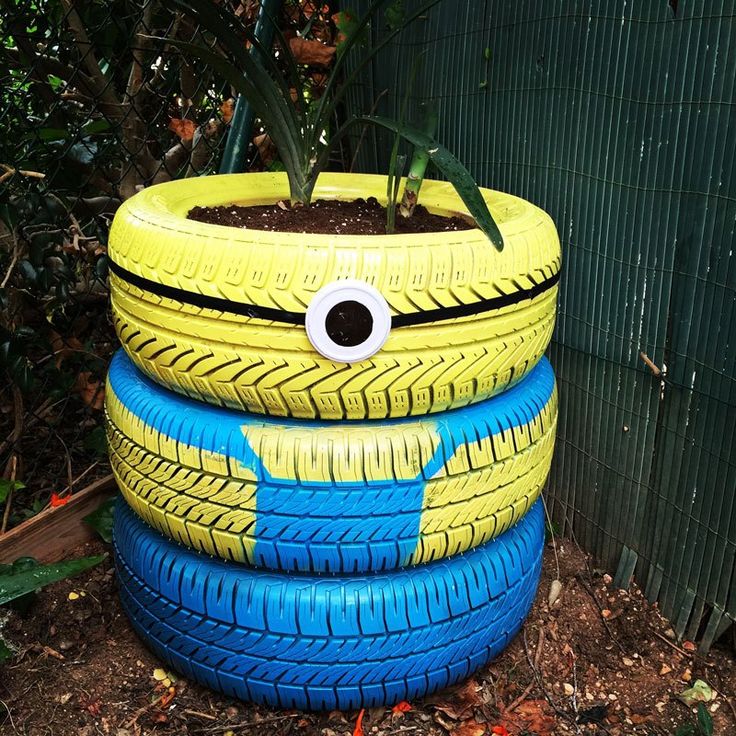 Using a drill bit or sharp knife, drill 6-8 holes in the bottom of the tire, leaving 1-2 inches of space between them.
This step is super important to drain water out of your planter and avoid root rot. Make sure the drainage holes cover the amount of space you plan to fill with plants.
Now it’s time to give your tire planter some color! I recommend this spray paint, which is made for both indoor and outdoor use and has a sleek finish. This type of paint also doesn’t require a primer.
I chose a teal color that I had used previously to make pressed flower wall art. You can select any hue that speaks to you based on your decor style. You can even paint multiple planters and use different colors for each one!
Before spray painting, I suggest laying down a dropcloth or pieces of cardboard to protect your work surface. You should always paint in a well-ventilated area, preferably outdoors.
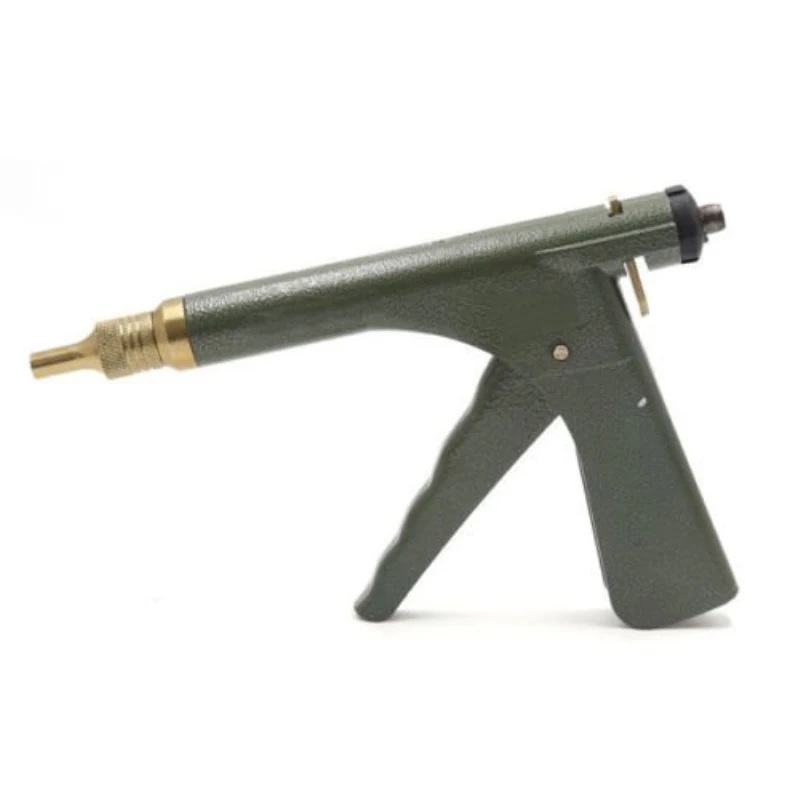
Tip: When spray painting, this tool comes in handy to avoid getting your hands messy.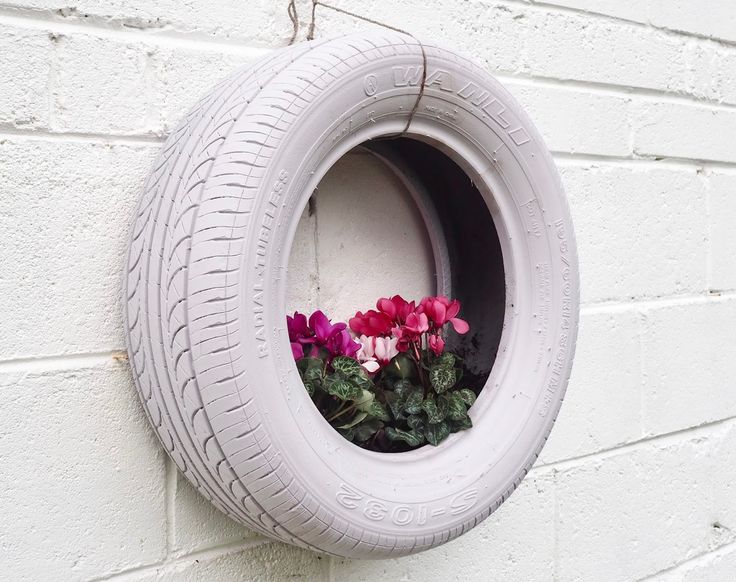
After spraying one side of your planter, be sure to wait a full hour before painting the other side. If you want to add additional layers of paint, wait one hour in between coats.
Let your planter dry overnight before adding your potting soil.
Once your tire planter is sporting the color of your choice, it’s time to add your soil. Evenly distribute your potting soil throughout the bottom half of the tire planter (the side with the drainage holes).
I like to use this potting soil for my plants, but feel free to use any potting mix that you prefer for your garden.
You want the height of your soil to be all the way up to the rim of your tire planter without spilling over the sides. This way, the roots of your flowers have enough room to grow.
Note: Make sure to water your potting soil before adding plants.
If you’re looking for more gardening tips this season, be sure to check out my guide on Vegetable Gardening For Beginners!
 Add plants to the tire planter
Adding plants to your tire planter is all about balancing your display. In my tire planter, I have at least one thriller plant, one filler plant, and one spiller plant.
For the non-gardening experts out there, this is the technique that will keep your container garden looking professional.
Adding Yellow Calibrachoa, Angelonia and Vincas to the tire planterA thriller plant is the main focal point of your container garden. This plant is vertical in structure, adding height to your garden.
I used Angelonia as the thriller in my tire planter. I love the way the rich, deep purple color is the first thing onlookers’ eyes are drawn to!
Filler plants are mid-sized plants that are typically mounding perennials. These flowers support the thriller by filling in the inside of the planter and adding volume to your display.
For my tire planter filler, I chose to use white and pink Vincas, but there are hundreds of great fillers out there.
A spiller plant looks exactly how it sounds. These plants cascade over the edge of the display and spill down from the sides.
I used Yellow Calibrachoa, Petunias, and Sweet Potato Vine as my spillers. The Yellow Calibrachoa and Petunias add a lovely burst of light color, while the Sweet Potato Vine adds depth and contrast to the arrangement.
Whichever plants you choose, make sure the plants have the same sun/shade requirements and can grow well together. If you aren’t sure, a local nursery can help you select the perfect combination.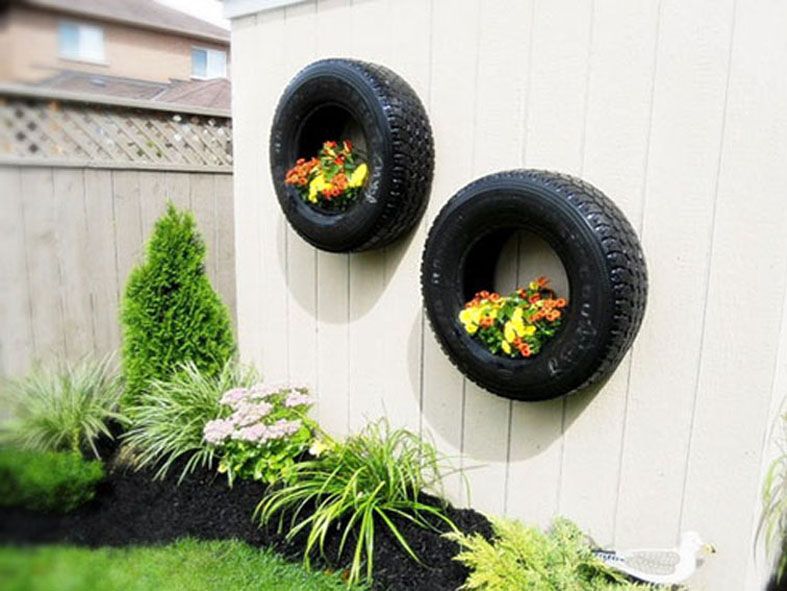
After planting, be sure to water regularly! Hanging tire planters may dry out more quickly than garden beds, so treat them as you would a hanging flower pot.
Finally, it’s time to choose how you want to display your DIY tire planter. Personally, I went with the hanging tire planter option.
To hang your planter, you’ll need a heavy-duty rope to make a hitch knot and loop it through your tire. Make sure you hang your planter from a strong, sturdy branch.
If you don’t want to hang your planter, you can lay it flat and use it as a raised garden bed. You can also stack tires to make a taller bed for plants with deeper roots. (A stacked tire planter can also keep some pests like rabbits at bay.)
I hope you enjoyed this easy tutorial. Let me know in the comments how you plan to use your new DIY tire planter!
According to most experts, while tires do contain some harmful chemicals, those toxins are only released upon incineration and are not water-soluble, making tires a safe choice as planters.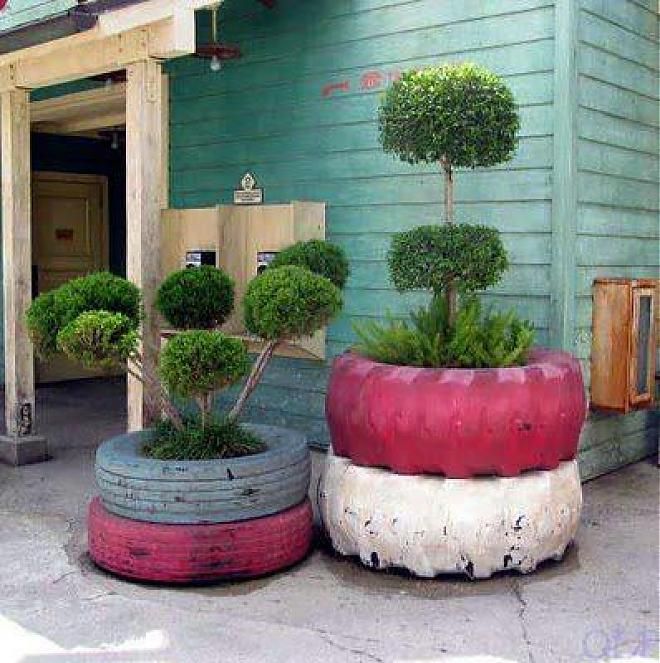 If you have safety concerns, however, you can choose an alternative planter for edibles like fruits and vegetables and leave the tire planter for decorative displays.
Similar to hanging baskets, hanging tire planters may require frequent watering for the average non-succulent plant. Watering frequency depends heavily on the time of year. During the fall or winter months, you may only need to water your planter every two to three days. In the heat of the summer, you may need to water your planter daily.
You can use a porous landscape fabric to line the bottom of a tire planter that rests on the ground. This will serve as a weed barrier and still allow water to drain.
It's already quite warm, and, just as birds fly in from warm lands, all summer residents go to their plots in a friendly formation.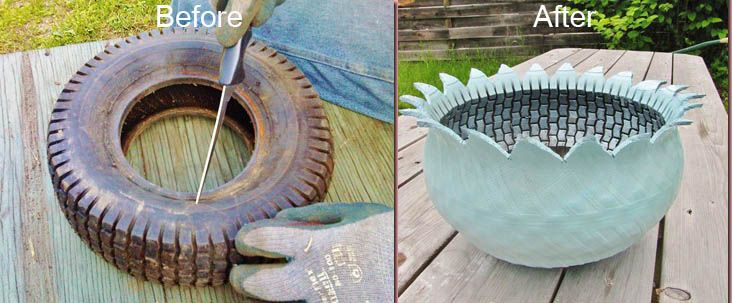 Therefore, today edition "So Simple!" wants to recommend some unusual, beautiful and practical ideas for decorating a garden or summer cottage.
Car tires are a versatile item that can last for many years after disposal. Why is it worth using car tires to create planters and other practical things for a summer residence?
First, this material is easy to find. If you do not have your own car, then you can ask neighbors or acquaintances for unnecessary tires. Secondly, tires work great with tires. You can safely wield an ordinary sharp knife and drill and make almost anything out of tires.
In addition, tires are an excellent and weather-resistant craft material. Even if you spoil something in the process, it's not scary at all. You can safely use the trimmings as patches, as well as for small details of future creations.
In order to make a planter, you need to find an old tire , take a sharp knife and be inspired by our ideas!
The planter can be either floor standing or hanging. For hanging it is worth using a rope or old chain .
How to make a hanging planter ? Cut off the sector of the tire, make holes for the rope along the edges and pour the earth inside - the planter is ready.
If you already have some skills and experience with this material, try to make these wonderful planters in the form of birds. Experiment and involve children in the process, because they love to make something together with mom and dad. Making your own hanging pots is not at all difficult, it just takes time and a little patience.
You can also make many useful things out of tires for kids. For example, a big climbable dinosaur or a car would be great fun. Make such things quite easy, and the child will get a lot of pleasure!
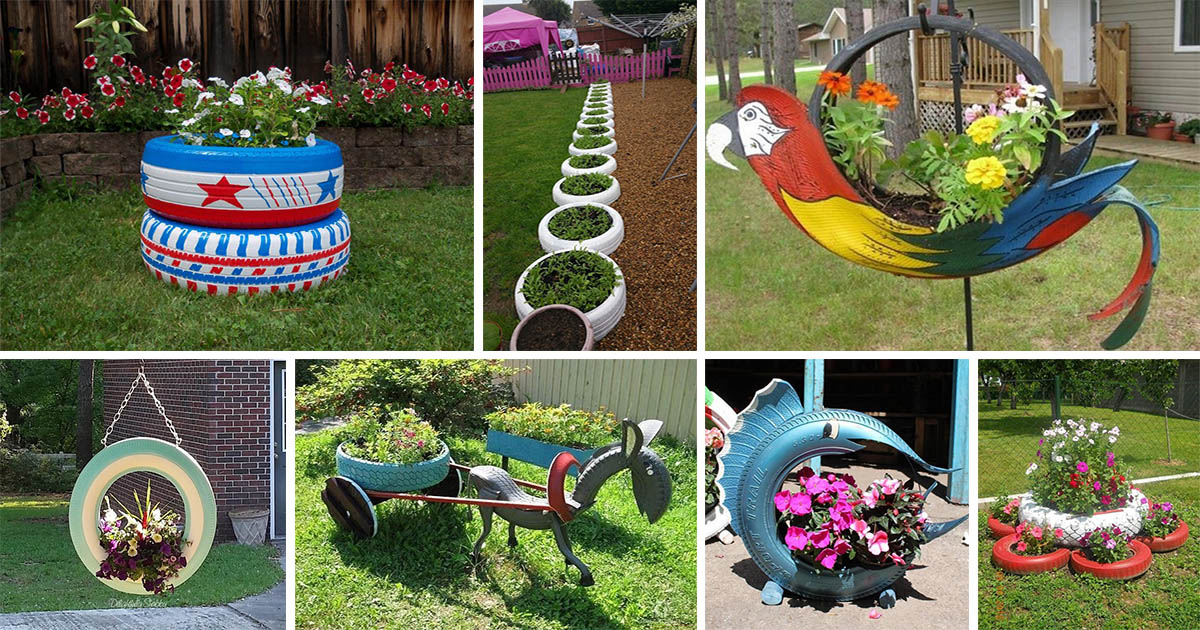
In addition to cutting and stitching tire pieces, you can also paint them to give your ideas the perfect shape. Look especially good painted birds from tires.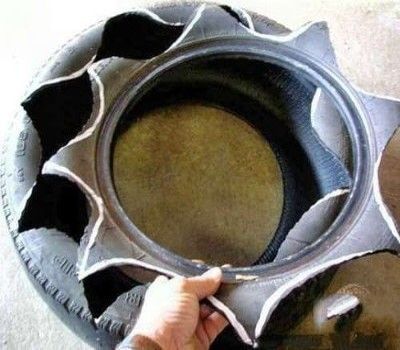 For example, such bright parrots can decorate a veranda or playground.
But such frogs can be good floor decorations or planters.
Flower beds can be decorated not only with tires. You can find many other interesting and unusual ways to decorate and decorate flower beds on our website.
The question is not only where to plant, but also what to plant. We want to recommend you a selection of the most unpretentious country plants that will decorate any garden.
Don't forget to read the advice of a gardener with 20 years of experience. These tricks and secrets turn an ordinary garden into a piece of floral art.
Share
Flowerpot for flowers in the form of a toucan
It is not difficult to renew and ennoble the landscape in the garden and summer cottage, you just need to find materials that are already unused and unnecessary at first glance, for sure everyone will always have something like that.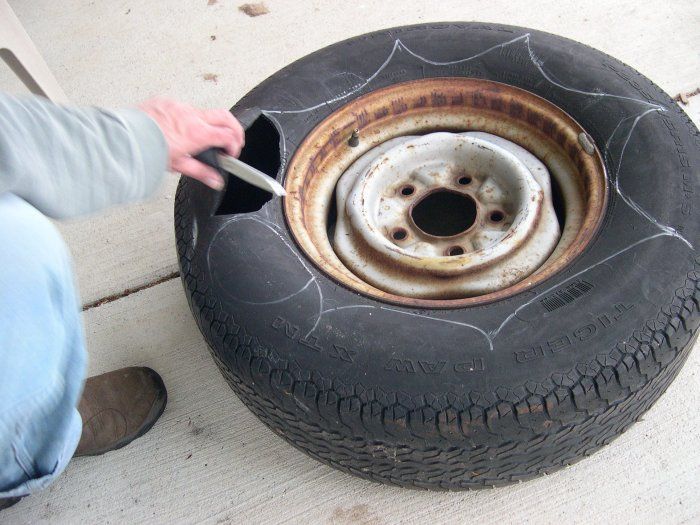 Do not rush to get rid of old tires, they can still do a good job, make beautiful and original planters out of them, be sure that such products will definitely not leave anyone indifferent. Many gardeners have managed to appreciate this material, because rubber is quite easy to process, its flexible elastic structure allows you to give products the desired shape.
The main feature of , which distinguishes the planter from the usual flower pot for plants, is the absence of drainage holes in the bottom of the container through which excess water flows out. A well-chosen container will not only be a decoration, but will also help facilitate the care of plants.
Pots can be either hanging or floor standing!
can be used as a decoration for a facade or fence, they can also be hung on trees
Kashpo can be simple in the form of cut tires
9000 9000 9000 9000
or a whole tires that can be hung on the wall
Materials needed:
Stages of work

Hang the finished planter with a strong rope or wire to a horizontal structure, you can put a flowerpot inside.
Photo source: www.prosto-ma-ma.ru
Variants of such a planter can be different, it all depends on how exactly you cut the tire. Use different bright colors to bring all kinds of ideas to life
An unusual planter can also be made in the form of a rooster, as in the photo below. This planter is not hanging, it is easy to install it anywhere, you can build a similar stand for it
Photo source: www.pinterest.com
Markers or chalk are best used for this purpose.
You can think of your own version of the swan, but the main parts should be a neck with a head and wings. The diagram below is quite simple, but can be completed with various decorative details or additional cutouts and scalloped edges if desired.
This photo shows a variant of a swan planter with the usual cutting of tires without reinforcing and fixing the neck with wire or other available materials, the head is also made simply without the use of additional elements.
1. Before starting work, it is advisable to make a diagram for yourself on paper, then draw with chalk on the old cleaned tire the contours along which the details will be cut.
2. After cutting the parts and performing the cuts, it is worth rinsing and degreasing the surface of the tire, then cover it with a primer, then the product will last longer.
3. Bend the wings of the swan and give them their final shape, the edges of the wings and tail can be jagged, and the neck of the swan can be fixed and given the desired curve with thick wire, later it can be masked with paint.
4. The final part of the work remains: color the resulting product, use additional materials to make it more believable.
For example, you can carefully cut out a head from foam and attach it to the neck of a swan. There can be many options here, someone tries to give the necessary shape immediately when cutting the tire, some even use cut plastic bottles for this, as in the photo below
Photo source: www.mnogo-idei.com
Rubber is a material that requires special handling.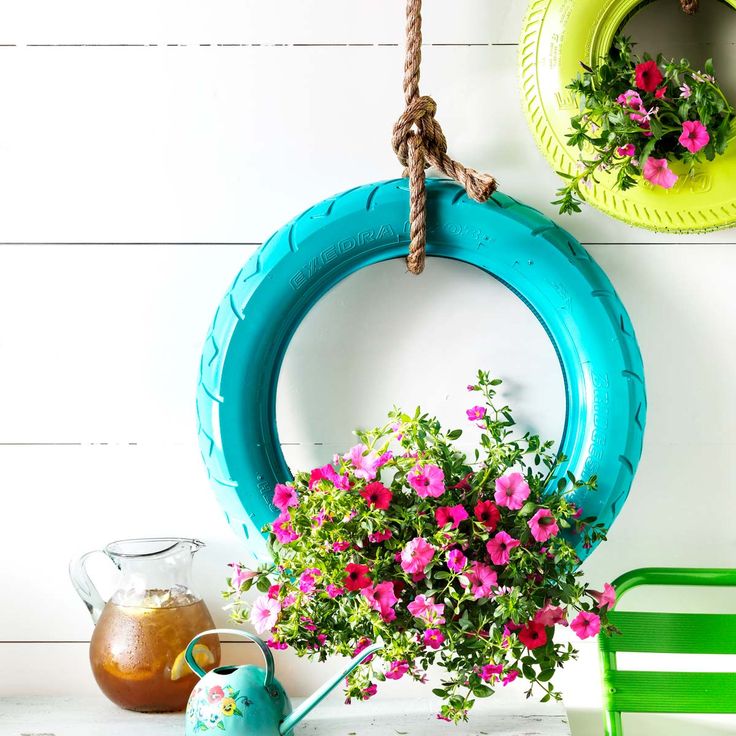 For painting such products, use the following types of paints:
Acrylic enamel is a good option, it can be thinned with water, it is also odorless. Such paint can also be purchased in the form of a spray, in which case it is much more convenient to apply, and it also reduces consumption. To increase the adhesive properties of the oil coloring composition, it is recommended to pre-treat the rubber surface with a primer, so you get rid of possible roughness and irregularities. The most optimal in this case will be the primer composition GF-021, apply it with a brush, it will reduce paint consumption. To enhance the strength of the coating, add a little PVA adhesive to the primer. It is possible to paint products only after the final drying of the primer, it is advisable to paint it on the inside as well.
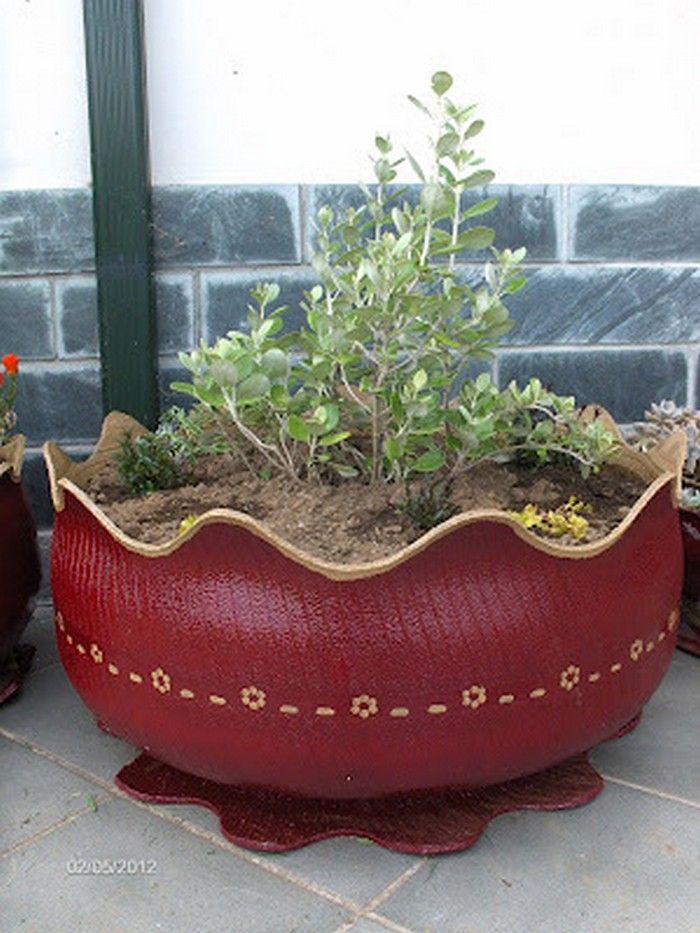
Planter from tires in the form of a basket
The original planter is easy to make in the form of a basket, below is the workflow:
for example, in this photo:
Photo source: www.