NASCAR may have been founded around moonshine, but those early days of running “white lightning” are long gone. Nowadays, auto enthusiasts prefer to run a different kind of shine, and unlike those hot-rodding bootleggers, this stuff won’t force you to run from the fuzz.
Homemade DIY alternatives are as numerous as crashes at Talladega, and nowhere is this more apparent than in the world of car detailing, with liquid car detailing solutions leading the pack. So is it possible to concoct homemade tire shine with a bunch of random ingredients you’ve got lying around the house? It’s not like you have to worry about a peeling clear coat or hard water spots when caring for tires. So why not get play “mad scientist,” and mix-up a potent shine of some sort?
Now before we get too “antsy in the pantsy” over talking tire shine, let’s get one thing straight: There’s a reason why the tire dressing business is so fucking profitable. For decades, the world’s wealthiest chemical companies have spent an asinine amount of cheddar on researching and testing tire shine products, just to guarantee that they work.
That being said, please don’t get all hot under the collar when your homemade tire shine solution isn’t lasting nearly as long, or bringing the thunder like a $1 billion dollar investment from 3M. You are here because your cheap ass is trying to make due with what you’ve got, and you’re curious to see if all those post-apocalyptic survival supplies you’ve been hording in your auntie’s garage will cut the kimchi.
Well fear not good citizen! The following three, relatively decent, super simple homemade tire shine recipes are here to make your quest for frugality a reality. While we’re at it, I guess we might as well address some of the common issues associated with homemade solutions of this caliber, and maybe even throw in a brief FAQ section, just for shits-and-giggles. Onwards!
3 of the Best Homemade DIY Tire Shine Solutions
While a lot of people have their own homemade tire shine recipe (tortoise saliva and turpentine anyone?), the following three oddball entries are generally accepted as the best, and safest solutions. However, just to err on the side of caution, we strongly suggest using protective gear such as nitrile gloves and eye protection when concocting an automotive “tincture” on one’s own. The last thing we want is for you to end up in the hospital because you just discovered that you are allergic to any combination of the following ingredients.
It may sound like a frilly Hipster highball, but when you combine castor oil and alcohol with a little auto shampoo and water, the natural shine of the rubber and synthetic materials contained within modern tire compounds really pops. Here is what you’ll need to make this oddball “cocktail.”
To whip-up this magical mixture, you’ll first blend the automotive shampoo and water to wash the tire. Use a tire brush to get into all of those little grooves and textured surfaces on the outer sidewall.
After scrubbing the rubber, use some rubbing alcohol to further clean the tire. The alcohol essentially acts as an extra step to further remove contaminants from the tire’s sidewall, and should be used sparingly, as it can dry out rubber rather quickly. A modest splash of rubbing alcohol on a microfiber towel or applicator pad will be all that is needed to wipe the entire tire clean.
Once the tire has dried, splash some castor oil on a different microfiber towel or applicator pad, and hit every square centimeter of the tire’s sidewall in a circular motion until a sheen can be seen from every angle.
Out of all of the products on today’s list of homemade tire shine formulas, baby oil has to be the cheapest and slipperiest. Not only does this slick mineral and aloe-based oil add insane amounts of shine to anything it touches, but the infusion of Vitamin E has caused it to become prized for its ability to nourish cracked and drying surfaces, and that includes automotive rubber.
Here is what you’ll need:
First, pour the 1/2 cup of water into a bucket, add the baby oil, and mix with three drops of automotive shampoo. Pour the solution into a spray bottle and shake it up. Spray the homemade tire shine directly onto the tire , as well as onto a clean microfiber towel. Once the tire is completely covered and slick-looking, allow the solution to sit for a minute or two before wiping it away with a separate microfiber cloth.
While the smell of burning rubber may excite fans of drag racing, most people abhor this pungent automotive aroma. Try laying a citrusy smackdown on UV damage and cruddy contaminants with the dry-rot-reducing power of a lemon oil tire dressing solution. When blended properly, this concoction acts as both cleaner and conditioner.
First, pour the automotive shampoo into a bucket and then add the water along with the Borax. Stir the concoction until fully mixed, adding the lemon oil last. Once fully blended, dip the brush in the solution and clean the tire, reapplying fresh amounts of solution as necessary. Rubber thoroughly scrubbed, break out a clean microfiber towel and conduct a final, dry wipe down.
A Few Other “Unique” Homemade Tire Shine OptionsNaturally, there are a ton of other homemade tire shine options out there, most of which rely upon common household products. The issue, is that from a shiny tire’s viewpoint, most of these ingredients really aren’t all that great when it comes to durability and visual appeal. So take the attached video with a glob of grease, because the aforementioned DIY tire shine solutions are about as good as it gets.
In order to help you remember the core components of routine tire care, we suggest following the classic T.I.R.E. acronym, for it still rings true today. This will not only help keep those sidewalls looking spiffy, but potentially prolong the life of the tire compounds themselves, and therefore make your windshield time all the more safe.
“T” is for TIDYThe easiest way for someone to keep their tires in good shape, is to clean them regularly. Washing away tire contaminants like grime, brake dust, pollution, and road salt helps remove the risk of this crud embedding into the rubber.
By keeping your tires tidy, and routinely applying a protectant, contaminants and UV rays alike become far less of an issue, as both are the core cause behind premature cracking and blowouts.
“I” is for INSPECT The old “penny test” may be a proven method for testing tread depth, but on many tire compounds this means you have reached a dangerously low level of grip. The top of Lincoln’s head on the US penny measures about 2/32nd’s of an inch, which traditionally means it’s time to replace a tire. Don’t wait until your tires reach this level, because your traction at this point will likely border on being dangerous.Automotive tires should undergo monthly maintenance checks, especially when routinely driven. This includes checking tire pressure levels, which should be done every other week, especially since these numbers fluctuate when there are dramatic changes in ambient air temperature.
Inspecting tires for cracks, bubbles, or odd wear patterns should also be a routine, with a monthly, or bi-monthly basis being the norm. This will not only help you keep an eye on the condition of the tire compounds themselves, but by detecting uneven or unusual treadwear patterns, you will shine a spotlight on any suspension alignment issues. There is also the issue of improper tire inflation, which can lead to premature wear and potential blowouts.
“R” is for REPLACEMany car owners assume that if there is more than 2/32nd tread depth left on a tire, they’ll be totally fine. This is one of those outdated, shade-tree mechanic recommendations. By the time a tire’s tread pattern has worn this low, traction will have been reduced to a dangerously low point. Play it safe, and replace your tires when the rubber reaches Lincoln’s forehead on the US penny.
“E” is for EASY For those of you who are unfamiliar with tire lingo, this guide will help explain what all the numbers and letters on the sidewall of a tire means.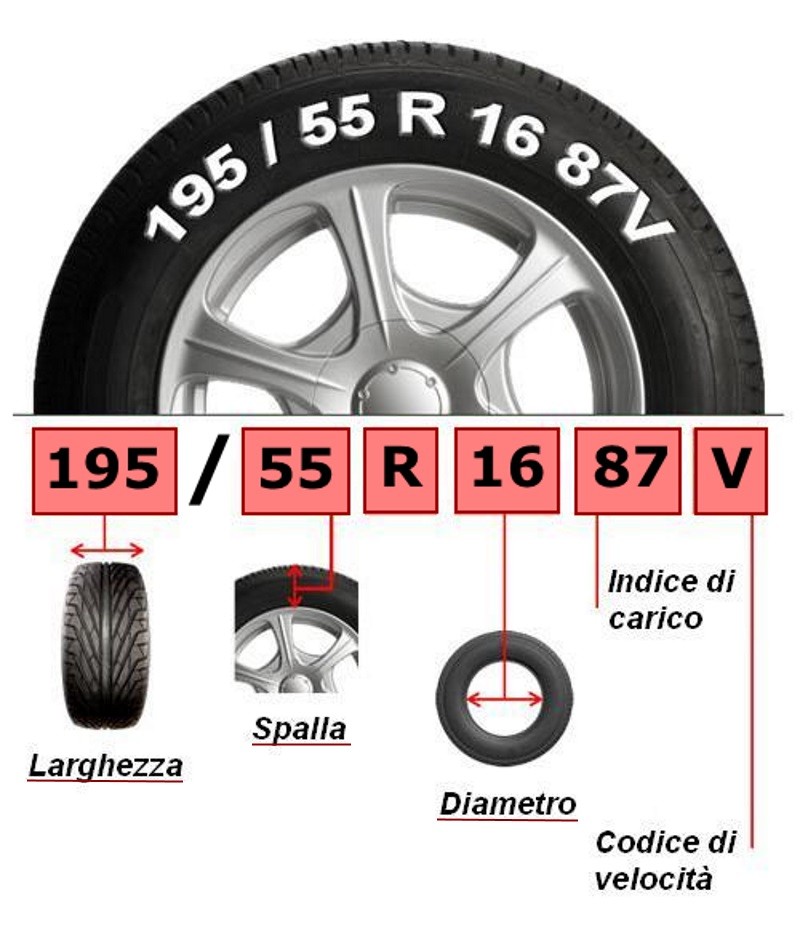
Having the right tires on your vehicle is just as crucial as routinely inspecting and maintaining them with a tire dressing cleaner. Keeping an adequate load weight, and not exceeding the tire’s maximum capacity is a core way to maintain tire integrity, as is ordering the appropriate tire size.
Overloading a vehicle, or specific areas of a vehicle (like the trunk or truck bed), puts a ton of strain on tires, as every tire compound on the planet comes pre-engineered to withstand a certain amount of pressure. So shop wisely, and know that any tires with the letters “XL” on their sidewall won’t be “extra large,” but strong enough to hold extra air, thus allowing them to carry “extra loads.”
Quick Tip: Don’t forget to check your spare tire every month. Nothing is worse than having a flat tire, and realizing that the doughnut is also low on air or damaged in some way.
Parting ShotsDry rotting tires or tire sidewall cracks are a commonplace, and often avoidable tire malady. If your tires look like this it is time to replace them ASAP.
While these homemade tire shine solutions are rather good at improving appearances and protecting sidewalls, extending longevity really boils down to protection, not enhancement. That is why the lemon oil shine option remains the preferred homemade method for accomplishing this vital step.
Just remember, automotive tire care is more than just applying a product or some homemade solution to a piece of rubber. In order to safely enjoy the joys of the open road, one must first inspect and then protect their tires. This rubberized consumable product is the only part of the vehicle that comes into contact with the ground. So take good care of these rolling pieces of rubber, and they will take care of you…
Priscilla February 23, 2020 Tips Leave a comment 2,977 Views
No one likes a dull tire, but do you know that shine tire doesn’t cost if you use the right formulation? You can prepare a homemade tire solution without spending a penny.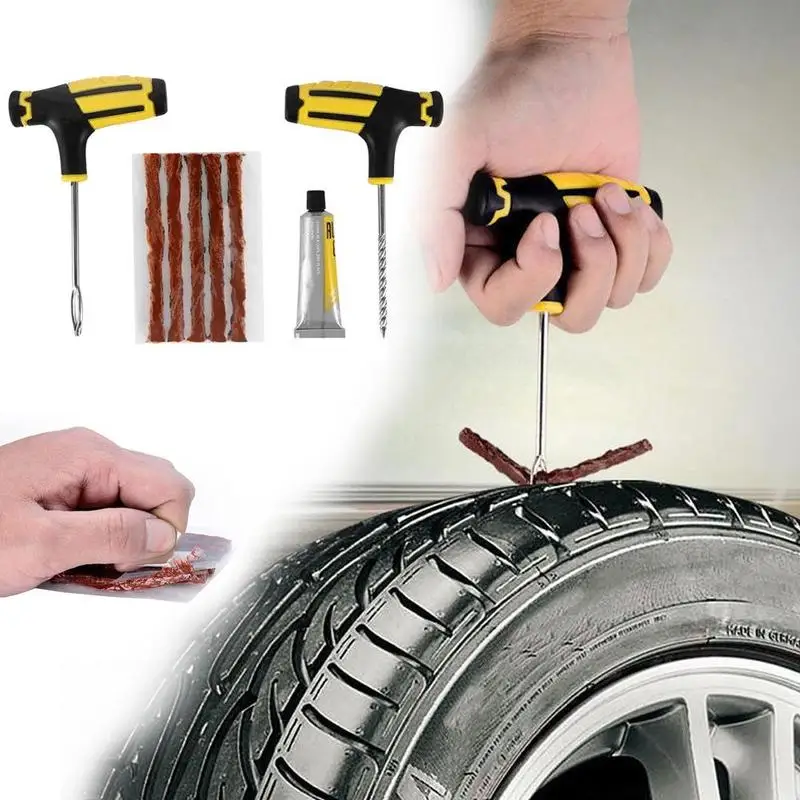
You have finally been able to lay your hands on that gleaming car you’ve always wanted. It’s yours now. But it’s just a few miles that give your tires a very shabby look. It’s such an eyesore! Suddenly your new car seems to have lost much of its appeal. Those admiring glances from your neighbors and passersby are gone too.
Our instructions will help you shine your tires like a true professional. You can use stuff easily available in your house that’ll help you save a lot of money. We are here to get your tires shining again using only a few ingredients readily available in your house to prepare a perfect homemade tire shine. What’s more, you can have them in no time at all. Before you get started, here’s a word of caution. Make sure that you protect yourself with nitrile gloves and do use protection for your eyes before you blend the ingredients.
So, today, we are going to show you how to prepare a homemade tire shine at your home only with these simple tips.
This is an effective yet cheap homemade tire shine ingredient. Your car tire is pampered like a baby when you wash it with baby oil. We say pamper as baby oil has no harmful chemicals and is made from natural ingredients. It’s really great for shining your tires, just perfect for your gleaming new car.
You Shall Need
The Method
This mixture is just great if you’re looking for an inexpensive way to clean your tires. It’s the perfect homemade tire shine for you! What’s more, it lasts for a few months too! That gives you the chance to clean your tires every week making them look brand new for years.
Disgusting as it may taste, Castor oil makes for a really good homemade tire shine when mixed with alcohol. It’s really effective when it comes to shining your tires.
You Shall Need
The Method
We advise you to use a homemade tire shine more like a rubber conditioner. This will protect it from the wear and tear and dry rotting caused by the sun’s UV rays and other contaminants. Lemon Oil is the right ingredient for this kind of tire shine, a rubber conditioner. It also acts as a tire wax and protects the sidewall of the tires.
You Shall Need
The Method
Read also: Safety driving tips for truck driver
This is yet another great recipe for squeaky clean tires. Not only does it make the tires shine, it extends their life too. It also helps protect them from UV rays.
Things you will need
The Method
While these are the best tire shine formulation being inexpensive and efficient at the same time, we have some other ingredients too that are good for shining your tire.
You are sure to have a great shine on your tire, just right for your new car when you apply these on your car tires and leave them for a little while.
Things to Remember While using Tire Shine Solution
Conclusion
Taking good care of your car tires gives them a longer life. The tires are more dependable too and have a better grip. The tire shines not only clean your tires, but they also don’t let them degrade. That helps keep your car tires in good shape much longer. Remember, the intention is not just to make the tires look great; they should also be protected for longer life. It’s Lemon Oil that best helps protect your car tires. We hope you find our article on how to make homemade tire shine useful. We feel they are just right for the clean tires that your gleaming new car will look great with. Do share your feedback with us. Goodbye for now!
Previous Sarjak Container Lines Tracking Online & Contact Number
Next Truck Driving Schools In Oklahoma
A Full Truck Load (FTL) simply means that the truck will be used to ship …
Products: brake cleaners, rim cleaner.
Equipment: all modern tire systems are powered by compressed air: pneumatic guns for loosening wheels, tire changer, inflation guns.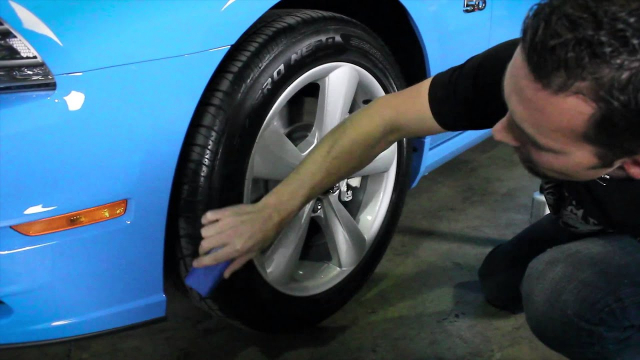 Therefore, the main tool in tire fitting is a compressor. In 99% of cases, reciprocating compressors with a capacity of 400 lmin are used. These compressors require ISO VG 46 and 100 compressor oils, depending on the compressor manufacturer's recommendations. Oil change, on average, 200-250 hours when using mineral oils, that is, about once a month during the tire season. Using synthetic oils, such as Liqui Moly LM 500, article 4076, you can increase the compressor maintenance period up to two times a year.
The air gun is an essential tool for quick wheel removal. It has a lubricator lubrication system, that is, oil is supplied along with compressed air using a special lubricator-lubricator. In small tire shops, they save money on lubricators and periodically bury the oil directly into the air gun. To lubricate air guns, use Liqui Moly Oil fur Pneumatikgerat, part number 7841.
| Fig 1 | Fig 2 | Fig 3 |
To carry out work, place the vehicle at the place where the brake is to be carried out.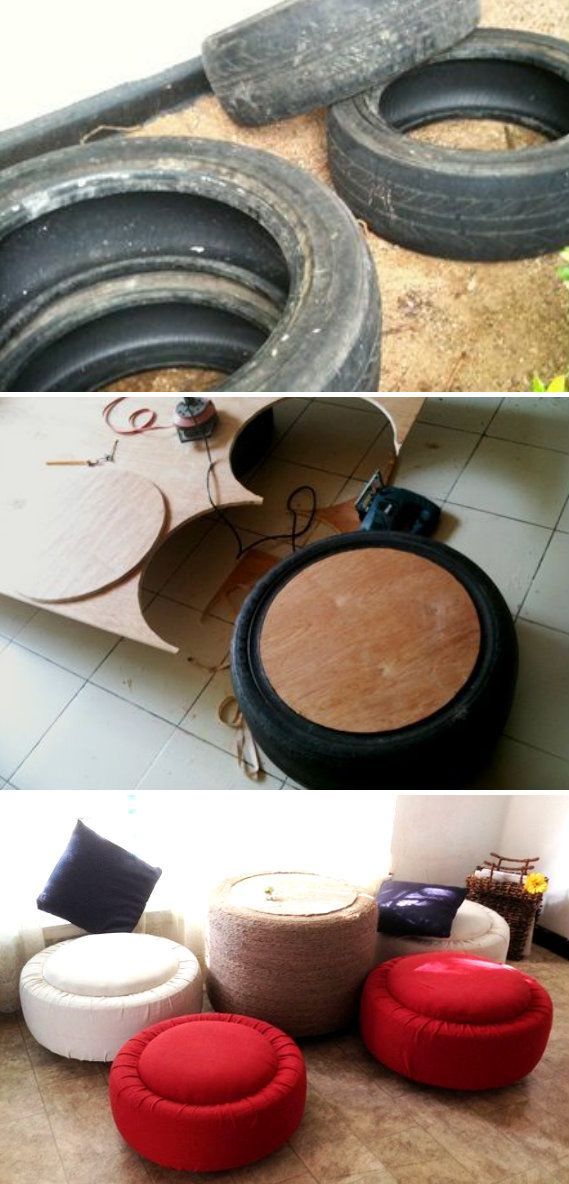 work and fix manually Raise the vehicle with a tire jack or scissor lift, unscrew the wheel fasteners and remove the wheel. Wash the wheel in a washing machine, dry it. Using the special tool, unscrew the valve and bleed air from the wheel. Remove balancing weights, if self-adhesive weights are used, then remove the remaining glue from the rim with a rag using Liqui Moly Dichtungs Entferner. It is necessary to carefully inspect the tread for stones stuck in the sipes, since wheel balancing is meaningless with a dirty tread. If you plan to install the tire back after repair, then it is necessary to mark the position of the nipple for inflation on the tire using a special marker or chalk. The tire is installed in the same position in which it was removed from the rim. Install the cleaned wheel on the tire changer and tear off the sidewall of the tire from the rim with a spatula (Fig. 1). Next, center the wheel on the clamps (1) of the machine Fig. 2, (use plastic protective pads when working with light alloy wheels) and completely separate the sidewall of the tire from the hump with a roller (Fig.
 3). Before removing the tire from the rim, apply Liqui Moly Reifen Montierenpaste to the parts of the tire adjacent to the rim.
It is recommended to apply the paste with a flute-type brush, it is not recommended to use fly brushes (Fig. 4). Pry off the sidewall of the tire with a mounting spatula, bring it up by the heel of the machine (Fig. 5) and rotate the tire until the sidewall of the tire completely goes beyond the rim. Do the same with the bottom of the tire and remove the tire from the rim (Fig. 6).
| Figure 4 | Figure 5 | Figure 6 |
| Figure 7 | Figure 8 | Figure 9 |
Before mounting a new or refurbished tire, be sure to replace the tubeless tire valve (Fig. 7), clean the tire contact surface with a Reiniger und Ferdunner cleaner (Fig. 8), place the rim in the wheel balancer (Fig. 9) and check the runout of the rim .
To mount the tire, it is necessary to put the disk back into the clamps of the machine (Fig. 2). Before installing the tire, apply mounting paste to the sidewalls of the tire adjacent to the rim (Fig. 10) using a flute brush on both sidewalls of the tire. Put the tire on the disc using the machine's thrust pad (Fig. 5). Orient the tire according to the marks made earlier, in case of using a new tire, align the factory mark (yellow or white) with the tire valve by location. Inflate the tire, allow the sidewall to take the correct position on the hump of the rim, for which give an air pressure of 6-8 bar (when the tire is seated, a loud bang will occur). Check the tightness of the fit by using Leck Such Spray or immersion in a water bath. After checking the tightness, bring the pressure in the wheel to the nominal value and install it in the balancing machine. Center the wheel on the center hole and studs and balance. Degrease the rim with Reiniger und Ferdunner in places where self-adhesive balance weights are fitted.
| Fig 10 |
Before installing the wheel on the hub, treat the mating surface of the hub with your choice of (Fig. 11): Aluminum Spray, copper spray Kupfer Spray or ceramic paste Keramik Paste. The same compositions must be used to treat wheel fasteners (Fig. 12), studs or bolts (if there is a corresponding recommendation from the car manufacturer). Install the wheel on the car (Fig. 13), manually tighten the fasteners, make the final tightening to the required torque with a torque wrench. Attention: Do not use pneumatic tools to tighten wheel fasteners!
For seasonal preservation of winter or summer sets of tires, use Reifen Glanz Schaum Tire Foam.
The change of seasons requires car owners to purchase two sets of tires. Off-season tires do not provide stability on an icy road and a comfortable ride in hot weather. The best solution is to purchase winter and summer tires. To save on service fees, you can use manual tire fitting when you need to change tires between seasons.
Insurance companies require timely replacement of tires. This ensures safety when moving in changing weather conditions. In the CASCO agreement, a separate clause states when to change tires to winter and vice versa. You can try to ensure high-quality tire fitting and comply with the requirements of the agreement on your own.
It is important for drivers to distinguish between warm and cold seasons in order to understand when to change tires to summer tires or prepare a vehicle for operation in winter. Experts advise relying on weather data, using homemade tire fitting under the following temperature conditions:0003
 Summer tires are not able to provide reliable grip on icy roads.
 In order to ensure safety while traveling, it is important to change the tires in time. I use a special tool and an understandable video about tire fitting with my own hands, you can try to cope with the work yourself.
Do-it-yourself tire fitting requires a special machine that will save you:
Having decided to make a tire changer with their own hands, a manual tire changer is assembled first. You can find suitable models in stores, but you can assemble them yourself using available materials.
To do tire fitting with your own hands, the drawings are studied, and then everything you need is purchased. You can collect different types of devices. It is recommended to pay attention to functional and convenient models, which consist of several nodes:
It is recommended to choose high-quality rolled metal for the construction. Elements must withstand increased loads. The design must remain intact, not pose a threat to the master. Having decided to do the tire fitting with your own hands, the drawings for the manual tire changer are used as in the picture below.
To perform tire fitting with your own hands, hand tools are assembled in stages:
Last install the lever, which consists of a paw and a shoulder. The first element will be required to remove the tire. Having assembled the structure, you can understand how to do tire fitting with your own hands. To do this, use the video guide below, photos and explanations of the masters.
In the absence of a special machine, it is almost impossible to dismantle or install rubber yourself. After assembling the device, you can start changing tires, for which you should learn how to do tire fitting. The process is carried out in several stages:
Further work can be done with a simple pry bar of great length (elements with a welded handle) to completely rid the disc of rubber. To do this, it is necessary to insert the mount with a narrow part under the rubber in order to bring it out of the rim.
Fix the wheels after installing it on a homemade machine using a special clamp.
It should be understood that the process of changing tires is quite laborious and complicated. It is necessary not only to assemble the machine with your own hands, but also to use it correctly, helping yourself with additional tools. It is not always possible to do such work, so you have to look for high-quality tire fitting.
When deciding how to choose a tire service, it is recommended to pay attention to several points:
Quality tire service in Moscow is actually not so easy to find.