Tire maintenance cannot be overlooked. Proper upkeep extends the life of your tires, and more importantly, keeps you safe on the road. Everyone knows you have to regularly check tire air pressure and keep your wheels properly inflated. But when was the last time you checked your tire treads? If it’s been awhile, you can try these tricks to measure your tire tread at home.
Tire treads provide traction for your vehicle, so they are vital for safety on the road. They provide a void where water can escape during wet conditions, which keeps your vehicle from hydroplaning. They also allow movement in the tread blocks to create traction. These are tire tread measurement guidelines:
It’s easy to check on the condition of your tire treads and ensure they are 4/32 inches without going to a mechanic. Here are three ways you can do it from the comfort of your own driveway.
Take any U.S. quarter and place it between your tire treads. Roll the coin until the top of George Washington’s head is inside the tread. If any part of Washington’s head is covered you are in good shape. That means you have at least 4/32 inches left on your tire tread. Repeat this process in various treads on all of your tires.
This test uses a U.S. penny to measure tire tread. Put the penny into the groove of the tire, and roll it until Abraham Lincoln is standing on his head. If you can see his entire head, this means it’s time to replace your tires. If any portion of Abraham Lincoln’s head is covered, it means your tires are in good condition and you can drive safely with them.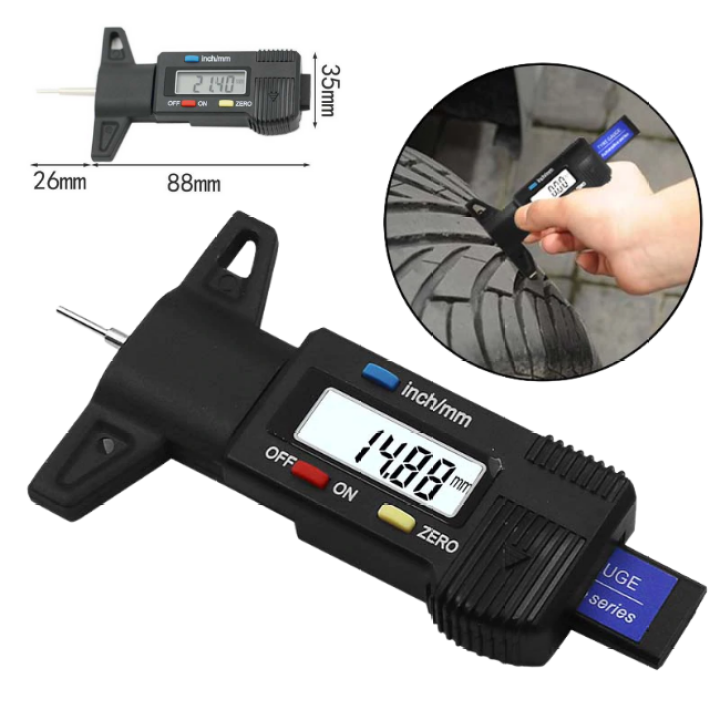
Did you know most tires are manufactured with a built-in measurement of tire tread? It’s called a treadwear indicator bar, and they’re located in random places inside the grooves of your tires. If the tread wear indicator bar lines up with the adjacent ridge in the tire, your tires are worn out and need to be replaced right away.
If you prefer not to use coins or examine the tires up close, you can use a tread depth gauge purchased at your local auto parts store. These handy gadgets let you measure tire tread in just a few seconds. Place the gauge inside any tire tread and push down. Carefully remove the gauge and you will have an accurate measurement. Be sure to do this on several different treads on all four tires to determine the condition.
Don’t underestimate the importance of the place where your vehicle meets the pavement. Tires with proper tread provide safety and security by helping you avoid accidents.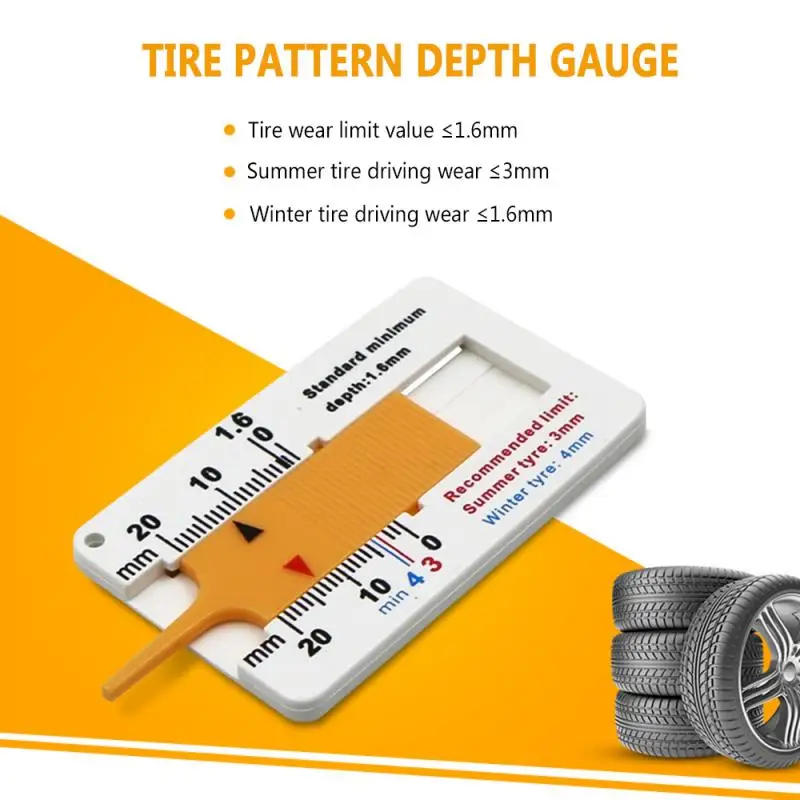 With these simple tricks, you can easily measure tire tread at home.
PPMC-Transport is supported by its audience. When you buy through our links, we may earn an affiliate commission. Learn more
Written by Steven Schiller
Fact checked by Henry Speciale
A tire tread is composed of ribs or grooves throughout the circumference of the tire. This raised portion of the tread expels water making the vehicle safe to drive under difficult weather conditions such as rain and snow.
However, when the tire tread wears down, it loses traction on the road and forces the braking and steering system to work harder especially on wet conditions. It becomes unsafe to drive when the tire tread depth reaches 2/32 inches.
But, how to check tire tread depth? Tire tread depth can be measured using a penny, a quarter, a tire tread wear indicator, or a tire tread depth gauge.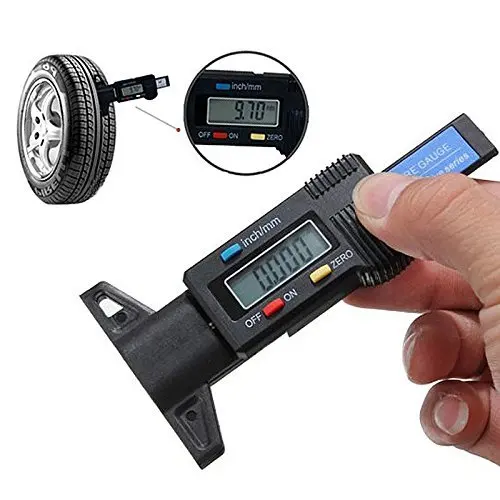
Table of Contents
In the US, you can measure tread depth on a tire using a penny.
Insert the penny to the tire groove with Abraham Lincoln’s head going in first.
Some recommend replacing tires as early as this tire tread depth measurement because of diminished vehicle performance. The tires may not survive harsh driving conditions.
Another way to check the tread on your tires is using a quarter test.
In this test tread on tires, the tire’s tread depth is measured using George Washington’s head.
Conducting a penny test or checking tire tread with a gauge can reassure you that you measure tire tread correctly.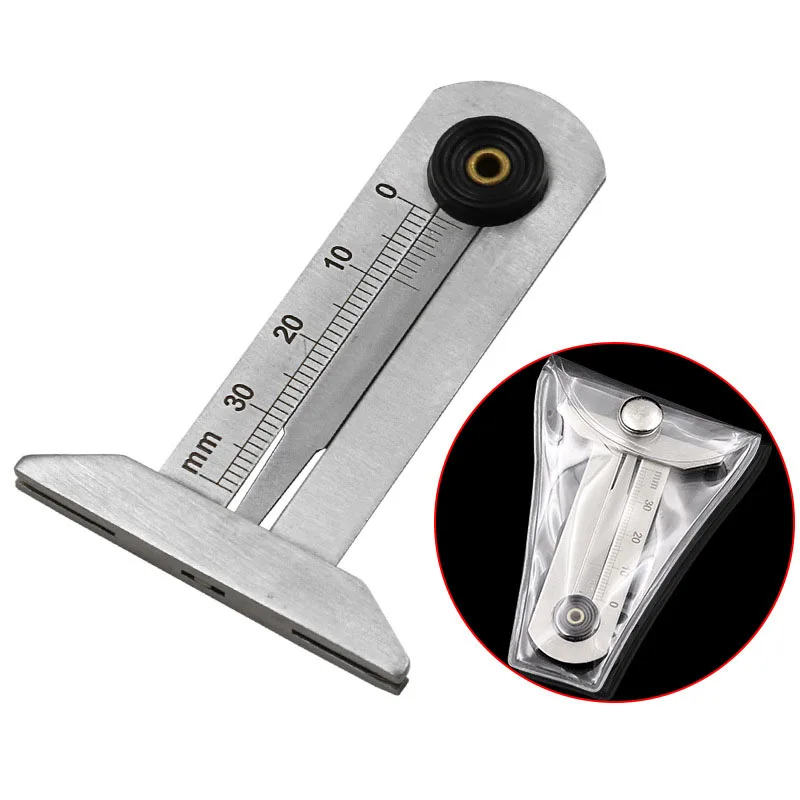
You can also check wear on tires without any tools because tires have a built-in tire tread indicator or wear gauge.
They can be seen as six bars throughout the tread ribs. The bar becomes visible as it reaches the minimum legal tread depth of 2/32 inches or 1.6 millimeters.
Some tires were designed with different grades of bar, such as 8/32, 6/32, 4/32, and 2/32. So check all the tread grooves to make sure it follows the tire wear indicator chart.
The tire tread depth of brand new tires of pickup trucks or large vehicles is around 15/32 to 20/32 inches.
If you would like to get a precise tire tread depth measurement, use tire tread depth gauge.
Of course, this tool cannot measure a bald or totally worn-out tread.
Look for the lowest tread depth. Insert the gauge pin into the groove, then press it towards the tread. This tool provides exact readings in inches and millimeters.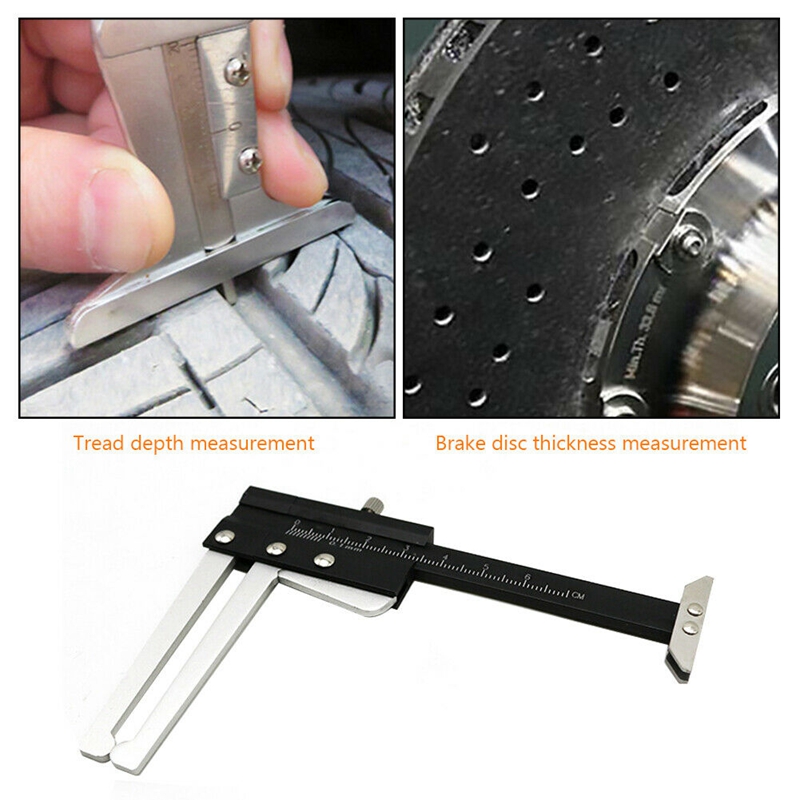 They can be purchased in automotive shops for around $4.
What to prepare: Penny, Quarter, Tire Tread Indicator or Tread Depth Gauge

If a part of Lincoln’s head disappears in the groove, the tread is still above 2/32 inches.
If the tread covers Washington’s head, the tires are safe to use at 4/32 inches deep.

In general, tire tread depth should be checked every 3,000 miles or 5,000 km. It is also recommended to check the tread on tires seasonally or during changing of winter or summer tires.
Keeping a close check on your tire’s health is possible if you know how to check tire tread depth.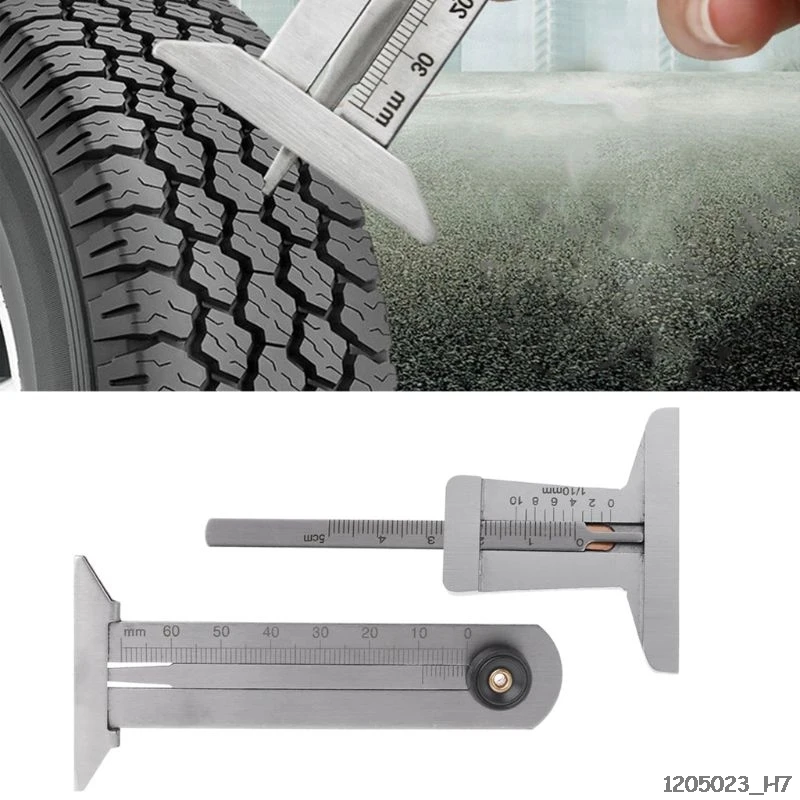
You can measure the tire tread depth with or without a gauge. The coin tests are helpful in providing an estimate of tire tread depth. However, if you would like to prevent vehicle accidents, the best way to check tread on tires is by using tire tread depth gauge.
The standard minimum tire tread depth is 2/32 inches but it is safer to plan tire replacement as soon as they approach 4/32 inches deep.
If you would like to know more about hydroplaning, feel free to share your thoughts.
Categories FAQsI'm Henry, the content writer for PPMC Transport. We build our site entirely on experience and extensive market and customer research. My goal is to create a trusted platform where people can go to determine what is best for their vehicles in terms of safety and convenience. Keep an eye out for our useful guide!
- Speciale Henry
The tire tread is the outer part of the wheel that provides traction in all weather conditions.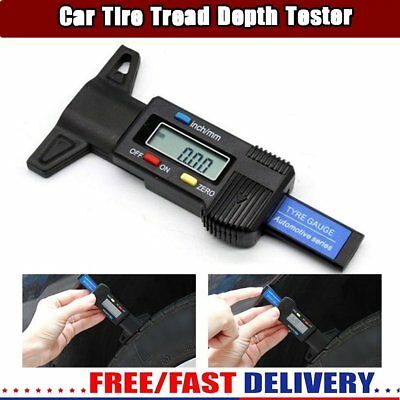 The protectors inevitably wear out during the operation of the car, the working height of the slope decreases. The residual tread depth should be periodically monitored and the set of tires should be renewed in time - this will reduce the risk of losing control of the car and save the car owner from fines from the traffic police.
Tread wear rate depends on many factors:
Measuring the thickness of the tread layer will allow you to accurately determine the degree of tire wear and make a decision in time to replace them with new ones.
Different tires have different wear limits. Tread depth affects vehicle handling and road safety.
| According to Chapter 5 of the SDA, limiting norms for the height of the tread pattern have been established. For category M1 - passenger cars - as well as vehicles of categories N1, O1 and O2, the minimum allowable value is 1.6 mm. When using winter tires on snowy or icy surfaces - the limit is 4 mm. |
Let us explain what categories of vehicles we are talking about:
N1 - vehicles intended for the carriage of goods, having a technically permissible maximum mass of not more than 3.5 tons;
O1 - trailers, the technically permissible maximum mass of which is not more than 0.75 tons;
O2 - trailers, the technically permissible maximum weight of which is over 0.75 tons, but not more than 3.5 tons.
The traffic police officer has the right to measure the residual depth with a verified device. In case of a recorded violation, a fine is imposed on the car owner.
The new summer tire has an average tread depth of 7-8 mm. The service life of summer tires is usually 3-5 seasons with average mileage and moderate driving style.
| Residual height limitation by law is 1. |
Do not wait until the critical value is reached. Make sure you change tires in advance.
Winter tires are used in severe weather conditions: low temperatures, icy conditions, on snowy road surfaces. Worn elements make the tire ineffective on slippery winter roads. Accordingly, a more serious approach to the condition of the tire tread is needed.
Non-studded friction tire (velcro) with tread depth 8-9mm. A new studded model - from 9 to 11 mm, some firms produce a tread with a height of 12-18 mm.
| If the tread wear is up to 4-5 mm, the winter set of tires needs to be replaced. In addition, the loss of more than 50% of the metal spikes is also a reason to change the car's shoes. |
The average life of winter tires is 2-4 years.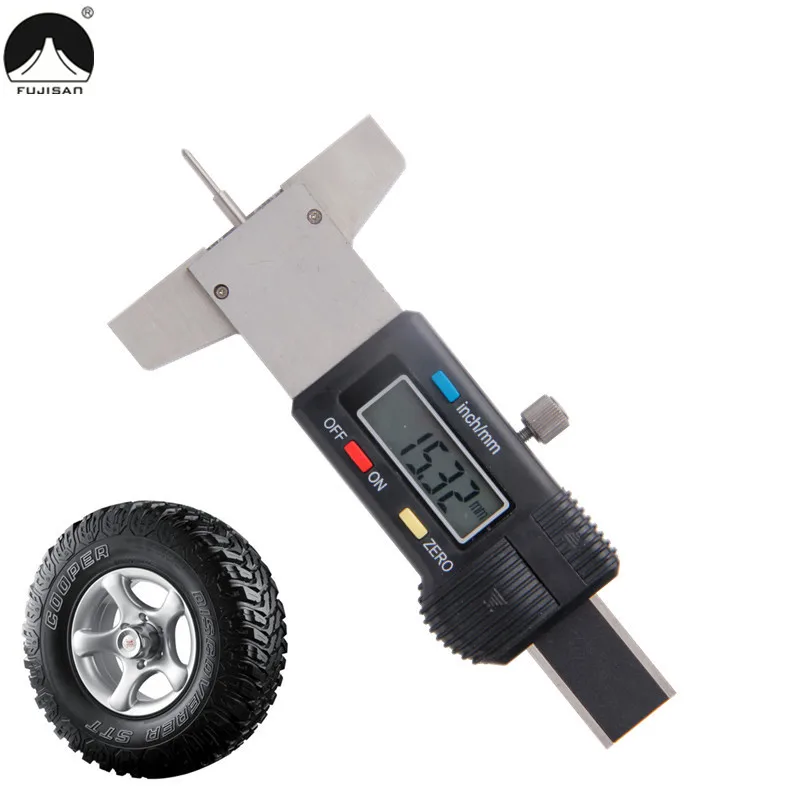
Universal all-weather is used in a temperate climate both in winter and in summer, it is optimal at temperatures from +10 to -10˚C. This type of tire is not suitable for use in snowfall or severe frosts. SDA allows the use of all-season tires in the winter if there is a special marking:
| All-season tires last 3-4 years on average. In summer, at high temperatures, all-weather tires wear out much faster. It is recommended to buy new tires when the tread layer is abraded to a value of 2-2.5 mm. |
You can estimate the remaining tread layer in various ways:
On some tire models there are special volumetric indicators in the form of jumpers. Check: if the tread layer is worn down to the level of the jumpers, the tire is not suitable for further use.
On the surface of certain types of tires, manufacturers knock out numbers of various depths. Depreciation is assessed visually - by the visibility of individual numbers.
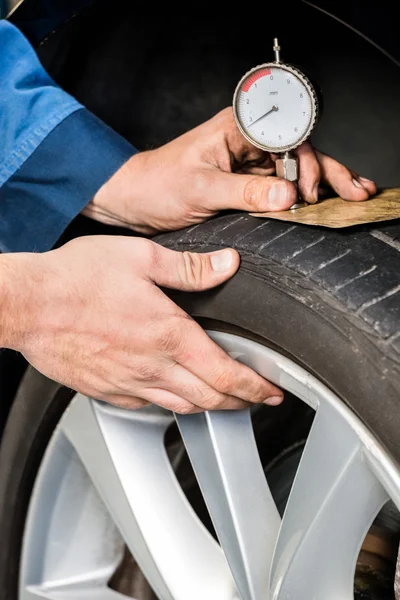
With the help of measuring instruments: from a metal ruler, caliper, depth gauge to an electronic tread depth gauge.
Many motorists measure the remaining tread depth with a coin. Warning: this method of measurement is not accurate. It will not show you actual tire wear figures.
Tire tread height should be measured at least at 6 different points, preferably at 9 or even 12: in the center and from both edges of the tread, at different points around the circumference of the tire. The measurement results at all specified points must match. If they do not match, then the tire wears unevenly. The driver should find out why this is happening. Some causes of uneven tire wear are low or high pressure in them relative to the regular one, suspension failure, extreme driving style.
Old tires have become unusable, the amount of tread remaining is approaching a critical line - no need to take risks, it's time to change your car's shoes. There is a great temptation to get by with small financial costs and purchase a set of used tires. Be careful!
Sellers advertise used tires as good or excellent condition. Do not be too lazy to personally measure the height of the tread layer. And remember: for winter tires, a residual tread depth of 4 mm is already 100% wear.
When buying used tires with tires, it is important to remember that tires from different manufacturers and seasons initially have different tread heights (when they are new). And most importantly: the tires have, accordingly, different wear limits - the tread depth at which the tire begins to lose important characteristics. These differences are most noticeable in winter and summer tires. Keep these points in mind when measuring the remaining tread depth of used tires.
The quality of domestic roads, unfortunately, does not allow tires to be used for 7–10 years. If you still decide to buy a used kit, check the year of manufacture - it is better not to consider tires older than 8 years.
there is no guarantee for tires bought from hands;
the seller can cheat - for example, offer tires from different manufacturers in one set. Some especially enterprising salesmen even cut the tread on the worn rubber, as if the tires had not yet worn out;
you will have to spend a lot of time picking up tires from private sellers - much of what is put up for sale is only suitable for recycling;
Products may have hidden or visible defects. Visible are punctures, tears, cuts. A tire with a lot of damage can collapse in motion. Hidden defects include damage to the cord, which most often occurs after punctures or a strong blow. A car with such a malfunction may wiggle on the road, and it will be unstable;
the goods were stored in the wrong conditions, for example, under direct sunlight - this reduces the life of the tires and they will quickly become unusable, even if the residual tread depth is ideal;
it is not always possible to carry out a tire fitting in the presence of the seller, you will have to check the kit yourself after payment.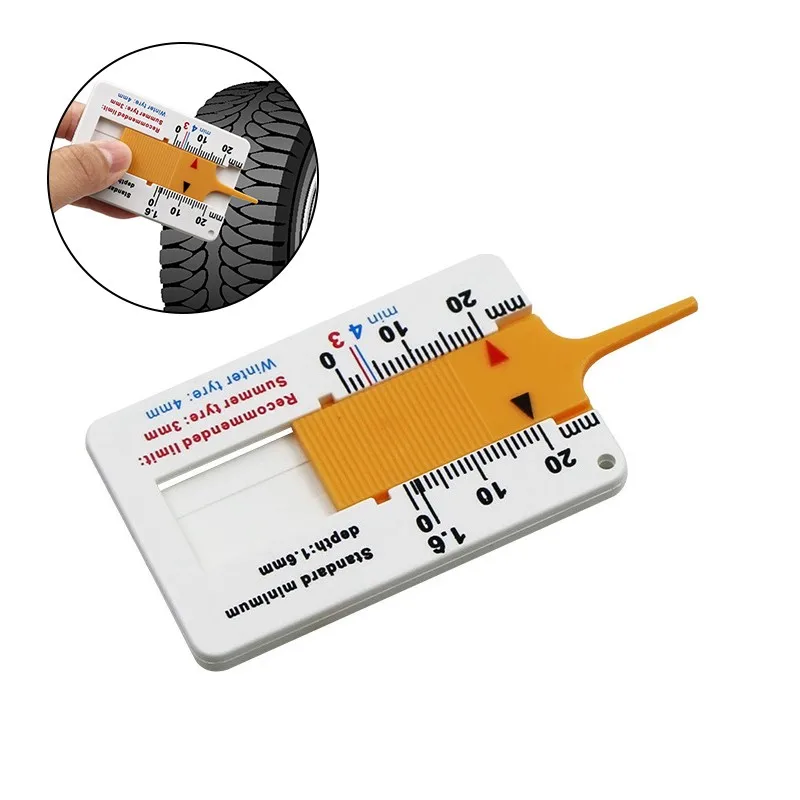
Without a specialist, there is a risk of buying tires that you cannot use. Don't skimp on safety. Purchasing a new set of tires will require more investment, but will pay off with a long period of trouble-free operation.
The maximum permissible residual tread depth for a passenger car is 1.6 mm in summer and 4 mm in winter.
SDA strictly regulate the residual height of the tread pattern. Violation of traffic rules is a reason for drawing up an administrative protocol.
For your own safety, replace worn tires on time. Better for new ones.
• Manometer;
• Technical specifications for the motorcycle and its tires;
• Motorcycle hand tire pump or air compressor (compressed air units are available at some gas stations).
The pressure gauge should measure pressure within the appropriate range and in the appropriate units that you can work with (in Europe it's bar, in North America it's pounds per square inch (PSI)). Many professional pressure gauges are capable of measuring in both units. Slider type gauges with a sliding plastic stem are relatively inexpensive, but they are capable of making fairly accurate measurements.
The correct tire pressure for a particular motorcycle will be indicated in its Owner's Manual. If it is not at hand, then this question can be checked with a mechanic, read the specification on the side of the tire of the selected brand, or call the dealership where you bought the motorcycle.
A manual motorcycle tire pump does a great job when you need to pump air, and it's a lot less expensive than an air compressor. In addition, it is easy to carry and does not require electricity. A tire pump is an essential part of a motorcycle tool kit. Of course, if necessary, you can use the pumps at gas stations, but always double-check the pressure with your own pressure gauge.
Tip:
Be sure to use your own pressure gauge to double-check the pressure level after filling the tires with air. Service station pump gauges are considered relatively inaccurate measuring devices. Also, your pressure gauge should be the only one that will be used to ensure correct readings. Each measuring device is unique in its own way.
Over-inflated tires will wear out prematurely, damaging both the tread itself and the tire rim. Excessively high pressure can also reduce traction.
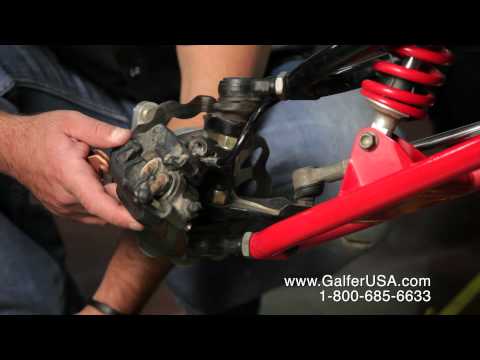
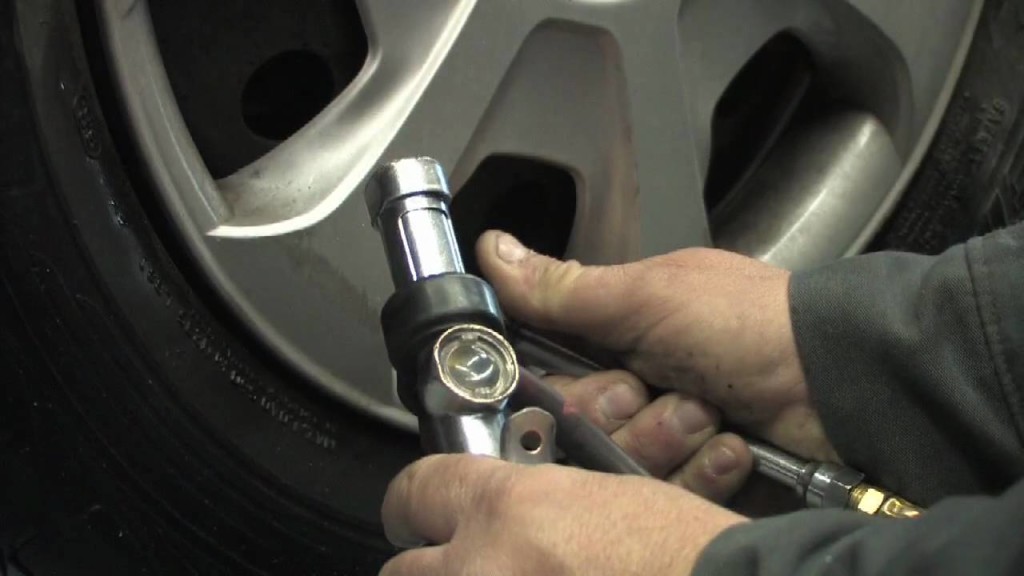
• Locate the valve stem on the inner surface of the wheel rim. For convenience, it may be necessary to roll the motorcycle back and forth until the valve stem is easily accessible. Sometimes the valve stem has a cap (which protects the valve from dirt, debris, and damage). In order to remove it, you need to unscrew it by turning it counterclockwise.
• After removing the cap, the end of the valve will be visible.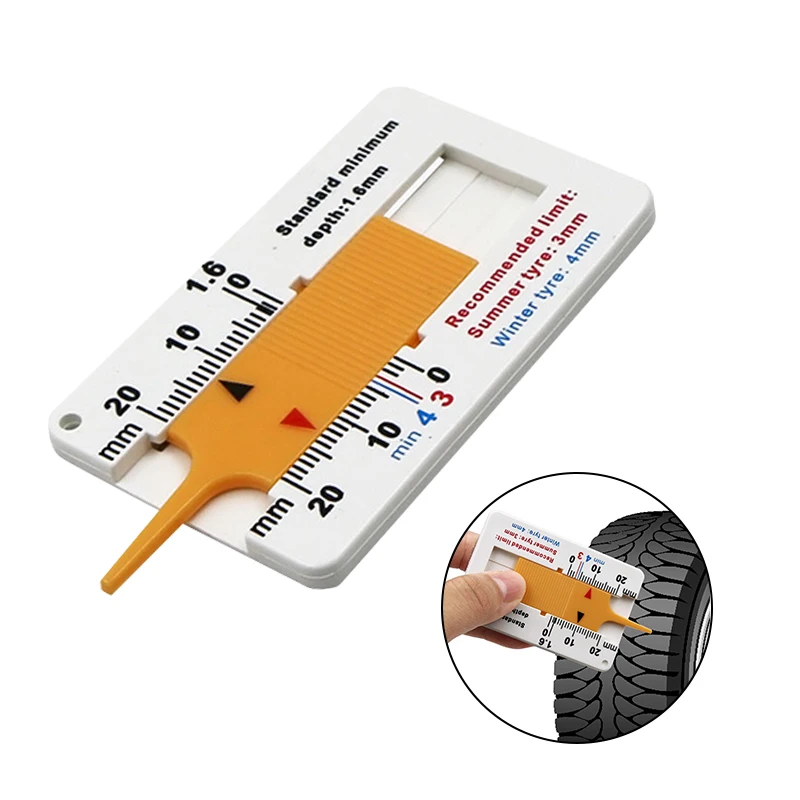 Make sure it is clean and then install a pressure gauge on the end of the valve, carefully aligning it before pressing on the valve stem.
• First check that the pressure gauge has been reset to zero or that the dipstick has been returned to its original position. If a hissing noise is heard or air is felt to come out, the pressure gauge is not set properly and the measurement will be incorrect.
• Remove pressure gauge and try again. If no air leakage sounds are heard, the pressure gauge is correctly attached. Most pressure gauges retain their readings after they are removed from the valve. If a slider gauge is used, be careful not to move the end of the gauge before reading the measured pressure.
• By knowing the air pressure level in the tire, it can be adjusted accordingly to achieve the desired value. When pumping air, it's always easy to pump too much in and then bleed to get the pressure you need. However, it is worth adding air little by little, and then you need to check again until the correct pressure is ensured in the tires.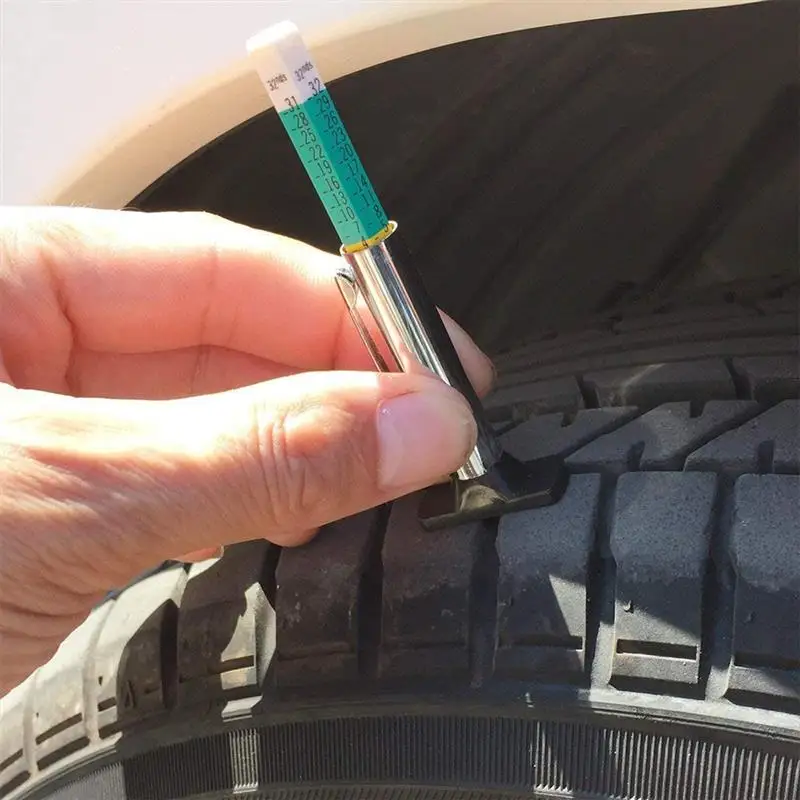
• If excess air is to be bled out, the pin in the center of the valve stem can be pressed down with a fingernail, or often at the opposite end, gauges have a small angled tip for this purpose. Once the pressure is at the desired level, replace the valve stem cap.
Checking the tire pressure on the rear wheel is a little tricky due to the chain and rear brake discs. If the motorcycle is equipped with a center rack, then it will be very useful for this task.
Repeat the above process for the rear tire. When finished, screw the cap back onto the cleaned valve stem.
Look for the following: tread depth, signs of uneven wear or undulations, signs of aging such as small cracks in ruts, and any signs of puncture damage. If you find something like a nail or screw in your tire, but the tire is still holding pressure, don't remove it until you've taken the motorcycle to the nearest service station. If you remove a foreign object from the tire, it can immediately release all the air.


 6 mm. However, with a remaining outer layer of 3 mm, the machine is already difficult to control, grip deteriorates, and safety is threatened.