Spread the love
Looking to paint your wheel rims black? You can save bucks by doing it yourself at home. Here’s our step-by-step guide on how to paint your rims black.
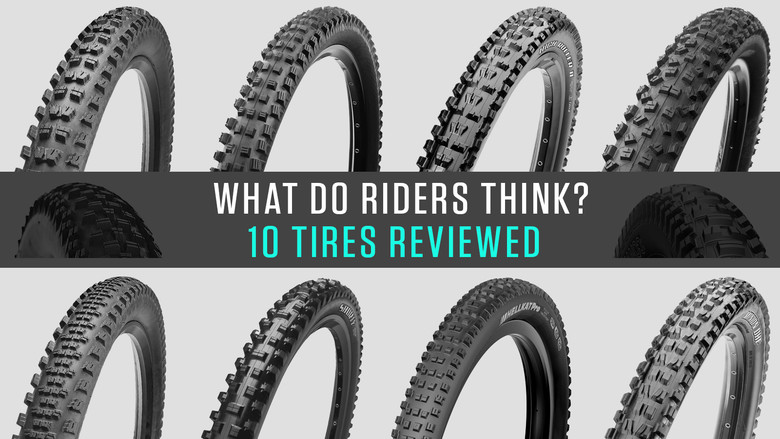
If you’re a car enthusiast, you already know how popular black rims are. For the uninitiated, black rims have a huge fan base and are a head-turner. If you’re on the mission to make your car look cool and stylish, then black rims are the way to go. No matter what size your car is, black rims on your vehicle can never go wrong. So, if you’re looking to paint your rims black using DIY techniques, you’ve arrived at the right place. In this post, we’re explaining how to paint your rims black. Keep reading to know more.
Follow our step-by-step guide and learn how to paint your rims black.
For best results, we recommend removing the wheels. That’s because you can end up applying the pain unevenly if you don’t remove the wheels from the vehicle. Use a jack, lug wrench, and jack stand to remove the wheel from the base.
Separate the wheel from the tire. By removing the wheel from the tire, you can avoid spraying paint. If you’re looking to paint only the face of the wheel, then you can leave it as it is.
You need to first clean the wheel before painting them. After removing the wheel, clean it with a high-quality wheel cleaner. First, rinse the wheel with water, then apply the wheel cleaner. Now, use a soft brush scrub and remove the dirt and grime. Finally, rinse it off with water and dry it using a microfiber towel.
After cleaning the wheel, you will now see the scratches and bumps in it. If they are mild, you can skip this step. However, if they are deep, use sandpaper and water to smoothen the surface. Use 300-grit sandpaper and water and sand the entire wheel. Next, use 500-grit paper and repeat the same step.
Once you’re done sanding the wheel, run your finger over it, you should be feeling a smooth surface.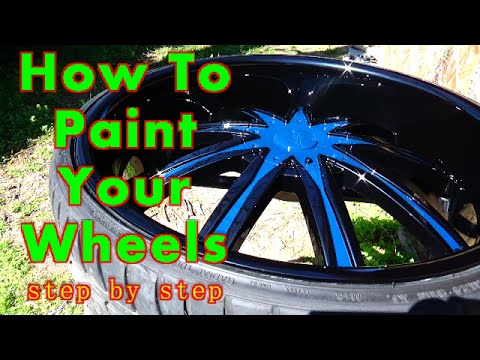 Now spray water over the wheel and dry it with microfiber towels.
Wear a protective glass and gloves to safeguard yourself. Next, choose a dust-free place with ventilation to paint. Place the wheel on the floor or the wall and begin the painting process.
Now tape the outline of the rim. The portion inside the tape is what you’ll be painting. Using plastic wrap, cover the entire wheel. Cut out the center of the plastic – the spot you’ll be painting – using a razor or knife. The others parts are protected from overspray.
Before painting, you need to apply primer to the wheel. You should be applying two or three coats of primer and follow the duration between each coat as per the instructions on the product. The primer will protect your wheel from rusting and make the paint look even across surfaces.
The actual painting process begins now. Shake the paint well and start spraying it on the wheel. Like the primer, you’ll be applying multiple coats of paint. Spray the paint back and forth at a consistent pace. Don’t leave any gap. You should wait and allow the paint to dry before applying the next coat. Two thin coats followed by a thick coat should get the job done.
Once you’re done painting, check the wheel and allow it to dry. Follow the same steps to paint other wheels.
Read our blogs for information on the best airport parking and hourly parking spots near you and the most affordable insurance for your car.
Updated: Mar. 20, 2019
Next Project›
Family Handyman
If you go through the trouble of detailing your aging car, sooner or later the rusty wheels are going to bug you.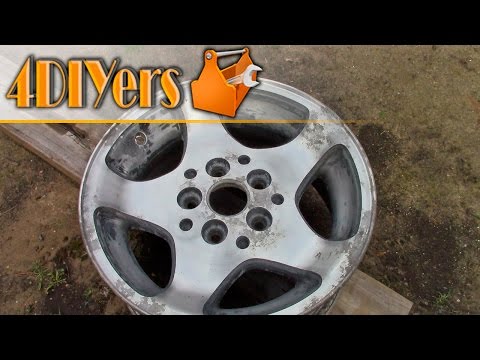 Here's how to refinish the wheels so they look new again.
By the DIY experts of The Family Handyman Magazine
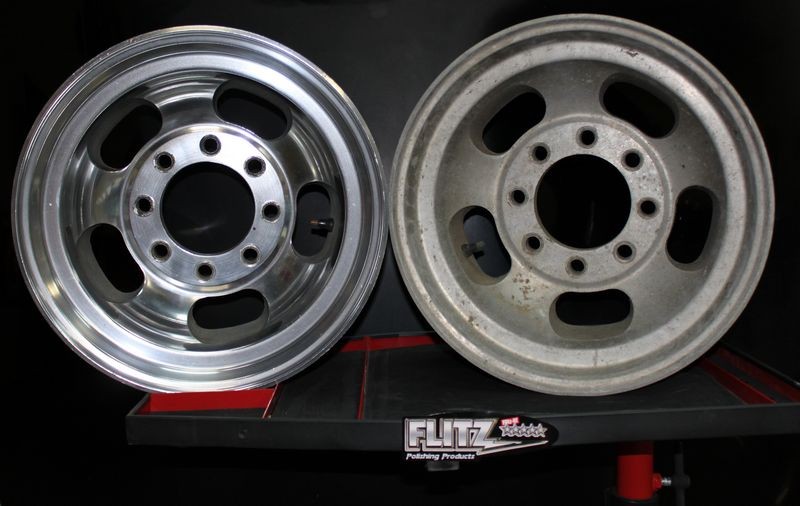
Compare the pictures. The difference that sanding and repainting makes can be striking.
Sometimes a middle-aged car can still look fine except for wear and tear on the wheels and wheel covers. Fortunately, you can fix this yourself for very little cash. Removing the rust and painting your wheels take a full day. (Don’t panic—mostly you’re waiting for paint to dry.) Then the wheels must dry for 24 more hours after painting before you remount them. So make other arrangements for transportation for a day. The supplies to paint rims costs about $50 from any auto parts store. Here’s how to paint rims and how to refinish wheels.
Besides the primer and paint, you’ll need masking tape, plastic sheeting, a drill and a wire wheel. If the wheels are really rusty and the rust has pitted the metal, use “rusty-metal” primer. However, if they’re only lightly rusted, buy self-etching primer instead. It’ll prime any bare metal and bite into the old paint around the rest of the wheel.
Next, buy spray paint formulated for wheels. (Rust-Oleum, Dupli-Color and VHT are three well-known brands carried by most auto parts stores that are the best spray paint for rims) Wheel paint has higher pigment content, is more chip- and wear-resistant, handles higher temperatures and repels brake dust better than ordinary household spray paint. Then buy clear coat spray (gloss or satin) to further extend the life of the paint. Two cans each of primer, paint and clear coat is usually enough to paint the outer face of four wheels. Double the amounts if you plan to paint the inside of the wheels too.
If you want to refinish the wheel covers, buy three cans of plastic-rated metallic spray paint.
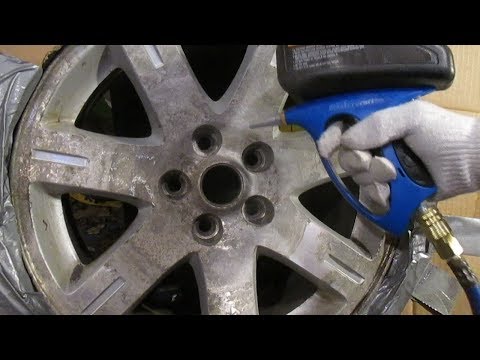
Jack up the car and support it with jack stands.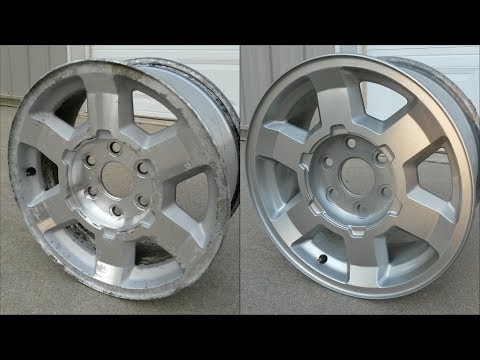 Then remove the wheels and scrub them with heavy-duty spray cleaner, a brush and water. Rinse off all the crud and blow the wheels dry with compressed air or a leaf blower.
Select a well-ventilated area to spray the wheels. Cover the floor with a tarp to catch the overspray. Then set out two sawhorses and lay down three 2x4s. Set the dry wheels face up on the 2x4s.
Apply masking tape to the tire and draw an arrow pointing to the center of the weight. Write the weight markings on the tape so you can get them back in the same place. Then insert a small Phillips screwdriver into the circular opening and tap the screwdriver until the weight pops off.
Wire-brush the rusted areas down to the bare metal. Then lightly scuff all the painted areas around the entire wheel, including areas near the tire bead and lug nuts. Slow down around the valve stem so you don’t damage it.
If you paint over the wheel weights, you’ll see the old paint spots the next time the shop rebalances your wheels or you change tires. So take the time to remove them before you start painting (Photo 1). Next, don an N95 paint respirator and protective eyewear and remove the rust with a drill and a wire wheel (Photo 2). Blow off the dust with a leaf blower or an oilless compressor—not compressed air from an oiled compressor. (Oiled compressors often spit out oil droplets, which can cause fish-eyes in the paint. Trust me on this—I’ve done it and ruined paint jobs.) Then wipe down each wheel with a tack cloth.
Apply two coats of primer, letting each dry for the time recommended on the can.
Apply the color and protect it with clear coat spray. We painted our wheels a glossy black, and in this photo we’re spraying on the first of two coats of clear coat.
Mask all around the wheel using small sections of masking tape (this is really tedious). Next, lay plastic sheeting over the wheels and cut out the center wheel portion with a scissors. Tape the sheeting onto the first layer of masking tape before you start the tire rim paint job. Then mask off the valve stem.
Read the can labels to find the recommended wait times between coats. Then apply two coats of primer (Photo 3), three coats of paint and two coats of clear coat (Photo 4). Let the wheels dry for 24 hours. Then remove the sheeting and tape. Reinstall the wheel weights and remount the wheels.
To make the rest of the car sparkle, see Car Cleaning Tips and Tricks.
Even though they’re plastic, wheel covers can be sanded smooth and refinished.
Most plastic wheel covers are painted. After a while, the paint peels and all those curb kisses gouge the plastic. You don’t have to buy new wheel covers. Just refinish the old ones.
Start by scraping the peeled areas. Then feather the peeled edges with 120-grit sandpaper.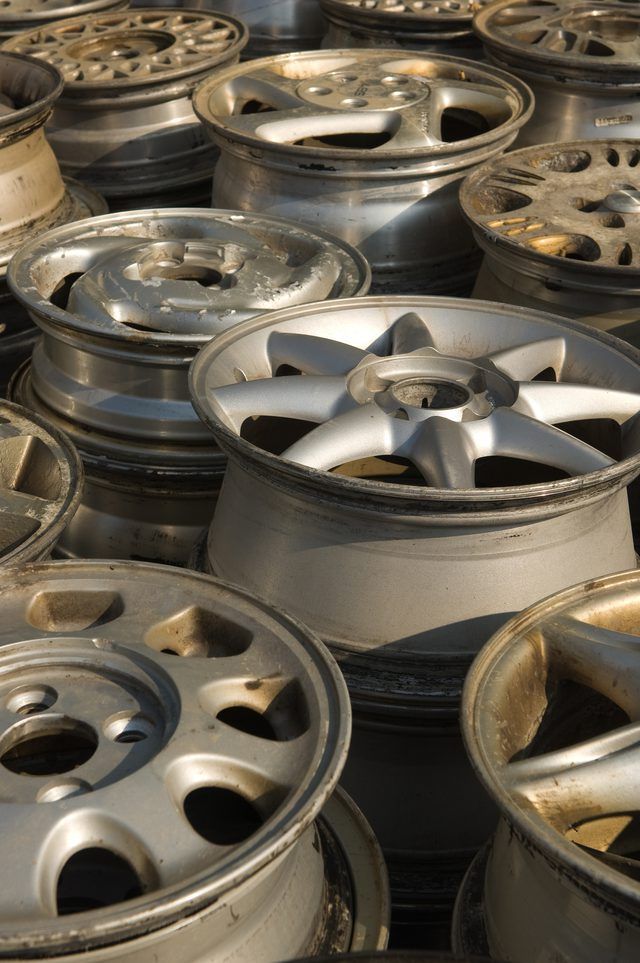 Sand down high ridges on the gouges until they’re level with the rest of the wheel cover. Then wash the wheel cover with heavy-duty cleaner and a scrub brush. Rinse and dry. Then paint the entire wheel cover with a metallic spray paint rated for plastic.
Peelable paint is the latest craze. Car buffs use it to protect their wheel covers and rocker panels over the winter months or to give their rides a shot of color. Peelable paint is a spray-on rubbery coating that peels off when you’re done with it. If you scratch it, you can simply recoat it. Use it on any smooth surface indoors or out.
When you use peelable paint outdoors, it should be removed after three months. You can leave it on longer, but it’ll be harder (or impossible) to remove. But indoors, it’s removable for nearly a year.
Peelable paint is available at auto parts stores, home centers and craft stores. Rust-Oleum, Dupli- Color and Plasti Dip are three well-known brands of peelable paint.
Have the necessary tools for this DIY how to refinish wheels project lined up before you start—you’ll save time and frustration.
Avoid last-minute shopping trips by having all your materials ready ahead of time for this how to refinish wheels project. Here’s a list.
Originally Published: December 11, 2018
ⓘ
Photo from social networks.
Worn and cracked wheels can turn even a luxury car into a wreck. Not for nothing they say that the wheels are half the responsibility for the appearance of the car. However, high curbs and road reagents are not dormant - the disks, alas, quickly deteriorate. However, there is a simple and, most importantly, inexpensive way to restore their former gloss and even add a “zest”. Which one, the AvtoVzglyad portal will tell.
Eduard Raskin
Another scratch — it's about the wheels. Either let the ambulance pass, or park in the center, right next to the granite, or simply from fatigue: the wheels suffer much more often than the body. And the larger the disks with a radius, the more they get. I got ready, bought myself a really attractive kit with rubber in the style of "duct tape", and then you park the car a kilometer from the curb. However, even such precautions do not help - there will still be scratches. Which means it needs repairs.
There are thousands of companies on the service market that dream of taking on the restoration of your rims. Prices are different and often depend on the diameter and model, but if you sum it up, it's just "expensive". Waving your hand won’t work either - damage will quickly lead to delamination of the paint and destruction of the metal, and exponentially. It is necessary to repair, but the question is how, if the salary is no longer enough for everyday needs? There is only one answer - on your own.
Gather your strength, buy consumables and do the work yourself. Moreover, there is nothing complicated there, and tire fitting is not needed. It is foolish to claim an ideal result, but a “solid four” is within the power of every domestic driver, regardless of gender, age and political preferences.
Photo dockermsk.ru
So, for complex restoration you need a primer and a special aluminum putty, degreaser and varnish, as well as paint. For the best result, you will need paint for the wheels - a couple of cylinders for four wheels will be enough with a margin. We will leave the fashionable procedure on the Internet with sticking playing cards around the disk to bloggers - we need a good old newspaper and masking tape.
First of all, wash and clean the disc from dirt, rip off the peeling paint with a blade. Having surveyed the resulting ruin, otherwise this spectacle cannot be called, we take a skin or drill with an appropriate nozzle and bring the disk into a decent look. The factory varnish should be peeled off, ideally sandblasted, but you can just walk with a grinder with a brush nozzle. The work is easy and you get the hang of it quickly.
Then - sandpaper: first 120, then 200, then 320. Blown with a compressor, degreased, applied primer, then putty the damaged areas. Putty is put in a thin layer, after which it dries for 20-30 minutes, and you can put more. Ten thin coats are much better than 1 thick coat. Here you have to sweat, but cunning and dexterity will come on the second wheel. Further - easier.
347519
Photo tvoirazmer.ru
When the putty is dry, you can sand it, giving it the desired shape. After - again degrease and prime. And you can paint: the first layer is spraying, then two dense ones.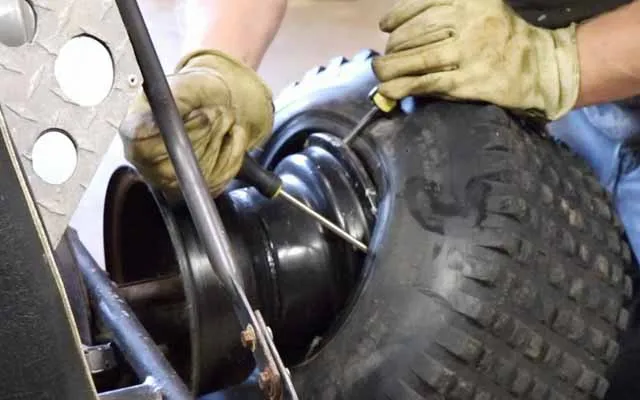 Smoke breaks between layers - about 20-30 minutes, but it is better to read the details on the paint can. After all, all manufacturers have their own requirements. After the last “pass” has set, you can apply varnish. We also purchase two bottles of it and put it in two layers. It's not hard to remember.
When choosing paint for wheels, you should forget about your native color - you will never pick it up - and choose the one you like. Dark, light, chameleon or bright - to your taste. The salt of history is not restoration, but putting in order. The main thing is that such work will take a whole day, but it will bring pleasure for many years. And the realization that it was made with your own hands - for the rest of your life.
The police took on car audio lovers
83432
Police took up lovers of auto -sound
83432
Subscribe to the Autovzglyad channel:
 Sen
Sen Maintenance and repair
admin 0 comments rims, auto repair, tuning
During the operation of the car, rims suffer the most. There are plenty of potholes, potholes, speed bumps and other wheel traps on our roads. Falling into such a trap, not only rubber suffers, but also the wheel disk. If you can purchase the affected tire in a single copy, then the disk is unlikely. And the purchase of all four discs at once noticeably "hit the pocket". But you can paint and thereby "update" your set of aluminum rims in a garage with minimal cost and with your own hands. The cost of materials in this case will be only 10-20 percent of the cost of a new set of disks.
Wheel rims are painted for various reasons - oxidized, peeled off, scratched or just don't like the color. You can bring the disc to a decent look without even removing the rubber. How to do this - consider step by step.

It is MANDATORY to change the film after priming before painting! The primer does not adhere well to the film and, when painting, can break away from the old film and get on the surface to be painted.