If you’re wanting to change the look of your ATV without needing to spend the money to buy all new plastic body parts, one option is to paint the existing plastics. There’s a quick and easy way to get this done, and a longer more professional approach. Either way, it’s cheaper and more rewarding than buying new ATV plastics all together.
Most ATVs come with colored plastics already, maybe with some printed graphics on them. Some ATVs may even have hydrographics or water transfer printing done. This can lead to some pretty cool designs that would be almost impossible for the average person to recreate with spray paint or other painting methods. I go over hydro dipping in more detail below.
In general, to paint ATV plastics, you’re going to need to clean the plastics and sand them down, then remove contaminants in the plastic that prevent paint from sticking. After you’ve done that you’ll want to use a primer, paint, and top coat to seal and protect the paint job. I will go more in depth below with a step by step guide.
If you don’t want to go through all that trouble, there is a quicker method. It probably won’t last as long as taking the professional approach, but it works well. Before you begin either method, you’ll want to make sure your plastics are in good condition. Check out this article on Repairing ATV Plastics if you want to fix them up a bit before painting.
This method is the easiest most straight forward way to paint your ATV plastics. Simply get a can of this Krylon Fusion Spray Paint For Plastic from Amazon. It can’t get much easier than just spray painting right?
You will first need to take all the plastic pieces off the machine that you want to paint, unless you’re really good at taping off the painting area. Every time I try to just tape off the area, I end up still getting paint where I didn’t want. It’s up to you on this one, I take the plastics off the quad from now on.
It’s also easier taking the plastics off because you need to clean them before applying paint. It’s best to use a bucket of warm soapy water, take extra care to get all of the dirt and grime that will prevent the paint from sticking. Use a rag or sponge to thoroughly clean the plastic parts.
Krylon claims that you don’t need to apply a primer before painting with Krylon Fusion paint. I’m a little skeptical about that, but it’s up to you. I’ve just seen the paint last longer when a primer is used. You might be ok if you’ve cleaned the plastic well enough.
Now you’re ready to paint, I’ve done this before by hanging the plastic from a tree with a rope. But this can also be done by simply laying the plastic on a bench or outside. Try to get into an area about 65 – 70 degrees if you can to help cure the paint.
I recommend painting from the bottom up. If you spray from the top down, then when you get to the bottom the over-spray will get into the top and make it look grainy. You should try to spray in light coats to avoid the paint running. If you spray too much in area the paint will lift. It’s up to you how it looks after the first couple coats if you need another one.
The paint itself will dry in about 15 – 30 mins but it’s recommended to wait 24 hours before handling. Also, it will take a week before the paint is chip resistant, according to Krylon.
The biggest problem with this method is it doesn’t last a long time. Chipping and cracking after a couple years is pretty common with this approach.
Hydro dipping is only in the article because I think it’s one of the coolest ways to paint something. You may have seen this before. They lay a graphics film over a bucket of water and as they dip something into the film adheres to it giving it a cool graphic design paint job.
They do sell kits you can use at home for pretty cheap, like this HydroGraphics Kit From MyDipKit on Amazon. I can’t vouch for this myself because I’ve never tried it out. I do know, to get it professional done at a place is usually gonna run you somewhere around $500.
I’ve seen the hydro dip paint jobs hold up pretty well too, but again, those were professionally done. Not to mention you can get some pretty awesome looking graphics on your quad. It will definitively turn some heads.
This is not that hard to do, but it will take some time. A lot of sanding, cleaning, and waiting for paint to dry. First, take all the plastics you want to paint off the machine. You can’t do this method with the plastics on the machine, it just won’t work.
Start by cleaning the plastics thoroughly with warm soapy water. This is just to get all the dirt and dust that you can off the plastic. Next sand the plastic with 180 or 200 grit sand paper. You don’t want to press hard enough to create wells in the plastics so be careful.
Over time, ATV plastic exposed to the sun and other elements will get a thin coating on them. The point of this step is to remove that coating.
Use a scouring pad or scuff pad like they do with burnt on stuff on the dishes. Like a Scotch pad or Brillo pad. Use whatever cleaner you’d like for this step, 90 – 95 percent alcohol works or even carb cleaner if you have any laying around.
Make sure to scrub good this time, not to wear out the plastic but to get a good scrub on all parts of the plastic. This will determine how well the paint sticks to the plastic, it needs to be super clean.
You should sand with 200 grit sand paper again if you notice any spots you missed the first time around before starting with the sandblaster. Use 80 grit aluminum oxide in the sand blaster.
If you don’t have a sand blaster, sand with 400 grit sand paper and scrub again with a cleaner. It’s best to use a sandblaster, but if you can’t, do the best with what you’ve got right?
Get the plastics dry and spray down with a surface cleaner or degreaser of your choosing. Something like this Panel Prep Surface Cleaner and Degreaser from Amazon will work just fine.
Spray a nice heavy coat of this stuff onto the plastics and give it a minute to work. This will dissolve any contaminants still on the plastics surface that might prevent the paint from sticking. After waiting a minute or so, wipe the cleaner off with a paper towel or rag.
Now apply an adhesion promoter of some kind. This will help keep the paint stuck the plastics for a long time.
It helps keep your paint job durable and prevent chipping and cracking in the future.
I use this Polyvance Plastic Magic from Amazon. It’s an aerosol spray like a can of spray paint and it’s nice and easy to work with. Apply two coats of this, making sure to let it dry completely.
You will need to let the first coat flash before applying the second. You’ll see it sort of change color and it should happen pretty quick.
Now apply a coat of a high build primer of your choice. Here’s a link to a 16oz Grey High Build Primer if want to stick to the spray cans.This step is important for filling any scratches left by the sanding or sandblasting steps. Or any existing scratches you had that you want covered.
Wait for the primer to completely dry before continuing. After the primer has dried, sand it down with 320 – 400 grit sand paper. A lot of primers dry with a thin top coating you need to remove. Plus this will smooth out the surface for the next step.
Before applying the flexible sealer, now is a good time to fill any gouges and big scratches with some type of flexible filler like Putty Flex. Let cure and sand down until smooth to match the rest of the plastics.
The flexible sealer is for use over any primed plastic parts. You could skip this step, and a lot of people do because of how expensive the sealers can be. It’s not totally necessary, but will extend the life of your paint job for sure.
The all season sealer will protect against cracking due to the heat of summer and cold of winter. Here’s a link to a good option if you want to check it out. It’s the All Seasons Waterborne Flexible Bumper Sealer from Amazon.
Let the sealer dry completely before continuing.
Finally, the actual painting step. Use a paint and clear coat of your choice, if you still want to use spray cans the Krylon Fusion for plastic we talked about above will work. When selecting a top coat, make sure there is a flex additive in it or add one yourself.
Let the paint dry between coats and don’t put too much paint on at once. The paint will run and you’ll have to sand down and start over. If you do need to sand down the paint, just sand down to the primer or sealer, I would start with a higher grit like 600 – 800 and drop to 320 if you need to. That way you don’t have to re-do those steps.
That’s it! it’s really not too hard once you get going. It can be time consuming waiting for all the different primers, sealers, and paints to dry though. Just to recap, the quick method works great, just won’t last for years and years. It’s definitely a lot easier though.
If you want your machine looking pristine, go with the professional method. your time and effort will surely show once you’re done.
Sharing is caring!
If you are a motor enthusiast, you must have heard about the concept of ATV plastics. These plastics have been specially designed to give protection both to your ride and you from the rocks and dirt that you will inevitably come across while riding. If you are into colourful graphics, then you can use the ATV plastic to customise your bike so that it starts to look even more professional.
When choosing the perfect ATV for your vehicle, it is essential that you keep the following factors in minds- performance and looks.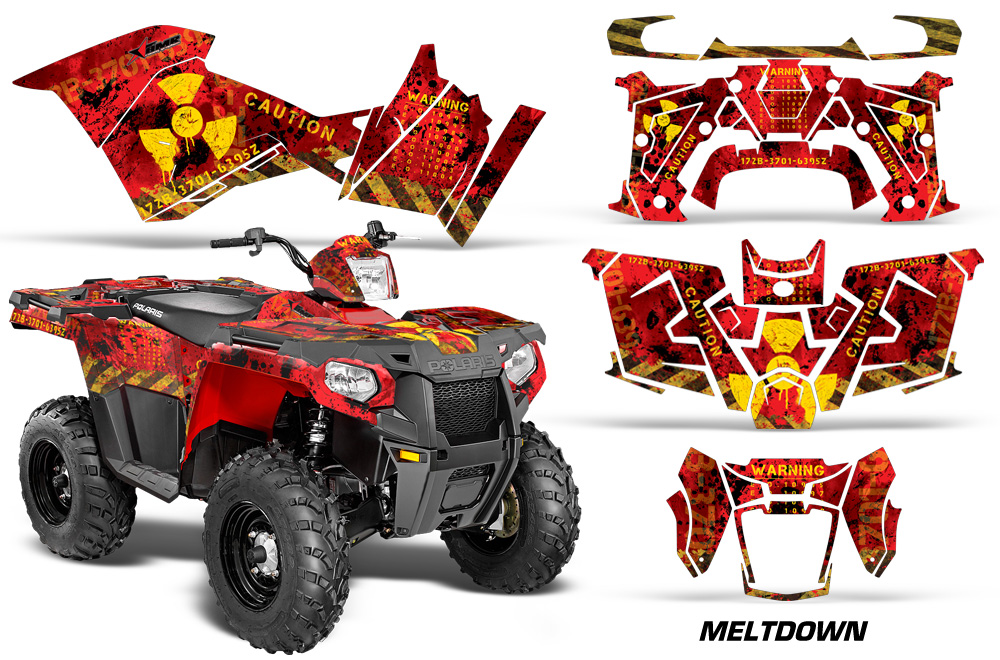 You can check the specifications before buying to ensure smooth functionality. However, when it comes to the appearance of the ATV plastic, you can go DIY and paint it yourself.
Painting ATV plastics is not as difficult as it sounds. It is fairly easy if you know what to do and how to proceed. Remember, the most important thing you need to do is gather all the tools you might need beforehand. Unless you are well-prepared, it might take a lot of time, and you will end up disliking it. After you, it is your ATV that needs to be made ready for painting.
Contents
Let us help to get through this process with minimum hassle. Just abide by the instructions listed below, and you will breeze through it.
To paint a surface, the first thing to do always is cleaning it thoroughly so that no dust can hamper the paint coat. Once you are finished with that, use a 180 grit sandpaper on the entire surface that will be painted.
These ATV plastics have been out in the open battling natural elements like sunlight and wind for a long time which leads them to develop a thin layer or crust on the surface. Sanding will help you remove this unwanted crust so you can move on to the next step. Don’t go soft because you need to get rid of every last particle. When clean your ATV, you also can using best motorcycle oil to fill oil to your vehicle.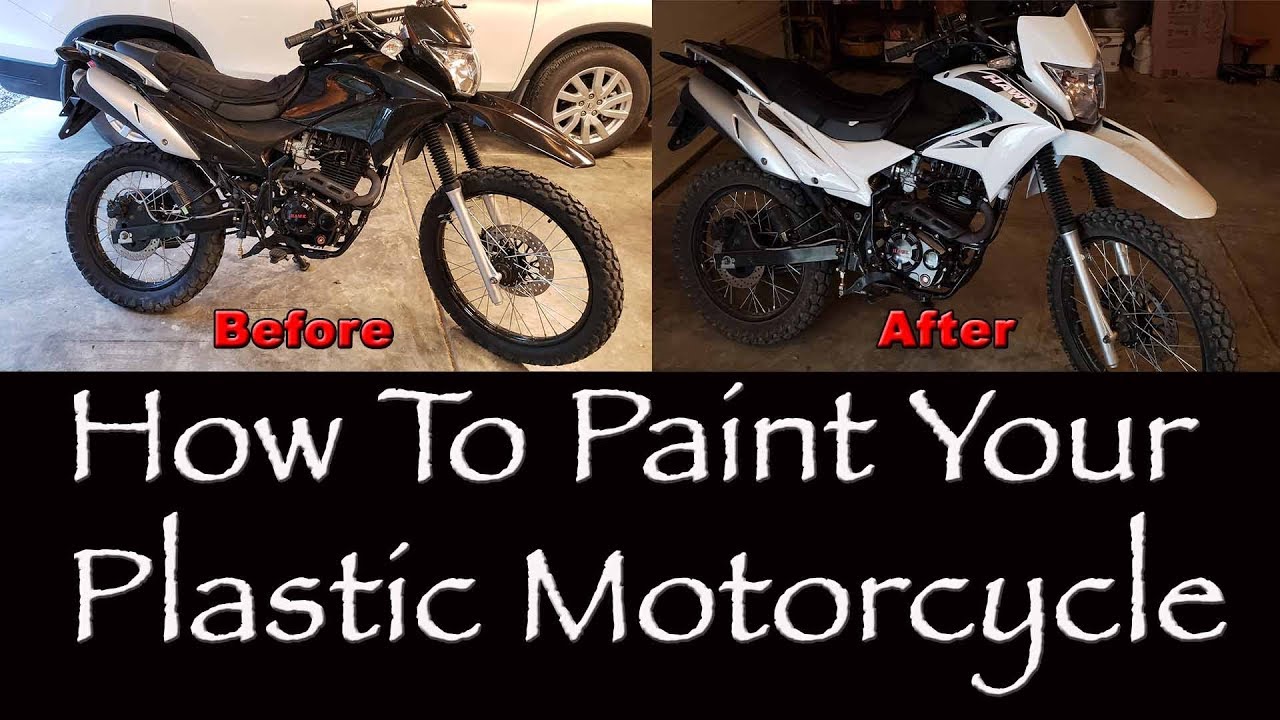
Once you are done sanding, it is time to remove all water-soluble contaminants from the surface that is to be painted. Use a scuff pad and a solution of your preference to do this. This step is also helpful in eliminating any contaminant that might have seeped into the plastic during the previous step.
We cannot stress it enough that unless the surface is squeaky clean, the paint will either not settle or it will lose the texture and gloss. If you want to make your efforts count, pay particular attention to these first few steps.
It never hurts to be a little extra careful or take some precautions. You can repeat the sanding process with 180 grit sandpaper once more just in case you missed any spot the first time around. This is optional, but it is best if you do it anyway.
Once you are finished with the tedious cleaning, you can go directly to the next important step. Sandblast the ATV plastic, and make sure that you cover the entire surface that you want to paint, with 80 grit aluminium oxide. Sand is a very effective cleaner, and with this step, you will be one step closer to finally applying paint. However, hold your horses a little while longer because we are yet to do some more cleaning.
Use a plastic cleaner to complete the cleaning process. You can choose the brand based on your market research. They are available as sprays which are really easy to use. All you have to do is spray a heavy coat and then wait till the solvents manage to dissolve all contaminants. Give it twenty minutes to do its job and then wipe the coat off using a clean paper towel.
Now you have to apply two heavy coats of any industry-level adhesive on the surface of the plastic. Do not double-coat without letting the first coat flash off first. Before you go on to the next step, make sure that the adhesive has dried off completely.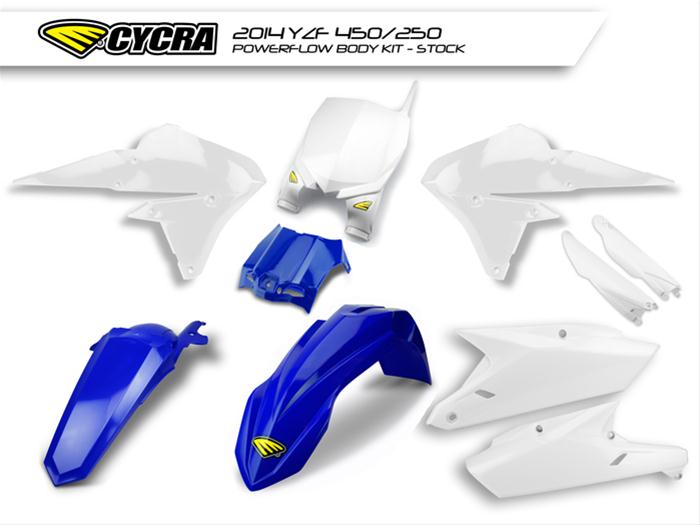
Since we are now getting ready to paint the ATV surface finally, we need to layer and texture it properly. Use the waterborne primer surfacer to slather the surface completely. Due to the high build, you won’t have to worry about any scratches. However, the first thing that you need to look at is to leave the primer to dry.
Since you will have to use high-build primer surfacer, you need to make an extra effort if you want that perfect finish. In other words, you have to sand the entire surface till it is absolutely smooth. Use a 320 grit paper for maximum effect.
Now it is time to cover up any imperfections that may have already been there or which were caused by our rigorous cleaning. Use the best finishing glaze that you can find to cover up these spots. Find one that has a lower viscosity if you want a smooth flow.
Give the finishing glaze some time to settle down and then use sandpaper to smoothen the surface out. After you paint, even the smallest undulations will be noticeable. So sand it well.
Now it is time for the one final step before you start off with a paint brush. Apply a freeze-tolerant waterborne bumper sealer on the surface that will now be painted.
Wait till the sealer dries before you start applying the paint. Do not forget to double layer it- a basecoat and a clear coat are enough. Use a flex additive on the topcoat. Flex additives help in better adhesion of paint to plastic surfaces.
Your ATV plastic is now fully painted and all ready for use! There may be a lot of steps but at the end, it will be well worth your time.
Posted by Ronald Bounds
in VEHICLES
My name is Ronald D. Bounds, founder and editor in chief here at The Rider Base. We are enthusiastic about speed and travel. This website is built to share the information for rider. We help you to choose motorcycle accessories for yourself without much time.
Accessories and additional equipment are installed by the owners of ATVs not at all to give brutality or decorate the appearance of equipment. First of all, they improve off-road patency, allow you to successfully pass mud and water obstacles without changing the planned route.
The tuning parts protect the vulnerable parts of the ATV and extend the life of the vehicle in the conditions for which this tuning is designed. We will tell you what types of tuning you should pay attention to and how they will improve your ATV or ATV.
Power bumper (in the common people kenguryatnik) is a reliable means of protecting the ATV both in front and behind. It protects:
The bumper will protect plastic parts and optics from damage after a collision, so pay attention to the material. Choose steel or stainless steel bumpers: they are light but strong.
Evaluate the quality of welds and painting. The bumper will last longer if it is treated with a polymer powder coating - this saves from corrosion and minor damage.
If you accelerate into a ditch, dirt and clay will definitely get on the radiator. When the water evaporates, the dirt will dry out, remain on the combs and prevent air from circulating freely. The radiator will "clog" and there may be a risk of the engine overheating, even with the cooling fan running all the time.
Removing the radiator will help avoid this situation, because it:
Stems are often made of steel and are strong but heavy. The alternative is aluminum. It is lighter and better protected from corrosion.
Choose a stem for your specific model so you don't have to drill extra holes. These radiator stems come with all clamps, hoses and adapters needed for your ATV or ATV model.
It doesn’t matter if you are going on a long expedition or just “mixing dirt” with friends on the weekend – you have to take a lot of things with you: compressor, water, first aid kit, fire extinguisher, matches, knife, flashlight, raincoat, etc. .d. Luggage must be placed somewhere and hermetically sealed so that it does not get wet and dirty.
Trunks solve this problem. They are of two types:
Trunks are mounted on the front or rear bumper using special fasteners. They are easy to remove or replace. Such a trunk holds tightly, can be locked with a key and is quite tight - nothing will be lost or spoiled. You can stick flickers on the case or install additional reflectors, which will make the ATV more visible in the dark.
Wherever you go, extra fuel never hurts. ATV riders easily solve this problem by grabbing one or more expeditionary plastic canisters. They are presented in different capacities - 5, 10, 20 liters - and are made in various colors.
Canisters are specially designed for installation on ATVs and ATVs: they exactly repeat the design and architecture of cargo areas and panniers. Light in weight and made of dense plastic, they do not deform under temperature changes and are perfect for use in extreme conditions. The canister is installed using original fasteners that allow you to securely fasten it and quickly remove it when you need it.
During active driving, as a rule, a lot of dirt flies into the driver from under the wheels. To avoid this, it is worth installing arch extensions. They act as a barrier and protect the driver from splashes.
Rubber expanders used to be popular, but now many give to flexible plastic that does not lose elasticity even at sub-zero temperatures. Such an expander is made exactly in the shape of the wing and will not break on impact. In addition, you can easily install or replace this tuning element yourself.
Since the ATV cannot be driven on public roads, it needs an additional light source.
There is a huge range of headlights, LED bars and optics on the market. They illuminate the road in different modes:
Drivers most often choose LED optics specially designed for ATVs because they give a powerful stream of light, instantly turn on, are resistant to vibration, have a good dust and moisture resistance. It is important to correctly connect the headlights, adjust them correctly, keep them clean and not use colored lamps.
When riding off-road, the underbody of the ATV is extremely vulnerable. Not only the frame is under attack, but also the suspension, gearbox and even the engine. Bottom protection will cover vulnerabilities and pay off with savings on possible repairs.
Protection is made of three popular materials:
More and more extreme sports enthusiasts ride until late autumn or even winter. At this time of the year, it is important not to freeze on trips, and additional heating of the handles and the gas trigger will help with this. This is not only a matter of comfort, but also of safety: it is very inconvenient and even dangerous to press the brakes or open the gas with stiff fingers. And a frozen person may not be able to stay in an ATV at all on a difficult terrain.
When the ATV is moving at a decent speed, it is important to control the road and have a good view. This cannot be guaranteed if dirt and branches are thrown at the driver. A good windshield will help avoid these inconveniences.
Windshields are made of clear or black plastic or glass with metal fittings. The choice of tuning depends on your driving style. The main thing is that the glass does not interfere with the review and your maneuvers.
When driving aggressively, the load on the frame and suspension increases, and the shock absorbers reduce it. It can be difficult to pick up a shock absorber the first time, but some manufacturers meet the needs of customers.
Modern shock absorbers - such as those from ELKA - can be completely customized:
ELKA models are distinguished not only by the flexibility of settings, but also by the load they can withstand. This is possible thanks to a special system in setting valves and springs that can be adjusted to a specific weight. The systems have been designed to increase the stability of the ride and the stability of the ATV while riding and to eliminate suspension breakdowns.
ELKA dampers are hand assembled from light alloy parts. Induction hardening of the rod gives additional points to strength and wear resistance. Therefore, they do not lose their properties even at extreme temperatures and serve for a long time. This is important, because poor-quality shock absorbers after aggressive driving turn into consumables.
Your comfort is guaranteed even during hard acceleration and braking. Thanks to the smooth damping, the ATV is less prone to bouncing and overcomes obstacles better: ELKA shock absorbers adapt to different riding styles and dampen the transfer of weight on tracks of varying difficulty.
You can purchase all the listed types of tuning in the showrooms of official CFMOTO dealers. Consultants will help you choose accessories for your model.
ATV Club
September 2, 2012
Owners of small off-road vehicles, wanting to increase the reliability of their pet, install various power elements and protection. There are many options for sale and under the order - it's just that your eyes run wide.
There are enough off-road body kit manufacturers abroad in our homeland - Kimpex, Moose, Quadboss, Warn, SuperATV. .. But everything is spoiled by delivery, which takes a long time, and the cost of shipping and customs clearance, which almost doubles the cost. But the power bumper or underbody protection is quite simple to manufacture, they can be produced, in principle, anywhere. Therefore, it is not surprising that companies have appeared on the Russian market that are seriously engaged in the production of body kits for ATVs and snowmobiles.
They all started, as a rule, with the operation of off-road vehicles. They found vulnerabilities and refined it for themselves and friends, for various reasons refusing imported tuning products. Then they developed, and then they made themselves various types of protection. So, starting small, they have developed into very serious enterprises with their own dealer networks that sell quality products for a wide range of models. Many, in addition to serial production, also develop and produce exclusive products for the needs of particularly demanding customers. It is difficult to cover the immensity, but for the products of the main manufacturers and their popular models, there is usually everything.
GENERAL PRINCIPLES OF PROTECTION
Bottom protection on any ATV crawling through mud is important and, I would even say, mandatory, because stumps and pebbles emerge imperceptibly at the most inopportune moment and cause irreparable damage. This means that the protection must be strong, light and have a sufficient number of specially shaped drainage holes to drain the dirt and so that the clay does not stick. It is also important that the maintenance holes are exactly opposite the drain plugs: it is not very convenient to remove the protection every time you change the oils. When installing, the fasteners must match the standard fasteners in order to fit the finished product, and not over-drill it. The contours of the contours must exactly follow the bends of the frame and levers, protecting the anthers of the transmission drives from damage.
For the manufacture of this type of protection, most of our major firms use CNC-machined aluminum. The result is excellent, high-quality protection at an affordable price.
EXTERIOR FABRIC
Manufacturers mainly design standard bumpers to reinforce the front trunk area, and they do not protect plastic. The rear as standard is generally a rarity. The plastic of an ATV's bonnet is usually brittle, and the headlights and taillights are usually attached to it. After meeting with a good bitch, all this beauty turns into rubbish, rarely recoverable. Replacement is a dreary and expensive pleasure, which also requires a long wait for the ordered spare parts. That is why the kengurin, made and tested taking into account all local nuances, calculated specifically for each model, is irreplaceable. Its wide "ears" securely cover the entire front end, protecting the headlights and plastic. The quality of the head light deteriorates a little due to the protective grilles of the headlights, but this is the small sacrifice that you have to make.
One more detail: the power kit is imported according to passive safety requirements and is made of thin material. Our producers are not burdened with such norms. Products, for example, from ATVStar, are made of a two-millimeter pipe, therefore, in the event of an accident, the overall geometry of the bumper is not lost, but only the fasteners made of plates are deformed, which are then easily corrected. Durability and resistance to corrosion in a wide temperature range is achieved by powder coating. A properly applied polymer coating can withstand small impacts without problems, is resistant to abrasion, because it remains flexible for the entire service life - unlike conventional painting.
Fender guards can be fitted with front and rear bumpers. It saves them from breakage when falling to the side, it is easy to put on and for beginners it will be an additional degree of safety.
DON'T LET IT OVERHEAT!
Mud baths are good for overall rider morale. They increase self-esteem and reinforce the idea that the sea is really for you-know-what. But all this affects the technique with the opposite effect. General pollution, however, is not so terrible. The main problem is a clogged engine cooling radiator, when there can be no talk of any more or less tolerable work. The way out is simple: transferring the radiator to the front trunk in a protective case. These kits are also produced by this company. It is not universal, but is developed specifically for each model. Fasteners with an installation kit and a set of nozzles for the easiest installation, protection against damage - all this is the result of a lot of accumulated experience.
And this, of course, is not the whole list of products for power tuning. The conclusion is simple: consumers need a low price, decent quality and everything in stock.