So, you have a flat tire or one that’s leaking air. It’s not the end of the world. Luckily there are safe and cost-effective ways to properly repair most tire punctures. The purpose of this article is to show you the difference between a safe, permanent repair and a temporary string, plug or patch repair.
According to the National Highway Traffic Safety Administration (NHSTA) and the Tire Industry Association (TIA), the only method to properly repair a tire puncture is to fill the injury with a repair stem and back the stem with a repair patch. This is commonly known as a combination repair or a patch/plug repair.
Patch/plug repairs are most often performed using a one-piece repair unit that combines the repair stem and cap (or patch) into one unit. However, special circumstances may require the use of a two-piece combination repair (ex. If the angle of the puncture exceeds 35 degrees). The repair is then permanently bonded to the inside of tire and through the injury channel using a cold, chemical vulcanizing process.
The repair essentially becomes part of the tire, creating an air-tight seal that keeps air in and moisture and contaminants out (more on this procedure below).
Emergency roadside plug repairs are NOT intended to be a permanent tire repair. Plugs and string repairs are designed to get you back up and rolling long enough to get home or to the nearest service center to perform a proper tire repair.
The common misconception with plug and string repairs is that because they hold air, they are safe to use. While it is true that many plug repairs do a great job of keeping air in the tire, that’s only part of the equation. Because they’re not completely sealing the injury, plug repairs may allow air and moisture to penetrate the body of the tire. Over time, this could lead to a dangerous (or even deadly) blowout.
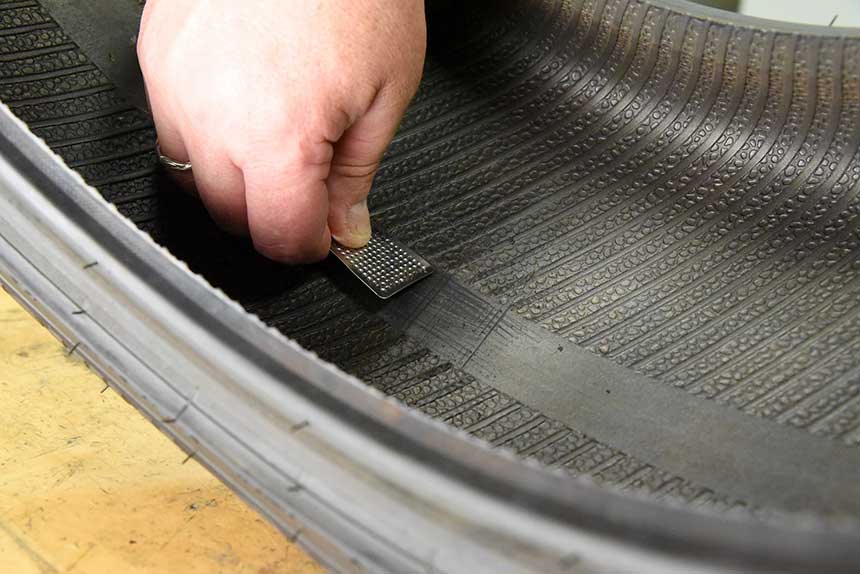
A Patch-Only Tire Repair Leaves Your Tire Susceptible to DamageA tire repair that uses only a patch is also NOT considered proper or safe.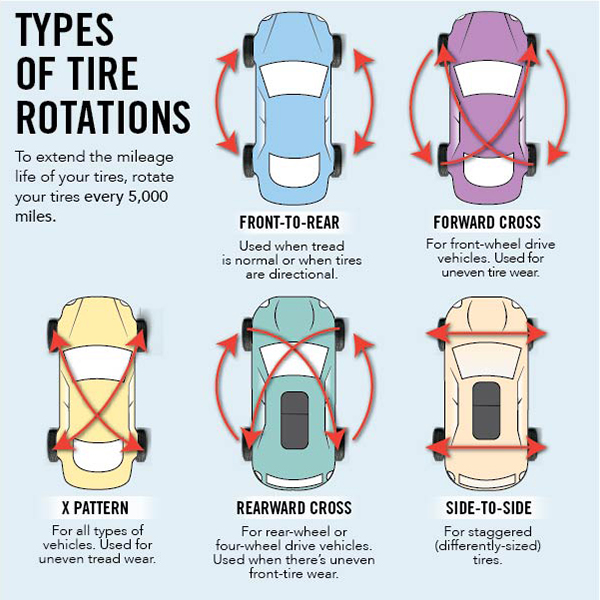 A properly installed patch will do a great job of allowing the tire to hold air. However, similarly to the plug-only repair, the patch does not fill the injury channel. Therefore, air and moisture could seep into the tire from the tread surface and eventually damage the tire.
Only a proper patch/plug repair completely seals the puncture from inside the tire and through the entire injury channel. There are a few extra steps necessary to perform a proper tire repair in accordance with industry guidelines. We’ve developed a simple acronym to help organize and remember the steps: R.E.P.A.I.R.
 It can also be determined if the puncture did any significant damage to the cords or belts.
 The over-buffed area of the inner liner is treated with a thin layer of rubber sealant, and the excess repair is trimmed to approximately ¼” above the tread surface.
There are a number of factors that may determine whether or not your tire is safe to repair. These factors fall into three main categories:
 Excessive wear, casing separation, impact damage and other conditions may make it unsafe to properly repair your tire. For a more comprehensive list of repairable vs. non-repairable conditions visit our blog Can Your Tire Be Repaired?
The occasional flat or leaky tire is an unavoidable part of life. But, taking shortcuts to repair it can be dangerous to you and your passengers. Take the time and do the research to do the job right and/or find a reputable tire repair shop trained in proper tire repair procedure.
If you discover a nail or other object in your tire, you might not need to replace it. If it’s still in good condition and the puncture occurred in a repairable area, you might be able to patch it. The process of patching a tire is relatively simple, and something just about anyone can do in a few minutes.
If you’ve found yourself with a hole in one of your tires, keep reading!
Today, we’re sharing how to easily patch a tire hole in your tire. Let’s get started and get you back on the road!
Watch this video on YouTube
There are limitless possibilities for what type of object might puncture one of your tires. We’ve seen many nails and staples, but hitting any blunt object at a higher rate of speed can cause a hole in one of your tires.
The difficult thing about tire holes is that you might not notice them immediately. A small nail could cause a leak in the tire which could take a day or two before your car alerts you or you notice the tire looking low. This is why it’s crucial to regularly examine your tires and check your tire pressure.
There are a variety of sealants available that you can use to plug a tire temporarily. One of the most popular options is an aerosol sealant that contains foam or liquid. You connect the aerosol can to your tire, and the sealant fills the tire’s interior. As your tire moves, it coats and seals its interior, which prevents it from leaking.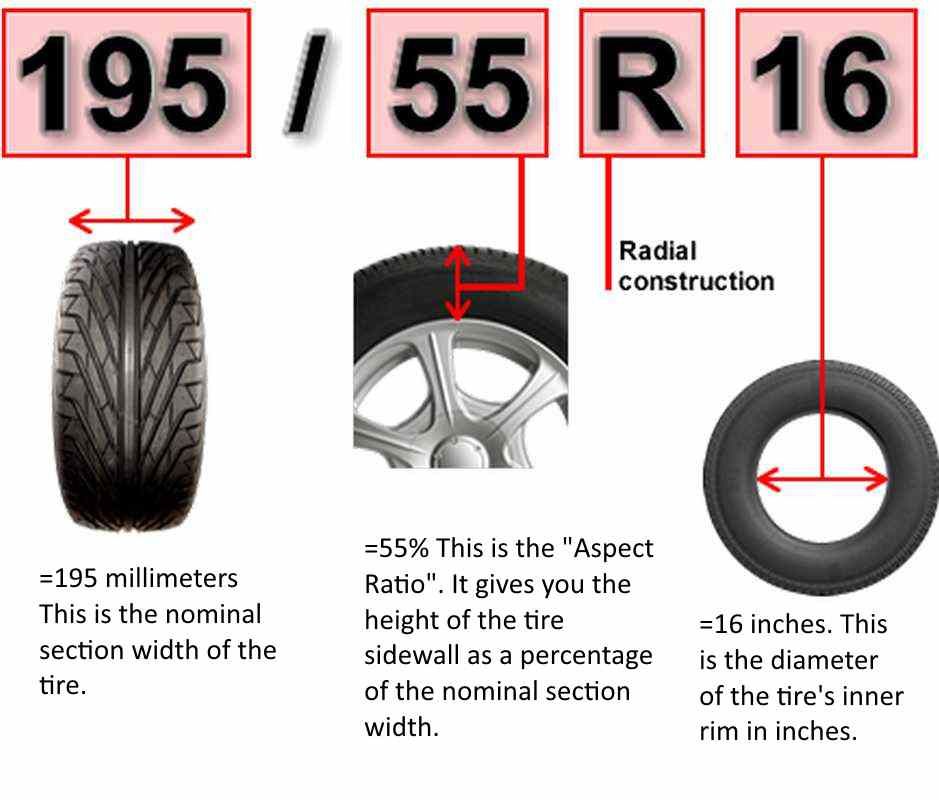
This is only a temporary fix and should only be considered during an emergency. You’ll want to get your tire to a repair shop as soon as possible. However, this method can get you back on the road in minutes and can require no additional tools.
Easily patch your tire at home with a tire plug kit.You’re going to need a tire plug kit. Most local car part stores will sell these kits, and you’ll typically see them for $10 to $15. One of the most popular brands of kits is from the well-known tire repair company, Slime.
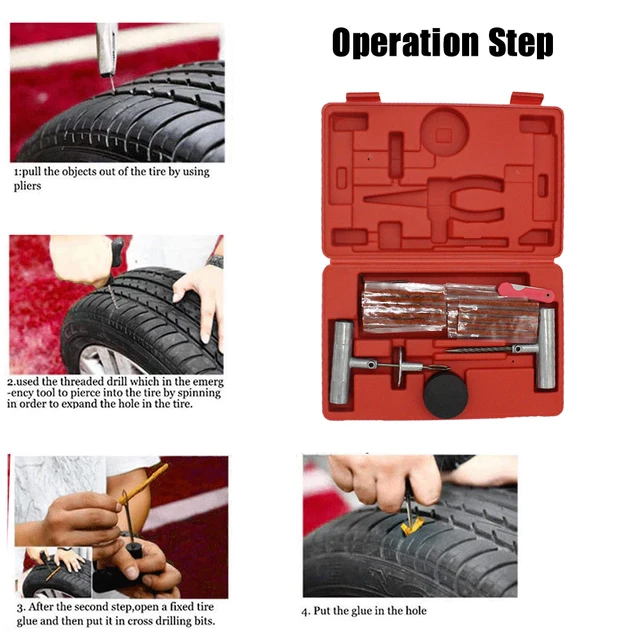
Once you have the kit, you’ll need to remove the tire from your vehicle. If you can remove the object from your tire, go ahead and do so. You’ll then need to use the tools included with the kit to push through the tire. This will help ensure the hole is the appropriate size for the plug and that it will seal correctly. If the hole is too big, you’re not going to be able to patch it, and you’ll need to replace the tire.
After pushing the tool through the hole, mount the patch strips onto the set tool. Put some of the sealant that came with the kit into the hole and on the strip. The strip will slide through and center on the set tool. Push the tip of the setting tool through the hole until the strip folds upwards toward your hand. Make sure not to push the strip through the tire. Remove the set tool and fill the tire to the proper PSI.
With the tire at the proper PSI, look and listen for air leaks. You can use a spray bottle to look for air bubbles that indicate a leak. If all is good, you can clip off the extra patch pieces, so they’re flush with the rest of the tire tread.
Pro Tip: Can’t repair the hole in your tire and need to use your spare tire for a while? This is How Long You Can Drive on a Spare Tire.
If the hole in your tire is too big, you will need to replace it.Bubble gum may be sticky, but it’s not a good patch for a tire. It may do the job for a few seconds, but it will not be sticky enough to withstand the weight of the car and the road conditions.
There have been several who have tried this experiment with smaller bike tires and failed. If you’re worried about a flat tire, it’s best to make sure you have a spare tire or a sealant kit available in your car.
If you can’t remove your tire from the car, you can still patch the tire in some cases. You’ll need to rotate the tire to access the object that is puncturing it. Once you can remove the object, the process is the same as if the tire was off your vehicle.
Push the plug through the hole and remove the plug set tool. Air up the tire and look for any leaks. This will likely get you by until you can get to the shop and replace the tire.
Pro Tip: We uncovered Do You Need to Rotate RV Tires Regularly to make your car maintenance easier.
Watch this video on YouTube
We always recommend having a professional do the job.
Your tires play a pivotal role in keeping you safe while traveling down the highway. You want to ensure that they are in top-notch condition to avoid any issues. However, many tire shops will often patch tires for free.
Places like Discount Tires will often repair the tire for free and encourage you to return to them the next time you need tires. These tire service stations will only repair tires if they’re safe. If they’re not willing to repair them, there’s a good chance it’s time to replace them.
Have you ever had to patch a tire? Tell us your experience in the comments.
To be honest with you, we hate paying for camping. There are so many free campsites in America (with complete privacy).
You should give it a try!
As a matter of fact, these free campsites are yours. Every time you pay federal taxes, you’re contributing to these lands.
Become a FREE CAMPING INSIDER and join the 100,000 campers that love to score the best site!
We’ll send you the 50 Best Free Campsites in the USA (one per state). Access the list by submitting your email below:
Email *
Like Loading...
To learn how to seal a puncture in a tubeless tire, it is worth considering that there are several ways to perform this procedure. Most often, tire repairs are performed using a tourniquet, a fungus patch, and special sprays that tighten the puncture site and stop air leakage.
If you want to learn how to seal a tubeless tire at home with a repair harness, you should follow the instructions:
The machine must be put on the parking brake, and a chock can be used to fix the position of the transport. Next, the car is jacked up and the wheel removed.
You need to carefully inspect the surface of the wheel to find the puncture site. Damage could occur as a result of piercing the wheel with a nail, self-tapping screw or glass shard. In this case, the head of the nail or the edge of the glass will indicate the cut. The foreign object must be removed with pliers. If the puncture site is not visible, you can pour water on the tire, which will cause the air that comes out of the hole to attract attention with a hiss. The puncture site must be cleaned of dirt and marked with chalk or a marker.
Next, you need to take an awl with a screw tip and apply special glue to it. After that, the awl is immersed in the puncture hole and several reciprocating movements are made. The tool should not be removed from the hole.
Then, a repair harness (a strip of raw rubber) is installed in an awl with a needle hole. From two parts there should be identical strips, on which a thin layer of glue is applied. To perform a short-term repair of a large damage, you can apply two rubber strips at once.
The first awl is removed from the puncture, and a tool with a tourniquet is placed in its place. Outside the tire, the edges of the strip remain (1-1.5 cm long). Next, the awl is pulled out of the hole after the tourniquet passes through. A strip of rubber that has folded in half will remain at the puncture site, and its ends should be cut off.
Having learned how to properly seal a tubeless tire with a tourniquet yourself, and after completing this procedure, you need to inflate the tire to the optimum pressure, after which the wheel can be returned to its place. This method is considered relevant if you need to seal a tire tread puncture, and the hole diameter is up to 10 mm. As for side cuts, the elimination of such a problem should be entrusted to professional specialists working in a car repair shop.
If you are looking for an option on how to seal a tubeless tire with a repair kit yourself, you can perform this procedure using a patch fungus. For this method, you will need to remove the wheel and tire from the disk. You also need to purchase patches in the form of fungi, sandpaper and glue. The repair procedure is as follows:
It is necessary to clean the puncture site, rinse it and remove dirt, as well as foreign objects that damaged the tire.
Next, the puncture site is cleaned from the inside to give it a roughness. For this task, you can use sandpaper or a drill with a special nozzle.
At the next stage of work, a fungus of the required diameter and size is selected (patches can be purchased at auto parts stores), based on the size of the puncture.
The patch is covered with glue and placed on the puncture site, after which it must be firmly pressed.
Then the patch must be allowed to dry, after which the wheel can be assembled.
If you are looking for an answer to the question of how to seal Michelin tubeless tires or tires from another brand, you can use the easiest and most effective way.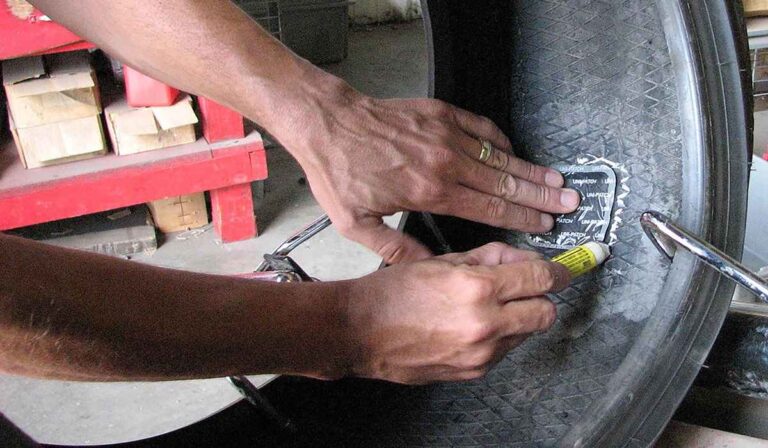 You can use a spare in a can. Sealant allows you to quickly seal the wheel. To apply it, you need to unscrew the nipple (this action is not always required). The contents of the vial must be squeezed into the opening of the nipple and returned to its place. Within 10 minutes after inflating the tire, you can continue on your way.
To see how to seal a tubeless tire in a video, you can watch a YouTube video with detailed video instructions: https://www.youtube.com/watch?v=PpnKzfpkeoQ.
Based on the method of repair, certain tools and fixtures will be selected. To repair a tire with a tourniquet, you will need a repair tourniquet, two awls (one of them with an eyelet) and glue. When using a patch fungus, you will need a patch, sandpaper (or a drill), and glue. Among other things, repairs can be carried out with tire sealant. Also, when repairing tires, it is worth using a portable compressor (for inflating tires), a repair kit, a jack, pliers, a wheel wrench, a knife and anti-recoil fixing auto devices.
When choosing a repair method, take into account the degree of damage to the tire and follow the instructions so that the work is done as efficiently as possible and the wheel returns to its previous operational state.
Nowadays, tubeless tires are most often installed on passenger cars. They differ from chamber ones due to their low cost, lightness and ease of repair. However, they are pierced in the same way as chamber ones. Inside tubeless tires there is a special enveloping layer that significantly slows down the descent of the wheel in case of damage. If the puncture is small, then the tire can be sealed without removing it from the axle. This article will look at how to seal a tubeless tire in several ways.
Contents
There are several ways to repair tubeless wheels.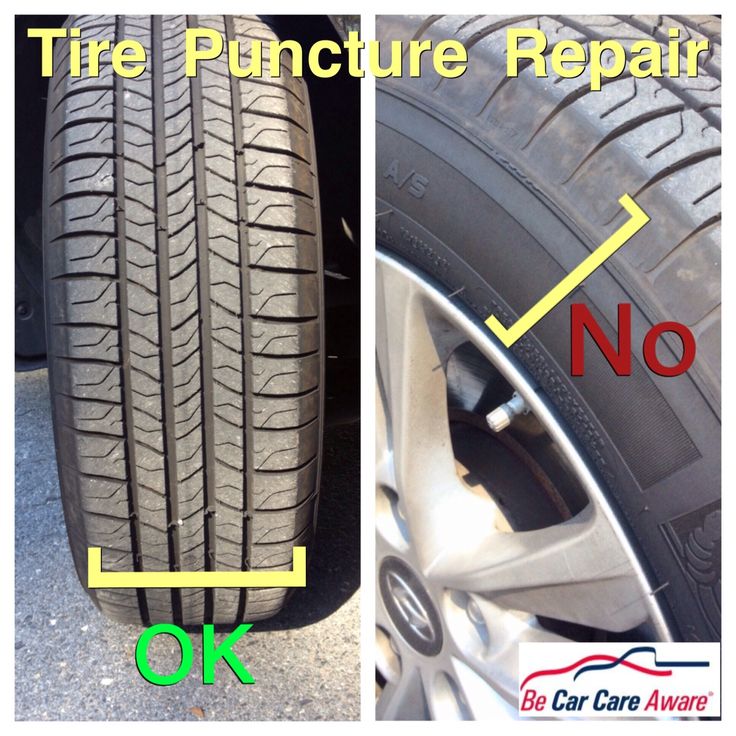 The most common is repair with a rubber band, however, some prefer to use a fungus installation or a special spray that “tightens” the puncture with its mass, preventing air from leaking out. You can seal the wheel without help, but for this you will need some tools and materials. When preparing for a long trip or journey, make sure that these devices are always at hand.
Let's return to the methods of how to seal a hole in a tire. Some methods require special tools and some skills, while others, on the contrary, are not difficult. Therefore, how to seal the tire is up to you. However, the effectiveness of the repair to a greater extent depends on the size of the puncture - if the damage is extensive, then the tightness can be restored qualitatively only in a tire shop.
This is a fairly simple method that will help you quickly and cost-effectively seal the car camera. With correct and careful actions, a sealed tire is used for its intended purpose for 2-3 years (proven in practice). Typically, a repair kit kit includes two awls (one for cleaning the hole, the other for installing the harness), glue and special rubber bands for tire repair. The procedure is as follows:
This method is very simple and also does not take much time, because even with a large puncture of a car tire, having just a few harnesses will help you reach the nearest service station.
This is the easiest way to repair tubeless tires and requires only a car pump (which every driver has). The tire sealant itself is sold in cans at any auto chemical store. The bottom line is this: if the tire has been punctured, you need to turn it upside down, unscrew the nipple (although if the sealant is an aerosol type, this is completely optional) and connect a can of activator glue. Under the influence of pressure, the tire will return to its original state, and the glue will clog the breakdown. Of course, this is not a full-fledged tire repair, but it will be enough to get to the tire fitting.
There are other options for repairing car tires, but they require stripping the wheel. For example, it is considered effective to use a patch in the form of a fungus (sold in all car dealerships).
The algorithm of actions is as follows:
This technology is suitable for those who have the skill of stripping wheels. The advantage is that this is a full-fledged tire repair and subsequently you do not have to contact the service station. However, this requires an appropriate tool, which not everyone carries with them daily.
The tire can be retreaded on the road by yourself or in a workshop. It all depends on the degree of damage, the availability of consumables, tools, skills and time for repairs. If you are not confident in your abilities, then it would be best to put a spare tire or call a tow truck.
On the road, you can seal the tire yourself. How to do this (with a tourniquet, sealant or patch) is up to you. However, if the damage is significant, then it is better not to risk and not endanger yourself and other road users.
In a tire shop, quite large punctures and cuts (up to 5 cm in length) of car tires can be repaired. This is done as follows: the area is cleaned, then the rubber around the damage is vulcanized, after which a special patch is installed on the glue, similar in structure to the tire material. However, even with proper repairs (which is far from being observed everywhere), such a tire will not last long. Therefore, a driver who encounters such a problem should take care of purchasing a new wheel in the near future.
You can repair punctures or cuts yourself, and such a tubeless tire after repair will practically not lose its driving performance. To do this, use a tourniquet (if you carefully seal it, then tire fitting services will not be required for a very long time) or fill the sample with sealant and drive to the nearest service station. For more information on how to repair a wheel on the road, see the video.
It's also worth purchasing a matching tire repair kit and keeping it in your car in case of such "force majeure". And don't forget to buy a jack.
Cuts or punctures repaired by vulcanization and thermo-patch under workshop conditions.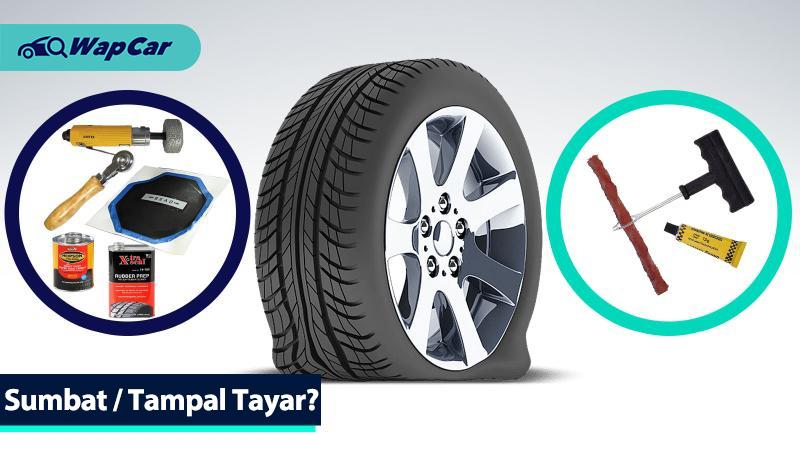 Such a patch can be applied in two ways:
This article has covered several ways to seal a tire with your own hands. Each of them has both advantages and disadvantages of implementation. Therefore, if you find yourself in such a situation, then be guided by the availability of improvised tools and other materials.