If you’re a regular driver, you may have had the bad luck of experiencing a broken tire bead.
Hitting the curb or pothole, or even a quick sharp turn can result in an unseated tire bead, making the tire impossible to re-inflate.
Reseating the bead by taking it to a workshop might not be the most viable option when you’re left stranded in the middle of a road.
But do not worry because there is a rather quick (albeit dangerous) fix to pop a tire back on the rim.
All you need is some combustible fluid, a source of ignition, and a little faith in science. Just spray a little starter fluid outside the rim, and light it on fire. The expanding gas will push the sidewalls of the tire up and out, causing the tire bead to snap back into place.
You would require the following items to perform this task:
Follow the steps outlined below to properly seat a tire back on the bead:
Step 1: Lift the tire up from the groundElevate the wheel off the ground with the help of a jack. If you’ve already disassembled the wheel, place the rim inside the tire and lay it flat on the ground.
Don’t have a jack?
Well, don’t worry you can check out our guide to jacking up a car without a jack!
Carefully spray some starter fluid in the cavity created by the rim and the sidewall of the tire.
Make sure you don’t spray too much of the liquid as that might damage the sidewall of the tire.
Once you’ve sprayed it around the entire bead, spray a little off the edge of the tire and onto the floor in a straight line.
Be extremely cautious with the amount of fluid that you spray onto the wheel.
Starter fluid is highly flammable. Using exorbitant amounts of such combustible liquid can cause a fire that might be difficult to contain.
Due to this reason, always keep a fire extinguisher nearby.
Using a lighter, matchstick, or whatever source of ignition you have, light up the starter fluid starting from the link you previously made on the ground.
This step must be carried out immediately after spraying the tire bead so that the fluid does not evaporate away.
You might want to step back and distance yourself a bit after this step as it will cause an explosion.
The fire will cause the gases in the wheel to ignite and expand rapidly.
This sudden expansion of gases (an explosion) will cause the tire beads to move along the wheel and catch the grooves, seating them back in place.
As soon as you hear a popping sound, put out the fire as soon as possible.
This indicates that your tire is seated back onto the rim.
Finally, pump air into the tire using an air pump and you’re all set to hit the road again!
There are some disadvantages that come along with this method of popping tires back onto the rim. If not done properly, this can result in Pyrolysis, which is basically the thermal decomposition of the tire.
Pyrolysis can not only cause chemical deterioration of the tire over time but can also lead to a full-blown-out explosion.
The pressure inside may rise up to 7000 kPa and seriously injure anyone in close proximity to the tire.
Watch this video to learn the science behind using fire:
This is why you must always put off the fire as soon as you hear the ‘pop’ sound – usually a couple of seconds after you light up the fire.
Any kind of clicking or popping sound from your car’s tires is a cause for alarm, and something not to be taken lightly.
Sounds coming from a vehicle’s wheels might be due to an underlying problem in one (or more) of the following parts:
In order to find out the exact cause of trouble, you would need to take the car for a road test.
However, before you do that, make sure that there isn’t something dangling off your vehicle or a broken car part causing the noise.
Using fire might be a convenient way to pop your tire back onto the rim, but it surely isn’t the safest. Playing with combustible fluids and fires can be very risky and dangerous if you don’t know what you’re doing exactly.
Always try to seek help from a professional first, and if that isn’t possible, only then should you try pulling off such a feat. Just make sure that you abide by all the necessary safety protocols, and you should probably be fine.
(Visited 5,616 times, 6 visits today)
Humans have always looked for ways to get things done easier, faster, and stress-free since the beginning of time. From advancement in communication to advancement in traveling, we have always come up with intriguing ways to save time and energy – so it came as no surprise when I discovered the easiest way to pop back a tire into its rim with little effort from my part, in fact, all that is required to just place the rim in the tire, and the fire does the rest.
Okay, I know it sounds fun and all, and some even see it as a faster way to get the job done, but the fact remains that there are so many things that can go wrong if you don’t apply caution. Before I proceed, here are the few things you will need to get the job done.
Table Of Contents
 1 Step 1: Decompress The Tire
Now let’s get down to business, shall we?
How To Pop A Tire Back On The Rim With FireThis should be done after you must have addressed any issue that made you remove the tire from the rim in the first place, which is most likely to be bead leakage or a tire puncture. Whatever it is, ensure you are satisfied with the result before you continue because this happens to be the most important part of the entire process.
Step 2: Spray A Starter Fluid Around The Bead Of The TireGet this bottle of starter fluid. It comes highly recommended and will do a perfect job under normal circumstances. Spray it around the bead of the tire, but don’t spray too much so that you would need the fire extinguisher.
After spraying it round, spray a little on the ground close to the tire in a straight line and let it lead to the bead. This to avoid you getting burnt once you light the match because using a starter fluid is highly flammable.
This should be done almost immediately after spraying the starter fluid on the bead of the tire so that it doesn’t dry out. Once you strike the match or let out fire from whatever fire source you are using, remember to start from the ground link leading to the tire bead for your safety. (Read Also: Can Bike Tires Pop?Find Out Now)
As soon as the fire reaches the tire bead, you are likely to hear a pop sound in less than two seconds. Once the sound occurs put out the fire as quickly as you can, and if you feel you won’t be quick enough, get a fire extinguisher.
Step 4: Pump In The AirThe pop sound should signify that your tire is now on the rim. At that point, get your air pump and pump in the required air in the tires, and you are good to go.
The method of popping your tire back on the rim using fire is necessary, especially if you find yourself in a place where a garage is not in sight.
Trending Searches
With all pros come at least a con, and popping your tire back to its rim with fire is no different. The side effect of this procedure if not handled carefully can lead to a term called Pyrolysis.
Pyrolysis is a chemical reaction that occurs in tires when a tire becomes overheated to a certain point. It causes the tire to deteriorate, and also creates a rapid pressure within the tire that can lead to an explosion.
Apart from the heat that comes from popping a tire into its rim, overheating in tires can also be caused by aerosol tire inflators, welding near a tire or on the tire, and overheated breaks.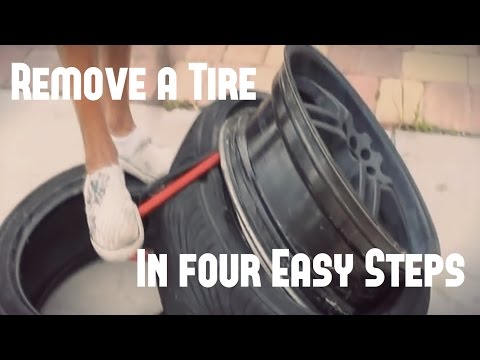 That’s why it’s important to put out the fire from your rim as soon as the pop sound occurs, which is not usually more than two seconds after you strike your match. (Read Also: Can Tire Shine Damage Rims?)
You should also note that Pyrolysis can occur in temperatures as low as between 1830 C – 1850 C and does not require oxygen to continue the process. Once pyrolysis sets in on your tire, it can continue on its own, even if the heat source has been removed. There are usually no visible signs, and it can last for a few seconds or several hours.
Pyrolysis causes the pressure inside to tire to go as high as 7000 kPa which can result in serious injury to anyone standing around the tire at that time.
So please, apply all the caution necessary to avoid this experience. It’s even worse when it happens while driving. (Read Also: Can You Paint Bicycle Tires?Find Out)
Care And Preventive Measures Of Pyrolysis
In terms of driving, you need to have a sense of security as could be expected under normal circumstances.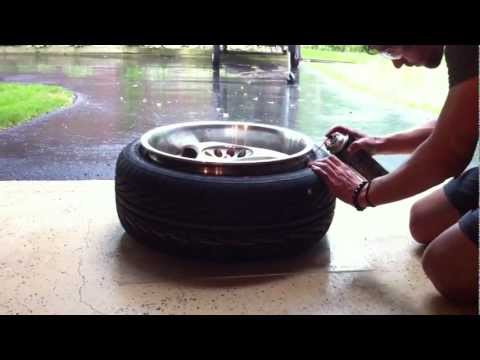 So when you hear a clicking or popping sound coming from the vehicle tires or wheels, it’s ok to be concerned. All vehicles require to be protected before working them on any street with other vehicles.
Read Also: How To Change A Tire On A Single Axle Travel Trailer Like A Pro
Clicking or popping sounds that come from the wheels could result from any of the accompanying parts:
When diagnosing a clicking or popping sound from the wheels, a road test is needed to know the sound that is being emitted. Before you take the vehicle on a street or road test, you would need to walk around the vehicle to guarantee that there isn’t anything tumbling off the vehicle.
Look under the vehicle to check whether parts to the vehicle has severed. If something is broken on the vehicle, you should address it before embarking on a street test.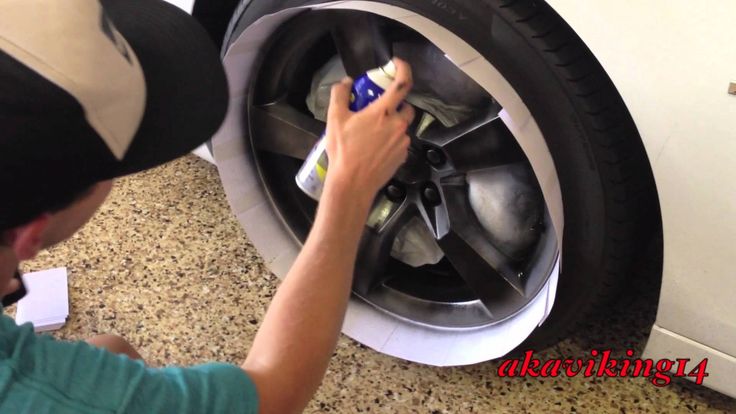 Likewise, make sure to check the tire pressure. This shields the vehicle from overheating the tires and permits you to do the right test.
These step by step methods should help you know if your constant velocity joint is damaged or not. Read carefully.
Step 1Push down on the front and back of the vehicle. This will verify whether the joints are secured in a vertical movement.
Step 2Turn on the engine. Turn the steering from the lock and back again going from left to right. This will verify whether the joints are locked up in a horizontal movement or motion.
Step 3Take a spin in the vehicle around the vicinity. Make turns that will require you to turn the steering in a direction. As you do this, listen for any clicking or popping sound. Generally, the external joint takes the entirety of the abuse and you are likely to see it as a popping sound being transmitted especially during hard turns.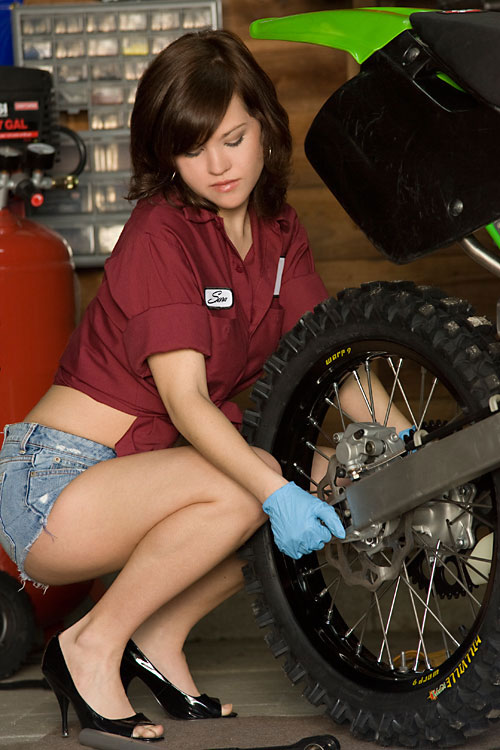 (Read Also: Can You Use Tire Shine On Leather?Find Out)
This is because the balls in the joint are worn and have no grease. The balls fit into an enclosure that permits them to pivot as the wheels are turning. The consistent speed joints make points to an astounding 47 degrees.
Step 4Drive the vehicle over knocks or potholes. This will verify whether the CV joints will make a clicking or popping sound as the wheels are turning and moving in a vertical way.
After the street test, you should prep the vehicle to check the constant velocity shafts to know if they should be removed or not.
How Do You Pop A Tire Back On The Bead?The phenomenon of tire beads popping out from the rim is a normal occurrence especially if you ply muddy routes a lot. Tires being separated from their rims shouldn’t be a problem for you as long as you have the following tools on hand, which you should have with you anyway.
Let out the air from your tire. This is necessary if you want to ensure that the rim fits perfectly with the tire bead.
Your ratchet strap should be placed around the tire. Ensure that it is placed in the middle of the tire to get the job done correctly. After placing it in the middle, tighten the ratchet and ensure that it has a firm grip on the tire.(Read Also: Can You Check Fuel Pressure With A Tire Gauge?Find Out)
Step 3: Pump Air Into The Tire Until The Tire Pops Into PlaceUse your air pump and pump air into the tire. Pump the air for a little while, then release the ratchet strap from the tire. After releasing the ratchet strap, continue pumping air and watch out for the pop sound, at which point you can stop pumping air into the tire. Fix back your tire in the vehicle, and you are good to go!
What Do You Do If Your Tire Comes Off The Rim?Like I stated earlier, this is a common experience with vehicles that ply muddy terrain. However, if this happens to you in any area at all, follow the simple steps that will be highlighted shortly.
Fear is one factor you don’t want to have in this kind of situation. Try as much as you can to keep calm and always remind yourself of something worse you got out of. A loose tire has never ended the world and yours will not be the first to end it.
Step 2: Try Parking At A Safe Spot If You CanTry as much as you can to park off the road as long as it doesn’t damage your rim in the process. If parking isn’t possible, using a warning sign to warn motorists who plying that route.
Step 3: Remove The Tire From The WheelUse your car tools to remove the tire from the wheel. Lie it flat on the ground. Decompress the tire and use your ratchet strap around the tire and tighten the grip on it, just the same way I explained earlier.
Pump air into the tire a little then release the ratchet strap, after which you should continue pumping air in until you hear the anticipated pop sound.
Fix the tire in the wheel and then you are good to go. But take note that all these can be only possible if you have the required tools set to carry it out, and if this is not the case, call 911 or the emergency helpline in your country for help.
Are there other ways to get your tire back on the rim? Apart from visiting a workshop, using this DIY method, or using the fire pop method, there are no other ways I can phantom. If you know of any, kindly let me know in the comment section, and let me give it a try.
 sportek.in.ua
 Nikolaev bicycle shop "Sportek"
Published: 02.02.2021
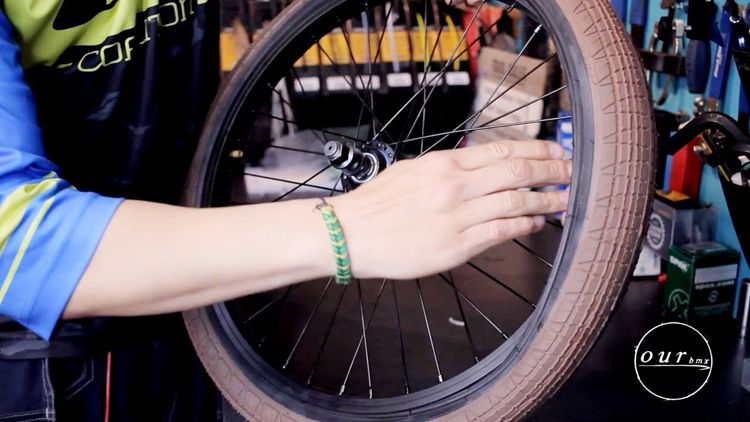
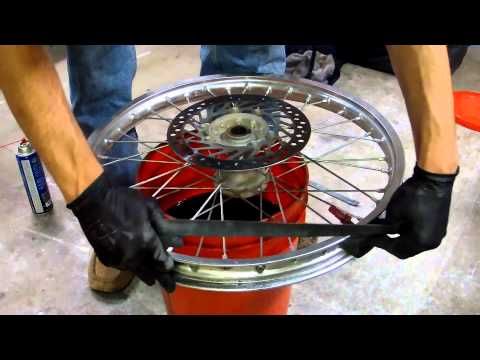
Beading tires on a bicycle wheel is a fairly common and not complicated procedure.
We will not tell you in full how to remove and put on a tire on a wheel rim - there are many different videos and articles about this on the Internet. Let us dwell on only one important moment, but not often discussed by the authors of videos and articles, when, when putting the tire on the rim, the last 10-20 cm remain, and the tire does not want to “sit down” in any place.
In order to tighten the last part, you need to make sure that as you put on the previous parts of the tire, the bead cable does not start to get into its “rightful place” in those parts of the wheel where the tire has already sat down.
That is, during the beading process, you should try to keep the edges of both beads of the tire with the bead ring in the center of the rim - where its “deepest” place is. Thus, slack is formed and the last centimeters of the edge of the tire are much easier to throw over the high side of the rim.
This is illustrated more clearly in the picture:
In case it doesn't work out at all, of course you can use the usual bead blades that many cyclists use.
But for these purposes, in addition to the commonly used blades, there are also special combined blades designed also for putting a tire on a wheel, and not just for removing it.
For example:
Featured Products
11 UAH
BauTech bead blade for bicycle tires (plastic)
15 UAH
BauTech bead blade for bicycle tires (metal)
Comments (0)
x
| NIVA FAQ | FORUM | NEW FAQ | SITE MAP | SITE SEARCH |
| Overboard chamber rubber Author Beekeeper |
I am driving one evening, twilight in Sunday on Minka past Mozhaisk.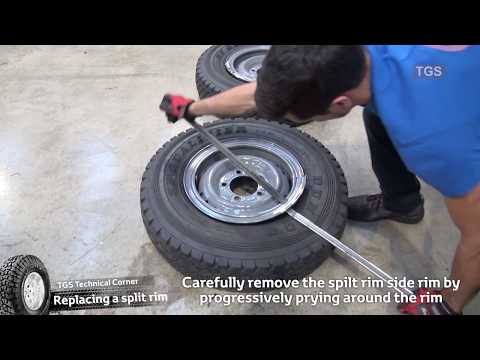 Nearly continuous stream. On the side of the six on jack. Two people vote (both at once) a weeping woman and all bandaged, a man in the blood ... They pierced two wheels. FROM spare no problem. The second one was removed dismantled, the camera was replaced (thrifty), but they can't mount it. Like a man's hand ripped open and got a black eye, not asked. But already two hours (!) as they despaired and just voted.
And it's two minutes. By the way, on the Niva the rubber is removed and put on much easier, than on the Zhiguli, and even easier than on the Tavria.
Breakdown:
1. Put the wheel under the regular place for jack (front), so that half the wheels were under the car, and the other half out.
Something like this:
---------
---- O * -
where:
--- - thresholds
O - wheel
* - jack
2. Insert the jack and support it base into the tire, as close to the rim as possible.
3. If the air has not yet come out of the wheel, then still unscrew the nipple.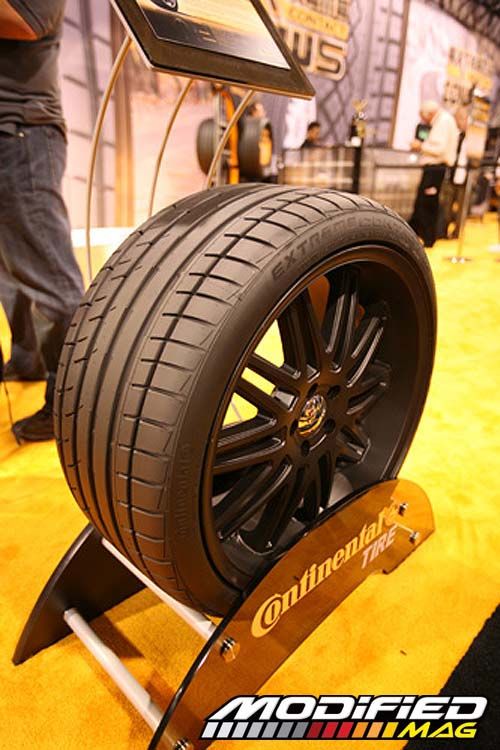
4. Turn the jack "to the stop". Until those until either the tire comes off the rim, or the machine will not raise until the "liftable wheels" or until the car rolls (if under the wheels on the opposite side nothing is planted, and the handbrake does not hold).
4a. If the rubber sticks well to the rim, then "tear" her from him the first time is not succeed. This is fine. In this case should be placed in the resulting gap between the rubber and the rim of something that is there will be able to squeeze. wooden block 5 cm thick is ideal for this.
4b. "Unscrew" the jack in the opposite direction side, turn the centimeter wheel 5-10 clockwise (if as on figure), we shove the base of the jack into the slot between the rim and the rubber as far as possible from inserted bar and return to point 4. For the most stuck-on wheel, I I had to repeat this process four times. times. Usually the rubber "comes off" from the outside from the first time, from the inside - from the second. Sometimes it helps from extra times "torsion jack" "jumping" on the bumper raised wheel.
5. Having peeled off the rubber from the rim on one side, repeat the same for the other, turning over wheel.
6. Place the wheel on an open, clean, opportunities, place side with nipple up and drive away the curious meters to three, or else they might get on kinda nose with a mount in the process of further actions.
7. Bend the rubber by the rim with a mount side of the twisted nipple, jumping at this on the opposite side of the tire to its edge as far as possible "went" to the center of the rim. Insert next to the mount screwdriver (or similar) we press to the disk with one foot (the second and standing at the opposite end of the bus) to the edge of the tire just pulled out by the mount didn't fall back. Take out the mount. And...
8. ... continue point 7 sequentially throughout the wheel diameter. If you don't have enough forces to pull out another centimeter of rubber for rim, or it starts to bend, or rubber starts to crack - it means you forgot to "jump", that is, the opposite edge of the tire is not on the center of the rim.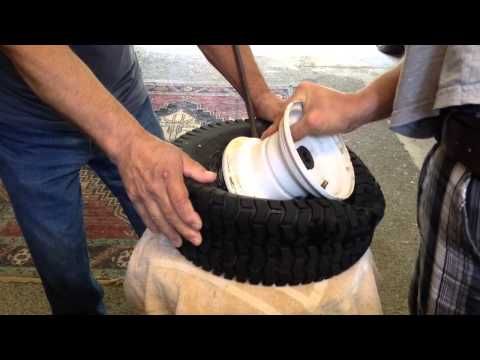 Hold the pry bar firmly and screwdrivers do not jump off, otherwise they may fly away.
9. Pull out the camera. If the wheel had little talc, it will take strength.
10. If you want to remove the tire completely, lay the wheel flat on the ground inverted from before provisions. Pull out the disc from one side as much as you can. Once I saw a guy rip it out all at once, without any equipment. Correct the opposite edge with your foot tires again so that it is in the middle rims. And now with a pry bar, a screwdriver, pipe, stick, board, ... pull out the disc more as much as you can. AT insert something into the resulting gap long and thick (to me, again, the same like a wooden block). We put the wheel vertically and with a mount, resting its end flat right into the rim, push the rubber out rim edge. (Second option: mount insert the edge into the hole next to the bar rims (on a regular disk) and do the same, guiding the mount like a lever along the rim.)
Much has been written, although it is done easily.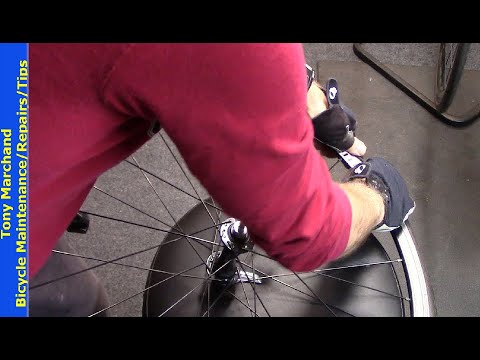
Return:
-10. We put the tire, insert the edge into it disk (external). We push the mount gradually the edge of the rubber. Trying push the disc inward at the same time (AGAIN, the inserted edge should immediately aim exactly in the middle of the rim!). For Nivovsky wheels is easy. Well, if you managed to remove it, then dress like nothing to do.
-9. We insert the camera. Better shove first half of the chamber, where the fitting, in tire, then insert the fitting into the rim, and only after that push the rest part of the camera. The wheel is more comfortable keep vertical. "Spread" camera. Push the camera to the center with your fingers rims, otherwise you can accidentally pinch mount and ... in this case, you have to start all over again, and even a hole in the cell glue.
-7, -8. The same as 7, 8, but in the opposite direction. Not tired of repeating: INSERTED EDGE MUST IMMEDIATELY AIM EXACTLY AT THE MIDDLE OF THE RIM!
-6,-5,-4 Align the wheels on both sides the edges of the tire so that they are everywhere "equidistant" from the edge of the rim. This will contribute to ensure that the tire sits flat on the rim. If a ignore this, it may turn out or figure eight, or imbalance, or return to points 4,5,6.
-3 Inflate the wheel until the tire will not "fit" on the rim. If a, despite the previous paragraph, (or rather in advance, during inflation) the edges of the tire to edge of the rim are pressed unevenly, help them fix it. prying how much pry along the entire length of unevenness, gradually increase tire pressure. The nipple could not be twisted :-), because...
-2,-1 Bleed the chamber, knock wheel on the ground. Screw the nipple pump up the wheel. Ready. Whole procedure takes a maximum of 30 minutes slowly.
Optional:
It is advised to note before starting the procedure position of the tire on the rim and keep it at installation, which contributes to the preservation wheel balancing. This is true if you just from the tire shop, and besides, with wear, the rubber is eaten unevenly. Balancing must be done or every 1500 km (if on the highway for a hundred with a squeal in the corners), or not to do at all (especially if driving only in the city and dirt).