Story and Photos by Nick Nelson – ATV World Magazine
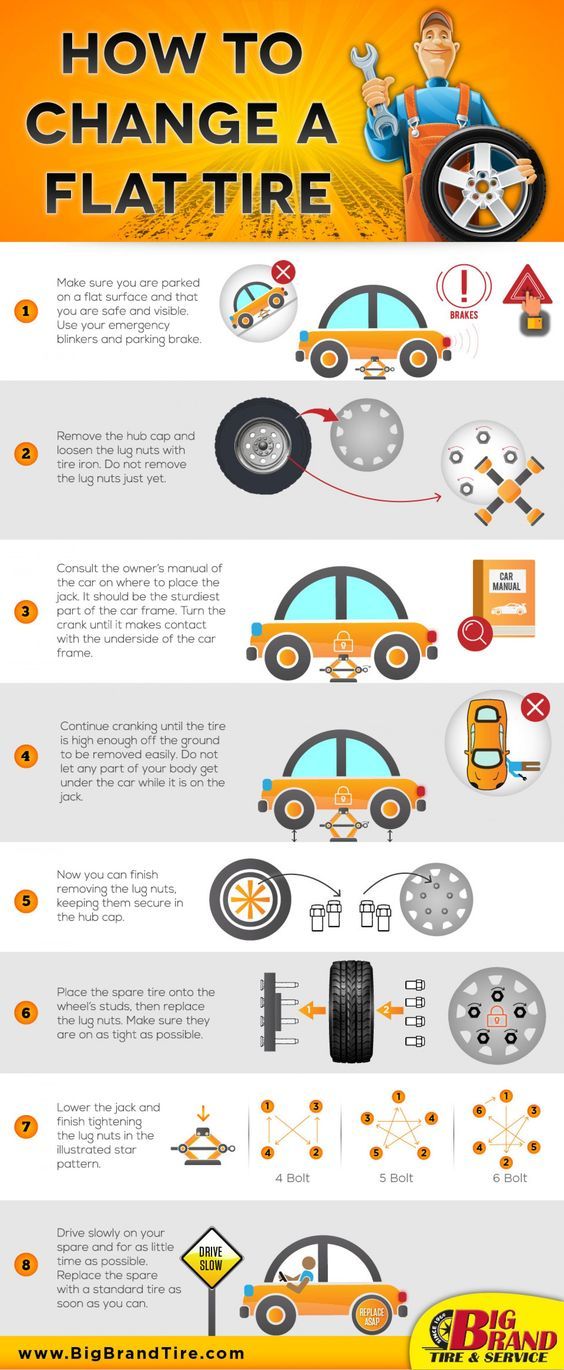
If you log enough hours on an IRS ATV wearing out or breaking CV axles, joints or boots is one of those things that is bound to happen. While it is not a fun chore, it’s not rocket science and I’m sure that most of you could take it on with minimal patience and a decent set of hand tools. Replacing dry, cracked or torn CV boots is the most common example of this job, as the rubber boots tend to dry up with age and exposure to the elements. A torn boot will quickly leak the grease out and dirty contaminants will get in, prematurely wearing out the CV Joint. We will show you in detail the process for replacing a torn CV boot on a rear Rhino axle. This same process will be used to replace a broke axle, or cv you will just need to sub in the new parts when the axle is dissasembled.
We demonstrated this on a Yamaha Rhino rear axle, but it is very similar on any IRS rear axle or front 4wd axle. The major difference being the process and tools required to remove the culprit axle from the ATV or UTV. Please check out EPI Performance for replacement boot kits, CV rebuild kits, or even replacement CV axles “wheel shafts”. They have all the parts and tools you could need to fix your CV problems in stock and ready to ship. www.erlandsonperformance.com
Acquire the following supplies before starting this project.
Step 1
The first and sometimes most difficult step is to remove the culprit axle assembly. Start with a clean machine to avoid dirt entering rear end. Revert to your manual, but typically you will need to remove outer axle nut, then remove the hub and spindle assembly. With the outer spindle/hub out of the way, you should be able to yank the axle/CV out of the rear end housing. Might take 2-3 popping motion pulls.
Step 2
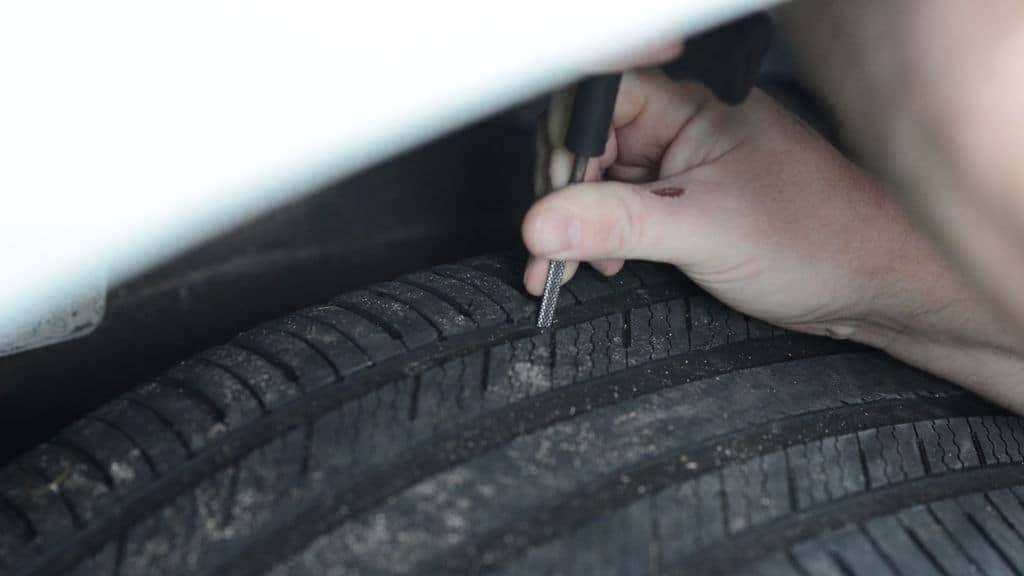
Line a large flat bench or floor space with rags or towels as it will get a little messy. Wearing rubber gloves cut the cv boot bands off both sides of the boot or CV that you will be replacing. As most cv boot kits come with both the inner and outer, we suggest that you replace both boots if you are already disassembling the axle.
Step 3
Slide the boots back off of the CV and toward the middle of the axle. This may require a little prying with a small flat blade screwdriver to loosen the boot from the CV. Use a rag to wipe away as much excess grease as you can at this point.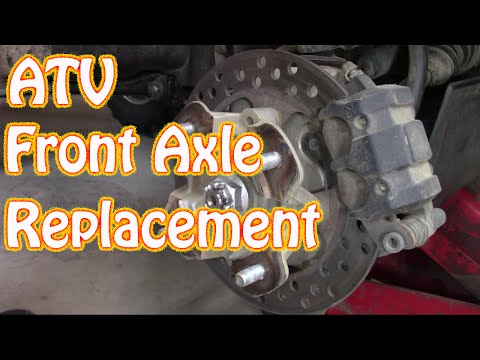
Step 4
If you are replacing the axle or inside CV then you will need to remove it as shown in step 4-7. If not you can skip to removing the outer cv and replace both boots from that end. Use a small pick or flat blade to remove the retainer cir clip from the CV joint.
Step 5
Be sure to clean and layout everything you remove in the correct order. Remove the axle and race from the inner axle stub. Wipe away grease
Step 6
Use cir clip pliers to carefully remove the cir clip that retains the CV race onto the axle. Remove the axle from the bearing. Clean all parts and keep them in the correct order.
Step 7
If you axles were loud, loose, clicky or noisy then this is the time to inspect the inner CV for damage. Use screwdriver to rotate the center splined piece enough to remove the ball bearings one at a time. Clean and inspect all surfaces for cracks, or pitting. Grease and reassemble the race if it has no issues, or replace any damaged parts.
Step 8
Removing the outer axle stub. With our inner removed we could use a hole cutout in the workbench for disassembly. If you are leaving your inner assembly on the axle, use the open jaws of a large bench vise against the housing in the same manner. You are compressing a cir clip enough to pull it through the housing. If you don’t have a vise, this can be done with a hammer against the housing.
Step 9
This is the cir clip you were popping through the housing. If it is damaged you should replace it. In a pinch you can close a slightly loose one by removing it from the axle and pinching it shut in a vise. Clean the axle thoroughly.
Step 10
Pack the clean axle stub full of fresh CV grease, the proper grease will be supplied with the new boots. Slide both CV boots onto the axle in the correct direction. They are usually different from inner to outer, so be sure to get them orientated in the right way.
Step 11
With the boots and the clip installed on the axle use a screwdriver to align and compress the clip properly into the axle housing. You might be able to push the axle in with the screwdriver working the clip, but you will probably need to drive it in.
Step 12
With the axle stub housing held in a table hole or vise, use a dead blow hammer to drive the clipped axle into it’s housing. If you don’t have a vise, you may want a friend to help you hold the axle so that you can drive the housing onto it, opposite of how we did it in the photo. The axle will clip securely into the axle housing.
Step 13
If you removed the inner cv, Flip the axle over and install the freshly greased joint onto the axle. Slide the joint all the way onto the axle so that you expose the groove for the cir clip. Use cir clip pliers to install the retainer cir clip.
Step 14
Pack the inner housing full of fresh grease, then slide the axle with joint into the housing. You will need to align the ball bearings with their respective grooves. Install the retainer cir clip, making sure that it seats into it’s groove.
Step 15
Pack both boots with additional grease and then slide into place. This can be a tight fit and might require a little bit of force. Try to keep the outer housing and inner flange clean and free of excessive grease. Using the EPI banding tool or most any automotive band tool to tightly install the boot bands. We have seen hose clamps used for this, but it is a temporary fix, if your taking the time to do this, get the tool and do it right.
Step 16
Install the freshly rebuilt CV into your machine. It will take a little pop or force to get the inner stub to seat into the rear end. Install the spindle and hub onto the outer axle end and reattach to the a arms. Torque the outer axle nut to factory specs, and be sure to peen in any retainer in the nut.
| |||||||||||||||||||||||||||||||||||||||||||||||||
Good day! I want to show instructions for making a simple ATV. Such an ATV can ride with an engine from a moped, motorcycle or walk-behind tractor. Excellent homemade product for driving through the forest, picking mushrooms, as well as for hunting or fishing.
If you are interested in homemade, I suggest you study the production in more detail!
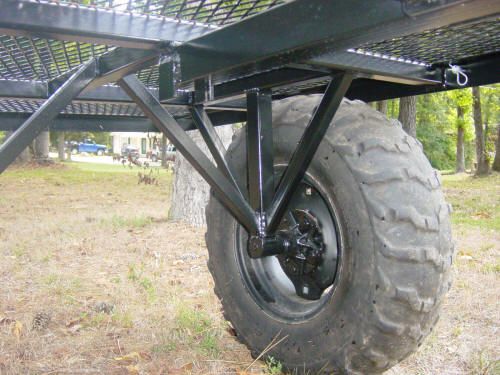
Frame and front suspension
We weld a simple frame from shaped pipes, corners with holes are welded in the front part.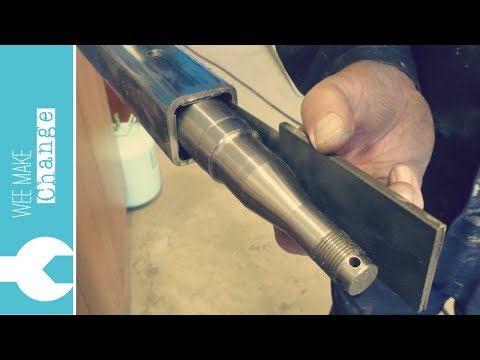
We attach ready-made purchased front suspension forks and hubs to the brackets
Hubs can be taken from an ATV or a car.
Attach shock absorbers.
We weld brackets to the frame and install the engine. You can take the motor of a moped, motorcycle or walk-behind tractor, the power will not be superfluous here, since the rear is a one-piece drive axle without a differential. We mount the motor securely, it is advisable to use rubber pads to reduce vibrations and prevent friction of the fasteners on the frame.
We weld pipes to the steering tips, thereby lengthening the steering rods. The steering shaft can be made from a pipe, a bearing in the housing can be placed on it. Well, as a steering wheel, a steering wheel from a moped or motorcycle is suitable.
The rear fork is pivotally attached to the main frame, here you can put one or a couple of shock absorbers.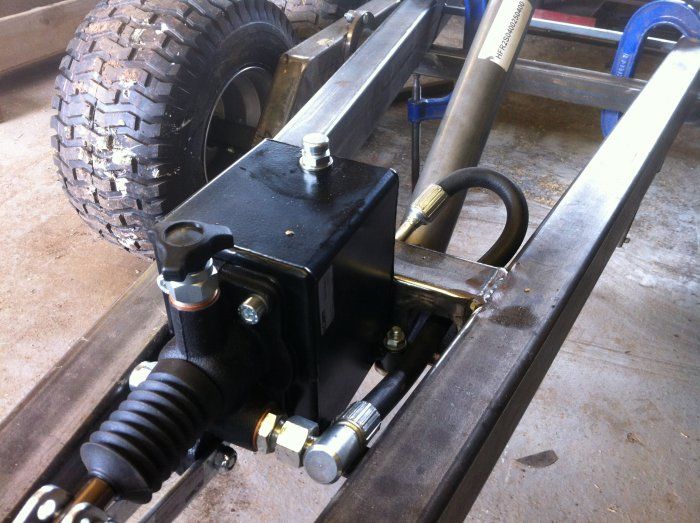
The rear axle is solid, the driven sprocket and disc brake are attached to it.
In the end, we put the gas tank, reinforce the frame, put protective and decorative covers if necessary.
The rear axle is solid, it has a driven sprocket and a disc brake.
The author rides without problems, the ATV is quite maneuverable. It will not be superfluous to put a trunk so that you can take different things with you on a trip.
Watching video:
networks
The ATV is a machine and therefore, the device of the ATV, albeit in a simplified form, resembles the device of a car.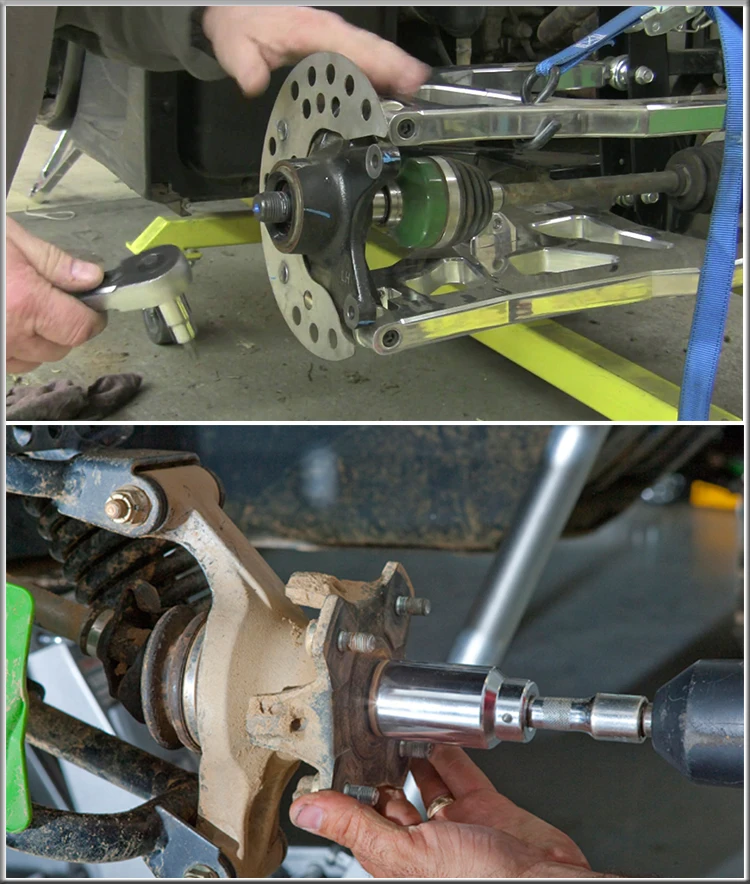 The ATV consists of the following units:
1. engine;
2. transmission;
3. Chassis, consists of frame and suspension;
4. control system;
5. brakes;
ATV suspension is one of the most important elements in the design of an ATV, it is it that allows you to achieve comfort when moving and facilitates the passage of difficult terrain.
Suspension consists of the following structural elements:
- elastic elements that take on the reaction forces of the road that arise during movement along its uneven part.
- guide elements that determine the nature of the movement of the wheels and their connection with each other and with the carrier system. In addition, the transmission elements also transmit longitudinal and lateral forces and their moments.
-shock absorbers that dampen vibrations of the carrier system that occur during road operation.
The suspension is one of the most important structural elements of vehicles.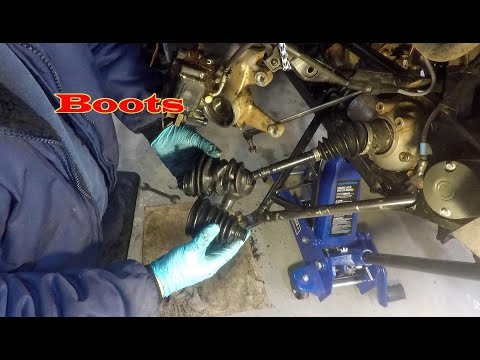 It is entrusted with such functions as:
- physical connection of the wheels with the body or frame of the vehicle; -
- transfer to the carrier system of forces and moments that occur during the contact of the wheels with the road surface;
- ensuring the required nature of the movement of the wheels relative to the position of the body or frame;
- the smoothness of the vehicle.
There are two types of suspension: independent and dependent.
Independent ATV suspension is the most common among modern models of ATVs. In this type of suspension, cross-country ability and comfort of movement are present at the same time. The wheels of one ATV axle do not have a rigid connection between each other, each wheel is separately attached to the ATV frame by two Y-shaped levers, which in turn are equipped with ball bearings. Due to the simple design of this type of suspension, comfort in movement is in the first place here, which is very important for the owner of an ATV. The advantages of this type of suspension also include the possibility of its careful adjustment, based on the conditions of the track and the wishes of the driver. Thanks to its design, the suspension compensates for roll during cornering, and also maintains a given camber. Not so long ago, independent suspension was installed only on the front wheels of an ATV, but now almost all models of utility and touring ATVs are also equipped with a rear independent suspension.
A dependent suspension is structurally much simpler than an independent one and is a continuous transverse bridge or, in other words, an axle. Thus, it wears out much more slowly than independent
As for the minuses, they include significantly less ride comfort, since vibrations are damped worse and more transmitted to the driver. There may also be an acute shortage of stability of the ATV during the passage of uneven sections of the road. Usually, budget Chinese models of ATVs with a small engine capacity, as well as sports ATVs, are equipped with dependent suspension.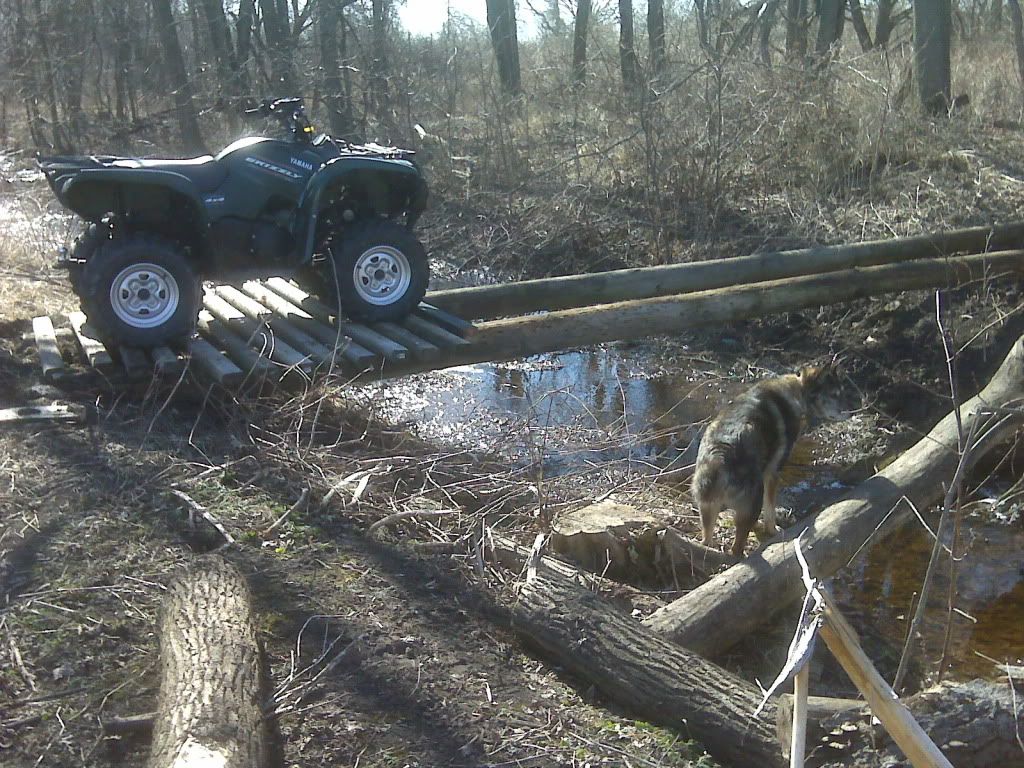

 In this short tech story, we want to
show you how to rebuild a worn out CV joint on our
Yamaha Rhino 700 SxS. This is not a complicated
process for most but it does require good mechanical
skills and tons of patience.
In this short tech story, we want to
show you how to rebuild a worn out CV joint on our
Yamaha Rhino 700 SxS. This is not a complicated
process for most but it does require good mechanical
skills and tons of patience.  Using
jack stands instead of just a jack will make sure
that the SXS doesn’t collapse and leave
stains resembling body parts on the floor of the
shop.
Using
jack stands instead of just a jack will make sure
that the SXS doesn’t collapse and leave
stains resembling body parts on the floor of the
shop.  Loosen
the A-arm mounting bolts that attach the arms
to the frame, lift them up as high as possible
and retighten a little to help hold them out of
your workspace.
Loosen
the A-arm mounting bolts that attach the arms
to the frame, lift them up as high as possible
and retighten a little to help hold them out of
your workspace.  The
axle should come right out. Some retaining clips
will make certain axles a little more difficult
to remove but just keep tugging as they are designed
to be removable. When the axle is out you may
want to closely inspect the seal in the differential
for possible replacement while you have the rear
end apart. Stuffing a few paper towels in the
axle hole will keep differential fluid from draining
out onto the shop floor.
The
axle should come right out. Some retaining clips
will make certain axles a little more difficult
to remove but just keep tugging as they are designed
to be removable. When the axle is out you may
want to closely inspect the seal in the differential
for possible replacement while you have the rear
end apart. Stuffing a few paper towels in the
axle hole will keep differential fluid from draining
out onto the shop floor.