A loose tire bead can be a real problem to fix, and if you are out on the road alone and have no access to help, you must have some ideas on how to pop a tire back on the rim.
There are a couple of popular techniques to pop a tire back on the rim, including the use of fire blast or the safer method of using a lubricant and air compressor. There is no definite answer as to which one is the better method. It is highly dependent on the user’s preference, but there is no doubt that the latter is safer.
I will present both methods in this article for you to compare them. Then you can decide which one works better for you.
This technique is becoming highly popular. If you go on YouTube looking for tips on how to pop your tire back on the rim, videos of people blasting their tire will come first on the list.
Why did this method become popular? It is because it looks so easy to do. It is easy to do but not very safe because you are dealing with fire using a highly flammable agent.
What is the science behind this method? It is simple. It is the rapid expansion of gas that puts the tire back into the rim.
This video provides a detailed explanation of how everything works.
Step 1: Ensure that the tire is clean and dry.
If your tire is awfully dirty, clean your tire first. This process is necessary to ensure that no specks of dirt or any objects can cause an issue as you continue with the process.
Ensure that the tire is dry before proceeding to the next step.
Step 2: Spray the fluid around the bead of the tire.
Make sure to spray a moderate amount of fluid not to create a huge fire that could make your task more dangerous.
You need to be extra careful when doing this process because you are dealing with a highly flammable substance, and one simple error could cause some burns.
Step 3: Pick up your lighter or matchbox and lit up the tire bead.
Using a match to light up the tire bead is safer as you can throw the lighted match stick towards the tire, keeping you away from the flame.
When the fire hits the tire bead, you would likely hear the pop sound after a few seconds. When this happens, put the fire off as quickly as you can using your fire extinguisher.
Step 4: Fill up the tire.
Pump air into your tire, and you are good to go.
Using fire to pop a tire back on the rim sounds like a straightforward method. However, I must tell you that the process has some side effects. These include the condition called Pyrolysis, which is a chemical reaction when the tire is overheated.
Pyrolysis can cause the tire to deteriorate. When Pyrolysis hits your tire, it can go on its own even when the fire is already out. It can continue for a few seconds, sometimes even for hours.
The exposure of the tire to extreme heat could also possibly cause it to explode. That is why applying the right amount of fluid and the quickness in putting the fire off is crucial.
Also, read our review on excellent touring tires from Primewell: PS890 Touring
I can’t coin a catchy term to call this method of popping a tire back on the rim. I would say that this is the traditional way of reseating a tire bead on the rim.
Why does this method work? Well, the explanation is simple. Minimizing the gap between the bead and the rim allows the tire to hold enough air pressure and push the bead back to the rim.
Step 1: Clean up the tire.
Clean the tire to ensure that no dirt or debris on the bead area. Feel free to wash the tire with water and soap.
Step2: Lubricate the bead.
After ensuring that the bead area is clean, spray a lubricant around the tire bead. This lubricant will help the bead to move or slide into the rim faster.
If you do not have access to a bottled lubricant, a good alternative is a soapy water. Melt enough soap until it bubbles in the water, and pour it around the tire bead when ready.
Step 3: Remove the Schrader valve.
To ensure that enough airflow goes into the tire and put adequate pressure to push the tire bed to the rim, I suggest that you remove the tire’s Schrader valve.
It is also important to release the air pressure after the bead is seated back on the rim.
Step 4: Wrap the ratchet strap around the tire.
When you wrap the tire with your ratchet strap, make sure to put it at the center.
Wrapping the tire with your ratchet strap will push the tire’s sidewall towards the rim, closing or minimizing the gap between the bead and the rim.
Alternatively, you can also use a chain and a binder. Follow the same process of wrapping the tire with the chain and tightening it up using a binder. Ensure to position it at the center of the tire.
Step 5: Pump air into the tire.
Using your air tank or compressor, pump enough air into the tire until the bead is seated back on the rim. If the gap between the bead and the rim still does allow the tire to hold enough air, you might need to push the rim in and push the tire out to close the gap.
The air will still leak when you pump it in as the bead is not seated yet. However, when enough pressure is applied, it should push the bead into the rim. Keep on pumping air into the tire until you hear it pop.
If necessary, add more lubricant around the bead, especially if you don’t see it moving towards the rim when you pump in the air.
Step 6: Put the Schrader valve back.
The final step is to put back the Schrader valve and pump up your tire. Now, you are ready to roll again.
Using a lubricant and air pump to reseat the tire bead is the most suggested method because it is safe for you and the tire. There is no risk of damaging your tire like the Pyrolysis possibility when using the fire blast method.
However, this method can be a little challenging, especially if you are working on bigger tires. It might require you to use force to help push the rim in to minimize the gap between the tire bead and the rim while pumping the air into the tire.
As previously mentioned, there is no definite answer as to which one is the better method. You will have to decide which one to use based on your assessment of the method’s effectiveness and ease of the process.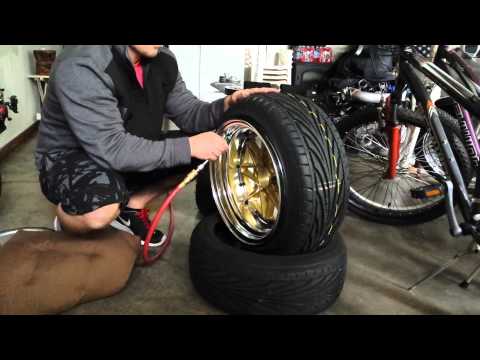
As far as speed is concerned, the fire blast has a clear advantage. You can pop a tire back on the rim in a matter of seconds. All it takes is just to spray some burning agent like a starter fluid or WD40 into the tire bead and light it up. Then, boom! Your tire bead is back on the rim.
The other method takes more time because of the extra steps like strapping the tire with either a ratchet strap or using a chain and binder. You also exert more effort to push the rim inwards while pumping the air into the tire until enough pressure goes in to push the bead back.
Safety-wise, the traditional method is safer for the simple reason that it does not involve fire. Fire is dangerous as it can lead to accidents and harm you while doing the process.
Additionally, it does not only harm you, but it could also potentially harm your tire. If this happens, it would not be very economical as you might end up buying a completely new tire.
If you are a risk-taker or utterly confident in doing the fire blast technique, it could be the most effective method.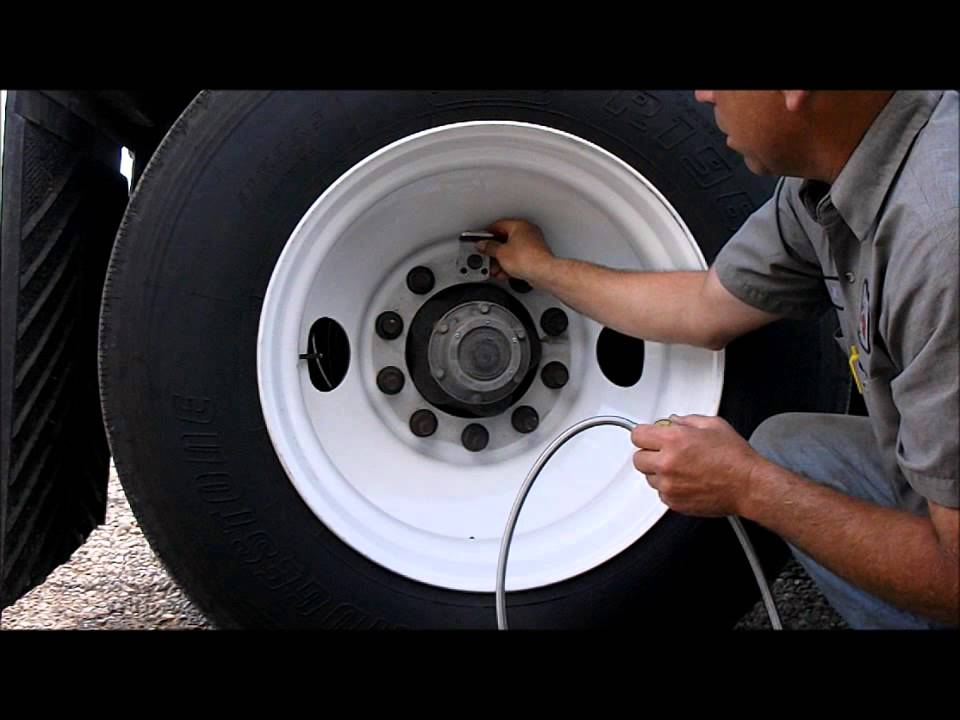 However, if you prefer to do it safely, doing the other process is the way to go.
You have just learned a couple of techniques to pop a tire back on the rim. There could be other methods other than these, but these are the typical process that people use.
If you prefer a quick and easy method, you can use the fire blast technique. Of course, you will have to take some risks in doing this. Thus, it would be best if you were extra careful.
Using a lubricant and air pump to reseat a tire bead is a safe method, but not so quick.
If you’re a regular driver, you may have had the bad luck of experiencing a broken tire bead.
Hitting the curb or pothole, or even a quick sharp turn can result in an unseated tire bead, making the tire impossible to re-inflate.
Reseating the bead by taking it to a workshop might not be the most viable option when you’re left stranded in the middle of a road.
But do not worry because there is a rather quick (albeit dangerous) fix to pop a tire back on the rim.
All you need is some combustible fluid, a source of ignition, and a little faith in science. Just spray a little starter fluid outside the rim, and light it on fire. The expanding gas will push the sidewalls of the tire up and out, causing the tire bead to snap back into place.
You would require the following items to perform this task:
Follow the steps outlined below to properly seat a tire back on the bead:
Step 1: Lift the tire up from the groundElevate the wheel off the ground with the help of a jack. If you’ve already disassembled the wheel, place the rim inside the tire and lay it flat on the ground.
Don’t have a jack?
Well, don’t worry you can check out our guide to jacking up a car without a jack!
Carefully spray some starter fluid in the cavity created by the rim and the sidewall of the tire.
Make sure you don’t spray too much of the liquid as that might damage the sidewall of the tire.
Once you’ve sprayed it around the entire bead, spray a little off the edge of the tire and onto the floor in a straight line.
Be extremely cautious with the amount of fluid that you spray onto the wheel.
Starter fluid is highly flammable. Using exorbitant amounts of such combustible liquid can cause a fire that might be difficult to contain.
Due to this reason, always keep a fire extinguisher nearby.
Using a lighter, matchstick, or whatever source of ignition you have, light up the starter fluid starting from the link you previously made on the ground.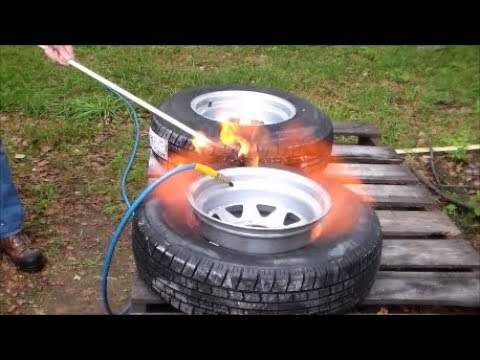
This step must be carried out immediately after spraying the tire bead so that the fluid does not evaporate away.
You might want to step back and distance yourself a bit after this step as it will cause an explosion.
The fire will cause the gases in the wheel to ignite and expand rapidly.
This sudden expansion of gases (an explosion) will cause the tire beads to move along the wheel and catch the grooves, seating them back in place.
As soon as you hear a popping sound, put out the fire as soon as possible.
This indicates that your tire is seated back onto the rim.
Finally, pump air into the tire using an air pump and you’re all set to hit the road again!
There are some disadvantages that come along with this method of popping tires back onto the rim. If not done properly, this can result in Pyrolysis, which is basically the thermal decomposition of the tire.
Pyrolysis can not only cause chemical deterioration of the tire over time but can also lead to a full-blown-out explosion.
The pressure inside may rise up to 7000 kPa and seriously injure anyone in close proximity to the tire.
Watch this video to learn the science behind using fire:
This is why you must always put off the fire as soon as you hear the ‘pop’ sound – usually a couple of seconds after you light up the fire.

Any kind of clicking or popping sound from your car’s tires is a cause for alarm, and something not to be taken lightly.
Sounds coming from a vehicle’s wheels might be due to an underlying problem in one (or more) of the following parts:
In order to find out the exact cause of trouble, you would need to take the car for a road test.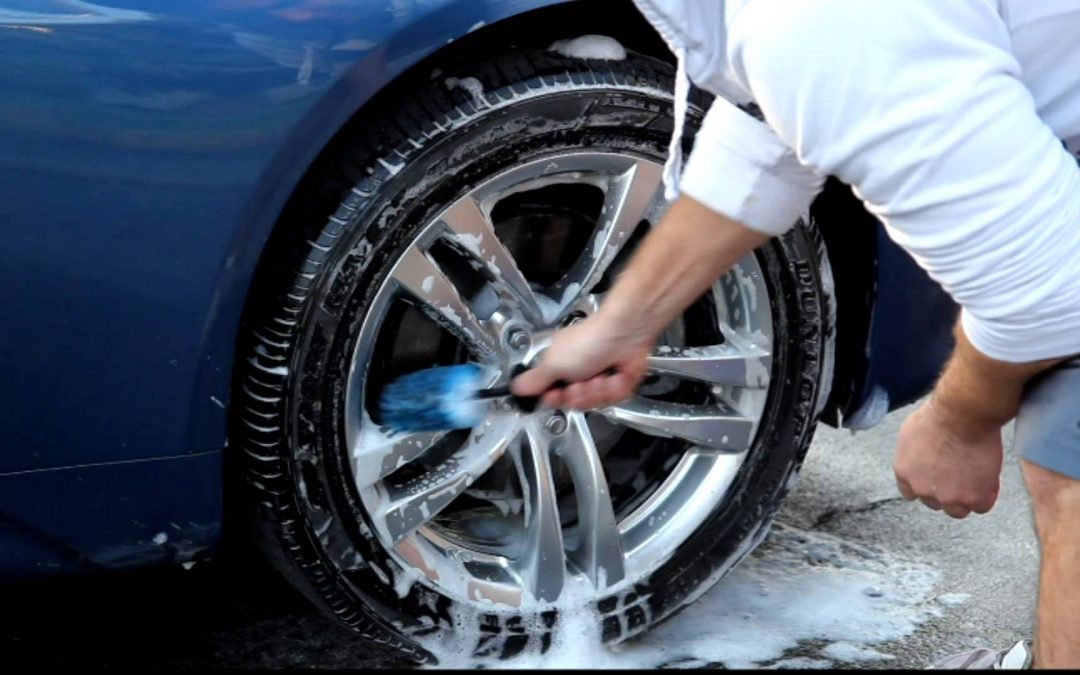
However, before you do that, make sure that there isn’t something dangling off your vehicle or a broken car part causing the noise.
Using fire might be a convenient way to pop your tire back onto the rim, but it surely isn’t the safest. Playing with combustible fluids and fires can be very risky and dangerous if you don’t know what you’re doing exactly.
Always try to seek help from a professional first, and if that isn’t possible, only then should you try pulling off such a feat. Just make sure that you abide by all the necessary safety protocols, and you should probably be fine.
(Visited 5,616 times, 6 visits today)
There is not always a way to call a tow truck, and driving on a flat tire, “chewing” the rubber and killing the rim is at least uncomfortable.
The very first replacement of rubber on a motorcycle or scooter gives reason to think - what is better in terms of quick repairs: tubeless ones that do not require wheel disassembly to eliminate a puncture, but leave the rider helpless if, along with damage, it “led” and flattened the edge of the disc? Or chambers - allowing sealing almost ring breaks (if only there were enough patches), but requiring the removal of rubber from the rim for this? The unequivocal answer is no.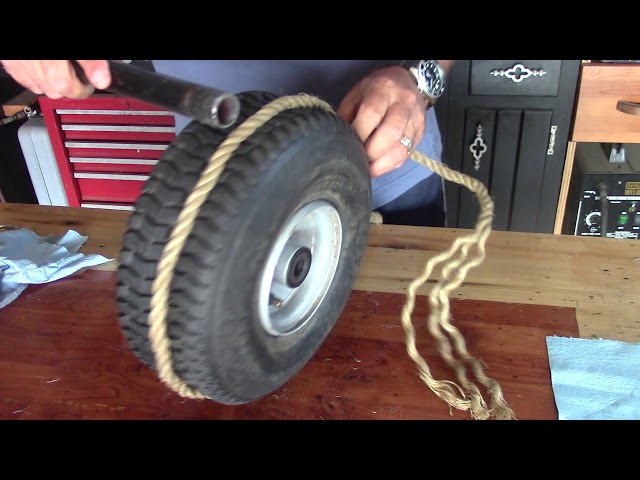 Few classics, straights or tourers today remain "loyal" to tube rubber models: tubeless tires are lighter, softer, warm up and cool down faster thanks to simplified heat transfer. In sports, more precisely - enduro and motocross, chamber - on the contrary, prevail: only spoked wheels can "play", withstanding strong alternating loads during landings and impacts.
The nuance is that a tire with a chamber can be put on any spoked or cast disc, and a tubeless one can only be placed on a cast one, because only it can ensure tightness. Tube – can be installed in a tubeless tire as an emergency measure. In case of major damage to the sidewall, cracks or curvature of the edges of the rim, this will make it possible, after pumping up the wheel, to reach the nearest tire service (and there already - straightening, balancing and other maintenance according to the rules). True, for such a focus, it is advisable to take a camera with a face value one less than the diameter of the disk, otherwise it will create folds inside that will rub for a couple of hundred kilometers.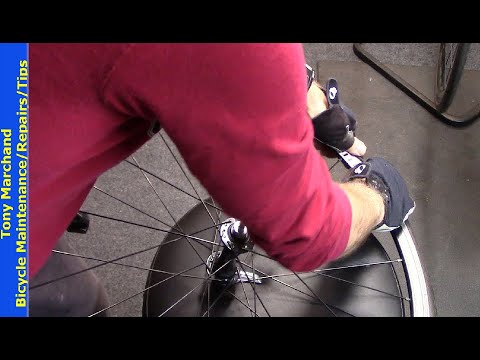 The resource of such a “treatment” is large - until the next puncture, like a new one.
It depends on the magnitude of the damage whether it will be possible to eliminate it on your own, or whether you will have to “surrender” to the motorized tow truck. In tubeless - holes up to 5–6 mm are patched, in chambers - as much as there is enough glue and patches, the main thing is the condition of the tire. To determine the extent of the disaster - find a place where you can safely stop without violating traffic rules (where it is prohibited - you will have to sacrifice tires and drive on).
If the wheel deflates slowly, and the object that pierced it is still inside, you can try to carefully drive to the tire shop. A completely deflated "pancake" will have to be resuscitated on the spot, or - remove the wheel and take it to the service.
To find a hole in a tubeless tire, if it is very thin and not immediately visible, the wheel must be pumped up, slowly pouring water - bubbles will go.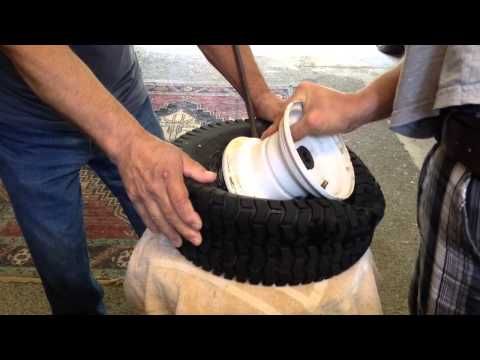 In place, tubeless tubes can be “harnessed”, or filled with sealant inside, without removing from the motorcycle.
With the second type of tires - more difficult. A torn balloon must be removed from the tire to detect a defect and seal. In a good way, the wheel must be removed from the motorcycle and disassembled on a clean, flat, hard base. Suppose such a “patch” can be provided even off-road, but how to remove the wheel on a motorcycle if it does not have a central stand? And shooting is not required. The motor must be carefully laid on its side, after making sure that the faucet is closed, gasoline does not flow out through the tank cap (antifreeze does not flow from the tank if the motor is “dropsy”), and removing the plastic or wardrobe trunk with fragile contents (if any).
You will have to unscrew the wheel from the motorcycle only if you need to replace the tire, or it is decided to patch the tubeless tube with a “fungus”. In the absence of a central stand, this will also have to be done on a lying bike, or - make this stand from improvised materials (bricks, stump, car jack), placing them under the crankcase protection from below, the central tube of the frame, the duplex jumper (but not under the plastic, itself engine crankcase or attachments!), under both footrests - if they are not folding, or - under the pendulum. Before removing the rear wheel on a motorcycle, the front fork must be loaded with something, or an even higher lining is made.
In a motorcycle tire fitting shop, tubeless tubes are repaired by cold vulcanization. They are removed, disassembled, the puncture site is cleaned from the inside, degreased, lubricated with glue and a calibrated “fungus” patch is inserted into the hole from the inside. The fungus itself is a thin plate of rubber with a “leg” tube in the center. The leg - by the guide wire is dragged through the hole of the damage, and the "hat" seals it.
After half an hour - you can put the tire back. The reliability of such a repair is high, the patch does not cause a significant imbalance, the service life of a sealed tire does not decrease.
This method is also applicable on the road, the main thing is to have the necessary equipment and materials with you:
The fungus repair procedure does not require much experience. The main thing is to keep it clean, fully clean the place where the patch fits, let the glue dry slightly to a dull finish and press (roll) the surface of the fungus with high quality, expelling all the air between the layers. If necessary, you can degrease the place before gluing with gasoline, but without the rest of the above, it will not be possible to fully carry out repairs.
The compressor is sometimes replaced by a small cylinder of compressed air or carbon dioxide. Unlike a mechanical pump, it will immediately create a “throw” of pressure, pressing the tire beads against the rim flanges (in emergency cases, even a fire extinguisher was used to pump flat tubeless wheels). When connecting the compressor, start the bike's engine before you start inflating the tire - let it idle. Otherwise, the motor can "land" the battery, and you will not start.
Manometer - needed for control. It is undesirable to pump over the repaired tire. It is recommended to "inflate" 0.2 atmospheres less than the nominal value. Inflating too little is also bad: a flat tire has a larger contact patch with the road, so the place of a fresh patch will deform more.
“Burning” a tubeless tube and sealing its internal cavity through a nipple are quick, simple methods that do not require special skills. To repair the damage, you only need the materials themselves, and how to pump up the wheel.
Now in Moscow, and not only, 6-5 varieties of cans with a sealant are sold - a quickly hardening "liquid rubber", with a volume of 800 to 250 ml.
Applying "Anti-Puncture" is simple: put a tube with a fitting on the nipple of the camera, turn the can over, and hold the button according to the instructions. Then - pump up the wheel, cleaning the nipple from the foam, roll it, making a full turn to distribute it.
The sealant is blown out with air into the puncture hole and clogs it, solidifying. After 20 minutes - you can go. Reliability of repair is high. Resource - until the next puncture.
If you have a compressor, start immediately pumping up the wheel, so it will be easier to work with a puncture, insert a patch, and it will swell faster.
Procedure:

You can go in 5 minutes, you just need to make sure that it doesn’t descend anywhere else.
Outwardly identical, repair kits for harnessing wheels can differ in price by almost half. This variation is explained by different configurations - one will have only three items, the other - six or seven.
A complete tubeless tire repair kit contains:
Regardless of the cost, you need to choose a kit in which the harnesses will be reinforced, and the awl - with a deep spiral winding (notch), and not a “needle file”. Inserting a flagellum is sometimes easier with a regular thin screwdriver. If there is no glue in the kit, or it has dried up, the flagellum is moistened with gasoline.
At motorcycle service stations and car services, holes in the chambers are closed by hot vulcanization: a layer of raw rubber is applied to the cleaned, fat-free puncture site and, after squeezing it well, it is heated with a special “iron”. Iron - burns, layers - are fused into a single whole. Reliability of repair is high. The resource will be almost like a new one.
Cold vulcanization (patching) - used if the workshop is not equipped with a vulcanizer. In this case, the quality of the service and the reliability of the repair will depend on the accuracy of the master. For the convenience of gluing, the camera is completely removed in the service, but, I repeat, this is not necessary. It can be repaired on the spot in the same way (there are no other options except for replacing the camera), but without removing it from the motorcycle.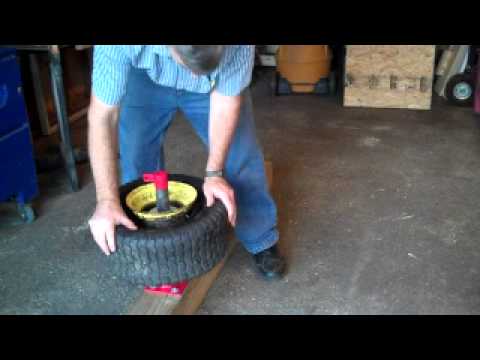
This can only be done if you have two metal mounting blades. At least one, the second can be replaced with another flat tool. You can still disassemble the wheel with a wide screwdriver and a “family” key wrapped with electrical tape. But this is only as a last resort, otherwise you can damage the cord.
Sequence of work:
 Let the glue dry for a minute.
 The fencing must be carried out twice as carefully and more slowly than dismantling, lubricate the side with water or soap, “help” more with your hands, otherwise there is a risk of picking up the edge of the chamber with a spatula and tearing it.
Important! If the wheels of the motorcycle are equipped with tow bars - before pressing the tire bead from the rim, you need to loosen this tow bar! But do not unscrew the nut completely, do not disassemble to the end.
A standard “first aid kit” (a set for repairing classic motor rubber) contains only patches and glue, so it is advisable to supplement it yourself with a piece of “skin” or a needle file. You can degrease with gasoline, or apply a little glue first and wipe off immediately, rolling up the dust with it.
Now there is no shortage of specialized motorcycle workshops not only in Moscow - in all major cities there are motorcycle helpers who help motorcyclists directly on the track, or tow to where you can quickly change the camera, or patch the tubeless correctly, so that there is no trace left. Where there is a guarantee.
Self-replacement of a tire on a motorcycle requires a certain physical condition, and for the first time - a “kilometer of nerves”.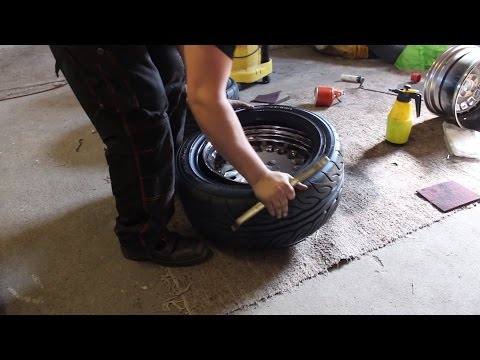 At the service station, instead of you, automation will “sweat”, which will not lock up the board and will not scratch the disc coating with a spatula. The main thing is to do it quickly (if you need to go urgently, the price sometimes does not matter).
Repair at the service - may be the only possible one if, due to driving on a flat tire, the tire nipple is turned and torn off. Especially if he flew off and got lost, but there is no spare. In mototiremontazhke - there is always a set of consumables for any wheel diameter. In the same place, in extreme cases, you can buy a new tire, or a used dokatka.
In addition to the patch, for normal operation of the wheel, balancing must be ensured. This is generally a useful procedure during any change of rubber, otherwise if there is a strong imbalance, the wheel bearing will inevitably break due to vibrations, and the hands will quickly get tired and “buzz” after long rides.
The first couple of tens of kilometers - do not drive, go at the speed of the flow. Stop, check for a flat tire. If the patch is not of high quality, it will manifest itself almost immediately. Parking will tell about the long-term perspective: if the cylinder has not lost volume in the first day or two, then everything is in order, you can drive as before.
Knowing what to do if a flat tire is on the road is important not only “for yourself”. To help a newbie or a fragile girl is to earn an important “plus in karma”, which will later return at the right moment. But, I hope, this knowledge will be useful to you only in theory. Good luck on the roads, no nail, no wand!
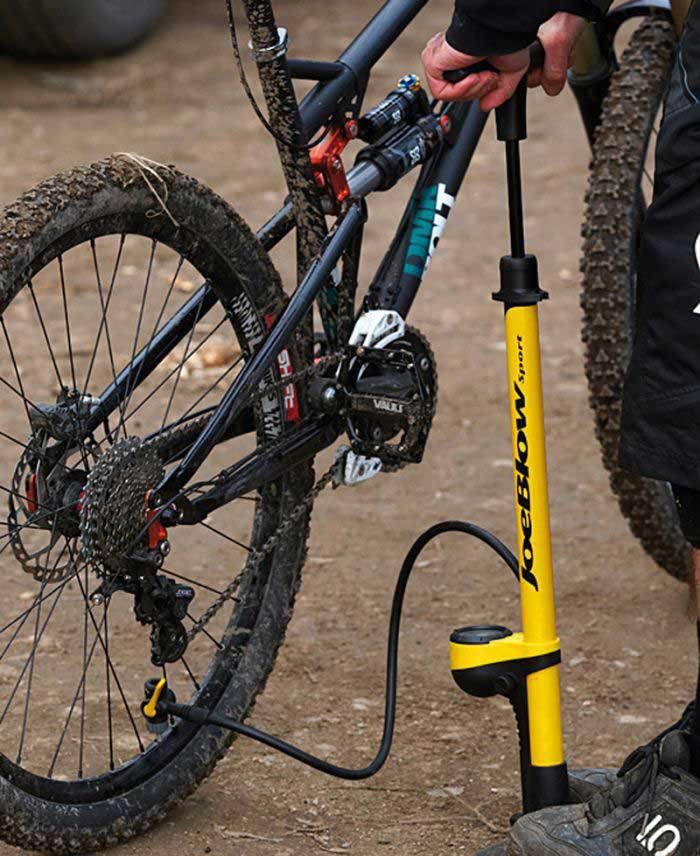
We welcome cyclists of all ages!
In this most interesting section of our site you will find articles about bicycles carefully collected and written by us. They reflect all the most necessary technical knowledge about bicycle technology, advice from professionals from the world of cycling, interesting facts and many other entertaining things.