Every editorial product is independently selected, though we may be compensated or receive an affiliate commission if you buy something through our links. Ratings and prices are accurate and items are in stock as of time of publication.
Modern vehicle tires are tough, standing up well to rough terrain and thousands of miles of driving. Trouble is, tires are not invincible. Every so often car tires spring leaks. Air can start leaking from anywhere on a tire, and the location of the leak determines whether or not you can fix it yourself. And if you can't fix it yourself, the location of the leak will also tell you if you need a professional repair or a new tire.
Whether or not your tire is tubed or tubeless affects things, too, because only tubeless tires can be repaired using the technique of plugging that we'll show you here. The good news is that modern vehicles always have tubeless tires, and this means that repairing with a rubber plug is often an option.
Plugging a tubeless tire is only a possibility when your puncture is in the tread area. If the air leak is where the sidewall of the tire meets the rim — this is called a "bead leak" — you'll need to visit a mechanic with a tire machine to dismount the tire from the rim and remount it with sealing liquid applied to the bead. If your sidewall has been punctured, you need a new tire, because damage there can lead to a blowout at highway speeds, even after repair.
Learn exactly how to plug a tire so next time you spring a leak between your treads, you'll be able to get up and running again in record time.
Total time completing the repair is about 15 minutes. Doing the work yourself will save you about $20 and the time spent driving to the garage and waiting.
Steve Maxwell for Family Handyman
Complete DIY projects like a pro! Sign up for our newsletter!
Do It Right, Do It Yourself!
Originally Published: August 27, 2020
Posted by Jefferson Bryant Know How
Flat tires tend to happen at the worst time in the worst places. If you are on the road or outside of normal business hours when your vehicle has a flat and the spare is missing or no good, you might feel stranded, but there is an option—a tire plug kit. This is something that anybody can do, you just need the right parts.
Liquid tire repair might get you down the road, but it could make your tire repair difficult and possibly damage the TPMS (Tire Pressure Monitor System) unit inside the rim itself depending on the formula. The best solution for an emergency tire repair is a tire plug. Made from cork and a gooey adhesive that keeps it place and seals the tire, a tire plug repair is an excellent way to get your car back on the road until you can get to a tire shop for a proper internal patch.
Installing a plug in your tire works for pierced tread area only. You cannot fix sidewall damage, compression breaks (from potholes, gravel roads or curbing) or any other type of catastrophic tire damage. The most common road hazards you will find are punctures from nails and screws. Fixing these issues are perfect for the good old fashioned tire plug. If you are wondering how long does it take to plug a tire, then the answer is just a few minutes. Most of the time is spent preparing to perform the plug itself. Here’s how to plug a tire with a plug kit.
You will need the following to make a tire plug repair:
There are all kinds of tire plugging kits, but you want the most complete tire repair kit which comes with the plugs, the installation tool, and the reamer tool. Some flat tire repair kits just come with the plugs and installer, but the reamer tool is a necessary component to a good repair. Some tire plugging kits also come with liquid cement. You can use it or not, but the cement helps make a more permanent repair.
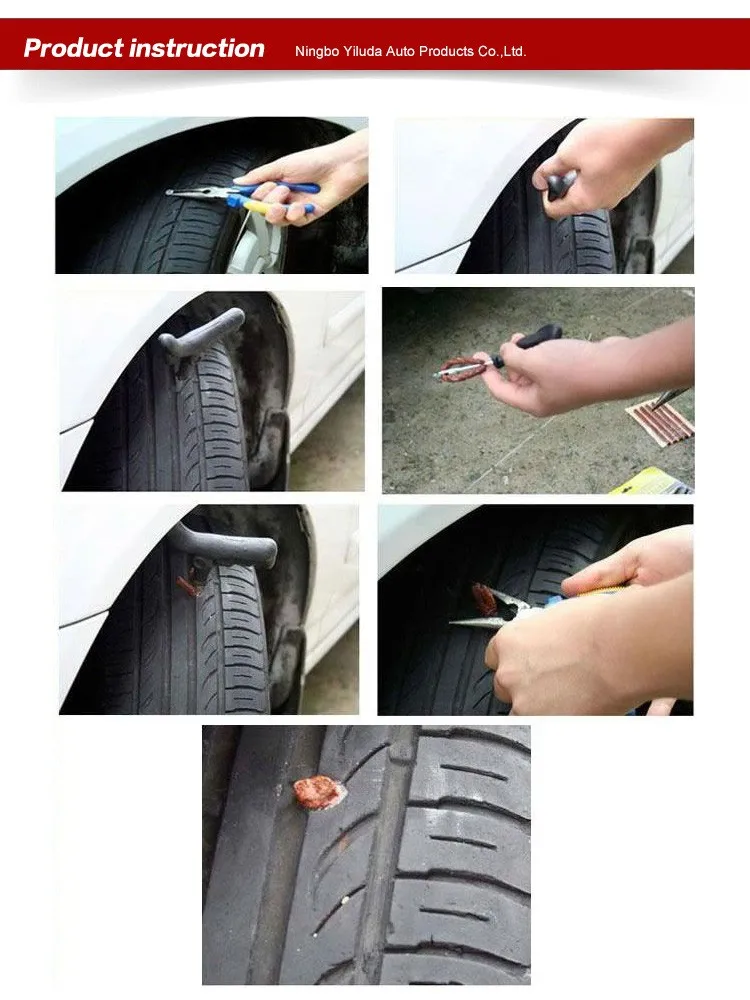
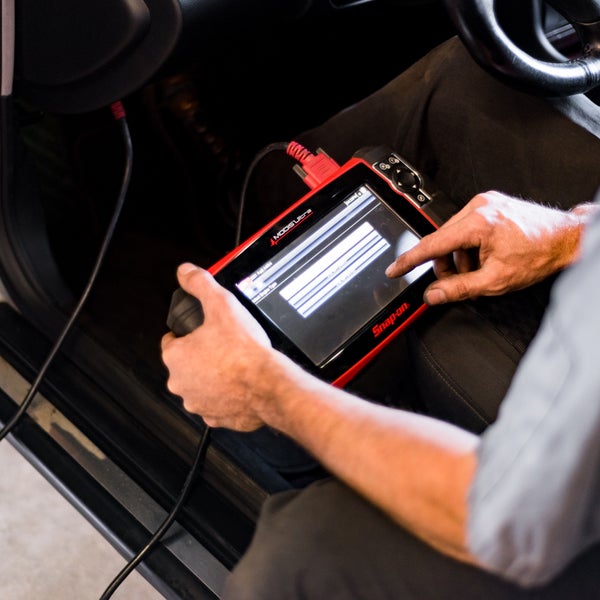
Locate the puncture. If you don’t see or hear the puncture, spray some soapy water on the tire and look for bubbles.
This is a small staple that was dropping tire pressure by 20 psi in about 12 hours. It needs to go.Remove the offending item. This is usually easy, but sometimes the nail or screw is worn down, making it hard to get a bite on it. This is where the side-cutters come in really handy. You will want to position the tire where you get the most leverage.
Side cutters work best for removing these items, as they can grip small round objects better than regular pliers.Insert the reamer. This will take some effort, as you have to push it through the steel belts. Use a twisting motion and push it into the tire. Once the reamer is through, saw it in and out of the tire a few times to really make a nice hole for the plug. Yes, it is counter-intuitive, but it is necessary.
Push the reamer all the way and then saw it in and out a few times to make a clean hole.
Prep the plug and installer. Pull a plug off the strip and push it through the eyelet of the installer tool. The pliers will make this easier. Push a little through, grab it with the pliers and pull the plug halfway through the eyelet.
Pull a cork strip from the tire plugging kit and grab the installer tool, which looks like a large needle with a slit in the eye.Threading the sticky cork tire repair plug is not easy, but if you can get it squished into the hole, you should be able to pull it on through. The side cutters might help.
Insert the plug into the tire.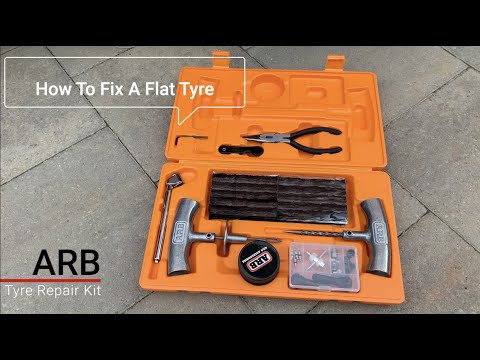 If the kit has liquid cement, apply some to the plug before inserting it into the tire. Simply push the installer into the hole in the tire until the plug is about 3/4 of the way in. Twist the installer tool 90-degrees and pull it out. The plug will stay in the tire and the tool will come out nice and easy. You may trim away the excess plug or leave it to wear away as you drive.
This is what you should see when the tire plug is installed.
Once the tire repair plug is in you can now twist the handle 90-degrees and pull the tool out.
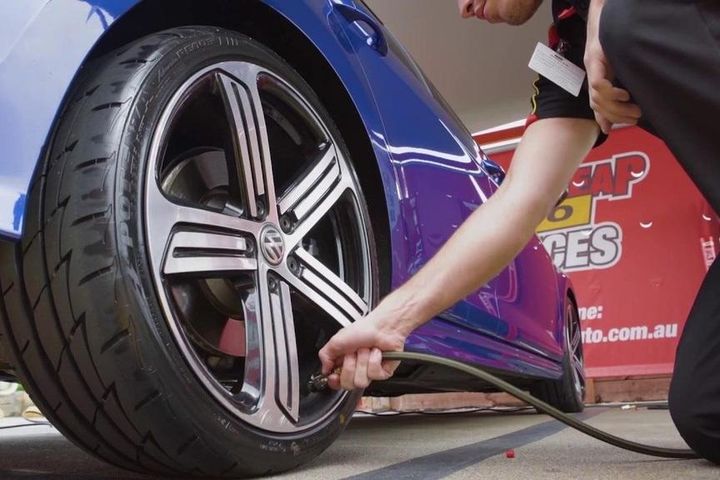
Fill the tire to the proper PSI. If you have a portable air compressor, this will make things easy. However, if you do not, you need to get air very soon.
All done. You can trim the tire plug or leave. You will need air, so don’t go driving until you have the tire aired up.
Every automobile you own should have an emergency tire plug repair kit in the tool box, along with a portable air compressor. These emergency repairs are quite good, but for a long term repair, you should take the vehicle to a tire shop for a proper repair as soon as possible. They will know the best way to patch a tire for your type of damage.
Check out all the steering & suspension parts
Categories
Know How
Tags
emergency repair, flat tire, flat tire repair, patch flat tires, sealant, tire maintenance, tire plug kit, tire pressure, tire safety, tire wear, tires, wheels
A life-long gearhead, Jefferson Bryant spends more time in the shop than anywhere else. His career began in the car audio industry as a shop manager, eventually working his way into a position at Rockford Fosgate as a product designer. In 2003, he began writing tech articles for magazines, and has been working as an automotive journalist ever since. His work has been featured in Car Craft, Hot Rod, Rod & Custom, Truckin’, Mopar Muscle, and many more. Jefferson has also written 4 books and produced countless videos. Jefferson operates Red Dirt Rodz, his personal garage studio, where all of his magazine articles and tech videos are produced.
esportby.com
An easy way to quickly restore tire tightness and continue your journey. True, for this you need to have the right wheel repair kit with you.
Maxim Stroker
“Catching” a nail, screw or piece of wire in a wheel on the track is a trifling matter and somewhere even everyday. However, it turns into a serious "trouble" if this happens, for example, at night or a couple of tens of kilometers from the nearest tire fitting point.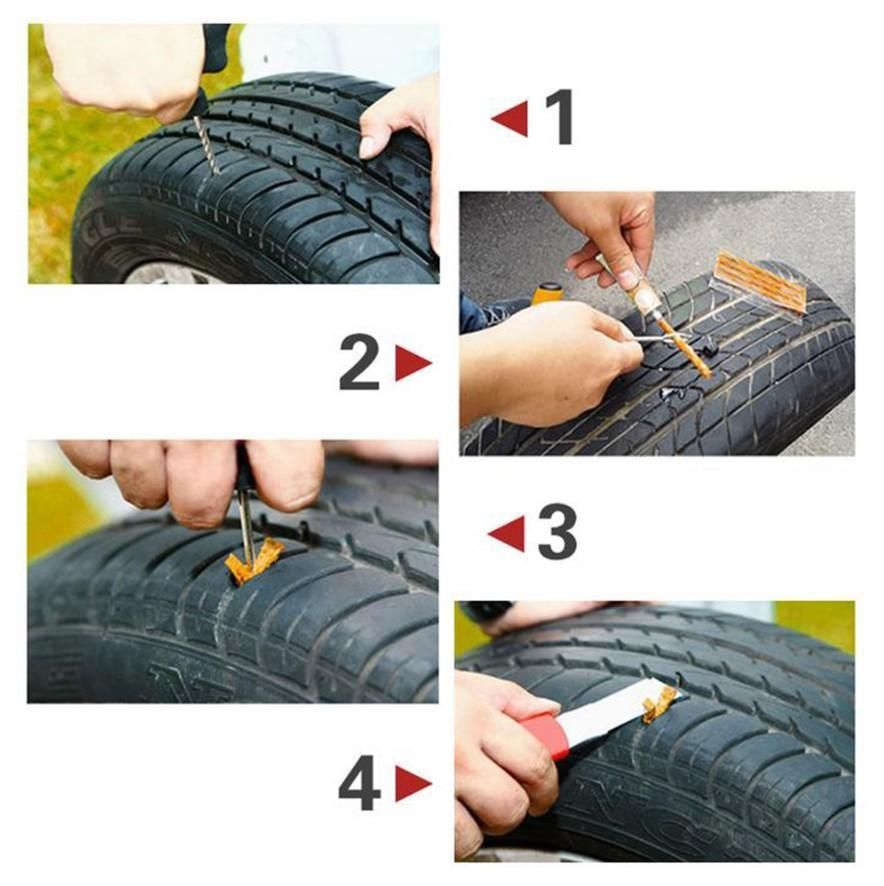 In theory, in this case, you need to put a spare wheel and go further. Although, in the case of a family trip on vacation, the process of digging it out from under a pile of junk in the trunk can turn into an adventure that deserves a separate story. Be that as it may, often the trouble does not come alone and the spare tire can be broken literally on the next kilometer. After all, where one carnation fell on the road, there may well be another one, and another, and another ...
With a couple of crippled wheels, you'll either have to wait an unknown amount of time for a tow truck to be sent in, or fix it yourself. Therefore, in a not particularly urbanized area, it makes sense to carry a repair kit with you to eliminate punctures in tubeless wheels. In principle, it can be of any manufacturer. The main thing when choosing it in the store is to make sure that the “drill” included in the repair kit is not very toothy and sharp. After all, his task is simply to clear a puncture hole in the tire, and not to break its metal cord.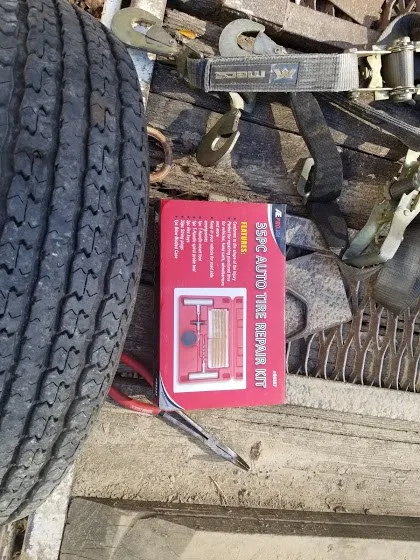 The second recommendation: the flagella, which are supposed to close the puncture hole, should be plump and reinforced with thin wire or plastic threads.
n-i.kiev.ua
And the third criterion for choosing a wheel repair kit is the obligatory presence of a tube of glue in it. Yes, yes: there are also “glueless” sets on sale, which are essentially useless.
So, we notice that the wheel is flat (or has already been blown off) and proceed to eliminate the problem. Most often, the hole in the rubber is not visible. Therefore, to begin with, we hang out the damaged wheel by raising the car on a jack, and inflate it with a pump or compressor to 3-4 atmospheres. If even after that it is not possible to detect damage by the whistle of escaping air, we methodically and consistently wet the entire surface of the wheel and look for bubbles at the puncture site.
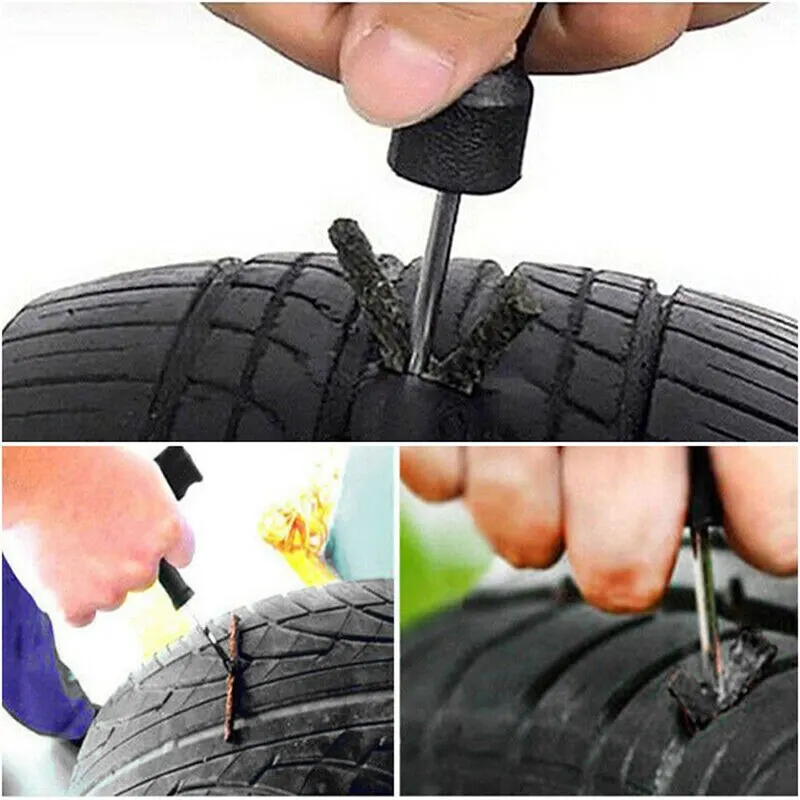
Having found a puncture, we take the “drill” from the set and pierce the damaged area with it several times. So we clean the surface of the hole before gluing. Next, we smear the “drill” with glue from the set and again immerse it in the hole. We repeat this operation and, leaving the “drill” sticking out in the hole smeared with glue, we take out the flagellum and insert it halfway into the eye of another tool - the “overgrown needle” (sometimes called the “awl”), also available in the repair kit. We coat the flagellum with glue and, quickly pulling the “drill” out of the hole, insert our “needle” there so that the ends of the flagellum remain above the surface of the wheel tread. Next, we pull out the “needle-awl” and wait a few minutes until the glue grabs. After that, we pump up the wheel and carefully cut off the protruding tails of the flagellum with a knife. Everyone, you can move on.
Test drive of one of the best family minibuses
19849
 Zen
Zen wheels, summer tires, cheap cars, repairs, tires, winter tires, track
You hit: the tire is flat, but there is no spare tire. Modern tires are tubeless - if you managed to block a small leak with a sealing compound, pouring it into the valve, you can not look for a puncture. Effectively - plug the hole with a rubber band. It is injected from the outside with a special device (such kits are inexpensive on the market). But now we are talking about an extreme case - when a careless driver has nothing at hand to quickly repair a puncture.
The technique is not new, but effective: we move the tire bead using the weight of the car and the force of the jack.
The technique is not new, but effective: we move the bead of the tire using the weight of the car and the force of the jack.
A small hole can be plugged by screwing a self-tapping screw into it.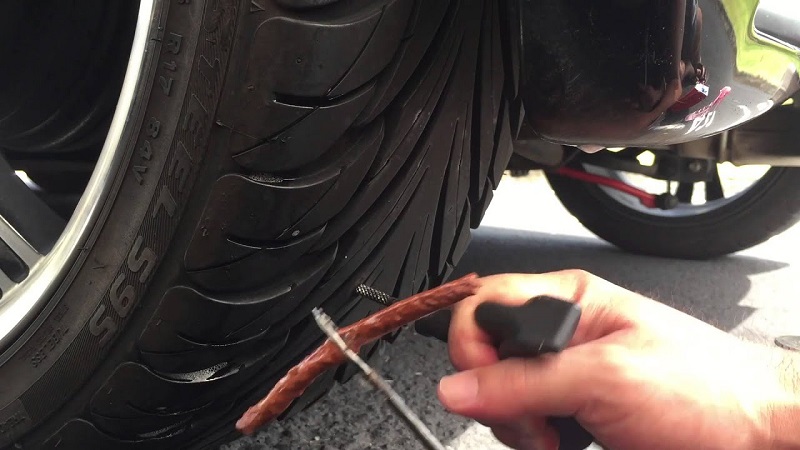 You can take it, for example, from the trunk lining. Another option, if the puncture is small: pour half a liter of water into the tire (with a pump through the valve) so that it slows down the air outlet. But periodically you will have to pump up the wheel.
Approximately ten cubes of gasoline, a torch, an explosion - and the board sits still!
Approximately ten cubes of gasoline, a torch, an explosion - and the board sits still!
To seal a large hole, the tire will have to be removed from the rim, at least on one side. But first, move both tire beads deep into the rim groove. Experienced people carry a piece of steel angle and a heavy hammer for such a case. Or they move it with a jack, resting its heel against the sidewall of the tire, and the shelf against the threshold of the car. Next, installers need to drag the desired bead over the rim flange, and only after that you can take on repair fungi, glue and patches.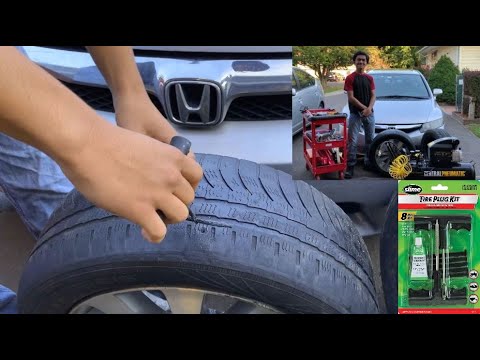
The puncture has been repaired - but how to return the tire to the rim shelves? Not everyone has a high-performance electric compressor with them. And in order to use a conventional pump, you will have to seal the gaps as much as possible - for example, pull the tire around the circumference with ropes. If the sides hit the hump and the pressure began to rise, the problem is solved. In practice, these methods require manual dexterity. It's easier to land the tire with a light blast. This requires 10–15 g of gasoline. Pour a few milliliters of fuel inside the tire, then, so that it evaporates better, we roll the wheel. We put it on its side and, pressing on the sidewall, bring the flame to the gap. But not a match, but a torch! There will be a pop - and the tire is in place. A typical mistake is to pour too much gasoline: instead of popping, a fire will break out. We extinguish, we air ...
“Inflate” the tire with a watering hose. The matter requires patience, but on such a wheel you will reach the place of repair.
"Inflate" the tire with a garden hose. The matter requires patience, but on such a wheel you will reach the place of repair.
When the hole is in the knuckle, the tire cannot be saved. Unless you insert a camera into the tire. From the inside, it is useful to cover the hole with a "coat" of a couple of layers of rubber or with a bandage cut from the sidewall of a tire lying on the side of the road - there is a lot of this goodness along the roads. This will protect the chamber from sand and reduce the chance of further tearing. And if it's not far from the purpose of the trip? On a flat tire, you can drive 15–20 km on asphalt at speeds up to 40 km/h before it finally falls apart. We talked about this experiment in ZR, 2009, No. 7.
But what if there is no camera? Then turn on the fantasy. Someone "fills" the tire with a watering hose; all sorts of rags, sponge rubber from old seats, plastic film, linoleum strips, sidewalls cut from old tires, etc.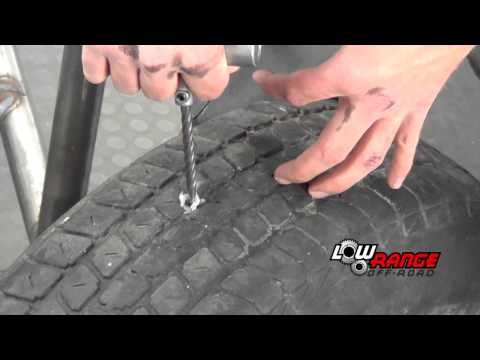 will be used. With such stuffing, tires will wrinkle less on the go. But forget about driving in normal mode - slowly, extremely carefully, we drive to the nearest tire shop.
Travel set: wedges, jack, pry bars, wheel wrench, hammer, gloves, corners, compressor. Do not forget repair fungi, self-vulcanizing patches and, of course, a valve cap with a head that is used to unscrew the spool. There are usually no such caps on the wheels of modern cars, but if you look, it may come in handy.
Travel set: stop wedges, jack, pry bars, wheel wrench, hammer, gloves, corners, compressor. Do not forget repair fungi, self-vulcanizing patches and, of course, a valve cap with a head that is used to unscrew the spool. There are usually no such caps on the wheels of modern cars, but if you look, it may come in handy.
CARE OF THE WHEELS, RULES OF DISMANTLING AND ASSEMBLY
— Not all tire damage can be repaired without loss of its qualities.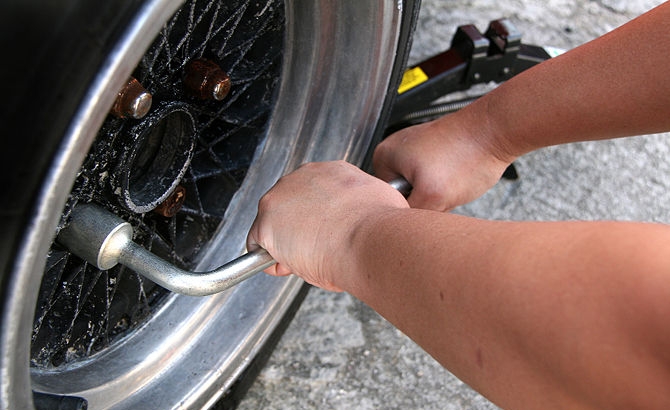


(87).jpg)