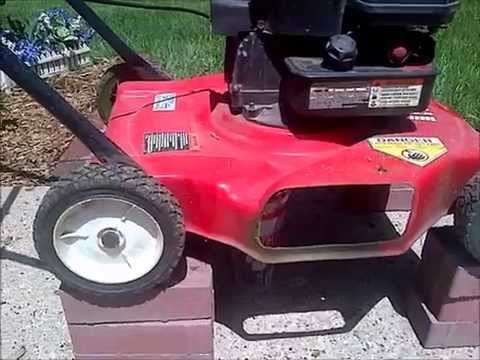
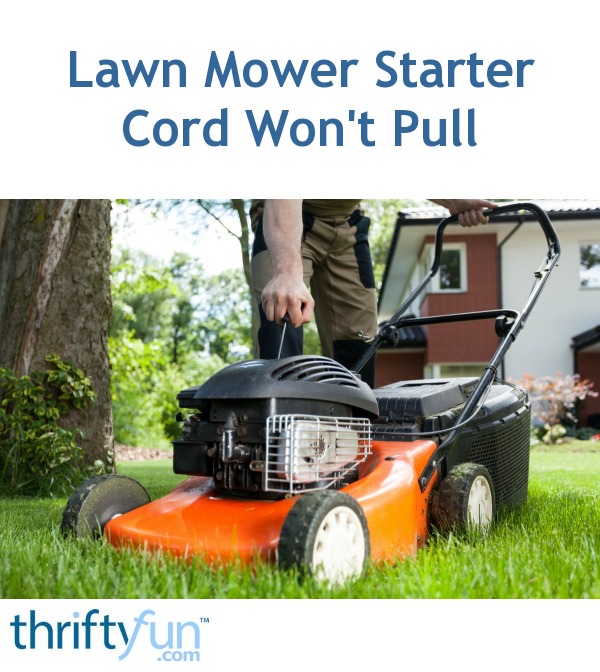
It’s a fine sunny day of the spring season, and you are busy with some work in your garden. You use your trusted lawnmower that has not failed you. But suddenly, you feel that the lawnmower is not running as smoothly as it should. It feels like it’s being dragged on the ground forcefully. So, you turn off the lawnmower engine and get off your riding lawnmower. But what you see now is not pleasant at all. Your lawnmower has a flat tire, and you know you need to fix it with a new tire or tube.
As the lawnmower tire gets old, it is more likely that a nail can easily pinch into the tire and make it flat. A hard bump to the lawnmower can also cause this issue. This article shall be a step-by-step guide on removing a lawnmower tire, fitting a new tube or tire, and putting the tire back on the rim.
How to put a lawnmower tire back on the rim, step by step:
Contents
 4 ● Step 4. Install the tire on the rim:
The detailed procedure of removing and replacing your lawnmower tire has been broken down into several small steps.
The first step to fix the flat tire or replace it with a new one is to remove the old tire and the rim from the lawnmower.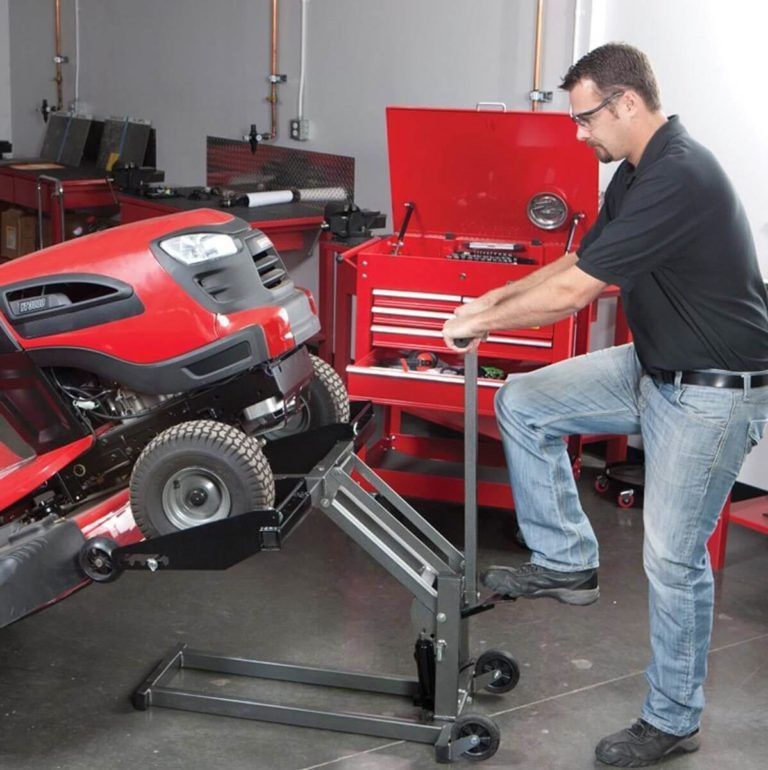 You shall follow the following steps to complete this procedure:
There is a plastic boot (or a cap) at the center of the tire’s rim. Grab it using a pair of pliers and remove it from the rim. Try not to break it as it holds some grease and is a little brittle because of that.
Behind the plastic boot lies a c-clip. Grab the tab of the c-clip using a pair of pliers and pull it out of the rim.
Once you have removed the c-clip, you shall see a washer. Draw this washer out of the rim.
After you’re done with the steps mentioned above, you can now pull out the rim along with the tire from the lawnmower.
As you have removed the rim and the tire from the lawnmower, it’s time to remove the tire from the rim.
To remove the old tube’s nozzle (if your tire has a tube), you first need to peel the tire off from at least one side of the rim.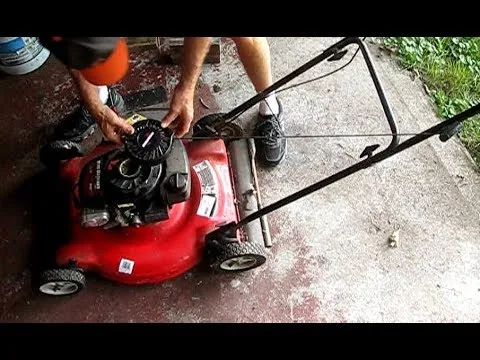
To do that, hammer a flat head screwdriver at the junction of the tire and the tube. Once the screwdriver gets inside this junction, please give it a push and try peeling the tire off the tube. Repeat the same step on the opposite side of the tire as well.
Every tire and tube has a nozzle that is fitted into the tire’s rim. It would be best if you pulled out this nozzle from the rim to proceed further.
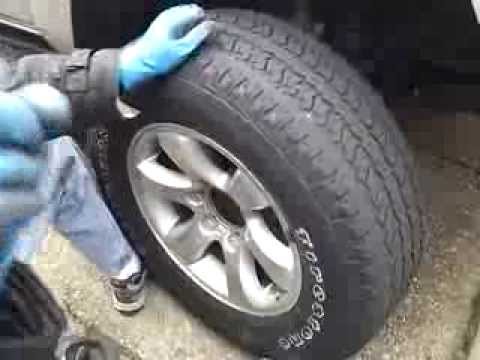
This is where things get exciting and is the most technical step of the entire process. You may need a couple of screwdrivers for this step. Although there are special tools to take the tire off the rim, we shall use screwdrivers to save some bucks.
Insert screwdrivers at different positions: Insert a screwdriver inside the junction of the tire and the rim, and pull the screwdriver upwards so that the tire starts coming up off the rim.
Do the same step using another screwdriver, which shall be inserted at some distance from the first one. Keep working around the tire doing the same step.
Remove the tire off the rim: The tire is now completely free from the rim’s grip. Remove this tire off the rim.
Grab a torchlight and check if there are any nails or a sharp object pinched into the tire’s inside or on the outside surface. If you find any, remove it from the tire’s surface using pliers.
Phew, that must have been a tiring job. You are now halfway there, and all you need to do now is install the new tire back on the rim.
Some tires might be tubeless, while some may have a tube. You need to install a new tube if the previous one had completely weathered or has had various punctures.
Please insert the new tube inside the tire and stuff it in. The tube’s fill valve must be in line with the fill valve hole inside the rim, where it is to be fitted in. Insert the fill valve into the fill valve hole located on the rim.
If you are installing a new tire or putting the old tire back on the rim, this step is applicable for both of these cases. Screwdrivers and some hand force are all you need for this step.
 This step is done to make the edges softer so that they may easily fit onto the rim. Oil can also be used to serve this purpose in case transmission fluid is not available.
Once the tire has been put back on the rim, it shall now be installed back on the lawnmower.
Place the tire back on the lawnmower’s axil, just like the way you pulled it out earlier.
 2. Re-install the washers:
Insert the washers back into the tire’s rim.
Re-install the c clip back into the rim with the aid of pliers.
Re-install the plastic boot back on the tire’s rim.
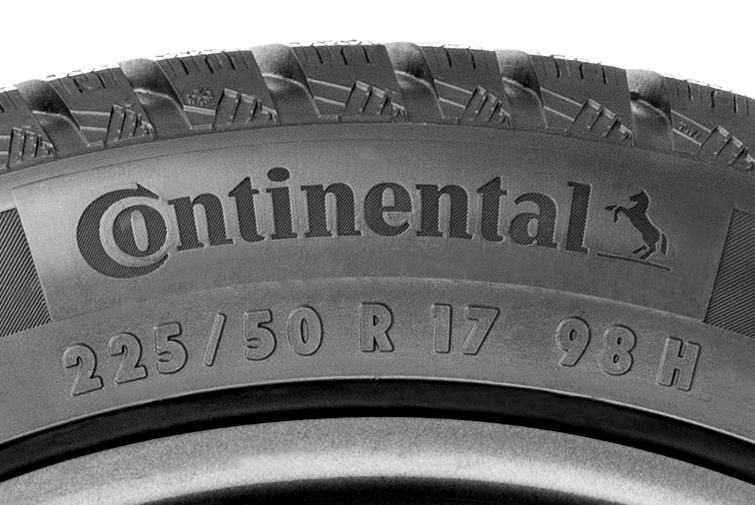
Related Questions:1. What size of lawnmower tires should I get?Like other tires, a lawnmower tire has a series of numbers imprinted on one of its sides. These numbers indicate certain specific details about the tire. Only two parameters are enough to indicate the tire’s full size, i.e., the tire width and the rim diameter. There are two different systems for tire’s sizing:
Two-number sizing:
Most of the lawnmower tires use a two-number sizing system to indicate the tire size. For example, in two number sizing, numbers are displayed as 5-9. This number indicates that the tire width is 5 inches and the rim diameter is 9 inches. These two numbers are all that you need to get a fresh piece of a lawnmower tire.
Three-number sizing:
This sizing system indicates the tire’s size with the help of three digits. For example, if the number 15×6.00-6 is imprinted on your tire, the number before ‘x’ indicates the tire’s diameter when it is fully inflated. The tire width is indicated by the number between the ‘x’ and ‘- ‘. The last number indicates the rim’s width.
2. How much air pressure should I maintain in lawnmower tires?Like other lawnmower parts such as the engine, fuel, and filters, they must be maintained for the lawnmower’s ideal performance. Similarly, maintaining an adequate and specific amount of air pressure in the tires is equally essential.
A flat lawnmower tire can ruin a garden lover’s mood. But removing and replacing a tire is not very complicated and can be done easily by most. Do not forget to take some precautionary measures before you start. Wear safety glasses and protective gloves to protect yourself from unnecessary injuries. And when you finish fixing your tire, also think about other maintenance tasks like the carburetor, air and fuel filters, and do not let gas get too old. This will prolong your lawnmower’s life, and you can continue to maintain your lovely garden!
By Keith Dooley Updated March 07, 2022
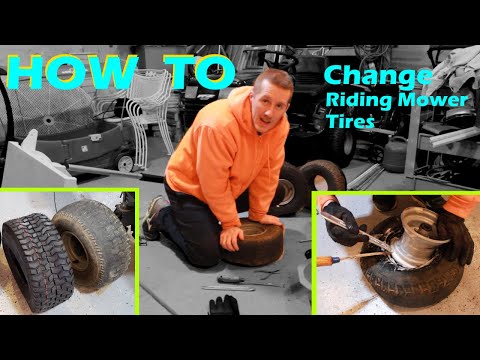
Riding mowers are a matter of convenience for some homeowners and a necessity for others when cutting large areas of grass. The tires on a riding mower are designed to be durable, but due to normal use, there may be times when a tire loses air pressure. When this happens, the tire may separate from the rim. Sealing a mower tire to the rim requires a few basic steps and can be accomplished at home.
Park the riding mower on a flat and level area, leave the transmission in gear and set the parking brake. Put on gloves to protect your hands while working.
Pull the plastic cap off the axle with the flat tire. Remove the snap ring with snap ring pliers, and then pull the ring and washer off the axle. Place a tire jack under the front of the mower. Home Depot points out that the jack must be under the frame and not the motor. Raise the mower so the flat tire is off the ground and pull the wheel and tire off the axle.
Inspect the tire for damage such as a slit or puncture that could prevent proper inflation.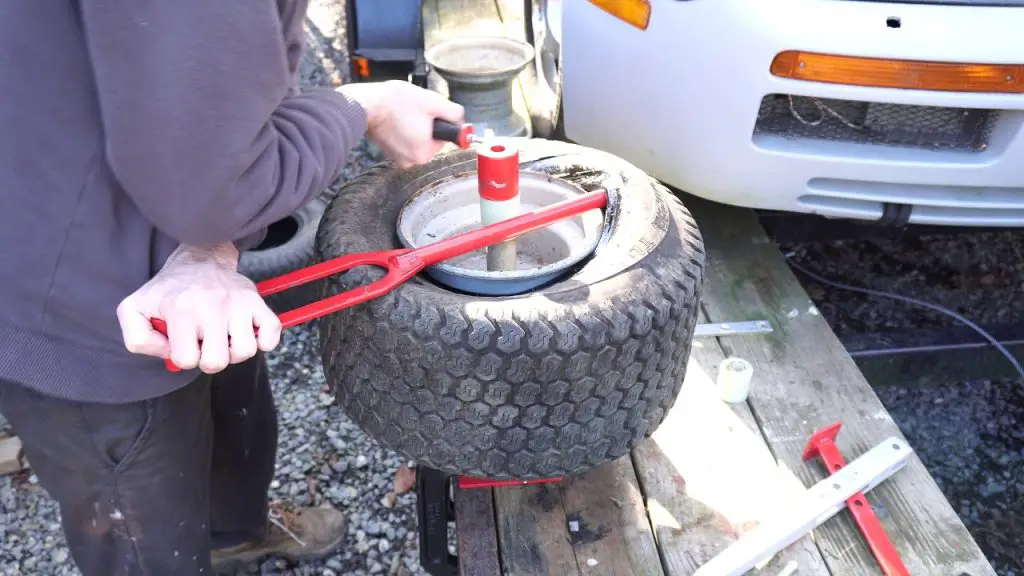 Remove a damaged tire from the rim by prying the tire over the rim with blade screwdrivers. Obtain a suitable replacement tire if necessary from a mower repair shop or hardware store.
Install the replacement tire onto the wheel by working the tire over the rim with the blade screwdrivers. Apply tire seal along the edge of the rim where the tire will seat.
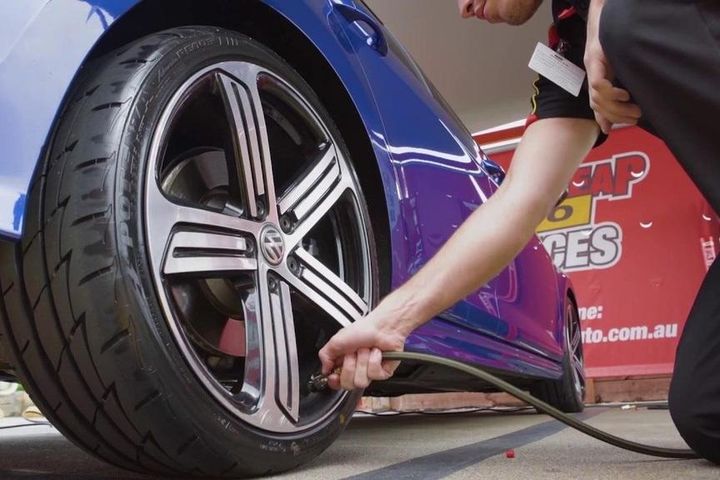
Place a ratchet strap around the tire and pull down until snug, instructs Random Knowledge Guy. Apply enough pressure to the tire with the strap to force the sides of the tire down firmly against the wheel. Use a tire pump to inflate the tire partially and force the sides of the tire to seat against the rim.
Loosen the ratchet strap a little and add more air. Continue to loosen the strap and add air until you are sure the tire is securely seated on the wheel. Remove the strap, and then fill the tire completely with air. Use a tire pressure gauge to check the pressure.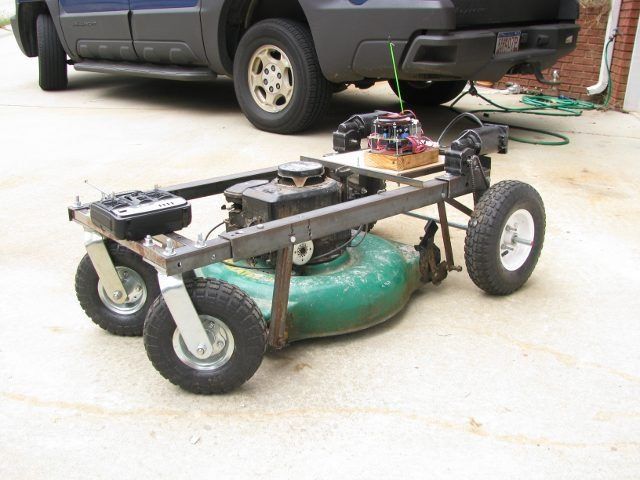 Refer to the manufacturer's recommended tire pressure; it is usually listed on the side of the tire.
Place the wheel and tire assembly back on the mower axle. Install the washer and snap ring, and then replace the plastic cap on the axle. Lower the mower with the jack to use the mower.
Gloves
Tire jack
Snap ring pliers
Blade screwdrivers
Replacement tire
Tire seal
Ratchet strap
Air pump
References
Writer Bio
Keith Dooley has done work in the field of landscaping and design for more than 10 years. He has implemented his own designs, as well as pulled from techniques learned through studies, creating many landscapes for others to enjoy.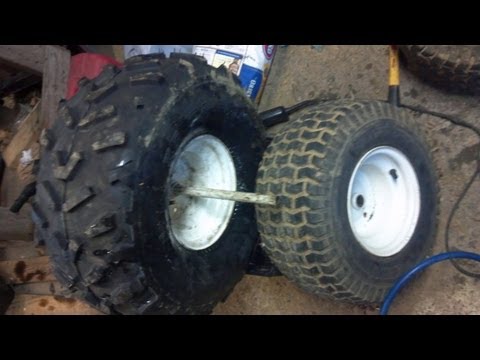 He has also maintained lawns, athletic fields, town parks, large gardens and game fields.
Mowing the grass in the countryside helps to give the area a well-groomed and pleasant look. But constantly doing this with a hand scythe is very inconvenient, not to mention a serious waste of time and effort. But it is not always possible to buy a lawn mower. Then you can do it yourself. Let's try to understand the intricacies and features of this process.
To make a lawnmower, you will need a parts list on hand. The main engine will be from any device that is not used for some reason. Motors from small devices are unlikely to withstand the heavy loads that inevitably arise when mowing grass.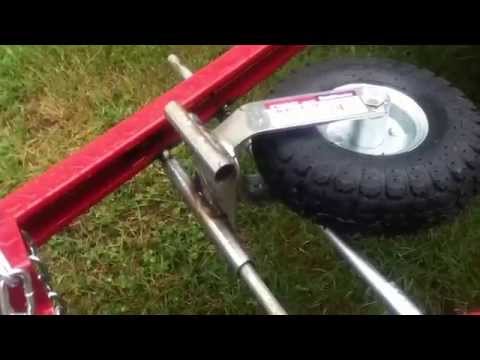 They overheat and break too quickly. And there is no point in repairing them. They often try to use the vacuum cleaner motors, but they definitely can't handle it.
The next item you will need is a knife. It must be made of strong and as thick steel as possible. There may be several. This self-sharpening disc may also work. This is the simplest and most durable option.
As for the lawn mower handle, you can take it from an unwanted car or an old stroller. In addition, we need a metal frame on which all elements of the device will be installed. It is important that there are no signs of corrosion on it and that all parts are not damaged or damaged.
You will also need a power cord, preferably a more authentic one, to build the lawnmower. But this is if we are interested in a home electric mower. You will also need small diameter wheels. To freely move the self-propelled mower around the site, it is enough to have wheels with a radius of at least 10 centimeters.
You will also need a special protective cover that is attached around the burners. It can be made from sheet metal or choose the size of the finished solution. You will also need a protective cover to ensure the safety of the person operating the mower. In addition, it will save the incisors from stones. Other parts may be added to the mower, depending on the design features required. For example, the grass collector will not leave the grass on the territory, but will collect it in a special container. Can be:
Fabric solutions are very compact and light, but need washing from time to time. When the cells start to clog the grate, a certain air overload is created, which can cause the motor to overheat.
Plastic counterparts are made using high quality materials. If a foreign object accidentally gets into them, this will not interfere with the operation of the device. The plastic container is easy to clean.
Combined solutions are usually supplied with expensive mower models. , due to the fact that they have the benefits of both container categories.
So, before you start assembling the lawn mower, have the following items on hand:
In addition, An important preparatory step will be the creation of drawings and diagrams of the future design . This will help keep all future design elements in the correct position and create the right frame that can support the weight of all elements and look beautiful from an aesthetic point of view.
Now let's talk about the process of creating a lawn mower from different devices and how to assemble it yourself.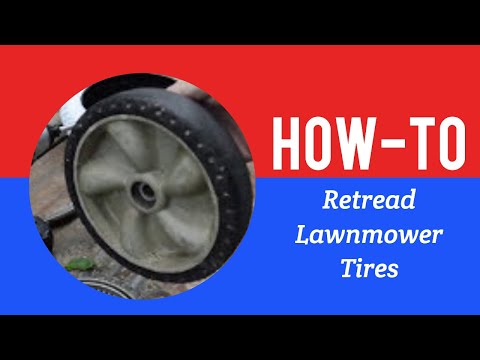 First you need to form a metal frame from a sheet 2-3 cm thick. It is cut off, after which holes are made in it under the motor shaft.
The next step is to select and install the engine. It is very important to choose it based on the length of the installed knives. When it's done, you need to make the knives and then attach them to the device.
The next step is to install the mower's protective cover, which is a metal strip rolled into a ring and a frame for the knives. The next step is the selection and subsequent installation of mowing wheels. Then you need to pick up and install handles.
The final step is to install the elements of the lawn mower power system.
To create a lawn mower from an old washing machine, will need:
If the mower is made from a car engine, then it is better to take a model with a power of 170-190 W, equipped with a start relay with a capacitor. You also need to pick up wheels.
Knives must be made of steel 2 or 3 mm thick and up to half a meter long. The cutting part is slightly curved, which helps to protect the shaft from various objects falling into it. The handle is created from a tube so that the device can be comfortably held. It is attached to the frame by welding.
Sheets are made on the chassis of the trolley previously installed. Then a hole is made for the motor shaft. A steel grill is installed at the front as protection. The upper and lower parts are fastened with bolts to which the wire is attached.
The grill of the device allows you to create a gap for the knife. The motor is mounted so that the shaft goes into the hole. He has a sharper knife than before, and a hole is made in the middle.
The knife must be balanced and in the center. The motor is covered with a cover for protection. Considering that it must be cooled during operation, the case must also have holes. It is connected to the wiring attached to the case. To avoid electric shock, the metal handle must be wrapped with a rubber cap.
Making a good lawn mower is easy if you use a regular grinder. The body of the device is made of a car disk. It needs to be cut into a couple of pieces. The cover is welded to one of them. A hole is made in the part where the front of the mower will be located. The handle and wheels are attached to the body. Holes are made in the body. The device is bolted to the body. Also, the knife must be made of steel. Its edges should be well sharpened and installed like a screw.
The knife is attached to the Bulgarian shaft and then tightened with a nut. At the last stage, it is tightened with a screw installed in the nut. The switch on the device is fixed bAL-KOy. We place the switch and plug on the handle so that it is easy to attach an extension cord to it.
Another way to create a lawn mower is to transform the vacuum cleaner. First make a cutter. If possible, use polymer thread. It must be attached to a steel segment with a hole in the middle. Now the knife is made from a saw. By the way, if the steel is very hard, it should be softened.
The workpiece must now be very hot and then allowed to cool. When a knife is made, it needs to be heated up and cooled down very quickly. The length of the torch should be up to half a meter. The cutting part is usually sharpened at an angle of 60 degrees. The edges are made along the edges of the knife. The rough hole must have maximum accuracy because the cutters will need to be balanced in the future.
All parts of the structure must be fixed as best as possible. To prevent accidental deformation of the knife after hitting the stones, it must first be made.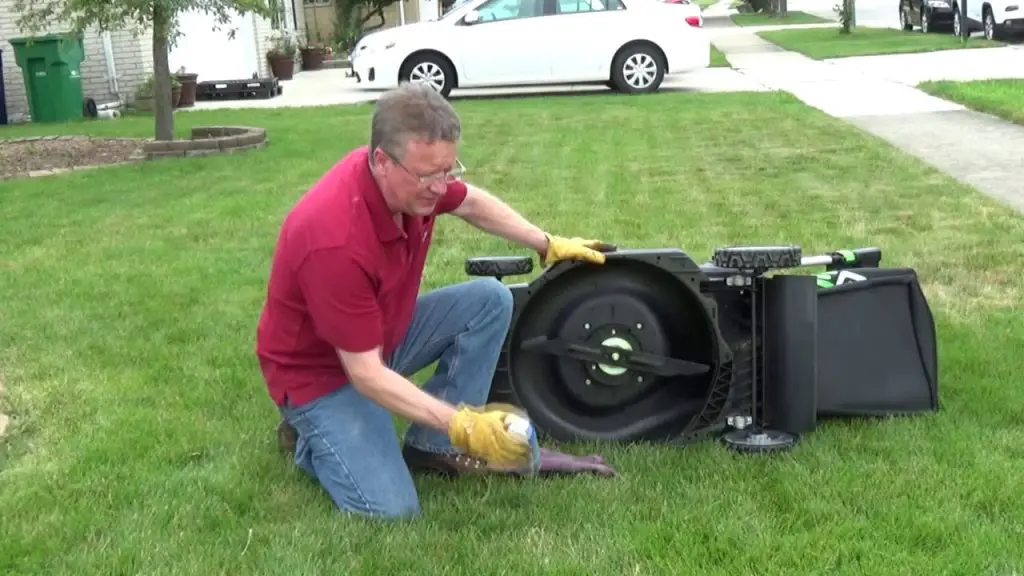 The steel blades must be bolted to the center of the base on both sides. When hit, the knife will only twist, and the risk of damage will be minimal.
There is a hole in the plate to accommodate the motor. It is placed in the groove and clamped with a steel strip, then installed through the groove and secured with screws. The part where the turbine is located is removed from the engine. There is a cutting element.
The turbine is removed from the back and a tin fan is installed instead. A tin cover is attached to the hob to protect the engine. You can use the cover of a vacuum cleaner from which the motor has been removed. Circuit boards with motor mounted on chassis with wheels. In the last step, the handle must be attached to the device using the brackets on which the switch is mounted. Now there is a cable connection to the motor and button. In the end, they must be isolated and the system works.
The electric mower is also made from a conventional drill.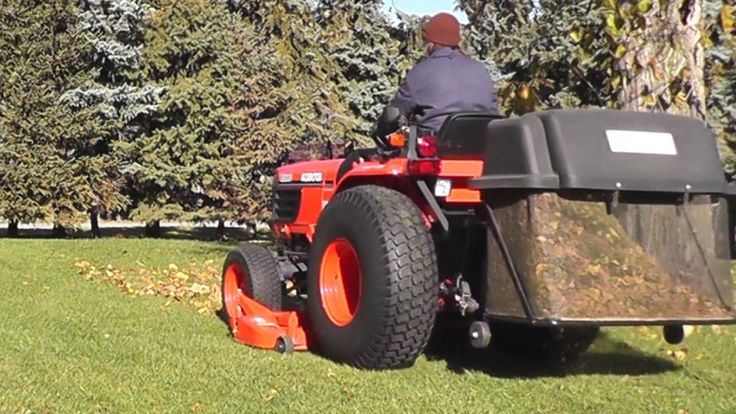 Its main components must be made on lathes and milling machines. But first you need to make a reference element from a sheet of steel.
The base will be fixed with a clamp. 6 longitudinal cuts are made in the shaft. The screed should have maximum density. At the end of the flange, 8 holes are made for the base plate type. Made from 3mm steel sheet. It's a lawnmower handle.
This makes 8 holes for the base. Half of them will be needed to connect to the guide. 3 - for attachment to the cutting plate. You should also make a steel clown with a 4mm gap.
You must make a hole for the lathe on the lathe. The stock is made of rods with a diameter of 10 mm. Pin and shaft made of hardened and ground steel. The axis is placed in the earring, and the pin is placed at the end of the rod.
The 5 cm long guide is now made of steel. Other holes made for mounting. After that, you need to prepare the drawings of the burner and combs. After that, they are applied to cardboard and cut to obtain a template. Then it is transferred to the metal and processed. Now we punch holes for guides and fasteners, after which the metal is extinguished. It remains to sand the surface a little and assemble everything.
You can turn a chainsaw into a mower. We take the motor to put it on the cart. It is made according to the type of frame from the corners of the profile 2.5 by 2.5 centimeters. Its dimensions will be from 50 to 60 centimeters. The wheels are set at the corners. You should also install the steering wheel and tire.
Height adjustable handle made of pipe. Steering wheel, hose and cable attached to it. The engine is now bolted to the frame. The tire is fixed with a hole in the gearbox. Mounting covers are located below. This is the future foundation of the mower. Now it remains to install the knives by welding. This is done on a dust star behind a pre-installed pipe section.
Certain precautions must be observed when using this equipment in a domestic environment. There are two main hazards:
Therefore, the mower can only be inspected after it has been switched off, and before using the appliance, make sure that all electrical connection points are well insulated. In addition, it is not superfluous to collect all debris on a level area where work is planned, so that it does not damage the device and does not injure the person who will use it. Also, don't ignore the handcrafted working lawn mower.
Watch how to make your own lawn mower in this video.
Source
The process of commissioning a lawn mower, whether you bought it now or got it after winter storage, the rules listed below will allow you to avoid basic mistakes that can damage the tool.
Let's assume that you have just bought a petrol trimmer. Take the instructions out of the box and see if you have all the parts of the lawn mower that are listed. After that, you can start assembling.
For the convenience of preparing the fuel mixture, it is better to have a special canister, where one part contains gasoline and the other 2-stroke oil. We recommend getting one, it is very convenient to use https://ru-sad.ru/prinadlezhnosti-dlya-sadovoy-tehniki/dlya-benzopil/kanistryi/
help you to prepare the mixture as accurately and quickly as possible. Look in the instructions for which brand of gasoline and 2-stroke oil https://ru-sad.ru/prinadlezhnosti-dlya-sadovoy-tehniki/masla-i-smazki/ are recommended by the manufacturer of your lawn mower model. Pour gasoline and oil into the container for preparing the fuel mixture, according to the proportions indicated in the instructions. Then carefully pour the finished mixture through a funnel into the fuel tank of the trimmer. The ratio of gasoline and oil should be exactly as indicated in the instructions.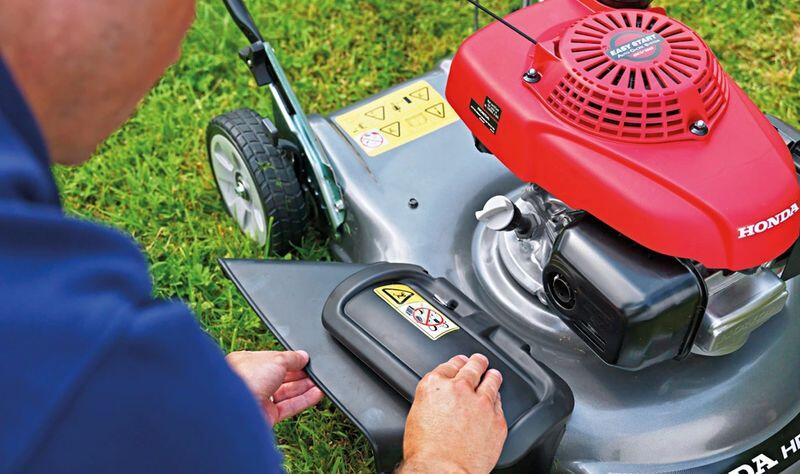 This is a very important point!
To start the brushcutter for the first time, locate the choke lever and set it to the closed position. Turn on the ignition on the handle. If your model has a manual fuel pump, popularly called a suction pump, then press it 3-5 times until you see the fuel mixture inside the primer. The tool is now ready to run. Place the trimmer on a flat surface to ensure a stable position. Gently pull the starter rope until you feel resistance, and then pull the cord towards you 3-5 times with a sharp movement.
If the engine starts after 5 pulls, open the choke. If this does not happen, open the choke anyway (if the choke is open and you continue to try to start the engine, the fuel will fill the spark plug and you will have to dry it, and this is an extra waste of time).
If the engine does not start, with the throttle open, then close it and continue to pull the cord. The first launch can be quite difficult and require up to 15 jerks.

(87).jpg)