Delivery options and delivery speeds may vary for different locations
Sign In
or enter a zip code
Email * Password *
REPAIR & HOW TO
MAINTENANCE
TROUBLESHOOTING
GUIDES
TIPS & TRICKS
ALL ARTICLES WATCH VIDEOS ABOUT US SHOP PARTS CONTACT US
If you’ve already replaced the clutch drive belt on your Polaris ATV but you’re still experiencing performance issues, you may have a bigger problem inside the clutch.
Clutch problems might create the need to rebuild the entire clutch system. Watch the video above and follow the steps below for part one of this three-part Polaris Sportsman 850 clutch rebuild series to learn how to remove the primary clutch and secondary clutch.
NOTE: The primary clutch is also referred to as the drive clutch and the secondary clutch as the driven clutch.
How to Remove Polaris ATV ClutchStep 1. Put the ATV on jacks, and remove both rear wheels to make reaching all of the bolts easier.
Step 2. Remove the 15mm bolts holding the frame brace in place, followed by the frame brace itself.
Step 3. Remove the eleven 10mm bolts holding the clutch cover in place, then pull off the cover itself.
Step 4. Remove the clutch drive belt.
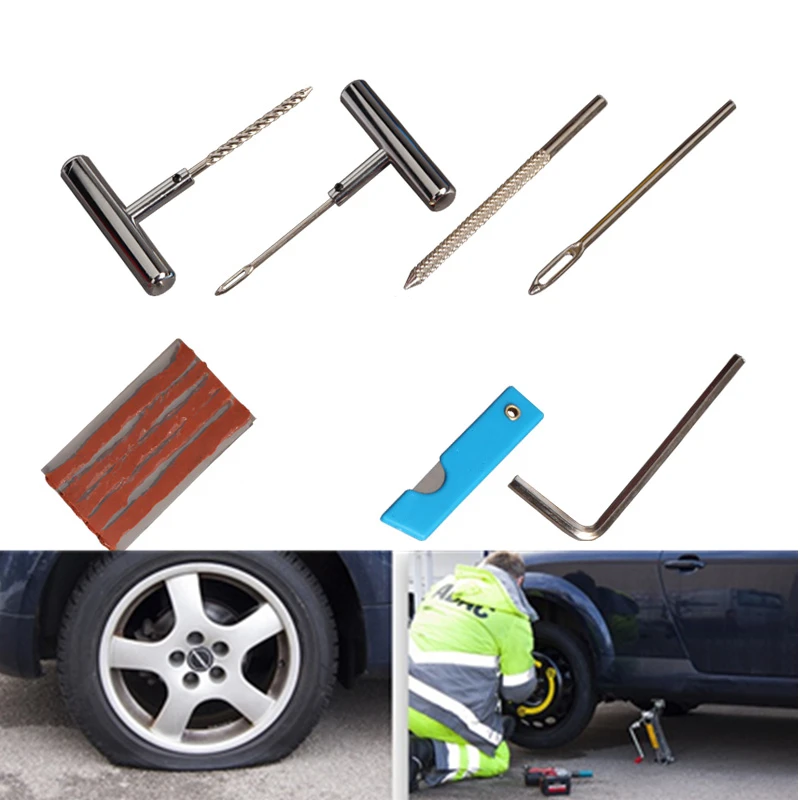
There are two methods for removing the clutch drive belt on your Polaris ATV:
Method 1:
Watch the clip below to see the first method of removing the clutch drive belt on a Polaris Sportsman 850 ATV.
Method 2:
Watch the clip below to see the second method of removing the clutch drive belt on a Polaris Sportsman 850 ATV.
How to Remove the Driven (Secondary) Clutch on a Polaris ATVStep 1. Remove the 15mm bolt at the center of the driven clutch.
NOTE: There are two washers on the bolt: one on the inside and one on the outside. Don’t lose these washers.
Step 2. Slide the driven clutch off the shaft.
How to Remove the Drive (Primary) Clutch on a Polaris ATVStep 1. Use an 18mm socket to loosen the bolt in the center of the clutch, turning it clockwise. Wedge a drive extension in to hold the clutch in place while you loosen and remove the bolt.
Step 2. Insert a primary clutch drive puller into the opening for the 18mm bolt that was just removed, then bottom it out. Use a 22mm socket and drive to turn it clockwise to break the clutch loose from the shaft.
Step 3. Remove the drive puller so the clutch can slide right off.
With the drive and driven clutch removed, you’re ready to begin the process of rebuilding the clutch. Continue watching our Polaris Sportsman 850 clutch rebuild video below to move forward to the next phase: disassembling the clutch and replacing it with new components.
body
Length: 22:54
Created: May 27, 2021
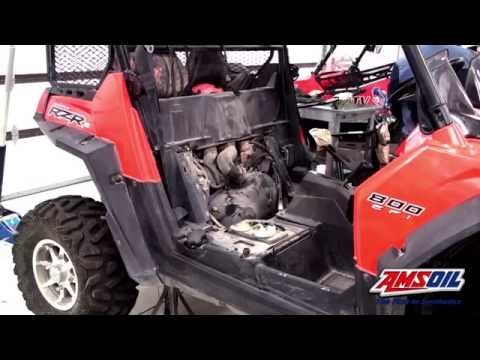
What’s up, guys? Are you looking for better engagement and better belt life on your Polaris RZR Trail S 1000? SuperATV has you covered with our REV1 Clutch Kit, and today we’re going to show you how to get one installed.
Remove the Belt Cover[00:46] First, remove the belt cover. Loosen the clamp here and remove all of the clutch cover bolts.
Once you have all your hardware removed from the clutch cover, remove the cover from the machine. When doing this, you will have to pull it out sideways a little bit and rotate it up. Give it a few wiggles. Just have to find that sweet spot where it’ll clear the primary clutch.
Disconnect the Belt[01:56] Remove both the primary as well as the secondary clutch and disconnect the belt.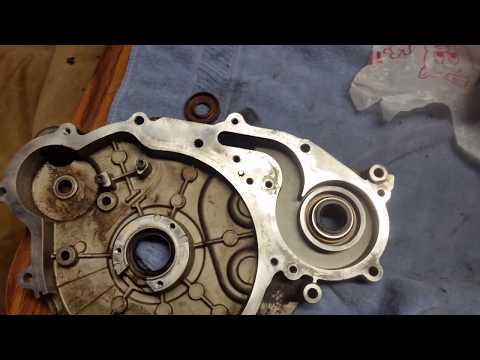
In your factory tool kit, notice that you have this specialty wrench. On one side, it’s a shock wrench; on the opposite side, it’s the clutch tool. Take this clutch tool and slide it right here in either of these openings. Use the side with the little hook on it. Slide it in here like this, angle it, and then pry it.
If that’s too difficult for you or if you don’t have a factory shock tool or clutch tool in your tool kit, get a long pry bar. It works exactly the same. Slide it right in here and pry it down. That’s going to open the clutch up even further than what the factory tool can do (I prefer using the pry bar to be honest).
Once we have it opened up, the belt’s good and loose. Now, grab the belt and pull out on it and rotate it around the clutch.
Do not stick your fingers in either of these holes and don’t get them in between the sheaves. As soon as that belt is off of the clutch, it’s going to close back up. If your finger’s in there, it’s not going to be good.
I advise against reusing the belt you removed from the machine, especially if it has any kind of wear and tear.
This belt is not a perfect circle anymore. Its lost its form. Usually, whenever a belt does that, it’s got an issue. It may be hourglassed or it may be a worn-out old belt—but look around here, and if you see any wear at all, you might as well change it.
Sometimes the cogs get knocked off the belt. You’ll be able to see if you’ve slipped the belt. See if it’s gotten hot or if it’s glazed. If it’s glazed, that’s why it’s slipping.
Since we’re putting a clutch kit on, we’re going to upgrade to SuperATV’s World’s Best Belt today.
Remove the Secondary Clutch Hardware[04:19] Use a 15mm socket to remove the secondary clutch hardware. Then, we’ll use an 18mm socket on the primary clutch hardware, as well as a clutch puller tool, which you can purchase at SuperATV.com.
Once you’ve removed the hardware, give the clutch a good pull. It’ll slide right out no problem. Remove the bolt and grab the clutch puller.
Slide it right into the clutch and thread it all the way in until it bottoms out. When it bottoms out, do a half turn back and grab a 27mm socket on a half-inch drive impact. That’s what I’ve found works the best.
[05:24] Hammer this thing home. It’s going to pop that clutch off. Just hit it with that half-inch drive impact—popped it right off. Now with both the primary clutch and secondary clutch removed from the machine, we’re going to show you how to disassemble them.
Disassemble the Clutches[05:59] So, at this point, we’ve got the primary and the secondary clutch. We also have everything that we need out of the kit. But one of the most important things to this installation is having this clutch compressor tool. You can pick this up at SuperATV.com.
Start with the secondary. Grab it, line it up, slide it right down, and then grab this little piece. Just slide it right down.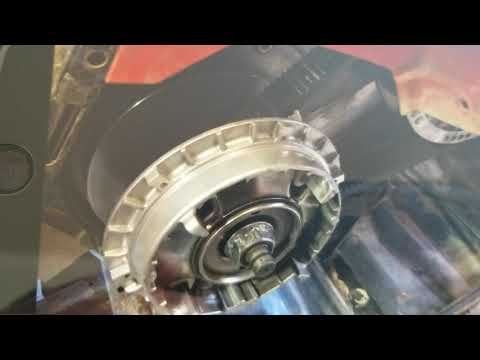 Notice that you have two nuts in the kit. One secures the stud, and then one is gonna hold tension here and also compress it.
[06:52] Once you’ve got the nut ran all the way down, grab the handle and slide it down. Line it up with the nut and put a little bit of tension on the helix. This component here is called the helix.
Remove all four of these T25s.
Once you have the nut tight, go ahead and remove the handle and remove all of the screws.
Whenever removing these T25 screws, I highly recommend that you use an impact, and you’re definitely going to want to use a T25 socket. Use something short like what we have. Put as much pressure down as you possibly can because it’s easy to strip these out.
[07:39] If you’re having issues, get a propane torch (something handheld) and gently heat around this screw.
Before you remove the helix, make a mark on it and on the back portion of the sheath. Take the handle and remove the nut, and then raise this helix up off of here.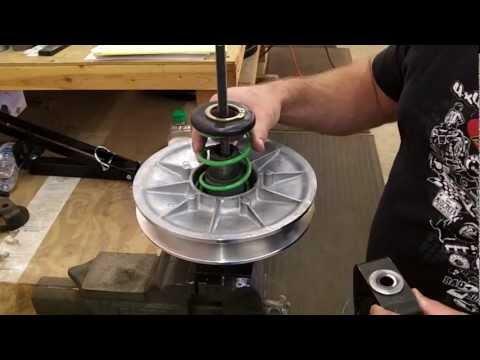
Remove the nut from the all thread. Remove this portion of the compressor. Grab the helix, pick it straight up, and set it aside. Grab the rollers and move those to the side as well. Pick the spring up to the side.
Clean the Clutch[09:01] Once you’ve got everything removed from the secondary clutch, it’s a good time to do a little cleaning. I like to use brake clean because it dries quickly. You definitely never want to have any kind of liquid or oil (or anything of that nature) in the clutches. That’s gonna cause them to slip, make the belt slip, and cause all kinds of problems.
Wipe this down and get any kind of excess off. This machine’s pretty new, so it doesn’t have a lot of build-up, but if you have an older machine, it absolutely will.
Take a piece of red Scotch-Brite and lightly sand the sheathes here. There’s no right or wrong way—you want to get a good scuff on it, which is going to help the belt grab.
If there is any rubber or anything built up on the shoes, sand that off with the red Scotch-Brite.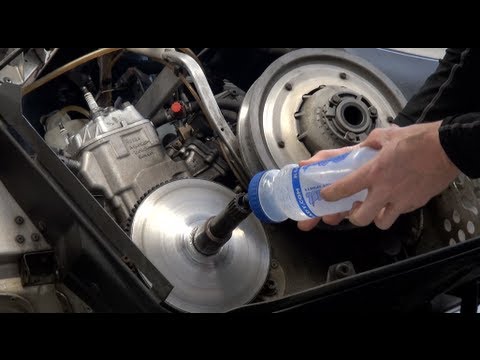 Ensure that you use red Scotch-Brite—you don’t want to use sandpaper or anything of that nature.
Grab the secondary purple spring and slide it right down inside the secondary into the groove.
Reinstall the rollers and take the helix and slide it back on. Grab the compressor and set it on the helix. Then, reinstall the nut. Grab the handle and compress the helix down to where the mark and holes line up.
Clean and reinstall the hardware. Apply blue Loctite to each of the screws before you reinstall them.
Once you start to get close, you’ll notice it’s a pain to keep all the holes lined up. Get two holes lined up first, put the hardware in, and continue tightening. Then start all the hardware and fully tighten.
[11:58] Once the secondary clutch is all buttoned up, it’s good to go. Remove it from the compressor. Get the primary and do the same exact thing. Slide it on, take the compressor tool just like you did on the secondary, run the nut down, and put some tension on it.
Put a couple of turns on the primary clutch to put some tension on it. Put some marks on your clutch if there aren’t any. If it lines up, the clutch is still balanced.
Take a 10mm socket and remove all the hardware. Remove all the tension off the spring by loosening the compressor.
[13:43] Next, remove the lid and set it aside. Remove the spring and install the new spring as well as the new arms.
Grab a 1/8” Allen as well as a 10mm socket and remove all of the clutch arms by removing the hardware. Put the Allen wrench here on this side. Then you can use a ratchet or impact—it doesn’t matter when removing the hardware.
Take the arm bolt, slide it out, and then reach up in here. Pull the arm straight out and then discard it. Put the clutch arms back in or put the clutch hardware back in the factory arms and set it aside if you need it again.
[14:30] Once you have the clutch arm bolts removed, take a piece of 120 grit sandpaper and sand out the holes. Roll it up about the same size as what the bolt would be, stick it in the hole, and run it in and out the best that you can.
Get the residue off of there. It doesn’t have to be perfect. That’s going to make this clutch function perfectly for a longer period of time. Do that for each of the holes and then take a little shot of brake clean and clean it out.
Do the same thing that you did with secondary. Get a piece of Scotch-Brite, lift the shoes apart, and sand them down really good. Get any of that residue off of there. There’s no right or wrong way. Make sure they’re clean and they’re roughed up a little bit. Only use red Scotch-Brite. Don’t use sandpaper or anything like that.
Once you’ve cleaned around the whole sheath, get your brake clean and a rag.
Wipe the clutch down and install the arms and springs.
Install the Arms and Springs[15:43] Take the clutch arms out of the kit, as well as the clutch arm bolts and nylock nuts.
On the clutch, you have two different locations.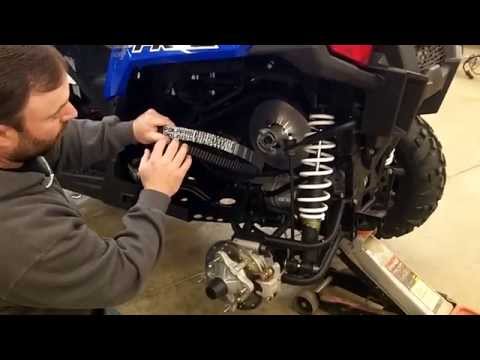 You can have a flat spot, which is where the head of the Allen-headed screw needs to go. Then the nut will go on the side that’s recessed.
Take the arm, and slide it back into the factory location. Take the hardware, slide it through, and get the nut started. Do the exact same thing for the rest of the arms.
[16:40] Tighten the clutch arm bolts. Utilize the same tools that you did on the factory hardware: the 1/8” Allen as well as the 10mm socket.
Use a ratchet when tightening the nut. Don’t use an impact. If it gets over-tightened, it can actually crush the casting, and then the arms aren’t going to move as they should.
Fully tighten the hardware. Now, there’s not a lot of movement side to side. That is not what you want. Tighten it all the way and don’t crank it down. Run it up to where the nut touches and then back it off about a quarter turn.
We have a little bit of side-to-side play. Make sure that the arm moves freely and that it’s not spinning the hardware whenever you’re moving the arm up and down.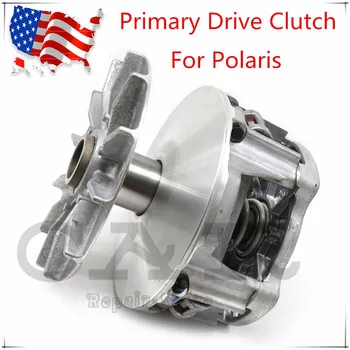
[17:50] The reason that we leave a little bit of play here on the hardware is that if any dust builds up inside of the holes where the hardware is going through, it’ll work it out. That way, it won’t freeze the bolt or the arm up, so then the clutch won’t have any issues.
Take the primary spring and slide it right down where you removed the factory spring from, and then take the lid and slide it right down. Make sure that you line up the marks that you made.
Put the clutch compressor tool and the nut on. Then line up the holes and reinstall the factory hardware. Get all of them started before you tighten any of them. Tighten them in an X pattern. Get them all tight and then remove the compressor.
[19:47] Now that we have the clutch kit installed to both of the clutches, it’s time to get them reinstalled in the machine.
Grab the primary clutch first. Install this and torque it to 96 foot-pounds. Make sure it slides on the crankshaft. Take the bolt and slide it back in the clutch. Get it started, take an impact, and run the bolt all the way in before you torque it.
Do the same thing for the secondary. The secondary sometimes can be a little bit of a pain to get installed because it’s double splined. Get the secondary lined up and install the bolt. Before you install the bolt, put a little blue Loctite on it.
Torque to Factory Specs[20:59] Torque to 40 foot-pounds on the secondary clutch and 96-foot pounds on the primary clutch (the factory specs). Then install the SuperATV World’s Best Belt, which you can pick one up from SuperATV.com.
Install the Belt[21:14] When installing this belt, make sure that you can read the writing on it. Other than that, it doesn’t matter which direction you put it on.
Slide it on the primary clutch and get it started on the secondary clutch. I like to get it rotated as far as I can. Take the clutch tool and put it in here. Pry the clutch apart, and as we’re doing that, rotate it.
Just continue working that belt and spin it until the belt rides all the way up. Next, you’re gonna reinstall the clutch cover, the vent tube, and all the hardware.
How to get Your Rev1 Clutch Kit[22:29] So that’s all there is to install SuperATV’s Rev1 Clutch Kit on this Polaris RZR Trail S 1000. To get your Rev1 Clutch Kit, head to our website. Drop a like, comment, and subscribe. Keep the rubber side down, and we’ll catch you next time.
Most recently, the American company Polaris introduced the Sportsman XP 1000 sports utility all-terrain vehicle. When it was created, the engineers gave everything 100%: they worked out the design, handling and maneuverability, took care of a lot of additional chips. Despite the rather impressive weight, the all-terrain vehicle easily accelerated and overcame difficult obstacles. Soft suspension, powerful engine and reliable shock absorbers allowed him to drive through impassable roads and swamps.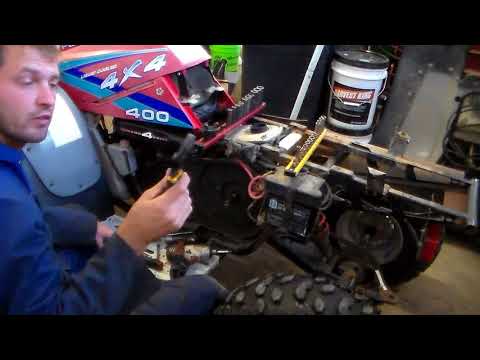 But this was not enough for the developers - they set out to create an ATV that would overcome any dirt. That is how the new Polaris Sportsman XP1000 High Lifter Edition was born. nine0003
| ENGINE | 952cc cm, turbo, 85 hp with. |
| CLEARANCE | 34.3 cm |
| TIRES | 29.5″ x 9.5″ Outlaw 2 |
| Dimensions | 224 x 127 x 128 cm |
To create the updated Athlete, Polaris teamed up with High Lifter, a company that has been successfully turning ATVs into mud conquerors for over 20 years. Key features of the updated version of the ATV:
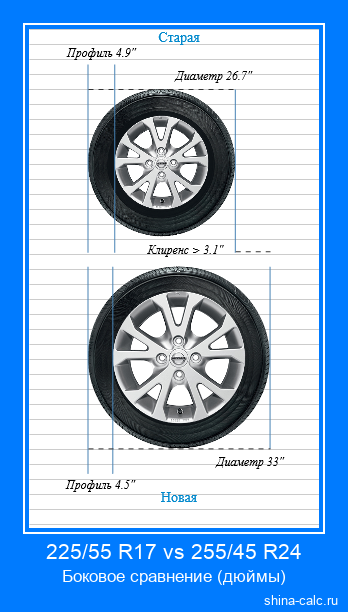
29.5x9.5” High Lifter Outlaw II tires and 14” rims. For comparison, on the standard modification of the Sportsman, presented in 2017, there were wheels measuring 26-27 inches.
ProStar Twin Cylinder 952cc Engine cm and a capacity of 85 liters.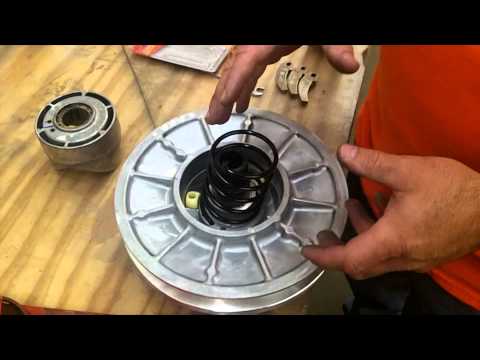 with. The motor is taken from the basic version of the Sportsman, but reconfigured for driving through swamps, puddles and mud. Of the main changes: the engine does not have the Action Descent Control system that controls the descent. nine0003
Additional water protection for air intake and belt.
Standard all wheel drive . This component was completely borrowed from the basic version of the Athlete. Since the system works on a 1:1 basis, the rear wheels of the machine do not lose traction before the front tires lock up and spin.
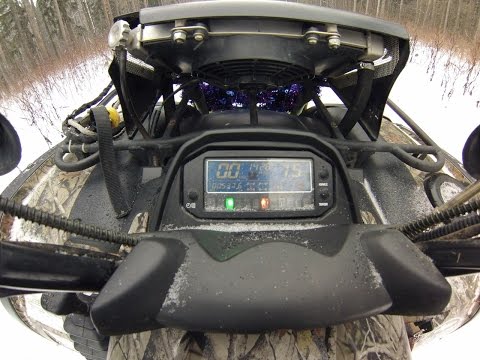
Clutch vents and air filters are located above the handlebars. This is necessary to protect the elements from moisture. The developers also raised the radiator, now it is in place of the front trunk. nine0003
Cooling fans reversed. This facilitates access to the radiator and allows you to clean it at any time.
Although all of the Sportsman's electronics were well protected from moisture, the engineers decided to move the fuse box higher. Now it is located near the radiator, which makes it easier to maintain.
One of the most interesting features of the XP 1000 Sportsman is the handrail above the handlebars. It is used as a lever when the ATV needs to be pulled out of the mud. Engineers paid attention even to such trifles as the steps - they have holes in them that allow you to get rid of water.
Unique A-arms provide maximum ground clearance even on rough terrain. Engineers also dug into the suspension of the apparatus. In order for the car to withstand the increased weight and sticking dirt, the developers put stiff springs that maintain the necessary ground clearance. Because the quad has new 29-inch wheels, vertical suspension travel has been reduced. Now it is 170 mm at the rear and 188 mm at the front.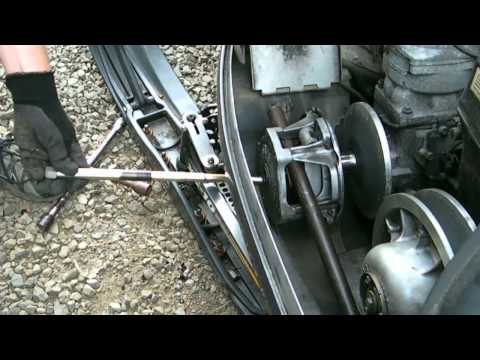
To increase the effectiveness of the rear suspension, the developers removed the anti-roll bar. The steering stops have also been upgraded. This avoided unnecessary turning of the wheels and reduced rubber friction.
Since the Polaris Sportsman XP 1000 High Lifter Edition is slightly larger than its predecessor, it has been fitted with oversized tires. Now the dimensions of the ATV are: 223.5 cm long, 124.5 cm wide, 132.1 cm high. But the key change, which ensures high cross-country ability, was an increase in ground clearance by 50 mm. The ground clearance is 34.3 cm, thanks to which the ATV can drive even on difficult off-road conditions. nine0003
All modifications have resulted in a significant increase in the weight of the ATV: the updated Polaris Sportsman XP1000 High Lifter Edition weighs 442 kg. To stop this monster, disc hydraulic brakes were installed, to activate which you should press the pedal on the right side of the device and a special lever on the steering wheel.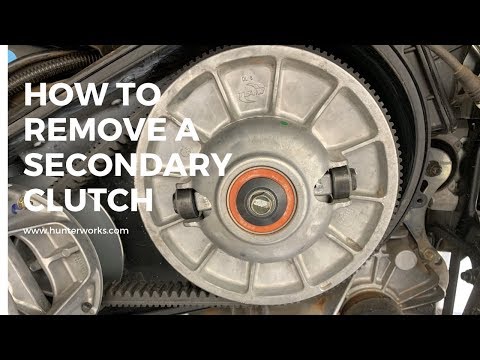
Since the XP 1000 High Lifter Edition's front rack space has been taken over by a radiator, the rider can use the 34kg rear deck to haul cargo. But do not forget that the updated ATV, like the standard model, has a trunk with a volume of 7.6 liters under the seat. Bulky and heavy loads up to 680 kg can be simply towed. To do this, a hitch is provided on the rear of the all-terrain vehicle. nine0003
Although the updated Sportsman has just hit the market, some riders have already appreciated its charms. Fans of extreme sports noted the excellent driving performance of the ATV. After modernization, the all-terrain vehicle literally breaks out of the swamp and loose mess. Thanks to a powerful engine, suspension and special rubber, it confidently keeps on wetlands, off-road, loose and wet soil, passes through deep puddles and small reservoirs. nine0003
Riders testing the Polaris Sportsman XP1000 High Lifter Edition were even able to put it on its rear wheels while traversing a muddy pond. A quadric weighing 441 kg, even in such an unusual position, easily passes through a reservoir a meter deep.
Riders also appreciated the new High Lifter Outlaw II tires. Tires provide excellent grip on both hard and soft surfaces. The ATV practically does not get stuck in the mud and does not slip. But if you put him on the "belly", the driver will have to swing or push the ATV to free him from captivity. nine0003
The Outlaw's unique tread pattern makes it perfect for muddy riding, but also performs well on the road. During a trip over rough terrain or a dirt road, there is almost no shaking, Polaris confidently keeps its course. And even the fact that the developers had to reduce the vertical travel of the suspension to install large tires did not affect the comfort of the driver or passenger. Wheels with a diameter of 29 inches practically do not notice bumps and small pits, and the suspension copes with more serious obstacles. The model is less comfortable than the basic version of the Polaris Sportsman XP 1000, but it also dampens obstacles well. nine0003
Handling is also no problem. The ATV confidently enters turns, even despite the absence of an anti-roll bar. At low speeds, the electric power steering helps with control. When riding, the rider almost does not feel the impact and vibration.
Off-road enthusiasts can now turn their ATV into a mud conqueror on their own. But modernization and components will cost a round sum. In addition, experienced engineers have already created an excellent dirt ATV with excellent flotation. Buying a Polaris Sportsman XP 1000 High Lifter Edition saves you time, effort and money. nine0003
Worn paddle valves can cause the snowmobile to start harder and the throttle less responsive to commands. If the two-stroke snowmobile has more than 2,000 miles, the valves may need to be repaired or replaced. Replacing reed valves yourself may seem like a very difficult task at first, but, in fact, everything is not so scary - just follow the step-by-step instructions.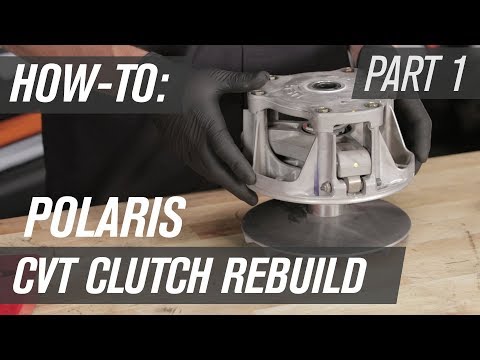 nine0003
Remove the panels on both sides and set them aside, then remove the two screws that secure the hood to the chassis at the steering wheel lift area. Standing on the right side of the snowmobile, pull the hood forward about an inch to disengage its mounts from the body, then raise the hood so you can disconnect the cable system from the sensors. Remove the hood, then remove the plastic rivet that separates the left side of the console from the fuel tank. This will give you access to the fuel tank, which is necessary for step 6. nine0003
Step 1: Use a small screwdriver or wire cutters to remove the plastic rivet.
Use the special L-shaped tool from the tool kit to remove the drive belt. Clamp the brake lever and use a wrench or clamp to remove the bolt that secures the secondary clutch to the transfer shaft.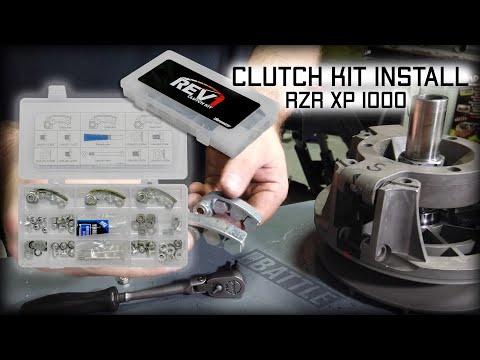 Remove the clutch and set aside, being careful not to lose the transfer shaft shims; washers sometimes stick to the coupling hub. nine0003
Step 2: Remove the screws securing the bottom nose of the left footpeg to give you enough space to pull out the secondary sleeve.
The clutch guard and oil reservoir must also be removed to gain access to the engine intake. First, remove the protective cloth that hides the wires and conductors located near the front of the oil reservoir. Locate the wire that leads from the oil level sensor in the tank to the male-female conductor; disconnect the sensor. nine0003
Step 3: The oil level sensor connector is located inside the protective fabric pouch, near the front of the clutch guard.
Disconnect the two rubber bands that connect the oil reservoir and clutch guard and remove the two bolts that hold the oil reservoir and ECU together.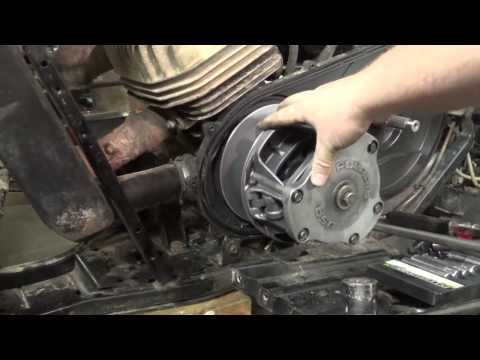 Pull out the oil reservoir and secure it with a shock-absorbing cable or cable tie. nine0003
Step 4: Before pulling out the tank, make sure that the lid is tightly closed.
Disconnect the cable system of the engine control unit and the voltage regulator, but do not disconnect them from the clutch protection yet. Loosen the nuts securing the clutch guard to the chassis, remove the clutch guard and set aside.
Step 5: It is not necessary to disconnect the power regulator (on the left, under the oil reservoir) and the engine control unit from the clutch guard. nine0110
Remove the bolt that connects the fuel filter bracket and the air box, disconnect the two pipes and wires from the fuel pump.
Step 6: Disconnect the tubing.
Grasp the end of the air box intake pipe and carefully disconnect the wires from the air pressure sensor that is connected to the intake pipe. Disconnect the pipe and set it aside. nine0003
Step 7: The three components make up the intake silencer package. This is its lower part, which is called the intake silencer.
Four latches connect the top air box to the main muffler. Disengage the clips and remove the upper air box from the chassis. Use a long screwdriver to loosen the clamps that connect the intake silencer to the throttle body. When the clamps are loosened, you can remove the muffler and get to the throttle body. nine0003
Step 8: To loosen the fasteners, you will need a screwdriver at least 30 cm long.
Use a screwdriver to loosen the clamps that secure the throttle body to the crankcase inlets. Then, gently pull the throttle body so that it is a short distance from the engine and locate the fuel pump hose - it is located between the inductor and the power take-off. Carefully detach the sleeve from the assembly, remove the assembly and secure it with a shock-absorbing cable or cable tie to gain access to the reed valves. nine0003
Step 9: The fuel pump hose has a plastic friction lug that connects it to the throttle body.
Each reed valve body is attached to the crankcase with six bolts. Use an 8mm clamp or ratchet screwdriver to loosen the bolts. Next, remove the intake assembly to get to the reed valves. nine0003
Step 10: A swivel coupler is best for loosening the intake bolts.
Take the valve in your hand, check the petals for chips and cracks. Check the elasticity - lift each petal with your fingernail and release sharply; You should hear a sharp click. If the petals are worn out, replace them with new Polaris parts. Or replace the valves entirely.