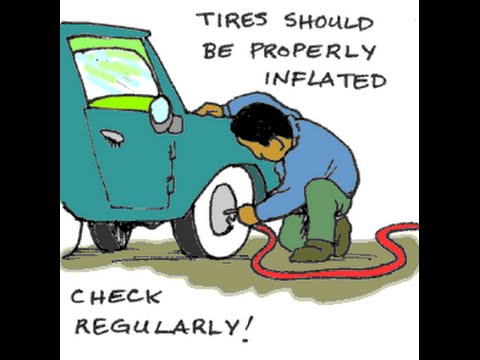
It is essential to keep your tires adequately filled with air. Underinflated tires can suffer from overheating, uneven wear and less efficiency. However, it can sometimes be inconvenient to take your flat tires to a professional. In that case, it is helpful to know how to fill a tire using an air compressor on your own.
The first step is to make sure you have the correct tools for the job. Otherwise, you won’t be able to safely and effectively fill your tire to the proper specifications. You will need several tools, including:
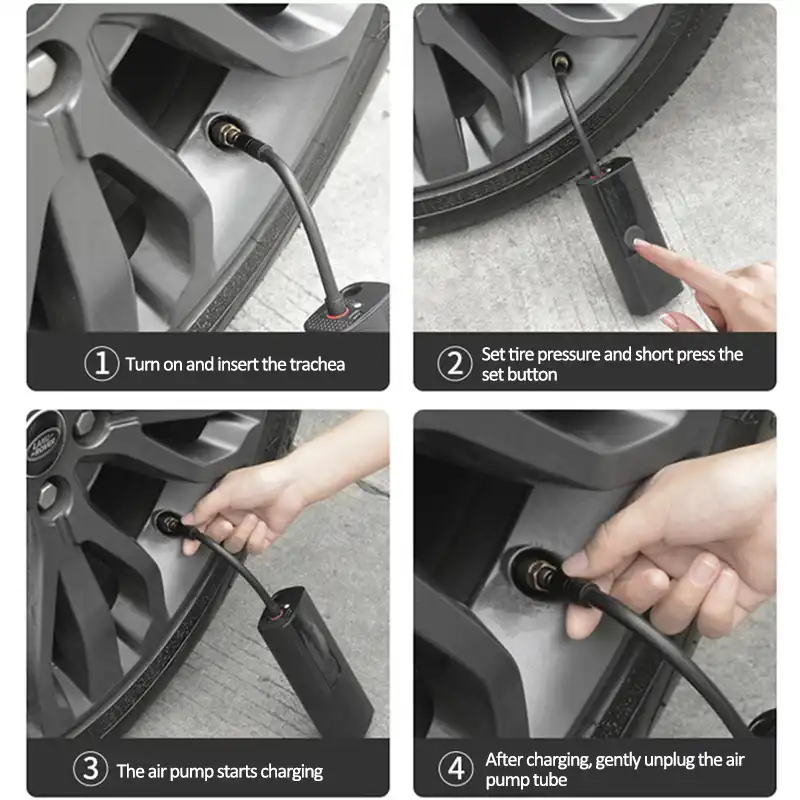
The two most common types of tires you can fill at home with an air compressor are car and bike tires. You can also use an air compressor to fill the tires of dirt bikes, lawnmowers, tractors and other equipment. Here are the basic steps for filling tires with an air compressor:
While the basic method of filling tires is the same, knowing how to fill a bike tire with an air compressor is slightly different from a car tire. There are several variations, including:
Understanding these differences is vital in knowing how to service your bike tire with an air compressor.
Air compressors can help refill tires on cars, bikes and other equipment.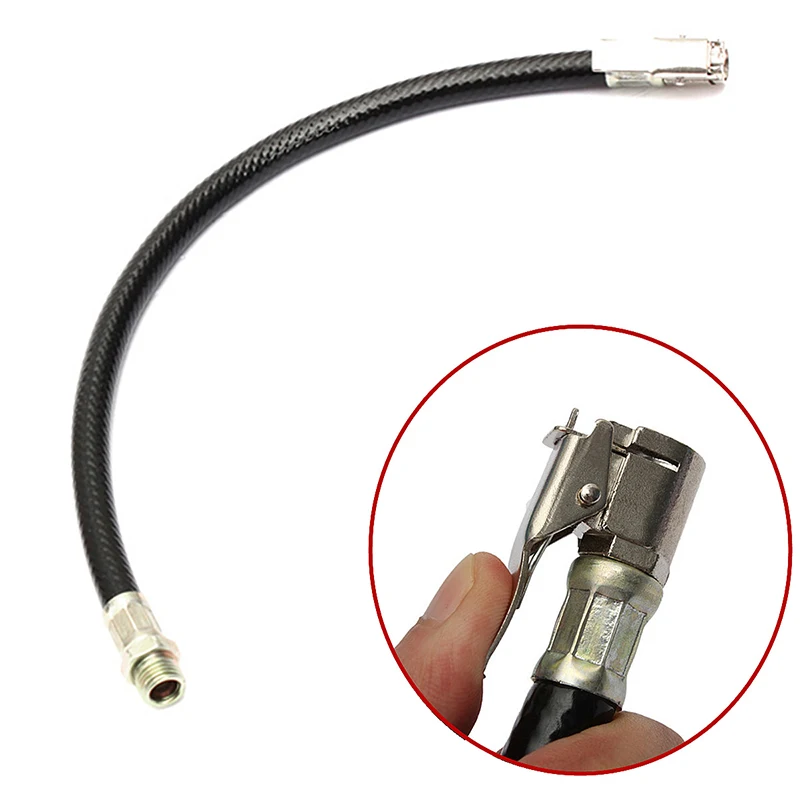 There are some differences across each tire type, but the process is mostly the same. With Quincy Compressor, you can find the perfect air compressor to fill up any of your flat tires on your own. Contact us today for more information, or explore our portable air compressor options!
Want To Share This?
You can use an air compressor to fill a bike tire much faster than you can with a manual pump, but there are a few things you have to watch out for – especially if you are trying to air up the tires of your mountain bike at the gas station.
The important thing to keep in mind when using an air compressor with your tire is to always be in control at all times.
Road bike tires, in particular, have so little volume that it’s all too easy to pump air too quickly, having disastrous results for your tube.
With the right adapter and set up, though, an air compressor will get you back on the road or trails sooner and with more energy to spare.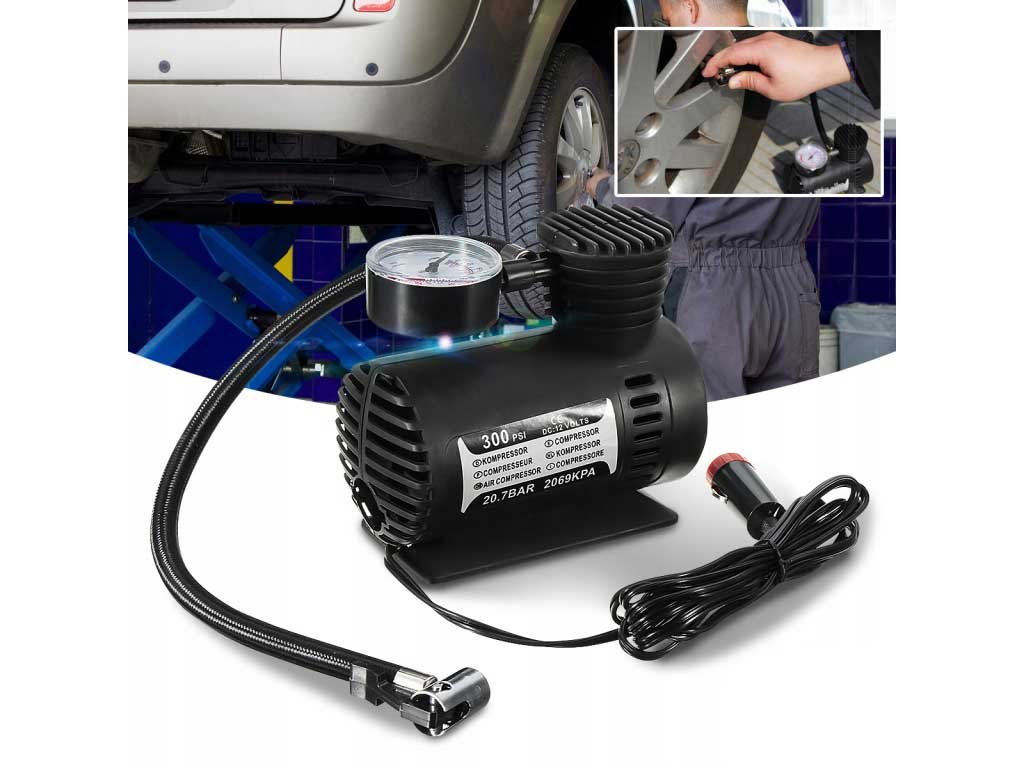
For serious bike riders, every little bit of upgrade can go a long way to improve the performance of a bike.
Lightweight components, frames, and fancy shifting equipment can have a drastic effect on how far you can take a bike – but they all hardly compare to one of the biggest improvements you can give to your bike: a set of properly inflated tires.
Proper tire pressure does so much for improving the handling and riding comfort of a bike, which makes it worth the investment of having an air compressor ready to give your tire a quick air boost before you take it out for a ride.
Proper bike tire pressure is important, but many bike owners forget a simple fact of owning a bike – tires leak air over time. There’s not a lot of air in a bike tire in the first place, so even a tiny leak can have a big effect on your bike’s performance.
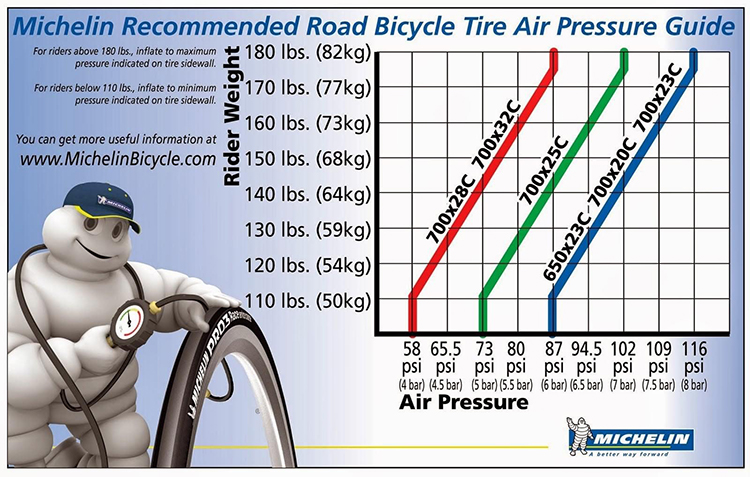
What’s more, the ideal pressure for your bike tires depends not only on the type of tires that you have but also on how much you weigh. With a bit of practice and experience, you will be able to figure the perfect tire pressure soon enough.
All bike tires leak air over time, but some types can go flat more quickly than others. If you have a pair of tubeless tires that are fairly new and properly sealed, then you may get away with checking your tire pressure a bit less often.
Bike tires that have butyl tubes are also able to keep their pressure a bit longer compared to lightweight latex tubes.
Also, if you happen to have one or more of your tires just repaired or patched for a flat, or refilled with CO2 canisters, then you may need to re-check the tire pressure the next time you try to bring it out for a ride.
Patches can have their own leaks, and CO2 leaks and seeps through the tire wall more readily than plain air, so your tires will probably need topping off sooner than you may expect.
Finally, the type of valve that your tires have will also have an effect on how quickly your tires lose air.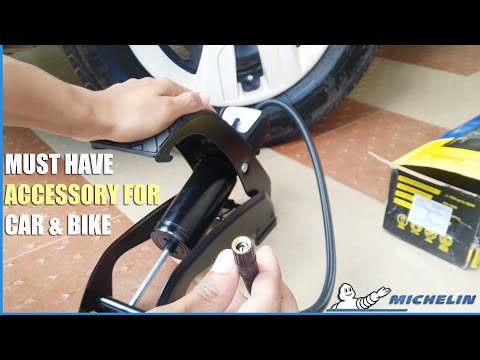
Bike tires that have Schrader valves (the ones that are the same size and shape as your car tire stem valves) tend to leak just a bit more air compared to the more slender Presta valves.
Your bike likely didn’t come with a bike tire pressure gauge, so it’s always a great idea to invest in a good digital gauge just for your bike.
Your floor pumps or your air compressor may come with their own gauges, but these gauges measure the pressure near the pump and not at the tire itself, which means they tend to be less accurate.
Next, check your bike tire’s tire pressure depending on the type of valve you have. If you have a Schrader valve, then you measure it the same way as you do with your car tire.
Unscrew and remove the valve stem cap and put it somewhere safe like in your pocket. Press the tire pressure gauge over the valve stem – if you hear a hissing noise, or you can feel air leaking out, press the gauge down harder. Wait for the indicator to stabilize, and then take your reading.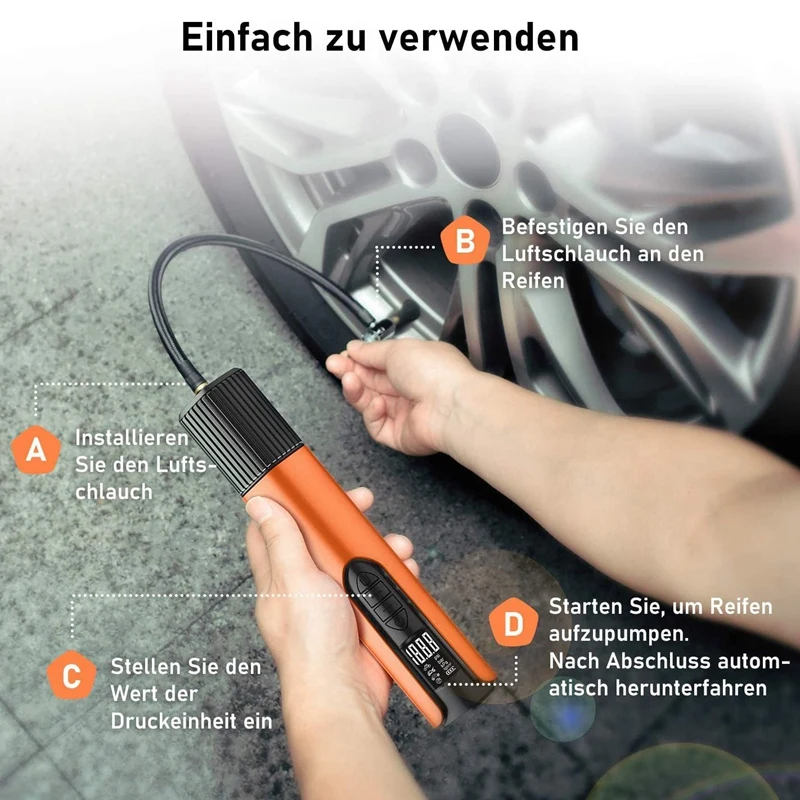
If you have Presta valves, then you will need to remove the valve covers first. Then unscrew the valve cap at the top – don’t worry about taking this part off, since the valve cap will not come off the valve stem even if you keep turning it.
Tap the end of the valve cap to test if you opened it all the way – you should sense that air is coming out when you press it. Then push the pressure gauge down on the valve all the way, until the indicator stabilizes and you can get a reading.
As a general rule, the wider the tire, the less pressure it needs to maintain its proper shape and handling characteristics.
Fat mountain bike tires need only 25 to 35 pounds per square inch or PSI. On the other end of the scale, narrow road bike tires will typically need 80 to 130 PSI. Tires designed to be somewhere in between, which are sometimes called hybrid tires, require around 40 to 70 PSI.
Check the tire wall for the maximum air pressure that the tire is designed for, and carefully note that number.
You do not want to exceed that pressure, and you may have to set up your air compressor to avoid any chance that you blow up your tires by exceeding its maximum PSI rating.
The ideal pressure for your bike tires are likely in the middle of the range they are designed for – 30 PSI for a mountain tire is a good place to start, for example. You do have to factor in your body weight, though.
A rider weighing 200 pounds may need to run their mountain tires at 32 PSI, while a lighter 165-pound rider may find that 28 PSI is already plenty. In any case, never exceed the maximum tire pressure recommended by the tire manufacturer.
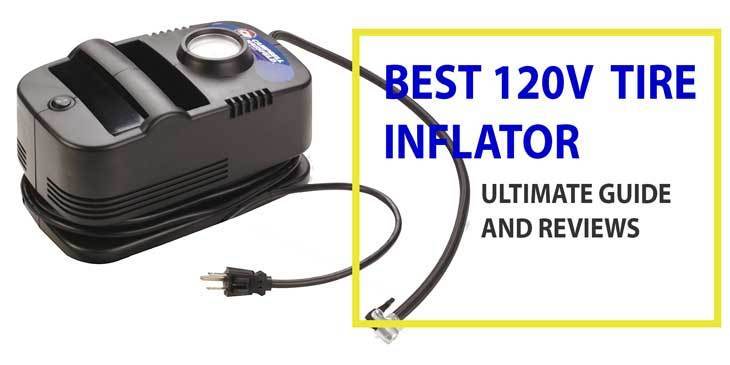
If your tires need to be aired up, then it’s time to take out the air compressor (or just roll the bike up next to your compressor unit). First, adjust the PSI for your compressor before turning it on.
After that, plug the air compressor to its power source and let it accumulate pressurized air.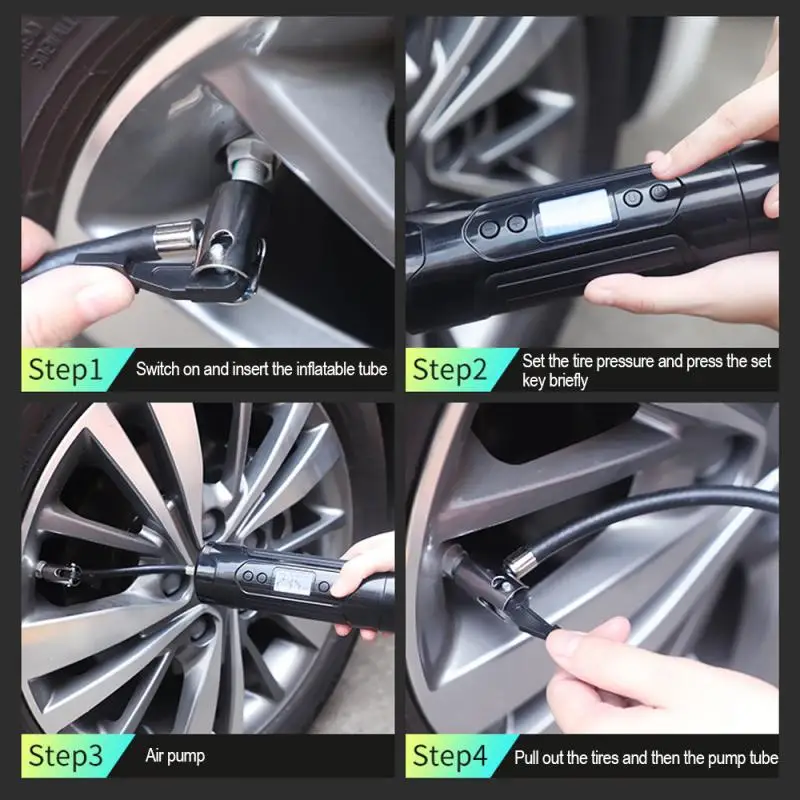 Read off the gauge to make sure you have the air tank at the pressure you want.
Depending on the type of bike tire valves you have, you may need to invest in an adaptor.
For tires with Schrader valves, the inflator nozzles designed for car tires will fit these valves with no further adjustment necessary – just push the nozzle on the tire valve stem all the way until you get a good seal.
If you do have Presta valves, which are more common in the narrow road bike tires, then you can buy an adaptor for that from just about any bike shop.
These adaptors are very inexpensive – you can get them for a dollar or so, and it’s probably a good idea to buy a spare or two since they’re so cheap.
When filling up a tire with a Presta valve, then the same procedure applies as when you are reading the tire pressure using a gauge. First, remove the valve cover and then unscrew the valve cap all the way up.
Test to see if the valve is open by tapping the end and checking if air comes out.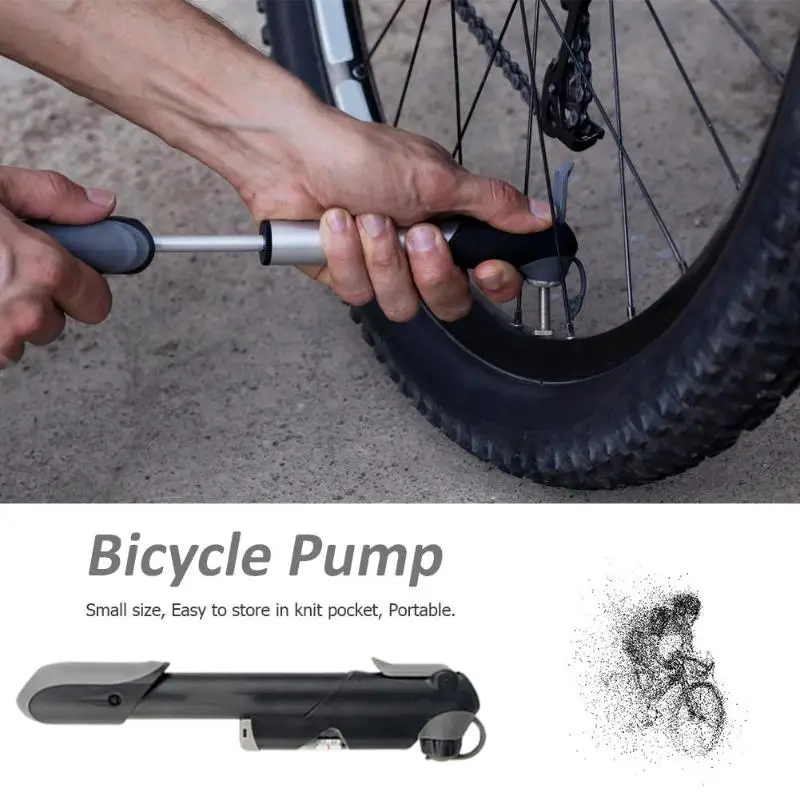 Once the valve is open, then you can attach the air hose by plugging the Presta valve adaptor all the way down until it covers the shaft of the valve stem.
When filling up a tire, try to do it at a very slow rate. The volume of air that larger air compressors can put out will easily exceed the maximum capacity of a bike tire, and opening your compressor valve all the way could lead to a blown tube or even a tire blown completely off the rim.
Patience is the key here, especially if you are doing this for the first time. Go slow, and watch your tire and your gauges.
Once you get a good deal of experience filling up your bike tires using a compressor, then you can get a good feel on how fast you can go.
Once your tires are filled up to the right level, then detach the air hose, screw the valve caps back down if you have Presta valves and put the valve caps back on.
If you do feel that you have overinflated your bike tires, then you can easily check and correct this by bleeding some of the air out.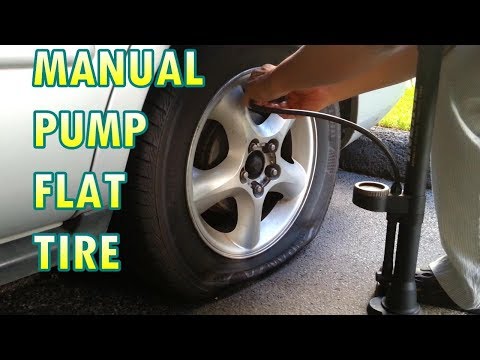
To bleed air out of a Schrader valve, you can push the center pin down to release the air using a flat screwdriver or the tip of your keys. Some tire gauges will also have a tool for this task.
If you have a Presta valve, then screw the valve cap to the open position at the top, and press down to release the excess air. Screw the valve cap back down to a closed position, and put the valve covers back on.
Want To Share This?
0003Related materials
If I change wheels, do I need to balance them every season?
Inflating a tire in the city is not a problem. There will always be a thrifty car enthusiast nearby who will lend a compressor. In extreme cases, you can drive to the nearest auto parts store and buy this useful device. But if the need to pump up the wheel caught on a long journey, on a deserted track, you will have to use your ingenuity.
A very banal way is to turn to professionals, that is, truck drivers.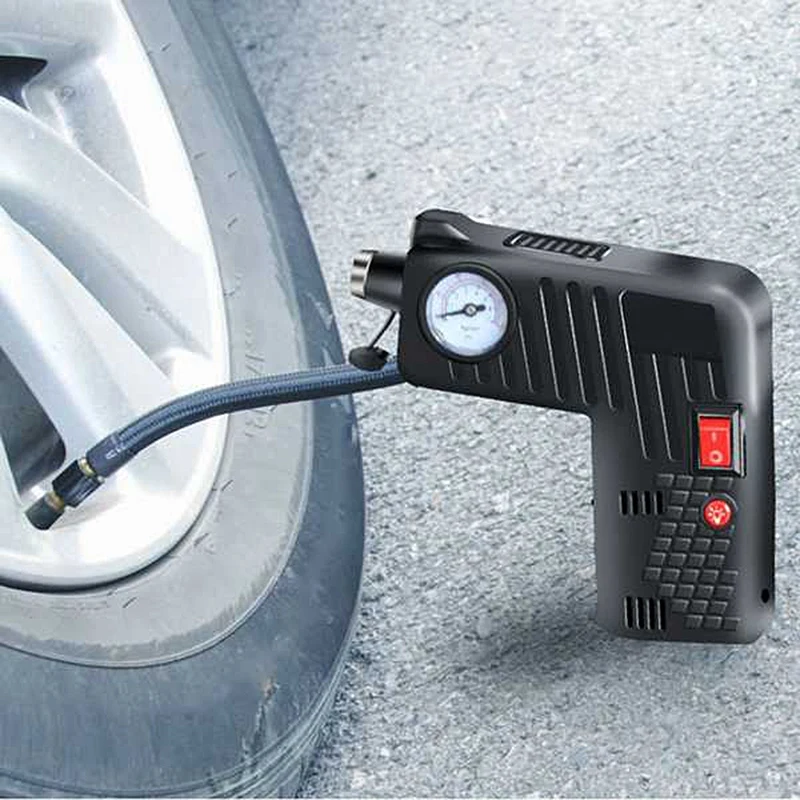 The fact is that any truck with pneumatic brakes can supply dried and purified air with high pressure through a hose that a thrifty truck driver always has with him.
Many gas stations now have tire inflation points, and perhaps the easiest way is to hitch a wheel to it and then return to your car in the same way. If all of the above did not work, then read about the tricks that we personally tested for effectiveness:
Attaching a can (any) to the nipple is not so difficult. The pressure inside the cylinder is 1.8-2.8 bar. It is important that the contents do not dissolve the rubber and do not harden, such as building foam.
Here, of course, compressed air canisters are good for blowing, for example, office equipment. But the inner volume of a wheel of a small class car is about 20-25 liters. For pumping, you will need several boxes of cans. Unacceptably!
It is possible to connect the tire valve to the brake master cylinder connection after draining the reservoir. After that, we begin to press the brake pedal in the same way as is usually done when bleeding the brakes when replacing the brake fluid. To inflate the wheel, it will take a gigantic number of clicks. Unacceptably!
Connect the hose to the air path after the turbocharger. The boost pressure in the line between the compressor and the intake valves of conventional (non-sport) engines is not enough to inflate the wheel. No matter how you gasp - unacceptable!
Advanced car enthusiasts know the method of transferring the bead ring over the hump of the rim with the help of an explosion of fuel vapors. The Internet is full of videos on this topic.
It is usually advised to unscrew the spool from the valve. I wonder what will happen if this is not done? We need to keep up the pressure. We conducted an experiment and got an unsatisfactory result. With this method, it is possible to provide a very small pressure in the wheel - about 0.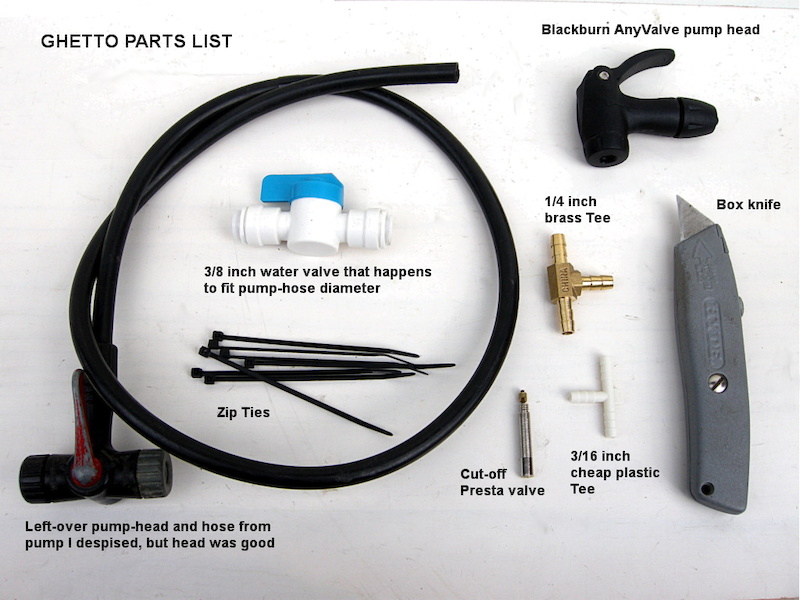 2 bar. The method really allows you to brilliantly cope with the task of transferring the sidewall through the hump, but it is not suitable for pumping!
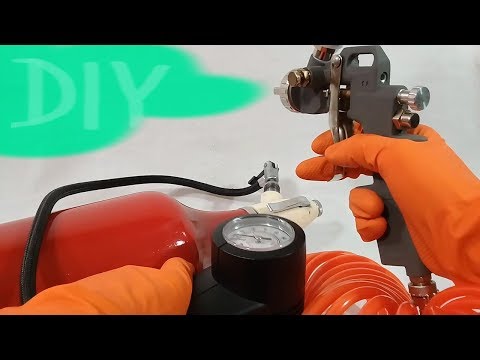
And this is perhaps the most unusual way to inflate a tire. After conducting an experiment with a large 6-kilogram fire extinguisher, it was possible to raise the pressure by a completely ridiculous amount of a couple of tenths of a bar. And this despite the inverted spool. Everything around was covered with a rather nasty powder. Unacceptably!
The average car owner usually has a powder-type fire extinguisher in the trunk. A powder fire extinguisher of a rather large volume worked very badly. It was not possible to pump up the wheel.
The average car owner usually has a powder-type fire extinguisher in the trunk. A powder fire extinguisher of a rather large volume worked very badly. It was not possible to pump up the wheel.
 Exhaust system
 If you can attach a hose to the exhaust pipe, then you can inflate the wheel in this way. The engine is able to provide a pressure of two or more bars with a sealed exhaust system and if you “give it a gas”. The method is acceptable, but only as a last resort. The fact is that with this method, the catalytic converter, and even the corrugation of the exhaust system, may suffer.
The most difficult thing is to achieve tightness of the junction of a thin hose with an exhaust pipe. A variety of caps from bottles, washers, water squeegees can go into business. What will be at hand. Electrical tape will help seal the connection.
The most difficult thing is to achieve tightness of the joint between the thin hose and the exhaust pipe. A variety of caps from bottles, washers, water squeegees can go into business. What will be at hand. Electrical tape will help seal the connection.
Related materials
If you want to pump up a wheel, jack up the car! Debunking the Myth
Using a hose, you can transfer part of the air from other wheels to the one we need to inflate. The method is complicated, because the valve mechanism will interfere with such a procedure. If we turn out the spools, we risk leaving several wheels without air. But even if you manage to get by with minimal losses, the pressure in all the wheels will turn out to be insufficient. In the best case, 75% of the pressure will remain in the wheels. Without preliminary preparation, which consists in assembling a hose with two tips like those installed on the compressor, we do not recommend trying this method!
***
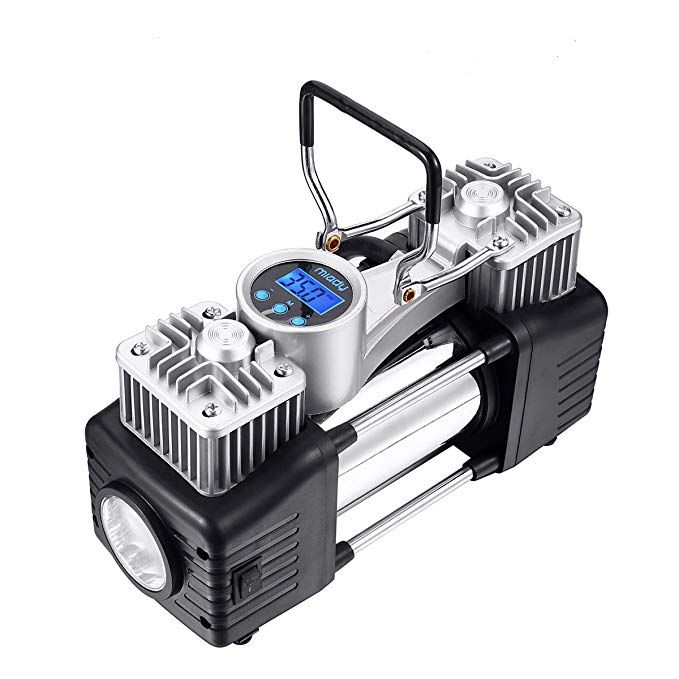
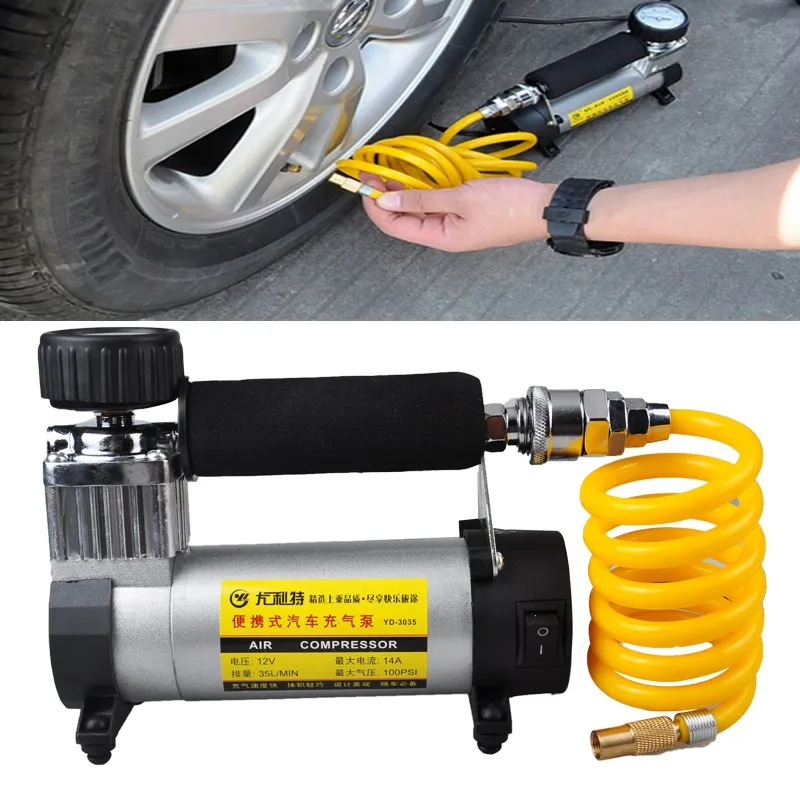
Alternative ways to inflate tires are complicated, inconvenient, require advance preparation and can damage your vehicle. Therefore, we advise you to always have a serviceable and inflated spare tire. And just in case, you should carry a portable electric compressor with you. It will be useful not for yourself, but for a less thrifty car enthusiast.
Our new video
Peugeot from Iran: to take or not? Video
4 cool features of Moskvich 3: blitz test of the first serial crossover
Geely Tugella: just look!
Did you like the note? Subscribe and you will always be in the know!
Driving on Yandex.Zen
News smi2.ru
Contents
Flat tires do not bode well for a cyclist. The situation must be resolved immediately, otherwise you will have to become a pedestrian for a while. What should be done? That's right, pump up the camera and calmly continue moving. Consider how to pump up a bicycle wheel with a pump, what subtleties are available when using an autocompressor, and whether it is possible to do without a pump.
Tire pressure is the main parameter that is responsible for the speed of movement, grip and safety of the cyclist. The average minimum indicator for bicycles is 2 atmospheres. For driving on asphalt, the recommended value is within 3.5 atm., For primers - 2.6 - 2.8 atm.
It is easy and simple to determine the pressure inside the bicycle tube using a pressure gauge - separate or built into the pump:
Another method: feel around the entire circumference of the tire with your fingers. If the rubber does not flex, then you can ride. It should be noted that this method will only give accurate results for thin slicks on road bikes and tires on city bikes.
Consequences of underinflated tyres:
On the contrary, an excess of air in the chambers threatens the following:
Maintaining the recommended pressure will eliminate all these shortcomings and allow you to get the most out of your trips. Below is a table of values depending on the weight of the cyclist:
*1 atm = 14.696 Psi
In general, a bicycle pump is a necessary thing for every cyclist. With the help of this simple device, it will be possible to inflate the wheels on your own, and not roll your bike to a service or gas station.
Hand pumps are divided into two types: simple and with a recording device (pressure gauge). It is recommended to purchase the second option, however, if a separate pressure gauge was lying around in the cabinet, you can buy a cheaper pump.
Universal hand pump with dial gauge
For ease of pumping with a conventional hand pump, you can immediately count the number of air inlets until the optimum pressure is reached and then pump exactly like this, even without additional use of a pressure gauge.
How to fill the chambers correctly:
Pressure tracking:
By the way, the latter will not be superfluous to do with a pressure gauge, since the pressure inside the pump can increase during pumping, but air does not enter the chamber (the valve is not completely closed) or exit through a hole in it.
Common bicycle nipples are automotive and Dunlop. For thin wheels, a Presta nipple with a valve is used. It requires cleanliness and accuracy in handling.
Presta tubes fitted to road bikes and select hybrids
A special small volume pump is matched to it. A regular bike pump may not fit or you may need to use an adapter.
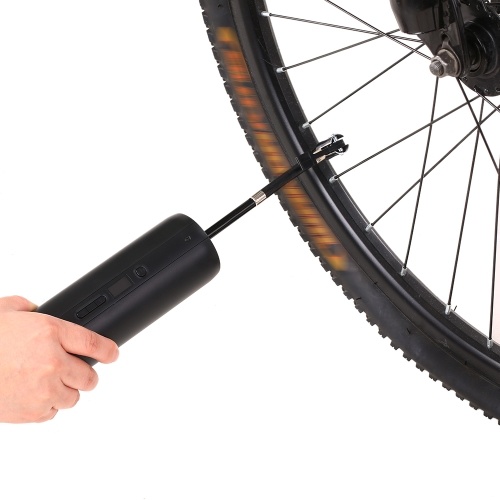
Most bicycles have a "schrader" or car valve. The standard option allows you to inflate tires at gas stations and public bike pumps (of which there are only a few in our cities so far) directly.
How to inflate simple wheels with a car pump:
How to inflate Presta with a compressor at a gas station:
In this case, it is very important to know exactly how many atmospheres it is necessary to let air into the chambers. With increasing pressure, it can quickly burst.
The last option left is Dunlop. It is identical in size to an automobile nipple, but in terms of design features it is similar to the French one (aka Presta). When inflating a wheel, you should follow the rules for a sports analogue.
Is it possible to inflate bicycle inner tubes without a pump? It is unlikely to reach the recommended pressure, since a regular supply of pressurized air is required, but you can reach the minimum values. Let's consider several methods of pumping chambers, which can be resorted to without using a pump:
Vacuum cleaner. Many models are equipped with a blower mode, when switched to which air is blown out. A thin hose can be used to connect the wheel nipple. The result directly depends on the tightness of the connection between the hose and the nipple. Here you can use rubber pads, clamps and even rags.
Bottle pump. You will need two plastic bottles. One of them will serve as a cylinder, the other as a rod. Cut off the bottom of the first bottle and connect its neck through a thin hose to the chamber outlet. Next, insert the second bottle into it and with translational movements pump air through the cylinder into the hose. For tightness, grease the connection of the neck and the hose with sealant or lay a rubber pad. High pressure cannot be created, but it is possible to ride the N-th distance on a bicycle.
Schematic illustration of a bottle pump: 1 - stem, 2 - cylinder, 3 - cylinder neck, 4 - hose
The third way is to remove the nipple and inflate like a balloon.