| How-To - Wheels and Tires
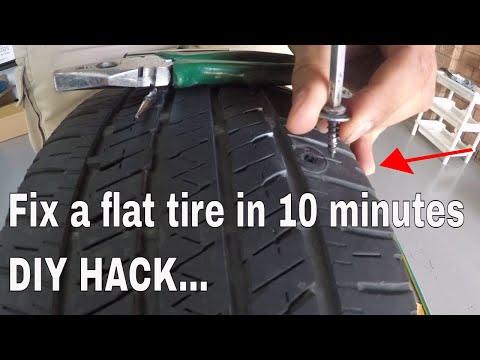
Tires—sometimes even the best go flat, especially when you use your 4x4 off-road or on back roads. We recently picked up a 4-inch lag bolt in one of ours, and when it came time to fix the leak we thought we'd shoot a quick video on the topic so you could see the process. Using a plug, you can fix a tire almost anywhere, and having the tools and knowledge to plug a tire can save your bacon as it did ours. Check it out!
There are several tools that will make fixing a tire on the side of the road possible. When we found the bolt in our tire we had on hand a tire plug kit, a bevy of hand tools, and a portable air compressor. Our tire plug kit is from Power Tank and is known as the Pro Series Tire Repair Kit, but we also like the Safety Seal Tire Kit from our friends at Premier Power Welder.
Our air supply is the ARB Twin High Performance Portable Compressor for 12-volt systems, but a charged Power Tank would work well, or even a can of compressed air would do in a pinch. We also needed a pair of locking pliers, although the Power Tank tire repair kit comes with some needle-nose pliers that would work for many jobs.
Needle-nose pliers help get the plug into the plug insertion tool. You want to center the plug in the tool before inserting it into the tire.
You can now pull out the object that has created the leak. You can add air before or after inserting the plug, but a little air pressure will help keep the tire firm and help you get the plug or plugs in.
If the hole is big you may need more than one plug. Several plugs may come out more easily than one would, as they will add more weight that will want to exit when the tire spins fast.
With the plug pushed into place you can quickly yank out the insertion tool. You may need to add more plugs to seal up the hole. Be careful when adding subsequent plugs so you don't push existing plugs into the tire.
You'll want to trim the excess plug material flush with the surface of the tread.
This Pro Series Tire Repair Kit from Power Tank is old and tattered but still does the job. It's one of the best because it's small and portable but has everything you need and more.
Tire plug insertion tool and reamer.
The kit also comes with some handy needle-nose pliers, a valve core tool, a couple of extra valve stems with valve cores, some lubricant that can be helpful for getting multiple plugs installed, a small knife to trim the excess plug material, and more.
This kit also comes with a valve stem installation tool and a length of wire you can use to try to stitch up any larger cuts or tears in a tire if you must.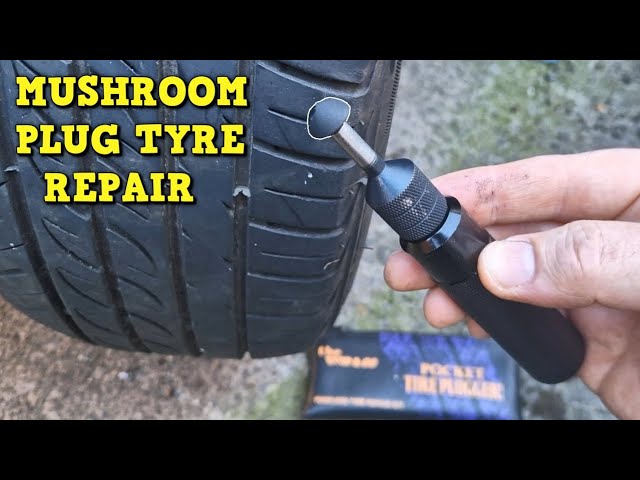 With the tire stitched up, ideally you can then shove plugs in the remaining holes to help plug the tire until you can get back to someplace where you can be rescued. Don't drive on the road with a very damaged tire—that can be very dangerous.
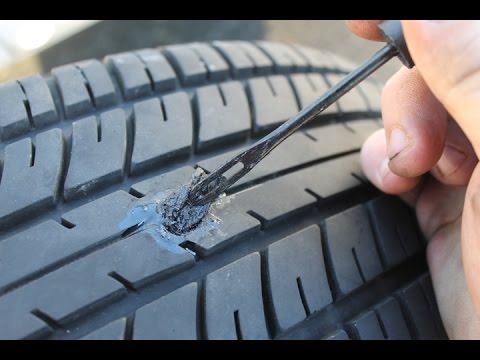
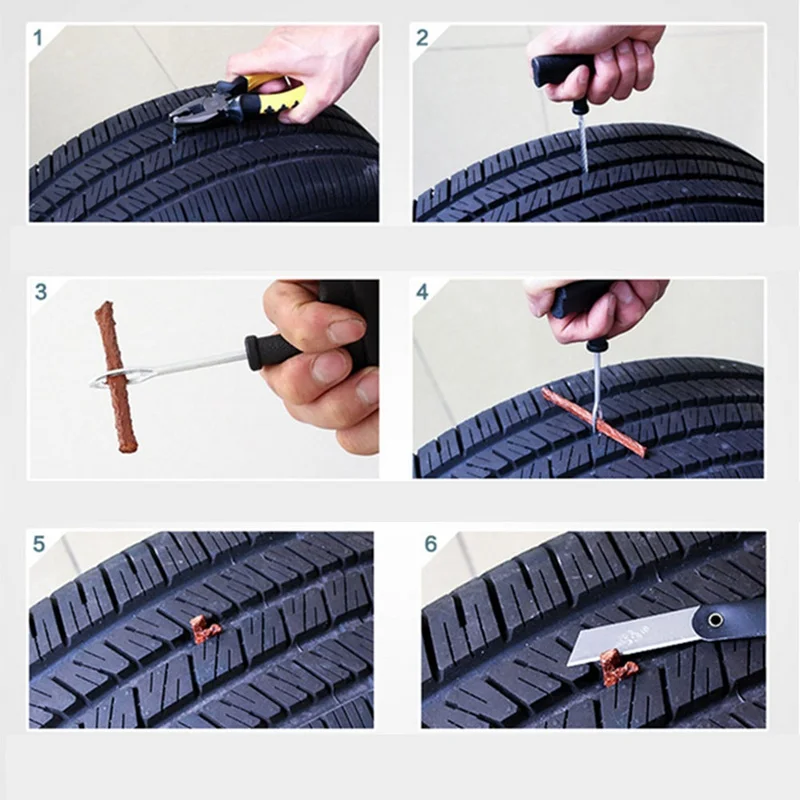
First you need to find the source of the leak. In our case it took some looking but eventually we noticed a big old bolt head in one of the tread blocks. Once you find the leak, get your tire repair kit out and thread a tire plug through the insertion tool. Pliers will help with this. You want the plug to be centered in the tool. Then, pull out the object creating the leak and quickly shove the plug in the hole. You can add air before, during, or after the plug is inserted, but having some air pressure in the tire will help you get the plug in place. Once the plug is in the hole, you will pull the tool out quickly, and hopefully leave the plug in the hole.
Some plug tools have a collar that helps keep the plug in place when you remove the tool. If the hole is big, you may need to install two or more plugs in the hole. Some kits come with a reaming tool to help make the hole round to accept plugs, and most kits include some lubricant to help with inserting the plugs, but this can also help them self-eject when you don't want them too. With the plug or plugs in place and the leak sealed you will want to trim off the excess tire plug material flush with the surface of the tread. Now the tire is plugged, but that doesn't mean the plugs won't come out when you are driving home or to the tire shop. A tire shop can make a more permanent repair to many holes in tires, although not all holes in all tires can be fixed.
Sources:
 Tire Plugs: Which Is Better?
Home » Tire Patches vs. Tire Plugs: Which Is Better?
What are tire patches and tire plugs? Well, they are useful when you get a flat tire. In such cases, there’s a good chance that a minor repair can get you back up and running again quickly.
Three of the most common of these “minor repairs” are:
The first option, a tire plug, is cheap and fast to administer. Plugs work best when you’ve run over a nail or similar blunt object that punctures the tire and causes it to leak air. After the nail or sharp object is removed, the plug can be inserted into the hole to fix the leak. While plugs of the old days were problematic and served more as a band-aid type of repair than anything else, many plugs available today actually vulcanize to the tire to provide better stability.
Tire patchA patch, on the other hand, is considered to be a better quality tire repair. However, it’s a bit more laborious of a repair than a plug. Patching a tire actually consists of removing the tire from the rim and then using a die grinder to clean up a 2-inch diameter around the puncture to give the patch enough of an area to bond with. The patch is then pushed from inside the tire through the outside of the tire, sealed, and let dry.
The best modern tire repair solution is a plug/patch combo product. This is one piece and it combines the best benefits of both options.
Keep in mind that not all tire damage can be repaired. For example, tire bubbles are a dangerous problem that will result in needing new tires.
The question is: Can or should you repair a tire on your own?
If you purchased your tires from a mechanic or tire-specific business, then chances are they will either plug or patch your tire for free if it develops a leak and a patch or plug can resolve the issue.
Tire plugMany tire-specific businesses will also fix your tire via these means as a way of developing goodwill with you, the customer, so that when it comes to buying new tires you’ll consider purchasing that next set from them.
However, outside of these two scenarios, tire patching and plugging aren’t necessarily expensive (usually only $10-$20 a repair), but more of an inconvenience.
Considering this, patching your tires on your own might not be worth it.
DIY patching or plugging is still an option, yet we’d advise you to be absolutely sure of what you’re doing before going the patching route.
The plugging route is fairly simple (and cheap, as plug kits can be purchased for just a few dollars), as all you really need to do is locate the hole and insert the plug. Going the patching route is also fairly inexpensive, but there’s a lot more involved.
For instance, patching a tire consists of:

Plugs won’t usually work when a puncture is near the sidewall, as it likely won’t be able to completely seal the area. Plugs are also ineffective when the puncture is on an angle. Patches are usually the better-recommended option, but they do have their limitations. For instance, if a puncture is greater than a quarter-inch in diameter, a patch will likely be ineffective and the tire may be too damaged to repair.
What’s better – tire plugs or tire patches?Plugs, when installed correctly and in the right situations, can help a tire last for up to 25,000 additional miles. But while plugs can be effective, usually patches are considered to be the better, more secure option of the two. The patch/plug combo is the safest and most reliable option.
Yes and no. Years ago they were and if they aren’t installed correctly or in the right situations today, they still are. However, today’s plugs vulcanize to the tire and can help it last for tens of thousands of miles more.
Ceiling to floor curtains are the latest trend in interior design. It is realized with the help of ceiling cornices, which just allow you to close the entire space. We will discuss how to fix the ceiling cornice and how to hang curtains on it.
Contents of the article
The first issue , which occurs when you start installing the cornice above the window, this is at what distance from the corner it should be fixed. Close? Stepping back 10 cm? 20 cm?
In fact, the distance can be from 8 to 15-20 cm. It is determined depending on the location of the heating radiators and / or the window sill. The cornice should be placed so that the tulle and curtains hang freely, without touching either one or the other. Firstly, this way the drapery lies perfectly, secondly, it is better for fabrics, and thirdly, air circulation is better, which is important during the heating season.
Some plastic ceiling moldings have pre-drilled mounting holes. In this case, the manufacturer has provided for the load, you just need to install fasteners in each hole. Fasteners are sometimes included. If it is not available, when choosing dowels, do not forget about the shape and size of the screw heads. The cap should be larger than the diameter of the hole. Moreover, the difference should be solid - at least 2 mm, but better - more. If the hat is too small, there is a chance that the cornice (especially with heavy blackout curtains) may fall off. As a solution in this case, the use of washers of a larger diameter.
If there are no holes in the cornice profile, you need to drill them yourself. The optimal distance is 50-60 cm. If there are two tracks in the profile where fasteners can be installed, we make holes in a checkerboard pattern. So the load is more evenly distributed and reliability is higher.
When drilling holes in the eaves plank, take the drill bit equal to the diameter of the body of the dowel or self-tapping screw. The hat on the underside should be straight - this way the case will be well pressed against the plane of the ceiling.
The procedure for attaching the ceiling molding is not too difficult, but if the product is more than two meters long, an assistant is required. In addition to fasteners, you only need a drill and a screwdriver with a suitable slot.
Before attaching the ceiling cornice, some preparatory work must be done. The first thing we do is adjust the length. If everything suits you, great. If you need to cut off the excess - you need a hacksaw. The canvas is desirable for plastic, but also suitable for metal. If the cornice is assembled, remove the plugs and turns (if any), cut off the excess, then return everything to its place - turn, plug.
Adjusting the lengthIf the mounting holes are not drilled at the factory, you will have to make them yourself. We start with markup. Mark so that the distance between adjacent screws is no more than 50-60 cm. If there are junctions, then step back from the joint 5-10 cm on both sides. For better load distribution, it is better to stagger the mounting holes.
Once the marks have been made, we drill mounting holes in the plastic. Use a drill that is equal in diameter to the dimensions of the fastener.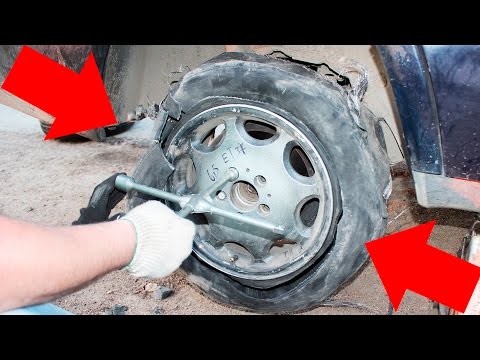 More is undesirable, but less is also not good - plastic can crack when twisted.
After all the holes are ready, if the cornice is prefabricated, assemble all the parts. You can not install a decorative bar (if any). She will only interfere.
Most apartments and many private houses have a concrete slab ceiling. Accordingly, we take a drill on concrete. The diameter of the drill must be taken according to the size of the dowel. Then we act according to the plan:
That, in fact, is all. You know how to fix the ceiling cornice to the concrete floor. If the floor is wooden, it is still easier: there is no need for pre-installation of dowels. After all, wood screws are usually used. In this case, the eaves are leveled and self-tapping screws are immediately placed in the mounting holes. It is more convenient to follow the same order: along the edges and in the center, and then - as it turns out.
If it was decided to install the ceiling cornice at the stage of repair, most likely there is a special niche in which it is installed. In this case, it is attached to the ceiling, and how to fix the ceiling cornice to concrete and hardwood floors is described above. It will be a little more difficult, since freedom of action is limited, but not critical.
Mounting the cornice in a niche is a little more inconvenient Maybe the second option - without a niche. In the place of installation of the cornice, a mortgaged wooden beam is fixed. It is located between the drywall and the main floor. In this case, the ceiling cornice is attached to the beam through drywall. It is necessary to use self-tapping screws for wood of sufficient length so that in the body of the beam there is at least 2/3 of the length (more is better).
But if you decide to replace the cornice with a ceiling cornice after repair, you will have to look for special fasteners. These are the so-called butterfly dowels and snails. Both are distinguished by an increased contact area with the material, due to which the load is distributed over a large surface. But still, it is better not to use heavy fabrics.
Using Special Drywall Fasteners Both types of drywall fasteners, the butterfly dowel and the volute dowel, are available in plastic and metal. Stronger, clear metal. But the trick is that, most likely, not a dowel, but drywall will not withstand a high load. And to prevent this from happening, reduce the installation step of the fasteners. For example, you can make 40-45 cm. This will increase the complexity, but will give at least some hope that the structure will not collapse.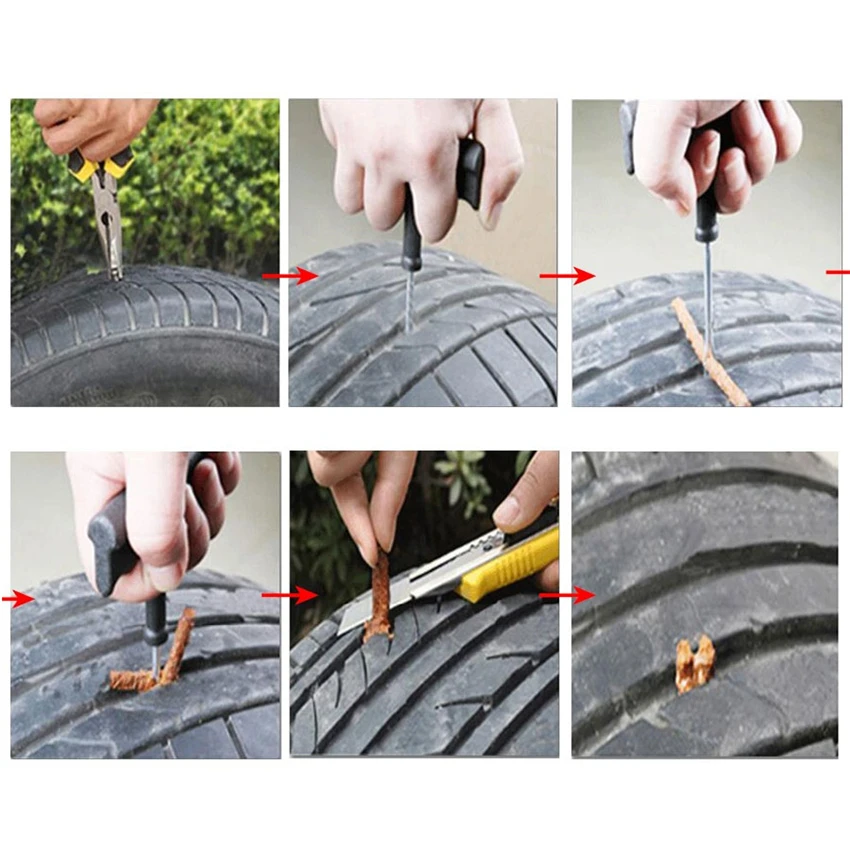
In the case of a stretch ceiling, the ceiling cornice can only be fixed to a pre-installed embedment beam. It is fixed before the canvas is stretched. When fastening, wood screws are used, they are attached immediately to the beam through the ceiling canvas.
How to fix a ceiling cornice on a stretch ceilingThe second option is a niche for installing a cornice, but it is also made during the installation of the ceiling and not later. In this case, there is also a wooden beam, but a guide for a stretch ceiling is attached to it.
Ceiling cornice fastening in a stretch ceiling nicheThere are no options for installation on an already finished stretch ceiling. There is a real compromise - fastening to the wall on brackets just under the ceiling. There is a gap to the ceiling, but it is small and not too noticeable.
For cases with a stretch or plasterboard ceiling, there is another installation option - on special brackets that are attached to the wall.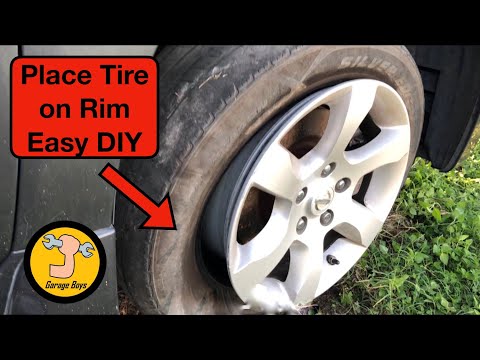 In this case, the distance from the corner is determined by the parameters of the bracket. They are with longitudinal slits that allow you to adjust the length to your liking. There are several holes at a distance of 5-6 cm from each other. Wall mounting brackets usually come with mounting plates that are attached to the plastic case with four small self-tapping screws. The mounting step for wall mounting is the same - 50-60 cm, two stops are placed at the joints, stepping back from the joint 10-15 cm.
How to fix the ceiling rod to the wall? The installation procedure is the same as in the case of installation on a concrete ceiling: marking the mounting holes, installing dowels, then attaching the cornice itself to the wall on the brackets. But with different brackets, the procedure is different.
Here's what you get when assembled.Option with long cuts in the bracket body:
This option is good, because if desired, you can move the cornice closer or further within the length of the cut. It is also possible to level non-ideal wall geometry. When using the option with several holes, it is easier to first attach the brackets to the cornice, then raise the entire structure, and make markings. After installing the plastic part of the dowels, again attach the cornice assembly to the wall. As you can see, it is very difficult to do without an assistant: you need someone to hold the cornice.
The ceiling cornice has hooks or runners for hanging curtains. For each type of profiles - their own, but they are of different heights.
It is necessary to select hooks / runners according to the type of profileNow about how hooks differ from runners. The runners have small wheels. They are more expensive, but the curtains move much easier. In order to save money, you can take hooks for tulle (we move it very rarely) and runners for curtains (curtains).
Types of hooks for ceiling cornices To hang the curtains on the ceiling cornice, a special tape is sewn to the top of the curtain.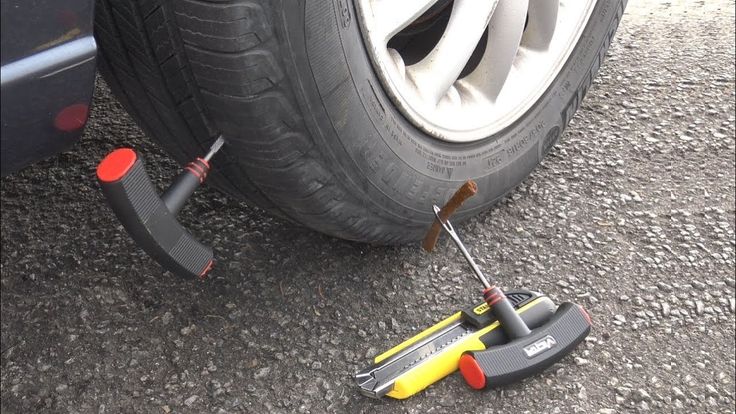 It helps to form folds of the required size. This ribbon has a strip that can be used as eyelets. That's what the hooks are for.
Another option is to make eyelets by hand, but then the folds will have to be laid and sewn up by hand. This option will have to be used if you need to lay not standard folds, but with some special pattern.
There are two ways to hang curtains on the ceiling cornice:
The first option is physically simpler, but the second is more often done. When you remove the wash hooks, they can get lost, you can make a mistake in the order in which they are installed. In general, it is not so important how exactly you will hang the curtains on the ceiling cornice. The choice is yours. And finally - a little life hack on how to put loops on hooks easier. This is a dreary and difficult task that annoys many.
Window decoration in a room begins with the selection of curtains. Depending on the design of the room, they can be represented by light tulle curtains, massive designs made of dense fabrics or decorative chains. But curtains can't just hang in zero gravity over windows. For this, there are special ceiling cornices.
Almost the most common cornices are ceiling cornices.
Contents
Ceiling cornices are more beneficial both in terms of practical and aesthetic indicators than conventional wall cornices. Firstly, the structure itself is installed on the ceiling. In the classic versions of the cornice, installation is carried out in the middle of the wall section, which is located above the window. Thus, the upper edge of the curtains does not completely close the space under the ceiling, creates an extra horizontal line and makes the walls visually shorter. Ceiling cornice eliminates all these shortcomings.
Hanging curtains on a ceiling cornice is much easier than it sometimes seems to non-professionals.
Secondly, ceiling cornices have many design and construction options:

Ceiling cornices are a very successful design.
Some types of ceiling moldings can cover the top of the curtains with frames, which also come in different sizes, colors, styles and materials. So, for example, for a classic interior, a plastic frame with a shade like that of the ceiling is suitable. And the minimalism and consistency of modernity will be emphasized by light-colored metal.
For jacquard or country interiors, wooden frames can be used.
Thirdly, cornices can vary in shape:
Ceiling curtain rods have proved their worth in use.
Fourthly, there are many options for attaching the fabric to the cornice. They can be represented as:

To ensure that the curtain hangs beautifully, the distance between the hooks should not exceed six centimeters.
However, all these types are not universal for each type of cornice. So, for example, cornices, consisting of only one string, are best used in rooms where windows are decorated with light tulle so that the structure can withstand the weight of the fabric.
Beautifully selected curtains for the ceiling cornice add comfort to the room.
Important! There is only one web of fabric per row of strings or hooks. Otherwise, the fasteners inside the eaves may not support the weight of all the curtains.
If the interior needs to achieve maximum layering or complexity of window design, it is better to use a plastic ceiling cornice for double-row curtains with hooks. They better withstand dense and heavy fabrics.
Many rows allow you to hang several types of fabrics and decorative elements on one window.
How to hang curtains on a ceiling cornice with hooks if the structure itself is not ready yet? No way, so first you need to go through several stages of preparation and direct installation:
It is necessary to measure the length of the ceiling cornice and the height of the room.
Installing a fully assembled cornice, although it requires more time and someone else's help, is much easier than redoing all the work yourself several times. After all, it is at the assembly stage that it becomes clear what specific length the cornice is needed. And if necessary, you can correct its dimensions with a hacksaw or return it to the store.
A suitable shape and design of the ceiling holder must be selected in advance.
Important! At the assembly stage, it is better to immediately fix all the hooks on which the curtains will hang with the help of plugs. After installation of the product, it will not be so easy to do this.
The next step is marking. To do this, you only need a pencil, a ruler and a building level. Using these stationery, it is necessary to draw a straight line along the entire length of the eaves, constantly measuring the distance from the wall with a ruler.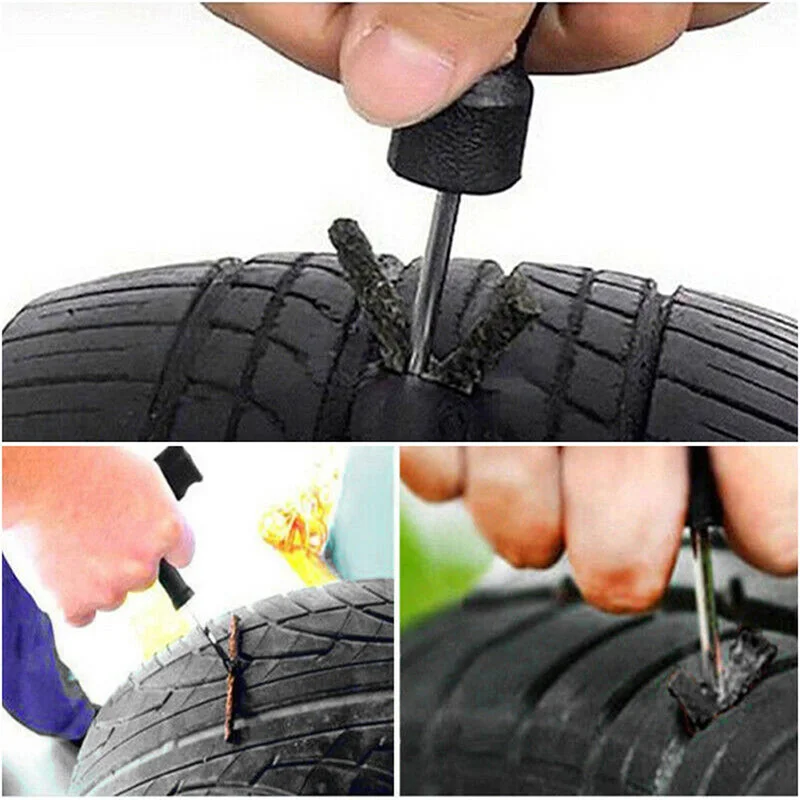 If the cornice has only two attachment points to the wall, then on the straight line it is necessary to mark the points of attachment symmetrically.
Depending on the style of the curtain ensemble, a holder with the required number of rows must be installed on the ceiling.
Eaves are always installed on a hard and stable surface. Therefore, the installation sequence (third stage) is almost the same in all cases. The exception is the method of fixing the eaves.
The third stage - installation for the concrete ceiling is carried out with dowel nails or glue, which can withstand from 15 to 80 kg/cm.
Before you begin to install the ceiling holder, you must carefully study the instructions supplied with the eaves.
To mount with adhesive, proceed as follows.
The successful fastening of the curtains will depend on a well-executed work.
The adhesive will dry out over the next 3 days, so it is not recommended to hang curtains on it immediately.
These fasteners are highly resistant to wear.
Important! If the fabric for the cornice is light, then the bolts and screws are located at a distance of 60-70 cm.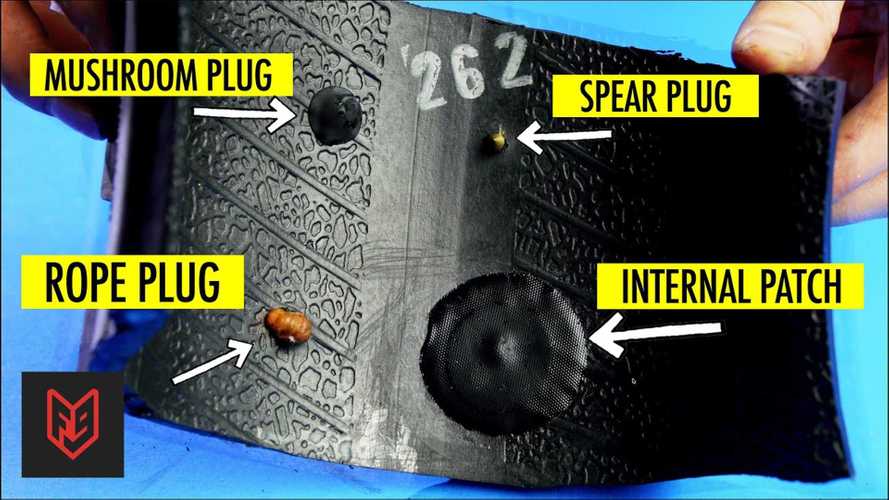 If the curtains are heavy, then it is reduced to 20-50 cm.
In order for curtain products to hang in beautiful folds, you need to know how to properly hang curtains on the ceiling cornice using different types of fasteners.
Important! The holes for each type of fastening are different: for anchors, the holes in the ceiling and on the tire are the same, and for self-tapping screws 1.5 - 2 mm less.
When the rail is securely fastened, all that remains is to insert the hooks inside and hang the curtain itself.
All calculations on how to correctly measure curtains must be made only after the cornice has been installed. This rule works in all cases, regardless of what type of cornice (ceiling or wall).
The beauty of curtains depends largely on how they are hung.
For the production of all measurements, you must take a construction tape measure. Its desired size is from 3 meters. So that with its help it was possible to calculate not only the height, but also the width of the fabric.
Beautiful folds can be created with a wide ribbon.
As for measuring the length itself, it directly depends on individual preferences. Curtains can be shortened to the window sill, to the radiator, long ones that do not touch the floor or vice versa with a margin, etc. But, in spite of everything, one general rule works: measurements should be made not at the lowest point of the eaves, but at the place where the fabric is attached. Hooks, rings, clothespins, etc. This rule does not work only in cases where the fabric is fixed with ties or eyelets.
Light curtains are made of soft fabrics that lend themselves well to draping.
A special feature of tape curtains is that they are attached to hooks from the curtain tape.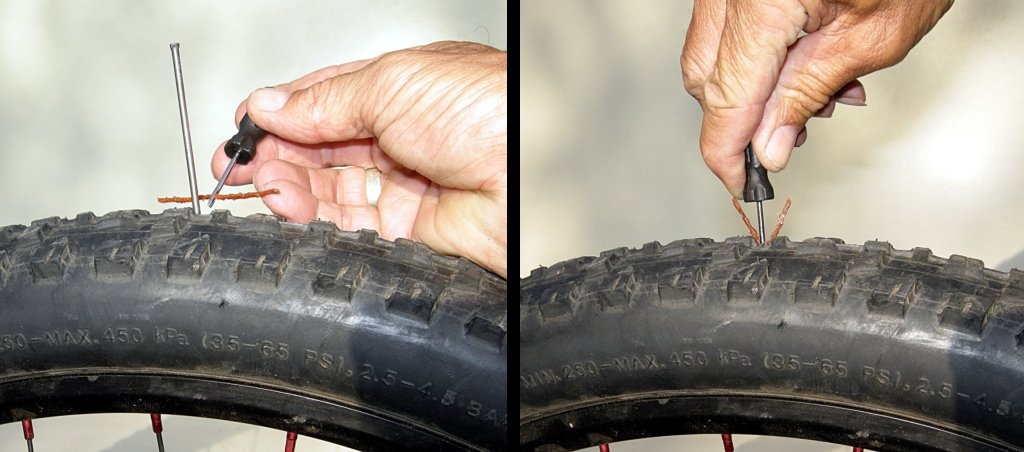 They are hidden on the wrong side of the canvas and are one of the key parts of the curtains. Therefore, measurements must be carried out taking into account the presence of the tape, and not just the length of the curtains.
Hooks are used to attach the curtain to the profiled cornice.
For each curtain length, there are unspoken rules for how many centimeters they should be from the nearest horizontal surface, namely:
Not only the quality of the material, but also the method of fastening the curtains can affect the overall decoration of the room.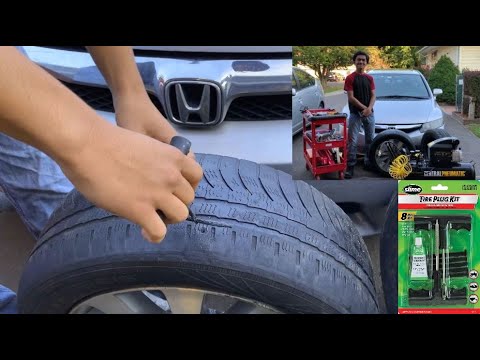
Once the length of the fabric has been calculated taking into account the requirements, it's time to take care of the curtain tape, for which the curtain fabric clings to the cornice. Its standard width is 6 cm and it has two fastening lines.
Many curtains on ceiling cornices are fixed precisely on the braid.
In order for the braid to cover the hooks and not add extra centimeters to the main length of the curtains, it is sewn to the upper edge to the fabric for a quarter of its width. And the fabric itself is hung for the lower middle row of hooks.
Everything should be in harmony with the environment of the room.
Thus, the calculations will look like this. Having measured the length from the mount to the floor, we got an indicator of 247 cm. We add 6 cm of braid to this indicator and subtract 3 cm to close the hook or ring on which the product will hang. There is still 3 cm left, which make up the second row of loops and the place where the fabric is attached.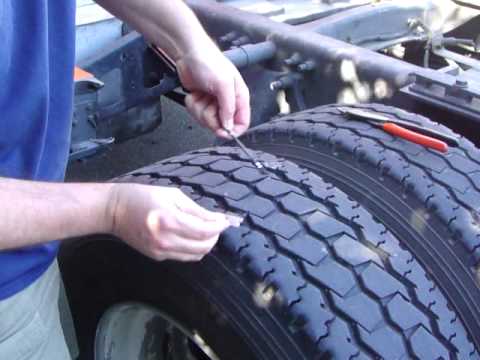 As a result, the canvas is 250 cm. It is this indicator that must be indicated when ordering.
It is also worth considering the functional purpose of the curtains, that is, whether they will constantly move apart and retract.