Posted on by Heather MacDonald
Contents
Align the opening in the sprocket with the valve stem. Thread the valve extender completely onto the valve stem and attach the pump. Inflate to the PSI indicated on the tire sidewall. immediately after inflating and close the round cover.
Finding the Correct Air Pressure If you have the original scooter tires on your machine, you’ll be able to find the proper tire pressure from the owner’s manual. Although it will vary from make to make, it should be approximately 18-24 pounds per square inch for the front tire, and 28-36 psi for the rear tire.
Yes, electric scooter tires worns out. Depending on the type of tire, you need to change them every 2,000-3,000 miles.
How to fix electric scooter flats with slime
The Power To Thrill
| E200 | E100 | |
|---|---|---|
| Battery | 24V, lead-acid | 24V, lead-acid |
| Motor | 200W, chain-drive | 100W, chain-drive |
| Run Time | Up to 40 mins | Up to 40 mins |
| Range | 8 miles (12 km) | 6.5 miles (10 km) |
Whilst screwing it on you may hear a hiss as some air escapes but as you tighten the adaptor down, this will stop. Inflate your tyre to slightly above the target pressure (to mitigate the slight air release when removing the adaptor) before unscrewing from the valve as promptly as possible.
Honda Scooter Tyres
| CC | Make | Front tyre pressure |
|---|---|---|
| 90 | Honda | 1.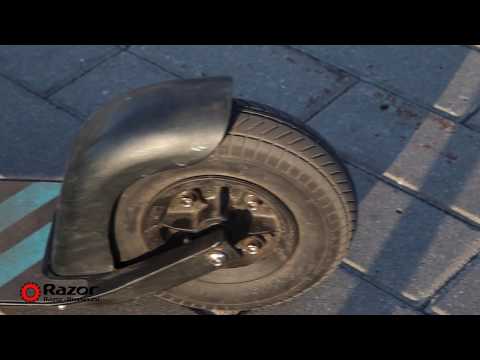 5 bar (22 psi)
 |
| 100 | Honda | 1.8 bar (26 psi) |
| 100 | Honda | 1.5 bar (22 psi) |
| 125 | Honda | 1.8 bar (26 psi) |
Honda Scooters With Their Tyre Sizes And Recommended Tyre Pressure
| NAME OF THE SCOOTER | TYRE SIZE | RECOMMENDED TYRE PRESSURE – FRONT (F) AND REAR (R) SOLO |
|---|---|---|
| Honda Activa 6G | 90/90-12 54J(F) and 90/100-10 53J (R) | 22 PSI (F) & 29 PSI (R) |
| Honda Dio | 90/90-12 54J(F) and 90/100-10 53J (R) | 22 PSI (F) & 29 PSI (R) |
How to Inflate Tires

A 5 gallon tank will not bring 4 large tires from 20 to 35 PSI.
Scooter India
Recently among the incoming packages, we found a box that was large, decently heavy and that said Razor on the label. As soon as the latter was seen, the evil stare of “outside!” was once again shared by a few in power, and within minutes it was unpacked and making its way through the various steps that got us closer to doing just that.
It was Razor’s latest version of their Flagship electric scooter, the Razor E Prime Air. Similar to the E Prime that we tested earlier in the year, only with a few welcomed improvements. One of which, was that the front tire is now pneumatic (win!).
As I said, it (left) is quite similar in the way that almost everything about it, matches the previous model (right). This one came with a new color theme, featuring an all-black design (the other one was black and silver). The handlebars are the same, as is the downtube (outside of less rattle from the push-pin).
It charges the same as the previous E Prime, has the same kickstand on the bottom, and features the same acceleration and brake controls.
The left side features a paddle control for engaging the electric brakes with. For the most part, it is all or none, with a soft braking motion (doesn’t seem to be variable). The right side features a variable control for speed. The further you push it down, the faster you go.
The back tire features a brake that you can engage by pressing down on the rear fender with your foot. Unlike the brake on the handlebar, this one delivers a swift braking motion to help bring you to a stop quickly. Needless to stay, this is still our preferred way of stopping as it gives you much better control. Where the paddle on the handlebar takes too long to stop–typically for safety reasons since stepping down on the back brake puts your body in a position where it is prepared to stop.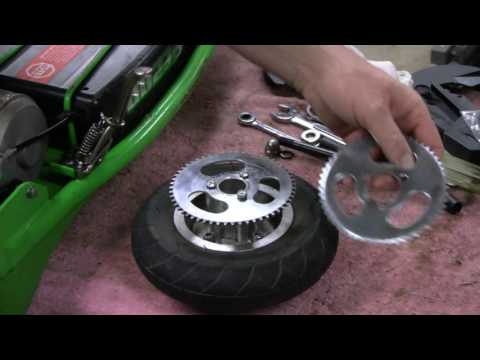 The handlebar, not so much.
That rear tire is still solid (rubber), however, this is more than likely due to the rear brake when it comes to the longevity of the tire. The brake is very effective, which could easily eat away at an inflated tire.
Focus on that front tire though.
A pneumatic tire! Something that not only looks more beast than the previous model but plays a major roll in the comfort of the ride.
Although it isn’t going to give you the same ride as a comfortable car that has all inflated tires, the difference is more than noticeable. Enough to say that the ride is around half as noisy when it comes to vibrations that pass through to the board and handlebar. Most of your impact is coming from that tire, where the rear tire probably counts for 25-35% of what you feel.
It’s like slapping a silencer on a rifle, and it does wonders when it comes to longer rides. Sidewalks and similar surfaces are much nicer, and your hands won’t go numb as quickly from it all.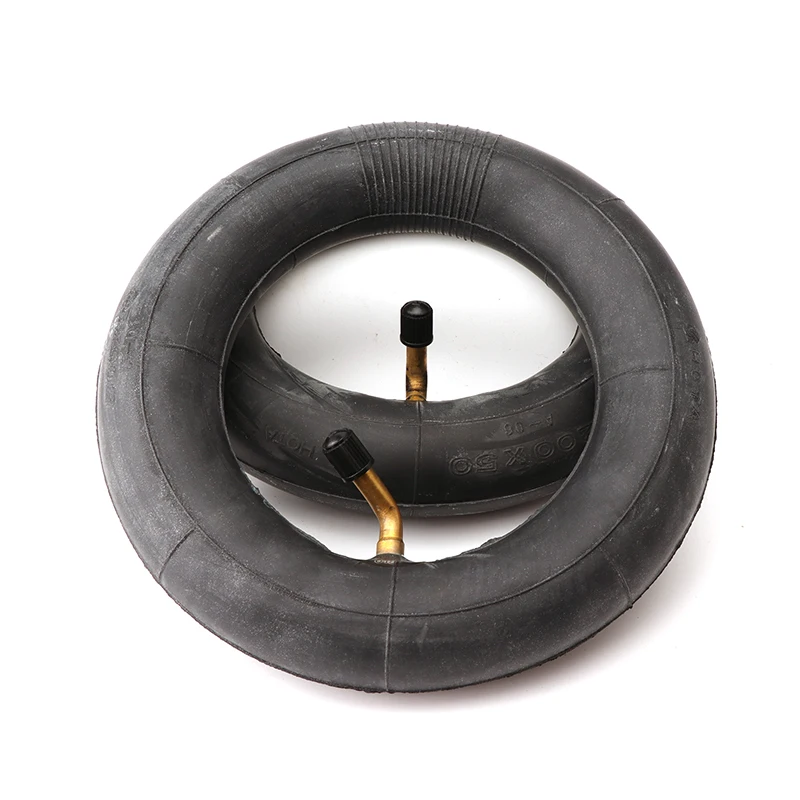 Of course, if you ride on a terrible surface (ie, a beat-up street that hasn’t been resurfaced in years), you will still get a good amount of vibration. This would be the same with any form of mobility, including skateboards or rollerblades. Only, in the end, this feels much more comfortable than any of that. All thanks to that tire!
Of course, it would be quite comfortable if the rear tire was also pneumatic, but chances are, you’d be replacing it sooner than you want if you like to lay down on the rear fender brake as we do.
The air stem is a bit difficult to fully get to. Just trying to unscrew the cap requires a little patience. It’s a tight space and a small tire, so it’s not like this comes at a surprise if they wanted a standard style stem, allowing you to use any normal pump lying around. It’s smart to use something like a small screwdriver to slide under the stem to gently aim the tip of the stem outward a little.
Ad – Buy the Razor E Prime Air Scooter on Amazon Today!
You’re to fill it to 60 PSI (and recommended to keep it there in order to get the most out of each charge, like MPG on a vehicle) using a standard pump or compressor (making sure to not move too fast), and that tire is ready for fun.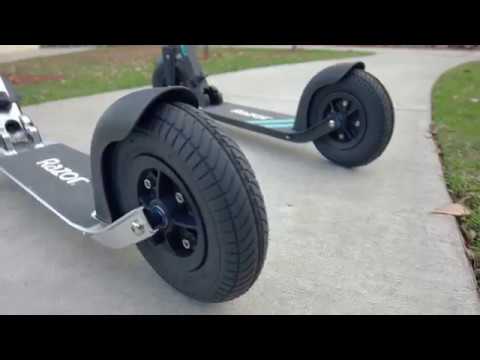
Turning the scooter on and off involves the same process of holding down the power button for a few seconds. It is located in the same area, right in the front (your legs are facing it when standing on the scooter). There are five LEDs above the power button that represents your current charge.
It takes a number of hours to charge like most electric devices of its size. With a full charge, it gets you up to 40 minutes of continuous use. Which depends on how hard you push it throughout your use. It’s enough to get you as far if not even further than the regular E Prime model. There is nothing like better battery life.
So this is perfect for students trying to get around a large college campus.
It also supports a large rider weight, with a 200lb max (vs the 176lb max of the previous E Prime), increasing the niche for potential consumers. Of course, max doesn’t always mean that it won’t work beyond that. It just means it won’t go as fast.
Its ability to fold in half for easier travel (when not in use) is all the same, including the exact method of closing or opening it.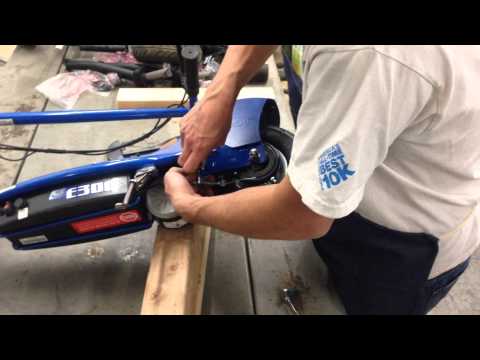 You have a knob at foot level that loosens and then slides upwards to unlock it, where you can then open it. The handlebar has a clamp than loosens, and then it can slide up fully until it clicks into place with the small pin that pops through the hole.
You can adjust the height by ignoring that small pin (it’s a safety for just the one height) and sliding it to wherever you need it, and simply tightening the clamp to make sure they don’t slide on you.
There is nothing else to the process.
As for engaging the motor, it is also the same where you have to manually kick off and be moving at a minimum of 3 MPH before the motor will engage and take off. This prevents the scooter from kicking off and out of your hands if you accidentally push down on the paddle when not ready to move.
There is some weight to it, so you won’t be carrying it around folded everywhere you go. This is more for storing it in the trunk of a car or inside when not in use. When it comes to situations where you have drained the battery dry, you can simply kick it around like a normal scooter to get to where you need to go (oh darn, a fun physical workout!). If you are carrying it folded in your hand in a situation where you can just as easily ride it, you might get a few odd looks. So don’t let the weight of it chase you off.
Our Conclusion
We absolutely love this scooter. It seems to keep a better charge, getting you a little further than before, and a very durable build. It can hold a larger max weight, which is great for the number of models sold I’m sure)–and thanks to that larger weight capacity, you might even be able to get a little more speed out of it depending on where you land on the scale (weight). Just like the previous E Prime, this scooter really can haul. It offers a fast, smooth ride, and its all thanks to that wonderful pneumatic tire on the front that takes a lot of the vibration out of the board and handlebar. The rear brake is the best when it comes to solid control and fast response, and it the board gives enough space for an average user’s two feet to exist without accidentally stepping on that brake. It’s a bit heavy, but they are all heavy (electric scooters). If you want to really see a heavy scooter, check out some of those rentals that might be hanging around your downtown streets (major cities). So this one is not bad. The price is still quite high for the average consumer. This will more than likely remain that way until there is enough competition and the scooters are more common. Although, we don’t see the price coming down too much in the future either (maybe $100 at most).
So far, this is one of the best electric scooters we have tried yet outside of a larger, more powerful model they have, which is the E-XR. Which may actually be our overall favorite, based on limited experience we had with it earlier this year (if we get a chance to ever put it to a full test, we’ll be sure to let you know).
| Buy from Amazon | |
Our Rating 9 / 10 stars | Average Price* $419. 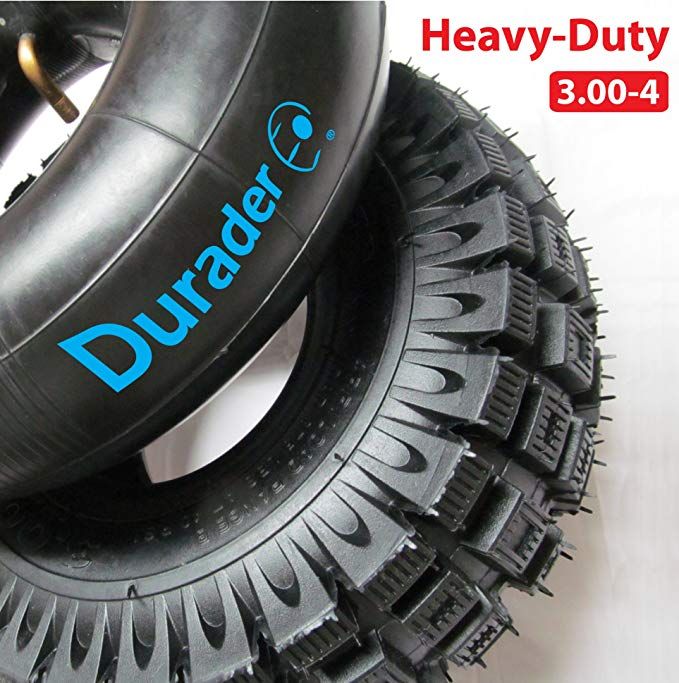 99 99 |
*Average price is based on the time this article was published
Video:
Unboxing:
CES 2019 Interview:
Additional Images:
Specifications:
Are you a manufacturer or distributor that would like us to test something out for review? Contact us and we can let you know where to send the product and we will try it out.
Don’t forget to subscribe for a chance to win cool prizes!
The wheels on an electric scooter must be inflated in an optimal way, and the pressure level varies depending on the load and type of road. An incorrect indicator will directly affect the comfort of movement, its safety, travel distance and developed speed.
In Russia, tire pressure is measured in Var or atmospheres (ATM). The scale in the manometer must be calibrated in these units.
High pressure makes tires stiffer. The area of contact with the road is reduced, due to which the speed increases, acceleration becomes more dynamic, and the cruising range increases. Not much, but significant for a scooter.
The downside is that depreciation becomes worse, so it makes sense to pump tires only on good roads, otherwise there is a risk of knocking off your legs or fifth point (if the scooter is equipped with a seat). This is usually done on long trips, especially in sports cars.
At low pressure, the area of contact between the wheels and the road seems to blur, becomes larger. The force of friction increases. Therefore, it makes sense to deflate the tires when driving on the ground, as well as on wet pavement. In this case, the wheels will brake better, which increases safety.
Reverse side: speed and travel distance decrease.
For all tires, the manufacturer sets the recommended pressure values. For models designed for scooters, the indicator is selected according to 4 main criteria:
The lower the more inflated the tire is. The profile of an overinflated tire curves in a semicircle, reducing the area of contact with the track. The friction force is reduced, making it less difficult for the wheel to roll. Acceleration is also improved, you can drive more on a battery charge. But this is only on asphalt or concrete. If you drive on soft ground, the wheel begins to fall, the contact area and the friction force increase sharply. Paradoxically, a flat tire has less friction on the ground.
Most scooters do not have shock absorbers and smooth running is ensured only by the elasticity of the wheels.
On these models, if the tires are inflated, then all the shocks will be given to the driver's legs or rear (if there is a seat). On smooth pavement, this is not critical, but on a worse road, you will have to select the optimal degree of pumping, at which it will not shake too much.
Under-inflated tires will spread out, increasing the contact patch with the ground. Grip and traction are increased. Thanks to these properties, permeability is significantly increased.
It makes sense to reduce the pressure on a dirt or uneven road, asphalt flooded with water. In addition to improved handling and reduced braking distances, under-inflated tires wear less and absorb shock better when overcoming bumps and pits.
Equal tire pressure reduces comfort. If the front wheel is pumped over, then it will become worse to drive the car.
There is only one answer to this question - definitely! The mass of the driver is the determining factor when choosing the pressure in the wheels. So, with a weight of 70-80 kg, it is recommended to inflate tires to a level of 3.5 bar. If the driver weighs less, then this value is large, if the mass is greater, then the increased deformation of the rubber must be compensated for by increased pressure.
Be sure to check the tire pressure at least once every 1-2 months, as air is gradually bled through the nipple.
Optimum pressure is selected as a compromise between speed, range and comfort level, safety. We pump - we improve speed and mileage, but worsen convenience and braking. And vice versa.
What pressure should be set in the tires must be indicated in the passport of the electric scooter.
For example, for the Xiaomi Mijia M365 brand, you need to set the following values:
| Rider weight, kg | Front tire bar | Rear tire bar |
| 50-70 | 2.40-2.75 | 2. |
| 90-90 | 2.75-3.10 | 3.10-3.80 |
| 90-100 | 3.10-3.50 | 3.50-4.15 |
Electric scooters use several standard wheel sizes. They are equal to 6; eight; 8.5; 10, 11, 12 inches.
6-8.5 inch wheels designed for asphalt travel. They are too small to successfully cope with bumps. Small tires have accelerated wear, so it is better to pump them over a little so that the resource becomes longer.
10-12 inch wheels suitable for dirt roads. To increase the patency, it is better to under-pump them a little.
To summarize everything that is written above, then choosing the optimal pressure for the wheels of an electric scooter, you need to take into account the weight of the driver, as well as where and how the vehicle is used. For movement on high-quality hard surfaces, it is better to pump tires, on rough roads - under-inflate. But you need to remember that you can’t lower the pressure too much - this will lead to the fact that the tire will fail faster.
If you have problems with an electric scooter and you live in St. Petersburg, then call Lenremont. Don't worry about the time - the dispatcher works 24 hours a day. You can simply order a callback on the site - they will call you back. The positive quality of the masters of Lenremont is that they do not try to breed for extra money. On the conscience they do the repairs that they ordered. But they are always ready to advise, including on what is the best pressure to pump into the tires of your scooter model.
NOTE: The unit must be moving at least 3 miles per hour (5 km/h) before starting the engine. Accelerate the engine to a speed of at least 3 mph (5 km/h) using the throttle to start the engine.
ACCEPTABLE RIDING PRACTICES AND CONDITIONS
Always check and comply with any local laws and regulations that may affect locations where the electric scooter may be used. Always stay away from cars and vehicles. Use only where permitted and with caution.
Always wear appropriate protective equipment such as an approved crash helmet (with chinstrap securely fastened), elbow and knee pads. A helmet may be required by law in accordance with local laws or regulations in your area. A long-sleeved shirt, long trousers and gloves are recommended. Always wear athletic shoes (lace-up shoes with rubber soles) and keep your laces tied and out of the way of the wheels, motor and drive system. Never ride barefoot or in sandals.
The charger supplied with the scooter should be checked regularly for damage to the cord, plug, housing and other parts. In the event of such damage, the scooter must not be charged until the charger has been repaired or replaced.
LACK OF THE GENERAL SENSE AND THE ABOVE WARNINGS FURTHER INCREASES THE RISK OF SERIOUS INJURY. USE AT YOUR OWN RISK AND WITH APPROPRIATE AND SERIOUS ATTENTION TO SAFE USE. USE CAREFULLY.
Remove the contents from the box. Remove the dividers that protect components from damage during shipping. Inspect the contents of the box for scratches on paint, dents, or kinks in cables that may have occurred during shipping. Since the scooter is 95 percent assembled and packaged at the factory, there should be no problems even if the box has a few scars or dents.
BEFORE CARRYING OUT ANY ASSEMBLY OR MAINTENANCE PROCEDURES, MAKE SURE THE POWER IS OFF.
Razor recommends assembly by an adult.
Assembly takes up to 10 minutes, not including initial charge time. Wait up to 12 hours for charging (see page 5 for charging information).
charger
(Note: Charger design may vary from picture shown)
The scooter was built to Razor's specific specifications. The original equipment supplied at the time of sale was selected based on its compatibility with the frame, fork and all other parts. Some aftermarket products may not be compatible and will void your warranty.
Note. The electric scooter must be traveling at a speed of at least 3 miles per hour (5 km/h) when using the throttle to start the engine.
The location of products identifiers:
(see locations on the left)
The content device Requires tool: Hexagonal key for 5 mm 9000 Front tire during production of heapons, but under the period may inevitably lose some pressure. Always inflate the tire to the correct PSI before first use. Lower air pressure can reduce travel time. Check the front wheel periodically. Re-inflate if necessary. Using a bicycle-type tire pump equipped with a Schrader-type valve, inflate the front tire to the PSI indicated on the sidewall of the tire. WARNING: Do not attempt to thread the stem into the front fork threads. Your electric scooter may not have a fully charged battery; therefore, the battery must be charged before use. charger WARNING: Use ONLY with approved charger. Batteries should only be charged under adult supervision. The charger is not a toy. Always unplug your charger before wiping and/or cleaning your electric scooter with ad.amp cloth. How to Operate After charging the battery (see page 5 for charging information): Note: Electric scooter must move at least 3 miles per hour (5 km/h) when the throttle is applied to start the engine. WARNING : Turn the power switch to the OFF position before servicing or servicing: Tool required: 10 mm wrench (not included) Tools Required: Two (2) 16mm wrenches (not included) Using two (2) 16mm wrenches, loosen the axle bolts by turning the wrenches counterclockwise. Remove the wheel and install a new wheel. Pay attention to the equipment sequence. Assembly and configuration
Roll fastening
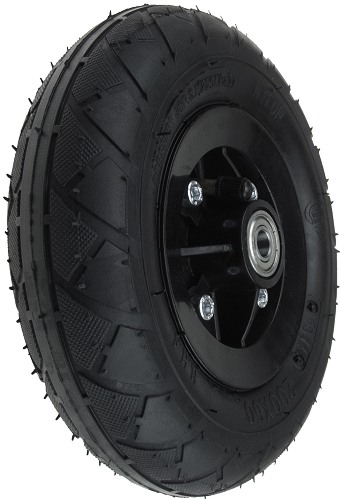
Tire
WARNING: Incorrect tightening of the collar clamp can cause the handlebars to move while riding, which can result in loss of control and a fall. When properly tightened, the steering wheel will not deviate from alignment with the front wheel under normal conditions.
WARNING: Check that cables and/or wires are not pinched or damaged when installing handlebars.
WARNING: Do not use the scooter for the first time until you have inflated the tire to the correct PSI. Failure to do so may result in damage to the electric scooter and void the warranty.
WARNING: Do not inflate too much air as this may damage the tire or wheel.
Note: Gas station compressed air systems are designed to inflate large volume car tires. If you decide to use this air supply to inflate an electric scooter tire, first make sure the pressure gauge is working and then use very short pulses to inflate to the desired PSI. If you accidentally inflate a tire too much, release the excess pressure immediately. CHARGING THE BATTERY
The design of the charger may differ from the one shown.
Note: If the green light (LED) does not come on, try a different outlet.
Charger LED should turn red while charging. When charging is completed, the indicator will turn green again.
The charger supplied with the electric scooter should be checked regularly for damage to the cord, plug, housing and other parts.
In the event of such damage, the electric scooter must not be charged until it has been repaired or replaced.
Chargers have built-in overcharge protection to prevent overcharging the battery.
Note: If the charger becomes warm with regular use, this is normal and is not a cause for concern. If your charger does not get warm during use, it does not mean that it is not working properly.
Socket - green (standby)
Socket and block - Red (charging) Socket and block - Green (charged)
Note: Continue to charge the unit even if the indicator turns green before 12 hours.
WARNING: The battery may deplete over time. Charge the battery periodically when not in use. PRELIMINARY CHECKLIST
Check brake function. When you apply the brake lever, the brake should provide positive braking action. Make sure the brake does not rub when the lever is released. When you apply the brake with the throttle on/on, the brake switch should cut power to the motor.
Periodically check the wheels for excessive wear.
Periodically check the tire for excessive wear and replace if necessary. Check tire pressure regularly and inflate if necessary.
Check for cracks or broken connections. Although broken frames are rare, it is possible for an aggressive rider to run into a curb or object, smash, bend, or break a frame. Make it a habit to check your scooter regularly.
Check all parts such as nuts, bolts, cables, fasteners, etc. before each ride to ensure they are securely fastened and properly assembled. There should be no unusual rattles or sounds from loose parts or broken components. If the item is damaged, do not ride. See "Safety Warnings" on pages 1 and 2 of this manual.
Always wear appropriate protective equipment, such as an approved safety helmet. Elbow and knee pads are recommended. Always wear athletic shoes (lace-up shoes with rubber soles) and keep your laces tied and out of the way of the wheels, motor and drive system. NEVER RIDE Barefoot OR IN SANDALS.
Always check and follow all local laws and regulations.
Do not assume that existing insurance policies necessarily cover the use of the product. Information about insurance can be obtained from your insurance company.
Prolonged exposure to ultraviolet rays, rain, and other elements can damage cabinet materials. Store indoors when not in use. USING
Do not operate the twist grip throttle unless you are on the scooter and are in a safe outdoor area suitable for riding.
How to ride
How to stop
The brake can skid the rear wheel and throw off an unsuspecting rider. Practice in an open area with no obstacles until you master the braking function. Avoid skidding to a stop as this may result in loss of control and/or damage to the rear wheel.
Note: As an added safety measure, the scooter is designed to cut off engine power when the handbrake is applied.
Note: The motor will restart (no start) if the brake is released and the throttle is applied before the scooter drops below 3 mph (5 km/h).
Note: Only practice riding in open areas where there are no curbs, parking lots or other obstacles. Wheels colliding with hard surfaces can damage the wheels. The limited warranty does not cover wheels. REPAIR AND MAINTENANCE
Brake adjustment
Front Tire Replacement
Rear wheel/hub motor/battery replacementmm, two (2) 10 mm wrenches, two (2) 8 mm wrenches (not included)
Scooter cleaning
Wipe with ad & cloth to remove dirt and dust. Do not use industrial cleaners or solvents as they may damage the surfaces. Do not use alcohol-based, alcohol-based, or ammonia-based cleaners as they may damage or dissolve plastic components or soften stickers or sticker adhesive.
Battery care and disposal
Do not store at or below freezing temperatures. To properly maintain your battery and ensure maximum battery life, please read the "Charging the Battery" section on page 5 of this User's Guide carefully.
Disposal: Your electric scooter uses sealed lead acid batteries and must be recycled or disposed of in an environmentally sound manner. Do not throw lead-acid battery into fire; the battery may explode or leak. Do not dispose of the lead-acid battery in normal household waste. Burning, burying, or mixing sealed lead-acid batteries with household waste is prohibited by law in most areas. Return depleted batteries to a federally or state-approved lead-acid battery recycler or local automotive battery dealer. If you live in Florida or Minnesota, it is against the law to dispose of lead-acid batteries with household waste.
charger
The charger supplied with the electric scooter must be checked regularly for damage to the cord, plug, body and other parts, and in the event of such damage, the product must not be charged until it has been repaired or replaced.
Use ONLY with the recommended charger.
Wheels
Wheels and drive system are subject to normal wear. It is the user's responsibility to periodically check the wheels for excessive wear and replace the hub motor components as necessary.
Spare Parts
Most commonly requested parts are available from select Razor retail partners. For a complete selection of replacement parts, visit www.razor.com
Repair Centers
List of Authorized Razor Repair Centers:
US and Canada only:
For more information about battery recycling, call toll-free 1-800-822-8837 or visit http://www. call2recycle.org
WARNING: If a battery leaks, avoid contact with leaking acid and place the damaged battery in a plastic bag. See disposal instructions on the left. If acid comes into contact with skin or eyes, flush with cool water for at least 15 minutes and seek medical attention.
WARNING: Battery posts, terminals and related accessories contain lead and lead compounds. Wash your hands after work.
WARNING: Wheelies and other stunt exercises reduce your ability to maneuver and control your scooter. Take the necessary precautions, such as wearing appropriate protective equipment and practicing in an area that is safe for stunt riding and clear of obstacles.
* Product(s) must be turned off and fully charged before any troubleshooting steps are taken.
NOTE: All troubleshooting steps should be performed by adults only.
| Problem | possible reason | Solution |
| does not work from the box | before the engine is turned on the unit should move at at least 3 miles per hour (5 km /). Battery undercharged | Strike to start moving at least 3 miles per hour (5 km/h) by applying the throttle to start the engine. Check the lights on the charger: Connected to the wall - green Connected to the wall and device - red (charging) Connected to the wall and device - green (charging complete) off / flashing - replace the charger |
| No longer working | No light on charger Insufficiently charged battery
Battery not holding a charge | Check power outlet and/or try another outlet. Check the lights on the charger: Connected to the wall - green Connected to the wall and device - red (charging) Connected to the wall and device - green (charging complete) off / flashing - replace the charger Charger - see page 5 for charging information. Replace battery. |
| Short run/slow run | Rider weight Riding conditions Battery not fully charged Old/damaged battery | Do not exceed the maximum weight limit of 220 lb (100 kg). Use only on flat, dry surfaces. Avoid slopes and areas with heavy debris.
Charger - see page 5 for charging information. Replace battery.
Charge the battery at least once a month when not in use. |
| For more troubleshooting tips, a list of available parts, or to find an Authorized Service Center in your area, visit our website www.razor.com or call toll-free +1 866-467-2967 to speak with a current customer service representative. | ||
Keep your electric scooter running smoothly for years to come with Genuine Razor Parts. Please visit our website or email for more information on spare parts availability. (Specifications subject to change without notice.)
WARNING: INSURANCE
YOUR INSURANCE POLICY MAY NOT PROVIDE PROTECTION FOR ACCIDENTS RELATED TO THE USE OF THIS SCOOTER/ELECTRIC DRIVE. YOU MUST CONTACT YOUR INSURANCE COMPANY OR AGENT TO DETERMINE WHETHER COVERAGE IS AVAILABLE.
This device complies with Part 15 of the FCC Rules. Operation is subject to the following two conditions: (1) this device may not cause harmful interference, and (2) this device must accept any interference received, including interference that may cause undesired operation.
Note: This equipment has been tested and found to comply with the limits for a Class B digital device, pursuant to Part 15 of the FCC Rules. These limits are designed to provide reasonable protection against harmful interference in a residential installation. This equipment generates, uses and can radiate radio frequency energy and, if not installed and used in accordance with the instructions, may cause harmful interference to radio communications. However, there is no guarantee that interference will not occur in a particular installation. If this equipment does cause harmful interference to radio or television reception, which can be determined by turning the equipment off and on, the user is encouraged to try to correct the interference by one or more of the following measures:
WARNING: Changes or modifications to this product not expressly approved by Razor USA LLC could void the user's authority to operate the equipment.
Razor Limited Warranty
The manufacturer warrants this product to be free from manufacturing defects for a period of 90 days from the date of purchase. This limited warranty does not cover normal wheel wear or any damage, breakdown or loss caused by improper assembly, maintenance, storage or use of the electric scooter.
This limited warranty will be void if the product:
The manufacturer is not liable for incidental or consequential loss or damage caused directly or indirectly by the use of this product.
Razor does not offer an extended warranty. If you purchased an extended warranty, it must be honored by the store where you purchased it.
For your records, please keep the original sales receipt with this manual and write the serial number below.
CUSTOMER SERVICE CONTACT
Need help? Visit our website for parts, product support, a list of US Authorized Service Providers, and support contact information at www.razor.com. Please have the product identification code (located on the white label of your product) ready to help you get help. Additional customer support contact information is listed below:
The United Kingdom and Ireland
Razor USA LLC (Great Britain)
Group 20
Business Center Hartnoll
Post-Hill, Tiverton
Devon EX16 4NG
+44 (0) 120 267 2702 9018 [ELECTRIC
Europe, Middle East, Africa
Razor USA LLC (Europe) Handelsweg 2
2742 RD Vaddinskven
Netherlands
+44 (0) 120 267 2702
[Email is protected] 9000 9000 9000 0160
Fantastic Limited
Lux 2.