by Emily Patterson
When a lawnmower tire has plenty of tread left yet has a puncture or leak, it may be less expensive to put an inner tube in the tire to extend the life of the tire. To purchase an inner tube for a lawnmower tire, get the numbers on the side of the tire and call local tire shops for price and availability. Check for any glass, nails or other debris and remove before inserting the inner tube in the tire.
Put a jack, jack stand, concrete block or other stable wedge under the lawnmower to support the lawnmower.
Remove the tire and rim from the lawnmower. Lay the wheel on a solid surface.
Wedge a crowbar and hammer between the rim and tire. Hit the crowbar with the hammer to push the tire away from the rim to break the bead. Go all the way around the rim with the crowbar and hammer to push the tire totally away from the rim. Be careful not to damage the edge of the tire or the rim.
Push the tire down where the valve stem is protruding through the rim. Use a pair of sharp snips to cut the valve stem and remove.
Use the crowbar as a wedge to carefully slide the tire, one small section at a time, over the rim so the rim is under the lip of the tire.
Sprinkle cornstarch into the tire. This will help the inner tube move freely in the tire and make it easier to maneuver into position.
Lay the inner tube on the top and position it so that the valve stem on the inner tube is in the same position as the hole for the valve stem on the rim. Push the inner tube into the the tire and push the valve stem through the hole in the rim. Use a pair of vise grips to clamp the valve stem on the outside of the rim.
Push the inner tube onto the rim with your hands and move it into position in the tire. Make sure that the inner tube is not twisted in the tire.
Wash the edge of the tire and inner edge of the rim with hot, soapy water. Do not saturate. It is easier to reseat the bead when both the tire and rim are clean.
Lay the crowbar across the rim horizontally so that the hooked end can be inserted between the tire and the rim. Hook the end of the crowbar onto the rim under the edge of the tire that was removed from the rim. Be careful that you do not pinch the inner tube. Lift the end of the crowbar so the tire moves back into position on the inner side of the rim. Follow this procedure all the way around the rim, in small increments, until the entire tire has been moved back into position on the rim.
Remove vise grips from the valve stem and inflate the inner tube until the tire pushes against the rim. When the tire pushes against the rim, pour liquid dish soap between the edge of the tire and the rim. Wrap a heavy rope around the center of the perimeter of the tire and pull it tight. You can also use a clothing belt for this. The purpose of this is to push the edge of the tire as tight against the edge of the rim as possible with equal distribution all the way around. Pour more dish liquid all the way around the rim between the tire and the inner tube.
Continue inflating the inner tube until the tire is completely tight against the rim and there is no space between the edge of the tire and the rim. Deflate the inner tube and push on the tire where it meets the rim. If it pushes away from the rim, reinflate the inner tube. Repeat this process until the tire cannot move away from the rim when pressed.
Deflate the inner tube until it is inflated to the manufacturer's recommended pressure. Replace the rim on the lawnmower.
References
Tips
Things You'll Need
Warnings
 Inflate the tire only to the manufacturer's recommendation before replacing on the tire. Overinflating can cause the tire to burst.
 Writer Bio
Emily Patterson has been creating content for websites since 1996. She specializes in home improvement, natural body care and natural cleaning articles. Patterson holds a computing certificate from Penn State University.
There is no substitute for a lawn mower to make your lawn look nice and attractive. But a lawn mower is only effective when all of its parts are perfectly fine.
If the lawn mower is used regularly, then there is considerable pressure to fall on the wheels. As a result, the wheel is likely to be leaked or punctured. Like other vehicles, tubeless tires can not be used in lawn mowers.
If the tire is leaking or getting punctured then it is absolutely necessary to repair it. And this can be solved by putting a tube inside the tire.
Are you in a dilemma on how to put a tube in a lawn mower tire? Throw out all your confusion as you are here!
Yes, we’re here to give you the right guideline.
In this article, we are going to bring up all the steps that you need to put a tube in a lawn mower tire.
So, without panicking, Let’s see what is waiting for you.
In this content you’ll learn:
First things first, before putting a tube in a lawn mower tire, it is necessary to gather the required tools. You will easily find these effective tools. Let’s have a look at the necessary tools.
Necessary tools:
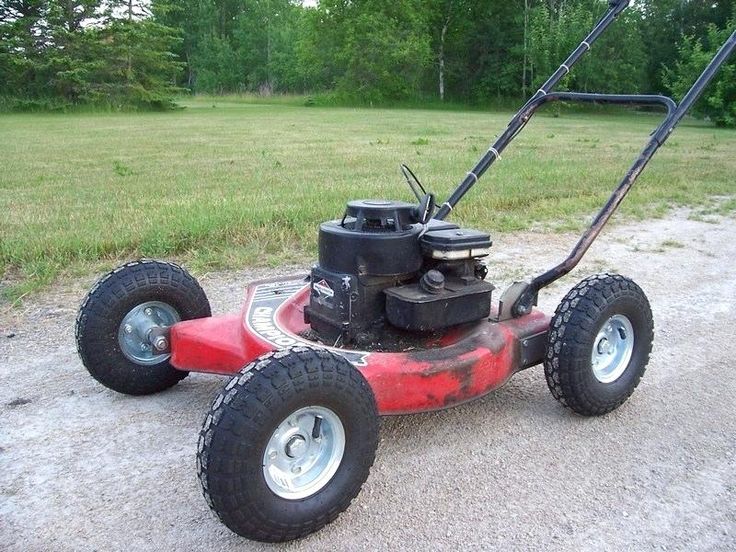
Steps to follow:
Step #1: Adjust The JackFirst of all, take the lawn mower to a flat surface. Enter the jack under the lawn mower for the convenience of the task.
Step #2: Remove Tire and RimNow take out the tire and the rim from the lawn mower. Put the wheel on the ground horizontally.
Step #3: Remove The Rim From The TireInsert a crowbar between the rim and tire and gently hit the crowbar with a hammer. This will slowly remove the rim from the tire. Do the same thing around the tire. However, be careful that the edges of the tire and rim are not damaged.
Step #4: Cut Off The Valve StemPull the tire down and find out where the valve stem is. Cut off the valve stem using scissors and bring out.
This time, try to open the tire carefully using the crowbar. But don’t try to open too many portions at once. It is likely to damage the tire. Notice that the lip of the tire is always at the bottom of the rim.
Step #6: Sprinkle CornstarchSprinkle some cornstarch inside the tire. The tube will easily come out of the tire.
Step #7: Insert New TubeNow it’s the turn to insert a new inner tube. Insert a new tube inside the tire. Notice whether the valve stem of the tire and the valve stem of the inner tube is in the same position.
Step #8: Insert The Tube Inside The TireInsert the tube inside the tire so that the valve stem can be easily inserted into the rim hole. A couple of vise grips allow you to band the valve stem on the outside of the rim.
Step #9: Adjust The TubePush the inner tube within the tire and set it carefully in the inner portion of the tire. Try to ensure the tube within the tire doesn’t fold. Remove the vise grips at the outside.
Now wash the tire’s edge and the inner edge of the rim thoroughly with a mixture of hot water and soap. Installation is easier when the tire and rim are clean.
Step #11: Set Up The Tire and The RimWhen the tube is properly positioned, this is time to set up the tire and rim. To tighten the rim inside the tire, tighten a rope around the tire. The purpose of the rope is to tighten the rim so that it can be firmly attached to the tire.
Step #12: Apply Some Liquid Dish SoapRub some amount of liquid dish soap at the edge of the tire and at the rim’s edge. This will help attach the tire to the rim. Rub the dish soap around the rim and the edge of the tire and give some pressure to the tire to attach with the rim well. Apply pressure until the tire is fully tightened against the rim.
Always make sure there is no gap between the tire and the rim. Finally, check around the tire well.
Step #14: Reinstall The WheelDone. Now reinstall the wheel with a lawn mower. It will be re-usable when inflating the tube according to the manufacturer’s recommendation.
Special Tips:You can use a spoon to remove and attach the tire to the rim well. This will make your task easier.
Cautions:Putting a tube in a lawn mower tire is an easy task if you have proper knowledge about it. But If you are a newbie, it can be a quite tough task for you.
Following the above-stated process will make your task easier. You can even try this at home. Nevertheless, always maintain the cautions for avoiding any kind of unforeseen accidents.
Hopefully, this article has helped you to get the appropriate guidelines on how to put a tube in a lawn mower tire.
MowersTips
Todd L Miles
Lawn Mowers Enthusiast
I started "Landscape and Lawns Care" to provide clients with lawn care with better service, better products and, most importantly, better ethics. My promise to every customer is to give the greenest grass possible while controlling weeds, insects, and diseases! The most important thing is that I strive to always do the right thing for you, your lawn and your wallet!
When purchasing a cultivator for a household or farm, they often look solely at the performance of the unit and engine power. But the running gear of the equipment has a direct impact on the efficiency of work. Each owner must clarify in advance which wheels fit of his model walk-behind tractor .
Factory walk-behind tractors are fully equipped, however, the undercarriage fails over time due to loads. It is important to have at least two pairs of spares in the bins at home wheels on the cultivator cart in order to replace the defective part in time.
In addition to replacing worn out wheels, modernization of the running gear is often required. This must be done in the following cases:
In our store you can choose and buy top wheels for motoblock Neva and other manufacturers.
Before you decide which wheels are best for your walk-behind tractor , it is important to know about their varieties. The undercarriage for the cultivator is available in several versions:
In order to clarify how much wheels for a walk-behind tractor , you need to call our contact numbers or go to the catalog on the official website of the store.
When choosing wheels for the Salyut walk-behind tractor and other manufacturers, it is important to consider what land the cultivator will cultivate. For loosening clay soil or in conditions of high humidity, it is recommended to use pneumatic or soil cutters. nine0007
When choosing wheels for a walk-behind tractor with a standard size of 8 , it is important to pay attention to the following criteria:
For the primary processing of virgin soil, cast wheels of the walk-behind tractor with a size 13 are better suited. They are not equipped with an internal chamber, so they are not afraid of mechanical damage. It should be borne in mind that such a running traction has a lot of weight, therefore it is suitable for heavy walk-behind tractors. nine0007
Our store offers a wide range of wheels for a walk-behind tractor from trusted manufacturers, including Neva . We guarantee the high quality of each unit and offer the most favorable price , because we work directly with suppliers without intermediaries.
If you have any difficulties, just call the contact numbers. Professional consultants with experience will help you choose the best model, including big wheels for the cart of the motor-block at the most favorable cost.
The driving traction must provide the cultivator with high maneuverability, while not damaging the plantings and seedlings on the site!
03/05/2013
Probably the most common cyclist failure is a tire puncture, especially if he rides in an aggressive style.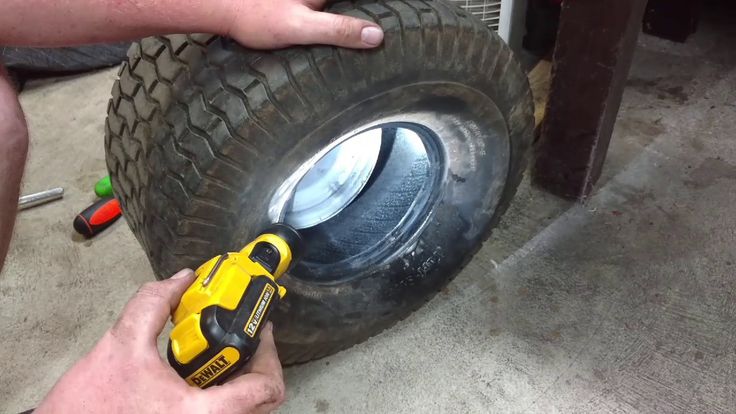 Either he hit the glass, then a nail, and sometimes he just ran into the curb at speed. Experienced cyclists can change the tube in the bike with their eyes closed, but what about a beginner who can't even take off the wheel, let alone change the tube. The main thing is not to despair! If you are traveling a long distance (and always better), take a pump with you, a spare tube, or, in extreme cases, a "bike first aid kit" for the wheel. Someday she will save you from the fate of pulling the bike "on yourself". nine0007
So, if you punctured the wheel , first you need to get off the bike, in no case continue to move on a flat tire . Firstly, you will tear the tube even more, and secondly, you can ruin the tire, and in the worst case, the rim.
How to change the tube on a bicycle
1) If the wheel has not completely deflated, deflate it to the end, to do this, unscrew the nipple (spool) cap. If you have a nipple (spool) the same as in the car, press something sharp on the small button in the middle and hold until the tire is flat. If you have a cap with a key for the spool, then just unscrew it. If you have a nipple (spool) like in old bicycles, unscrew the lamb and take it out. nine0007
2) Remove the wheel. If the wheel is on an eccentric, removal will not cause difficulties, if not, then keys will be needed (depending on the bike and wheel - 13-17).
3) If you have "pliers", use them to remove the rim from the wheel, if there are no pliers, you can use an improvised tool (wrenches, etc.), but it is advisable not to use objects with a sharp edge - this can lead to damage to the tube or rim. Tear the tire with your tool and, resting it against the rim, press down until the edge of the tire comes out of the rim, then take the second key or mount and do this action again, while NOT removing the first key. When you feel that the keys do not lean back when you release them - just try to move the second key in a circle away from the first key.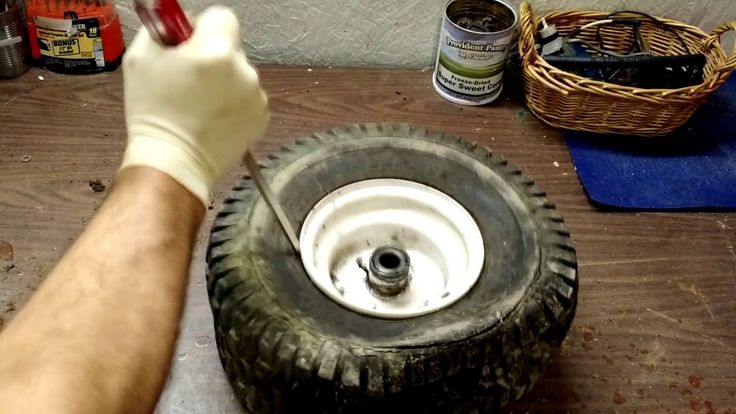 nine0007
4) Remove the camera by simply grasping it with your fingers. Grasp the opposite side of the nipple (spool).
5) In principle, it is possible to insert a new tube, but I recommend removing the tire completely (this can be done by hand or with tools (wrenches)).
Check the condition of the rim: there are no metal burrs inside, check the condition of the rim tape, look inside the tire. This should be done if you change cameras frequently and don't know where you might have blown a tire. nine0007
How to install a tube in a bicycle wheel
1) Take a new tube or a sealed tube (how to tape a tube), squeeze it with one hand and run it in a circle - this will help to clean it of unwanted foreign objects (rubber pieces, metal chips, etc.) .d.)
2) Lightly inflate it, if you removed the tire completely, put it on one rib (if the rubber is directional - make sure you install it correctly (you can peek at the rear wheel if the treads are the same)).