If you travel to the mountains or snowy areas regularly, sooner or later you’re going to have to use tire chains. Start by getting the right set for your vehicle at your local Les Schwab.
Quick-fit chains are not your grandpa’s tire chains. They are MUCH simpler to put on and take off. Here are a video, step-by-step instructions, and driving safety tips for installing quick-fit tire chains on your vehicle.
When you need chains, driving conditions are nasty. Snow is coming down, passing traffic is spraying slush, dirty water is dripping off your wheel wells, the road is slick, and it may be dark. Don’t make this the first time you put on your chains.
Practice installing your new chains once BEFORE you travel. Take advantage of a dry garage or driveway to make sure your winter tire chains are the right size and you’re comfortable putting them on. If needed, the professionals at Les Schwab Tire Centers can help.
Put together a simple winter road trip safety kit with warm gloves, waterproof layers, and other items to make your winter driving more safe and comfortable. In the winter, always carry this emergency kit and tire chains in your vehicle.
Once you’re comfortable installing your chains, you’re ready to hit the snow.
Be Safe. If you’re on the road, pull off as far as possible onto a safe shoulder. Flip on your hazard lights. Put on your waterproof layers, hat, headlamp, and gloves from your winter road trip kit.
Identify the Correct Tires. If your vehicle is front-wheel drive, the chains go on the front. If it’s rear-wheel drive, chains go on the back. If it’s all-wheel drive, please check your owner’s manual. If you’re not sure, you can ask the experts at Les Schwab for help.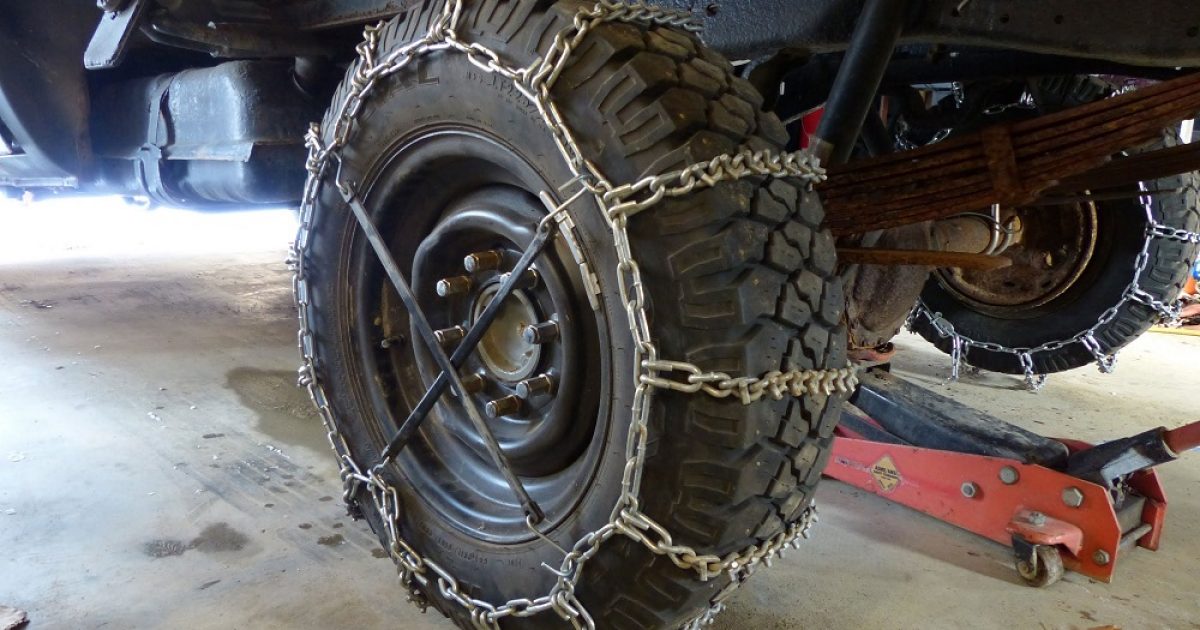
Pull Out Chains & Instructions. With your vehicle parked, open the bag and pull out your instructions and your first chain. Each bag comes with two chains. The plastic instruction mat that comes with your chains can be used as a barrier between you and the snow to keep you dry.
Untangle Your Chains. Holding them from the plastic-covered cable, make sure everything is straight and the chains are not looped over one another. Hold up your chains so the yellow end is in your left hand and the blue end is in your right.
The chains should hang loosely and the metal hooks seen along the yellow and blue sections should be facing away from you so they don’t damage your tires.
Place Chains onto Your Tire and Connect the Cable. Lay your chains on the ground and push them behind the tire, yellow cable end first, from the right side to the left.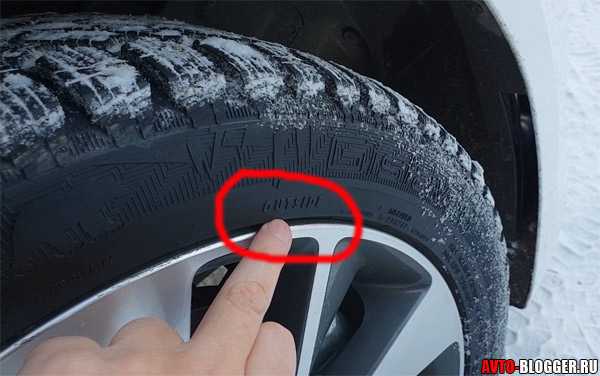
Once the chains are centered behind the wheel, grab both ends and pull them up over the top of the tire. You should feel the chains against your axle.
This will allow you to easily connect the yellow and blue ends of the cable by slipping one end into the other and pulling them into place.
Connect the Red Hook. Now that the cable is connected on top, look for the red hook directly opposite the cable connection. Connect the red hook on the right to the first available gold link on the left.
Check the Diamond Shape. Push the connected chain over the top of the tire. You should see the diamond shape in the chains against your tire. Between each of those diamonds is the center rail, which should be placed down the middle of the tire tread.
Connect the Red Chain Along the Bottom. Now that the cable is connected on top, look for the red hook directly opposite the cable connection. Connect the red hook on the right to the first available gold link on the left. Push the connected chain over the top of the tire.
The bottom of the chains includes a red draw chain with bungee on your right, and a chain guide on the left. Pull these out towards yourself.
Take the long red chain and run it through the chain guide and pull as tight as you can with both hands. Don’t pull using the bungee. As you pull, one of the chain links will find its way into the notch on the red chain guide, locking it into place.
Using the bungee end of the red chain, pull it through one or both of the red loops and secure it to a gold-side chain opposite the red loops. If you can’t get it through both loops, that’s ok, pull tight through one and attach it to a side chain to the left of the loop.
Repeat on Second Tire. Repeat these steps to install chains on the other side of your vehicle.
Drive Forward Slightly. The next step is to drive forward about 15 feet, or a full car length. This gives the chains a chance to relax and settle on your tires.
Re-tighten Chains. To take up any slack, unhook the rubber end of the red draw chain and pull it tight again. Once it’s tight, guide the red chain through the loops and, again, securely latch the bungee end to the gold-side chain.
The chains should be tight on the tire. And, be sure to stop if you hear them making any contact with your vehicle. If your chains are still loose, unhook the bungee and adjust the red hook straight across from the chain guide. Unhook and reattach to the tightest position on one of the three gold chain links. It’s okay if the extra links are hanging loosely. Now, you’re ready to reattach your bungee.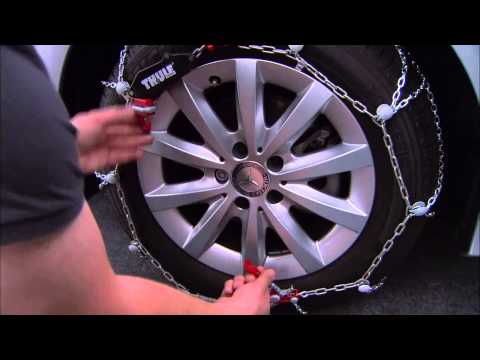
While driving with tire chains, listen for a loud sound of slapping, or metal on metal. If you hear any indication that a chain may be broken or hitting your car, STOP as soon as safely possible. Loose or broken chains that flap can wrap around a strut or shock component, causing big damage to your vehicle. To help prevent damage, here are a few tips for driving when you have winter chains installed on your vehicle.
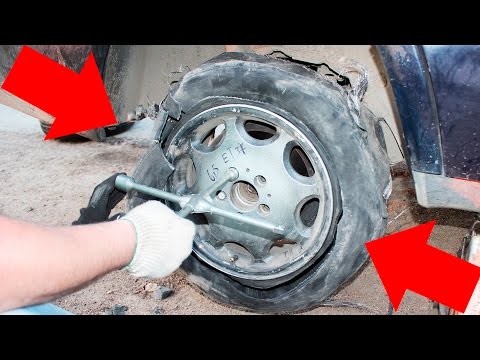
Pull over in a safe location and remove the chains. Start by unhooking the bungee and chain from the guide, removing them from the tensioner. Unlatch the red hook, and then undo the blue and yellow cable connection. Once all of your chains are off and lying flat on the ground, pull backward or forward slowly a few feet so you can safely pick them up.
At the end of your trip, lay your chains out in the garage and let them dry. If you pack them wet, they can rust.
Also check them for wear, especially if you’ve driven them on asphalt for any distance. Look for flat spots, and replace the chains if you find some.
Link at left shows flattening from wear. Link in center shows sharp edge from wear that can damage a tire.
Remember, if you don’t use your chains all winter long, you can return them with proof of purchase to any Les Schwab for a full refund in the spring.
Get your next set of Quick-Fit chains, along with a few tips on how to install them, at your local Les Schwab, where doing the right thing matters.
Want more tips on winter road safety? See 19 Winter Driving Resources You Can’t Do Without.
Get More Winter Tips
By Kurt Spurlock
If "Jingle Bells" has taught us anything, it's that dashing through the snow seems like a damn good time.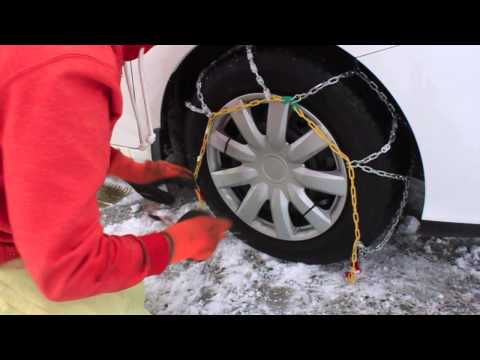 Laughing all the way and making spirits bright, all while "Miss Fanny Bright" rides shotgun? Sounds pretty dope. Dashing off the side of the road in an uncontrolled skid, on the other hand... Much less dope.
Contents
Easy
10 minutes
Of course that song was written in 1857, and chances are whatever you're driving has something a bit more substantial than "one horse" under the hood, in which case you're going to want to learn how to put on snow chains before taking off o'er the fields. Here's how to go about that.
Gloves are a good idea. Hat choice is a more personal matter.Proper fitment is the first and arguably most important step for choosing and using snow chains. Get a set that's too small, and you won't be able to get them on the tire.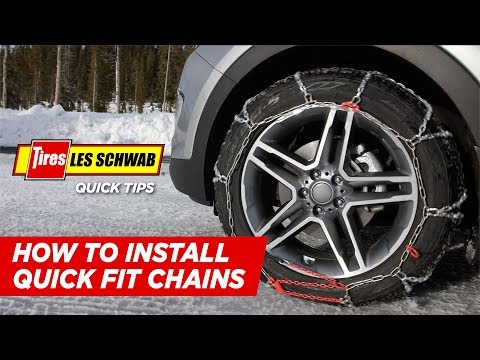 Go too big, and you won't be able to snug them down properly, which is both unsafe and can tear up your tires and wheels in short order.
The good news here is that finding the right size snow chains for your car is also the easiest part of the process. All you need to know is your tire size.
If you already know what size rubber your car is sporting, you're ready to shop. If you're not sure, just walk out your front door and take a look at the sidewall of your tires.
The number you're looking for is typically written in big letters, separated by slashes, dashes, or spaces. Some are smaller and less obvious than others, but it should look something like the "255/30ZR20" in the image below:
Everything you need to find the right size chains is written on the side of your tires.Generally speaking, snow chains are pretty low-tech and have been around forever, and all work in more or less the same way by stretching lengths of chain over the tread of your tires to better "bite" into the snow and ice underneath.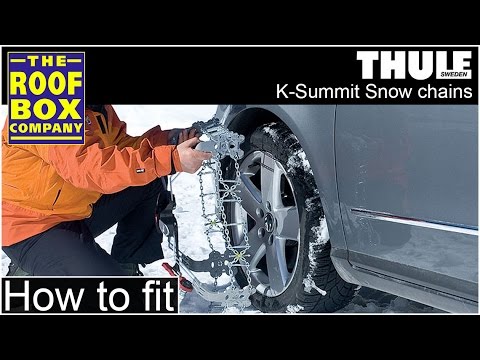 With that being said, some are simpler and/or more crude than others.
The two main factors you'll want to consider are (a) ease of installation and (b) how much you care about your wheels.
As far as installation goes, as we'll detail below, most chains require you to lay them out, drive over them, then secure them to your tires. Others use a "quick-fit" system that can be installed start to finish on a stationary vehicle. As you'll read, neither option is particularly difficult with a little practice, but just know some snow chains go on easier, faster, and with fewer steps than other.
In terms of your wheels, the important thing to note is that some chains lay across the surface of your wheels, while others only touch the rubber surfaces of your tires. If you're a stickler for keeping your wheels nick, scratch, and ding free, you'll likely want to shop around for a set that doesn't stretch across the surface of your rims, or at least uses a protective/soft surface at any contact points on your wheel.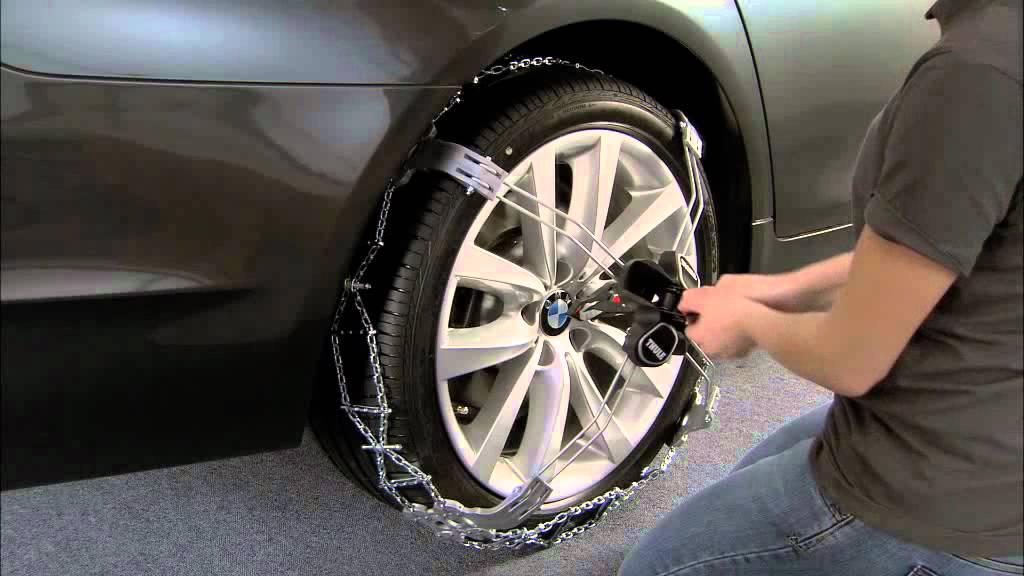
Right. Down to business.
As stated above, some snow chains use unique hardware to attach and tighten, but 99% of chains all share the same basic attachment procedure. Here's how to go about that.
Step 1: The first thing you want to do is find somewhere safe and out of the way to park while you install your chains. Make sure your wheels are straight and that you set the parking brake before getting started. Safety first and all that.
Step 2: Next, take out your snow chains and determine which side of the chains hold all the fastening/tensioning mechanisms. Some use hooks, some use cams, and some use ratcheting systems, but they all use something. Whatever your chains use, you want to ensure the side with the fastening hardware goes on the outside of the tire.
Step 3: Once you've got heads or tails of which side is which, it's time to drape the chains over your tires. Which tires your chains go on depends on whether your vehicle is front, rear, or all-wheel drive. Snow chains always go on the driven wheels, so front-wheel drive cars get chains on the front, rear-wheel on the rear, etc.
If you're driving an all-wheel-drive or four-wheel-drive vehicle, typically your chains will go on the front tires to boost traction when steering, but always double-check your owner's manual because those folks probably know your car better than we do.
Right. Start out by draping your chains over your tires, taking care to center them as much as possible with the middle of your tire tread. What we want here is for the bottom inch or two of your chains to sit on the ground, tucked directly in front of the tire, while the remaining slack hangs back toward the rear of the vehicle.
Step 4: Next, hop back in your car, release the e-brake, and drive about two feet straight forward to get both open ends of the chains around to the rear of the tire.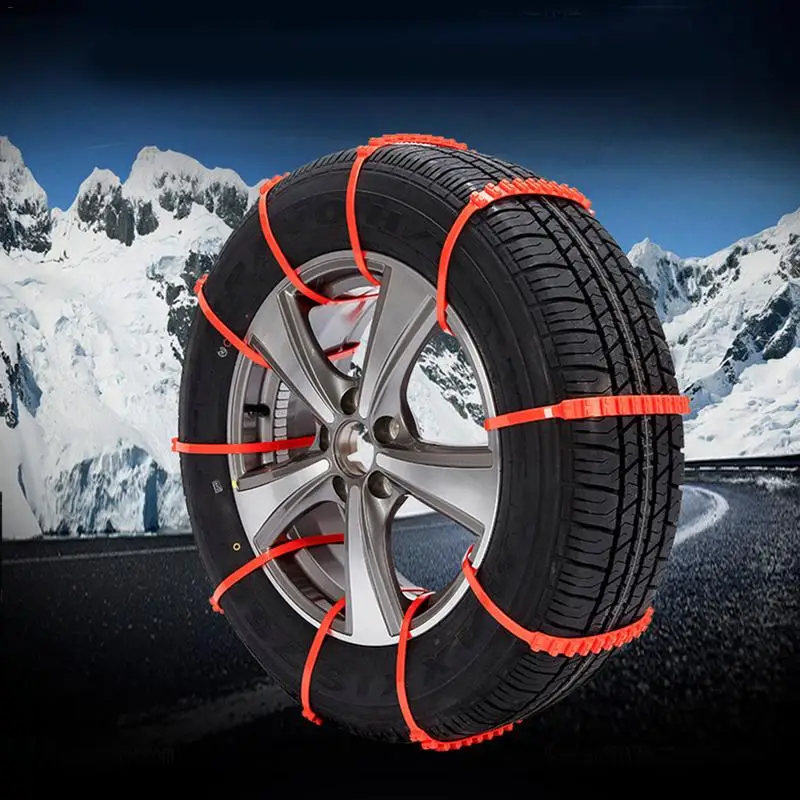 Set the e-brake again, hop back out, and connect the open ends of the chains on both the inside and outside of your tires.
Step 5: Once the chains are connected, it's time to tension them down. The goal here, regardless of how your chains tighten, is to get your snow chains snug enough that they won't squirm around as you drive. Tighten your chains down until you can't wiggle them around on your tread by hand.
Step 6: Once everything feels nice and secure, get back in your vehicle and drive 2-3 car lengths straight ahead. Once again, park and set your e-brake, then get out and recheck the tension of your snow chains.
Driving this short distance allows your chains to "settle" and distribute any remaining slack. Give both chains a good tug to make sure they're still safely secured to your tires. If either one has loosened up, tighten them down again, then repeat this step. Once you've confirmed your chains are nice and tight, you're all done and it's time to hit the road.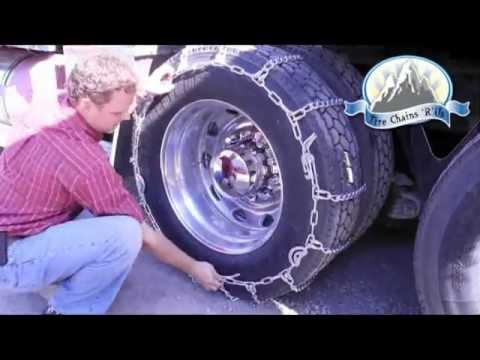
Once your chains are secured, proceed to drive as you normally would in snowy or icy conditions. If you missed our guide on how to drive in the snow, now is the time to check it out.
Apart from that, there are two main things to keep in mind when driving with snow chains on your car.
First, you should never drive over 25mph with jewelry on your tires, no matter how well you've snugged them down. Snow chains create an imbalance on your driven wheels, which can lead to high-speed wobbles or outright failure at faster speeds. Both of which are a serious safety issue, so don't risk it.
Second, once you get through the snowy portion of your drive, you should take your snow chains back off immediately. On dry pavement, snow chains damage the roads, aggressively wear down your tires, and can even be worn down to the point of failure after a few short miles. We know taking them on and off is a pain (especially when it's painfully cold outside), but keeping them on just isn't worth the risk or expense.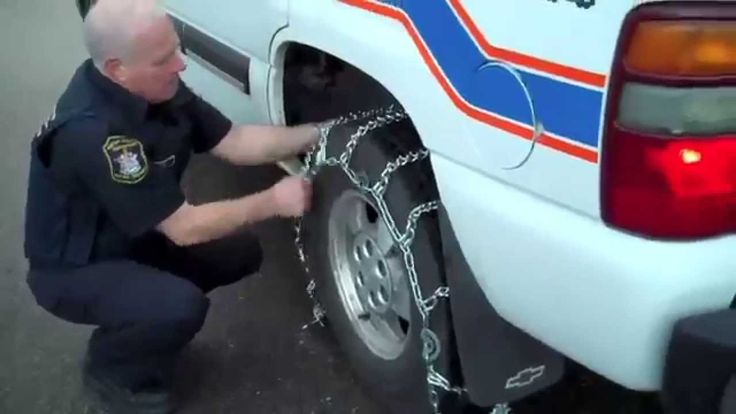
An effective way to significantly increase the car's cross-country ability is to install snow chains on the wheels. The tool is simple, but you usually have to mount it on wheels literally in the field. How to do it quickly and without stress and nerves?
A paradoxical thing: many drivers are so afraid of the procedure for installing chains on wheels that they are ready to abandon the chains in favor of some simplified devices such as bracelets, nets and the like. Although in fact it is the chains that are the easiest to install. However, this is true only if you know the basic techniques for putting a car in a chain. nine0003
Snow chains on wheels significantly increase the vehicle's cross-country ability, but do not turn it into a tractor.
Before installing this powerful piece of equipment on a machine, consider whether the chained wheel looks like a photo or another machine. Understand the appearance and placement of each element of the chain: the working part, the side branches and the lock. Regardless of the brand, it is customary to highlight each element in its own color - to simplify putting the chain on the wheel. nine0003
See also: What not to do when driving on fresh snow
If you know the chain design and terminology, you can immediately go to the second part of the article, where we talk about mounting them on the car.
The working part is located on the tread, its elements cross the tread of the tire across or almost across, but usually there are several longitudinal links.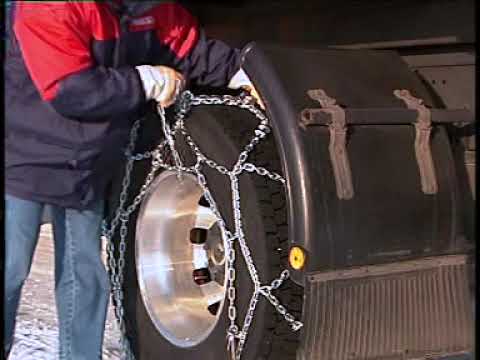 The working part of the chain has a neutral color, as a rule, this is the tone of the galvanized metal coating. nine0003
Properly dressed chains look like this. Side branches (red and blue) keep the working part on the tread
The side branches are ring-shaped and respectively hug the tire on both sides - they keep the working part of the chain on the tread. The outer side branch, like the working part, is made of the chain itself, the inner one, which is not visible on the car, is made of a rigid cable in a plastic sheath. The inner, cable branch is detachable, but has a fixed diameter. The outer branch is chain, consists of two parts and closes through a carabiner and a lock, thanks to which it easily changes the length (that is, the diameter). In addition, there is a hook with a rubber shock absorber on the outer ring. Lateral branches are usually colored: blue, red or yellow. nine0003
Lock is designed to tighten the outer side branch (reducing its diameter) and fix the achieved diameter.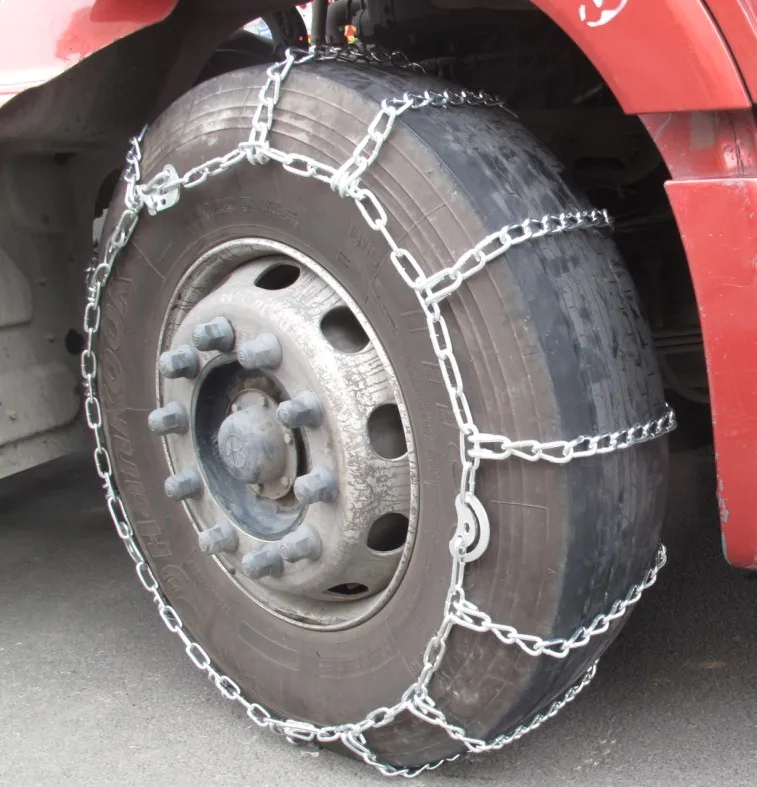 Actually, it is located on the very side ring. Locks come in various designs, including those with automatic tension. They are often made in a bright color, usually red.
See also: In the Carpathians with skis: we go to a resort with cars
There is nothing complicated in this operation, the only unpleasant thing about it is the need to squat near the wheels and the need to hold cold metal with your hands. Therefore, it is desirable to have gloves for such a case, preferably leather. nine0003
The algorithm for installing chains on wheels is generally simple. We advise you to use gloves and some kind of padding under your knees
After putting on the chains, drive up to ten meters and tighten the side branch in the lock again (on the photo in red)
If your kit has a self-tightening lock, the last two operations are not necessary and you can go straight away. But it’s better to stop after a few minutes of driving, get out of the car and make sure that the chains fit the tires well. Keep in mind that in many cases the chain can scratch the wheel rim, which is not very pleasant for the owner, especially if the rims are alloy. But with a strong desire, you can almost always pick up a chain of such a size that it will not be located outside the bar. nine0003
Most chain manufacturers allow a maximum speed of 35 - 50 km/h.
Also remember that it is very important not to drive too fast with the chains on the wheels, as this will damage the tires, rims, and even the fenders of the car. It is also very undesirable to drive with chains on wheels on clean asphalt (short sections do not count).
In order not to get tangled in the chains, removing them from the case somewhere on the side of the road or in a deep rut, we strongly advise you to practice installing them on the car in advance - for example, at the beginning of the season or before leaving for snowy areas. This will be useful even if you already have some experience in this matter, and even more so if the kit is new. nine0003
See also: How not to skid in the snow: 5 tips
Contents
Whereas in Europe, on the contrary, few people use studded tires. And when traveling to ski resorts, on some roads you may encounter a mandatory requirement to use snow chains. nine0003
You will be informed about this by the relevant road sign. And the fact that you can have winter tires installed will not matter. So for peace of mind, it's better to have chains in the trunk.
New vehicles are often offered for sale with different wheel/tire sizes. Some of them may not be suitable for fitting snow chains.
The problem is that installing chains adds a few centimeters to the width and diameter of the tires. This means that with some wheel/tire combinations, the snow chains will hit the body, suspension or parts of the braking system, which can lead to serious consequences. nine0003
Circuits can also interfere with the correct operation of electronic sensors mounted on the steering wheel.
The vehicle manual must clearly state which wheel size the manufacturer allows snow chains to be used with.
If the chains cannot be used with the wheels installed on your machine, then your only option is to buy a second set of wheels/tyres.
You should only use snow chains where the road surface is completely covered by compacted snow or ice. nine0003
If signs require the use of snow chains, they must be fitted to all vehicles. Including those equipped with both winter and studded tires.
If you attempt to use the chains on a road that has been cleared of snow, you risk damaging the road surface and the vehicle. If you damage the road surface, you may face a large fine.
Therefore, as soon as you reach a section of the road free of snow or ice, you must select a level place and remove the chains. nine0003
It can be quite inconvenient to install or remove chains, for example when the wheel arches are filled with snow and your gloved hands are wet and cold.
So when you buy chains, don't just throw them in the trunk and forget about them. The practice of installing them at home when the weather is warm and dry, and you feel much more confident when you have all the necessary tools at hand, will help to cope with them in more difficult weather conditions. nine0003
At least one pair must be used on the drive wheels. But two pairs are better, especially if you spend a lot of time in conditions where snow chains are a must.
As a general guide:
As a general rule, traction control (a system that controls the amount of slip on the vehicle's drive wheels to prevent them from spinning during acceleration) should be disabled when snow chains are used.
It is important to drive carefully with snow chains fitted. For cars with chains, different countries have their own speed limits.