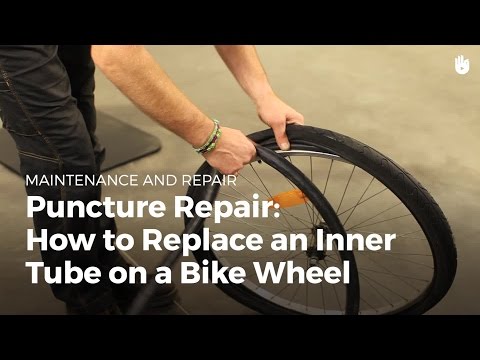
| Afraid to take off your rear wheel to fix a flat tire (or when taking off both wheels to put a bike in a car trunk)? Worried that you'll mess up the chain or shifting; or that you'll get all greasy? Think you'll never get the rear wheel back on right? We have good news: Anyone can remove and install a rear wheel and it won't affect the shifting or the chain. And if you work carefully, you won't have to touch that greasy drivetrain either. Here's how it's done on any bicycle with derailleurs, from road bikes, to mountain bikes and any 2-wheelers in between. Watch the videos and review the step-by-step photos and text. We're also happy to demonstrate in person, too, so please let us know if you'd like a quick lesson. We've covered all the tips and tricks, so you'll be an expert in no time! |
WHEEL REMOVAL 1, 2, 3!
1. Shift onto the small cog and small chainring.
Shifting the chain down onto the smallest cog on the rear wheel and the smallest chainring on the crankset, creates slack in the chain, which makes rear wheel removal much easier. It also makes wheel installation easier because it gives you an accurate way to line up the wheel (on the smallest cog) so that it slips right into the bicycle frame.
If you're riding and feel the rear tire becoming soft slowly from a puncture, you may have time to make the shifts to the smallest cog and ring as you're slowing to a stop.
If you're not riding, or have already stopped, operate the right shift lever, lift the bike by the seat and pedal by hand and the chain will move down the cogs in the back. Depending on the type of shift lever, you may need to move the lever a couple of times to move the chain onto the smallest cog.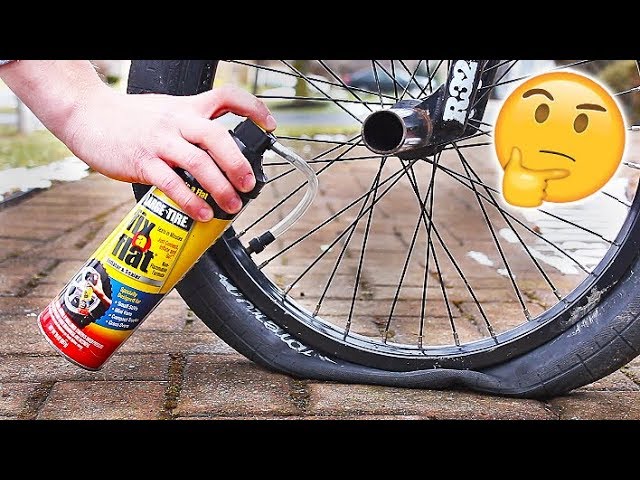
Now, do the same with the left shift lever and pedal by hand and get the chain onto the smallest chainring in front, too.
2. Open the brake
Note: If you're fixing a flat tire, you needn't worry about this step because when the air is all out of the tire it will fit through the brake easily. Also, if your bike has disc brakes, you too can skip this step because you don't need to touch disc brakes to remove wheels.
On most bikes with rim brakes, when you try to remove the wheel, the tire bumps into the brake pads. This is because the brake needs to be adjusted close to the rim, while the fully inflated tire is significantly wider than the rim.
To prevent the tire bumping into the brake pads, you can open sidepull brakes by fully rotating the little lever on the brake upwards (photo a). This little lever is called the brake quick release for the way it lets you quickly release (open) the brake pads. For linear-pulls (also called "direct-pulls," and "V-brakes") lift/pull the end of the "noodle" out of its holder (photo b).
Some sidepulls are opened by pressing a button on the lever. Look for this if there's no lever on the brake.
Open cantilever brakes (these feature a cable that runs over the top of the tire) by lifting the cable end on one side out of its holder.
Workarounds: If you can't find a way to open a brake, you can also let air out of the tire until you can pinch it enough to squeeze it through the brake pads. Another trick - though it requires tools and time - is to remove one brake pad which will often provide sufficient clearance. If not, you can remove both pads. Just be sure to remount them carefully so that they contact the rim squarely and don't touch any part of the tire.
3. Pull the derailleur back and remove the wheel
Now you're ready to remove the wheel. Most bicycle wheels have quick releases holding them in the frame (the red parts in the photo). To open the quick release and loosen the wheel, simply pull and fully open the lever, which is usually on the opposite side of the chain. Don't twist the lever. Just pull it out/away from the frame.
When the quick release is open, the wheel is ready to come out. To remove it, lift the bike by the seat so that gravity will help you. On some bikes the wheel will drop right out at this point (don't let it roll down the road and escape!). Or, if it doesn't fall out on its own, give it a slight blow with your hand and that might knock it right out.
Don't force anything though. If the wheel doesn't come out right away, it's because the derailleur and chain are blocking it. To get them out of the way, keep holding the rear end of your bike off the ground by lifting the bike by the seat. Reach down with your free hand and pull back the derailleur with your hand to get it, and the chain, out of the way.
Now, the wheel should fall out or drop out if you shake the bike. If the chain gets in the way still, just grip the wheel and shake it so that it's free of the chain and fully off the bike (that way you never touch the chain and stay clean). Good job!
Note: To clearly show the desired derailleur position, we locked it in place. You must pull it back by hand when removing wheels because it won't stay in place on its own.
How to put the rear wheel back on
| As you guessed, installing the rear wheel is the same as removal only in the reverse order! You just place the wheel back in the frame being careful to get the chain on the right cog, close the quick release to lock the wheel in, and close the brake so your brakes are working again. The video shows front and rear wheel installation in that order. We go over the step-by-step below and explain some of the things that can go wrong and how to deal with them. It can be frustrating if the wheel won't go in easily. But there's always a mechanical reason. So, look at what you're doing carefully and read our instructions a few times and you should be able to find the problem and address it so that the rear wheels goes right back where it belongs. |
If your wheel won't go in easily, check these things:
Did you get the chain on the cog right? Remember that you shifted the chain onto the smallest rear cog before you removed the wheel. So, you must put the wheel back on by first lining that smallest cog up just right so that the chain is on it. Also, pay attention to how the chain rests on the cog. The chain is a closed loop. The cog should be inside the loop (see the photo in Step 3).
Note: If the wheel has been off the bicycle for some time, it's possible that someone might operate the shift levers. This can move the derailleur so that when you line up the wheel with the smallest cog the wheel won't go into the frame. Instead it bumps into the frame. To remedy this and get the wheel in, simply operate the shift lever as if you're shifting onto the smallest cog. This will move the rear derailleur back where it needs to be so that the wheel will line up right with the frame and go in.
Did the chain come off the derailleur pulley? Another glitch that can prevent the wheel going right into the frame is if the chain happens to come off the top pulley on the derailleur (photo). This is hard to see but it has a similar effect to someone shifting the derailleur into the wrong position and it makes the wheel run into the frame and not want to go in. To fix it, just push the chain back onto the pulley and make sure it stays there as you install the wheel. Tip: Use a stick to push it on or wrap your finger in a rag and you'll stay grease-free.
Is your quick release still open? Sometimes when the wheel is separate from the bike, the quick release lever gets bumped and flipped over and closed. When this happens the wheel won't fit in the frame anymore because the quick release is closed and in the way. Open it and the wheel will fit.
Now that you know how it's done, you may want to practice removing and installing your rear wheel a few times to become expert at it so that when you have to do it, it's a breeze. And, so you can dazzle your friends by helping them remove/install their wheels! Have fun and let us know if you'd like a demo.
Whether you are taking your mountain bike for a ride on the local trails, packing your cruiser bike for a trip to the beach or bringing your road bike along for family vacation, you may find yourself needing to remove the front wheel to take your bike where you want to go. Removing a wheel from your bike will make it easier to fit in the back of your car and some bike racks require the front wheel to be removed before you can strap your bike into the rack. You will also need to know how to remove a wheel if you get a flat tire. Check out our video on how to remove a bike tire and fix your flat.
A quick release axle has a 5mm rod with a camming lever on one side and a nut on the other and its function is to allow you to remove the wheel of your bicycle without the use of a tool. A quick release axle also allows you to remove the wheel without removing the axle. The axle will stay inserted in the hub. All you have to do is pull the lever to the open position and loosen the nut on the other side.
Some bike hubs (particularly mountain bikes) require larger axles (12mm, 15mm or 20mm), which are called thru axles. These axles also have a camming lever on one side of the hollow rod, while the other side is threaded into the fork. This system allows you to remove the wheel without the use of any tools BUT you do have to remove the axle from the hub to take your wheel off of your bike.
If you have a bike rack on top of your car that requires you to remove your front wheel, make sure you have the correct adapter for your bike’s axle!
1. Release Your Brakes: If your bike has rim brakes or cantilever brakes, you will need to release the cable tension so you can remove your front wheel. For rim brakes, there should be a lever near the caliper that will release some cable tension, thus allowing your brake pads to be far enough from the rim for your tire to slide past them.
2. Flip Your Bike Over: Flipping your bike over to remove your wheels is ideal, unless you have a mechanic stand handy. When you are changing a flat tire on the side of the road or trail, allowing your bike to rest on the seat and handle bars will give you a more stable platform to work with. Flipping your bike over makes things a little easier and reduces the risk of your bike falling over after the wheel is removed.
3. Open the Quick Release or Remove Axle: If your bike has a quick release, flip the lever into the open position. If the lever is tight, you can use a tire lever to pry it open.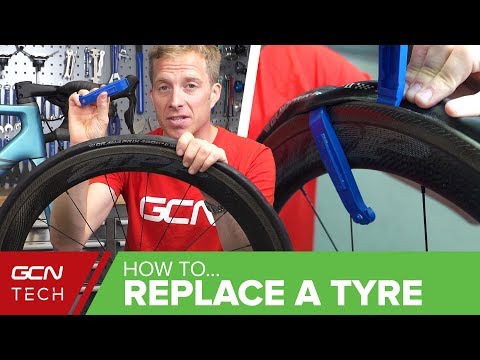 Holding the lever still, loosen the bolt on the other side of the axle, but DO NOT remove the bolt completely. For thru axles, open the lever into the open position and turn the lever counter-clockwise to unthread the axle and remove it from the hub.
4. Lift the Wheel Up and Out of the Fork: Make sure you do not dislodge your calipers if you have rim brakes and be careful with rotors if you have disc brakes.
1. Guide Your Wheel Back Into The Fork: If you have rim brakes, be careful not to dislodge calipers when you reinstall your wheel. If you have disc brakes, guide the rotor in between the brake pads.
2. Tighten the Axle: If you have a quick release axle, settle the wheel completely into the dropouts. Make sure the quick release axle is on the non-drive side of the bike, matching the wheel. Holding the lever in place, tighten the nut on the opposite side and push the lever into the closed position.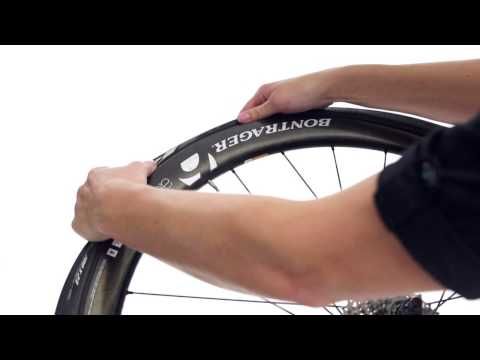 It should feel tight, but it should not be too difficult to close the lever. If you have a thru axle, line up your hub with the holes at the bottom of your fork. Look to see which side of the fork is threaded and push the axle in through the opposite side. Turn the lever clockwise to thread the axle into the fork. Once tight, push the lever into the closed position.
3. Flip your bike over: If you have cantilever or rim brakes, make sure your brake cable is reconnected or tightened properly.
4. Spin your wheel: By spinning your wheel, you will make sure your brake pads are not rubbing the rim or the rotor. If your wheel does not spin, it could be crooked in the fork’s dropouts. Flip your bike back over, loosen your axle, push down on the wheel and tighten the axle again.
Need to learn how to remove your rear wheel? Check out our video!
Helpful Tip: If you have hydraulic disc brakes do not squeeze the front brake after you have removed your front wheel. The brake pads will move closer together and you will not be able to get the brake rotor back between the pads. If your brake lever is accidently compressed, the ideal tool to separate the pads is a pad separator tool. If you do not have this tool, you can use a flat bladed screw driver or a credit card to wedge in between the two pads and carefully work them apart. It is possible to damage the pads if you use too much force. Also, make sure whatever tool you use is clean so it does not contaminate the brake pads. Replace the wheel and squeeze the brake lever a few times to reset the pads.
Nikolaev bicycle shop "Sportek"
Published: 07/09/2016
Edited: 12/04/2020
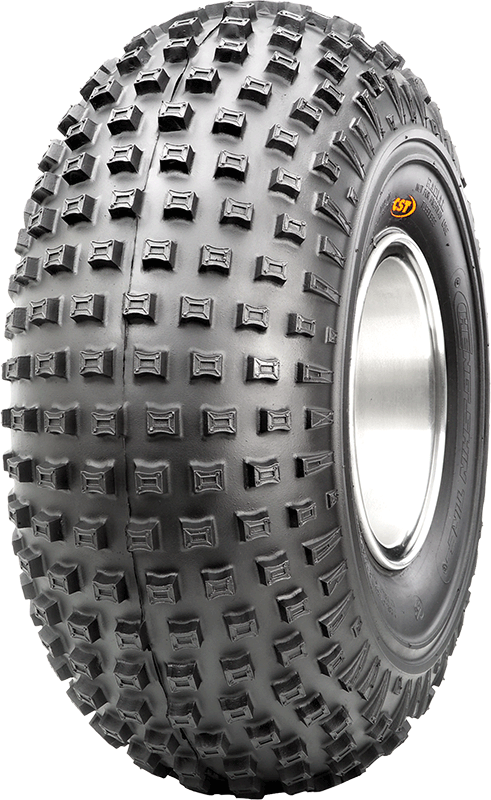
Let's start with the most important thing - it makes sense to put tires with different treads only for off-road driving (mud, forest, earth, sand, gravel, etc. ). When driving on asphalt and even normal dirt roads, this does not make any sense.
Well, now let's try to figure out which tires can be put on the front wheels when driving off-road, and which ones on the rear wheels. Why do it and what it gives the cyclist.
We have a separate article on the types of tires on our website: “Which tire to choose for a bike”.
In this article we will only talk about mud and "toothy" protectors.
First of all, you need to understand that each wheel has slightly different functions when riding, well, except for spinning and rolling the bike.
When riding, most of the stability and maneuverability comes from the front wheel. It plays a major role in cycling. After all, it is his cyclist who turns with the steering wheel. It is also more important when braking.
The grip of the front wheel with the road surface completely depends on the handling of the bike. It has worse traction than the rear wheel. The cyclist puts pressure on the front wheel only with his hands, while the main weight falls on the rear wheel.
The weight distribution of a cyclist on the wheels looks something like this: 35% of the weight falls on the front wheel and 65% on the rear.
Judge for yourself: if there is a smooth tire on the front wheel, and when turning it starts to slip in the mud, then the bike will simply skid on the turn and everything will end up falling into this very mud.
Almost every cyclist has experienced a front wheel slip at least once. Everything happens very quickly, often not noticeable and almost always ends in a fall.
So one of the main requirements for a front tire is to keep the bike from side slipping.
The rear wheel skid is compensated by the front wheel or quick support on the foot and you, in the worst case, will get mud on your foot, but not fall.
The rear wheel is responsible for the movement of the bike. It is more loaded and because of this it has initially better grip. The main requirement for the rear wheel tread is a large traction force in the plane of rotation of the wheel to transfer the muscular effort of the cyclist's legs.
But the more the wheel is loaded, the more it resists rolling. Therefore, a smoother tire than the front wheel will make the whole bike roll more easily. Moreover, the rear wheel skids less often and, as mentioned above, its skidding is easier to compensate. There is no need to just go to extremes and put slicks on it. Remember, we are only talking about toothy tires. This refers simply to a different degree of “toothiness” and tread height.
Next, I would like to note a few more points when installing different tires:
 They are specially marked. This is described in the article "What do the numbers and inscriptions on bicycle tires mean."
If the tread pattern resembles the English letter "V" as, for example, in the figures below,
then when it is installed on the rear wheel, there should be a trace of the form: “>>>>>>>”, and on the front, on the contrary, of the form: “<<<<<<<<” (imagine that the bike rides from left to right).
Why is that? As mentioned above, the rear wheel is more responsible for traction, ensuring the bicycle's cross-country ability.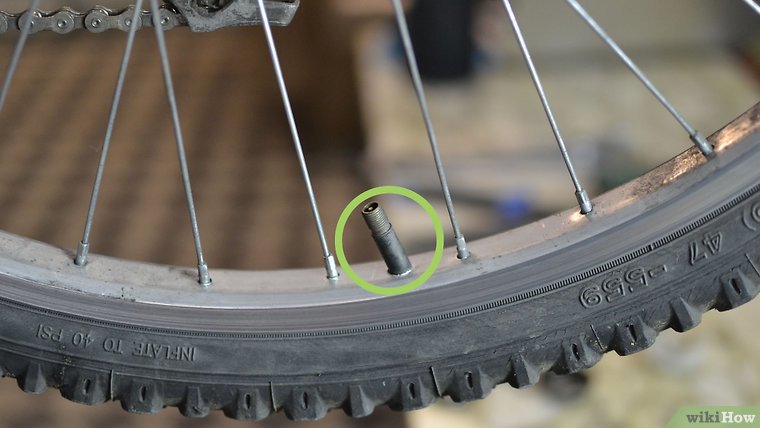 Therefore, it seems to rest on the road with two legs of the letter "V" and creates a better grip with it.
The front wheel is responsible for the bike's maneuverability and braking. Therefore, when braking, the front wheel already rests on the road with two legs of the letter “V”.
 Why does it appear and can it be “treated”
 Featured Products
170 UAH
Bicycle tire 16x2" (54-305 ISO)
100 UAH
Bicycle tire 20x2.125 (57-406 ISO)
Temporarily absent
168 UAH
Bicycle tire 26x1.95" (50-559 ISO)
Temporarily absent
165 UAH
Bicycle tire 28x1.75" (47-622 ISO) ChaoYang
Temporarily absent
Comments (4)
x
There is nowhere without a bicycle in the country. In the truest sense of the word, there is nowhere to go. Not for bread, not for screws, not for matches. Also, if you don't have a car. And if there is a car, and the driver tasted fragrant apple calvados in the morning? You have to walk, which takes a lot of time. And if there is a bicycle, he jumped on it, and in a few minutes there would be bread, and screws bought, and matches mined. Therefore, not only must bicycle transport be at your disposal, but besides, it must always be in good order, ready at any time to deliver you on urgent matters.
While conducting a spring revision of my old high-speed bike, we found an “eight” on the rear wheel - a change in its geometry. The rim was bent so much that it constantly brushed against the brake pads, making it impossible to drive safely.
First, we decided to tighten the spokes. There are special ways to do this at home. For those who are interested, it is enough to search the Internet for how to fix the G8. Upon closer inspection, it was found that a pair of spokes was missing. The plastic protection of the spokes installed on the wheel makes it difficult to install new ones, so it must be completely disassembled.
Turn the bicycle upside down, unscrew the eccentric clamp nut, remove the eccentric itself from the hole in the axle, release the footrest, remove the chain and wheel. In this case, you need to loosen the brake pads and release air from the wheel so that the tire does not cling to them.
Unscrew the nipple, pull out one side of the tire, carefully prying it with a flat screwdriver, without tearing the chamber. Get the camera, then remove the tire.
Now you need to remove the asterisk. It is impossible to do this without a special puller, so we took care of buying it in advance.
Insert the puller inside the sprocket and unscrew it with a gas wrench. By the way, any key for 24 can be suitable for these purposes.
Here another trouble was discovered - the rim was worn to the hole. Repair it was impossible, so I had to go to the store for a new one.
Our speed bike had a single rim wheel. Almost all modern cycle bikes are equipped with double rim wheels. It is believed that they are stronger and more reliable. The price difference is not very big, so we listened to the seller and bought a copy with a double rim.
At first, the plan to replace the rear wheel on a speed bike seemed simple: screw the sprocket onto a new one, insert the tube, tire and install on the bike. But upon closer inspection, it turned out that the axles of the wheels are different. The old one has a hole inside for the eccentric, and the new one does not.
Therefore, I had to rearrange the axle from the old wheel to the new one. This requires 2 keys. We hold the locknut with one, and unscrew the second with the other. Having unscrewed, remove the washer and unscrew the lock nut, which is the bearing boot. While loosening the nut, watch out for balls that may fall out of the resulting gap.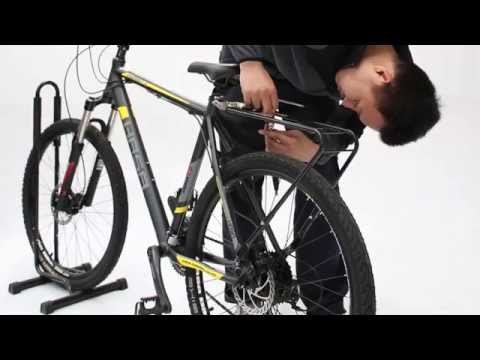 Now you can take out the axle.
In the same way, remove the axle from the new wheel. The grease in it is fresh, thick, so the bearing balls, having stuck to it, were in their place.
Carefully, adding fresh grease, insert the axle with the eccentric hole onto the new wheel and tighten the nuts in reverse order.
Tighten the bearing cone nuts until there is no play in the carriage, but at the same time the wheel rotates freely. On both sides of the axle, at the edges, we leave a space equal to 1 cm so that it fits into the lugs of the rear fork of the bicycle. This distance is adjusted by a washer in the form of a sleeve. Tightening the second nut, we fix the first one with a key so that it does not move, otherwise the wheel will spin with effort.
Then we assemble everything in the reverse order. We install the protection of the spokes, with the help of a puller we twist the sprocket.
Fill the tire on one side, insert the tube, fill the tire completely.