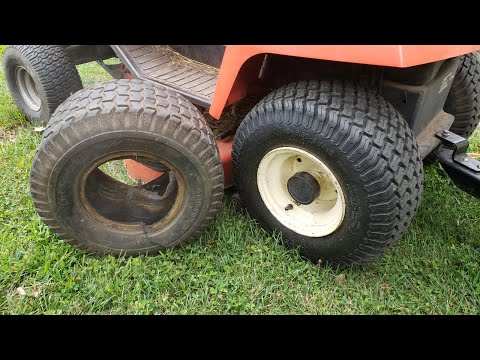
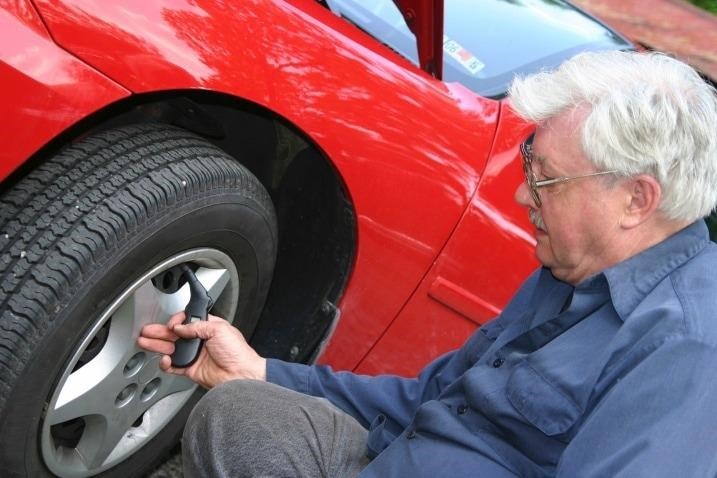
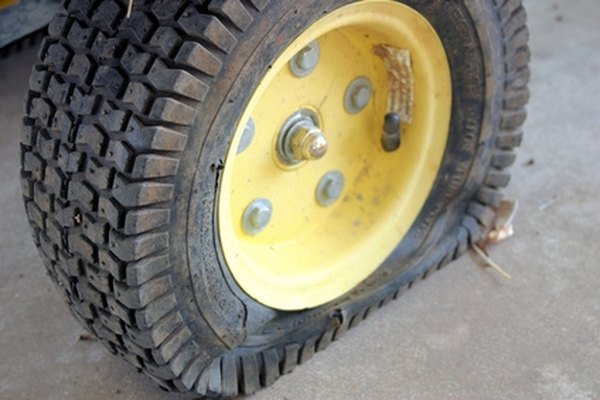
It’s a fine sunny day of the spring season, and you are busy with some work in your garden. You use your trusted lawnmower that has not failed you. But suddenly, you feel that the lawnmower is not running as smoothly as it should. It feels like it’s being dragged on the ground forcefully. So, you turn off the lawnmower engine and get off your riding lawnmower. But what you see now is not pleasant at all. Your lawnmower has a flat tire, and you know you need to fix it with a new tire or tube.
As the lawnmower tire gets old, it is more likely that a nail can easily pinch into the tire and make it flat. A hard bump to the lawnmower can also cause this issue. This article shall be a step-by-step guide on removing a lawnmower tire, fitting a new tube or tire, and putting the tire back on the rim.
How to put a lawnmower tire back on the rim, step by step:
Contents
 4 ● Step 4. Install the tire on the rim:
The detailed procedure of removing and replacing your lawnmower tire has been broken down into several small steps.
The first step to fix the flat tire or replace it with a new one is to remove the old tire and the rim from the lawnmower.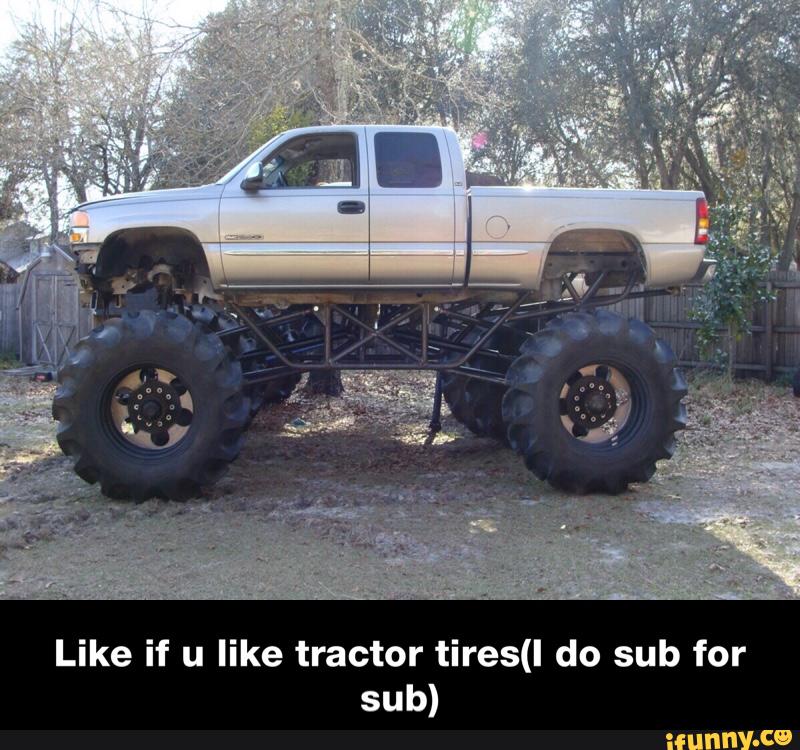 You shall follow the following steps to complete this procedure:
There is a plastic boot (or a cap) at the center of the tire’s rim. Grab it using a pair of pliers and remove it from the rim. Try not to break it as it holds some grease and is a little brittle because of that.
Behind the plastic boot lies a c-clip. Grab the tab of the c-clip using a pair of pliers and pull it out of the rim.
Once you have removed the c-clip, you shall see a washer. Draw this washer out of the rim.
After you’re done with the steps mentioned above, you can now pull out the rim along with the tire from the lawnmower.
As you have removed the rim and the tire from the lawnmower, it’s time to remove the tire from the rim.
To remove the old tube’s nozzle (if your tire has a tube), you first need to peel the tire off from at least one side of the rim.
To do that, hammer a flat head screwdriver at the junction of the tire and the tube. Once the screwdriver gets inside this junction, please give it a push and try peeling the tire off the tube. Repeat the same step on the opposite side of the tire as well.
Every tire and tube has a nozzle that is fitted into the tire’s rim. It would be best if you pulled out this nozzle from the rim to proceed further.
This is where things get exciting and is the most technical step of the entire process. You may need a couple of screwdrivers for this step. Although there are special tools to take the tire off the rim, we shall use screwdrivers to save some bucks.
Insert screwdrivers at different positions: Insert a screwdriver inside the junction of the tire and the rim, and pull the screwdriver upwards so that the tire starts coming up off the rim.
Do the same step using another screwdriver, which shall be inserted at some distance from the first one. Keep working around the tire doing the same step.
Remove the tire off the rim: The tire is now completely free from the rim’s grip. Remove this tire off the rim.
Grab a torchlight and check if there are any nails or a sharp object pinched into the tire’s inside or on the outside surface. If you find any, remove it from the tire’s surface using pliers.
Phew, that must have been a tiring job. You are now halfway there, and all you need to do now is install the new tire back on the rim.
Some tires might be tubeless, while some may have a tube. You need to install a new tube if the previous one had completely weathered or has had various punctures.
Please insert the new tube inside the tire and stuff it in. The tube’s fill valve must be in line with the fill valve hole inside the rim, where it is to be fitted in. Insert the fill valve into the fill valve hole located on the rim.
If you are installing a new tire or putting the old tire back on the rim, this step is applicable for both of these cases. Screwdrivers and some hand force are all you need for this step.
 This step is done to make the edges softer so that they may easily fit onto the rim. Oil can also be used to serve this purpose in case transmission fluid is not available.
Once the tire has been put back on the rim, it shall now be installed back on the lawnmower.
Place the tire back on the lawnmower’s axil, just like the way you pulled it out earlier.
 2. Re-install the washers:
Insert the washers back into the tire’s rim.
Re-install the c clip back into the rim with the aid of pliers.
Re-install the plastic boot back on the tire’s rim.
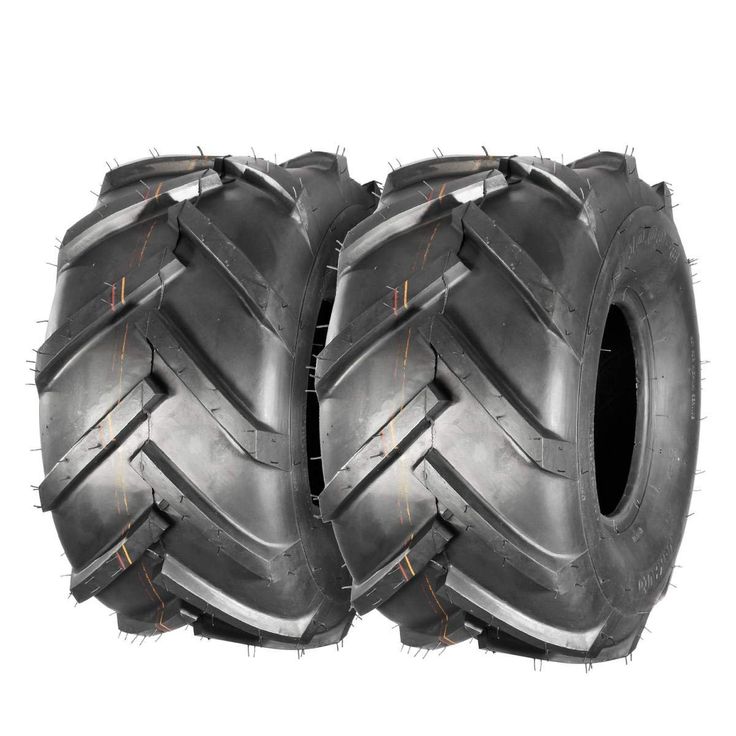
Related Questions:1. What size of lawnmower tires should I get?Like other tires, a lawnmower tire has a series of numbers imprinted on one of its sides. These numbers indicate certain specific details about the tire. Only two parameters are enough to indicate the tire’s full size, i.e., the tire width and the rim diameter. There are two different systems for tire’s sizing:
Two-number sizing:
Most of the lawnmower tires use a two-number sizing system to indicate the tire size. For example, in two number sizing, numbers are displayed as 5-9. This number indicates that the tire width is 5 inches and the rim diameter is 9 inches.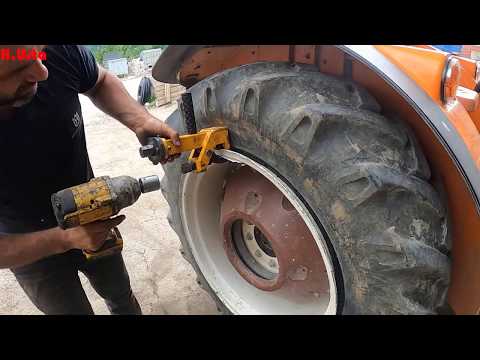 These two numbers are all that you need to get a fresh piece of a lawnmower tire.
Three-number sizing:
This sizing system indicates the tire’s size with the help of three digits. For example, if the number 15×6.00-6 is imprinted on your tire, the number before ‘x’ indicates the tire’s diameter when it is fully inflated. The tire width is indicated by the number between the ‘x’ and ‘- ‘. The last number indicates the rim’s width.
2. How much air pressure should I maintain in lawnmower tires?Like other lawnmower parts such as the engine, fuel, and filters, they must be maintained for the lawnmower’s ideal performance. Similarly, maintaining an adequate and specific amount of air pressure in the tires is equally essential.
A flat lawnmower tire can ruin a garden lover’s mood. But removing and replacing a tire is not very complicated and can be done easily by most. Do not forget to take some precautionary measures before you start. Wear safety glasses and protective gloves to protect yourself from unnecessary injuries. And when you finish fixing your tire, also think about other maintenance tasks like the carburetor, air and fuel filters, and do not let gas get too old. This will prolong your lawnmower’s life, and you can continue to maintain your lovely garden!
If you’ve had a lawn mower for more than a couple of seasons, chances are you’ve had a flat tire. In this article, we’re going to tell you how to get a flat tire back on the rim and how to change a tire if you need to.
With our step-by-step guide—lawn mower tire flat & off the rim? Here’s how to fix it, you’ll be back to cutting your lawn in no time.
A tire that’s slipped off the rim is never a wanted sight!Using simple tools and a few helpful tricks, you can get your tire back on the rim or replaced. With a little effort and minimal cost, your mower will be ready to go again.
Want to know how to get your lawn mower tire back in working order? Let’s get stuck in.
For this repair, you’ll need a few tools. And if you need to replace the tire, a few more. For both repairs, don’t forget your safety gear. Here, we’ve listed what each job requires:
Not all flat tires are created equal. Sometimes a flat caused by a very slow leak or just time can simply be reflated. And it will last a good while until next time. But sometimes a flat causes the tire to come off the rim of the wheel, and this requires a more complicated fix. And in the worst case, with a damaged or worn-out tire, you’ll need to replace it.
No matter if your tire is just off the rim, or needs replacing, we’ve got you covered. Here is our step-by-step guide to fixing a flat on your lawn mower. Steps 1, 2 and 3 are required for both fixes. After that we’ve split the instructions depending on whether you’re putting it back on the rim (steps 4a to 7a) or changing the tire (steps 4b to 10b).
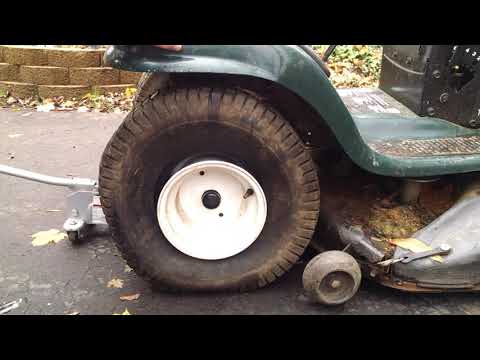
I know it’s obvious, but we’re nothing if not complete. Make sure your mower is on a flat surface. Then turn off the mower and remove the ignition key. It’s a good idea to chock the wheels as well.
What might not be so obvious, is that we highly recommend you remove the spark plug cable as well.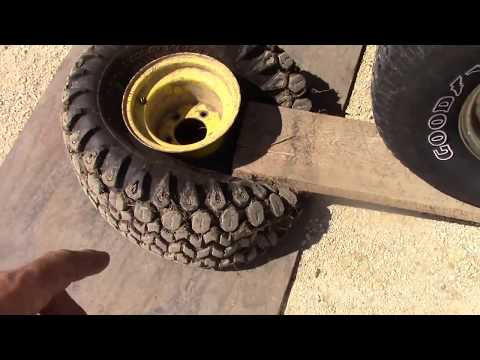 Removing the cable means there is no chance of the blades moving while you’re fixing your flat. It’s never wasted time to do things safely.
In order to get to your tire, you’re going to need to jack up the mower. Any jack will do as long as it’s rated for more than the weight of the mower. We would recommend fixing your flat on a hard surface, driveway, garage or shed. But, if your mower is still on grass, and you’re using a bottle jack, you’re going to need to put wood under the jack to stop it from sinking into the grass.
Jak up the mower so your tire spins freely. You want enough height to make it easy to get your hand underneath the tire. Once you’ve reached the required height, support the mower with a jack stand.
You need to check the tire for obvious damage, holes or sharp objects. If it helps, put a little chalk mark on the tire. Carefully roll the wheel round, inspecting both side walls and the surface for damage. When your chalk mark comes back around, you know you’ve covered the whole tire.
If you can’t find any obvious holes or damage, and the tire is not completely worn out, you can try putting it back on the rim, inflating it and seeing if it holds. If the tire is punctured, ripped, or completely worn out, you’re going to need a replacement.
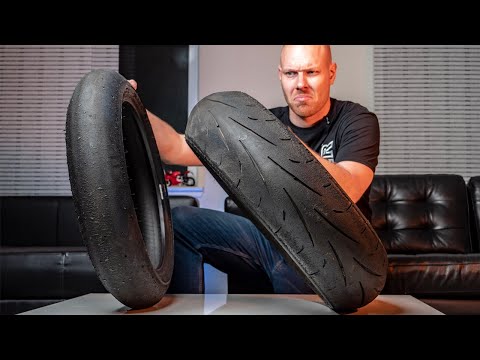
These days most mower tires are tubeless. That means there is no inner tube inside the tire that holds the air. Instead, the air is held inside the tire by a seal formed between the tire bead and the rim.
In order to refill a tire where the bead has come off the rim, you first have to create a seal between the bead and the rim.
The easiest way to do this is to apply pressure to the surface of the tire. This pushes the bead outwards and helps create the seal you need. On used tires, it’s usually not possible to do this by hand. So instead, we can wrap a ratchet strap or a rope around the tire and use that to help.
Get your ratchet strap around the tire and ratchet it a few times to apply pressure. This pushes the middle of the tire down and the sides outwards.
Once you’ve applied a bit of pressure, try pushing the sidewalls near the rim. If the bead seems solid against the rim, you can start adding some air and seeing if you have a seal.
If air still escapes from the sides and the tire won’t inflate, ratchet a couple of times on your strap and see if that helps. Once you have a seal, inflate the tire enough to keep the pressure on the bead so that you can remove the strap.
After removing the strap, you can continue to inflate the tire. The optimum tire pressure will be on the tire wall. And that is the number to aim for. Usually it’s between 15-40psi and often around 20psi.
Make your to check the tire and inflate to the right pressure.Make sure you check your tire and inflate to that pressure. Under or over inflating can increase tire wear, decrease grip, and increase the chance of a puncture or blowout.
That’s it, your tire is back on the rim and fully inflated. Re-insert your jack and raise the mower enough to remove the jack stand.
Lower the mower back onto all its wheels. We recommend letting it stand for a few minutes before moving it. This way you can wait and see if your tire will keep pressure.
Once your happy everything is working, don’t forget to reconnect the spark plug wire and remove any chocks on the other wheels.
So, you’ve inspected the tire and decided to replace it. Now you need to remove the wheel. Take off the axle cover if there is one. Underneath will be a retaining ring. Use a slot screwdriver or pliers to pull it off.
Now you can remove the washer and pull off the tire. Beyond the tire is an inner washer. It’s best to pull that off as well. Make sure you put your two washers and the retaining ring somewhere safe. It’s really annoying to find you lost one when it’s time to put the tire back on.
Take the tire and lie it flat with the valve facing upwards. Remove the stem cap and use the stem core removal tool to unscrew and pull out the core.
Push down on the tire to dislodge the bead. Using a couple of slot screwdrivers, pry the tire up and off the rim on one side. Take your time. Pry a little of the bead up, slide another screwdriver next to the first and pry a bit more. Continue around the rim until the whole side is free. Flip the tire over and do the same again so that you can pry the tire completely off the rim.
While you’ve got the rim separate, give it a clean. Removing any dirt and grime will give a better seal between the new tire bead and rim.
Now it’s the reverse procedure from removing the tire. Using your slot screwdrivers (and make sure there are no sharp edges that could damage the tire) pry one side of the tire onto the rim. Flip it over and pry the other side on.
Flip your tire vertical again and find your compressed air. With a new tire, and not attached to the mower, it shouldn’t be necessary to use a ratchet strap or rope to get the bead to seal.
Push down a little on the tire and start to inflate. The bead should seal. Once you’re happy you have a seal, re-insert the valve stem core.
With the valve stem in, you can continue inflating the tire to the optimum tire pressure. Remember to check the optimum pressure on the tire wall and only fill to this value. As we said above (step 6a), over or under inflating a tire is not a good idea.
Using the reverse procedure from taking off the wheel, you can now re-install it. Find your washers and the retaining ring.
Put the back washer on first and then slide on the wheel. Add the front washer. Using pliers, put the retaining ring back on the axle and then replace the axle cover.
That’s it, you have a new tire. Re-insert your jack and raise the mower enough to remove the jack stand.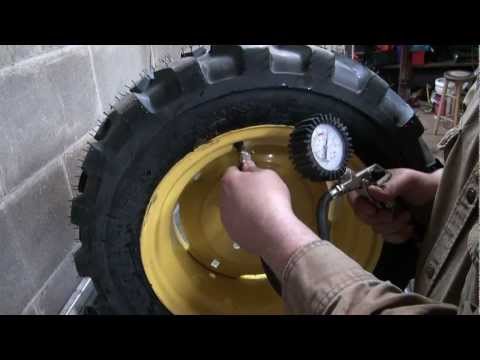 Lower the mower back onto all its wheels.
Once your happy everything is working, don’t forget to reconnect the spark plug wire and remove any chocks on the other wheels.
Well done! You have fixed your mower tire and are ready to get back to your lawn.
I hope this guide has been useful to you. Whether you’ve put your tire back on the rim or replaced it completely, following our step-by-step guide should get your mower back on the grass in no time. Happy mowing!
Another season of changing shoes is approaching. And you may remember that on one of the tires after the last winter/summer there is a jamb - a small bump. I don’t want to run to the store for the sake of one new tire. We understand. Or maybe it looks even better if repaired?
Yes, not every wheel that has met with a nail, rebar sticking out of the ground or a sharp stone on the road is considered damaged.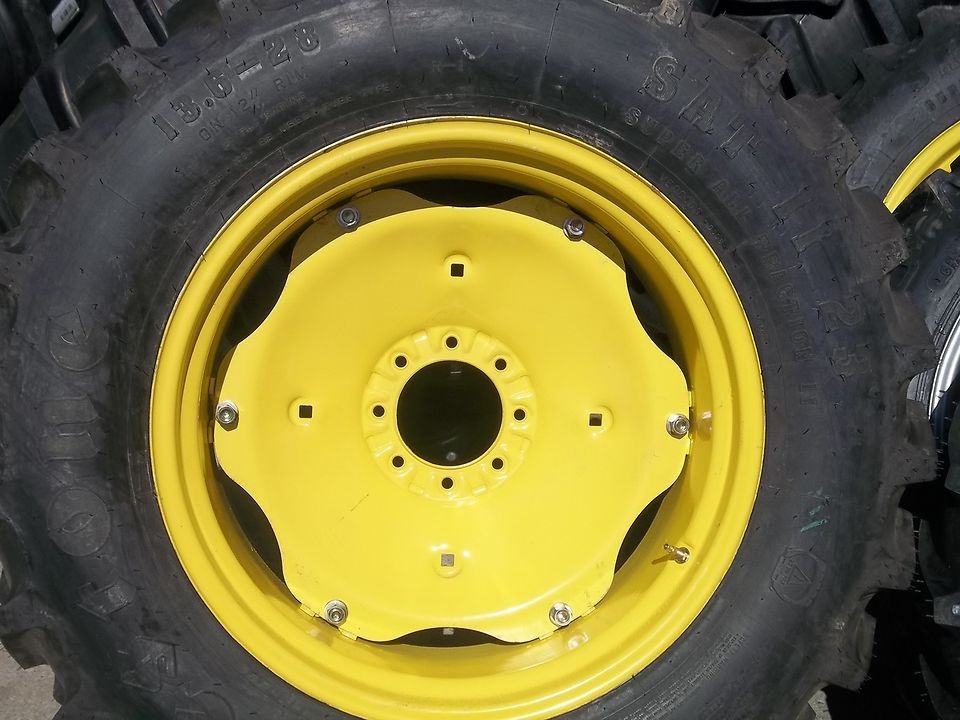 Everything, of course, depends on the scale of the damage and its location on the tire itself. Some are easily repaired, while others are simply impossible to do - the tire can only be sent to the trash.
A bulge on a wheel, referred to by drivers as a bump or bulge, is the most common tire sidewall defect. It appears due to a collision with an obstacle or after falling into a pit, more often at high speed. The threads of the sidewall carcass are easily damaged by impact, and the tire at this point can no longer hold the load and air pressure - swelling appears. A small bump sooner or later turns into a big one, and driving with such a defect is dangerous - the wheel can shoot at any moment. At high speed, this is fraught with loss of control, departure from the road and a rollover.
The quality of roads in Kazakhstan contributes to the appearance of bulges on tires
Some types of bulges are repairable, although this is a temporary measure. Not a single patch can restore the factory rigidity. Ideally, change the tire.
Special cord patches can extend the life of a tire with a herniation, even if the swelling has appeared on the tread. The sidewall is a different story. If the swelling appeared at a distance of more than 40 mm from the side, it can be repaired. If not, then the wheel needs to be replaced. Blisters on low profile tires are most often non-repairable.
For maximum safety when riding with a repaired bump, insert the tube. This is an inexpensive and reliable solution. On our market, you can find cameras made in China and Russia, the latter are slightly more expensive, but also of better quality.
The elimination of a side cut is a serious operation, therefore, as in the case of a bump, you will have to go to the professionals. We need cord patches, fortunately in our time they are of different sizes and with a different number of layers. And if you do it wisely, then you can't do without special tools and vulcanization.
A cut, by the way, cannot be healed in all cases. If the gap is in the shoulder area of the tire, it is unlikely that anyone will undertake to repair it, since no guarantees can be given here. However, our Kulibins take on even the most difficult cases, cutting out parts of the sidewalls from the tires and even weaving the cord on their own.
Tire overhaul. We would not put such a wheel on ourselves
Low profile tires can be repaired, but more difficult. A tear in the sidewall is easier to seal on tires with a medium or high profile.
Sometimes a cut is confused with a pluck. This is when the outer layer of the sidewall caught on something sharp, a tear formed, but the frame itself remained intact. There is nothing wrong with that, although the drivers at the tire fitting company successfully repair the cut, for which they take it accordingly.
If a piece of rubber remains on the sidewall, then glue it with ordinary superglue (101st). If it came off, then it is better to cover it with raw rubber and vulcanize. Leaving the pluck bare is not recommended, because the tire carcass, often consisting of a metal cord, will quickly corrode.
In Europe, defective or used tires are perforated before being sent for scrap to prevent their resale and possible operation. But they don’t know that we have such holes on the sidewall patched once or twice
Cuts and hernias are not the only possible damage to the side of the tire. You can also spoil the side ring, in the process of changing shoes, for example. If it’s for garlic, then such a tire is already dangerous. Sooner or later, the tire pressure and the load in motion will start to squeeze the rubber off the rim - a wheel explosion can occur.
This ailment is repaired if the wire ring - the base - is intact. There are no special technologies and materials to correct this particular problem, but most often craftsmen use a two-component composition for chemical (also called cold) vulcanization. After mixing, the mass is pressed into a fat-free damage. Compound manufacturers recommend waiting 72 hours before mounting a tire. Of course, our masters do not pay attention to this condition - they put the tire right away. And it’s good if the wheel is flat because of this at night in the parking lot, and not on the road.
If the side ring tears are barely noticeable, but the wheel still deflates, then you can use a special liquid - a bead seal designed to seal a tubeless tire.
These seals have been used in motorsport for some time. In particular, in the American Formula D Drift Series, drivers used compounds to keep the tire on the rim even with minimal tire pressure. Now they are banned.
Pay attention to the left rear wheel of the Nissan Silvia S13. Due to too low pressure, it was literally taken off the disk under load
Every schoolchild has faced this problem when patching the inner tube of his bike after hitting something sharp.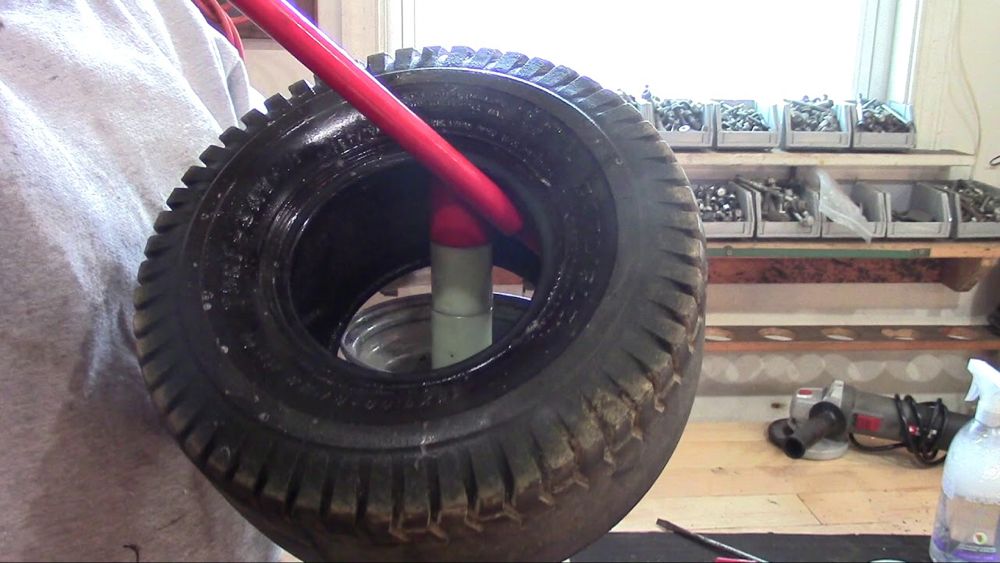 Repairing a car tire puncture with your own hands will also not be difficult even on the road. But for this you will need a pump (or compressor) and a universal tire repair kit with harnesses. All this is sold at any car market or gas station.
Repairing a tire on the side of the road with harnesses
The process is simple. If we are talking about the front wheels, then in most cases the wheel can not even be removed, it is enough to turn the steering wheel in the right direction, find the puncture site and carry out repairs. First, the hole is cleaned with a helical awl from the set. The tourniquet itself is smeared with glue and tucked into the eye of the awl, after which it is inserted into the tire hole. With a sharp movement, the tool is removed, and the tourniquet remains in place and clogs the hole. The tails are cut with a knife, but not at the root, it is recommended to leave about 20 mm. The tire is inflated and checked.
Sometimes a nail or self-tapping screw clogs the hole by itself, remaining in it. If you see a hat in a tread, do not rush to pull it out. While the pressure is holding, move to vulcanize. And sometimes they drive with a screw in a tire for weeks.
Repair of a puncture at a tire shop
Punctures are also repaired with harnesses at a specialized service, although among professionals such repairs are not considered long-term. After a few months, the flagella dry out and can let air through. There are more advanced methods like cold and hot vulcanization. The latter is more reliable. In this case, the hole is sealed with an elastic patch, and the funnel from a foreign object is filled with a special compound. After that, a vulcanizer is put on the tire, it heats up the rubber and solders it.
In addition to the plaster, the puncture is also repaired with special cord fungi. Craftsmen process the puncture site: drill it and treat the surface with a tool to roughen it. Then the repair area is lubricated with glue (it is also called cement) and a fungus is introduced.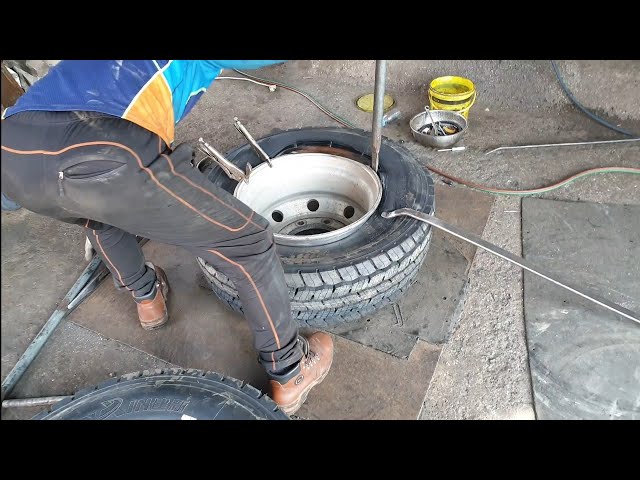 This is done from the inside of the tire. The cap of the fungus is rolled, and the excess legs are simply cut off from the outside.
Puncture repair with sealant
With the advent of tubeless wheels, and later run flat tires, many automakers began to abandon spare wheels. Instead, repair kits with compressors are supplied with the machines. A repair kit is essentially a bottle of pressurized sealant. Later, such spray cans began to appear on the shelves of ordinary car dealerships.
This method has not taken root in the CIS, because the condition of the roads makes it necessary to have at least a stowaway in the kit, but it can also be considered as a method of repair on the road.
The car must be jacked up and sealant must be pumped into the damaged wheel through the nipple. Next, you should spin the wheel, then pump it up, lower the car and drive a few hundred meters. If the tire tightness has not been restored, repeat the procedure.
For commercial vehicles, cutting the tread with a special device (regrower) is a common thing. Moreover, such tire retreading is provided by the factory (marked REGROOVABLE on the sidewall) to increase the service life. But there are entrepreneurs who undertake to deepen the grooves in tires for passenger cars. But they are not intended for such an operation. Often used tires for sale are “refreshed” in this way. Be careful!
What is the threat?
The worst option is that the retreaded tire will shoot out on the road, as the master can damage the undertread layer when deepening the grooves. Such a tire will not be able to hold pressure at some point. There will be a boom! At best, the tire will indeed last a little longer, but is the game worth the candle? We think it's not worth it.
How is cutting made?
A regrower is used to cut the tread.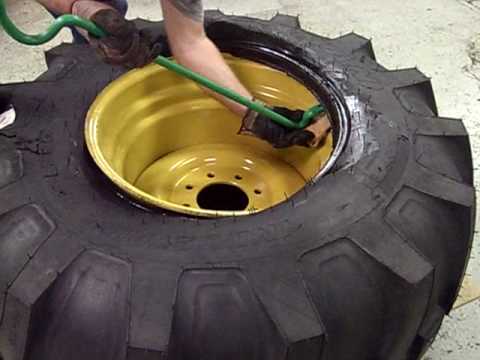 Roughly speaking, this is a large soldering iron with interchangeable tips of various shapes. It goes through rubber like a knife through butter.
If the tire is for passenger cars, then it is worth taking on a regrower only in one case - when part of the tread pattern was welded with "new" rubber during repair. This is where threading comes in handy in order to restore the grooves and symmetry of the tread.
Vehicle operation is prohibited if:
- tires have a residual tread height of less than 1.6 mm;
- tires have punctures, cuts, ruptures that expose the cord, as well as delamination of the carcass, delamination of the tread and sidewall;
- tires in size or load capacity do not match the car model;
- tires of various sizes, designs (radial, diagonal, chamber, tubeless), models, with different tread patterns, winter and summer, studded and non-studded, new and restored, are installed on one axle of the car;
- Tires retreaded according to the second repair class are installed on the front axle.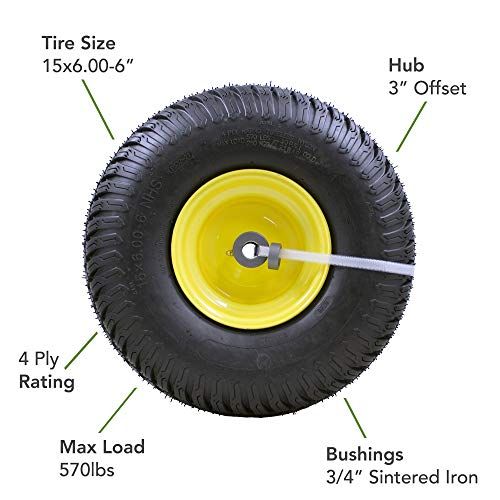
What is a second class repair?
This is the case when the carcass of the tire is restored after serious damage. A side cut (or tear) is a serious damage to the tire carcass.
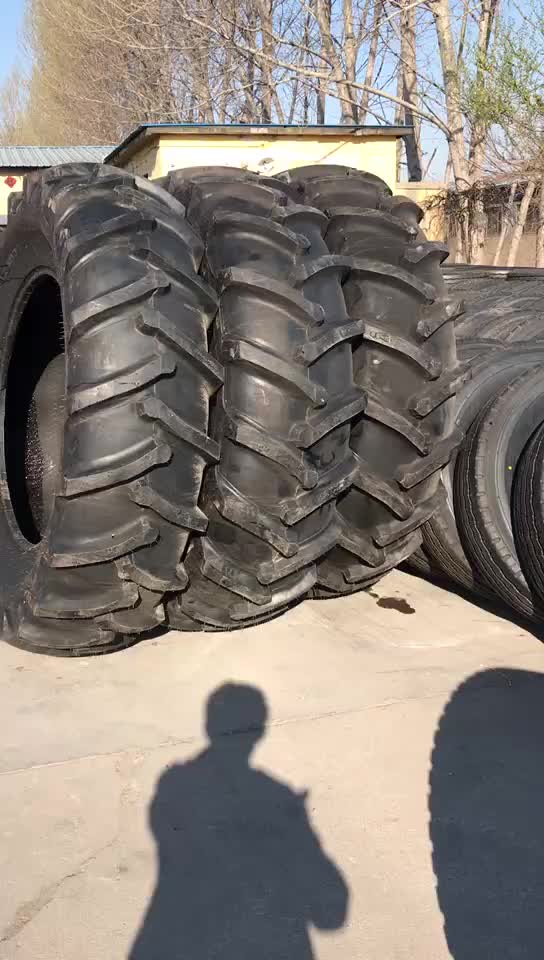
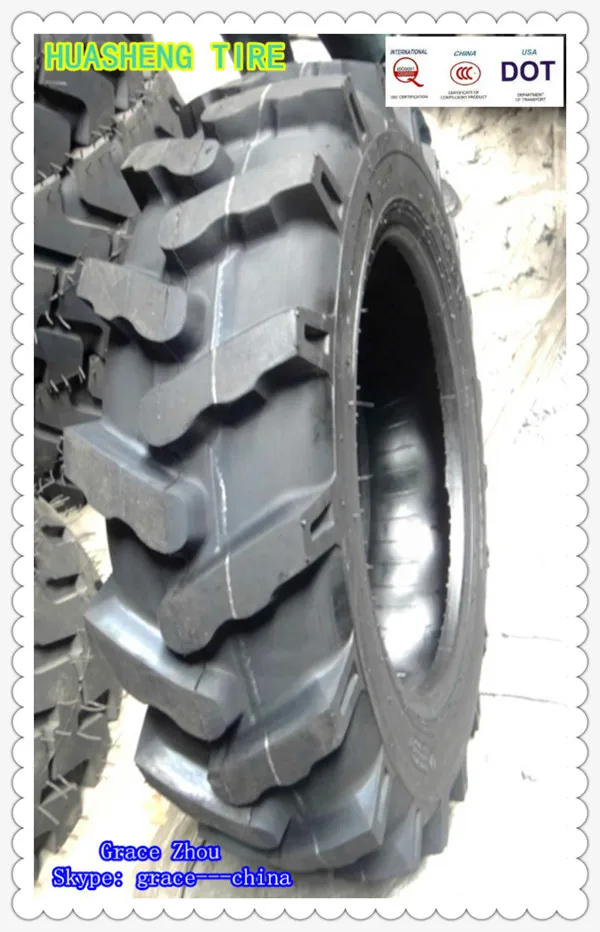
Tractor tires are selected based on operating conditions. Tractors of the Minsk Tractor Plant (MTZ) are universal and are used very widely: when clearing snow on the streets, plowing fields and harvesting, etc. Accordingly, there is no universal “rubber” option for them. It all depends on how the equipment will be used: on what soil, in what speed mode, etc. The model also plays a role - it is obvious that a heavy tractor needs larger and stronger tires than a compact “mini”, and the pressure in tires MTZ 82 will be different than in the chambers of a forest tractor type L82. 2. Sets for the front and rear axles are selected separately.
The MTZ 82 tractor tire consists of a chamber and a tire. The chamber serves to hold air in the inner cavity of the tire. The chamber walls and tires filled with compressed air perceive the loads acting on the tire. The tire consists of a tread, carcass, breaker, beads and sidewalls.
The carcass acts as the main strength of the tire, whose characteristics determine its load capacity and strength. The frame is made of several layers of special rubberized cord fabric, whose layers are tightly superimposed on each other. The tread is a running part of the tire made of a three-dimensional rubber layer, tightly fitting the carcass. The lugs and tread depressions form a pattern, the shape of which determines the grip of the tire with the ground surface. The breaker is a cushion layer made of soft rubber and serves to soften the impacts transmitted from the tread to the carcass. The sidewalls of the tire have much thinner covering layers of rubber and serve to protect the sidewalls of the carcass from damage.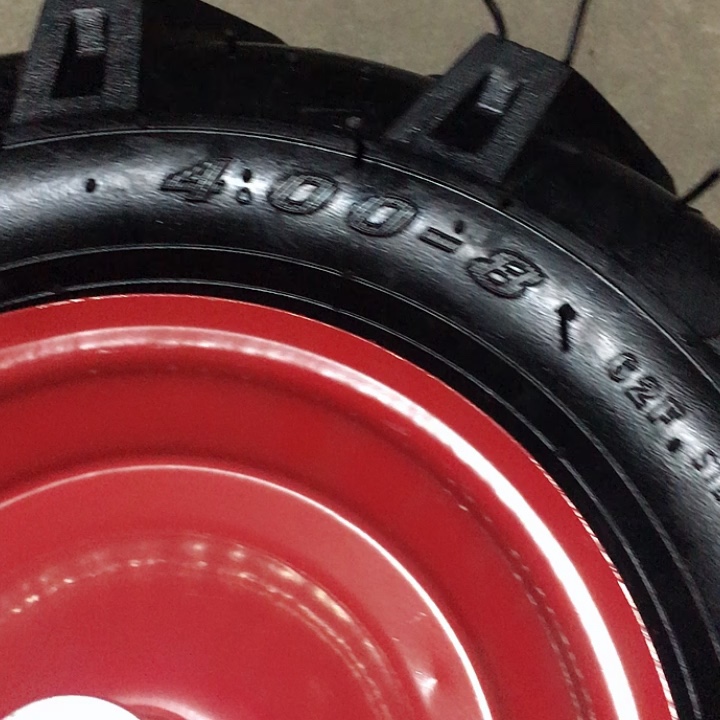 On the rim, the tire is fixed with the help of the beads. Inside the boards are wire rings wrapped with the ends of the carcass cord layers. Wire rings increase the rigidity of the tire beads and prevent them from stretching.
Pneumatic tire MTZ 82:
The chamber is filled with compressed air through a valve with a spool installed on it, which is a reverse-acting valve. The design of the tire valve for the rear wheels of the MTZ 82 tractor allows you to connect to it a device for filling tires with water or a similar liquid for ballasting the tractor.
Usually MTZ 82 rear tires are 15.5R38, front tires are 11.2-20. For each MTZ model, the manufacturer has established the recommended sizes of "rubber". Dimensions are selected according to the inner size of the tire, it must match the outer diameter of the rim. Otherwise, the owner has the right to choose between low- and high-profile tires, based on working conditions and financial capabilities.
Rear tires size 15.5-38 are distinguished by a reinforced breaker and radial placement of cords in the carcass. Tires, whose carcass has a diagonal arrangement of the carcass cord thread, form a tire profile plane with an angle of 50-54º, and tires with a radial design - their angle does not exceed 5º. The radial arrangement of the cords gives the tire better flexibility. Also, these tires improve the traction and grip qualities of the tractor, compact the soil and slip less, and have a longer tread wear life.
Operation and maintenance of MTZ tractor tires 82
The technical condition of the tires affects the traction and coupling qualities of the tractor, its fuel consumption, throughput and performance. Thus, we can safely say that tires largely determine the productive and economical operation of the tractor.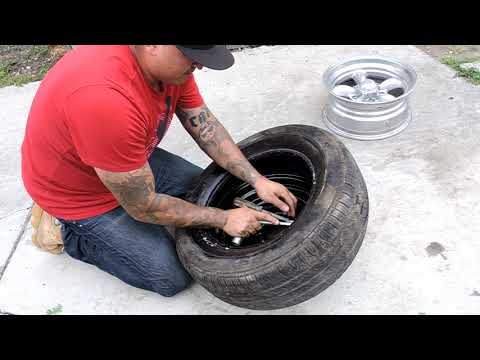 In addition, tires are expensive and wear parts of the tractor, the cost of which is about 12% of the cost of the tractor itself. Tires are changed 3-4 times during the entire life of the tractor, therefore, the cost of operating tires is approximately 20% of the total cost of operating the tractor.
The service life of a tire is affected not only by compliance with the rules of operation, but also by the conditions in which they are used: air humidity and temperature, road surface and soil properties. When using the tractor in the field, the service life of the tires is about 6000 hours, and when performing transport work, they wear out much faster. On stony soils, in mountainous areas, the tire life is reduced by 25-35%, and on winter snow cover, on the contrary, it increases by 25-30%.
The front drive tires MTZ 82 wear out faster than the rear ones. This is due to the fact that the rolling radius of the front tires is 1.7 times less than that of the rear ones. Passing the same path, the front tires make more revolutions.
Recommendations for tire pressure, kgf/cm2
Violation of the norms of internal pressure in tires significantly reduces their service life. An internal pressure that is 20% lower than the norm reduces the service life by 15%, and an increased pressure reduces the service life by 10%.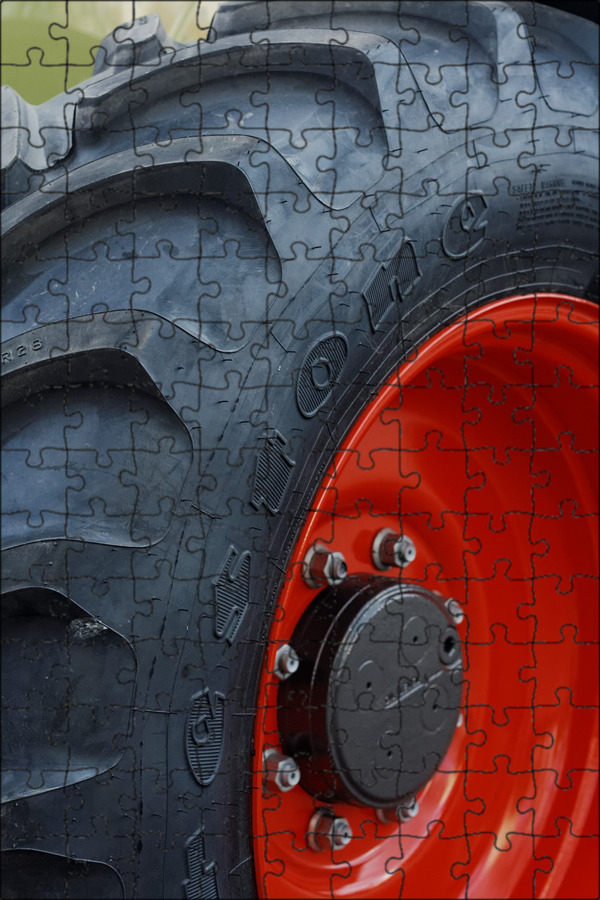 When performing certain types of work, temporary tire overload is permissible.
Due to the fact that there are many varieties of MTZ-80 for different tasks, the tire, respectively, can be different and differ in structure. The frame plays an important role, because all the effort and load falls on it. The correct carcass should evenly distribute the load, which increases the life of its tire and performance.
Fortunately, correct tire pressure and maintenance on your tractor will make changing a tire a breeze. According to statistics, for the entire life of the tractor, it is enough to replace the rubber 4 times. The agricultural tractor has a small feature related to the size of the wheels. For example, the diameter of the wheels is smaller in front, the rear wheels are an order of magnitude smaller. The pressure in the tractor tires on different wheels may differ, but in extreme cases, you can adhere to the indicator 1.4 kgf / cm2
I must say that the radiality of the front wheels R20, installed on this model of the Belarusian tractor, is optimal for standard operation.
However, the machine can also be used in winter, in conditions of high snow cover, as well as when working in quarries, swamps and in other more difficult conditions.
That is why the manufacturer allows independent intervention of drivers and the choice of wheels of other recommended parameters.

When installing wheels of an off-design radius, the driver should be prepared for more frequent maintenance work to repair the suspension, bearings in the hub, change oil and other procedures, since an off-design load on all systems provokes rapid wear of all parts. 82
In some cases, on the most inaccessible sections of the road, the classic rear or four-wheel drive of the tractor cannot cope with a thick layer of dirt and return to its track.
However, this does not mean at all that the equipment will not be able to overcome such a section, since the driver just needs to change the mode - turn on the center differential lock and brake, which will make the wheels rotate simultaneously and the tractor driver will be able to pull the car out of almost any mud.
This locking system has the following fairly simple design and principle of operation:
Tractor tire rupture Although the mechanical wheel lock is simple in execution and reliable in operation, it is difficult to operate and non-functional.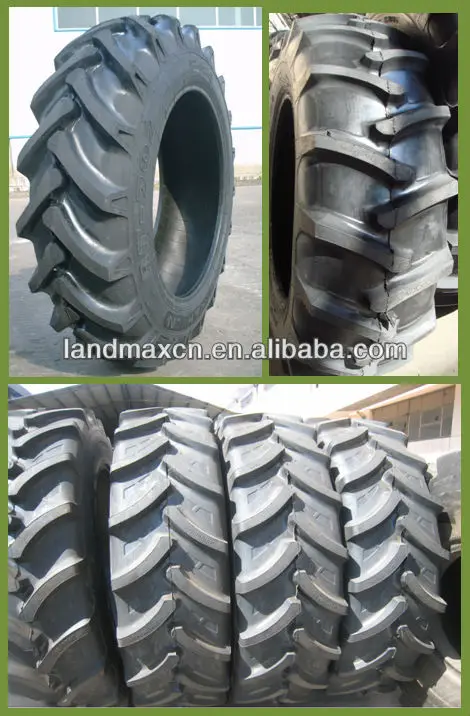 Therefore, on modern models of Belarusian technology, a more advanced system is installed - a hydraulic locking drive, which is different in that it no longer requires effort and a long arm to actuate the mechanism, since the traction force increases many times under the action of compressed oil in the piston. However, such a system can cause leakage in the piston when overloaded and more time-consuming and costly repairs to the equipment.
Often, on various Internet forums, owners and operators of MTZ-82 tractors complain about the problem when, while driving on a hard surface, their wheels become loose and start to “run”, which causes discomfort in cabin, and also causes damage to mechanisms.
The reason for these problems lies in several possible breakdowns of various systems at once, and the most common of them are listed below:
 This effect is especially pronounced when too much pressure is injected into the wheels on the MTZ, and the driver should slightly lower the tires to a maximum pressure of 1.2 ... 1.4 atm.
 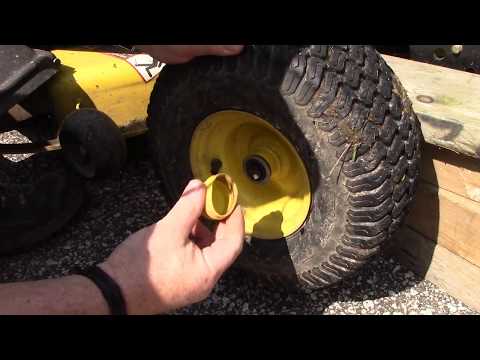 If such a problem is discovered after disassembling the hub, it must be immediately eliminated by replacing the bearing or the assembly, as it can subsequently ruin the entire suspension on the tractor.
 Tire fitting for MTZ 82 tractor Any problem with the smoothness of the movement of agricultural equipment requires a thorough check, as it can easily result in more serious breakdowns later. In addition, the operator or owner of the tractor should choose the nearest service center for himself and carry out periodic maintenance of the undercarriage of his unit at least once a year if there are no problems, and also regularly check and, if necessary, adjust the pressure in the MTZ 82 tires.