Charging Instructions for Motorcycle Battery How do I jump-start my vehicle? 3 Ways To Revive A Dead ATV Battery
← Charging
Having your ATV battery not turn over can be a really terrible time. At home, you can charge it using your battery charger, but if you are out on a trail or at a campsite, it can be scary when it won't start. But all is not lost. There are a few ways you can get your ATV battery going again.
The Compression Start is where you basically trick the ATV into starting. What happens is you get the wheels moving, and that can trick the engine into rolling over. Once it is on, it will charge the Battery as you drive.
Turn on the key or switch and put your ATV into first gear. Sometimes, if you cannot get it rolling fast enough, you may need to put it into second gear. Pull the clutch up and get the ATV rolling to 10 MPH. Then let out the clutch and add gas as your hear the engine try to turn. This should make the engine fire. Make sure to pull in the clutch once it's started to make sure you don't crash
This is a really useful way to jump start your ATV as you will usually be cruising with at least one other ATV. This is a fairly simple way to get your ATV running, it's merely jumping it like when you jump a car.
Connect the cables to the good battery first, then connect the bad Battery. When you connect the black wire, or the ground Wire, it is usually better to just attach it to the frame as there is not a lot of room on the battery. Just make sure it is grounded. Start the good battery first and let it idle for a few minutes. Then try starting the bad battery. Once it starts, remove the red wire first, then the black from the newly started ATV, repeat for the other. Let this ATV idle for a while before you turn it off.
You can actually use a car to jump start an ATV. This can be really useful if you just drove for miles and miles to a location and then found out your ATV isn't turning over.
Connect the wires like you would with any other ATV/ATV or car/car set up. Then, do NOT turn on the car. The car battery is much stronger than the ATV battery, and if you turned it on you could cause problems to the ATV Battery. Instead, just try to turn on the ATV. If it was the battery preventing it from starting, then it should turn over.
These three ways to get your ATV battery going can be really useful when you find yourself stranded. Knowing the power of your machine, what it can do, and how to get it going is very important for this. But try to take good care of your battery at all times, and check to make sure it is in working condition before you leave.
 Keep the battery charged to 100%, recharging when the lights
dim, the starter sounds weak, or the battery hasn't been used in more
than two weeks. Other than that, follow this simple check list every
month:
Keep the battery charged to 100%, recharging when the lights
dim, the starter sounds weak, or the battery hasn't been used in more
than two weeks. Other than that, follow this simple check list every
month:- Check the electrolyte level
- Keep the top free of grime
- Check cables, clamps, and case for obvious damage or loose connections
- Clean terminals and connectors as necessary
- Check inside for excessive sediment, sulfating or mossing
- Make sure the exhaust tube is free of kinks and clogs
- Replace caps firmly
Finish up by testing the battery with either a hydrometer or voltmeter.
To extend the service life of your battery, make monthly battery
maintenance part of your routine.
Storing Your Battery
If the vehicle is in storage or used infrequently, disconnect the
battery cable to eliminate drain from electrical equipment. Charge the
battery every two weeks.
For extended storage, remove the battery from the vehicle and charge to
100%. Charge the battery every month if stored at temperatures below
60° F. If stored in a warm area (above 60° F), charge every two weeks.
Make sure batteries are stored out of reach of children.
Spring Startup
When it's time to inspect the leisure use vehicles you've stored during
the off-season for spring use, you probably inspect the most obvious
items that come to mind such as tires, batteries belts, hoses and
fluids. Typically you check tire pressure and condition, making sure
that you have the necessary fluids, gas, coolant etc. and a charged
battery. The battery inspection is often performed through the most
fundamental method; you try to start the vehicle with the ignition. If
the vehicle starts, you may feel that you are good to go for the
upcoming season, but in many cases you may be headed for trouble. Unless you've maintained the battery during the storage period, it may
not be able to deliver its peak performance and service life for the
upcoming season. To insure that you get the best performance your
battery can deliver, it's recommended that you perform a few simple
checks. Remember, before performing any inspection on your battery,
insure there are no open flames or possibility of sparks around the
battery and absolutely no smoking.
Always wear eye protection, protective gloves and clothing.
For a Conventional style battery (those with the liquid electrolyte)
you should visually inspect the battery for any apparent problems.
These can include dirty or corroded terminal connections, low fluid
levels, physical damage such as broken or missing filler caps or dirt
and moisture on the battery. If you need to service the battery, it's
best to remove it from the vehicle. First insure that the electrolyte
levels are properly adjusted. Using distilled water; fill each cell
until the level is above the minimum level line on the battery case and
at or below the maximum line. Never overfill the battery or leakage
will occur. If you discover that the electrolyte levels have fallen
below the minimum level lines, there is a possibility that permanent
damage may have been done to the internal lead plates in the battery
and a new replacement may be required. After adjusting the levels, make
sure the filler plugs are secured and the battery is free of dirt and
corrosion. If you need to clean the battery, use a mixture of baking
soda and water to neutralize any electrolyte that may be on the outside
of the battery. Simply brush this on the battery and terminals using an
old paintbrush or tooth brush and rinse it off with clean water. Dry
the battery using an old soft rag or paper towel and make sure the
terminals are clean and free of corrosion.
 You can clean the terminals
with a small wire brush if the corrosion is significant or just
brighten them up using a piece of emery cloth.
Now that your battery is clean, it's time to check the state of charge. When using a voltmeter, the battery terminal voltage should read at least 12.6 volts. If your voltage is below this or you've adjusted the electrolyte levels, a boost charge is required. Charge the battery in a well ventilated area away from kids and pets. The variety of chargers you can use to endless but it is recommended that you use an automatic taper type charger specifically designed for Powersports batteries. Don't use a high current or fast charger for the boost charge unless you are familiar with their operation or permanent damage can occur to the battery?
When servicing a Sealed MF style battery, you obviously don't need to
inspect the electrolyte levels since the battery is permanently sealed
and must never be opened. The cleaning method and charging methods are
the same as for the Conventional style batteries. The one feature to
note about the Sealed MF battery is the battery terminal voltage. The
full charge voltage should read about 12.8 volts. These batteries have
a slightly different electrolyte, which influences the terminal
voltage.
After you've performed this maintenance, you still may require
additional help with your battery. While the battery may exhibit good
terminal voltage, it may not be in the best state of health.
Deteriorated from corrosion or sulphation, the battery could be
seriously short on capacity. To check this condition you may choose to
reinstall the battery in your vehicle and perform a very fundamental
start test or you could take the battery to a service center and have a
capacity test performed. Most battery dealers will perform a simple
electronic or electrical resistance test on the battery and be able to
tell you the state of health. By knowing the state of health, you can
determine the useful life expectancy of you battery. With this
information you can decide if you should replace the battery with a new
one or reinstall the existing one in the vehicle.
To insure maximum performance and service life for your battery, we
recommended that you use either the Yuasa 1.5 Amp or 900mA Automatic
Battery Charger for battery maintenance. Both chargers deliver Mistake-
Proof Technology to properly charge your battery and both are designed
to switch to a float mode once the battery has reached a full state of
charge and maintain it there. This feature allows you to attach the
charger to your battery for an extended period of time without concern
of an overcharged or discharged battery. Also, both chargers are
supplied with a Quick-Connect ring terminal harness that can be
permanently attached to your battery while installed in the vehicle. This allows you to instantly connect or disconnect the charger from the
battery without having to access the battery terminals. This can be a
great time saver for those hard to reach battery locations.
It's important to remember, even with the proper care and maintenance of your battery, they will eventually wear out. As with any of the parts on your vehicle, it's usually easier and more convenient to replace them before they fail unexpectedly. With this in mind, you may want to simply replace the battery every few years with a new one.
FAQs
Why should you charge your battery once a month?
When not in use, a battery discharges on a daily basis sometimes up
to 0.5-1%. This rate of discharge increases when the climate is warm.
To make up for this loss from disuse, a boosting charge should be given
once a month.
Sometimes a battery does not hold a charge.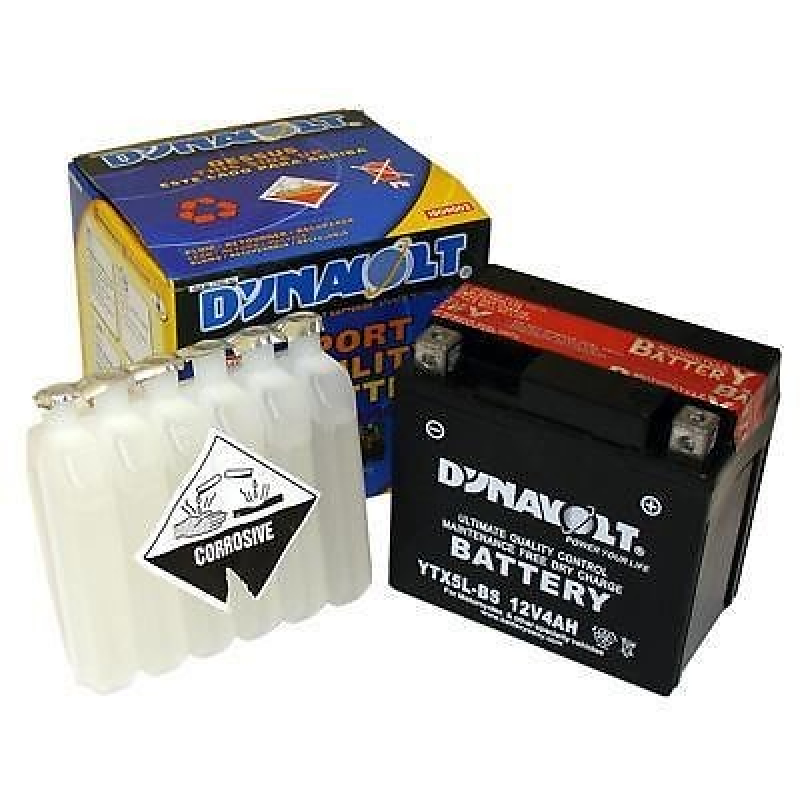 Why?
Why?
When a battery is in an excessively discharged state, it does not
readily accept a high current charge. The battery may appear to be
accepting charge, but charging is occurring only at the surface of the
plates. In such a case, the battery must be charged at a low current
flow for an extended period of time: for example, up to 24 hours on a
Yuasa automatic charger or equivalent smart charger.
What is sulfation?
Discoloration of plates with white lead sulfate crystalline deposits
may occur when the battery has been left for a considerable time in a
discharged condition. It can also occur as a result of the plates being
exposed to air due to low electrolyte level, or when a new battery is
filled with acid and stored without being charged. This phenomenon is
called sulfation. Once plates have been sulfated, the activity of the
affected area is permanently impaired, and the battery may not be
restored to its original capacity.
Why do the winter months seem to bring more battery problems?
The main reason is that batteries have to work so much harder in
cold weather. Engine oil is thick, so engine cranking effort is much
higher. Also, a battery's charging efficiency decreases in cold
temperatures. In addition, gasoline does not vaporize as readily in the
cold, which means that even more battery cranking effort is required.
How do you determine whether a battery has been charged?
The following characteristics will tell you if a battery has been
properly charged:
1. The specific gravity of the acid is over 1.275 (conventional type
batteries only).
2. Maximum voltage output across battery terminals can be maintained at
constant level for two hours.
3.Open circuit voltage is stabilized @12.7v or higher @ 6.3v or higher
for 6 volt batteries.
What can cause a new battery to fail soon after installation?
If a new battery becomes unserviceable within a few days or weeks after its installation it may be due one or more of the following
reasons:
1.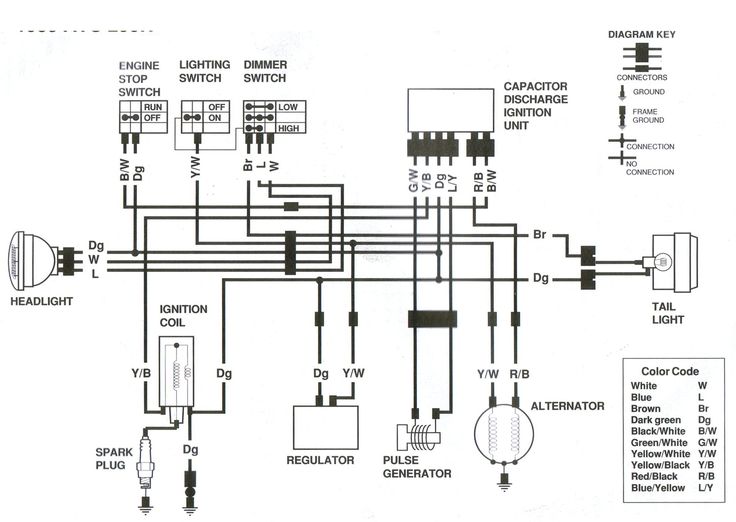 A faulty charging system.
2. A short circuit in the electrical system.
3. Battery terminals are dirty or not properly connected.
4. Excessive ignition off drains or high parasitic drains.
5. Electrical capacity of the battery is insufficient for size of the
vehicle.
6. The battery has been inadequately activated, dissipating its
strength from the outset.
7. The battery, after being filled with acid has been left too long
without initial charging, and has been allowed to become sulfated.
Most of the time that you will end up with a bad battery is when the batteries are not being properly charged during the initial set up.
Electric ATVs are rapidly gaining popularity due to their efficiency and environmental friendliness. But many riders still do not know how to charge an ATV on a battery.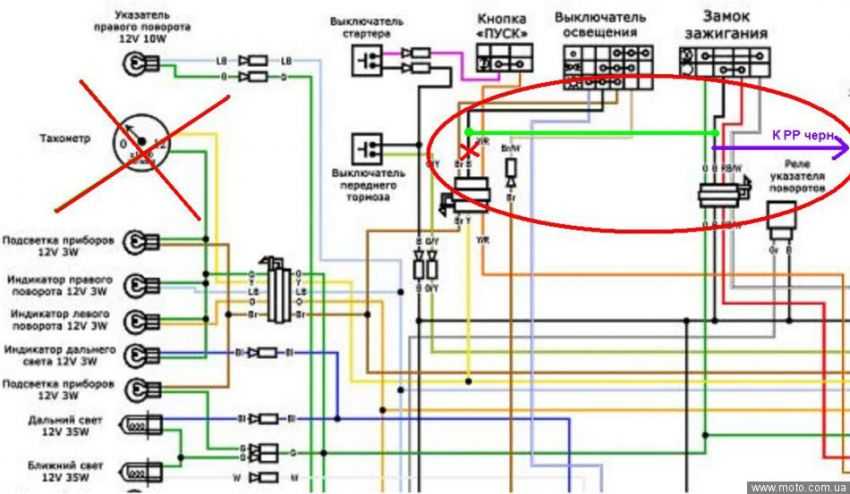 Improper charging reduces the battery life or the battery loses its capacity quickly. Therefore, let's figure out how to charge a children's ATV and consider the key recommendations of experts.
There are two ways to recharge the ATV battery. The first and easiest is to connect the charger to the appropriate connector. All electric cars and scooters are charged in a similar way, although not all quadrics have a similar socket.
If the ATV does not have a charging port, the rider will have to connect the battery directly to the charging station. To do this, you need:
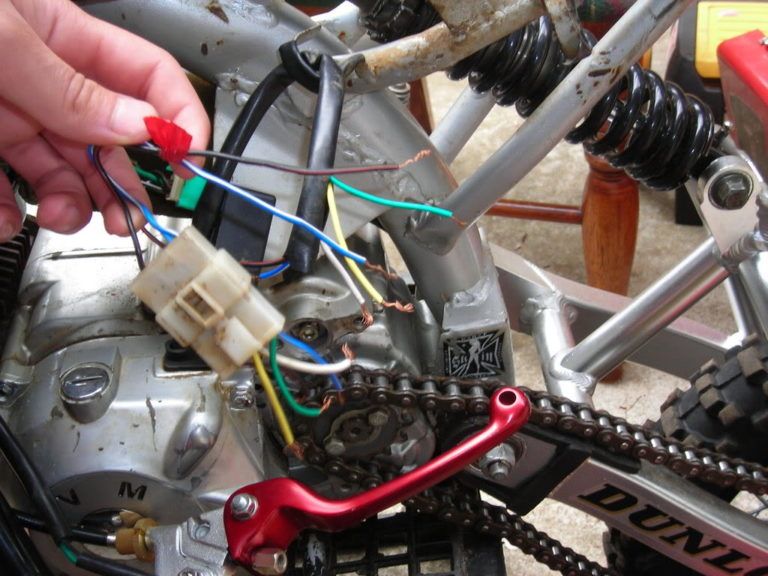
It is important to note that lithium batteries have a charge control board. This means that after a full charge, the process stops. Although overcharging the battery is still not recommended.
Another important question many riders are wondering is how to charge an ATV battery with an in-car charger. Yes, such a procedure is possible, but you need to properly configure the charger. For recharging, you can only use devices with adjustable charging current and the ability to set its minimum level (0.5-0.7 A).
Important : The optimal current for charging the battery is 1/10 of the battery capacity (in Amps).
Each vehicle's user manual lists the optimum battery charging time. On average, this figure is 6-12 hours. The charging time depends on the generation of the battery, its capacity and the characteristics of the charger. Don't forget to charge the battery, though. If the battery has 30-40% capacity left, the recharging time should be reduced.
But what if you don't know how long to charge your ATV battery? In this case, you need to almost completely discharge the battery and charge it for 8 hours. After that, the battery should be installed on the quadric, and the charge level should be assessed. If the indicator shows 100%, next time you need to charge the battery for 6-7 hours. In this way, you can determine the optimal recharging time.
Also remember that overcharging is the main enemy of batteries. It is strongly not recommended to leave the battery connected to the network for 15-20 hours. This leads to a decrease in battery capacity and, accordingly, a decrease in the operating time of the quadric.
Knowing how long it takes to charge an ATV, you can make a schedule for recharging it. For example, the battery can be connected to the network in the evening or after each trip. You can also purchase a replacement battery, thereby increasing the riding time on the ATV..bmp)
The battery of any electrical equipment must be properly maintained. Violation of the recommendations may lead to a decrease in battery capacity or damage to it. To avoid such problems, it is recommended:
Separately, it is worth mentioning the "buildup" of the battery. Immediately after purchasing the equipment, you will need to fully charge and charge the ATV several times (2-3 times).
Most riders store their bikes before winter. And in order for the device to be ready for operation in the spring, it must be properly preserved. Preparing an electric quad bike for wintering is quite simple, you just need to find a warm and dry place to store the quad.
Another important conservation point is battery preparation. Before wintering you need:
Note : If you leave the quad battery in the cold, the battery will simply "leak" and stop working.
11/16/2020 8762
Buying a children's ATV or its adult counterpart is not just about being a rider. This technique requires special attention. As a rule, the owners of this motorcycle often do not pay enough attention to charging the battery, which can cause it to fail almost every season. Remember, if you charge your ATV battery correctly, it will last you many times longer.
To avoid premature battery failure and reduced capacity, follow these guidelines:
Always follow the connection diagram when installing the battery in the ATV. You need to start by connecting the positive terminal. Be careful not to reverse the polarity as this can cause both the fuse to blow and the battery to explode.
If the vehicle battery suddenly stops charging, there may be several reasons for this:
The first signs of regulator relay failure are when the ATV battery starts to drain too quickly. Diagnosis of such a breakdown is carried out by measuring the resistance with a voltmeter at the battery terminals. Repairing any electrical equipment of an ATV is a rather complicated process that a true professional should perform.
Often the best solution when a battery or regulator fails is to replace it with a new one. It is much easier to prevent this kind of breakdown than to fix it later. That is why it is necessary to charge the battery of motor vehicles in strict accordance with the requirements of the manufacturer.
There are two ways to charge the child's ATV battery with the charger. The easiest of them is to connect the charger to the appropriate connector on the motorcycle. True, such a nest is not available on all models of ATVs. If there is no such connector, then the battery should be connected directly to the charger. The battery is charged as follows:
Lithium ATV batteries usually have a board that monitors the battery level. But even in this case, it is strongly not recommended to charge the device longer than necessary.
Each ATV gel battery manufacturer provides detailed charging instructions. It is very important to choose the right charger with the ability to adjust the amperage in order to avoid overcharging the battery.