If you're used to having your spare tire on your trunk, it can be quite a daunting task to remove the spare tire under a truck. But don't worry. We got you covered. We've asked automotive experts how this procedure is done so that you can get started on changing your flat tire and be back on the road in a jiffy.
Follow these steps to remove the spare tire from your truck:
Hang on so we can elaborate on the given instructions so you can remove your spare tire from your truck with no hassle. We'll also share with you how to do this task when you don't have your tire removal kit. We'll also have a short discussion on how long you can expect your spare tire to last and how far you can drive using your spare tire.
Before you continue reading, let us say we hope you find the links here useful. If you purchase something through a link on this page, we may get a commission, so thank you!
Unlike regular vehicles that conveniently have their spare tires in their trunks, pickup trucks have theirs underneath the truck bed. This is actually a genius move by manufacturers so that the spare tire won't take up valuable space on the bed of the truck. However, it makes removing the spare tire more challenging.
Don't worry because there's an efficient way of removing the spare tire without breaking your back or endangering your life. Just follow these steps. You can also watch this YouTube video for the demonstration.
 Attach the handle on the groove near the top.
Easy, right? You don't have to go under your truck after all!
Brand new vehicles come with a set of factory jack kits or tire removal kits to aid you in getting the spare tire off the truck. You need to familiarize yourself with these tools, so you'll know what they are used for.
The tool that you use to lower the spare tire is called the jack handle. As mentioned above, this is a long piece of tool that you need to assemble so that you can connect it with the vehicle's tire-lowering mechanism. You turn the handle counterclockwise to unfasten the tire until it reaches the ground and you can remove it from the cable and tire holder.
If you don't have this in your tool kit, it's best to buy one as soon as possible. You never know when you're going to need it. Always be prepared for what can happen on the road.
Check out this spare tire jack handle on Amazon.
In case you have a tire blowout and you don't have a jack handle with you, there are other ways for you to remove the spare under your truck. But it would still involve other tools that hopefully you've got in your tool kit.
What you need:
Steps to lower the tire:
 Make sure your car is parked properly on flat ground.
What you need:
Steps to lower the tire:

These are just two ways for you to remove the spare tire without a jack handle. Basically, you can improvise with the tools that you've got to see which one will work best for you.
The lifespan of your spare tire will depend on its tire type. There are usually three types of spare tires: a donut, run-flat, and a matching spare tire.
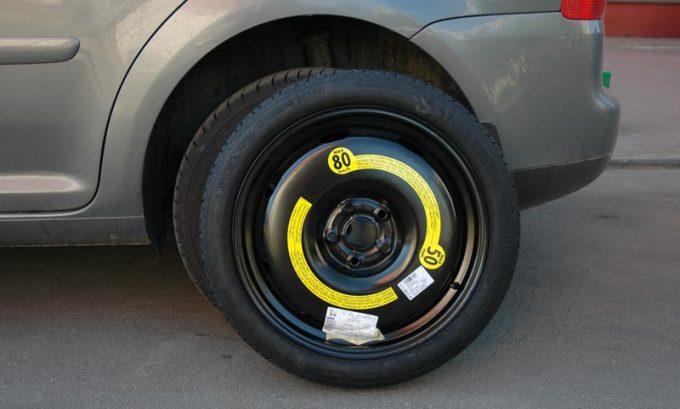
A donut is also known as a space-saver or compact spare tire. This is smaller and lighter than a regular tire. In recent years, manufacturers began using donut spare tires on their vehicles to reduce cost and save valuable space since a full-sized tire takes up so much room.
Since they are more lightweight, they help improve the fuel economy and power consumption of your vehicle. However, this type of tire is made of weaker materials than traditional tires. They have a shallower tread depth which makes them more vulnerable on the road.
As such, a donut spare tire is just meant to be a temporary replacement for your worn-out tire. It has to be replaced immediately before you get yourself into trouble while using it.
A run-flat spare tire is more commonly found on newer vehicles. It is also called a zero-pressure tire. It is more durable than a donut tire. It is made of tougher materials that's why it can resist deflation even when it has been punctured.
But still, this is a temporary fix for your vehicle. You're better off having it replaced right away.
This is the most durable among the different spare tire types. It may not be made by the same manufacturer as your regular tires, but it is at par when it comes to performance on the road. As such, you can use it for a longer time after replacing your flat tire with this spare.
Again, the distance and speed at which you drive using a spare tire would depend on the type of tire that you have.
Donut tires are not designed to be driven for long distances. You have to maintain a speed of 50 mph or less. This means that you cannot use this on the highway.
Since donut tires are smaller than your other tires, they have to work harder to keep up with the rest. This makes them more susceptible to damages on the road.
With a run-flat tire, you can go beyond 50 mph since it has better endurance on the road. You can drive up to 100 miles with it. This will give you more allowance to find an able auto repair shop.
Lastly, a matching spare tire can be driven similar to a regular tire. You can go at the maximum allowable speed on the road and there's no limit on the distance.
Take note though that spare tires have different speed ratings so it's best to check yours. Don't go beyond the recommended speed to avoid damaging other components of your vehicle such as the transmission. It's bad enough that you had a flat tire, you don't need the added expense of additional repairs or part replacement.
Make sure you always have your tire removal kit with you so you can take off your spare tire under your vehicle without any hassle. With the right tools, this task doesn't have to be a chore.
Check out these articles for some related reading:
Does Firestone Patch Tires For Free?
20 Types Of Tires You Should Know
by Smart Motorist
If you want to know how to lower spare tire without tool, you’re at the right place. This guide contains everything you need to know to complete the task. The step by step instructions given below doesn’t leave any room for confusion or mistake.
They are also easy to follow and practical. You don’t have to be a mechanic to put them to practice. Anyone who has ever held a tool in their life can use them to get their vehicle back on the road in little to no time. That isn’t where the good news end.
Our experts prepared these directives with the assumption that anyone using them would be on their own. That there might not be anyone assisting them in lowering their spare tire. It’s a good thing if you ask us as it means you can complete the task without any help.
Here’s what you need to do:
Before you go about reading our instructions, it’s important to make sure that you indeed have a spare tire in your vehicle. Most people assume this scenario without ever bothering to verify their assumption by looking at the spare tire. Such persons are often left with nothing at the end.
To verify the presence of the spare tire, discard the rectangular plastic cover under the passenger side of your vehicle’s license plate. If you can see an entrance for a key beneath the plastic cover, then you can be sure that your car does indeed has its spare tire.
That you’re going to lower the spare tire without ‘tool’ doesn’t mean you are going to go about the task with bare hands. Doing that would be counterproductive. You will still need some supplies to compensate for the lack of the key. Here’s what you’ll need.
Purchase a jack kit (without the jack). You can buy one from your local hardware store or Amazon. The next item on your ‘to-get’ list is an ignition key. Alongside the components of the Jack kit, the ignition key will loosen the tire’s connection with the wheel.
Experts tell us that one should never change tires on a slope. The same advice is applicable when you’re lowering a spare tire. Vehicles parked on an incline are extremely likely to go backward, thereby putting the safety of the person under the vehicle at risk.
Once you’ve done that, apply the hand brake. Turn on the emergency lights if you’re on the roadside. Put your vehicle in gear (if manual) or in parking (if automatic). Make sure that no one is sitting inside the car and put chocks or similar heavy objects behind all the wheels.
Follow these instructions to lower spare tire without a tool:
Picture in your mind the exact location of the spare tire. Or you can just fall to your knees and look beneath the vehicle. Fixate your attention to the back of the vehicle. There you’ll see a bulge protruding downwards. That is the spare tire that you’re going to lower.
The exact location of the spare tire will be just behind the tow hitch bar and under the bumper. You can further verify that the bulge is a spare tire by pressing your hand against it. The tire’s trenches will let you know that it’s indeed what you’re looking for.
Insert the ignition key in the hole beneath the plastic cover you discarded earlier. Drag the key towards you and you’ll end up detaching it from the hole. Doing this is vital as it will allow you to fix the assembly at the rear of your vehicle.
Get the crowbar and a couple of rods. One of the roads will have a wider end. Mechanics usually call this end the ‘female’ end. You’re going to insert this end of the rod into the hole that you disclosed in the previous step with the ignition key.
Doing this will help you in two ways. It will provide you enough space to add the male end of the pulley to the female rod. You will also be left with enough space to remove the bumper.
Look closely to make sure that the fitment between the female end rod and the 2nd rod is perfect. Then put this end through the hole.
You have by now one end of the rod into the hole. The other end, which is staying out of the bumper, should now be added to the crowbar. Follow that up by turning the crowbar in an anti-clockwise direction.
This will allow you to swivel the pulley and, by extension, the spare tire to the ground. Keep on rotating as long as the spare tire isn’t entirely on the floor.
This will let you detach the tire from below the vehicle. Keep one hand on the tire and the other on the middle gap of the rim. Apply full force to pull both ends apart and off the peak.
Lowering a spare tire without a tool isn’t exactly straightforward. You have to apply a lot of effort and the whole process will take about an hour for an amateur. Yet it is better than the alternative, which is to wait for hours on the roadside for help. You should therefore be aware of how to accomplish this task.
Repair and maintenance
- by Andrey Ku - Comment
Contents of the entry
The question of how to remove the spare tire for Lada Largus, the owners are asked at the moment when it comes to changing the wheel. In this article, we will help you and tell you how to remove the spare wheel on a Lada Largus station wagon, Cross and Van.
Since the progenitor of Lada Largus was the French van Dacia Logan MCV, from which the location of the spare wheel was inherited - under the rear of the car on a special bracket. This was done in order to save space in the trunk of a car, and even without a niche for a spare wheel, a flat floor is obtained, on which it is more convenient to load cargo.
1. Open the tailgate.
2. Find a regular jack and remove it to the side. Behind it is a wheel wrench, which we will need to remove the spare wheel.
3. Bend the flap in the trunk carpet to give access to the bracket bolt.
4. Use the wheel wrench to unscrew the bolt to lower the spare wheel bracket.
5. After that, remove the released latch and lower the bracket together with the spare wheel to the ground.
6. Next, pull the wheel towards you.
7. After replacing the wheel with a spare tire, put the damaged wheel on the bracket and put it back.
If you do not quite understand how to remove the spare tire on the Lada Largus station wagon, then I suggest you watch a visual video that shows the work process in detail.
For the majority of owners of domestic wagons, it is not news that the mounting of the spare tire on the Lada Largus was done as unsuccessfully as possible - the mounting bolt is located under the bottom, which means it is affected by moisture, dirt, and road reagents. Over time, it rusts and sours. And at the moment when there is a need for a spare tire — the bolt refuses to unscrew.
clean and lubricate the bracket bolt at least once a season. But who does this until they run into a problem?
If you decide to unscrew the soured spare wheel bolt on Lada Largus, then you will have to arm yourself with the necessary tool and be patient.
1. This work must be carried out on a pit, trestle or lift.
2. We clean the threads from dirt with a metal brush.
3. Spill liberally with penetrating lubricant such as WD-40.
4. We are waiting for 10-15 minutes.
5. Trying to move the thread with a wrench. If it goes, then turn the bolt completely.
6. If the thread does not lend itself, we arm ourselves with a gas burner and heat the bolt from the side of the bracket well. After these manipulations, the bolt should either turn out or break off. More often than not, the bolt will come loose.
7. We clean the threads with a metal brush inside the bracket, and change the rusty retainer to a new one, pre-treated with water-repellent grease.
Due to the inconvenient location and the problem of removing the spare tire, many Largus owners transfer it to the back door using a special bracket:
On Lada Largus Cross, the spare wheel is removed in the same way as a simple station wagon. The spare tire mounting device has no differences, so there is no difference. The same situation is with the Lada Largus van, where the spare wheel is also placed from below.
All without exception Lada Largus comes with a full wheel as a spare wheel. No temporary huts, dokatok (bananas) are provided from the factory.
| DIY
| |||
Volkswagen Sharan - Video Lesson Model: Volkswagen Sharan MK 1, 7M - Years 1995-2010 Open the trunk lid and lift the latch on the small movable part of the bottom mat of the same as shown in the video. A bolt can be seen under it, which must be unscrewed in order to free the spare wheel. When you unscrew this bolt, the wheel will fall out of place. As soon as he is on the ground, unhook his mount and that's it. Published on 11 November 2021 by ScegliAuto | Peugeot 3008 remote control battery replacement To replace the Peugeot 3008 key/remote battery, you need to take a small screwdriver and insert it for the lever into the cover with the Peugeot logo. Once the cover has been removed you will gain access to the battery compartment, again using the same screwdriver, lever up to remove the battery. Determine the type of battery (C2032) and replace it, paying attention to the position, i.e. positive pole up. Place the new battery in the provided slot. Move the cover, trying to attach it correctly by pressing with your fingers. |