After a busy week, the weather is looking great, and you finally have time to do some work on your garden. The grass is dry, a perfect time to trim your lawn. You go to your garage to get your lawnmower out. But, sadly, you find that its tire is punctured. You did not have this problem before, and you are unsure how to fix it correctly. This blog post will help you remove, fix or replace the tire on a lawnmower.
How to Remove a Lawn Mower Tire, step by step:
A lawnmower with a broken tire makes it inoperable. Erratic surfaces (rock and pebble) or frequent sharp debris may puncture the tire and cause them to wear out. Not only does this situation make your machine less productive, but it may also cause some safety hazards. The tire needs to be removed and fixed, or a new tire needs to be mounted. This blog post will look into more detail about what you need to do in the various steps.
Contents
 4 ● Step 4: Removing the damaged tires
Before working on the tire problem, make sure the lawnmower is turned off correctly. Remove the key. Use the parking brake to ensure that it can not move. If they don’t work well, you can put a piece of wood or something else in front of the tires that are still fine.
Inspection of the damaged tires is the first step. After it, you know how to fix it, and it helps to get an idea about the dimensions and types of tires your lawnmower uses. If you need to get a replacement, you need this information to get the correct tire.
Inspect the tires and see if there is only one tire with a problem or if more tires are involved. If the reason for the puncture is a nail, it will probably just one tire. But if it is mainly due to wear and tear, there is a good chance that more tires are involved.
To see if a tire needs to be replaced, there are several signs:
It is a good idea to check the tire condition a couple of times during the season. The condition of tires gradually declines, so also the handling of the lawnmower gradually declines. It is only when you replace them you notice the difference. In a lot of cases, it is better not to wait that long.
Check the size of your tires. In most cases, this detail is on the tire itself. Two or three groups of numbers are written on the rubber, which defines the diameter/thickness, the tire’s width, and the rim’s height.
If your lawnmower or lawn tractor has two groups of numbers on the tires, it will be something like “4.80-8”. In this example, the tire’s width is around 4.8 inches, and the diameter of the rim is 8 inches. It is easy to find the correct replacement tire online or in a store near you with those two numbers.
When you see a group of three numbers on the tire, it will be something like “18×9.50-8”. In this example, the first number, before the x, is the diameter of the tire, inflated and not under load. The second number between the x and the – is the width of the tire. The last number, after the –, is the width of the rim.
When you purchase a new lawnmower or lawn tractor tire, you also need to look at the ply rating. The ply rating is a number that shows the carrying capacity. For most lawnmowers or lawn tractors, this is not an issue, but a higher carrying capacity means that the tire is more robust and thus more resistant to punctures. For lawnmowers, there are two types of ply-ratings: A/2-ply or B/4-ply. Where the B/4-ply is the stronger one. You can find this on the side of the tire. Use a B/4-ply tire on more rugged terrain and the A/2-ply tire on a smoother surface.
Lawnmower or lawn tractor tires are divided into three types of tires:
 They will give you good traction on slick grass. And they are such that they do not damage your grass by digging up the turf.
Check if you use a tube or a tubeless lawnmower tire. There are two types of tires based on the presence and absence of a tube in them. Typically, unlike tubeless tires, a tube tire has a few nuts across the middle of the rim. On the other side, there is just one nut in the middle in tubeless tires. Another way to know the sort is to search for a fine print of the tire. If you have tubeless tires on your lawnmower or lawn tractor, you can sometimes repair them without removing them. Only try this if the condition of the tire is still ok. Check the user manual from the special sealant how to use it correctly. Check carefully for sharp objects that are in the tire and remove them before starting with the fix. Tires with an inner tube should not be fixed with a sealant.
Along with new tires, some tools and materials are also required to repair tires. The following are a few things that need to be at your workspace for removing the tires:
New tires, jack, soap/cleaner detergent, wrench set, air removal valve, air pump (with gauge), screwdriver, pliers
If you have all the tools, you need to set your mower on a flat surface (probably your garage floor), and you’re ready to remove the tires.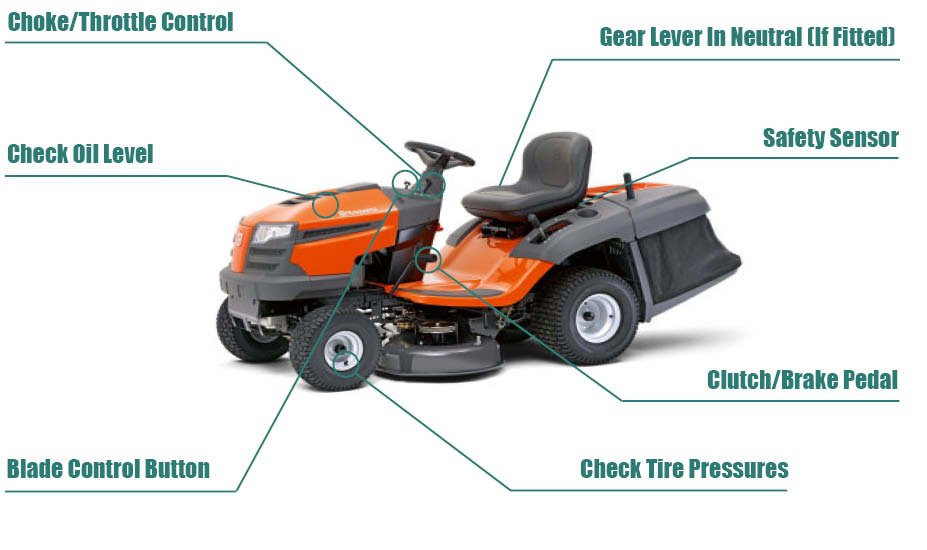
The jack is positioned under the lawnmower to provide lift so that the tires are free in the air and can thus be removed. Place it under the frame near the tire you want to remove. As the frame is one of the toughest components, you should ensure that the jack is under it and not under a waker body part.
This procedure varies slightly depending on the type of tire you are using.
To remove a tubeless tire, you need to remove a large bolt in the center with the aid of a spanner or wrench of the appropriate size. Push the tire back and forth several times to free it from the axle. Now deflate the tire using an air removal valve (with a pin) and, as soon as it is deflated, move the tire against the rim wall; this will release it. Please take note that the valve is in a downward position. Use pliers to separate the tire from the rim. Clean the bead seat of the rim.
To remove a tire with a tube, flatten the tire by pressing the air removal valve and a pin (just like above). Remove the nuts with the aid of a wrench. Push the tire back and forth several times to free it from the axle. Now detach the tire with the aid of pliers. Check that the tube is in an acceptable condition so that you can reuse it. If not, you should dispose it off.
Now that the tire has been removed, you may need to reinstall another tire in its place. For that purpose, the steps are given below:
If you can repair the tire depends on the type and the condition. Tubeless tires can be repaired with a special sealant. A tire with a tube can be fixed with a tire patch and some glue. Always make sure you check the tire itself for any sharp objects that did the damage. Remove them before the repair. Feel with your hand on the inside of the tube to ensure that you can not feel any sharp objects.
Apply soap water to the edges of the tires with the tube and set it around the bottom. Again, with the aid of pins and screwdrivers, patch the rim within the tire, bearing in mind that the air inlet to the tube remains undamaged. If the air pump is used, fill the air in the tire also maintaining the necessary pressure by keeping an eye on the gauge.
Remove the inner tube, pump it, and check with some water if you can find a hole. If you can not find it check the valve, sometimes it leaks air. If you find the hole, mark it. Remove the air, cut a piece of the tire patch, and glue it to the tube. After you let it dry, fill the tube with air and check if the repair was done correctly. If all is fine and you double-checked that no sharp objects are still in the tire, you can put the tube back in the tire.
Check if the valve is safe for tubeless tires. Now set the rim in the tire by keeping the directions in view. Mount one bead on the rim and one bead on the valve. Make sure the second bead stays partially uninstalled. After that, add the sealant while keeping the guidelines in mind. Now turn the tire to hold the sealant in the bottom as the bead comes to the top so that you can finalize the installation. Now fill the tire up with air while keeping the pressure insight by using a gauge.
After you’ve thoroughly washed all the dirt from the rims using a cleaning detergent and removed the rims, it’s time to install the new tires. Attach the tire back to the axle. Connect the cap and the nuts back to the whole wheel. When the wheels have been mounted, remove the jack from below.
The tire replacement is finally complete, and your machine is all set to go.
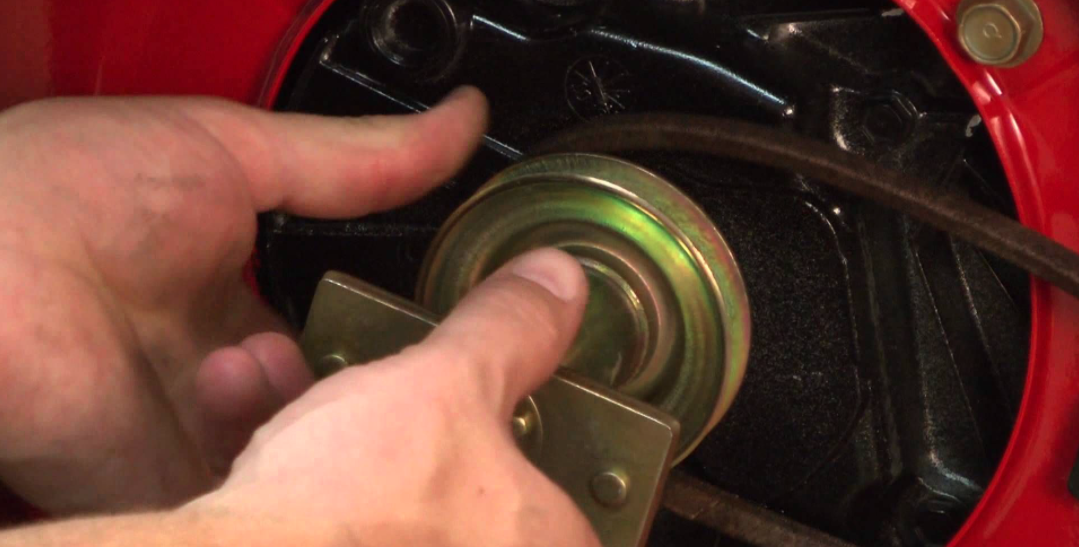 If you do not manage, take the tire to a professional.
Using a lawnmower on rough surfaces, such as bricks and pebbles, causes tire threads to wear out over time. This wearing out triggers an exponential decline in the lawnmower’s grip over time, making it unsafe to use. In addition, tires often get flat when they hit sharp objects or when their internal pressure is also not regulated.
Tubeless tires are devoid of an inner tube between the tire and the rim, unlike tires with an inflatable tube at that location.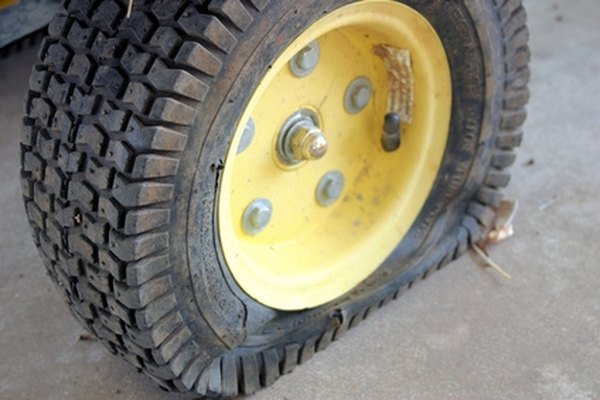
Tubeless tires are much more durable because, as a result of a puncture, they do not instantly lose all the air, unlike tires with a tube.
Also, in tubeless tires, punctures can be fixed without physically removing tires that are not possible in tires with a tube. On the other hand, fixing a tire with a tube is often more cost-effective. If the tire itself is still in good shape, but the tube is not. You only have to fix or replace the tube, and they are much cheaper than a tire. In the case of a tubeless tire, you always have to replace the whole tire if you can not fix it.
Ultimately, balancing tubeless tires is often relatively simpler if the weight of the tire is in equilibrium. The tires with tubes are still in use because they are cheaper than tubeless ones.
Changing damaged tires at home is not very difficult, and if you know how to do it, it takes only half an hour. In some cases, you can still fix the tire if it is only a small hole. If the damage is bigger or the tire’s condition is bad, you will need to replace it. In most cases, the other tires’ condition will be such that it makes more sense to replace more than one.
Please enable javascript to view the website ..
Repair help > Riding Mowers & Tractors repair > Riding Mowers & Tractors repair guides
January 1, 2015
By Lyle Weischwill
This step-by-step riding mower repair guide shows how to replace the rear tire on your lawn tractor or riding lawn mower if the tire is too damaged to repair. Installing a new rear tire is relatively easy and requires just a few tools and a manufacturer-approved lawn mower part.
Use this repair guide and video to replace the rear tire on Craftsman, MTD, Husqvarna, Murray, Troybilt, Toro, Snapper, Yard-Man, Weed Eater, Ariens, John Deer and Southern States lawn tractors and riding lawn mowers.
If the tire just has a puncture in the tread, you can fix it with tire sealant. The video How to Repair a Riding Lawn Mower Tire shows how.
Quick links
Tools required
Floor jack or bottle jack
Jack stand
Slot screwdrivers
Pry bars
Pliers
Valve stem core removal tool
Liquid detergent
Water
Wood blocks
Work gloves
Safety goggles
Compressed air supply
Anti-seize compound
Repair difficulty
Time required
60 minutes or less
Repair difficulty
Time required
60 minutes or less
Replacing a rear tire on a riding lawn mower
This video explains how to replace the rear tire on a riding lawn mower.
01.
Park the riding mower on a level surface and set the parking brake.
Turn the ignition switch off and remove the key.
Wear work gloves to protect your hands and safety goggles to protect your eyes.
Lift the riding lawn mower hood and disconnect the spark plug wire.
Lower the tractor hood.
Tip: Disconnect both spark plug wires if your engine has 2 cylinders.
PHOTO: Disconnect the spark plug.
02.
Block the front tires to keep the riding mower from rolling.
Position the jack under the frame and jack up the riding mower to raise the rear wheel.
Place a jack stand under the frame to support the riding mower.
Remove the jack.
PHOTO: Jack up the riding mower.
03.
Pull off the axle cover.
Remove the retaining ring and then pull off the washer.
Pull the tire off the axle.
Remove the square key.
PHOTO: Remove the rear wheel.
04.
Remove the valve stem cap.
Remove the valve stem core, which lets any remaining air out the tire.
Break the tire bead and pry the tire off the wheel rim on one side.
Pry the tire off the rim on the other side.
PHOTO: Break the tire bead and pry the tire off the rim.
05.
Clean the wheel rim.
Lay the new tire flat on a work surface.
Lubricate the top tire bead with liquid detergent.
Pry the rim into the top side of the tire.
Flip the rim and tire over.
Lubricate the tire bead with liquid detergent.
Pry the remaining side of the tire onto the rim.
Warning: Use blunt tools to pry the tire to avoid damaging the tire bead.
PHOTO: Pry the new tire onto the rim.
06.
Fill the tire with air to seat the tire bead.
Reinstall the valve stem core.
Fill the tire fully with air.
If the tire doesn't fill with air, install ratcheting tension straps around the outer edge of the tread on each side of the tire.
Tighten the straps to force the beads outward.
Fill the tire with air to seat the tire bead.
Reinstall the valve stem core and fill the tire with just enough air to keep the beads seated.
Carefully release the tension straps and then remove the straps.
Tip: If the tire didn't fill with air, install a ratcheting tension strap around the center of the tire tread, tighten the strap to force the beads outward, and fill the tire with air to seat the tire bead. Carefully release and then remove the strap.
PHOTO: Seal the bead to the rim.
07.
Slide the wheel on the axle and line up the key slots in the rim and axle.
Apply anti-seize compound to the square key.
Push the key into the rim.
Reinstall the washer and snap the retaining ring onto the axle.
Push the axle cover onto the wheel.
PHOTO: Lubricate the square key.
08.
Push the jack under the frame and raise the riding mower.
Pull out the jack stand.
Lower the riding mower to the ground.
Remove the wood blocks from the front tires.
PHOTO: Lower the riding mower.
09.
Raise the tractor hood.
Reconnect the spark plug wire and lower the hood.
Tip: Reconnect both spark plug wires if your engine has 2 cylinders.
Warning: Undertaking repairs to appliances can be hazardous. Use the proper tools and safety equipment noted in the guide and follow all instructions. Do not proceed until you are confident that you understand all of the steps and are capable of completing the repair. Some repairs should only be performed by a qualified technician.
Choose a symptom to see related riding mower and lawn tractor repairs.
Main causes: punctured tire or inner tube, leaky valve stem, damaged wheel rim
Read moreMain causes: worn or broken ground drive belt, bad seat switch, transaxle freewheel control engaged, transaxle failure, dirty carburetor
Read moreMain causes: shift lever needs adjustment, neutral control needs adjustment
Read moreMain causes: worn or broken blade belt, broken belt idler pulley, blade clutch cable failure, bad PTO switch, damaged mandrel pulleys
Read moreMain causes: damaged cutting blade, worn deck pulley, damaged mandrel pulley, loose fasteners on mower deck components
Read moreMain causes: engine overfilled with oil, leaky head gasket or sump gasket, damaged carburetor seals, cracked fuel pump, broken fuel line
Read moreMain causes: clogged carburetor, damaged flywheel key, dirty spark plug, stale fuel, improper valve lash, engine needs a tune up
Read moreMain causes: faulty battery, bad alternator
Read moreMain causes: unlevel mower deck, dull or damaged cutting blades, worn mandrel pulleys, bent mower deck, engine needs tune up
Read moreThese step-by-step repair guides will help you safely fix what’s broken on your riding mower or lawn tractor.
January 1, 2015
By Lyle Weischwill
Your mower can’t run on a damaged rear tire. Here’s how to install a new one.
Repair difficulty
Time required
60 minutes or less
Read moreJanuary 1, 2015
By Lyle Weischwill
If a blade on your mower is dull or bent, replace it following the steps in this repair guide.
Repair difficulty
Time required
30 minutes or less
Read moreJanuary 1, 2015
By Lyle Weischwill
Help your mower run better by replacing the fuel filter during your riding mower's annual tune-up.
Repair difficulty
Time required
15 minutes or less
Read moreUse the advice and tips in these articles and videos to get the most out of your riding mower or lawn tractor.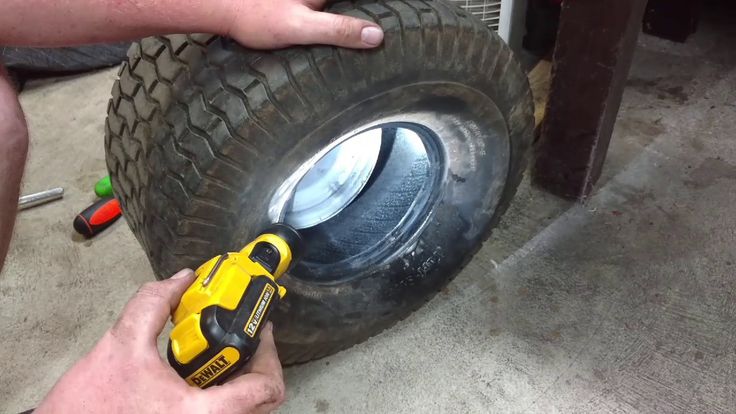
February 11, 2023
By Lyle Weischwill
Learn about the top 10 must-have electric lawn & garden tools for 2023
Read moreAugust 6, 2020
By Lyle Weischwill
Learn how a blade removal tool makes replacing the blade easier and safer
Read moreApril 9, 2019
By Lyle Weischwill
Keep these 6 things on hand to keep the mower season running smoothly.
Read moreDishwasher
Shop Frigidaire FFBD2406NB9B dishwasher parts
Dryer
Shop LG DLGX2502V dryer parts
Electric Wall Oven
Shop Bosch HBL8650UC/10 electric wall oven parts
Parts
Repair Kit 35791R 2302860783BLACK LOWER OUTER DOOR ASM WB56X33052Dishwasher Water Inlet Guide Assembly 4975DD1001A partsWasher Motor Stator WPW10419333 partsRefrigerator Can Rack WP13005401SP partsGrill Drip D WR17X23167 partsRefrigerator Door Assembly ADD74296601 partsSlinger Vane 905006MAWasher Outer Rear Tub Assembly DC97-19681A partsHome Electronics Shield 126-02036Elliptical Resistance Motor 241949 partsDishwasher Spray Arm, Lower WD12X10244 partsSpark Plug 715811
Rear-Engine Riding Mower
Shop Snapper 301016BE rear-engine riding mower parts
Repair
Gas Grill Not Hot Enough
Side-By-Side Refrigerator
Shop GE GSL25JFPEBS side-by-side refrigerator parts
Regular use of the lawn mower requires not only care for it, but sometimes repairs. In many cases, you can restore the performance of the lawn mower yourself. Husqvarna produces three types of lawn mowers - electric (powered by a 230 V household power supply), battery and gasoline. The first two types do not require gasoline and are easy to operate and maintain. But they also have problems with mowing the grass.
1. Lawn mower motor does not turn on. The engine is started with a single ON/OFF key on the control panel. If the engine is not running in the ON position, the battery may be discharged or there may be no mains power. The battery status will be shown by the battery level indicator LED and if it is low, it will need to be recharged. In the network model, use a multimeter or an indicator screwdriver to check for voltage at the power cord jack. If it is missing, the cable itself is checked, which must be de-energized. After replacing the damaged section of the cable and checking the voltage, you can get to work.
2. Irregular motor operation.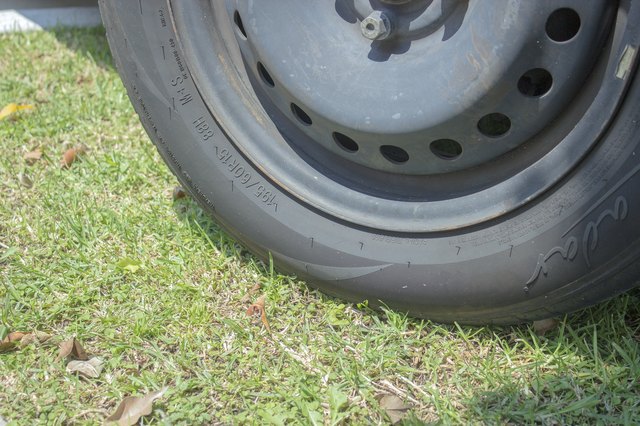 Check for contacts that may have oxidized and become poorly conductive. Contacts should be cleaned with sandpaper and degreased. Then a special conductive grease is applied to the contacts, which will protect the contacts from oxidation.
3. Reducing the speed of rotation of the knives. When mowing long grass or hard grass, the cutting attachments can become clogged with grass. Remove the battery and disconnect the network cable. Take a small stick and clean the area around the knives from the compressed grass.
4. Poor mowing. The grass is not cut, but knocked down with knives. This indicates that the knives are dull. Completely turn off the power supply and remove the lawn mower blades. We fix the knife in a vise and sharpen the blades with an abrasive bar. Blade sharpening angle 25 - 30°.
Gasoline powered lawnmowers most commonly experience problems common to all internal combustion engines.
1. The engine does not start. Is there fuel in the tank? If there is, then the fuel mixture must correspond to the proportions of the manufacturer. Then we turn out the spark plug.
• Wet spark plug (splashed with mixture). This indicates an excess of fuel mixture, due to incorrect carburetor settings. The candle should be thoroughly wiped, and pull the starter cord several times with the candle turned out. This will clear the combustion chamber of excess mixture. Carburetor adjustment is carried out in accordance with the Operation Manual (section "Maintenance. Carburetor").
• dry plug. The fuel mixture does not enter the carburetor. So the problem is not the ignition. We check the candle for the presence of a spark and if it is, then we check the fuel supply. With a weak supply or its complete absence, we replace the fuel filter, which is removed from the gas tank through the filler hole.
• Spark plug covered with soot. Incorrect carburetor setting or incorrectly prepared fuel mixture. The turned-out candle is cleaned with an awl and sandpaper. The space between the central electrode and the threaded part is cleared with an awl. The side electrode is cleaned with sandpaper. Set the spark gap (gap) between the central and side electrodes. The gap is in the range of 0.5 - 0.65 mm. A damaged sealing copper washer should be replaced. Putting a tip on the inverted candle and pulling the starter, check for a spark. If there is no spark, the candle is replaced with a new one and if the spark does not appear, check the high-voltage wire.
2. No required power. If the engine does not develop enough power, then it is most likely that the necessary pressure is not created in the engine cylinder for combustion of the fuel mixture. Most likely, the reason lies in the wear of the cylinder-piston group - the piston, piston rings or crankshaft liners. For a more accurate diagnosis, a compression gauge is inserted into the candle hole and with its help the compression pressure is measured. If the pressure is lower than required, then the piston group must be replaced.
3. Engine smokes. If the engine runs normally at low speeds, but smokes and stalls at high speeds, then the problem may be in the muffler. It should be removed and the spark arrester mesh cleaned with a metal brush. It is advisable to wash the muffler with a special detergent, dry it with a hairdryer and put it in place.
4. The motor is overheating. Long-term operation with a clogged air filter results in insufficient air intake. Remove filter and blow out with clean air. Put the filter in place. In case of severe wear and damage, the filter is replaced.
Simple advice. The lawnmower is a long-life gardening machine, and following the "Maintenance Schedule" (see the Lawnmower Owner's Manual) will help to avoid breakdowns and other problematic issues.