Biketoworkday is supported by its audience. When you buy through our links, we may earn an affiliate commission. Learn more
Written by Gary Johnson / Fact checked by Henry Speciale
There may come a time when your bike must do away with a punctured tire, or maintenance is desired. Whatever the reason might be, removing the rear bicycle wheel is necessary when that time comes.
Some bikes come with a quick-release axle that you can pull up the lever, turn a few times, and remove in a jiffy. Others don’t have this feature and instead rely on the good ol’ nuts. However, the technique is just as simple in this case. By loosening the rear wheel nuts, you can detach the brake cable and derailleur gear.
And voilà, your rear wheel is now ready to come off. Let find out how to remove rear bike wheel no quick release right now!
Table of Contents
First, let’s go over a few tools for this tutorial. Only one of them is mandatory to loosen up the solid wheel axle of your bike, and that is a 15mm wrench. You can now carry on to the next section of the article and will be doing just fine.
However, if you want extra maneuverability, consider a bike work stand. This apparatus serves to hold your bike while you do your work. No more neck and back strain, and no more damages to your bike frame. Another optional tool is a WD-40 spray. If you find yourself unable to loosen the nuts, this lubricant will come in handy because it loosens rusted parts.
In brief, these are the things you will need:
Steps to Remove Rear Bike Wheel without Quick ReleaseStep 1: PositioningThe chain side of the bicycle, also known as the driving side to cyclists, should not be damaged at all costs. But since removing a tire will topple the bike over, it’s wise to lay your bicycle down on its side with the chain facing up.
That’s what I personally would do, but many others prefer to turn their bike upside down, letting it rest on the handlebars. I tend to avoid this as it would result in damages to my seat and handlebars.
The pro tip here is to invest in a bike work stand, which ensures optimal working angle and convenience while you work on your bike.
Step 2: Gear adjustmentOnce you’ve had your bike set up, this next step is done by shifting your gear to the smallest cog, which typically is the outermost gear. Having your chain on the smallest cog allows for more chain slack, and makes it easier to drop the wheel.
How you do the third step entirely depends on what type of brake your bike is using.
Pick up the 15mm wrench, hook it onto the nut of the chain side, and turn it a few degrees to loosen without removing it. Move on to unscrew the nut on the other side, and then return to loosen the first nut.
If a nut doesn’t seem to budge and you think rust is the cause, spray a little WD-40 on it to reduce friction.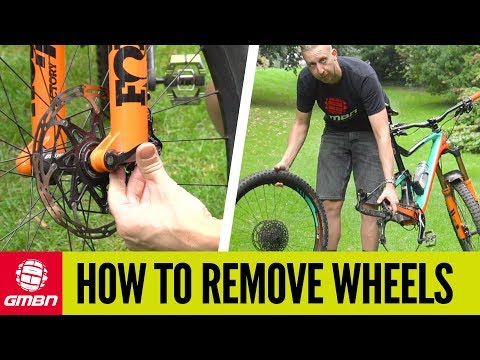 This lubricant is also known as Liquid Wrench after all.
With the chain, brake, and nuts loosened, the derailleur is now ready to be removed. Simply stand behind the bike. Stabilize the frame with your left hand. Place your right thumb on the wheel nut. Then, use your right fingers to pivot the derailleur all the way back. At this point, the rear wheel should be detached from its derailleur and drop to the ground.
Step 6: Lift the rear wheel off the chainWith your right hand holding the derailleur, carefully unhook the chain and use your left hand to lift up the frame. The rear wheel is now completely removed from the bike.
ConclusionThis step-by-step tutorial on how to remove the rear bike tire is easy to follow, isn’t it? I do hope that you’ve picked up the skill you came here for. Knowing how to remove rear bike wheel no quick release on your own would prove so useful as a bike owner. What’s more, the same technique is immediately applicable if you want to remove the front bike wheel without quick release. Just skip steps 5 and 6 and you are good to go!
Should you have any queries, opinions, or suggestions, please let us know in the comment section below. And if you know anyone who would benefit from this article, kindly share it with them so we can help them as well.
Gary Johnson
“I ride my bike to work for years, but is that enough? Our carelessness towards our surroundings has taken a toll on the environment. And now, everyone is responsible for changes; even the most minor contribution is counted. With this hope and spirit, I started with my partner to establish Biketoworkday to help more individuals commute to their work sites on their bikes.”
Biketoworkday is supported by its audience.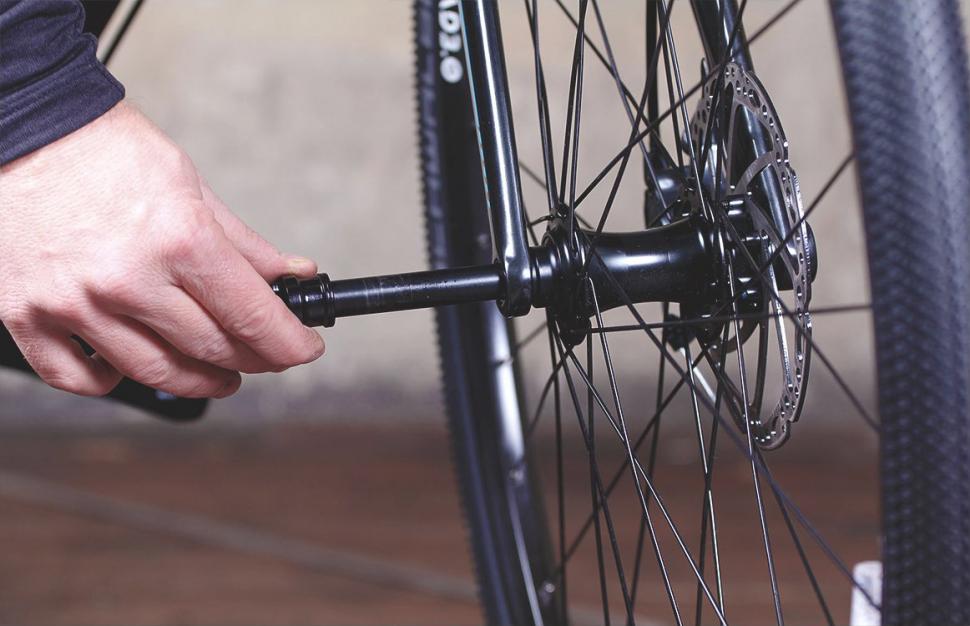 When you buy through our links, we may earn an affiliate commission. Learn more
Written by Gary Johnson / Fact checked by Henry Speciale
Removing your rear bike wheel is a normal feat for most bikers. However, there are incidents where you need to fix a flat tire, pack it inside your car, or do a regular maintenance check. With a quick-release mechanism, it has become a hassle-free task without any tools required.
But what if your bike does not come with a quick-release system? Well, here are some ways to learn how to remove rear bike wheel with no quick release. It can be done by properly preparing your bike, disengaging brakes and derailleur gear, and loosening the nuts. Then you can gently remove the bike wheel off the frame. To know better and more clearly how to do those steps, just continue to read our guide.
Table of Contents
First, let’s get to know what a quick-release system is and how it works on a bike.
A quick-release system is a convenient and most effective mechanism to remove a wheel from the bike frame. It utilizes a cam mechanism that allows bike wheels to be removed quickly without requiring any tool. In addition, it is simple to operate and will never give you a hard time removing your wheel.
It has a hub axle with a shaft, a lever that serves as a cam system, and an adjusting nut. The cam mechanism helps to put tension on the shaft and pull the cam and adjust nuts against the dropouts. With this system, you just need to pull the lever to an open position and loosen the nut on the next side. And yes, you can now remove your bike wheel that instant.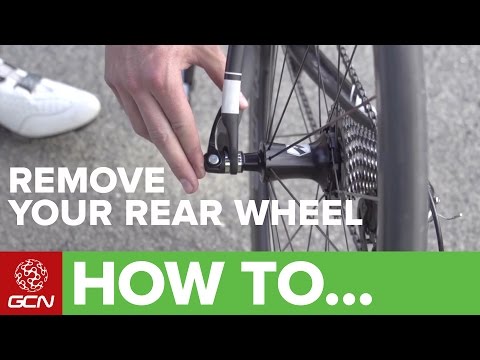
But without a quick-release, will removing your bike be more challenging?
Well, removing a rear bike wheel with no quick-release is not next to impossible. It is still feasible to remove a wheel without having to rely on quick-release. You just need to follow these five easy-to-follow steps:
The first but the most important part of achieving an effortless removal of the rear bike wheel with no quick release is preparation. If you have a bike repair stand, you need to put the bike steady on that for convenience when working on the bike. However, if you don’t have a stand, you can lay down your bike.
The position of your bike is required not only to give you convenience but a good angle when removing your rear bike wheel. So, I think it’s better to use a bike repair stand when doing this job.
Second, inspect whether your bike has cantilever brakes (rim brakes) or disc brakes. If your bike has rim brakes, all you need to do is open the breaks. For disc brakes, you need to take extra care so that your bike will not topple over. With this kind of brake, the rear wheel will come out, but it will have the tendency to bend as disc brakes tend to hold your bike wheel more rigidly than rim brakes.
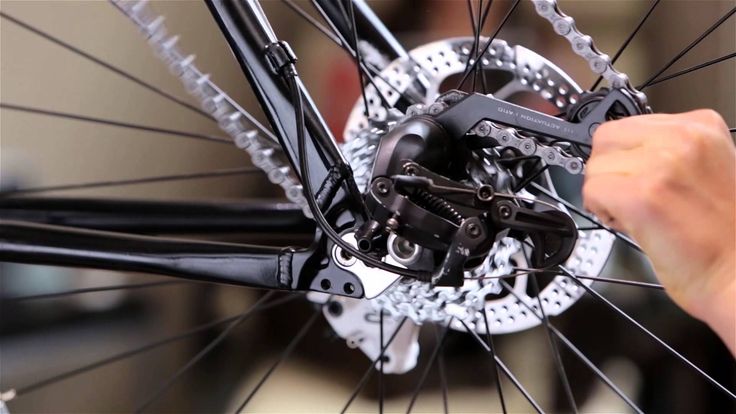
Next, work on the derailleur gear. Most bikes have derailleur gear that you need to disengage when removing a wheel. For this process, you need to select the smallest combination of the ‘sprockets’ and move the pedals while waiting for the chain to drop on the ground. Once the chain dropped, it revealed the nuts holding your rear bike wheel.
This step is important as it will give you a better view of the nuts you need to unscrew. Without loosening the nuts, your rear wheel will keep its hold on the bike frame or body.
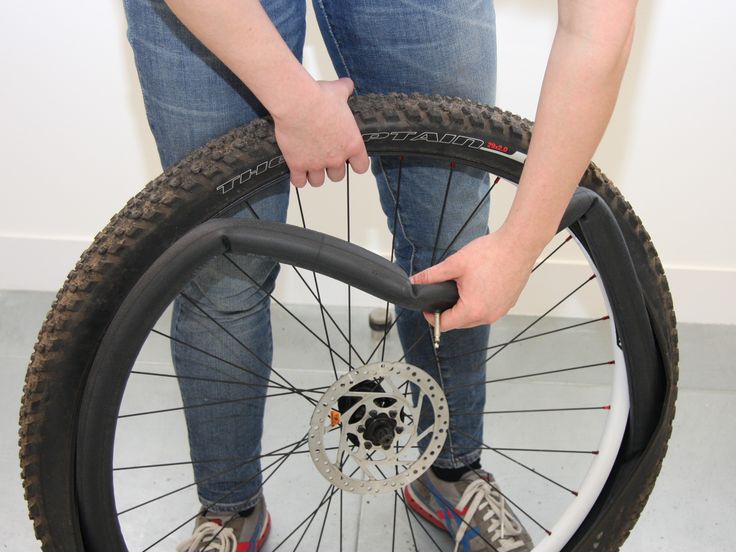
Once the nuts are entirely accessible to you, it is now time to loosen them. Your bike wheel usually comes with 15mm nuts on both ends. You need to loosen these nuts to release your wheel from the bike frame.
In this step, you will need a tool to release the nuts. Take note that the tool you need should fit exactly 15mm nuts. Look for a wrench or a spanner that can surround a 15mm nut.
Once you secure a compatible spanner, observe the position of the washers before turning the nuts to their desired degree. Check whether the nut is moving, and slightly move it to a direction where it will be unscrewed. Afterwhich, you can now unscrew the opposing nut, as well.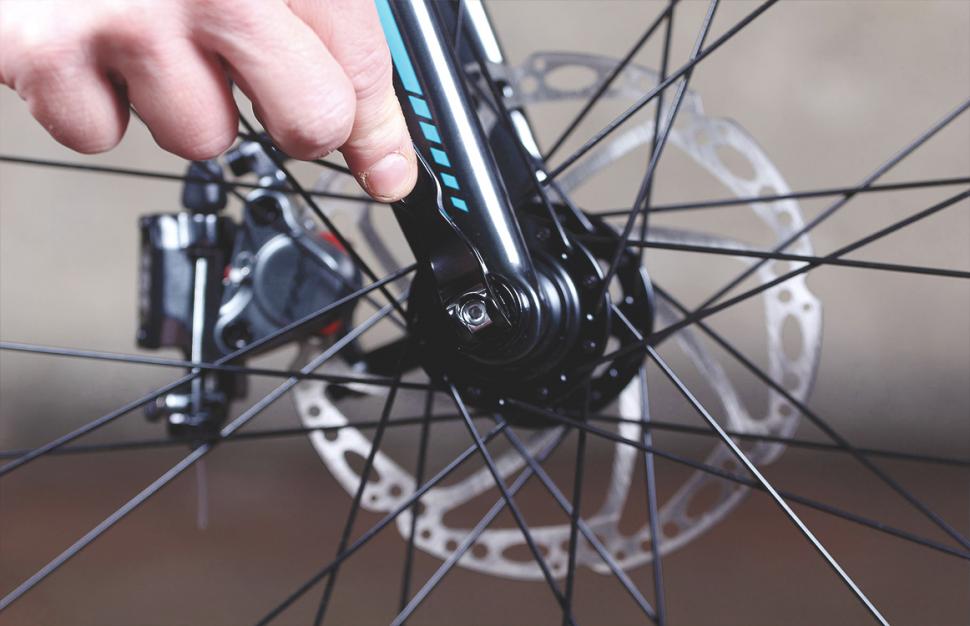
After the nut is wholly loosened and released, you can now stand behind the bike with your head on its center-line. It will give you a better angle of the wheel before removing it. In this step, the wheel is not entirely removed from the bike.
You need to gradually release the bike frame from the wheel by grabbing the left side of the bike while your right thumb is securing the end of the nut on the other side. Your left hand should give you stability while you are pulling the derailleur body completely from the wheel.
Once the derailleur rotates out from under the rear wheel, you can now lift the body of your bike while the wheel stays on the ground. In this step, you will notice that the wheel is already detached from the bike’s frame, yet the chain is not completely removed. You need to completely unhook the chain with your right hand and lift the bike body with your left.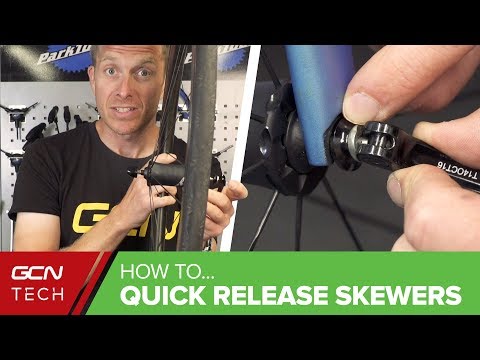
After lifting, the rear wheel is now fully removed from the bike. Hang your bike after, and inspect the rear wheel that you removed. At this point, you already removed the rear wheel from your bike.
ConclusionNow that you went through the step-by-step process of removing your rear bike wheel without quick release, I hope you find that it is not as challenging as it seems. With this guide, we believe it clearly explains the steps and gives you confidence in doing the job. Furthermore, if you are confused about how much it cost to true a bike wheel, please check out this article for more detailed cost.
Henry Speciale
“Bike commuting should be the trend for the next few years, and it is a convenient and eco-friendly way for us to travel.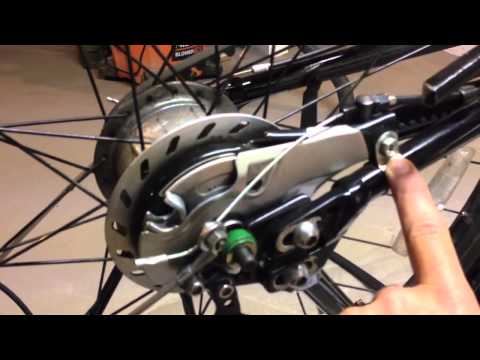 And we are here to make it a bit less troublesome for people who want to maintain their vehicle for a long time. So, the content I expect to put out here is offering help for bikers who are facing issues with parts of their bikes once in a while. Let’s have fun and protect the environment together!”
| Some beginner cyclists ask how to remove a wheel from a bicycle. Moreover, difficulties arise, as a rule, with the rear wheel. Quite often you can hear such phrases: "Oh, I'm afraid to remove the rear wheel, there are so many things screwed up, screwed on, I'll never put it back on and I'll definitely break something. I'll go to the service center better." Of course, you can do this, but rather than repeatedly wasting your time and money to go to a bicycle repair, it’s easier to just figure out how to do this operation yourself, especially since such a need may arise somewhere in the forest outside the city, and a bicycle workshop there will definitely not be found.
How to remove the front wheel?
Installing the front wheelAs you perfectly understand, the process of installing the front wheel is the reverse of removing it, and it makes no sense to describe it in detail.
How to remove the rear wheel? Removing the rear wheel is EXACTLY the same as removing the front wheel.
Installing the rear wheelThe installation process is also similar to the installation of the front wheel, with a small exception: it is necessary that the chain fits correctly. To do this, we bring the wheel to the attachment points, put the chain on the sprocket and then put the wheel in place. True, a situation may arise in which it seems to you that the chain is twisted, and in order to untangle it, you will need to remove it. This is not true. You just need to twist it back and forth, imagine how it was installed before on the stars and most importantly - do not panic. That seems to be all. Now you have mastered the art of removing and installing wheels.
P.S. If you also want to change the camera, then this article is especially for you. |
Removing the front/rear wheel is easy. Even if you are doing it for the first time. The wheel is removed to replace the tube, tire or spoke. Transportation in public transport or seasonal storage - for these reasons, dismantling is also resorted to.
You can always remove or install a wheel, carry out maintenance on your bike or solve any technical problem in our professional workshop.
The front wheel is easy to remove, but the rear wheel is a little trickier. After all, there is a chain, and a lot of sprockets, and a switch. But you definitely don't have to worry! In a new article, we will talk about this procedure in detail. There is nothing supernatural in this.
1. Depress the rim brakes.
2. Move the brake levers (one by one).
3. Slightly lift the cable holder up.
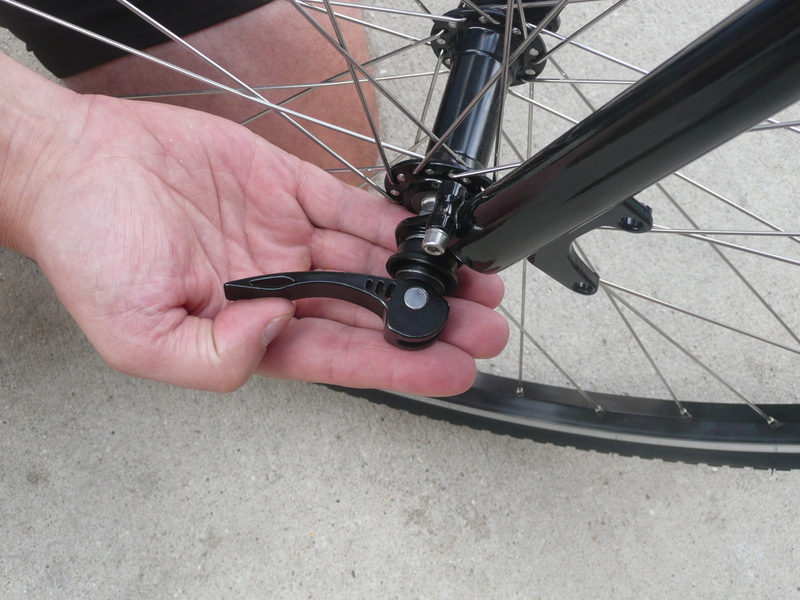
There are two ways to fix the wheel: with two nuts or with an eccentric (more often). In the case of nuts, you will need two wrenches. Use the first key on one side, holding it in one position. Turn the second one to the left (counterclockwise). It is not necessary to completely unscrew the nuts - you just need to loosen them enough. If the wheels are mounted on an eccentric, then the task is simplified: there is no need even for tools. Just pull the eccentric lever towards you, then, supporting the axle on the other side, make a couple of turns with it to the left - until the wheel is released.
When removing two wheels, it is advisable to remove both brakes. Otherwise, you will have to turn the bike over twice. If the tires have a large tread pattern or they are just very large, then deflate the air first.
It is also a good idea to loosen the chain as much as possible. To do this, put the chain on the smallest sprockets front and rear. Then you need to turn the bike upside down. Then simply open the eccentric / unscrew the wheel nuts.
Please note that in this position (wheels up) the bike will be very stable and accessible for maintenance.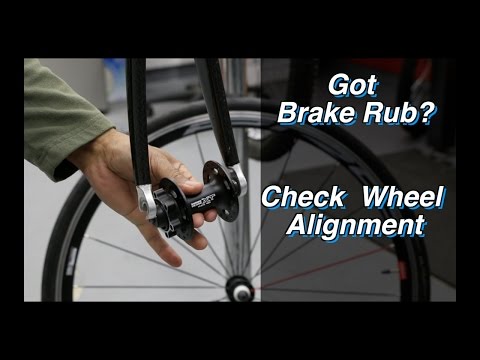

 You don’t even have to look at the equipment hung from the back (you only have to remove the chain from the axle if it catches).