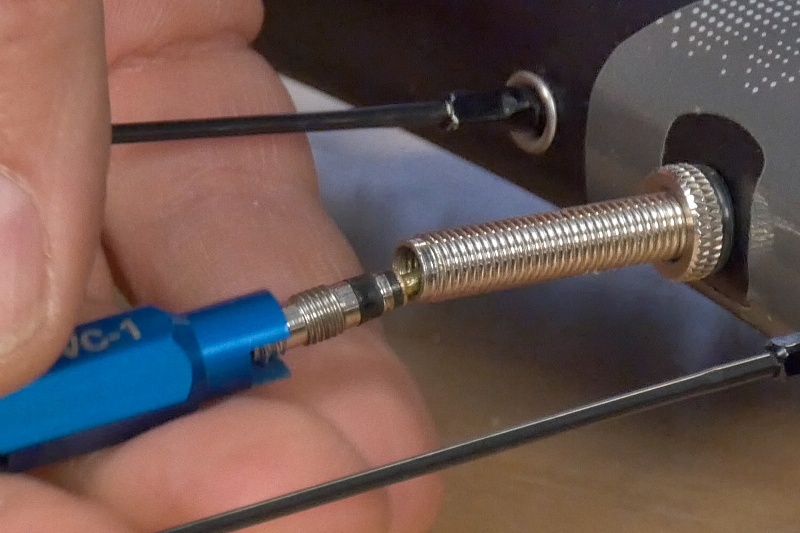
Learning how to remove a Presta valve core without a tool can be very useful especially when you need to replace the tubeless sealant, or seat an old tyre onto an old rim.
Riding bikes can require quite a few specialized tools, however, and it is quite easy to get caught out. There are a number of shortcuts and tricks of the trade that can be used in order to get around these situations.
So how do you remove a Presta valve core without the correct tool and how easy is it to do?
Table Of Contents
Most people have a pair of pliers kicking around their home somewhere. This solution is not ideal as it can damage the head of the valve, but if you have nothing else it will do the job. Simply hold the head of the valve with the pliers and twist anti-clockwise to loosen and clockwise to tighten.
Most people that ride bikes should own a chain tool, and if you don’t it might be worth considering one. Simply slot the head of the Presta valve core into the end of the chain tool, and twist anti-clockwise to loosen and clockwise to tighten.
What Is A Presta Valve?The Presta valve is a commonly used valve found on bike inner tubes. The valve is the system by which air is pumped into the tire.
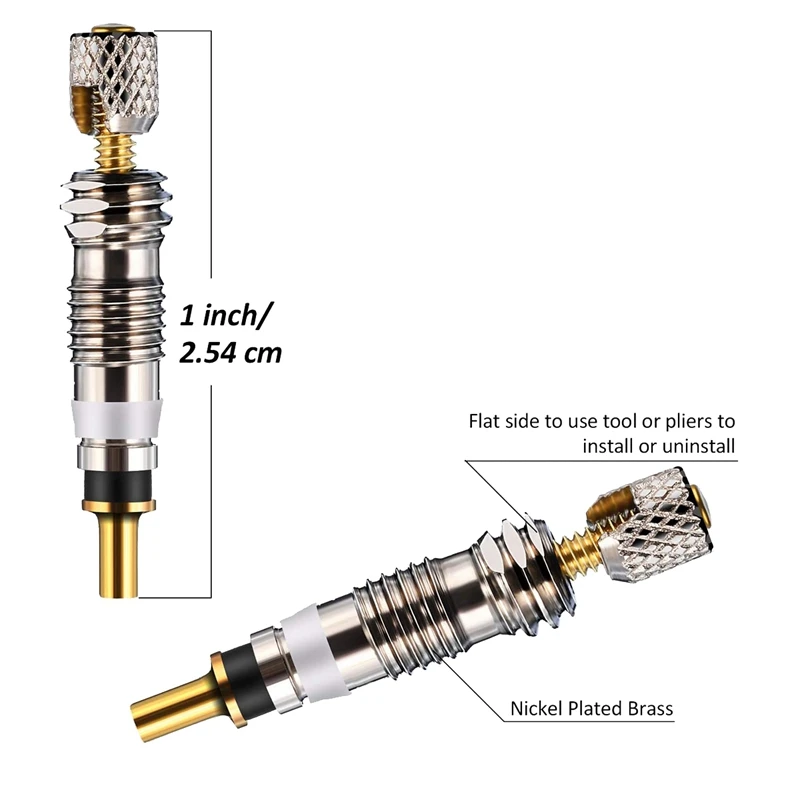
The valve is made up of an inner body and an outer stem.
The Presta valve was invented by the Frenchman Etienne Sclaverand and is also known as the Sclaverand valve or the French valve. The name Presta comes from the Latin word for fast or hurry.
The outer valve of the Presta is narrower in diameter than the other most common valve used on tires – the Schrader valve.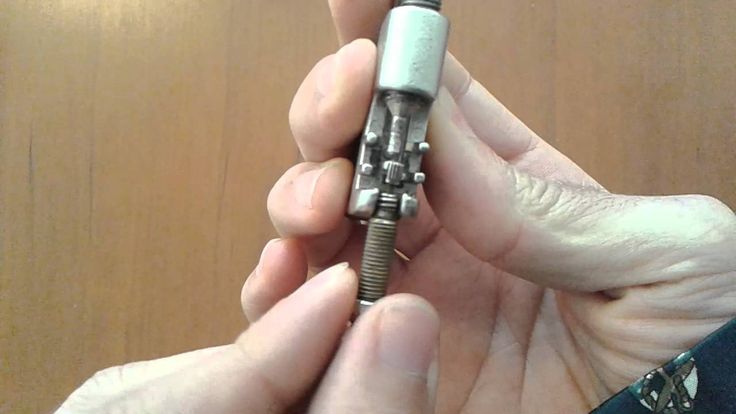 It is 6mm compared with the Schrader valve’s 8mm. The length is variable depending on what they are being used for.
The narrower diameter means that they need smaller holes on the bike rim. This means that they work better with narrow wheels without sacrificing strength. However, the narrower size also means that inner tubes equipped with Presta and Schrader valves are not interchangeable.
Are All Presta Valve Cores Removable?All Schrader valves are removable, but not all Presta valve cores are removable. However most Presta valve cores are removable.
How To Tell If Your Presta Valve Core Is RemovableHave a look at the valve stem. If you see that the valve is made up of two parts then that means it is removable. If the core is removable, that means that it can be used for a tubeless setup. Sealant can be added through the valve.
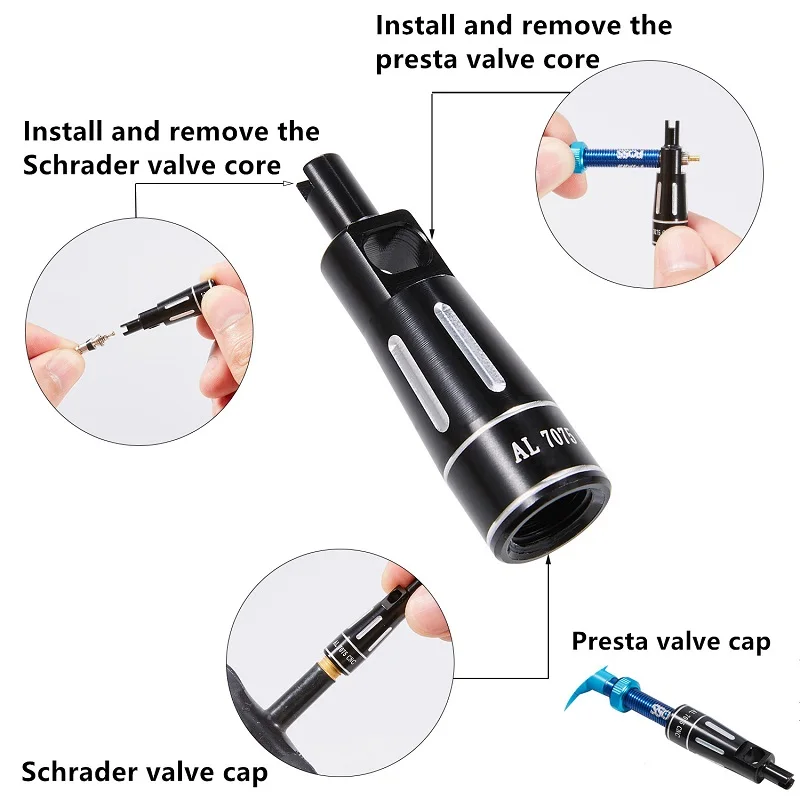
What Is A Presta Valve Tool?A number of different companies make cheap valve tools that work with both Presta and Schrader valves.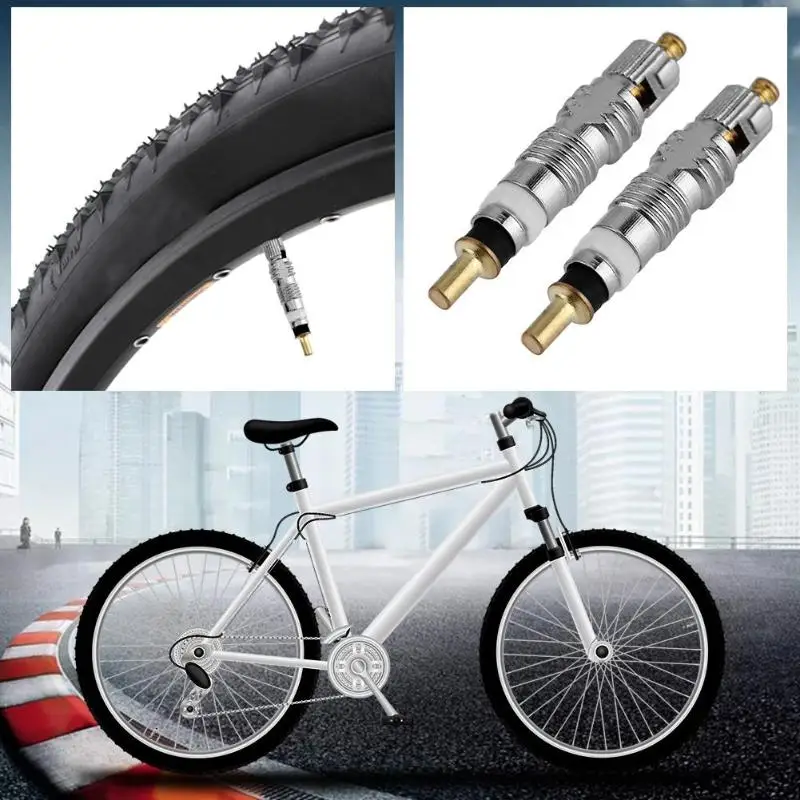 They attach to the valve and allow you to remove the core.
These tools cost about £10. They are easily available and small enough to take with you anywhere.
What Is A Presta Valve Tool? Is Presta Better Than Schrader?There really is no answer about which one of them is better or worse. Both of them have their own advantages and disadvantages. Some people have particular preferences, while other people are more prone to simply use whatever is available.
Schrader valves are more common, and sturdier and their core is much easier to remove.
Presta valves do not have a valve spring, which makes them easier to pump. They are also much better on thinner rims due to their smaller size, which makes them well suited for road bikes.
Presta valves are also lighter, although the benefit of the lower weight is fairly negligible, and they can handle pressure better. They are also better at staying unclogged, which makes them well suited for mountain biking.
Presta valves are fairly robust. As with all things, they can break, but they are not known for being excessively brittle. In fact, if anything, they have a reputation for sturdiness. Just ensure you don’t bend the valve when removing the Presta valve core or it will break!
Can You Put Air Into A Tire That Has A Broken Valve Stem?No, however, It is fairly easy and inexpensive to replace the valve core. Simply remove the broken valve core and screw in a new core, being careful not to strip the thread or damage the rim tape.
Can Presta Valves Be Lengthened?Presta valves can be lengthened if needed using extenders. This might be necessary with deeper rims, such as those on aerodynamic race bikes.
If you are looking to get extenders for your valve, it is worth noting that there are different extenders for valves with removable cores and those without, so make sure that you check which one you need and buy the correct one.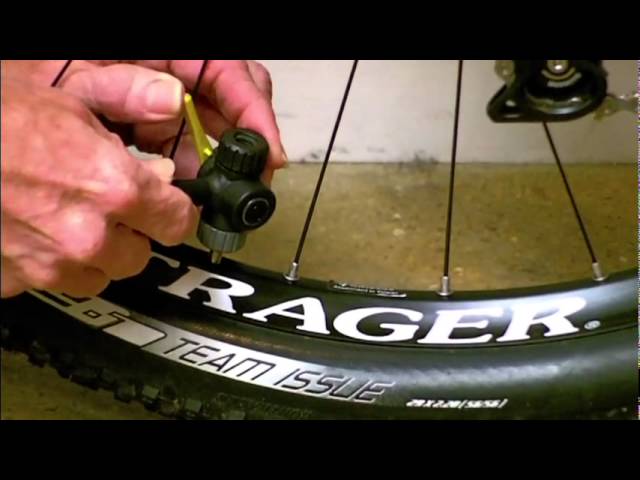
If you find that you need to remove a Presta valve core and you do not have the correct tool to hand then there is no need to worry.
A number of tools that you are likely to have lying around can be used to remove the core.
Pliers, such as needle-nosed pliers, can be used to perform the job. Vice grips will also work. However, the best solution to remove a Presta valve core without the tool is a chain tool or a number 11 spoke key.
If you do not have these to hand, then a little bit of ingenuity with whatever you have to hand can work wonders.
How to Remove a Presta Valve Core and Replace Tubeless Sealant?To start you will need to remove the Presta valve core and then remove the tire. You can see our full tutorial here: How To Fit Tubeless Mountain Bike Tyres | 9 Simple Steps
See our other tutorials here:
Tire valve stems are valves located on the wheel of a vehicle, from which the tires are inflated. They contain a spring-loaded valve core, which is sealed by the air pressure inside the tire. Over time, valve stems can age, break, become brittle, or start to leak, causing severe tire problems and impairing the driving/ riding experience.
When the valve stems start to leak, the tire will no longer retain air. Depending on how severe the leak is, the tire may be slowly losing air, or completely deflated.
In most cases, the quickest way to replace a valve stem is to take it to a bike store, remove the tire, and replace the valve type. However, in cases where this is not an option, it is possible to remove a tire and replace the valve stem manually.
Today’s article will show you how to manually remove the valve stem core in both mountain bikes and larger motor vehicles such as automobiles.
Your first step is to remove the valve cover. Because the cover is small and easily removable, put it in your pocket or another safe place so as not to misplace it.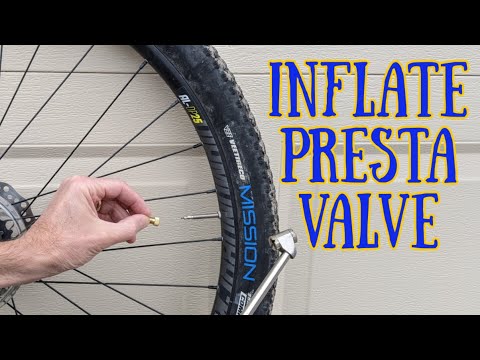
Using the valve stem removal tool or a grooved metal valve cover, turn the valve stem counterclockwise, turning it several times until it comes out of the valve. You will feel a gust of air if the tire is under pressure. As with the valve cover, place the valve stem in a safe place as it is small and easy to lose.
After depressurizing the tire, remove the valve stem. Start with your fingers, rotating the stem clockwise, and end with the valve stem removal tool or the grooved metal valve cover. If you are replacing a damaged tire and your valve stem is not at issue, hold on to this stem. You will need it when re-pressurizing the tire, and again, it might be easily lost.
Materials needed: Tube air pump, bike repair stand and valve stem removal tool. If replacing the valve stem on an automobile, you would also need a nut wrench, fine point pliers, tire iron, and jack stand.
 Immediately once the beads clear the lip of the wheel, run through the wheel until the tire is completely installed.
In most cases, the easiest way to replace a valve stem is to take it to a bike repair shop, remove the tire, and replace the valve.
However, in cases where this is not an option, or you’re looking for a task in the garage, it is indeed possible to manually remove and replace a valve stem and tire with the appropriate tools and procedures.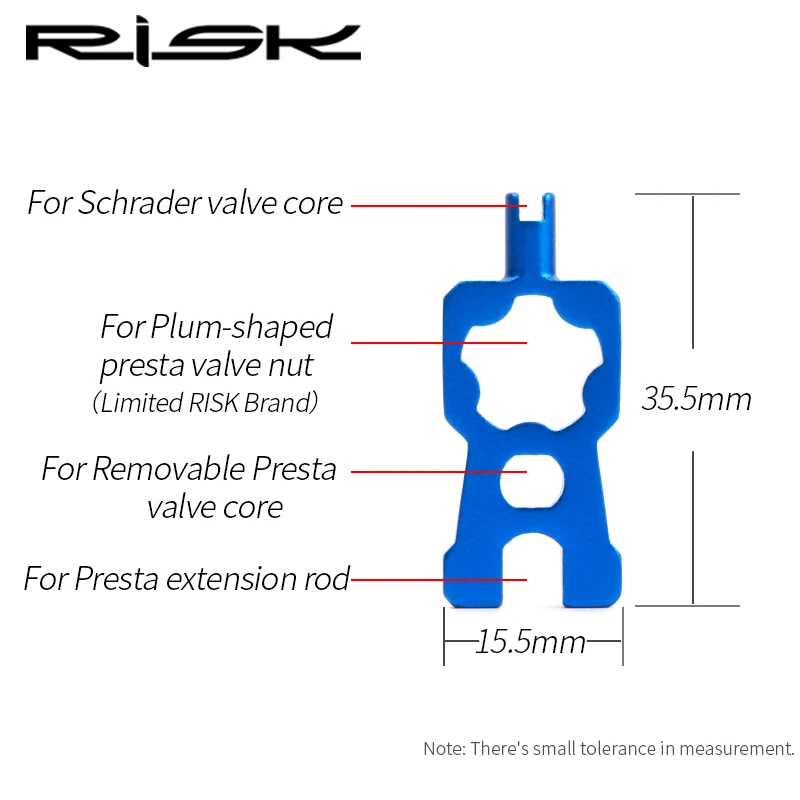 If you think there is a leak or damage to the tire and not just the valve stem, you should replace it altogether.
Contents
You can't go far on flat tires. There are cases when, after the next trip the next day, the wheel is significantly or completely flat.
Do not immediately blame the puncture and start beading the wheel to repair the tube. It is most likely that the reason is in the nipple or, as it is also called, in the spool.
A nipple or spool is a device that manipulates the bicycle tire pressure adjustment. Its design is elementary - a special spool (valve), which is placed in a cylindrical tube with or without an internal thread (depending on the type of spool), which is soldered or mechanically attached to the bicycle chamber.
There are three types of nipples:
 The latter is equipped with a metal rod with a spring, at one end of which there is a poppet-shaped valve. To screw in or unscrew the Schrader, you need a special key, which is usually integrated into the protective cap-cap.
 The serviceability of the nipple is determined by its functional suitability, i.e. the ability to maintain internal pressure in the wheels - if the pressure in the chambers goes down, then repair or replacement of the spool is required.
Causes of a nipple failure can be different, ranging from a breakdown of the valve itself (mechanical damage, natural wear), and ending with elementary contamination.
Tire pressure loss is the main symptom of valve failure.
The following methods will help identify the problem:
In the absence of the above signs of nipple breakage, you will have to dismantle the camera and further examine it - it is not uncommon for a defect to be found at the base of the nipple attachment to the bicycle camera. In this case, many cyclists advise to replace the camera, but this solution is not for professionals, but everything is in order.
As it may seem at first, this question is not worth considering. This is true if it is Dunlop or Presta. Unscrewing these nipples is not difficult. Even if they are a little stuck, ordinary pliers will help to unscrew them. But in relation to Schrader, as practice shows, not everything is so simple.
The fact is that in order to unscrew the Schrader spool, you need a special key, which is a rod with a diameter of 3-4 mm with a small (2-3 mm) cut in the center along the rod.
Such wrenches were widespread in the recent past, because they were integrated into the protective cap of the nipple, and were supplied with the cameras. Today, the chambers are equipped with plastic covers, with which the spool cannot be unscrewed.
Such a trifle becomes a real problem for some cyclists - after running around several bike shops, they find that there are no such keys, and in order to unscrew the nipple, they begin to make the tool themselves.
In this case, we can advise the following:
Since nipple spools are consumables, it is impractical to repair them. Their cost is low, and you can buy them at any bike or car shop.
But in some cases: in case of contamination or wear of sealing gum, it is possible to perform simple work to extend the life of the spool.
 e. close tightly. To restore working capacity, you need to unscrew the spool and rinse it well.
 These simple actions can cope with the task in the long term. But still, you should stock up on the road with the necessary (repair kit, patches, glue, etc.) so as not to get into an unpleasant situation along the way.
If the tire began to noticeably flat on the way, and the puncture was not to blame, you can do the following:
These steps can help you get home on your own. It should be remembered that the speed limit in this situation is recommended to be significantly reduced.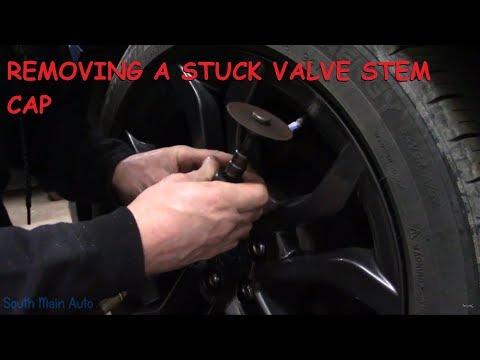
If the nipple in the chamber comes off with an enviable frequency, and the chambers replace each other too often, then the problem can be solved radically - degrease the inside of the tire, the chamber, replace the rim tape, sprinkle everything with talc.
This should prevent breaks. Also, before inflating the chamber, you should completely bleed the air and adjust (turning) the tire so that the pipette stands strictly vertically.
You can't go far on flat tires - this is an indisputable fact. And if a tire puncture can somehow be fixed in the shortest possible time, then a valve malfunction - such a small but important element can significantly change plans. How to unscrew the nipple on a bicycle? What is the goldsmith for? Why is this detail important to pay attention to? We will try to answer these and many other questions today.
I must say that the above methods do not always allow you to identify a malfunction. In some cases, you will have to remove the camera and examine it in detail. And most likely it would be advisable to replace the nipple on the bicycle wheel.
It may seem to some that this issue does not deserve so much attention. And indeed, if you need to remove Dunlop or Presta, for example, then everything is simple here. Even if the nipple is a little stuck, you can pull it out with ordinary pliers. As for Schrader, here, as life practice shows, not everything is as simple as we would like.
These spools require a special tool, which is a rod with a diameter of 3-4 mm with a small (2-3 mm) cut in the center. It would seem a trifle, but it is this nuance that becomes a significant problem for those who do not know how to unscrew the nipple from the bicycle chamber. Help:
Still, avid cyclists are better off buying a special key or building it yourself. It does not take up much space, and its importance in some situations is difficult to overestimate.
Nipple valves are a consumable item, so it is not practical to repair them. They don't cost that much, and you can buy them at any store that has at least a minimal range of bicycle parts.
In some situations, minor repairs can be made that can extend the life of the spool:
So, in simple ways, you can cope with the task. But it is worth once again reminding cyclists going on a trip that the necessary set of tools and spare parts should always be at hand.
Anything can happen on the road, and a flat tire can be an annoying nuisance that can ruin all plans. If on the way you notice that the tire has started to deflate and the puncture has nothing to do with it, then you can take the following actions:
This will help you get to your house or the nearest bike shop. However, remember that high speed and dynamic driving in this case will nullify all efforts.