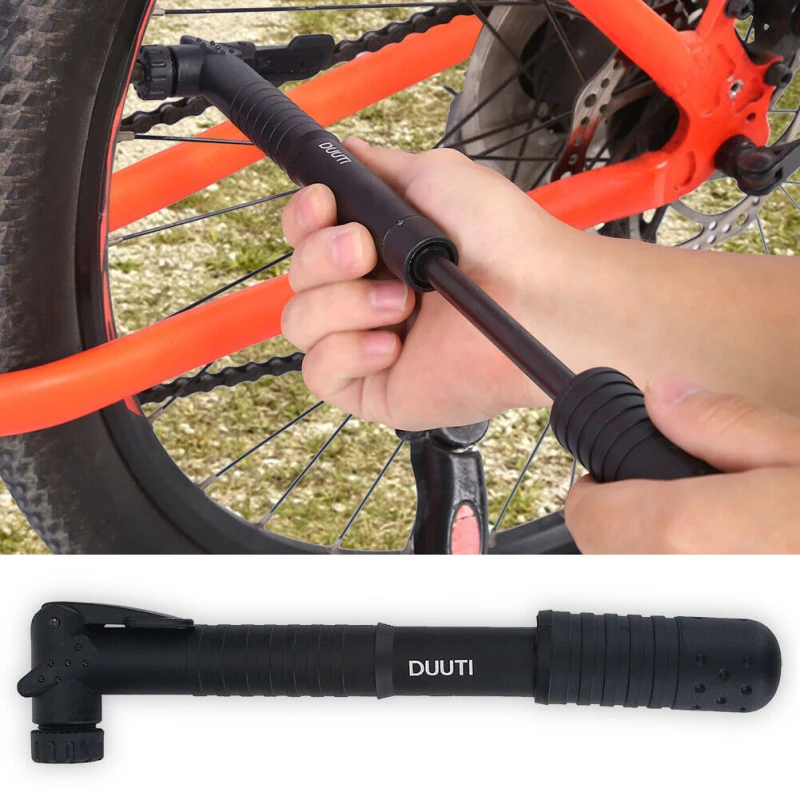
You've probably heard fellow ATV lovers talk about installing a twist throttle on their machine to limit thumb fatigue and recreate what they are already used to with other outdoor hobbies and sports. This post will go over how to install a twist throttle and how to determine if you should.
Image from www.quads.ca
It isn't hard to install a twist throttle. The cost isn't prohibitive. Kits usually range from $70 to $150. The actual installation of a twist throttle isn't too difficult either.
For this project, you'll need a new throttle cable, throttle tube, and tube housing. When you purchase a twist throttle kit, make sure it contains everything you need. All of them don't, and you don't want to get started only to realize you can't finish.
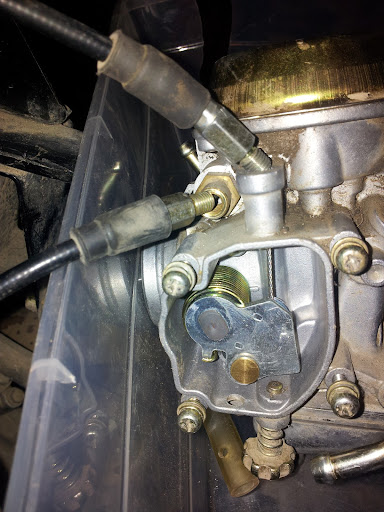
Before you can get to the throttle body, you'll probably have to remove some combination of the seat, gas tank, and fenders, depending on your ATV model.
You'll then remove the throttle body assembly. While removing it, take note of the routing of the cable so you can put it back. Taking a photo can give you extra security.
Remove the stock cable and route the new one.
Remove the old thumb throttle body, and the handlebar grip on the throttle side.
Install the twist throttle assembly and put the cable in the new housing. Make sure the cable doesn't bind and that the throttle closes and opens all the way. If it doesn't, play around with the cable a bit and try again.
Install the screws on the throttle body just tight enough to seal it up and prevent debris from getting inside.
You're done and ready to ride!
ATV are waterproof & breathable riding gear
Find out the items that suit your needs
Image from www.thumpertalk.com
Before getting a twist throttle and installing it, you need to know if you really want to.
People who are used to riding motorcycles and dirt bikes approach an ATV more comfortable with twist throttles. It can take some getting used to, and missing out on some satisfaction, to go from a twist throttle to a thumb throttle.
Also, thumb fatigue is real. When you're riding for hours, your thumb can get really tired, even weak, from working the thumb throttle that comes standard on an ATV. This is uncomfortable and distracting, and a weak thumb could limit your ability to use the throttle.
ATVs come with a thumb throttle for a reason. These four-wheeled machines don't turn into curves and react to angles like motorcycles or dirt bikes do. Your body doesn't stay in line with the ATV in these situations like it will on a bike. Sometimes the ATV is going one way and your body has to go the other to maintain balance. It is easier in all of the situations you can find yourself in on an ATV to reach and operate a thumb throttle than a twist throttle.
You also often need to have a firmer grip on your handlebars when riding an ATV that isn't optimal for twist throttle use. And just turning the handlebars can make you naturally want to start twisting the twist throttle. Both of these factors can result in distracting situations and unintended throttle use.
Throttle use needs to be quick and reliable, and it is harder to achieve that with a twist throttle on an ATV. They are often given as reasons for ATV accidents.
Supporters of the twist throttle ATV upgrade claim that there isn't any reason you can't use a twist throttle, that you can adjust to it and it's all about the right amount of gas. If you are prepared to take the risk, you are not alone.
If you are not fully prepared to take on the risk or the ATV will be ridden by someone else, you should stick with the thumb throttle.
You can reduce thumb fatigue with a thumb throttle in other ways. Riding more often for shorter periods of time or using hand strength exercises that include the thumb can reduce fatigue. Many people also vary the part of their thumb and the part of their hand they operate the thumb throttle with so no one part has to do all the work.
There are also upgrades, thumb levers and throttle converters, that make working the thumb throttle easier on your hand or temporarily replace the thumb throttle. You can install one of these instead. A thumb lever prevents thumb fatigue without reducing safety, and a throttle converter makes it easy to switch from a twist to throttle converter on shared ATVs.
The choice is up to you, but now you can be empowered with knowledge of the considerations and your options before you install a twist throttle on an ATV.
#CATALOG_ITEM_2#
The throttle cable may seem like a simple part of your bike, but it can keep you from riding if not properly maintained or replaced. Read as we take you through cable maintenance and install tips for a new ProX throttle cable.
With the riding season upon us, it’s not a bad time to cover an important, but often neglected, maintenance task: throttle cable inspection and replacement. The throttle cable connects your mind and body to the heart of your machine, which makes it an incredibly important link. Worn, damaged, misadjusted, or corroded throttle cables can lead to dangerous riding conditions and poor engine performance. Let’s dive into tackling this common maintenance task.
The throttle cable is a critical component to your bike's function, but it's often overlooked. Follow the guidelines below to make sure you're not stuck with a malfunctioning throttle.Most service manuals suggest checking throttle operation after each race or every 2.5 hours of operation. Along with this generic recommendation, engine performance can also be an indicator of cable issues. Poor full throttle operation may be a sign that the throttle cable has too much slack. An engine that is difficult to control or has an erratic idle may indicate that there is not enough throttle cable slack.
Your service or owner’s manual should provide all the pertinent cable adjustment information you need for your specific make/model of machine, and should be used to complement the advice and recommendations provided in this write-up. Within the service manual, you should find free play specifications, throttle cable routing information, lubrication info, and the prescribed tensioning procedure.
We’ll start by outlining the basic checks and adjustments that should be performed to ensure correct throttle cable operation. Once these are concluded, we’ll discuss complete cable replacement.
Cable Condition
The throttle cable should be visually inspected for damage. Cracks, kinks, corrosion, and severely worn areas due to rubbing should all be cause for concern. Systematically inspect the cable from the throttle grip to the throttle body/carburetor as best as visually possible.
Checking Cable Free Play
Throttle cable free play is typically checked by measuring the amount of throttle grip movement relative to a fixed point on the throttle cable housing. Most makes/models specify 2-3mm of throttle grip free play. This can easily be checked by referencing a predominant feature on the throttle grip, or marking it with a marker and measuring the amount of motion relative to the housing with a ruler, scale, or caliper.
You can measure throttle cable free play by marking the grip in accordance with a reference point, such as the split in the throttle cable housing. Twist the throttle until you feel resistance, and measure the amount of movement.Checking Throttle Return
All throttle systems designed for powersports applications are designed to fail closed in the event the throttle cables break or the rider loses control of the machine. Return spring pressure can be inadequate if the throttle cables are sticky, binding, or if the throttle grip is binding on accessories such as handguard mounts.
Check throttle operation by fully opening the throttle and letting go. Confirm that the throttle quickly and easily returns completely to the closed position. Check throttle return with the handlebars all the way to the left, centered, to the right, and halfway between center and full stop on each side. If the throttle does not completely return the cable may be binding, incorrectly routed, frayed, or corroded, which warrants further investigation.
With the bike OFF, twist the trottle open to the stop and let go. Make sure the throttle returns to the closed position quickly and easily. Perform this test with the handlebars turned to both extremes, as well as at multiple positions in between.Throttle Cable Adjustment
Most modern machines utilizing throttle bodies and carburetors utilize two throttle cables, aptly identified as accelerator and decelerator cables. Older carbureted machines often only feature one throttle cable. Depending on the type of machine you own, the adjustment process may differ slightly from the outline I’m going to provide.
The number of adjustment locations will also differ depending on the machine in question. Some applications have adjustment points at the throttle body or carburetor and at the throttle cable housing, while others have a single adjustment point on the throttle cable housing. On machines with multiple adjustment points, minor adjustments are made at the throttle cable housing and major adjustments are taken care of on the throttle body/carburetor.
Dual Cable Adjustment
The first step to adjusting dual throttle cable machines is to remove any necessary dust covers and identify the accelerator and decelerator cables. The accelerator cable goes into tension when the throttle is twisted open and the decelerator cable is put in tension when the throttle is closed. Each cable is often easily identified visually by looking at the housing design or by making minor adjustments and determining what is affected.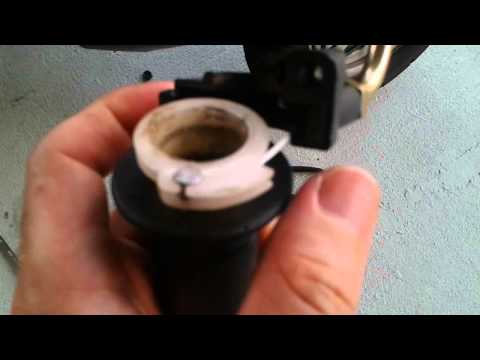
To adjust the cables, the locknuts are loosened and the cable adjusters are turned in to slacken or out to tension them. This can be accomplished by hand or with an appropriately sized wrench. Commonly, the decelerator cable is adjusted first. Decelerator cable tension is usually set so that there is no play when the throttle grip is completely closed. Once the decelerator cable has been set, the accelerator cable is adjusted. The accelerator cable tension is usually set so that 2-3mm of free play is present in the throttle grip. Once the correct tension has been applied, the lock nuts should be snugged and any dust covers should be slid back over the adjusters.
Cables can be adjusted using the appropriate size wrench. Turn in to slacken, and out to tension. Feel the throttle as you adjust to know how close you are.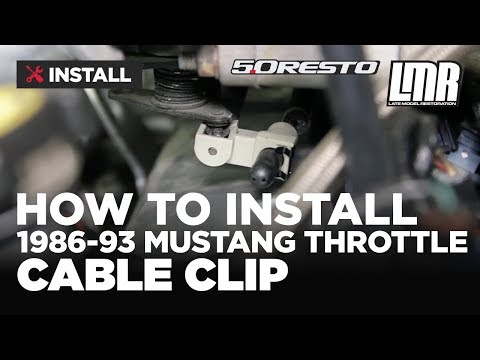 Typically, the decelerator is adjusted first.
Single Cable Adjustment
Single throttle cable adjustment is straightforward. Any dust covers protecting the cable adjuster should be removed first. Next, the locknut should be loosened. The cable adjuster can then be adjusted in or out so that the throttle grip has the correct amount of free play, which is usually 2-3mm. Once complete, the locknut can be snugged and dust cover reinstalled.
Checks After Adjustment
Upon completion of any cable adjustments, the system should be checked as outlined in the throttle return section of this article. Once you have confirmed that the throttle return functions properly in all handlebar positions, the engine should be started. With the engine idling and in neutral, rotate the handlebars from stop to stop and listen for any changes in idle behavior. Increases or decreases in idle speed may suggest that the throttle cable is binding either due to tight spots or cable routing.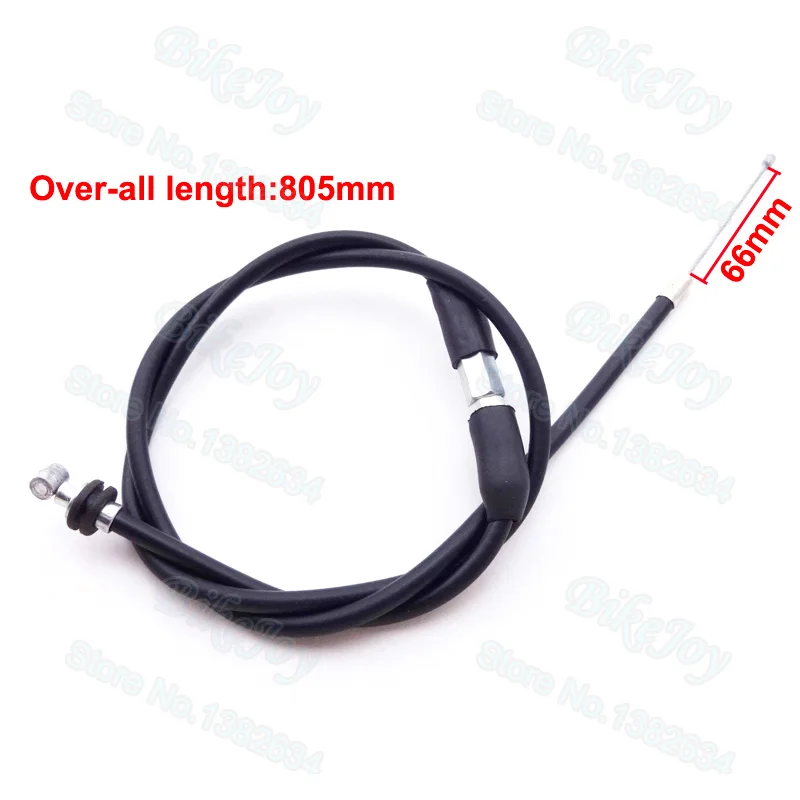
Throttle Cable Replacement
ProX has throttle cables available for a long list of applications.In the event that the throttle cable warrants replacement, cable replacement can be accomplished fairly easily. Selecting and sourcing a new throttle cable is equally important as carrying out the work. Sourcing OEM parts from a dealer can lead to overpaying, so it’s common for people to turn to the aftermarket. However, it’s important to be careful not to sacrifice quality for cost.
ProX offers throttle cables made by OE manufacturers at affordable prices. Because they’re made by OEM suppliers, OE quality and specifications are met. ProX throttle cables are made with pre-lubricated nylon inner sleeves, tightly-wound steel inner cables, and a flexible PVC outer jacket, which, combined, ensure smooth cable operation and long life.
ProX throttle cables are made by OE suppliers to OEM specifications, and they offer more affordability.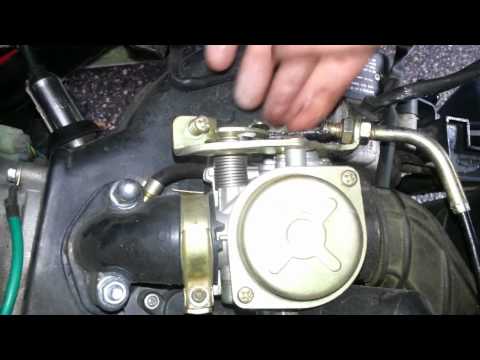
Find ProX cables for your model here.
The architecture of your specific machine will largely dictate what must be removed in order to successfully replace your throttle cable. Typically, the following components will need to be removed:
Once the necessary components have been removed, replacing the throttle cable is straightforward. We'll walk through the necessary steps with the assumption that we're working on a dual cable machine. The steps for a single cable application are nearly identical.
Start by loosening the throttle cable adjusters on the throttle housing and slackening the cables. Next, remove the fasteners holding the throttle cable housing together. Once removed from the handlebar remove the throttle cable ends from the throttle cable housing pulley. Note the accelerator and decelerator cable positions.
Remove any necessary covers from the throttle body or carburetor to gain access to the throttle cable ends. Note the locations of the accelerator and decelerator cables prior to removing them. Loosen the necessary lock nuts and adjusters then remove the cable ends from the pulley.
Remove the protective cover from the throttle body or carburetor, note which cable is which, and carefully remove the cable ends from the pulley.On single cable carbureted applications featuring round or oval slide carburetors, unscrew the top cap of the carburetor where the throttle cable enters the slide. Compress the return spring and carefully remove any necessary hardware securing the cable end to the slide.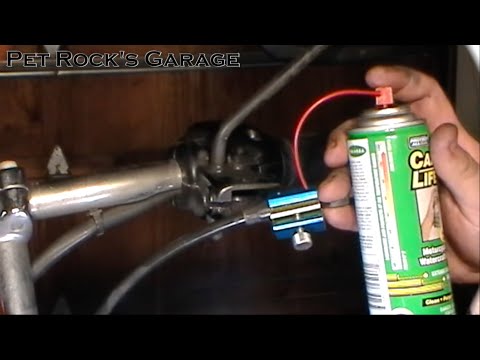 Once removed, the cable can be loosened and removed from the carburetor cap.
Prepare the new throttle cables by applying cable lube to both ends of the cables. Check the smoothness of the cables by moving them back and forth prior to installation.
A cable luber is a great tool to have. It simply fixes to the end of the cable, and allows the lube to flow through the inside of the cable.Once the old throttle cables are free on both ends, note how they have been routed. Then, remove the cables and route the new cables in a similar fashion. If the old cable routing is suspect, confirm with your service manual the factory prescribed cable routings.
Be sure to follow the OEM routing when installing your new cables.Upon successful cable routing, begin the reassembly process. Start by installing the cable ends into the throttle body/carburetor and throttle cable housing. Turn the cable adjusters on the throttle grip housing all the way in, then turn each of them one turn out. Once this is done, unless otherwise specified, use the throttle body or carburetor adjustment features to take the majority of the slack out of the cables. Refer to the tips outlined in the cable tension adjustment section to correctly tension the throttle cables. After the cable tensions have been set, be sure to check the functionality of the throttle return as prescribed previously.
Once the new throttle cables have been installed and the return checks are complete, finish the job by reinstalling any items that required removal to gain access to the cable system. With everything reinstalled, test the functionality of the system first with the engine off, then with the engine idling to ensure there are no abnormalities.
Add to compare
throttle cable, this part is compatible and can be installed on CF MOTO ATVs, according to the diagrams in the catalog number 9010-100510
| Article for order | 2000000072272 |
| Product category | spare parts |
| Model | for ATVs CF MOTO |
| Manufacturer | China |
| Quality | equivalent |
| Category | Spare parts for quad bikes cf-moto |
| Weight | 0.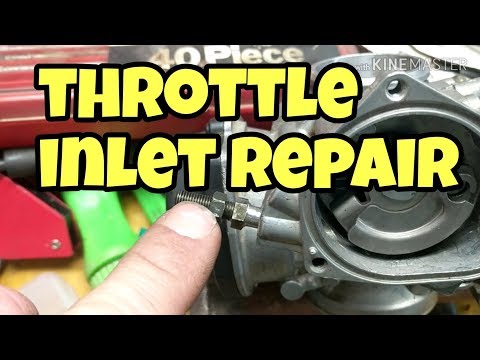 12 kg 12 kg |
Categories: Spare parts for CFMoto ATVs CF500-A F04 HANDLE 2 CF500-2A F04 HANDLEBAR (2)
Tags: spare parts for CFMOTO spare parts for cf moto spare parts for cf spare parts for cf spare parts for SF
Be the first to review this product!
 They even get to the throttle cables, handbrake and clutch. But is it really necessary to do this, the AvtoVzglyad portal figured out.
 Efim Rozkin
To understand whether it is necessary to lubricate the clutch, gas and handbrake cables, it is necessary to understand the mechanism of the process due to which they begin to bite, and they cease to move easily in the sheath.
The root cause of the problem is a torn boot. Through cracks, dirt begins to enter the cable sheath, which the cable itself drags even deeper when it moves during operation with pedals or a handbrake. When there is a critical amount of dirt, it begins to prevent the cable from moving freely. And even the force of the return spring may not be enough. If nothing is done, then in the end the cable wedges.
Another cause of cable breakage is damage to the cable. The steel wire from which the cable is woven frays, breaks and begins to cling to the braid, preventing the cable from moving freely.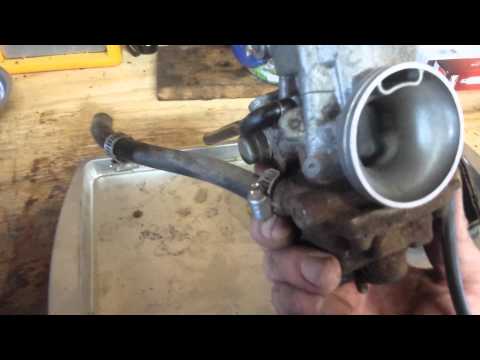 Also, weaving can lose its density. And in this place the cable will certainly thicken. There is some kind of hernia. As the cable runs, the problem only grows, and the end result is the same - the cable stops.
Photo avtovzglyad.ru
Mistakenly thinking that lubrication will help, some drivers have come up with the idea of cajoling the cable, ignoring both the torn boot and, possibly, hidden problems. And the cable, indeed, for some time begins to work again. However, this is not for long. Dust and dirt begin to accumulate faster, forming an even denser layer, because the lubricant in this case acts as a link.
As a result, the unfortunate driver will still have to go to the store for a new cable. And it can be quite costly. And if the car is already elderly, then the necessary part may not be found. The price for a rarity can also reach decent amounts. What to do?
The "Skilled Hands" circle, as they say, to help. The cable will have to be reanimated on its own.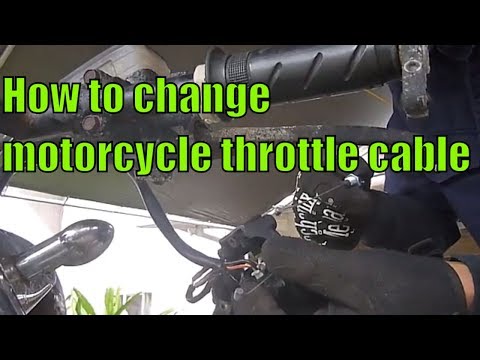 First you need to remove it and pull it out of the braid. Then thoroughly rinse both the cable and the braid from the inside. You may even have to come up with some kind of microbrush, with which you can rub the inner walls. At the same time, the cable itself must be examined for thickening, hernias, and ruptures of the wires that make it up. If everything is in order, then you can proceed with the assembly. That's just the anthers will have to make their own.
102486
Photo avtovzglyad.ru
Such repairs must be approached with all responsibility. Because frank hack-work is fraught with new problems, which, believe me, will not be long in coming. Therefore, we recommend not to save money, and not to engage in amateur activities, but to buy an original cable and replace the old one with it.
If the car is old and you can't find spare parts for it during the day, you can try to find analogues from other models, perhaps even from a domestic automaker. Sometimes, parts from our Zhiguli work perfectly on more modern foreign-made cars.