Ask Question
Asked
Modified 3 years, 5 months ago
Viewed 82k times
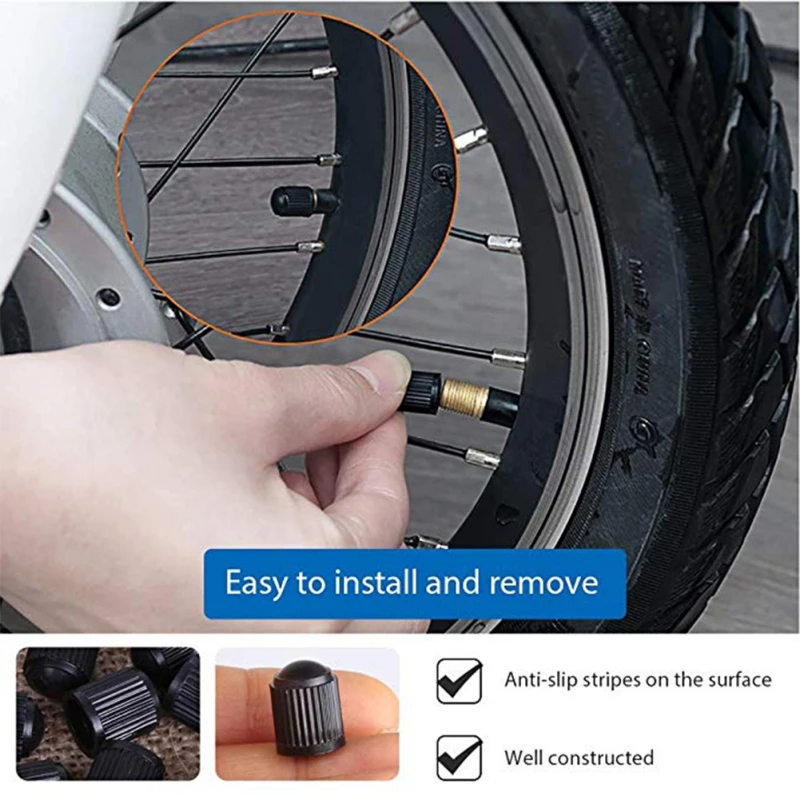
I put metal valve caps on my tires a year or so ago, because I'm an idiot. When I went to add some air to my tires one day, I found that the caps were seized up. Now I am unable to get them off. This is a sensitive part, so I can't just muscle them off.
I have tried:
Liquid wrench.
Holding the stem with pliers and turning the cap with another pair of pliers. I used as much pressure as I was comfortable with and no joy.
I'm out of ideas, because brute force methods will lead to much bigger problems.
Any ideas of how I can get these off without causing further damage?
Edit:
These are rubber stems, and luckily they don't have a pressure sensor (i hear that makes them extra fragile)
now I know why valve caps are plastic
4
Fellow idiot here.
Penetrants won't work. Get a hacksaw with a very fine metal blade and saw away. Use a screw driver to pry open both sides when you have enough clearance. You need to cut the top and one of the sides.
1
Given that it sounds like they have rusted to the valve stems, you could try soaking the threads and the whole area with PB Blaster specifically. I have seen it work really well, and could be better than Liquid Wrench. Although that does work well too. And when I say soak I mean overnight. It's not like you can use heat to loosen them up, you'll melt the valve stem.
If they still won't come lose, you can always take it to a tire shop and replace the valve stems with nice plastic caps.
Trust me, if this is the worst thing you ever do to your car, you're doing just fine. Lesson learned, we've all done worse I have no doubt.
1
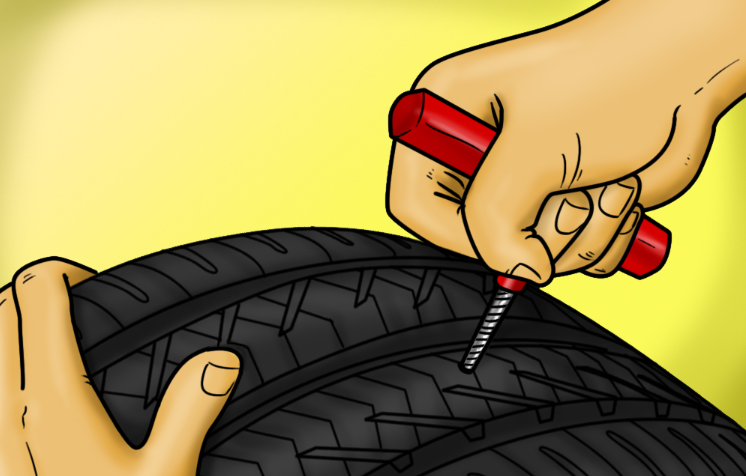
If using some sort of penetrant doesn't help loosen up the caps, you can cut them down the side with a Dremel tool. You will mess up the threads on the valve stem a little, but they will replace the stems when you get new tires anyway, so its not a big deal.
I would cut down one side, being careful not to go too deep, then try to pry the cap open by twisting a flathead screwdriver in the new channel that you just cut. The cap should be brass or aluminum, so it will cut quick and easy. Note that the valve stem is also brass and will cut easily, so be careful and don't try this if it's your first foray into dremeling.
3
Drill a hole in the top of the cap and squirt your favorite rust eater in there, this way you can soak it from both sides of the thread.
Also some gentle heat will draw the lube into the threads.
I'd combine the answers from @Jphi1618 and @Jsn - use a Dremel or similar to cut almost all the way through - up one side, across the top and back down the other side. You can then use a screwdriver or a nut splitter to split the cap in half - hopefully without having to cut far enough to ruin the threads on the stem.
Some damage to the threads will be fine, and most of the time you don't really need caps anyway, unless you're driving through mud or in a really dusty environment...
Use a dremel to grind off the top of the cap but do not go to deep and hit the threads on the valve stem. Then use a fine hacksaw blade ( just use the blade only and hold with your hands ) to make a cut from top to bottom of the cap . Do not go to deep and cut the thread on the valve stem. Then use a small flat screwdriver to pry cap apart it is just soft metal.
It's actually quite easy . Once you realize never to use those aluminium caps ever again. All I did was use a pair of vice grips to hold the valve stem in place. Wear a pair of gloves and then use your shortie hacksaw hand-held blade to slowly get it started. On the flat end piece. Cut a groove for a flathead screw driver. Then cut carefully down the side of cap to lightly expose and only until you see the thread of the valve copper. Then simply keep vice grip in place to allow yourself to use flat head to break the corrosion bead. And your good.
I used a Dremel on 1 of them, it took only 2 minutes to cut it just enough on top and on 1 side for it to crack. As somebody else mentioned, don't cut it deep and you will not damage the valve. I wasted $40 each on the other 2 tires where the the valve had to be replaced. I feel so stupid.
1
Taking a plastic cap off that is stuck on your tire valve can often be difficult to manage, as they can get stuck for various reasons.
Therefore, how do you remove a plastic cap from a tire valve? If you’d like to find out, continue reading to see what I learned!
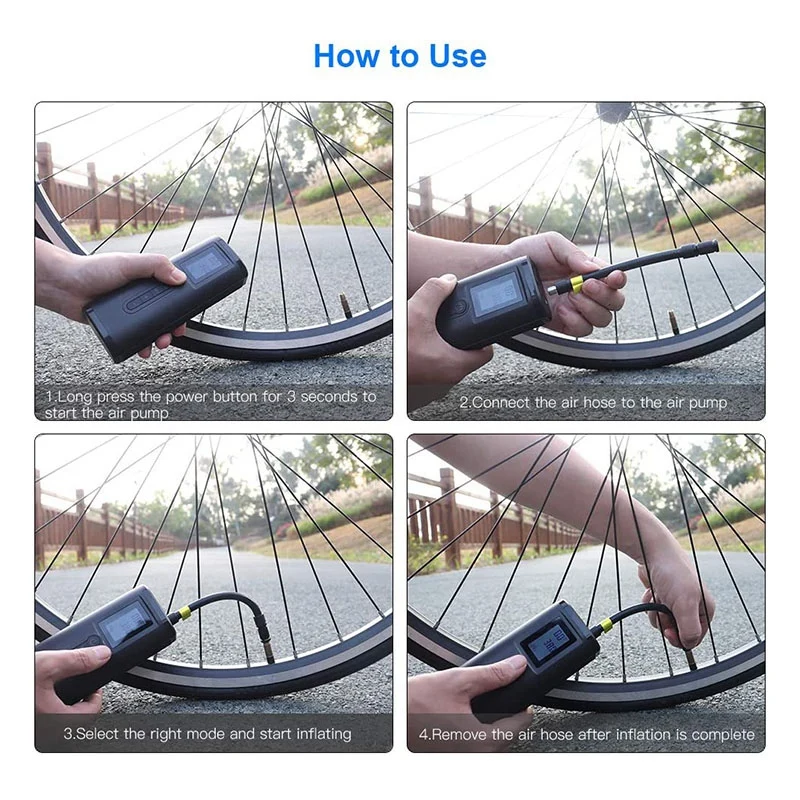
Plastic caps on tire valves get stuck because of the cold, brake dust, and road grime that gets stuck under the cap, or due to rust forming in the treads that the cap screws on to. Therefore, in order to remove the cap, drivers can use WD40 to help loosen it.
If you’d like to learn more about how to remove a valve cap, if you can drive without a valve cap and other similar topics, keep reading for more useful information!
Valve stem caps are used to protect the valve stem and as well as how it looks.
You won’t have to worry about air escaping from the cap being off, but you would have to worry about air entering the valve stem if it’s packed with dirt, road grime, brake dust, or ice.
Valve stem caps that are green are to indicate that the last time the vehicle’s tires had a fill-up they were filled up with nitrogen.
Note that there is no real test that you can use to find out whether the tires contain nitrogen, as both compounds are odorless and colorless.
If you drive without a valve cap, you could have some slow air leakage, but it likely wouldn’t be anything worth worrying about.
In fact, you could drive for years without valve caps and not see any initial tire pressure loss.
You can replace a valve even if you’re not a mechanic, as it’s not terribly complicated. You can purchase valves at the auto parts store for around $10, while having a tire shop do it for you could cost up to $30.00.
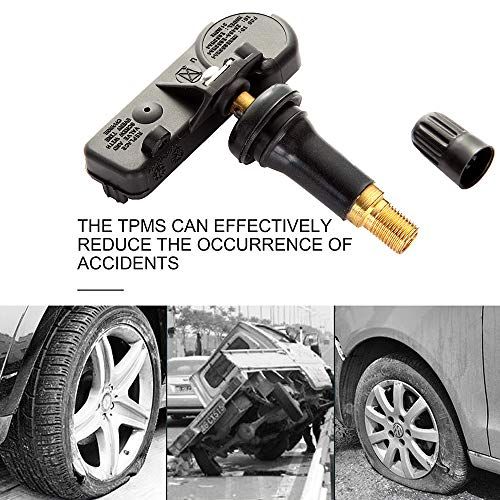
For the most part, all valve stems used to be the same until the introduction of the Tire Pressure Monitoring System (TPMS).
Therefore, you have to be careful when you go to the auto parts store and purchase a valve stem for your vehicle, and make sure you know if you have a TPMS on your car or not.
Plastic valve stem caps can get stuck, but not very often. Metal and aluminum caps are too easy to over-tighten, making them extremely hard to twist off.
As well, the valve stem is not the strongest part in the world and can’t handle that much torque, meaning they will easily spring a leak when torqued down on.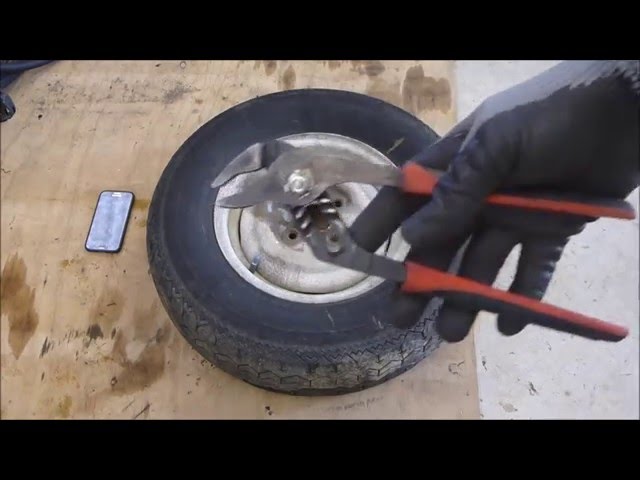
You can find out if your valve stem is leaking by taking some soapy water and applying it on and around your valve stem. If you start seeing bubbles, then you know you have a leaky valve stem.
To know more, you can also see our posts on what is a tire valve, air leaking from the valve stem base, broken belt in tire, and if you can drive without a tire valve cap.
Having a plastic cap stuck on your tire’s valve isn’t a large concern, but will take some work to get the plastic cap off without destroying it or the valve. Nevertheless, drivers can remove the cap using pliers and WD40.
A significant part of passenger cars are operated on steel rims. In order to make the appearance of the wheels more attractive, car manufacturers and drivers install decorative caps. In addition to the aesthetic appearance, it is also practical.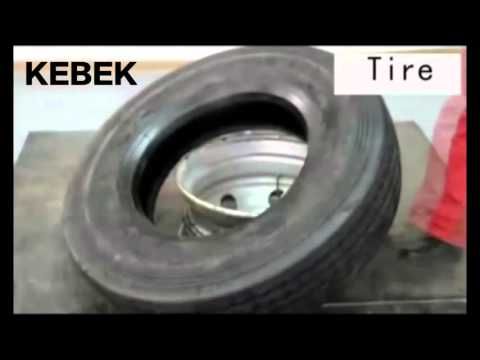 However, only experienced car owners can remove caps from discs without damage. Basically, inexperienced car owners are afraid of breakdowns. The fact is that the cap consists of plastic and is relatively fragile. Therefore, its structure can easily crack.
Caps for car wheels, designed to perform two functions. The first is the aesthetic appearance of the car. It is possible to hide the flaws and defects of the disk. The driver can choose any configuration and color range of decorative overlays. The general appearance of the car becomes presentable, while not having to spend a lot of money.
Second, this is a protective function. The disk itself and the brake system are less polluted. Caliper moving mechanisms coke and rust less, which prevents wear friction and squeaking. In addition to the above, the aerodynamic characteristics of the machine are improved. It is not recommended to purchase and install cast caps without holes. Wheels must be ventilated.
A tire puncture on the track can occur at any time. In order to install the spare tire, you have to remove the wheel. And for this, it is necessary to dismantle the cap. The surface must be cleaned first. Try to move the decorative overlay. If it sits very tightly, then it is recommended to treat the edges with WD-40 spray or silicone grease. In their absence, you can use water. For example, from a puddle. This will ensure that the steel hoop slides along the edges of the disk and the cap can be removed.
Rushed conditions can damage the trim. It should be understood that some caps are made of very fragile plastic. In general, the lining is not recommended to be pulled out by hand. It is better to take a large screwdriver, a mounting spatula or a lever from a jack. With the sharp side of the tool, go around the perimeter of the cap, gradually wringing it away from the disk. It is necessary to insert the lever at the location of the latches. As soon as one edge of the cap moves away from the disk by 3-5 cm, you can pull this place with your hands.
Before installing new trim caps, make sure they fit the wheel size. The manufacturer applies the tire size to the tire, for example, R13, R14, R15, R16, etc. Further, it is necessary to follow the general installation rules.
 To adjust the diameter, it is possible to reduce the width of the inflator pocket.
 It is recommended to install the caps in the winter season in a heated garage. If dismantling and installation takes place on the track, then the removed cap should be cleaned and put in the passenger compartment while the spare wheel is being installed. The plastic will be relatively warm and flexible to install.
Removing and installing caps does not always go smoothly even for experienced drivers. The main thing is to follow the installation rules and take care of decorative overlays. Then the risk of cracking is reduced.
Almost all economy and middle class cars are factory-equipped with steel wheels. They will forgive the appearance. To give the machines an aesthetic appearance, nondescript “stampings” are hidden under decorative caps. As a rule, most cars continue to be used in this form. This is quite practical: the disc is protected from dirt, and the outside of the wheel is easy to clean. However, fragile plastic can be damaged if there is no experience in dismantling/assembling. Each car owner should know how to remove wheel covers and what nuances may arise during the installation process.
There are several options for caps. The most common are 2 types: with holes for mounting bolts and with a spacer hoop for the rim. The second type is the most popular, it is with him that questions arise regarding installation / dismantling. The functions of the caps are the same: they decorate the car, prevent damage and contamination of the disk, from which it rusts.
The protection also extends to the brake caliper. The parts of this assembly are subject to aggressive attack. With a decorative overlay, moving elements do not coke and do not creak. And the caps give aerodynamic characteristics. With them, the car accelerates faster and consumes less fuel. The disadvantage of plastic protection is poor cooling of the brake assembly.
What makes it difficult to remove the wheel cap? Among the main reasons: dirt that has accumulated inside, and ice formed after washing or driving through puddles. You should also pay attention to the ambient temperature. For example, in cold weather, plastic becomes more brittle and less elastic.
Therefore, it is necessary to shoot carefully, without sudden movements. But first, it is recommended to clean the surface of the wheel and the perimeter of the cap with a brush in order to sweep out the grains of sand as much as possible. Through the gap, you can process the fasteners with a spray, for example, WD-40. If it is not there, then spill it with water (suitable from a puddle). Lubricated (moistened) edges of the guides will more easily come out of the seat.
Some car owners pull out the cap. This method does not always end successfully. Most products are quite fragile and break easily. In order not to damage the decorative element during removal, you should use a wide screwdriver or a wheelbarrow wrench with a mounting blade at the end. With the sharp edge of the tool, it is recommended to press the guides (latches) around the disc. As soon as a gap of 3-5 cm appears, you can pull the edge with your hands and remove the plastic part.
How to install the hood? This is the reverse process of dismantling. If you have purchased new decorative trims, be sure to check their size with the wheels.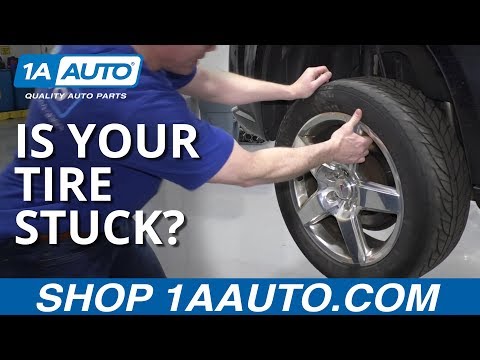 Usually, the manufacturer prints information about the purpose on the label. Then you need to follow these recommendations:
How not to lose the decorative cap? It can be additionally fixed to the mounting ties, and the protruding tips can be cut off flush.
If installation takes place in winter, it is better to keep the caps at home so that they are elastic.