Changing a bike tire might not seem like an especially important life skill, but if you ride a bike in any capacity, it’s a skill you should learn. No one ever plans on having their ride interrupted with a flat tire, but flat tires are one of those annoyances that every rider has the displeasure of experiencing at one point or another. By thinking ahead and taking some time to learn how to change a flat, the hassle of having to change a tire remains just that: an annoying interruption, but not the end of your ride.
If you want to successfully change your bike tire, then before even learning the “how” of it, you first need to know and collect the “what.”
In other words, you need to be prepared, which means having a fix-a-flat kit that you take with you on each ride. At the very least, you should include the basic materials required to effectively fix your flat; what you’ll need will depend on whether you’re riding tubeless or tubed.
Putting together a fix-a-flat kit might seem like an afterthought, but having one on hand might be the difference between a minor disruption to a ride and a major aggravation. If you end up with a flat, remember - always find a safe place, away from traffic and other possible dangers, before working on your bike.
The first step in changing a flat tire might seem obvious, but here it goes: remove the wheel.
If your tires are tubeless and you have a tubeless repair kit, then you might be able to skip this step. If the damage to the tire is a simple puncture, you can just plug it without taking the wheel off. However, if you find that the damage to the tire is extensive enough to where plugging it won’t resolve the issue, then the wheel will need to be removed. To remove the wheel from your bike, start by flipping it upside down.
Pro tip: You might find it easier to work on your bike when it’s upside-down. When flipping your bike, remove the computer from the handlebars to avoid scratching it.
Removing the rear wheel might seem intimidating at first, particularly when you realize that the chain and derailleur are located in the rear.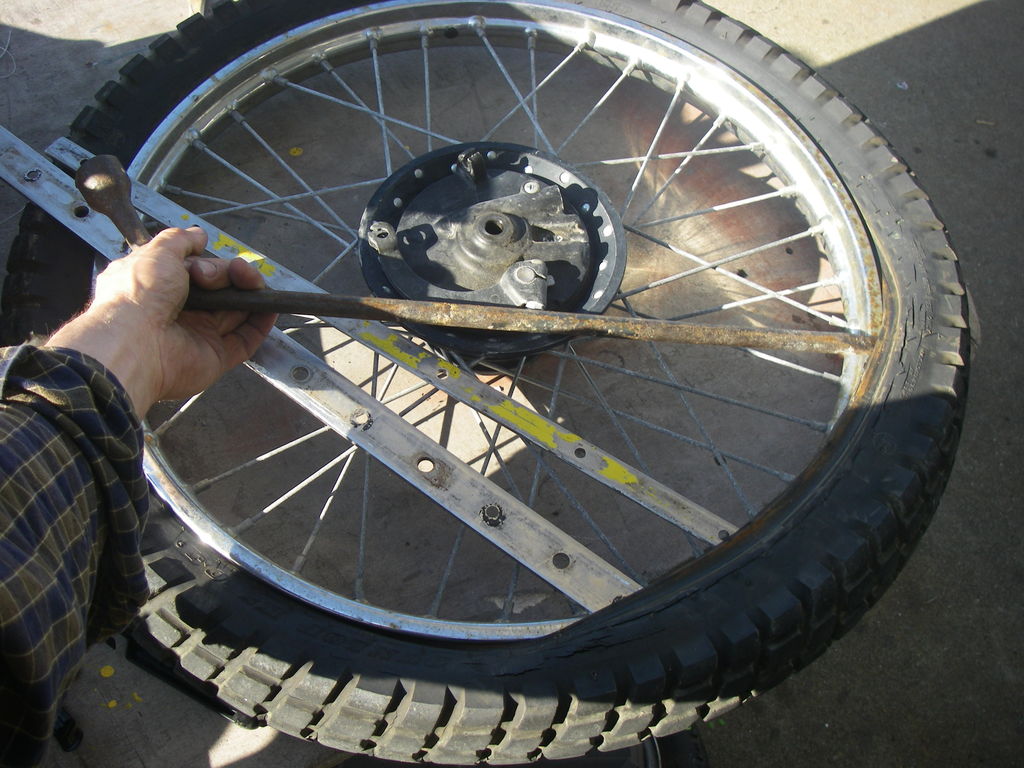 However, the process of removing the back wheel isn’t much more difficult than removing the front, especially if you take your time. To begin, first shift the bike into the smallest sprocket, creating slack in the chain for easier wheel removal and installation. Raise the bike by the saddle and while pedaling with your hand, use the right shift lever to shift gears. Repeat this, using the left shift lever, so that the chain ends up on the smallest chainring in the front as well.
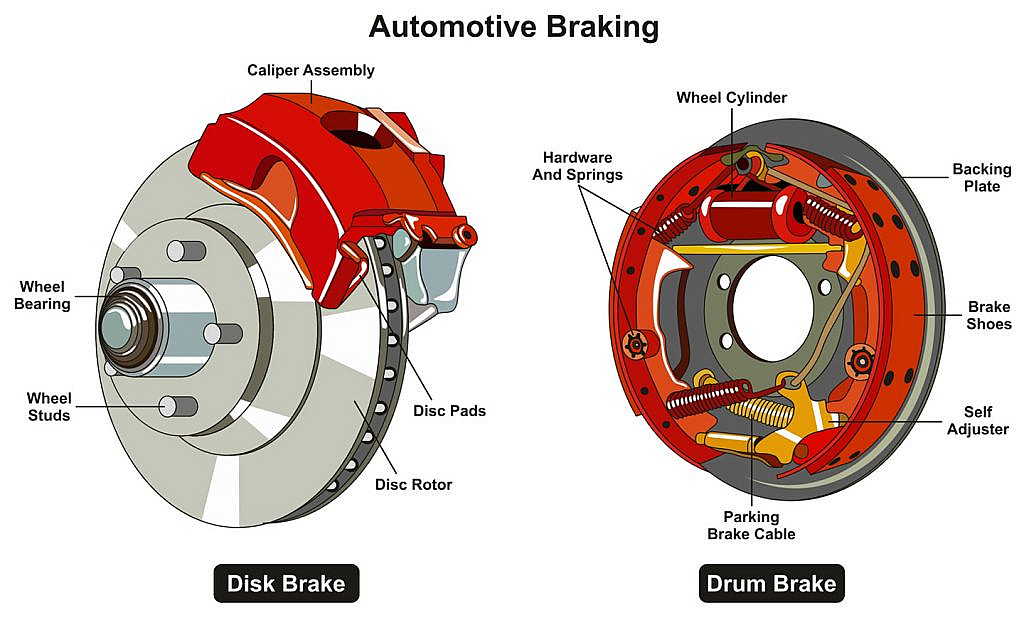
While typical wheel removal requires that you open the brake if you’re addressing a flat tire, then it’s likely that the tire has already lost enough air so that it slides out easily. If your bike is equipped with disc brakes, then you’re in luck because the wheels can be removed without touching the brakes. Quick releases that hold the wheel in place are especially common. To loosen the wheel via quick release, pull - do not twist - the lever out and away from the frame until it is completely open. You should be able to remove the wheel with ease by carefully lifting the bike by its saddle and letting the wheel fall out.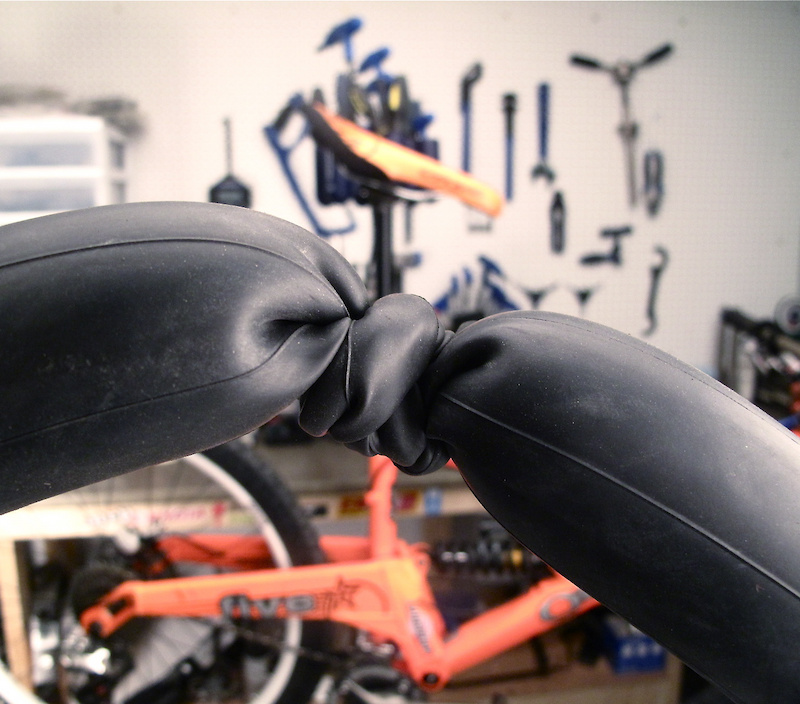 If it doesn’t fall on its own, hitting it with the palm of your hand gently should be enough to make it drop. If it still doesn’t come out, then check to make sure the chain and derailleur aren’t stopping it. If they are, lift your bike by its saddle and, while holding it up, reach around with your other hand to pull back the derailleur and consequently, the chain. Some derailleurs are equipped with a clutch, requiring that you release the clutch and then remove the axle. Push the derailleur cage towards the crank and let the wheel drop. At no point should you find yourself trying to force anything to move.
Once the wheel has been removed, it’s time to address the tire itself.
Standard tires are designed with an inner tube, which is inflated with air. While relatively inexpensive to replace, making them a popular option, tubes can be punctured or pinched flat relatively easily. Tubeless tires don’t have an inner tube and are instead equipped with an airtight rim that the tire snuggly rests in.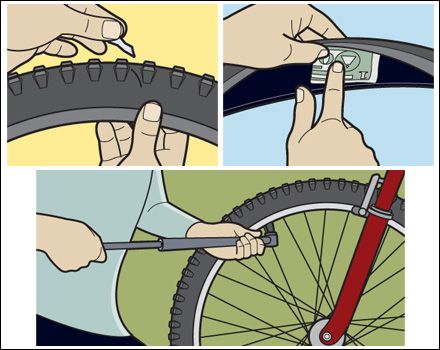
If you’re running tube, then you’ll need to remove it; if you’re running tubeless, you’ll need to patch it with a tire plug. Tire plug kits are sold at most reputable bike shops and consist of a strips of rubber and an insertion device, requiring no other equipment or changing out hardware. Most tubed tires can be converted to tubeless.
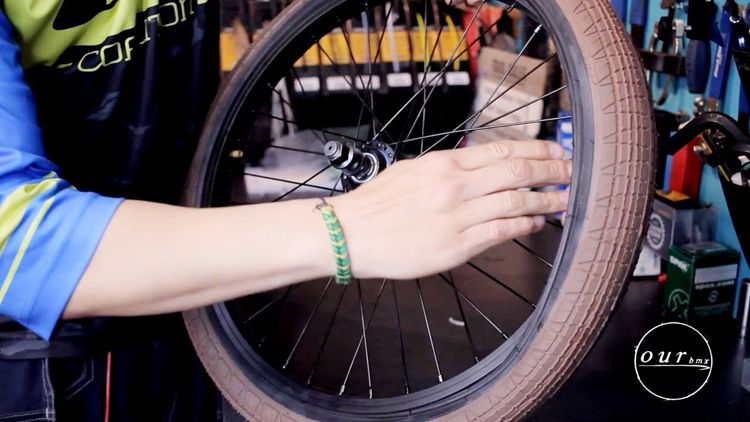
To remove the tire, you’ll need to use your tire levers. To do so, insert the flat end of the lever under the bead. Place a second lever under the bead and move along the rim until the tire is off. In most situations, you can reinstall the replacement or a patched tube without completely removing the tire. By breaking the bead on just one side, you will save a lot of time and greatly simplify the process.
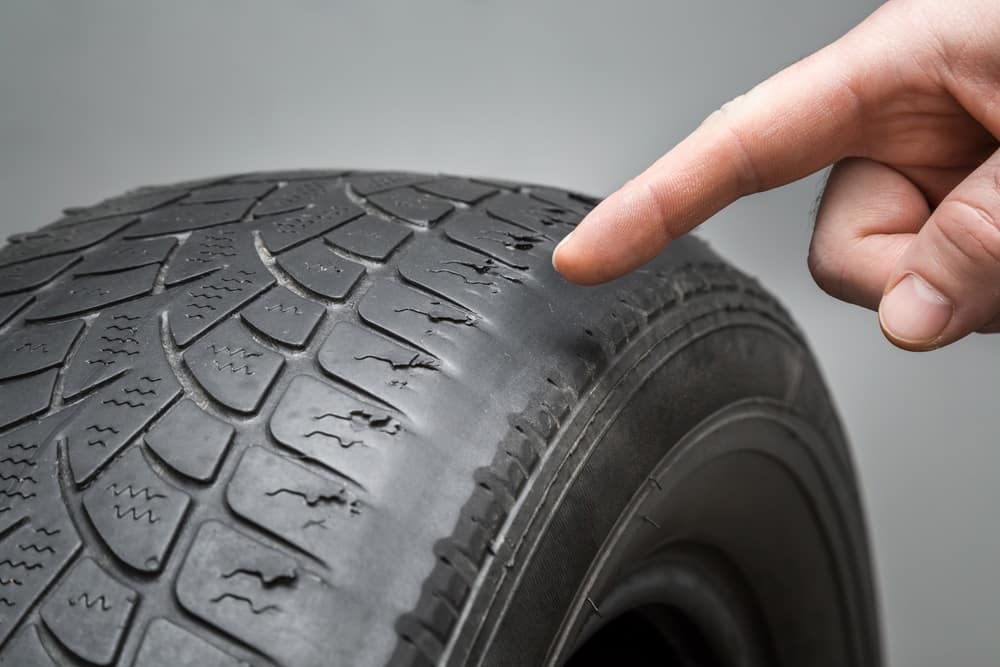
While many would recommend you run your finger along the tire to search for the culprit of your flat, doing so could also result in you having to do some patchwork on your finger, too. If whatever punctured your tire is still there and it’s capable of piercing a bike tire, then your finger stands no chance against it. Before doing a hands-on analysis of the problem, visually inspect the tire, both inside and out, first. It might take longer, but you’ll be able to avoid a finger cut and maybe even a tetanus shot. You can also pack cotton pads or use something else to create a barrier between your finger and the sharp object that it might encounter, but there’s still a risk of injury . Tire levers are used for the removal of tires, but you can also run one along the tire for inspection purposes if you prefer playing it safe.
If both the visual and tactile inspections fail, reinflate the tire to see if you can hear the air leaking out of the puncture point. If you find only one puncture hole, then you’re most likely looking at road debris as being the culprit. Depending on the location and manner in which your tire has been punctured, a pointed tool, such as a screwdriver, can be used to push out the object in question before it works itself inward and creates additional punctures. If you see two holes next to each other, then it’s likely that you’re dealing with a pinch-flat, which means your flat wasn’t caused by road or trail debris; it was caused when the tube got itself pinched between the tire and rim.
Patching tubes is an excellent option for anyone who prefers pinching a few pennies, going green by reusing, or being resourceful when there are no more spares. Patch kits are available exactly for this purpose and come with everything you need need in order to get the job done. Patch kits also happen to be very compact so they are a perfect backup, even if you prefer to replace the tube outright.
If patching is your thing, then you’ll want to start by cleaning the affected area and then roughing the surface with an emery cloth or sandpaper. Kits come with two kinds of patches: glueless and those required glue. If your kit has glueless patches, then it’s basically like putting on a bandaid: peel off the backing, place it over the hole, and press with firm pressure. If your patches require glue, then simply add a thin layer of glue to both the tube and the patch. Once the glue has reached a tacky consistency, place the patch and press firmly until you’re sure it’s solidly in place.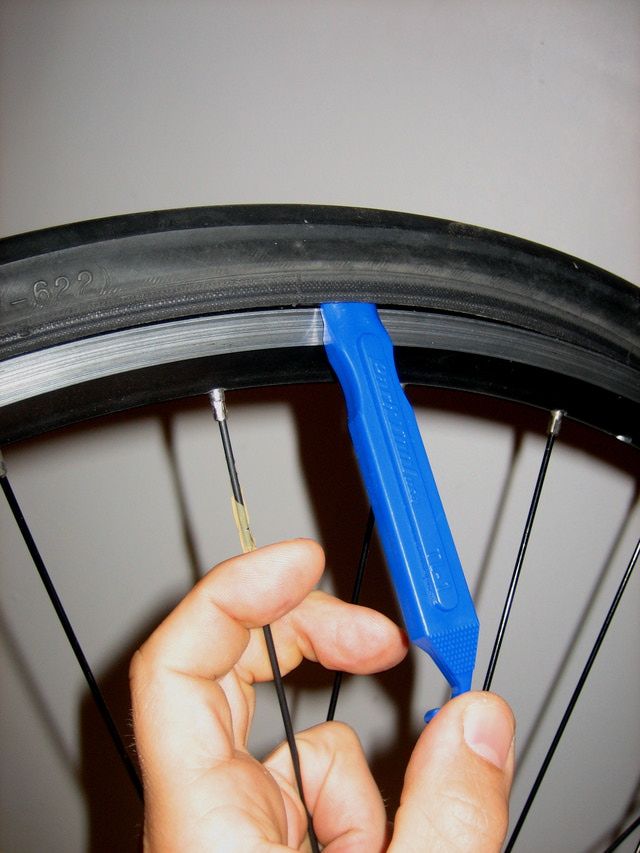
There are some flats that are simply too severe to patch. In those circumstances, you’ll need to skip this step and simply install a new tube.
To install your tube, you’ll start by using your pump to inflate it just enough so that it obtains its form, making it easier for installation and reducing your chances of suffering a pinch-flat. Starting with the valve stem, put the tube on the rim and insert the stem straight through the valve hole. Carefully work the tire back onto the rim by rolling the bead away from yourself using your hands, not a lever; levers increase the likelihood of accidentally puncturing the replacement tube. Upon reaching the valve stem, wrap sides of the tire bead low into the rim and push up on the stem to get the tube into the tire.
Pro tip: if you align the branding on the tire with the stem, you’ll be able to locate the stem much quicker next time.
To avoid having to deal with another flat, it’s important that you take extra care to ensure that the tire bead isn’t pinching the tube. Do this by grabbing the tire with both hands and "massaging" and twisting it side-to-side as you work around the rim. This will ensure that the tube is positioned correctly inside the tire, away from the bead that can pinch it.
Now is when you find out whether or not your efforts paid off; it’s time to inflate your tire. To do this, you can use either a CO2 cartridge, a minipump, or both. Each method of inflation has its pros and cons, so ultimately, choose what’s most comfortable for you. If possible, equip yourself with both.
CO2 cartridges are highly effective, especially when your goal is to inflate to higher pressures, but they are a one shot deal, so there’s no reusing them. It’s a good idea to practice tire inflation at home using a CO2 cartridge to ensure that when the inevitable occurs, you don’t blow out your tube or waste the cartridge, and get left stranded. The key to using a CO2 cartridge is to ensure that the inflator is properly connected to the valve stem.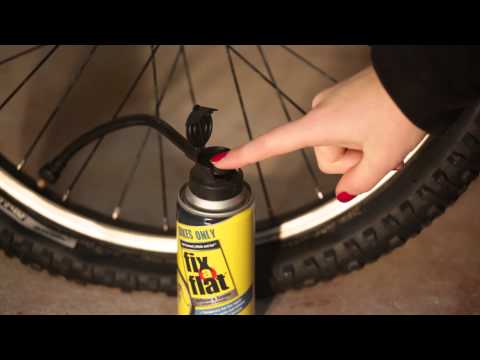
Having a minipump in your arsenal is highly recommended so that you always have a backup method for tire inflation, even if it’s not as easy to use as CO2 cartridge. Having a pump with a hose is also strongly suggested because it allows you to push the pump against the ground for better leverage, allowing you to accomplish higher pressures; pumps that attach directly to the valve stem don’t offer this advantage and might cause damage to the valve stem or even the rim when used improperly. Combination mini pump/CO2 inflators are also available.
As you’re inflating to your desired PSI, double and triple check the bead so that you’re sure it’s sitting in the rim correctly. Only after you’re certain that everything is in its proper place should you reattach your wheel.
Last but not least, it’s time to install the wheel. The processes of replacing the front and back wheels vary a bit, but neither is especially harder than the other, as long as you know how to effectively get the job done.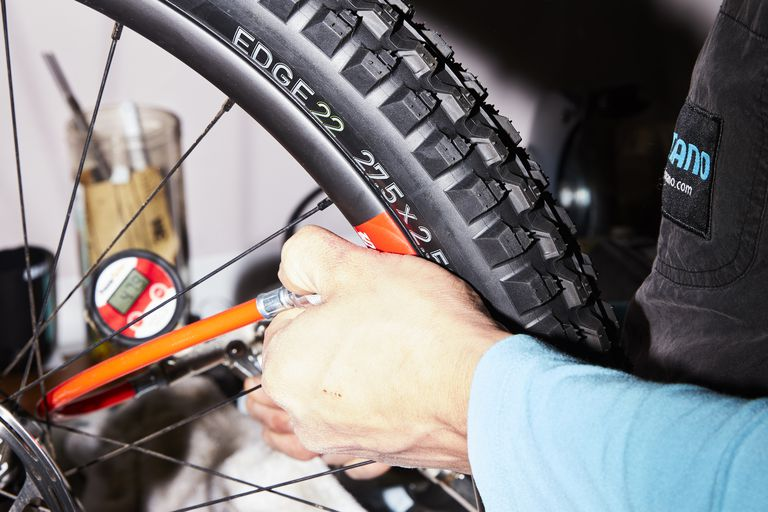
To attach the front wheel, first line up the fork dropouts with the axle of the wheel and gently lower the fork onto the axle. Carefully push down on the handlebar to check for the proper placement of the axle in the dropouts. It’s important to be mindful that the quick release or thru-axle lever is on the opposite side of the drivetrain and not touching the frame. Hold the quick release lever in place as you tighten the bolt. If you find that the lever closes too easily or ends up making contact with the frame, just open the lever and tighten the bolt a bit more. Be careful that you don’t over tighten the bolt, as it should be tightened just enough to allow you to use firm pressure when closing the quick lever. If your bike is equipped with rim brakes, don’t forget to reconnect, adjust, and check them for functionality.
If your flat occurred on the rear wheel, then lay the top of the chain around the smallest cog on the cassette and make sure the frame dropouts line up with the axle. As you gently push the wheel back into the frame, take care to also pull the derailleur down and back so that it doesn’t get in the way. In the event that the wheel doesn’t go in easily, remove it and try again. If you’re sure that the wheel properly placed, then it’s time to close the quick release (and rim brakes if applicable) or insert the thru-axle into the frame and hub and thread it shut. The final test in determining whether your bike is ready to continue its journey is by lifting the rear wheel and spinning the cranks. If it runs smoothly, then you know you’re good to go.
Flat tires are already unplanned and unexpected; planning ahead by prepping a fix-a-flat kit and learning how to change your tire can ease your mind for such unfortunate circumstances, but what do you do when even fixing your flat doesn’t go as planned? Read on for some quick, easy solutions when even flat tires don’t go your way.
Small, unfixable punctures.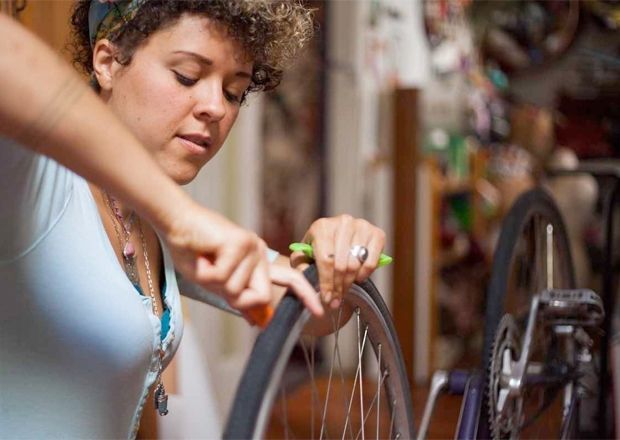 Super glue is already a life-saver in so many situations, so why should cycling prove to be any different? Super glue is a great quick fix for smaller punctures that might not be fixable otherwise, albeit temporary.
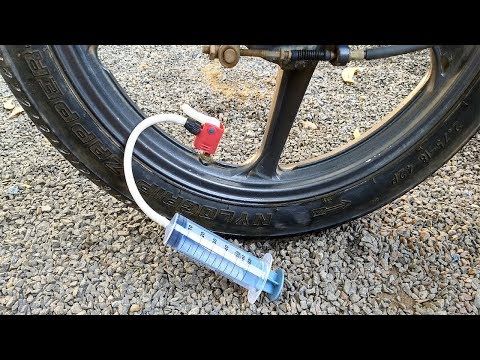
Large, unfixable punctures. If you find that you end up with a hole that’s simply too big to repair, then it’s time to resort to some out-of-the-box thinking. Cut out the damaged innertube section and tie the two ends together. It’ll be obvious to you that it’s not a perfect solution, but you should at least be able to reach about 50 psi, which is certainly enough until you can better resolve your tire situation.
Unfixable tire and sidewall gashes. In the event that your tire or the sidewall of your tire ends up sliced or gashed beyond standard repair, don’t despair; make a boot instead. Using a dollar bill, old gel wrapper, or piece of duct tape to cover the hole from the inside is a quick, easy way to resolve your emergency until you get home. It might not be ideal, but it should suffice until a more permanent resolution can be made.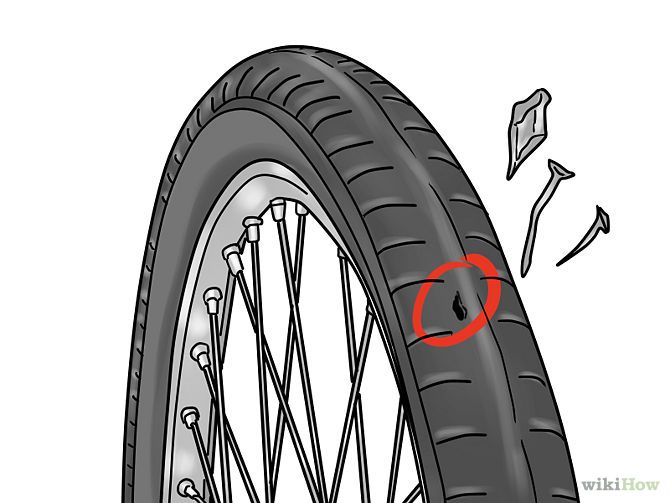
Learning the skill of bike tire repair can be thought of as a form of insurance: you might not want it and you might never use it, but if ever find yourself in a situation where you need it, you’ll be glad it’s there. The folks at Velosurance are all cyclists and understand that it’s only a matter of time before an unfortunate circumstance arises. From gap medical to liability, vehicle contact protection to even roadside assistance - for when you’ve got a flat and are fresh out of options - Velosurance offers a highly customizable policy to provide coverage for nearly any cycling associate risk. Whatever your needs, chances are, there’s a policy for you.
Changing a bike tire after getting a flat is a relatively easy fix—as long as you know how to handle it. Whether you ride on smooth pavement, rough gravel, or rocky singletrack trails, it’s bound to happen eventually, so you might as well prepare yourself with both the necessary tools and the bike repair knowledge you need address the problem.
Below, we detail everything you need to know about how to change a bike tire, including the bike tire repair tips you need to succeed.
First things first though—for tools, you should always carry tire levers, a correctly-sized spare tube, and an inflation device, be it a mini pump or CO2 cartridge. You may also want to consider a patch kit or tire plug, which can come in handy for certain riders. And if you run tubeless tires, scroll down to skip to the tubeless section. When you’re ready to go, here’s your step-by-step guide.
Start by removing the wheel. Keep your bike upright, and if it’s a rear-wheel flat, shift your drivetrain into the hardest gear. If your bike has rim brakes, which many bikes still do, you may also need to loosen the brake.
Next, position yourself on the non-drive side of your bike (opposite the chain) and either open the quick release or unthread the thru-axle to remove the wheel.
Now you can remove the tire. Hook the rounded end of one tire lever under the bead (the outer edge) of the tire to unseat it. Fix the other end to a spoke to hold the lever in place and keep the unseated tire from popping back into the rim. Then hook the second lever under the bead next to the first, pushing it around the rim clockwise until one side of the tire is off. You don’t need to completely remove the tire.
Once the tire is loose, pull out the old tube (if applicable) and look for the source of the flat, which could be a thorn, piece of glass, or some other sharp object. Carefully run your fingers along the inside of your tire and rim, making sure nothing sharp is left behind; otherwise, you risk getting another flat.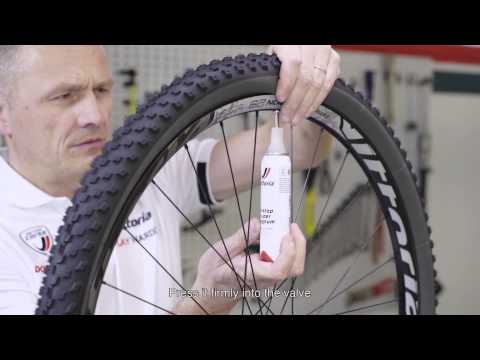 Also inspect the outside of the tire, again looking for any foreign object that might still be stuck in the rubber.
If you’re using tubes and want to do a little detective work, pump some air into the old one to find the leak. Two holes side by side indicate a pinch-flat, where the tube gets pinched between the tire and rim. A single hole is a sign that your flat was most likely caused by a sharp object. By lining the tube up with the tire using the valve as a point of reference, you can double check the area where the hole is to ensure the culprit is removed.
If you’re the thrifty type who likes to reuse old tubes, or if you’ve gotten multiple flats on your ride and have no more spares, then you can patch your tube with a patch kit. If you have a new tube, skip to the next section.
Start by cleaning the punctured area and roughing the surface with an emery cloth.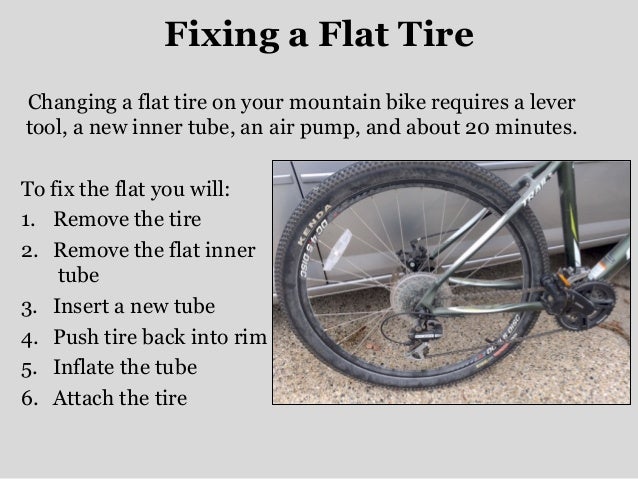 For a glueless patch, simply stick it over the hole and press firmly. For a patch that requires glue, add a thin layer of glue to the tube and patch. Wait for the glue to get tacky, then apply the patch and press firmly until it adheres.
If you prefer to reuse old tubes or ran out of spares, you can try to patch the hole with a patch kit.
Katja Kircher//Getty ImagesNow inflate your new or patched tube just enough so that it holds its shape. This makes it easier to place inside the tire. Next, with the valve stem installed straight through the rim’s valve hole, position the tube inside the tire. Work the tire back onto the rim with your hands by rolling the bead away from yourself. Try not to use levers to reseat the tire, as you could accidentally puncture your new tube. When you get to the valve stem, tuck both sides of the tire bead low into the rim and push upward on the stem to get the tube inside the tire.
Check to make sure the tire bead isn’t pinching the tube by gently pushing the tire to the side as you work your way around the rim. Then inflate to the appropriate PSI and check that the bead is seated correctly.
$50 at Amazon
Credit: Silca$8 at Amazon
$6 at Amazon
Credit: Park Tool$45 at REI
Credit: REIIf everything looks good, reattach your wheel, making sure the quick release or thru-axle lever is on the opposite side of your drivetrain.
If you had a rear-wheel flat, lay the top of the chain around the smallest cog on your cassette and carefully push the wheel back into the frame. Close your quick release (and rim brakes if applicable) or insert the thru-axle back into the frame and hub and thread it closed.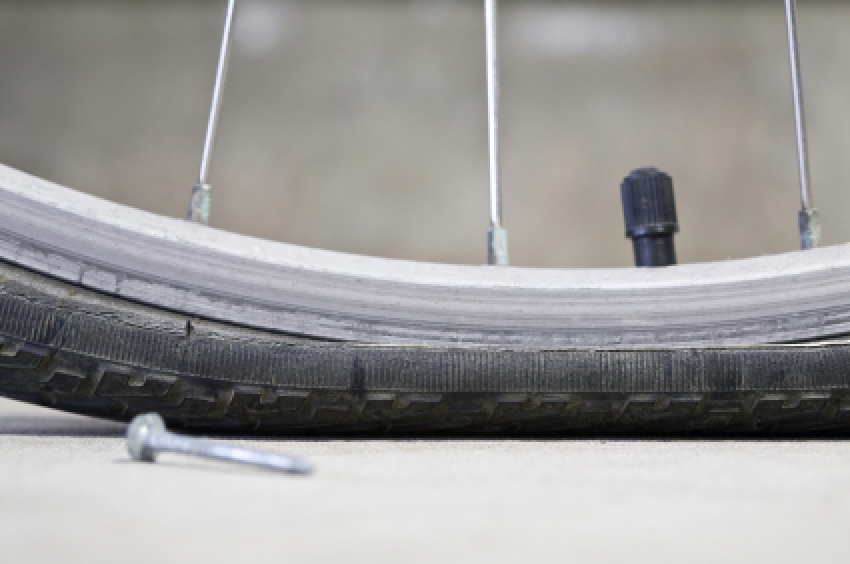
Finally, lift the rear wheel and spin your cranks once to make sure everything is back in place and operating smoothly. If all is good to go, get back on your bike and enjoy the rest of your ride.
Trevor Raab
For tubeless setups—all but standard in mountain biking and becoming increasingly popular on gravel, cyclocross, and even some road bikes—your sealant should do the trick without you even realizing it. Be sure to check your sealant regularly (about every three to six months) to make sure the tire has enough and that it hasn’t dried out.
But in the event of a bigger puncture or side-wall tear, you may need a tire plug to stop air loss. Plug kits come with a small strip of rubber and an insertion device, which allow you to plug the hole without even removing the wheel. Once you find the puncture and insert the rubber plug, re-inflate your tire to the appropriate pressure to see that it’s holding air.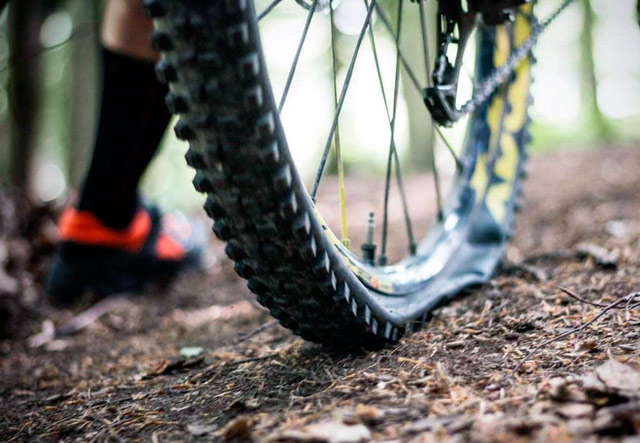 If so, start riding again, and check the repair every so often to make sure it’s holding fast. You could also add more sealant, but you’d need to carry a valve core removal tool and a small bottle of sealant.
Trevor Raab
If air loss is coming from a puncture bigger than a plug fix, you could try a patch or a boot on the tire. But fair warning: It’ll likely be difficult to get a patch to adhere to your sealant-coated tire without thoroughly cleaning the area. Adding more sealant or a patch could create another problem, too, by letting all the air out and breaking the seal between the rim and tire. It’ll likely be difficult to reseat the tire bead onto the rim on the spot. The easiest way to ensure your tire holds air at this point is to simply use a spare emergency tube to get through the ride and address it at home or at a bike shop.
$155 at Trek Bikes
$64 at Amazon
Keep It Clean
$10 at notubes. com
com
Precisely measure sealant and install with no mess.
Mid-Ride Repair
$60 at dynaplug.com
Brass-tipped plugs make fixing bigger punctures easy.
Jessica CoulonService and News Editor
When she’s not out riding her mountain bike, Jessica is an editor for Popular Mechanics. She was previously an editor for Bicycling magazine.
This content is imported from OpenWeb. You may be able to find the same content in another format, or you may be able to find more information, at their web site.
Everyone loves to ride a bike. Well, almost everything. And the head of the metropolitan traffic police, Dmitry Korzyuk, rides it, and the founder of the Internet portal TUT.BY, Yuri Zisser. But will cyclists be able to fix a two-wheeled vehicle if a wheel suddenly breaks on the road? Blogger Alexander Deshchenko decided to fill this gap.
A bicycle is a rather complicated technique. And any technique tends to fail over time. I will try to enlighten those interested in common breakdowns, as well as throw in some repair ideas.
There are plenty of parts on the bike. Of course, it does not reach the tractor, but still it will take a couple of days for someone who decides to take care of studying the names and purposes of at least most of them. Therefore, we will not deal with this, we will limit ourselves to the minimum that is necessary for successful and safe movement.
If your bike rides, the pedals turn without extraneous sounds, and the gears (if equipped) change easily and naturally, you can be envied. Seriously - as with people, there are no completely serviceable bicycles, there are underexamined ones.
The most common "disease" among new bikers is flat tires. Rubber is not completely sealed, and over time, tire pressure decreases. In addition, the cleanest city in the world does not let you relax, from time to time providing an excuse to practice bicycle repair.
If such a misfortune has overtaken you, do not panic - of all bicycle diseases, blown-out wheels are the easiest to "treat". If at home you found a flat tire during the second whole, try pumping up, maybe you just didn’t pump up the previous time.
By the way, pumps are cheap, portable and good, you can choose any two characteristics. Personally, I always have an inexpensive portable (more precisely, portable, because it hangs on a frame) pump at hand, and at home there is a good stationary one. In principle, pumping wheels is also better in the mind. At the end of any, even the cheapest and Chinese tires, the working pressures for which this tire is designed are indicated. If you don’t pump enough, you run the risk of breaking through on any bend in the terrain. If you pump it over - you can simply burst, like Piglet's balloon in the famous cartoon. Although, of course, there is also a pattern "pumped up less - it's softer to ride, pumped up more - it rolls better. "
"
But back to the flat tire. If you pumped it up, and it went down again, then it’s bad business with him, not with you. But here, too, you should not be especially upset. It is quite possible that when the wheel is inflated with the naked ear, a whistle of air is heard, or even some foreign object sticks out, indicating the place of the puncture.
If the rupture is visible, you can pull out a piece of the chamber with a hole, glue it, put it back and do not even remove the wheel from the fork. In bike shops you can find a wonderful mobile kit for patching wheels, a small box is sold for little money, the lid of which is two plastic spatulas for disassembling the tire, and inside there is a number of patches, a tube of glue and a piece of sandpaper.
If you have an interest in cycling, I highly recommend it, the thing is simply irreplaceable. Of course, the set is more likely to be marching and will not help in difficult situations, however, most of the common punctures heal.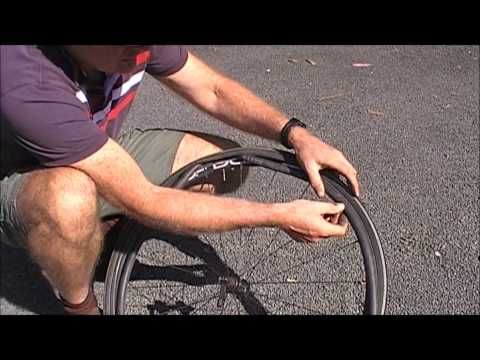
By the way, the patches from the kit are quite large in size, they can be additionally cut into several smaller pieces. It is very simple to seal the hole found on the camera - you clean the surface around it a little, smear it with glue and press the patch tightly. Usually they are made of "raw" rubber, so the main thing is to fix it correctly on the camera, carefully fill it back into the wheel and pump it up, and then under pressure it will flatten to almost zero thickness and implant like a native. And finally, you can inspect the tire itself for cuts.
Based on materials from the Avto.tut.by portal
It's time to turn on spring and update your technical wardrobe. Surely your young lady has been dreaming of a beautiful bike for a long time or has already grown out of the previous one.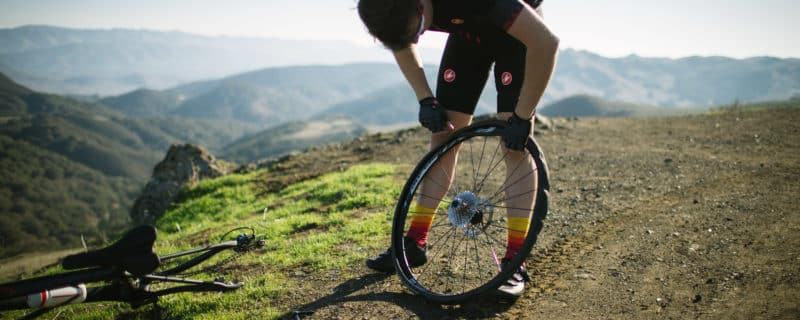 It's time to make a choice and have time to buy a 24-inch bike with a favorable discount. Female teen models, of course, not much ...
We are often asked - "...what is a butyl inner tube for a wheel?". Let's read this short article together to get the answer to this question. Let's start with the definition of what is butyl? Butyl is a highly elastic and airtight synthetic rubber, to which…
Artem Gorev, a cycling specialist, dispels all myths. Most people who want to buy a bike are not particularly knowledgeable about the subject and have a natural desire to consult with someone before buying, and they: - turn to their friends for help, ...
Bicycle specialist Artem Gorev advises: Every time I sell a bike to a person who is at the very foot of the cycling Olympus, I give a short briefing, i.e. I list the most important, in my opinion, points that a novice cyclist should remember in .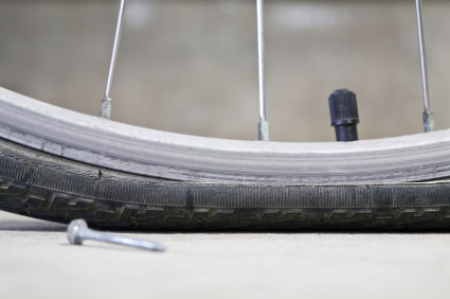 ..
..
Valuable advice is given by bicycle safety specialist Artem Gorev. Oddly enough, but with age you begin to appreciate life more (at least, I noticed such a feature in myself), it would be nice to think about the reasons for this paradox, but I will restrain myself, the purpose of this article is somewhat different.…
Artem Gorev, expert on safe cycling, tells. You bought a bike and hit the road for the first time. Of course, you are aware that this is not a safe business, but excellent knowledge (and observance) of the rules of the road relaxes you, an ugly inner voice whispers ...
Bicycle specialist Artem Gorev conducts research and gives advice. The other day I read an interesting article written by American professional rider Neil Bezdek called Finding the Right Cycling Coach.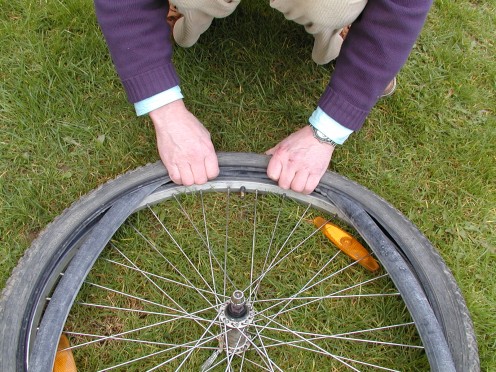 In addition to advice on choosing a coach, ...
The seasonal problem of all outdoor enthusiasts is what to do with the bike in winter. If you are not an extreme, ready to ride in snowdrifts, then for five months you need to attach an iron horse somewhere. In fact, the bicycle turns out to be a very fragile creature, and even if it withstands wintering ...
A city bike needs a professional service once a year, while a cross-country bike requires more frequent workshop visits. According to Kert Olle, head of technical products at Rattamaailm, home care of a bicycle starts right from the very…
Tires have a huge impact on the performance of a bike. We will reveal all the secrets... Camera: To be or not to be? Conventional tires use an inner tube filled with air, but how do tubeless tires work? In most…
Jump to page:
Contents
 If professionals have a whole staff of employees involved in servicing bikes, then amateurs have to decide on their own the question of why they flatten a wheel on a bicycle.
 An annoying nuisance that seems impossible to avoid. But this is only at first glance. Often we ourselves are to blame for the flat tire of the bike. What is this about? Read on.
There are at least five reasons that can spoil your mood before a bike ride or during a bike ride:
Let's look at each problem separately and find out what's wrong.
The most common tire on a bicycle is a flat tire that has outlived its useful life. The surface of the tire becomes more viscous, collecting various debris, small glasses, and so on. All the little things gradually penetrate inside, up to the camera. As a result, another puncture.
In addition, holes are formed on the used rubber, through which the bicycle tube is visible when inflated. It can simply come into contact with the road when driving. This will inevitably lead to another unpleasant situation.
They sealed the tube after a puncture using a flipper tape, but the working element still constantly lowers. Perhaps there was a piece of glass in the tire. It is difficult to detect and constantly creates problems for the cyclist.
Note!
Before beading, carefully check the wheel for small stones, glass and other foreign debris.
Beading and disassembling the wheel, you need to use a special tool - beading blade. Avoid screwdrivers, wrenches, and so on.
In this case, there is not enough shock absorption. You can get a puncture by running into, for example, a pointed pit.
Another reason why a flat tire on a bicycle. On the inside, the rim is glued with a flipper tape. It is she who guards the camera. An overfilled element may tear the flipper or burst.
It's true that protective tape can be a problem. It is tough with sharp edges. If installed incorrectly, the chamber can be cut.
Please note! Continuous use of the anti-puncture chamber reduces the wear resistance of the tire.
A bicycle first aid kit or repair kit is available from retailers and specialist shops. "Technical treatment" after finding a puncture does not take more than 5 minutes.
Camera needs to be removed. Pump it up and grease it with glue. Then apply on the patch. Wait for the glue to set, and after 5 minutes the camera can be mounted.
To prevent a flat tire, it is important to follow the manufacturer's recommendations.