Knowing the ins and outs of your new 2016 Volkswagen Passat is an important thing and can save you some major headaches in the future. A headache that you may encounter in the future is a flat tire. It is important that you know how to change a tire on your Volkswagen Passat — or any vehicle for that matter. It is an intimidating process that when you boil it down to the basics it really quite simple. Follow the steps below to find out what to do when you get a flat tire.
Generally a pretty simple step, it is important to know where to get the necessary equipment for changing a flat tire, including your spare tire, a jack and the tool kit. Chances are these items are located in your trunk, but you still want to consult the owner’s manual for any additional safety concerns.
READ MORE: How to Connect Your Volkswagen Jetta with Bluetooth
If you get a flat tire, it is vital that you get to a safe location where you can change your tire, such as a parking lot. First, make sure you are on level ground and in park. Volkswagen models with an automatic transmission should be put in park, while manual models need to be left in neutral. Ensure that the parking brake is on and you block the tires before you get started.
Before you can really get started, you may need to remove the hubcap and lug nut covers on your Volkswagen if it is not equipped with alloy wheels. A special pin will be included in your tool kit for this situation. Be sure to loosen the lug nuts with the tire iron before you raise the vehicle with the jack.
Next, you will need to get your jack out and place it at one of the recommended lift points marked on the underside of your vehicle — make sure to use the lift point closest to the tire being replaced. Lift the jack slowly so that you can ensure it is firmly on the lift point and then crank the jack until the flat tire clears the ground and you have room to put the spare tire on. Remove the loosened lug nuts and put the flat tire in the trunk.
READ MORE: Take a Closer Look at the 2016 Volkswagen Passat Trim Levels and Price
Put the spare tire on the car and hand tighten the lug nuts. Lower the car onto the ground and use the tire iron to tighten the lug nuts firmly. When you are tightening the lug nuts, do it in an alternating star pattern. This will ensure that the tire is on straight. If you use a torque wrench, make sure that the bolts are tightened to the specifications in your vehicle owner’s manual.
Chances are that if you drive long enough, you will have to change a flat tire and by knowing how to change a tire on your Volkswagen Passat
, you can save yourself some major headaches. While we used the redesigned Volkswagen Passat as an example for this blog post, the same principles apply to the whole Volkswagen model lineup. Consult your vehicle owner’s manual for any specifics to your model.
4710 NW 39th St.
Directions Oklahoma City, OK 73122
Hide Show
Click Here For Coming Soon Inventory!
When you're driving on the roads of Oklahoma City, Norman, and Edmond in your Volkswagen Atlas, the last thing you want to think about is a tire issue. Unfortunately, there may come a time during one of your commutes when you'll need to change a tire. Whether it's due to a flat or a blowout, the team at Oklahoma City Volkswagen is here to help.
Below, you'll find our guide about how to change a tire on a VW Atlas. With the right tools and these steps, you'll be fully prepared. Let's jump right in.
Schedule Tire Service
Service Center
Contact Service Center
Before you begin to change your tire, you'll need to locate your spare. In the Volkswagen Atlas, it's easy to find since it's conveniently stored under your cargo floor.
Open the back of your VW Atlas and fold down the third row of seating. Then, remove the flooring, and you'll not only find your spare tire but also a jack as well. Now, it's time to get started.
In addition to the jack, you'll need some other equipment to change your tire safely.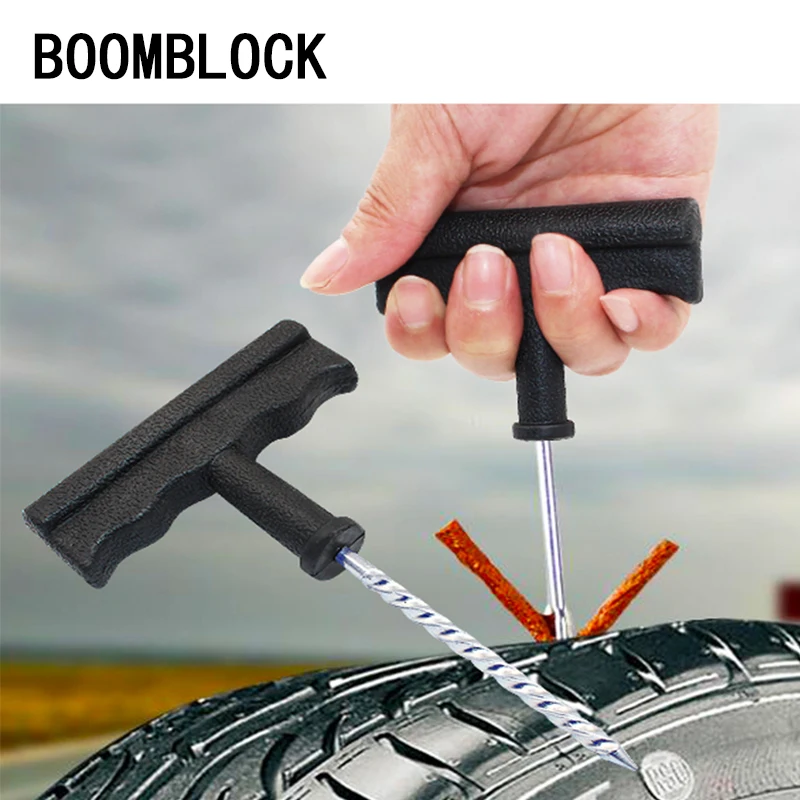 Having your owner's manual nearby can also be handy. Before you get to work, locate the needed tools, including:
Follow these steps to easily change your tire:

You May Also Like:
Tire Store Near Me
How to Change a Flat Tire
What Is Speed Rating for Tires?
Now that you've successfully changed the tire, it's time to outfit your VW Atlas with a non-spare tire. This is because spares can only be driven for a short period of time and should not exceed speeds of approximately 50 MPH.
In our tire center, our technicians will be able to give your vehicle the tire it needs, making your Oklahoma City, Norman, and Edmond commutes safe again.
Schedule Your Appointment
First Name*
Last Name*
Contact Me by*
EmailPhone
Oklahoma City Volkswagen
4710 NW 39th St.
Directions Oklahoma City, OK 73122
; ;
3. CHANGING THE WHEEL
Note:
Valid for vehicles with spare wheel.
The vehicle must be parked correctly before changing a wheel.
- To change a wheel, park the vehicle as far away from the road as possible on a level surface.
- Turn off the engine and turn on the hazard warning lights.
- Engage a gear or move the automatic transmission selector to position P.
- Apply the parking brake securely.
- Ask all passengers to get off. They must be located in a safe area (for example, behind a guardrail).
- Place a stone or other block under the opposite wheel.
- If you have a trailer, disconnect it from the vehicle.
- Remove the spare wheel and tool kit from the boot.
WARNING
- In the event of a flat tire, park the vehicle as far away from the road as possible. If necessary, turn on the hazard warning lights and set the warning triangle as required by traffic regulations. nine0006 - Ask all passengers to get out of the car.
- Apply the parking brake, engage a gear or put the selector in position P and place a stone or some other support under the opposite wheel.
- If there is a trailer, it must be disconnected and properly installed before changing a wheel.
- Make sure that the place where the jack will be installed is sufficiently level and firm. If necessary, a stable and relatively large additional support should be used. nine0006 - Use only the standard jack.
- Other jacks, even for other Volkswagen models, should not be used. The vehicle may fall - risk of serious injury!
- Never lift the car when it is on a slope - it is dangerous!
- The engine must not be running when the vehicle is raised - this is dangerous! Vibration from a running engine may cause the vehicle to fall off the jack.
- When the raised vehicle is only supported by a jack, do not put your hands or feet under the vehicle, otherwise there is a risk of injury! nine0006 - When working under a vehicle, use secure stands to belay, otherwise there is a risk of very serious injury!
- Never loosen the fastening bolts on discs with a screwed lock ring - risk of accident!
Note:
Remove the wheel caps before loosening the wheel bolts.
Removing wheel bolt caps.
- Take the wire puller from the vehicle tool.
- Insert the end of the wire stripper into the hole in the cap. nine0003
- Pull off all caps with a puller in the direction of the arrow.
The caps protect the wheel bolts and must be put back on after a wheel change.
Please note that security screws have special caps. These caps only fit lock bolts, not normal wheel bolts.
Note:
The hub cap must be removed so that the wheel bolts can be removed.
Changing a wheel: removing the disc cover
- Hook the puller on the hole in the cap.
- Pull off the cap in the direction of the arrow.
Note:
Valid for vehicles with full-size wheel covers.
The full size wheel cover must be removed to allow the wheel bolts to be removed.
Removing the wheel cap
- Hook the puller into one of the holes in the cap.
- Pass the wheel wrench through the puller and pull off the cap in the direction of the arrow. nine0003
- The cap must be pushed onto the disc so that the valve passes through the corresponding slot. Publishing house "Monolith"
- When putting on the wheel cap, make sure that the cap fits securely on the wheel around the entire circumference.
- Remove the wheel wrench (6) and wire shackle (4) from the vehicle tool.
To loosen the security bolts, a special adapter is required, which is included with the on-board tool.
Changing a wheel: Loosen the wheel bolts. nine0003
Wheel replacement: lock bolt and adapter.
- Push the wheel wrench onto the bolt until it stops.
- Grasp the end of the wheel wrench and turn the wrench about one turn counterclockwise.
- Take the lock bolt adapter from the vehicle tool kit.
- Insert the adapter into the security bolt as far as it will go.
- Push the wheel wrench onto the adapter as far as it will go.
- Grasp the end of the wheel wrench and turn the wrench about one turn counterclockwise. nine0003
Note:
If you cannot loosen the bolt, you can press the end of the key with your foot. At the same time, hold on to the body of the car and maintain balance. CAUTION
- Loosen the wheel bolts approximately one turn before lifting the vehicle.
- Never loosen the screw connections on discs with a screwed locking ring - risk of accident!
- Use only original wheel bolts to loosen wheel bolts.
When raising the vehicle, the jack must only be placed under the places intended for it. nine0003
Jacking points
Raise the vehicle only after loosening the wheel bolts.
1. Stop the engine, engage a gear, or put the automatic transmission selector in position P.
2. Apply the parking brake securely.
Left side rear jack position
3. Locate the jacking position under the vehicle near the wheel to be changed. On some vehicles, these places are marked with special markings. nine0003
4. Raise the jack leg until the jack can still be placed under the vehicle.
5. The jack must rest on the ground with its entire bearing surface.
6. Adjust the position of the jack and then evenly raise the jack leg until it wraps around the vertical rib - arrow below the vehicle.
7. Rotate the jack handle until the wheel is off the ground.
Note:
The jack must only be installed in the places intended for it. Near each wheel there is such a place. nine0007 WARNING
An insecure jack position can cause the vehicle to suddenly fall off the jack, resulting in serious injury. To avoid this:
- If the ground is soft under the jack, the vehicle may fall off the jack. Therefore, be sure to place the jack on a hard surface. If necessary, a stable and relatively large additional support should be used. If the surface is slippery, place something under the jack (e. g. a rubber mat). nine0006 - Install the jack only under specially designed places of the car.
- There is a danger of injury if the jack is not placed in the place intended for it! In addition, the vehicle may be damaged.
- The leg of the jack must wrap around the vertical edge of the spar so that the jack does not fall when lifting.
- If you have a trailer, disconnect it before changing a wheel.
- When the vehicle is raised only on the jack, do not place any part of the body under the vehicle (eg arms or legs) - risk of injury! nine0006 - Ask all passengers to get off. They must be located in a safe area (for example, behind a guardrail).
- When lifting the vehicle, no one should be in it.
- The engine must not be running when the vehicle is raised - this is dangerous! Vibration from a running engine may cause the vehicle to fall off the jack.
- Never lift the car when it is on a slope - it is dangerous!
- Use the hexagon in the screwdriver handle only to loosen or screw in the wheel bolts, not to loosen or tighten them. nine0007
Wheel change; unscrewing the wheel bolts with a screwdriver handle.
- Completely unscrew the loosened wheel bolts with the hexagon socket in the screwdriver handle and place them on a clean surface.
- Remove the wheel.
- Secure the removed wheel in the luggage compartment as described above.
Note:
When fitting a wheel with a directional tyre, pay attention to the direction of rotation of the wheel. nine0007
- Install the spare wheel.
- Screw in all the wheel bolts using the hexagon socket in the screwdriver handle and tighten them slightly.
- If there are security screws, use an adapter.
- Lower the vehicle.
- Tighten the bolts securely with the wheel wrench. Tighten the bolts not in a circle, but in a diagonal pattern.
- Fit the caps on the wheel bolts and the cap on the wheel.
Note:
If possible, have the wheel bolt torque checked by a workshop as soon as possible with a torque wrench: it should be 120 Nm for steel and light alloy wheels. nine0006 If, when changing a wheel, it was found that the wheel bolts were corroded and are hard to unscrew and screw in, they should be replaced before checking the tightening torque, and the threaded holes of the hub should also be cleaned.
Repair or replace the defective wheel as soon as possible.
Wheels with these tires must be set correctly.
Tires with a directional tread pattern have arrows on the sidewall to indicate the direction in which the tire rotates. The specified direction should be ensured when mounting the wheels on the vehicle. At the same time, all the advantages of such tires in terms of grip, wear, noise and aquaplaning are realized. nine0003
If the wheel is set so that it rotates against the arrows, drive carefully, as in this case the tire does not work well. This is especially evident when driving on wet surfaces. To take full advantage of a directional tyre, replace the wheel with one that has the desired tire position as soon as possible.
WARNING
- Improper tightening of wheel bolts and defective wheel bolts can cause an accident. nine0006 - When changing a wheel, make sure that the wheel bolts and their threaded holes are clean. The wheel bolts should be relatively easy to screw in.
- Never lubricate the wheel bolts and threaded holes in the hubs. Otherwise, the wheel bolts, even if tightened to the correct torque, may come loose while driving.
- Use the hexagon in the screwdriver handle only to loosen or screw in the wheel bolts, not to loosen or tighten them. nine0007
- Place the removed wheel in the luggage compartment recess and secure it with the wing nut.
- As soon as possible, check the tightness of the wheel bolts with a torque wrench.
- Repair or replace the defective wheel as soon as possible.
- Place the tire repair kit in the luggage compartment.
- If the failed tire was sealed with a tire repair kit, after ten minutes of driving, check the tire pressure. Publishing house "Monolith"
- A tire sealed in this way can no longer be used, it must be replaced.
Note:
If possible, have the wheel bolt torque checked by a workshop as soon as possible with a torque wrench: it should be 120 Nm for steel and light alloy wheels.
If, when changing a wheel, it is found that the wheel bolts are corroded and are hard to unscrew and screw in, they should be replaced before checking the tightening torque, and the threaded holes in the hub should also be cleaned. nine0006 On vehicles with a low tire pressure indicator (option), the system must be initialized after changing a wheel.
| DIY
| |||
Volkswagen Passat - Video Lesson Model: Volkswagen Passat B7 - Years 2010-2014 Let's see in this video how to remove and replace a wheel on a Volkswagen Passat. Open the trunk and take a wheel removal kit which includes: jack, jack lever, screwdriver, bolt wrench, telescopic wrench. We put the jack under the grip point of the car, that is, under the most rigid part of the frame, in order to bend the sheet of metal under the weight, substitute the protection under the wheel, loosen the wheel pins. Published 26 February 2022 by ScegliAuto | Replacing the engine battery Since this is a common operation for all types of vehicles, it is not necessary to specify the make or model. Proceed to unscrew the nut of the mounting clamp located at the base of the battery; loosen the nuts of the two-pole terminals by first pulling out the positive pole (be careful not to touch the metal parts with the terminals). After removing the battery, replace it with a battery of the same specifications (refer to the operation and maintenance manual) and move it into the housing, reconnect the terminals, being careful to start with the positive terminal to avoid sparking, and tighten the terminal nuts until tight. |