It can be very uncomfortable to have a flat tire on a riding mower. If it is partly deflated, It may affect the mower’s handling and cause it to slip on the surface, making your job more difficult. It also adds excessive load to the engine and can cause a higher fuel consumption. If the tire is completely flat, you can not use your mower until you fix it. A flat tire may be caused for several reasons. This blog post shall explore these reasons separately and explain how to fix a lawnmower’s flat tire.
How do I fix a flat tire on a riding lawnmower, step by step:
Tubeless tires do not have a separate rubber tube to carry the air inside them. Pressurized air is stored within the tire to withstand the lawnmower’s entire weight and the individual himself. The air pressure inside the tires can fall due to a variety of reasons. The tire can be punctured by a sharp object that allows the air to leak out. Generally, in winters, low temperatures enable the air to condense within the tires, resulting in a pressure drop. In all these situations, the tires should likely be filled with air.
To further elaborate on the steps listed in bold, we suggest going through the whole post.
Contents
/cdn.vox-cdn.com/uploads/chorus_asset/file/19493887/howto_storemower_02.02v1_copy.jpg) 2.1 – Punctured tire with an inner tube:
2.1 – Punctured tire with an inner tube:We shall focus on the procedure for repairing a flat tire along with other issues that can occur with a lawnmower tire.
There may be two main ways to conduct a tire inspection. You should visually inspect the tire to see if any tire is flat and needs to be fixed. You can also measure the air pressure within each tire to see where more air needs to be pumped.
You can need a pressure gauge to calculate the value of the air pressure within each tire. You may do this by connecting the pressure gauge to the stem of the valve.
If you have an air compressor at your side, it has a pressure gauge mounted, so there is no need to buy one separately. The prescribed pressure value is generally indicated on the side of each tire. If not given, you can check the manufacturer’s suggested value set out in the lawnmower manual.
Determine the air pressure inside all four of the tires. If the value falls by a large amount short of the recommended value, you may need to pump air inside it. We’re going to come to that step later.
Suppose any tire appears flatter than usual; attempt to bend over it and press it. If you can press it comfortably, you need to pump the air inside.
Some more expensive riding lawnmowers have a tire pressure monitor that will warn you when the tire pressure is lower than it should be. There are also aftermarket systems you can add to your machine.
Search for sharp objects such as iron nails, pins, glass splinters on each tire tread area. If this is the case, the tire is punctured and needs to be fixed before inflated with air.
You might come across a situation where the tire has fallen completely off the surface, and the air inside has leaked. In all these cases, it is important to repair the tire first before filling it with air.
Here, we’ll clarify how to patch tires that have either been punctured or lost contact with the rim. If your tire isn’t damaged, you can switch directly to step 3. Start with checking the type of tire you have. There are two main tire types: tubeless tires and tires with an inner tube.
If you use a tire with an innter tube, it makes the most sense to remove the inner tube and check it for leaks. It is possible to use a sealant with an innertube, but it is not advised. If you have removed the inner tube, you can inflate it and use water or soap water to locate the leak. If the area is not too big, you can fix it easily with some glue and an inner tube patch. Do not forget to check the valve as well. If you have found the hole, it is easy to fix. Always check the tire itself for any sharp object. You know the location that you just patched, so it is easy to find the area on the tire itself as well. Check carefully on the inside of the tire with your hand and remove the culprit. If the area on the inner tube is considerable, it is better to replace the inner tube.
If a sharp object, such as an iron nail, is stuck inside a tire, it can cause air leakage. To check there is an air leak, you can pour soap water at the puncture site to see if any air bubbles are developed. Please be careful that you do not withdraw the punctured region’s sharp object until the opening has been repaired. You should follow the steps below to patch the punctured tire:
 Now, tie the air compressor hose to the valve and inject some of the air into the tire. Pressurized air distributes the sealant to where the puncture has been created and allows the hole to close.
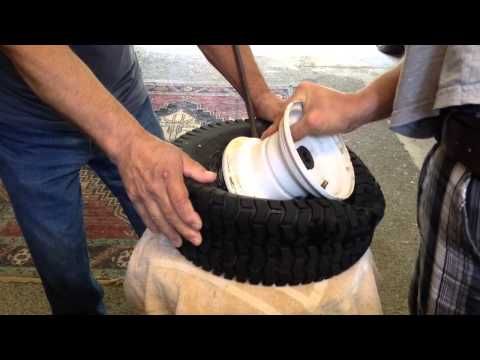
In the case of tubeless tires, it is possible that if your tire loses contact with the rim due to a strong cornering force, it loses all its air. It usually occurs when the tires are old and near the end of their service life. However, if you’re trying to repair this tire, you can follow the steps mentioned:
 Rotate the rod to twist the cord. The more you twist the rod, the tighter the rope gets, and the more you squeeze the tires’ treads. This force causes the rubber to press against the rim.
With the air filled within the tire, the rope can be withdrawn, and the tire is all ready to be used again.
After the tire has been repaired and checked for any damage, we can pump air inside the tire. For this action, you should follow the following steps:
The rule of thumb is that the sealant should be replaced every six months. The sealant appears to dry out over time and may split if the tires are pushed to a bumpy surface. In these situations, you don’t need to extract the old sealant unless there are clumps that can be picked up by hand.
In most riding lawnmowers, tubeless tires are used. Such tires do not have an inner tube, and the rim locks the beads in place. There are the following pros and cons:

You can replace your tubeless tires when they are fully worn out and no longer provide enough traction. When the tire is either leaking air right after it has been filled or torn by a knife or a very sharp rock, it should be replaced.
You should regularly check the tire pressure of your lawnmower. The best would be at the beginning of each mowing season, but at least monthly. We always suggest that the tires be filled to the specified amount and not more than that, as they should cause the tires to burst. Refrain from driving the mower when the tire is flat as it is uncomfortable and overloads the engine. If you’ve ever ruptured your tires before, make sure to keep filling them with sealant every six months as the old sealant becomes ineffective after that.
As an Amazon Associate we earn from qualifying purchases made on our website. If you make a purchase through links from this website, we may get a small share of the sale from Amazon and other similar affiliate programs.
Getting a flat on your lawnmower tire can be such a pain. And repairing the tire can be even more of a pain! There are plenty of options to find out how to fix a tire online, but the sheer amount of options from YouTube to forum sites may cause a headache.
To help ease your brain from ensuing headaches, I have compiled a list of three ways to repair a tire and the types of equipment you will need to repair your tire. This will put you on the right track.
For every tire, including lawnmower tires, there is a point of no return when a tire cannot be repaired. It is essential to know the difference between what can be fixed and what cannot be fixed. That’s why this article has a section dedicated to what tire damages and mishaps cannot usually be fixed using these three repairing strategies.
If there’s a small hole caused by an impaled object on your tire, one of the best ways to repair it is by using tire sealant.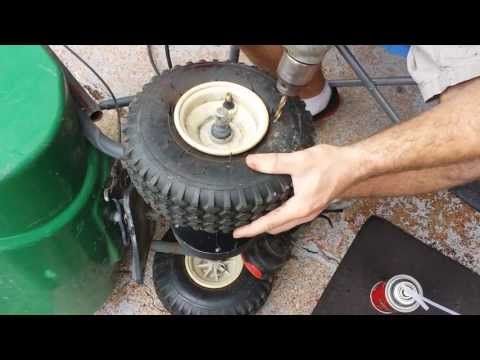
Using sealant to repair a lawn mower tire is ideally a straightforward process. But there are a few different types of sealant to choose from, so knowing the right one to choose is vital.
Pressurized sealants cost around the $6-12 range, so you won’t have an empty wallet trying to look for one. Pressurized sealants are cheap and only made for one-time use.
Liquid sealants, which pour into the valve stem of a tire wheel, cost a little bit more, around $9-12. You will need a compressor or portable tire inflator for the liquid sealant to work correctly.
Tire sealant kits come with a compressor, and they can cost in the $30-80 range. I would recommend getting a sealant kit over the other options. The kit provides the compressor that liquid sealants need and inflates the tire unlike what most pressurized sealants claim they do.
If you need recommendations on what type of tire sealant is the best, check out Consumer Reports’ tire sealant review page. Consumer Reports gives excellent micro-reviews on which sealants are capable of filling 2.4 mm and 5.8 mm tire holes. They also list the price of each sealant, so you don’t have to look it up.
Before you do any work, DO NOT pull out the object that is causing the hole in the tire at first. This will cause the sealant to be unable to seal the hole. You can pull the object out of the tire after applying sealant, as shown in the directions later.
Some sealant bottles may come with a chart to tell you how much sealant you should use for the size of the tire you’re fixing. Make sure you look at the chart to see how much sealant you should use or else your tire will not have enough sealant, and the leakage will happen again.
Tools Needed:

Directions
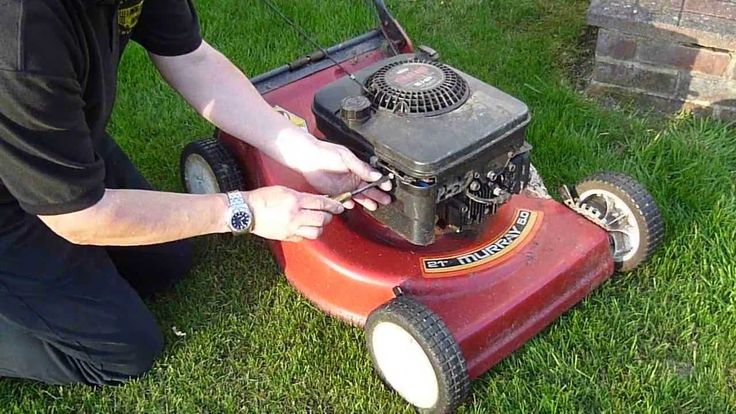 Remember, if you are using the liquid sealant, you will need a compressor or tire inflator.
This video here from TireJect explains the process step by step.
A tire plug kit is another way to fix a hole in your tire. Usually, tire plug kits come with a reamer/plug tool, some plug wires which block the hole, and some contact cement.
To plug a tire, the tire needs to be removed from the car, so a floor jack is necessary. Here are some of the tools you will need to patch up the tire.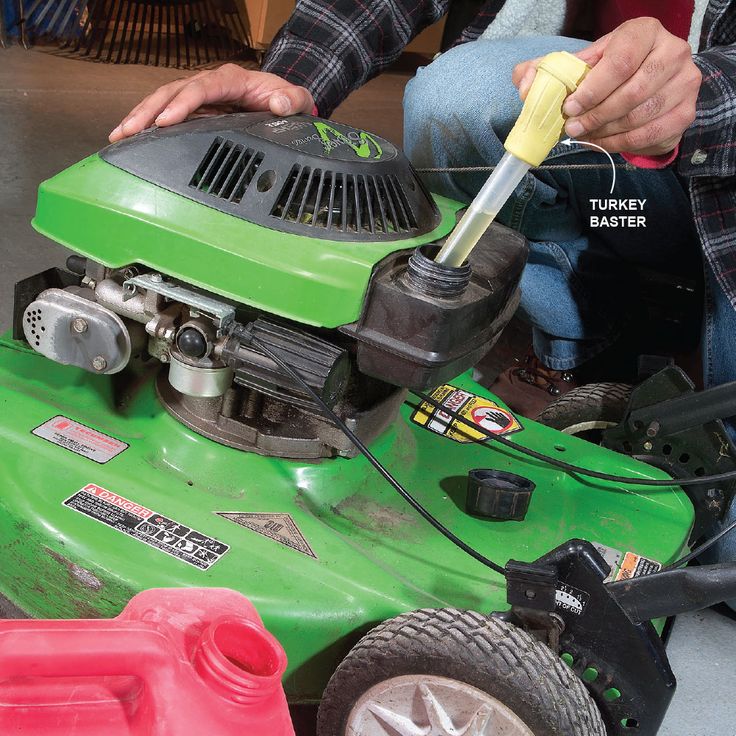
Tools:
If you don’t have a tire repair kit, make sure to have these individual items on hand:
Removing a Tire from a Lawn Mower
To plug the tire, you’ll first need to take it off the lawn mower. Follow the directions below to ensure you properly remove the tire, which will also help make sure it goes back on properly.
Directions:
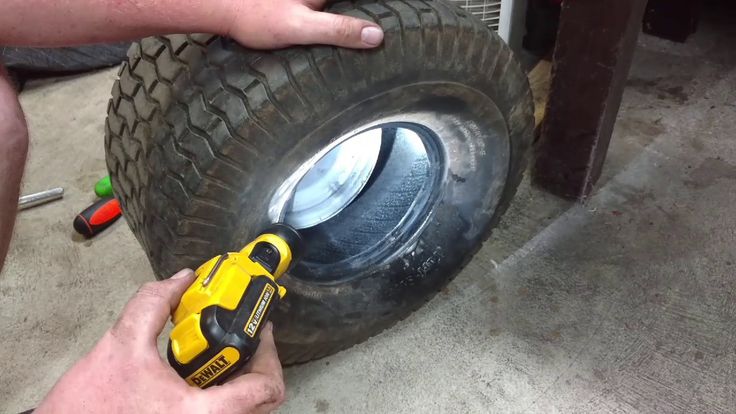 If you are working with a rear tire, use wood planks on the front tires.
Now that the tire has been removed from the mower, it is time to patch the tire using a tire plug kit.
Directions:
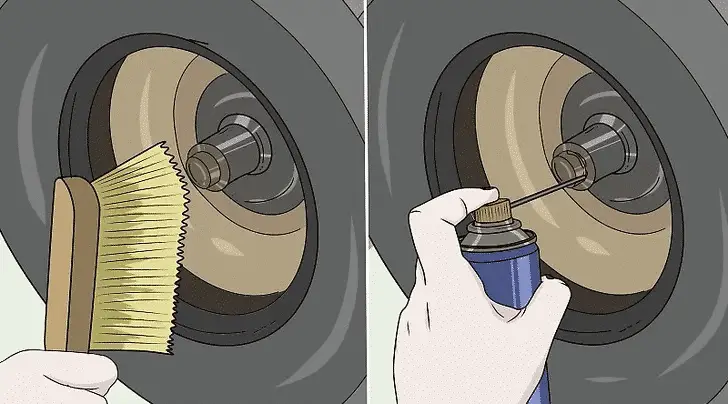
Helpful hint… I have seen videos on YouTube where people have poured the contact cement on the plug after inserting the plug in the plug tool. This also works.
 Like what you have done with the reamer in step 3, make sure you use a lot of force to push the plug into the hole.
This video here expains the process quite well:
Reinstalling the Tire

Patching a tire is considered the most efficient way to truly repair your damaged tire and can usually fix larger holes than plugs and sealant. The reason why patching a tire is considered the most efficient is because patching doesn’t just check the outside of the tire, but the inside as well.
When a tire has a hole in it and begins to lose air, the sidewall starts to deteriorate, leaving black dust from the sidewall on the inside of the tire. This can be prevented by patching a tire.
If you plan on patching a tire, prepare yourself. Patching a tire is easily the most challenging tire job out of the three ways to repair your tire in this article. You know the saying: hard work produces the best results.
But, the sidewall itself can’t be patched. Any damage to the sidewall itself, whether it’s from an outside source of weakening from within, will require a new tire.
Much like using the tire plug kit, patching a tire requires a floor jack to remove the tire from the lawnmower. Patch kits take things one step further, though. Removing the rim of the tire is a crucial step. You will find out how to do so here!
Tools Needed:
To save you some more time, we’ll start these directions after removing the tire from the lawnmower. Look back at the directions for “Removing a Tire from a Lawnmower” to learn how to do that properly.
Directions:

Helpful hint: Not all bead breakers are the same. Some may require a hammer to break the bead while some do not.
Directions:

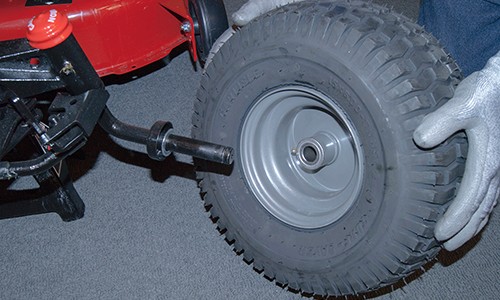
Lawn mower tires tend to last five years. Sealants, Plugs, and Patches are all perfectly fine ways to repair and expand your tire’s life expectancy (though I believe patching to be the most efficient).
But, there are points where tires have reached the point of no return. Car owners need to know when that point has been reached. Look below for more details!
To check for dead tread, insert a penny into the groove with Lincoln’s head right side up. If you can see all of Lincoln’s head, you should probably replace your tire.
You can fix a flat lawn mower tire on your own, as long as it’s not too far gone. Using sealant, plugging, or patching a lawn mower tire are each effective in their own right. It’s essential to fix the flat tire before any permanent damage is done.
The sidewall can become damaged if there’s a leak in the tire, and that is not a DIY fix. Keep an eye on your lawn mower tires and be ready to replace them about every five years.
Are you a landscaping enthusiast and want to help me grow Landscapingplanet.com? I am looking for writers! Just send me an email at [email protected]
Regular use of the lawn mower requires not only care for it, but sometimes repairs. In many cases, you can restore the performance of the lawn mower yourself. Husqvarna produces three types of lawn mowers - electric (powered by a 230 V household power supply), battery and gasoline. The first two types do not require gasoline and are easy to operate and maintain. But they also have problems with mowing the grass.
1. Lawn mower motor does not turn on. The engine is started with a single ON/OFF key on the control panel. If the engine is not running in the ON position, the battery may be discharged or there may be no mains power. The battery status will be shown by the battery level indicator LED and if it is low, it will need to be recharged. In the network model, use a multimeter or an indicator screwdriver to check for voltage at the power cord jack. If it is missing, the cable itself is checked, which must be de-energized. After replacing the damaged section of the cable and checking the voltage, you can get to work.
2. Irregular motor operation. Check for contacts that may have oxidized and become poorly conductive. Contacts should be cleaned with sandpaper and degreased. Then a special conductive grease is applied to the contacts, which will protect the contacts from oxidation.
3. Reducing the speed of rotation of the knives. When mowing long grass or hard grass, the cutting attachments can become clogged with grass. Remove the battery and disconnect the network cable. Take a small stick and clean the area around the knives from the compressed grass.
4. Poor mowing. The grass is not cut, but knocked down with knives. This indicates that the knives are dull. Completely turn off the power supply and remove the lawn mower blades. We fix the knife in a vise and sharpen the blades with an abrasive bar. Blade sharpening angle 25 - 30°.
Gasoline powered lawnmowers most commonly experience problems common to all internal combustion engines.
1. The engine does not start. Is there fuel in the tank? If there is, then the fuel mixture must correspond to the proportions of the manufacturer. Then we turn out the spark plug.
• Wet spark plug (splashed with mixture). This indicates an excess of fuel mixture, due to incorrect carburetor settings. The candle should be thoroughly wiped, and pull the starter cord several times with the candle turned out. This will clear the combustion chamber of excess mixture. Carburetor adjustment is carried out in accordance with the Operation Manual (section "Maintenance. Carburetor").
• dry plug. The fuel mixture does not enter the carburetor. So the problem is not the ignition. We check the candle for the presence of a spark and if it is, then we check the fuel supply. With a weak supply or its complete absence, we replace the fuel filter, which is removed from the gas tank through the filler hole.
• Spark plug covered with soot. Incorrect carburetor setting or incorrectly prepared fuel mixture. The turned-out candle is cleaned with an awl and sandpaper. The space between the central electrode and the threaded part is cleared with an awl. The side electrode is cleaned with sandpaper. Set the spark gap (gap) between the central and side electrodes. The gap is in the range of 0.5 - 0.65 mm. A damaged sealing copper washer should be replaced. Putting a tip on the inverted candle and pulling the starter, check for a spark. If there is no spark, the candle is replaced with a new one and if the spark does not appear, check the high-voltage wire.
2. No required power. If the engine does not develop enough power, then it is most likely that the necessary pressure is not created in the engine cylinder for combustion of the fuel mixture. Most likely, the reason lies in the wear of the cylinder-piston group - the piston, piston rings or crankshaft liners. For a more accurate diagnosis, a compression gauge is inserted into the candle hole and with its help the compression pressure is measured. If the pressure is lower than required, then the piston group must be replaced.
3. Engine smokes. If the engine runs normally at low speeds, but smokes and stalls at high speeds, then the problem may be in the muffler. It should be removed and the spark arrester mesh cleaned with a metal brush. It is advisable to wash the muffler with a special detergent, dry it with a hairdryer and put it in place.
4. The motor is overheating. Long-term operation with a clogged air filter results in insufficient air intake. Remove filter and blow out with clean air. Put the filter in place. In case of severe wear and damage, the filter is replaced.
Simple advice.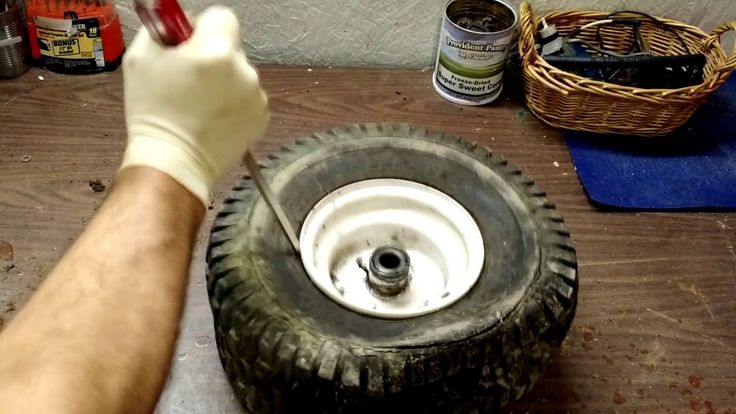 The lawnmower is a long-life gardening machine, and following the "Maintenance Schedule" (see the Lawnmower Owner's Manual) will help to avoid breakdowns and other problematic issues.
Go to Husqvarna lawn mowers
Lawn mower repair
Combustion engine lawn mowers are the most convenient and popular in the home. Unlike electric units, they are self-contained and do not limit the working area by the length of the power cord.
However, like any complex mechanical device, petrol lawnmowers periodically fail or simply malfunction. Below we will look at the most common breakdowns of lawn mowers powered by four-stroke internal combustion engines.

As far as engine failure or seizure problems are concerned, they are practically non-existent in the cart-type lawn mowers we are discussing in this article. These malfunctions are more likely to be inherent in hand-held gasoline scythes and account for almost half of the reasons their users contact service centers.
If the lawn mower stubbornly refuses to start, and for some reason you do not want or cannot contact the service shop, then try to follow a simple troubleshooting algorithm. As always, use an effective search method, moving from simple causes to more complex ones.
1. Check engine pressure (compression) . To do this, you will have to acquire a special device in advance - a compression meter for measuring the parameters of lawn mowers. Normal engine compression should be in the range of five to eight atmospheres (all depending on the individual characteristics of your engine).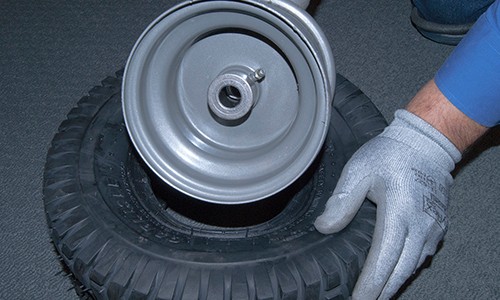 The compression parameters of your unit should be specified in the accompanying technical documentation. If the compression level is much less than the specified one, then your piston system is out of order, it requires a deeper study, repair or replacement of its elements.
2. lawnmower engine stuck. Although this type of fault is much less common in cart-type devices, it cannot be completely ruled out. Basically, engine jamming occurs due to gross violations of the operation mode of lawn mowers. But if this did happen, then repairing the lawn mower in a service center will cost you a lot. Therefore, always carefully read and follow the manufacturer's recommendations for the operation, storage and maintenance of the device.
3. Lawn mower starter failure . Checking the functioning of the starter is quite simple: you just need to try to pull the starting cord out of the lawn mower. If it does not pull out, try unscrewing the top cover of the mower along with the trigger and try to pull the cord out again.