While a tubeless setup is certainly less likely to puncture than a tubed tire, there is still a possibility for air loss. Therefore, you should be prepared with the correct knowledge and tools to fix a tubeless puncture on the trail and at home. Here are the most common tubeless issues you might encounter and how to fix them!
Never heard of tubeless? In our ultimate guide to MTB tubeless, we explain everything you need to know about tubeless setup, tires and much more!
There are a host of different scenarios that lead to a puncture or air loss on the trail but in the end, you always have one goal: seal the system so it can hold air again. With a tubeless setup, this job is often quickly taken care of by the sealant, meaning small thorns etc aren’t that problem. IMPORTANT: renew your sealant every 6 months (or every time you change a tire) to make sure it is able to work as effectively as possible.
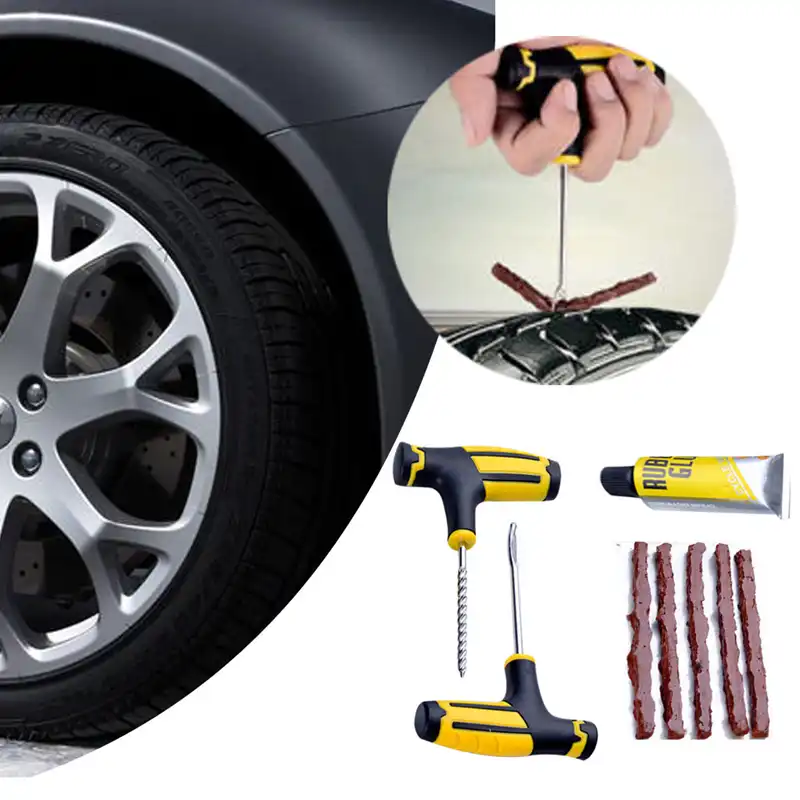
Depending on the severity of the problem, fixing a tubeless puncture can take less than a minute with the right tools. You will need a mini-pump (or Co2 cartridge and inflator), a tubeless tire plug set (click here to read our tire plug group test), a tire patch and a tube for the worst case. Luckily, it is possible to store all of these tools without needing to wear a backpack. They will easily fit into a hip pack (we tested 24 in a big hip pack group test), or even on your bike.
Fixable on the trail? Yes
Time needed for repair: 1-5 minutes
This kind of puncture is caused by small thorns, sharp rocks or nails etc on the trail.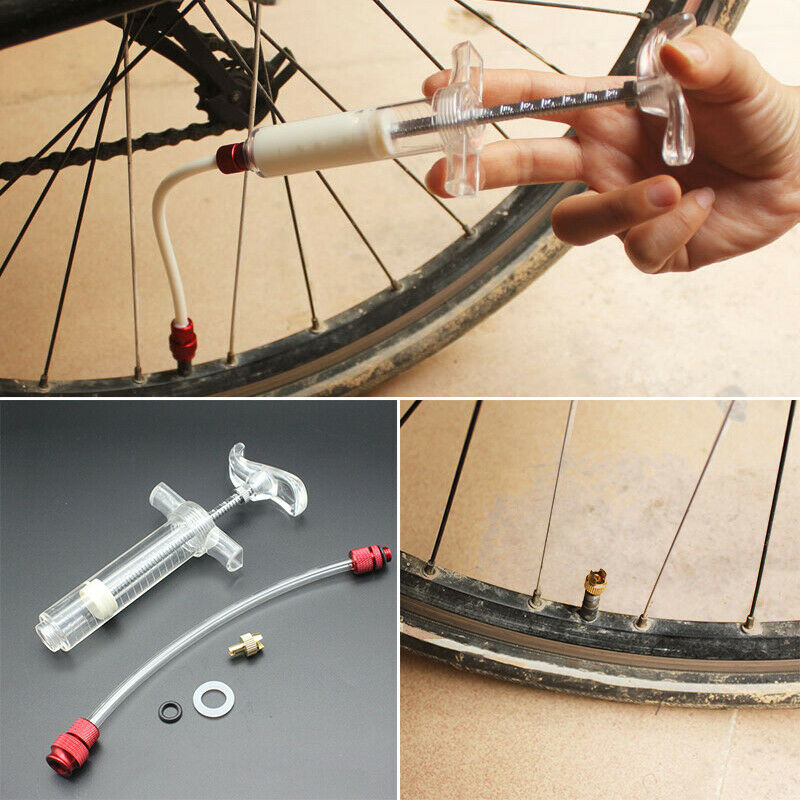 It is probably the most common tubeless puncture, and luckily also one of the easiest to fix. In fact, you might have already punctured on the trail without realising, as the tubeless sealant in your tires often seals these small punctures immediately. If, however, the hole is too big for the sealant to fix on its own – often caused by a pinch flat – you will need a tubeless plug kit. The first step is to find the hole (or holes) and wipe away any surrounding dirt. If you are riding in a group, ask a buddy to keep their finger over it to minimise air-loss. Then, quickly thread the tire plug through the plug installer.
Depending on the size of the hole and the plugs, there are two techniques to plug the tire. For smaller punctures, push the plug into the hole until it fully disappears inside the tire. Then carefully pull the installer out, until 5-10 mm of the plug is visible.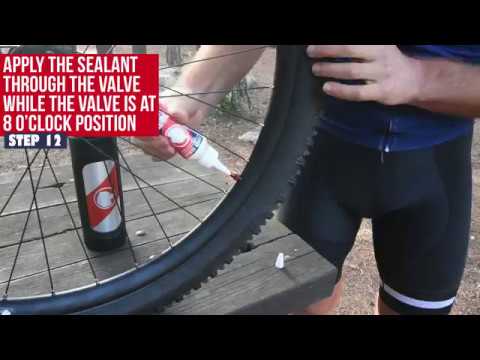 Use your fingers to hold the plug in place and remove the installer. If you are sealing bigger punctures with larger plugs, push the plug into the tire just over halfway, so that a “V” shape is left, and remove the installer.
Once the plug is installed, spin the wheel to let the sealant coat the tire and re-inflate if needed. In our experience, if installed correctly, tubeless plugs can last the lifetime of the tire and do not need to be removed. However, it is worth trimming the exposed plug to prevent it from ripping out under heavy braking.
Fixable on the trail? Yes
Time needed for repair: 1-5 mins
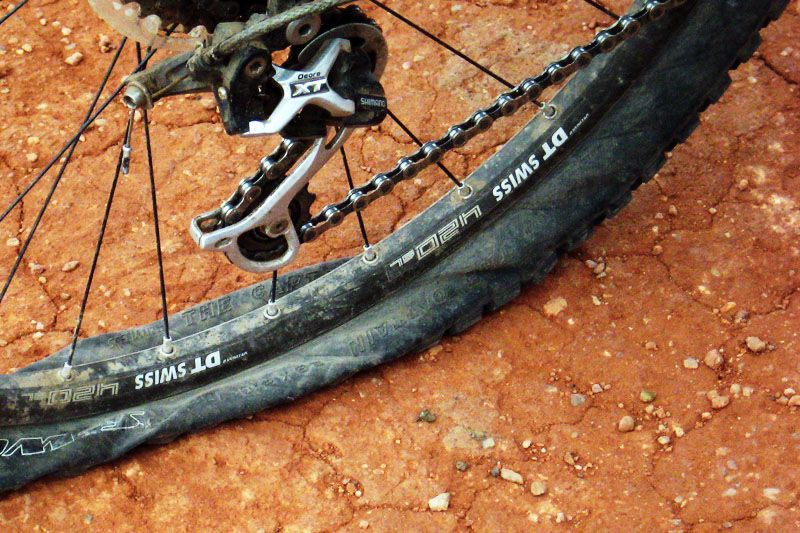
You’re flying down the trail, pushing around a tight berm and suddenly hear a loud “braaaap”! Your rear tire is not leaking, but it has definitely lost air… What happened?! You have rolled the tire so hard across the rim that the tire bead has pulled away from the rim, briefly letting a lot of air escape, before popping back in place and closing the gap between the rim and tire.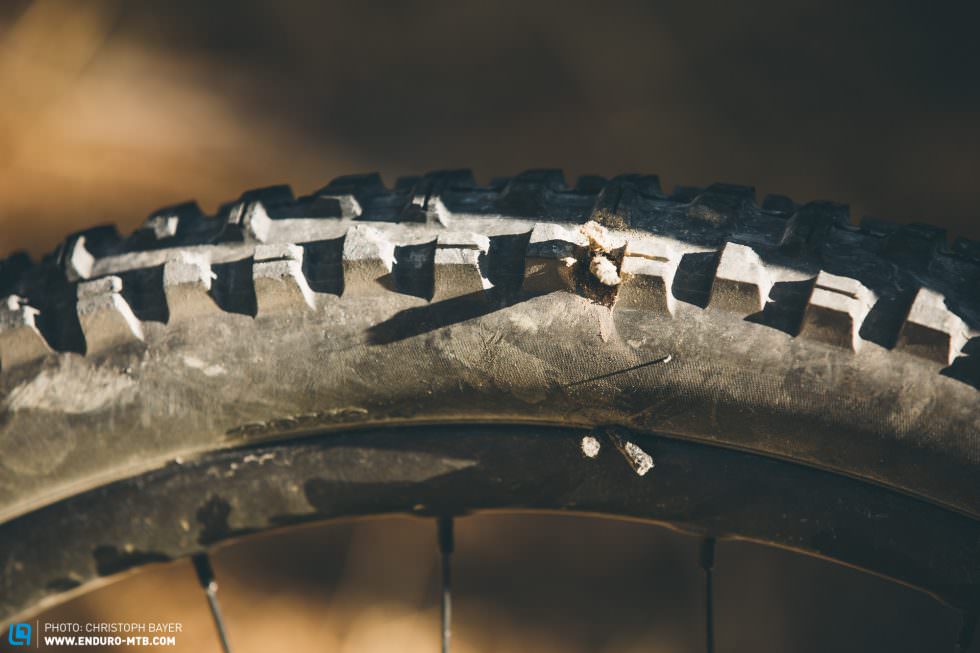 In short, you have burped a tire. There are two possible causes: either you were running very low tire pressure, compromising your tire’s stability or you just hit the turn really really hard. Either way, the fix is simple. All you have to do is re-inflate the tire and keep riding. We recommend checking out our Tire Pressure Guide to find your perfect pressure and prevent burping in the future. You should also top up your sealant before your next ride, as you most likely lost some during the burp. If you burp on a regular basis, even with high tire pressures, you are very likely running a tire that is too wide for your rim width.
Fixable on the trail? No, install a tube and fix at home
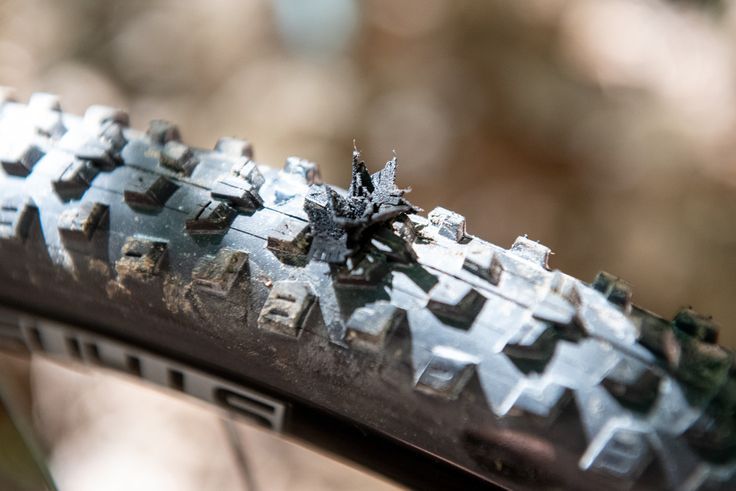
A cut sidewall is usually caused by long, sharp rocks which cut a long slit into the tire. These punctures are too big for tire plugs and sealant to seal. Your only option is to install a tube and ride home. If the cut is really big, try protecting the tube by sticking some tape or plastic etc in between the tire and the tube.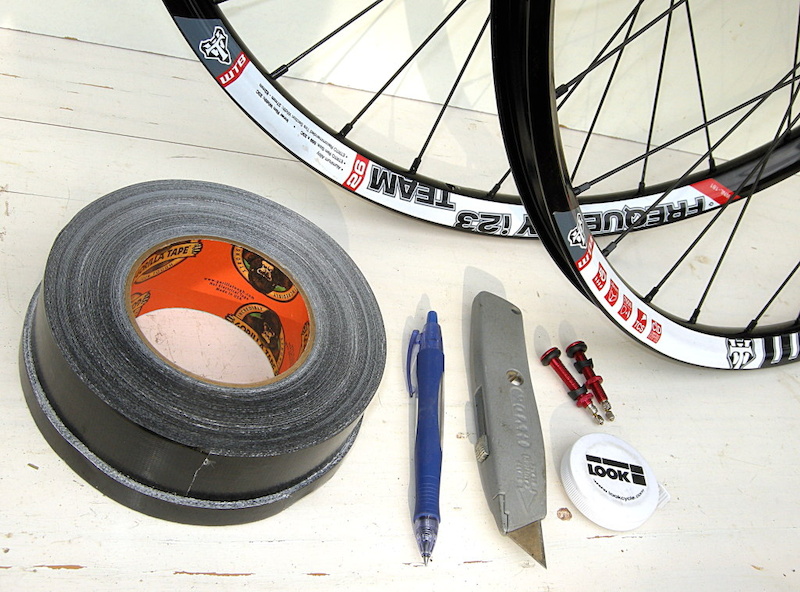 Depending on the severity of the damage, you can try fixing the tire at home by thoroughly cleaning the tire inside and out, roughening up the inside of the tire with sandpaper and applying a tire patch with vulcanising glue. Otherwise, the tire is a write-off.
Fixable on the trail? No, install a tube and fix at home
Time needed for repair: 20+ mins
If a spoke punctures through the tubeless rim tape, you will quickly start losing air through the spoke holes. Unfortunately, there is no easy fix and you will have to install a tube to get you home (make sure the spoke is not protruding into the rim bed!). In order to fix the issue at home, remove the tire and the rim tape and clean the rim thoroughly. If spoked snapped, replace it… Make sure you know why the spoke punched through the tape: check for even spoke tension and make sure your rim is an intact running true. Re-tape the rim (with new tape) and set up tubeless. Check out our Ultimate Guide to Tubeless for everything you need to know!
Fixable on the trail? No
If your rim is damaged and leaking air, it’s time to (carefully) head home.If you have dented your rim and it is losing air, the only option is to install a tube and carefully ride home. Make sure to thoroughly inspect the rim first – if the damage is too bad you will have to walk back.
Fixable on the trail? Likely
Time needed for repair: 5-10 mins
If your valve is leaking, try tightening the lock-nut that holds it in place. Sometimes they rattle loose, causing the leak. Admittedly, we all have bent or somehow messed with our valve core trailside. When releasing air for example… If your valve core is broken, no need to panic.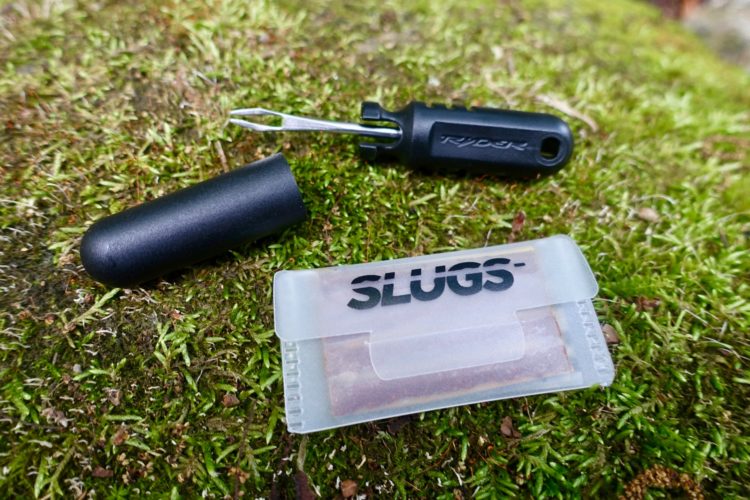 You often carry one around inside your spare tube without even knowing! Remove the core from the spare tube, carefully remove the one from the tubeless valve (this will let all the air out of the tire) and install the spare valve core. Pump the tire back up and ride on.
Are you doing everything right, yet still ending most rides in deflated disappointment? You are probably running the wrong tires! Luckily, we have put together a massive tubeless MTB tire group test, so you can find the perfect tire for your bike!
With the correct setup and tire choice, tubeless punctures are very rare. However, if you are caught off-guard and puncture, we hope the tips above will get you back onto the trail ASAP. Tubeless punctures are not scary, and definitely not a reason to stick with a tubed setup. Remember, you can always install a tube and ride home!
Did you enjoy this article? If so, we would be stoked if you decide to support us with a monthly contribution.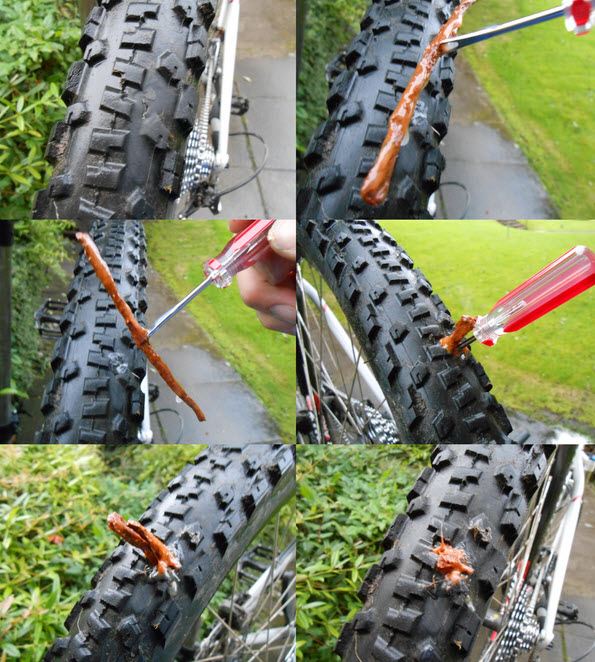 By becoming a supporter of ENDURO, you will help secure a sustainable future for high-quality mountain bike journalism. Click here to learn more.
Words: Finlay Anderson Photos: ENDURO Team
It’s pretty rare to get a flat tire when you have a tubeless setup. The sealant inside your tires will quickly seal small holes and cuts to keep you rolling on the road or trail. However, flats are always possible – even with tubeless. Whether you’ve discovered your tire is flat after storing it in the garage, or you lose pressure after a sudden impact with a rock, we have you covered with the tips you need. Check out our guide to fixing your tubeless flat and getting back out on your ride.
You also might need:


PRO TIP: Opt for plastic tire levers over metal ones. They won’t scratch the surface of your rim and they are lighter and easier to carry!
 If you find a large hole or gash in the tire that cannot be fixed with sealant alone, you’ll need to patch the tire and you might even need to install a tube until you arrive home.
PRO TIP: If the last bit is super tight, start back at the top and use your hands to wiggle the tire into the center of the rim. Just like you did at the beginning to loosen the bead from the rim, this creates extra slack in the tire and will make it easier to get onto the rim. While you wiggle the tire push down. When you get to the bottom, you might be able to pop that tire on with your bare hands!
 Then, just give it a spin and squeeze your brake to make sure everything works like it should. Nice job!
How to Choose the Right Saddle
How to Store Multiple Bikes and Gear in Small Spaces
How to Adjust Your Suspension on the Trail
How to Adjust a Dropper Post
How to Set Up Mountain Bike Suspension
Get Your Printable Fix-a-Flat Zine
How to Fix a Flat Tire | Tubeless
How to Fix a Flat with a Tube
Top Five Bike Maintenance Tips
What to Pack for an Epic Mountain Bike Ride
How I Became a Professional Bike Mechanic
How to Use a Torque Wrench
How to Select Mountain Bike Tires
How to Select Road Bike Tires
How to Perform a Safety Check on Your Bike
The Importance of Proper Bike Fit
How to Prep Your Bike for Riding in the Rain
How to Replace Disc Brake Pads and Rotors
How to Cut MTB Handlebars
Trailside Bike Repair Fix Guide
How to Setup Tubeless Tires
How to Silence Common Bike Noises
How to Replace Handlebar Tape on a Road Bike
How to Pack and Ship a Bike
How to Wash a Bike
How to Adjust a Bike Derailleur
How to Repair a Broken Bike Chain
How to Make a Wall-Mounted Shelf to Hang your Bike
How to Make a Bike Hook out of Pipe Fittings
How to Carry a Yoga Mat on a Bike
Removing and Reinstalling a Bike Wheel for Transport
How to Navigate the Subway with a Bike
How to Lock your Bike in a City
Parts of the Bike
How to Fix Squeaky Disc Brakes
Bike Safety | Hand Signals and Riding Tips
Cycling at Night: How to Light Up Your Bike
 Step by step guide to plugging, patching and sewing tires
 5/5 - (1 vote)
Tubeless technology has revolutionized riding both on and off road, but it is not completely safe.
Tubeless tire sealant designed to quickly seal small holes, often without your knowledge. However, sometimes the size or location of the puncture requires more than sealant.
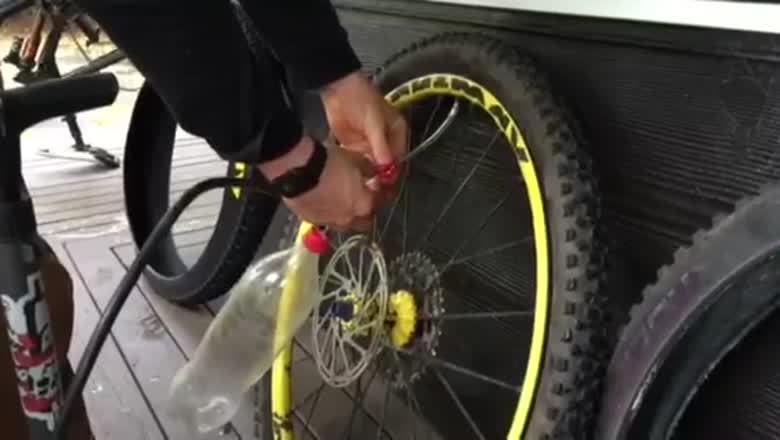
Tubeless punctures are often easy to find: look for leaking sealant or listen for the hiss of escaping air.
Here's how to repair a tubeless tire puncture using tubeless plugs, patches or sewing.
Contents
Tools needed to repair a tubeless tire puncture.
To repair a tubeless tire puncture you will need
You may also need:
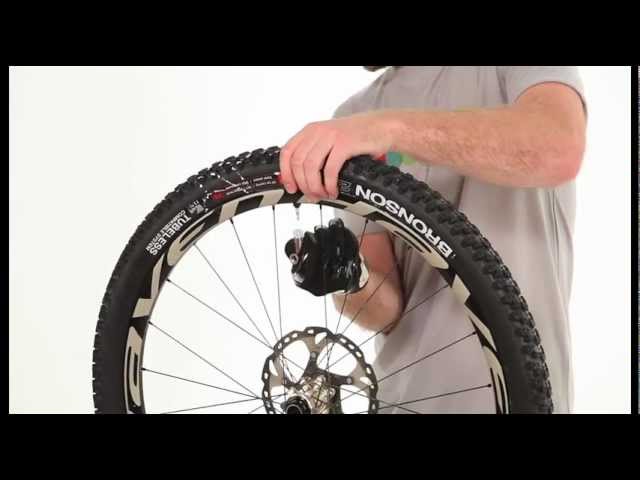
Tubeless puncture plugs are a quick and effective solution. With them, you do not need to remove the tire - just plug it in, pump it up and go.
While there are many tubeless repair kits, most work in a similar way, using a rubber plug to fill the hole.
Carefully rotate the tubeless plug tool as a reamer to prepare the plug piercing.
Select tubeless plug size according to puncture size.
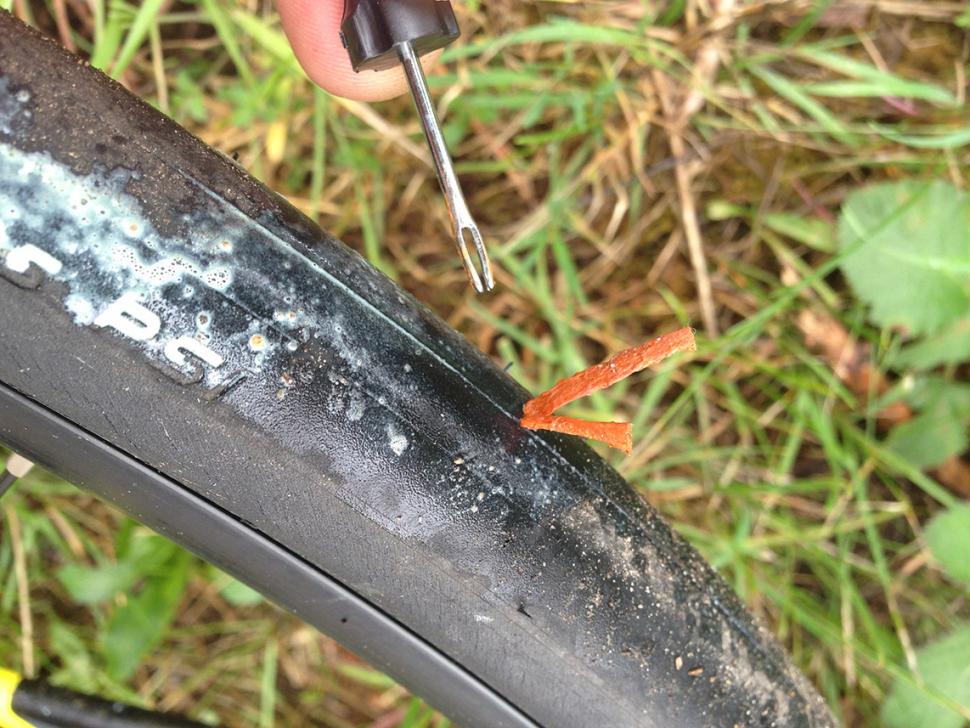
Carefully use the tubeless plug tool to insert the plug without damaging the rim tape or losing the plug from the inside.
Tubeless plug tails must be visible from outside when installed.
Trim the open ends of the tubeless plug carefully to avoid damaging the tire.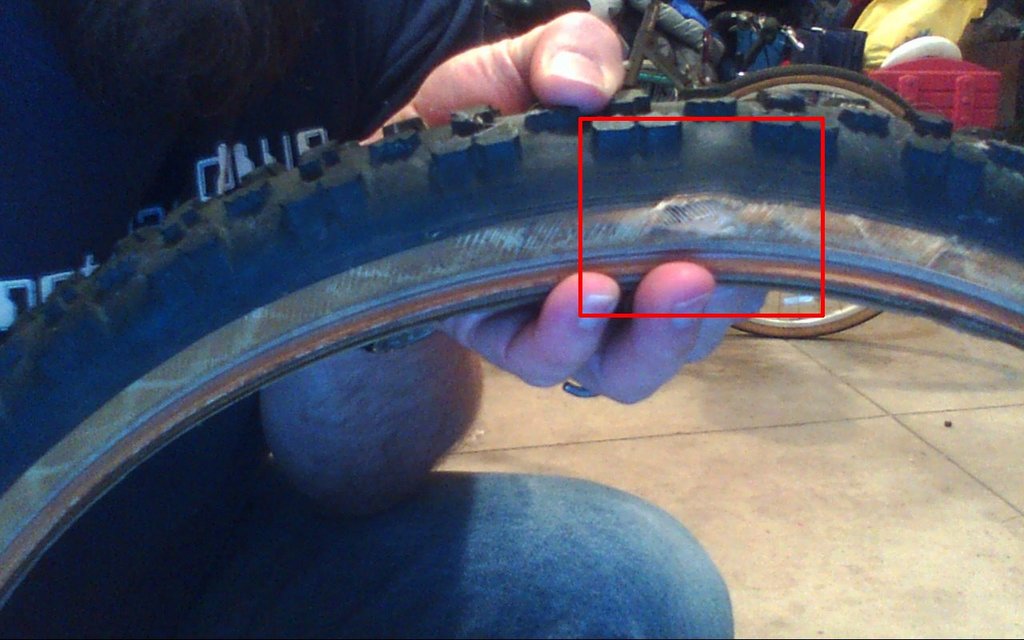
Tubeless cork may be barely visible in the tread after cutting.
After finding the puncture site, remove any obstructions (you can put small pliers in the tool bag for this).
Next, use a tubeless plug tool to make sure the hole is large enough to insert the plug - carefully insert the spike into the tire so as not to damage the rim tape and twist to make a clean round hole.
Insert the tubeless plug through the head of the tubeless plug tool. Most tools come with different plug sizes to match the size of the hole.
With the plug in the center of the tool, insert it into the bar without pushing it all the way through.
Then carefully turn the tool and slowly remove it, leaving the two ends of the cork outside the tire.
Inflate the tire to the desired pressure, being especially careful with high pressure road tires, and turn the wheel so that the valve is on the ground for a few minutes before driving again. This will allow the sealant to seep into the repair area and completely seal it.
You may need to cut off the remaining pin tails, but be careful not to cut them too close to the bar.
For more severe tubeless punctures that cannot be repaired with cork, internal patching may be required. This process is very similar to patching a camera.
A small piece of sandpaper or metal can be used to roughen the area where you want to place the patch for better adhesion.
Add the vulcanizing rubber solution to the affected area and wait until it becomes tacky before applying the patch.
Added tubeless tire patch to prevent air leakage from inside the tire.
First sand the surface to which the patch will be bonded, making sure there is no debris from the puncture. Cleanliness is key when patching.
Add a small amount of vulcanizing rubber solution to the patch site and wait until it becomes tacky according to kit instructions.
Apply the tubeless patch and press firmly. Avoid touching the bonded surface as this may contaminate the adhesive.
Depending on the type of patch, it may take several minutes or hours to dry, then install the tubeless tire as normal.
If repaired successfully, a patched tubeless tire can last for many trips, often to the end of the tire's life.
A blown tire can be a cyclist's worst nightmare. These repair options should be seen as a way to help you get home before your new tire is fitted, not as a long-term solution.
A tire liner can be placed on the inside of a tire without any adhesive, held in place by adding an inner tube.
Larger tread or sidewall section may be harder to fix and will require insertion and/or sewing to get home.
If you don't have a tire case, you can use a few different things to improvise. Money bills or parts of a tube of toothpaste work well.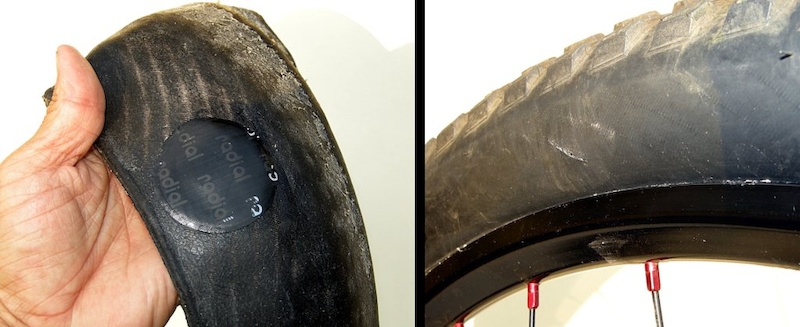
A dozen in your toolbox can save you more than once!
This flat liner provides a flat inner surface to prevent the tube from popping out of a cut tire. You can buy pre-made liners or make them from a variety of materials: tubes of toothpaste, a piece of camera or banknotes all work surprisingly well.
If you don't have an insert but have floss and a needle, you can mend a torn tubeless tire.
To sew the tire, you will need a strong thread and a needle, such as thick nylon or dental floss.
Using stitches perpendicular to the cut will help hold the tire shell together before you insert the tube.
If you're using this method, it's a good idea to add something between the crosslinked rubber and the inner tube, such as a strip of strong electrical tape.
If you are going to the mountains for a long bike trip or a tour, take a needle and thread with you - a good idea for repairing tires and any other fabric.
No matter how hard you try, there's always the chance that a tubeless tire can't be fixed on the road or on the trail. Inserting a tube can be a hassle when the sealant is already in the tire, so this is usually a last resort.
Carefully check the tire for punctures or damage such as studs before installing the tube. Just because you've found one spike doesn't mean there aren't others in the rubber just waiting to puncture your tube!
Snakebite punctures can also occur in tubeless tyres, so make sure the tire pressure is adequate, especially on rough or rocky terrain, to avoid the nasty double puncture from hitting the rim. Such punctures are notoriously difficult to repair because the holes are often too close to the tire rim.
In addition to tire punctures, there are other things that require careful maintenance to keep a tubeless system running, including rim tape, tubeless valves, and sealant.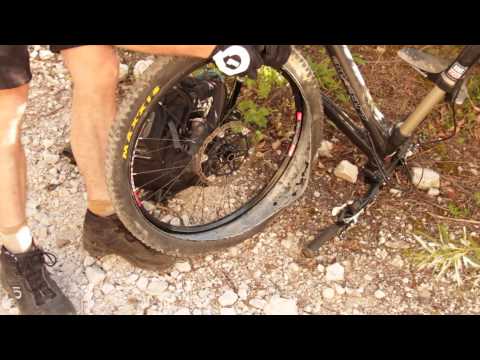
Understanding them on the go can be quite difficult, so in this case you may have to insert a camera and leave a more thorough inspection until you return home.
You might be interested:
Author: hkc5twrt Repair
Everything you need to know about one of the easiest chain connections. Quick release links can be used to secure the chain, making life much easier for you when servicing, cleaning or returning… Read More
Author: hkc5twrt Adventure
Solo bike tour in Russia Moscow Magadan. Survival alone with a tent on a bike. By bike across Russia. Last 16 episodes not included in the playlist. Magadan is an absolutely extraordinary city…. Read more
Author: hkc5twrt Fitness
Essential tips for preventing sudden, catastrophic power loss. Bonk is a funny name for a terrible feeling when suddenly there is nothing left in the tank, the legs turn into jelly, and to get to the finish line ... Read more
Author: hkc5twrt
Discuss vs. rim discussion is settled. But hydraulic or mechanical? There are some nuances here, especially in the lower price categories. The bicycle industry has long resolved the so-called disc dispute… Read more
Author: hkc5twrt Repair
Here's how to stop any unwanted noise from disc brakes. Disc brakes provide confident and stable braking even in wet weather. In general, these are very reliable and durable components, but disk… Read more
Author: hkc5twrt Fitness
How to stay fit, eat and be safe while cycling in the heat. Compared to running or any other non-water team sport,… Read More
Author: hkc5twrt articles
It's no secret that professional racers buy the best, but how much does it cost to copy them? It's no secret that Tour de France riders ride the very best bikes. One of many… Read more
Articles
When to accept different seating arrangements for cyclists on a group ride to be clear and safe. Spring is here, which means it's time to move on from indoor skating… Read More
Author: hkc5twrt
Hand signals are vital to the safety of everyone riding in your group, so here's what you need to know. Whether you are new to cycling or an experienced rider,… Read More
Author: hkc5twrt Fitness
Exercise-induced rhinitis: you may not have heard of it, but you may have experienced it. EIR is a common disorder associated with one or more symptoms including sneezing, runny nose, congestion… Read More
Author: hkc5twrt
Use our guide to help you determine your ideal mountain bike size. “What size mountain bike do I need?”. This question is often asked - and for good reason, because choosing the right size ... Read more
Author: hkc5twrt Accessories
The connecting rod - often referred to as the crank mechanism - is one of the most important parts of a bicycle. As one of the key components that helps move the chain while pedaling, it is at the heart of… Read More
Author: hkc5twrt Accessories
Froom points out friction and adjustment issues with the latest generation Shimano 9170 disc brakes. Chris Froome once again criticized the performance of disc brakes on road bikes, focusing on an unsolvable problem… Read more
Posted by hkc5twrt News
The International Cycling Union (UCI) has announced that, going forward, all professional cyclists racing on the World Tour must install dropper stands on their bikes and use them on all descents. New… Read more
Author: hkc5twrt Reviews
The best tires for road bikes should be fast, light, supple and bouncy. The tires you choose can make or break your ride, so here's our pick of the best. Choosing the best tires… Read more
Author: hkc5twrt
Cornering at speed is one of the hardest skills in mountain biking. Once you feel more confident on the trail, cornering becomes one of the most interesting parts of the ride… Read More
2022 UCI Road Cycling World Tour Calendar
 First Ride Review 1 view