Asked
Modified 3 years, 5 months ago
Viewed 32k times
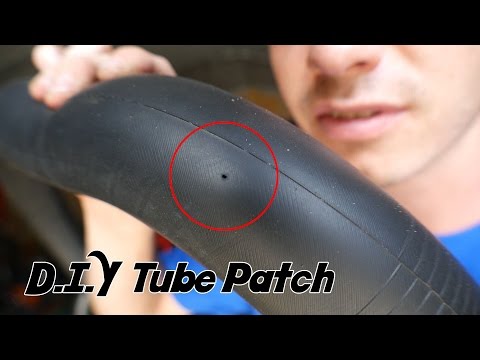
How do you deal with the small cuts in a bicycle tires main tread? Do folks fill these small cuts?
I have continental gatorskins which I periodically check and pull out the street glass shards.
thanks!
2
If it's a large enough cut that the tube pokes through the tyre once inflated, then the best solution is to use a regular tube patch on the inner surface of the tyre with the vulcanising glue just like when patching a tube.
While less recommended, I've also had success just using a drop of superglue for a small cut in a tyre.
2
I periodically check and pull out the street glass shards
I have been doing the same for as long as I have a bike. Glass shards, small sharp stones, nails, drawing pins... name something I haven't pulled out of my tires!
But I never worried of patching the tire, and never had problems because of that. My tires (even those which weren't puncture resistant) reached end of life because of wear, not because of cuts. I just patched the tube inside, and went on.
0
The only times you need to consider the tyre is if the hole is large enough for the inner tube to poke through, or if the hole is in the thin sidewall
I once had a hole that was ~1 mm across, and seemed okay. It took about 3 flats every 200 km of riding to realise that the tube was herniating through the hole and wearing through. A black tube and a black tyre made it hard to see the issue.
If you can't see the tube or the threads of the tyre in or through the hole, its fine. If you can, then its possible to stick an inner tube patch on the inside of the tyre to get more wear out of it, or if the tyre's worn out anyway then its time to replace.
Your other option is to work on your technique, and try to stop riding through broken glass so much. Not easy I know.
2
You can use a small amount of super glue to close the area that was cut by the shard of glass. Depending on where the cut is located you will have to re-apply the super glue every few hundred kms, but this can greatly extend the life of the tire.
1
Some puncture kits come with a piece of rubberised canvas which is intended for glueing over a (small) tear or hole in the tyre carcass - but I wouldn't rely on it for anything bigger than a slot a few mm long - perhaps you could get away with longer on a relatively low pressure tyre but not on a racing bike. For pinpricks or cuts to the rubber that don't penetrate into the fibre structure I've never bothered doing anything other than removing the foreign material from the tyre so it doesn't get worse. I've never had a tyre fail because I'd not glued up or repaired damage to the tread... general wear gets them in the end.
I don't bother patching cuts caused by tiny shards of glass and have never had a problem. When touring I carry a Park Tool emergency tyre boot in case I develop a bigger cut in the tyre - but I would only use it as a temporary solution until I can get home and replace the tyre.
There are also tire plugs which are designed to plug holes in tubeless tires that are so big the sealant does not work.
It might be overkill, but I see no reason why those would not work when using tubes.
Sign up using Google
Sign up using Facebook
Sign up using Email and Password
Required, but never shown
Required, but never shown
By clicking “Post Your Answer”, you agree to our terms of service, privacy policy and cookie policy
Asked
Modified 5 years, 8 months ago
Viewed 26k times
I was riding down a nice smooth bike path the other day (at speed), and there was a branch full of thorns about 10m ahead of me, straddling the path.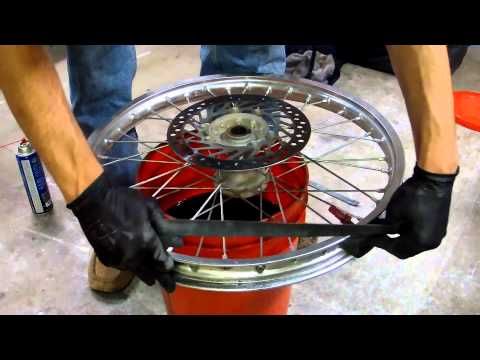 I couldn't have gone around it. One of the thorns pieced my tire, and pricked a hole in my inner tube - which slowly deflated. I will replace the inner tube - but is it worth me buying a new tire because of a 5mm hole from a thorn? Will this hole expose my inner tube too much? Thanks
3
A thorn hole in an inner tube is totally patchable. A 50 cent patch is a lot cheaper than a new tube. Stop consumerism!
As for the hole, it depends if the inner tube pokes out or not. The get-home fix is to line or reinforce that area with something laid between the tube and tyre.
On one tyre I ended up adding a patch to the inside of the tyre, which worked well enough. It lined up against the matching patch on the tube.
2
Holes in tires can be "temporarily" repaired by applying an emergency tire boot (e.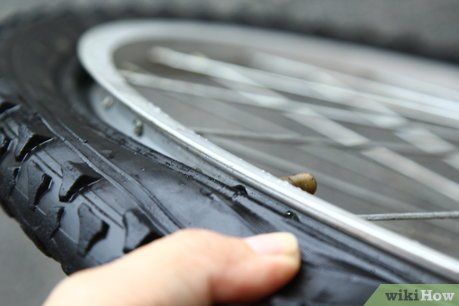 g., TB-2 Emergency Tire Boot) to the inside of the tire over the hole. These patches are stiffer than a regular inner tube patch (providing some structural integrity) and they should have a sticky compound on one side to help keep them in one place. They are also much cheaper than buying a new tire. Inner tube patches may not be stiff enough to support the break in the tire carcass, so I would recommend against taking this approach.
That all said, these are not intended as "permanent" fixes as they can fail under extended use if the tear in the tire carcass is too large. What is too large, well that depends on the conditions you ride under and tire pressures you use. That said, 5mm hole is pretty small. I have run a tire boot on a similarly sized hole in a tire for well over a year without any issues. That said, in the end this is a personal decision, and you monitor the tire to see if 1) the tire boot is holding and 2) the hole is getting any worse.
Finally as mentioned by Criggie, please consider patching the tube before replacing with a new tube.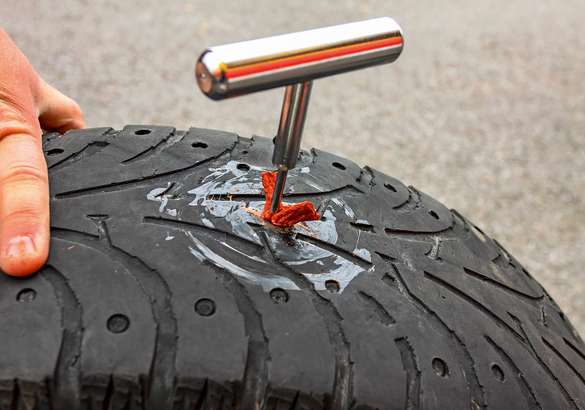 If you use classic glue on patches (not the glueless variety) these repairs can last years. If you need to replace, please consider recycling the old tube.
Sign up using Google
Sign up using Facebook
Sign up using Email and Password
Required, but never shown
Required, but never shown
By clicking “Post Your Answer”, you agree to our terms of service, privacy policy and cookie policy
 ru
ru Among the possible damage to a bicycle tire, there are those in which the replacement of the camera does not help. In a note, I will share this experience in repairing the sidewall of a Michelin Pro4 Service Course V2 bicycle tire.
A couple of years ago I was looking for road bike tires, more details here: Road bike tires, I want to go fast and not break through. I chose Michelin Pro4 Service Course V2 tires (for two bicycles on the farm). As for resistance to a puncture, there was confidence that there would be no regular problems on those roads on which we ride. Indeed, for a season and a half, not a single puncture. Even such an insidious option as a metal cord from truck tires (resembling a small needle) was not caught. More precisely, I got caught once, but after a side cut.
But there were no illusions about the side wall. In half the cases, tires of this level of rolling fail not due to wear, but due to a side cut. This is due to the fact that the side wall is soft, thin, elastic. Otherwise, it will not roll, too much energy will be taken to compress and straighten the tire near the “contact patch”.
The sides of the tires are usually cut with pebbles, which are often washed onto the road from the side of the road after rain. Or they are just scattered there in some places. The interaction of a pebble with a tire is worthy of a separate study. If in such a place along the road there is a metal chipper, then the pebbles sometimes hit it quite loudly, as if they were fired from a slingshot point-blank. That is, the pebble, as it were, is captured by the sidewall of the tire when the wheel hits, and then, when released, it is fired with very decent energy. Probably, if something goes wrong and the energy of the pebble turns out to be directed to the sidewall of the tire, and the pebble itself turns out to be with a sharp edge, then the tire may not withstand it. And it will not be a puncture, but a “bullet wound” 🙂
If possible, I try not to run into the pebbles on purpose, but since I am the “second number”, this is not always possible. In general, one fine day at the 18th kilometer of the planned 70, a shot rang out from under the rear wheel, as if it had run into a primer. There is a hole in the sidewall of the tire with a caliber of 7.62 mm, and in the chamber, of course, which exploded.
I note that the tire was inflated almost to the allowed maximum.
Maximum pressure - 116 psiWith a maximum pressure of 116 psi (marked on the side surface), the tire pressure calculator gives for my current "curb weight" the required pressure of 115 psi, which was "driven in". The tire itself passed one season on the front wheel (that is, in a gentle mode), we can say that it did not even squash. This is her second season in which she is working on pushing a curb weight from behind.
What should I do if I catch a side cut? On the Internet, this is chewed in more than detail, so I was well prepared for this. Just in case, I will list three options in descending order of the reliability of monitoring the situation.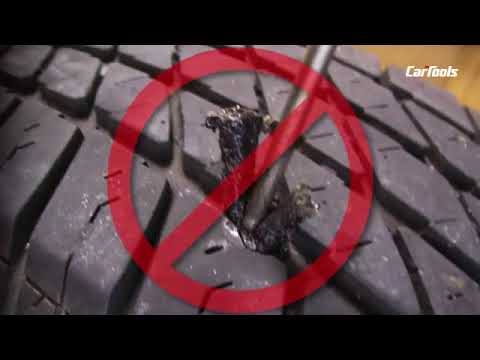
I stuck three layers of adhesive tape to the inside of the tire. When stuffing the necessary “nuts”, a small hernia appeared in place of the hole, but the camera was not at risk. One could say that I had a great ride up to the planned 70 km, but no, as I already mentioned, I also caught a wire-needle. I drive two cameras (because we ride together), so the cameras were enough for this trip “just right” 🙂
Repair of the sidewall of a bicycle tire is described quite well on the Internet, so I will hardly be original. However, there are a number of points that you need to pay attention to. The general principle is that during the repair, a sufficiently strong patch is glued inside, which should not allow the camera to squeeze out the hernia. But at the same time, of course, you need to say goodbye to the softness of the sidewall in this place. That is, the wheel will roll clearly worse. Yes, and the patch from the inside can fall off, because all the time it will either bend or unbend. Therefore, generally speaking, such a repair is not recommended. You could probably say the same about the bike. And on a car, in my experience, such repairs are simply prohibited, the tire is thrown out.
I chose the patch from a durable rubber found on the farm. I think that ordinary patches for punctures in cells are categorically not suitable, because they are easily stretched. Ideally, the rubber for such a patch should be reinforced with fabric, but I didn’t have one. The one that was found, to the touch is much denser than the patches for the cameras, it looks like the rubber of the sidewall of a tire. For some reason, it was attached to the ski helmet 🙂
Before gluing the patch, the hole must be sewn up. Not so that the threads hold the gap, but so that the entire problem area sticks evenly to the patch, which will hold the load. The threads can then fray during operation, this is no longer important.
I glued it as usual (sanded it, degreased it, the first layer of glue was dry, the second one was working, I pressed it for a day).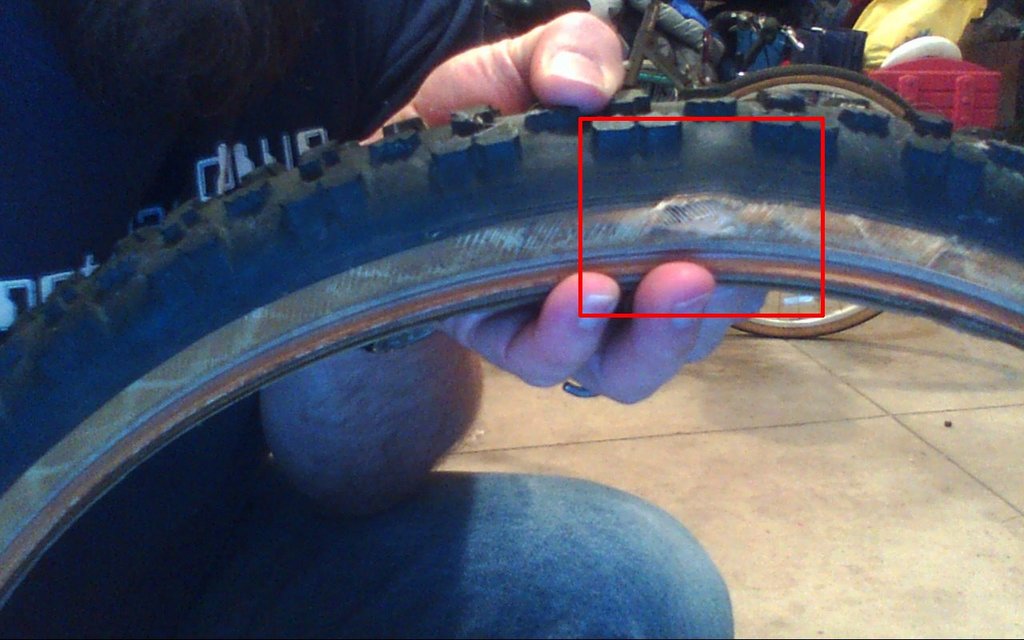 It turned out that the glue did not stick to the Michelin compound, everything remained on the patch. Maybe the glue was bad, universal based on gasoline, judging by the smell. I repeated the procedure with cyacrine glue (superglue). It stuck great. The edges of the patch were “nullified” with a dremel with a “skin circle” type nozzle. Just in case, I smeared the threads on the outside with cyacrine glue.
So far so good, but just in case I carry a spare tire with me.
Spare tiredid not notice any deterioration in rolling, although, in addition to the deterioration in rolling parameters due to the internal blotch, I still installed a conventional butyl bladder instead of a latex one. To be honest, suspected as well, but now there is something to think about additionally :)0001
views 29323
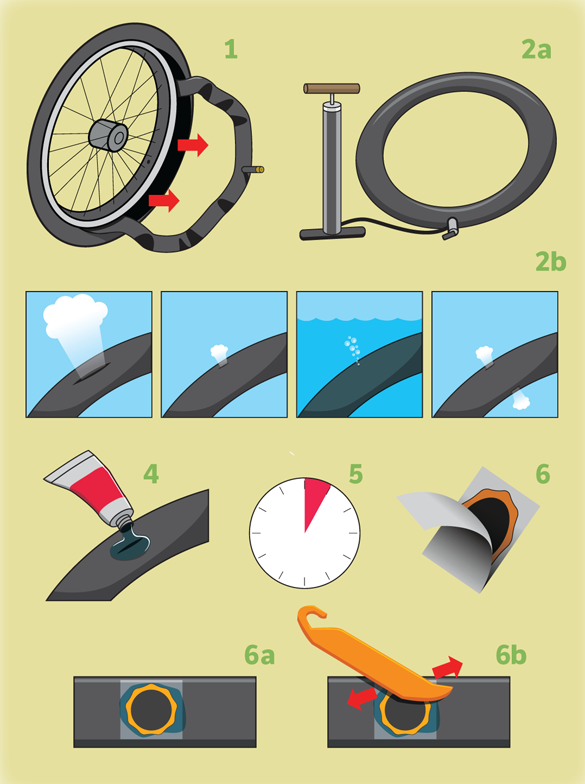
If you don't know how to seal a bicycle inner tube, then everything is quite simple - you only need glue and a patch. But wrenches, hexagons, disassembly, a container of water and a vise will also come in handy.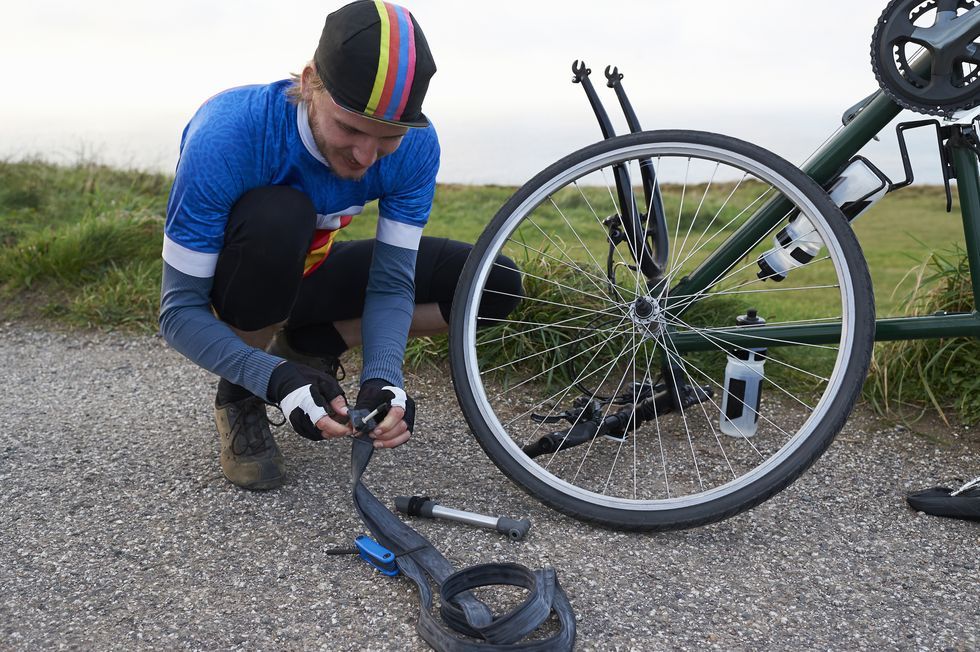 The set is enough, so you can carry out repairs in any conditions.
Do-it-yourself repair of the bicycle chamber is carried out according to the following algorithm:
 Then the film is removed from the patch, the adhesive is applied. It is pressed to the puncture site and held for several minutes;
 Sealing a bicycle wheel tube is easy - just remove it, patch the puncture site with a patch and put it back in place.
How to glue the bicycle inner tube with a repair kit is understandable, but what to do if it is not there, but repair is necessary? For example, a patch can be made from any rubber. Any glue is suitable, but the main thing is not to choose industrial.
There are also critical moments. In some cases, it is necessary to close the hole without glue and without removing the wheel. The patch is applied so that when inflated, it is pressed with strong pressure. But in this case, you need a pump.
If you don't have a rubber patch, a dampened plastic bag or duct tape will do, but only if you don't know how to seal the inner tube of your bike to get home, because the wheel won't withstand heavy loads.
Another option is vulcanization. This requires special tools, but the result is reliable. The point is that the patch and the camera are pressed against each other. Thanks to heating, both elements form a single whole. Before you seal the camera at home, think about vulcanization.
Even if you know how to properly seal a bicycle inner tube, it is worth learning how to avoid a puncture.
One of the most interesting options is cameras that can be sealed by themselves. Resin or a special gel is poured inside. When a breakdown occurs, the substance flows into the puncture point and seals it. In this case, it will be possible not to think about repairs for some time, but it will still have to be done sooner or later.
It is worth following a few simple recommendations to prevent a puncture: