Your safety with our products is a priority for us. Please have any outstanding safety recalls performed on your vehicle as soon as possible.
Contact your authorized BRP dealer to schedule an appointment to have the necessary repairs completed free of charge. (find a dealer)
Safety recalls about our vehicles as well as our parts, accessories and apparel (PA&A) are provided on this page. Find your PA&A equipment or your vehicle model and model year (MY) in the list below to see if there are any applicable safety recalls. To find out more about a recall, press the “Read full notice” button.
Often, not all vehicles within a model and model year group are subject to a given safety recall. If a safety recall is displayed for your model and model year, please contact your authorized BRP dealer or BRP to verify if your specific vehicle is involved.
The list below includes safety recalls from MY2008 and up. For vehicles that are older than MY2008, please contact your authorized BRP dealer or BRP to verify if there are any outstanding safety recalls
12/1/2022
MODEL YEAR: 2023
MODELS: Commander series, Defender series, Maverick Trail and Sport series equipped with a HD7, HD9, HD10, 1000 or 1000R engines
Fuel Hose Assembly Internal Damage - Potential Fuel Leak
Read full notice
6/7/2022
MODEL YEAR: 2022
MODELS: Outlander and Outlander MAX, 570, 650, 850 or 1000R engines
Steering Column Half Bushings May Be Missing - Potential Loss of Steering Control
Read full notice
12/15/2021
MODEL YEAR: 2022
MODELS: Outlander and Outlander MAX, with 450 and 570 engine
Speedometer Inaccuracy - Risk of crash.
Read full notice
6/17/2021
MODEL YEAR: 2020, 2021
MODEL: Defender with HD10 engine
Possible Fire Hazard in CVT Belt Enclosure When Using a Track Kit in Snow
Read full notice
5/5/2021
MODEL YEAR: 2021
MODELS: Outlander, Renegade
Possible Loss of Control - Front Lower Ball Joint May Detach
Read full notice
12/2/2020
Model year: 2021
Models: Outlander, Renegade
Possible Rear Wheel Loss
Read full notice
10/27/2020
Read full notice
7/16/2020
Read full notice
6/19/2018
Model year: 2018
Models: Outlander, Renegade
POSSIBLE FUEL TANK VENT OBSTRUCTION MAY CAUSE FUEL SPRAY
Read full notice
4/4/2018
Model year: 2017
Model: Outlander Max equipped with a DPS and 450 or 570 engines.
POSSIBLE LOSS OF STEERING - DYNAMIC POWER STEERING (DPS) SHAFT MAY BREAK
Read full notice
11/9/2017
Read full notice
12/20/2016
Model year: 2016
Models: Can-Am Defender, Defender DPS, Defender XT
MISLEADING PARK POSITION DISPLAYED IN INSTRUMENT CLUSTER
Read full notice
11/22/2016
Model year: 2017
Model: Maverick X3
POSSIBLE STEERING LOCK - RACK AND PINION ASSEMBLY
Read full notice
6/29/2016
Model year: 2013
Model: Commander equipped with Dynamic Power Steering (DPS)
POSSIBLE LOSS OF STEERING COUPLING STRIPPING ON RACK AND PINION ASSEMBLY
Read full notice
10/2/2015
Model year: 2015, 2016
Models: DS 90, DS 90X
FUEL FILTER REPLACEMENT
Read full notice
12/18/2014
Read full notice
2/25/2014
Read full notice
12/21/2012
Model year: 2011, 2012
Model: Commander
IMPROPER ASSEMBLY OF STEERING COLUMN ON RACK AND PINION
Read full notice
10/24/2012
Model year: 2011, 2012, 2013
Model: Commander
ACCUMULATION OF DEBRIS IN THE EXHAUST AREA IN VERY SPECIFIC RIDING TERRAINS AND CONDITIONS - FIRE HAZARD
Read full notice
11/14/2011
Model year: 2010, 2011
Models: Outlander and Renegade with DPS equipped
DYNAMIC POWER STEERING (DPS)
Read full notice
11/23/2009
Model year: 2010
Models: Outlander and Renegade ATV models equipped with DPS
DYNAMIC POWER STEERING (DPS) - SOFTWARE UPDATE
Read full notice
3/9/2009
Model year: 2008, 2009
Models: DS 70, DS 90 and DS 90 X
YOUTH ATVS LEAD COMPLIANCE
Read full notice
9/10/2008
Model year: 2008, 2009
Model: DS 90 X
TETHER ENGINE SHUTOFF SWITCH
Read full notice
If you have questions regarding a recall or if you believe your vehicle could be affected by a safety recall, please contact your authorized BRP dealer or BRP.
Your authorized BRP dealer is equipped to verify your vehicle identification number (VIN) for any outstanding safety bulletins. There is no charge for this verification service. (find a dealer)
To contact BRP, click here to submit an online request, or dial 1-888-272-9222 (toll free) between 8 a.m. and 8 p.m. Eastern time seven days a week.
COOKIE USE
This site uses cookies to ensure you have the best experience. By browsing this site, you are agreeing to our use of cookies in accordance with our Privacy Policy. Find out more on cookies and how to manage your settings on our Cookie Policy.
Have you ever driven down a wet road in 4 wheel drive during a heavy blizzard or on a very bumpy road when suddenly you notice your transfer case shift selector flopping around with no resistance? The transfer case shift lever is usually quite stiff but suddenly it feels loose and disconnected, sort of similar to a game console joystick.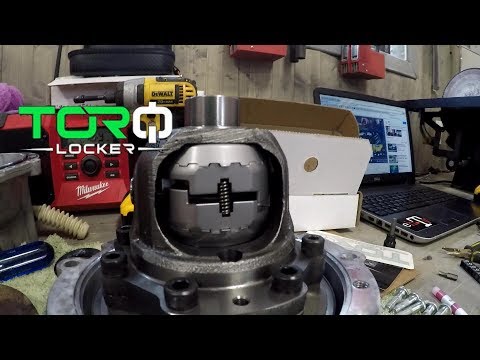 What could be the cause of this happening and how can it be resolved?
Why is my 4 wheel drive shifter loose? A transfer case shift selector is held in position by a linkage and a rubber bushing. Over time the rubber bushing gets soft and perishes, resulting in it simply breaking off or not holding the lever firmly in position any longer. Or, the linkage could break or the linkage junction could work loose and fall off, causing the transfer case shift selector to flop around loosely.
So now we have a high-level explanation as to the possible causes of the floppy 4-wheel drive shifter, let’s next look at how it can be repaired and how to determine if it is the rubber bushing or the linkage that failed. Later e will also look at an emergency fix when stuck in 4H, as well as the components required to get the 4-wheel gear shifter repaired.
Table of Contents
So, we’ve established the cause of the loose 4 wheel drive gear selector dangling around without any resistance to be either the linkage or the rubber bushing.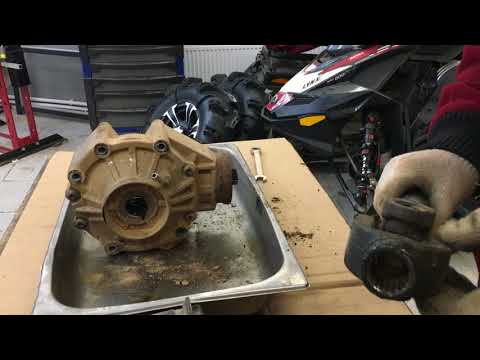 There is a third scenario, depending on the make and model, but there is a nut on the adjuster rod that could become corroded and either break off or work itself loose, also resulting in a loose shifter lever.
How does one go about determining this? Well, you will need to physically climb underneath the 4-wheel drive with a flashlight and inspect the linkages as well the rubber bushings for cracking, tearing, or broken and completely missing components.
Below is an extract from an actual explanation of how it happened:
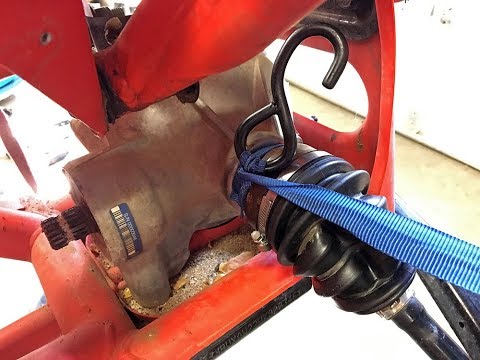
Got us a monsoon of a storm today, the kind with a foot or two of standing water on the roads, where there were a bunch of cars pulled over with flashers going. Came upon about a 1/4 mile low stretch, figured I’d put it in 4WD at least till I got to the other side. Shifted fine, 4 HI, drove through, no problem, hit a small bump just before coming out of the water (only about a foot to foot and a half deep) and noticed the transfer case shifter bounced forward about 3 or 4 inches.
Extract taken from dodgeforum.com.Put my hand on it and it freely moves all the way up & down. No resistance, doesn’t engage anything.
Next, let us look at what the actual cause of the rubber grommet failure is.
Like most things, rubber grommets and bushings, unfortunately, do not last forever and become susceptible to the effects of wear and tear as well as heart and oil. These all accelerate the rate at which a rubber grommet can perish prematurely.
You could have a situation where the grommet will come apart and cause the linkage to just float around. This will occur when you hit a small bump in the road. The linkage may have fallen out the lever of the transfer case.
Let us look at how heat and oil affect rubber grommets.
Rubber is made up of many atoms and molecules. (Molecules are groups of atoms that are bonded together. ) A human cannot see these molecules with the naked eye. The molecules are always vibrating around and bumping into one another. Now when the material gets hotter, the molecules vibrate more vigorously and more intensely. This bumping into one another harder is the reason why the material expands a little each time. The scientific terminology for this phenomenon is called thermal expansion.
Thermal expansion is responsible for many of the cracks you see in roadways, sidewalks, and rubber bushes, grommets, and seals constantly exposed to heat. The constant variation of temperature from very hot to very cold is caused when you drive the vehicle to when it is parked overnight. The engine temperature and heat are given off inside the engine may cause the materials to expand and contract over and over again, eventually leading to cracks.
Next. Let us look into more detail how the oil of an engine can affect the rubber bushings on a vehicle.
The rubber compound in O-rings is made up of a combination of different materials. The O-rings that are commonly used in the engines and gearboxes of motor vehicles are usually made of more heat, petroleum, and oil-resistant rubber. However, with time and constant exposure the rubber begins to break down bit by bit since chemicals like Vaseline and petroleum have the ability to degrade and break down the rubber over time.
What aggravates the breakdown and degradation of rubber grommets and bushings are when your vehicle develops a leak. The oil then oozes all over the engine or transmission and usually drips down due to gravity. When a rubber that is not designed to be exposed to hot oil or petroleum makes contact with it, accelerates the process and the rubber can quickly perish. A simple bump in a road can cause the rubber to either pop off or tear, causing whatever it was designed to secure firmly in place, to become loose and floppy or dislodge completely.
Next, let us look into how we can replace the bushing and secure the linkage back in place.
Many 4-wheel drivers have described how the linkage comes loose resulting in the shifter simply flopping around without any resistance. This results in the shifter failing to engage 4H or disengage 4-wheel drive mode once the rubbers bushing or linkage dislodges.
The repair process is pretty simple unless something broke inside the transfer case, there really is not much involved to repair the linkage. The only problem is if your linkage is broken in 4H mode.
This is a particularly tricky scenario if your 4-wheel drive was engaged in 4H mode while you were driving on snow or an icy road with low traction. Once you arrived home safely or the road conditions improve, you will need to disengage 4H mode and place it back in 2H to prevent drivetrain binding. The drivetrain binding effect is caused by driving on a high traction surface while 4H is engaged.
You can read more about drivetrain binding here
In this instance, if you desperately need to engage 2H mode you will need a quick fix. This can be done using a pry bar to remove the linkage so it is out of the way. This will allow you to manually move the lever at the transfer case and engage 2H mode.
When the transfer shifter lever moves around a bit it’s usually no big deal at all. Vibrations in the drivetrain and engine can cause this combined with an uneven driving surface. It is not a very serious issue and nothing to stress about. However, if the rubber mounts are worn or perished and become more loose than usual they could have shifted further than normal or just enough to bend or break the junction. The transmission and the transfer case are positioned quite a bit lower than the rubber mounts with the transmission shifter lever positioned above them. Hence, any slight movement will be exaggerated and the lever seems to float.
This is caused by the TC or Transmission mounts allowing more movement and shifting than it is designed to, causing the shifter movement to be exaggerated even more. This could also result in the junction popping off the linkage. If the lever is really loose, then the linkage has almost definitely broken or the junction could be rusted or damaged.
Below is a video that describes in detail, the effects of rubber bushing damage and possible linkage failure.
Broken or missing tension bolt
If your transfer case shifter has a setup that includes a bolt that is positioned on the lever with a tension setting then this part is for you. This is the kind of setup you will find in the Ford F150.
The bottom part of the shift rod is shaped like a small U and slots over a spall pin. There are a nut and bolt that is used to adjust the tension and fasten it and keep it in place. If this nut and bolt fall off, your shifter will be loose and lack tension.
Have a look at the below images and notice the missing bolt on the image on the right.
Image B shows the bolt that has fallen or broken offThe bolt can work itself loose due to constant vibration from perhaps regularly driving on a corrugated dirt road or a very bumpy road surface. Once the bolt loosens and falls off there will be no tension on the lever.
If the bolt breaks off inside the tension-setting arm, you will need to remove the entire arm and drill out the bolt first. This can be drilled and backed out with an easy-out of the same diameter.
Your other option is to drill a bigger hole and use a tap to clean the bolt threads out of the hole treads. Re-tap it with a slightly bigger thread and replace the bold with the appropriate size.
The last and easiest option is to buy a new linkage and replace the entire unit. This will result in slicker and easier shifting between 2H and 4H and especially 4Lo.
If you are experiencing problems with your Jeep Wrangler, not engaging 4-wheel drive, then this part of the article is for you. It also involves a linkage that has either failed or completely worked itself loose and fallen off.
The linkage we are referring to is the one that connects the transfer case shifter lever to the actual selector arm on the transfer case. This allows the driver to engage 4WD mode as well as select 4-Lo. If the lever feels more loose than normal or when you shift the lever back the Jeep fails to engage 4H or 4Lo.
If this happens then you need to investigate immediately by crawling underneath the Jeep and have a look at this transfer case linkage. It’s a very inexpensive part that can easily be purchased online. It is labeled as a linkage adjuster. The linkage has an adjuster which allows you to set the tightness.
Watch the below video which explains the missing shifter linkage and how to fix it.
So there are a few things that could possibly cause the 4-wheel drive shifter to not engage or be stuck in 4H mode. They could be any of the following:
Take the time to investigate what the possible cause is by crawling underneath and having a look around with a flashlight. We have established that it could be a problem if you are stuck in 4H or 4Lo mode and you desperately need to engage 2H mode to safely drive on a high traction surface such as tarmac roads.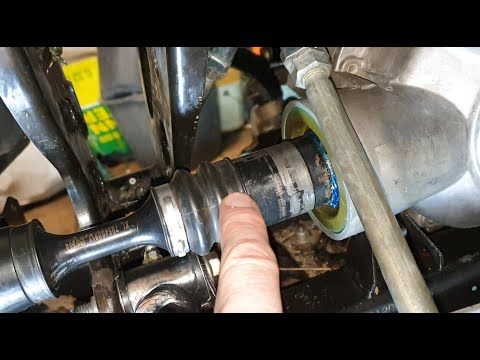 In this instance, you will need to physically pry the transfer case into 2H and have it repaired at your next convenience.
We recommend that you contact your nearest Authorized Can-Am Dealer. To find a dealer near you, use the search feature on the website.
For manufacturer's recommended service intervals, see the owner's manual for the appropriate Can-Am model. This section also contains electronic versions of the instruction manuals.
For technical questions, please contact your Can-Am dealer first. If you've already done this and your dealer wasn't able to answer your question, please contact Can-Am and we'll try to help.
Electronic versions of manuals are presented in this section. Alternatively, you can purchase a printed manual from an authorized Can-Am dealer.
You should first report your concern to the service manager at the dealership. If you are still not satisfied with any aspect of your ATV/ATV service, you can contact Can-Am Customer Service.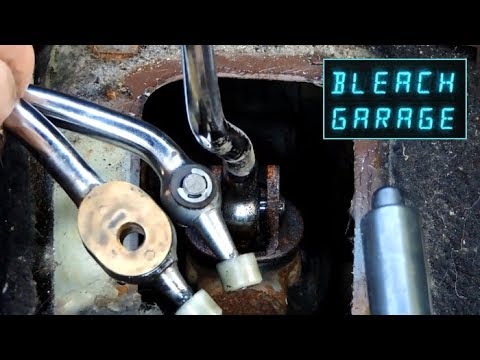
Information about how to store your Can-Am during the off-season can be found in the appropriate owner's manual in the Storage section.
The first step is to take your Can-Am to an Authorized Dealership for diagnosis. A specialist at the center will help you determine if this repair is covered under warranty.
Yes, vehicle-specific warranty.
Yes, factory warranty issues should be repaired by any Authorized Can-Am Dealer.
No, shipping the ATV/ATV to and from the dealership is not covered by the warranty and is the responsibility of the owner.
If a part is not found to be due to a manufacturing defect, it is possible that the repair will not be covered by the warranty.
Send us a copy of proof of purchase or ownership (such as a receipt), mileage or hours driven on the Can-Am ATV/ATV, and full mailing address and telephone number.
Can-Am off-highway vehicles and related parts and accessories are available from your dealer. To view the Can-Am ATV/ATV parts catalog, click here.
Contact the parts department of the dealer where you purchased this part or accessory.
Discuss your question directly with the Parts Manager at your dealership. If the problem persists after this, please contact us.
Contact your Can-Am dealer for complete information on current promotions and discounts.
Report this problem to the dealership where you purchased your Can-Am. If an issue with a discount or promotional item that you believe is covered by your purchase persists, please contact Can-Am Support and we can help resolve the issue.
The availability of safety bulletins and recall notices related to your Can-Am can be checked by your authorized Can-Am dealer using the VIN serial number. This service is provided free of charge.
USE OF COOKIES
This website uses cookies to provide a personalized experience and functionality. By continuing to browse this site, you agree to the use and storage of cookies in accordance with our Privacy Policy . For more information on which cookies are used on this site, you can find out by reading Cookie Policy .
Articles
02 Dec
Any wheeled vehicle - from a bicycle to a multi-ton truck - has a transmission in its device: a system that transmits rotation from the engine to the wheels. The operation of the transmission - and therefore the speed of driving - can be controlled by shifting gears.
Gear shifting is organized differently in each mode of transport. In the article below, we will tell you exactly how to shift gears on ATVs, and what gearboxes are found on such equipment.
Gearboxes for ATVs can be of two types:
 Similar to motorcycle gearboxes. They are put mainly on racing models, but in recent years they have also begun to be found on utility ATVs. They have a foot clutch or clutch with a lever on the steering wheel (in most cases it is), and a foot shifter. Manual transmission usually has 4 “forward” gears, neutral and reverse.
 Rare and mostly found in older models, but other variations can be found. For example - "automatic" with the ability to manually shift gears.
Manual ATVs are a little more difficult to drive (at least at first, until you get used to it), but you can more accurately select the appropriate mode. And vice versa: CVT "boxes" are much easier to operate, they are easy to master for a beginner who gets behind the wheel of an ATV for the first time. But on the other hand, with active driving along a route with variable difficulty, riding a CVT will be a little less convenient.
For example: you are driving on a flat packed dirt road on H, and you see a large stretch of muddy road ahead with deep mud (or a steep slope, or bumps, or stones). You will have to come to a complete stop and shift to L, drive through mud, and come back to a dry road, come to a complete stop again and shift back to H. , like motorcycles, and a manual clutch lever on the handlebar on the left.
The foot lever device can be of two types:
The shift itself is carried out in the same way as on motorcycles: