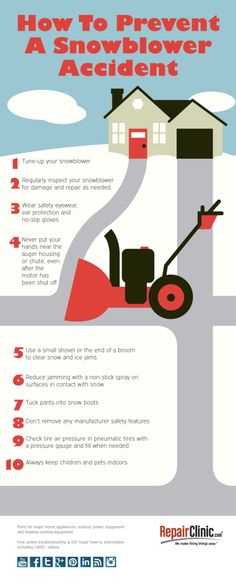
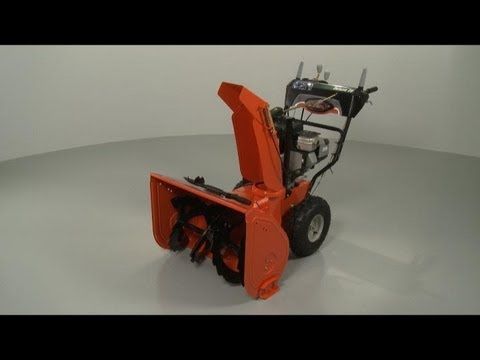
Have a flat on your Honda snowblower? Just got it out of storage to find a tire has come off a rim? Here’s what you need to do to fix it and keep it from happening again.
All Honda snowblowers built in the past two decades that use pneumatic tires are tubeless. That means if you have a leak, it’s in the tire itself. It also means that if the tire separates from the rim, the bead needs to be reseated to reinflate the tire.
Tire pressure should be checked before each use, even if you got your snowblower out the day before. If the temperature drops 10°F, tire pressure can drop up to one PSI. Tires can also lose one PSI each month they’re in storage. Honda’s snowblower tires are designed to operate at 8.5 PSI, so it doesn’t take much for the pressure to drop significantly between uses.
Removing the wheel will make it much easier to work on the tire. Honda offers some tires and wheels as a complete set, letting you replace a bent rim and tire in one step.
1. Disconnect the spark plug wire to prevent an accidental start.
2. Lift up the rear of the snowblower so that the tires are off the ground.
3. Depending on the model, there will be either a bolt or a Clevis pin on the axle. Remove this part, and slide the wheel off of the axle.
4. Slide the new wheel onto the axle and tighten down the bolt or reinstall the pin.
5. Air up the tire before lowing the snowblower to keep the bead from separating it from the rim.
If the tire pressure is too low, rolling the snowblower can cause the tire bead to roll off of the rim. If that happens, it can be reseated by using air pressure to push out the sidewalls of the tire:
1. Remove the wheel.
2. Hold the tire and wheel in a way that lines the bead up with the rim.
3. Connect the air valve to a compressor or a pressurized air tank. You may need to go over the recommended operating pressure to push the bead onto the rim, but try not to go above the maximum pressure on the sidewall. The goal isn’t to put a lot of air in the tire, it’s to put the air in quickly to get the bead to meet with the rim.
Most of the time, the tire will expand and seat on the rim with just air pressure. If the bead still doesn’t want to seat, there are a few things you can try:
— Apply grease on the inside lip of the wheel. This helps the tire slide up to the rim, and can reduce the amount of air escaping as you air up the tire.
— Remove the valve stem. This reduces resistance when airing up the wheel. Be gentle handling the wheel and tire when reinstalling the stem as the lack of air pressure can let the bead slide off of the rim again.
— Tie a ratchet strap or a rope around the tire tread. This pressure will help push out the sidewall so the bead doesn’t have as far to go to meet with the rim. To tighten a rope, slide a piece of pipe between it and the tire and twist, wrapping the rope around the bar.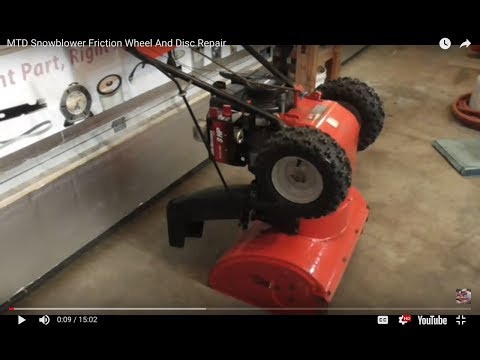
It is possible to spray the rim with starter fluid and light it to pull the tire onto the rim, but it should be obvious that this is extremely dangerous. If the tire is that difficult to fit, it’s worth getting a complete wheel and tire instead of setting your snowblower and yourself on fire.
If there are cracks in the rubber or damage to the tire, it should be replaced.
1. Remove the wheel from the snowblower.
2. Push in the tire valve to release any remaining air inside the tire.
3. Use a set of tire levers or spoons to pull the bead over the rim. Once one bead is off the wheel, lift up the tire and pull the other bead over.
4. Fit the new tire onto the wheel using the spoons or levers.
5. Use the process above for reseating the bead. Air up the tire to the correct pressure, then install the wheel on the snowblower.
www.hondalawnparts.com is a certified Honda Power Equipment dealer, so we’re able to ship any OEM part currently available to any address in the U. S. or Canada. Check out our wheels section to find a replacement for your snowblower, or use our search system to find the right part for your model.
Please enable javascript to view the website ..
Repair help > Gas Snowblower repair > Gas Snowblower symptoms
If your snowblower's tire has a slow leak, try pumping up the tire with air; it might stay inflated long enough for you to clear the snow. You might even be able to get away with that approach until spring. But if the tire won't stay inflated, you have to repair or replace it. Also check the rim of the snowblower tire and replace the rim if it's damaged.
Inspect the tires should be inspected before each use. If a tire is flat, repair or replace it. If the wheel rim is damaged, replace it.
Find the required part specific to your product.
Choose a symptom to see related snowblower repairs.
Things to do: replace the spark plug, change the oil, rebuild the carburetor, adjust valve lash, adjust or replace the belts
Read moreMain causes: punctured tire, damaged rim
Read moreMain causes: dirty carburetor, clogged fuel filter, dirty spark plug, incorrect valve lash, leaky engine gaskets
Read moreMain causes: clogged chute, damaged auger blades, broken shear pins, worn auger belt, damaged gear case, engine problems
Read moreMain causes: stale gas, clogged carburetor, clogged or broken fuel line, dirty spark plug, bad rewind starter, incorrect valve lash
Read moreMain causes: clogged chute, snow build-up in auger housing, broken auger shear pins, auger drive belt needs adjustment, auger cable problems
Read moreMain causes: dirty carburetor, stale fuel
Read moreMain causes: loose drive clutch cable, damaged drive clutch cable, worn friction disc, scraper blade scraping the ground, engine problems
Read moreMain causes: snow build-up in chute, chute drive mechanism failure, bad chute control assembly
Read moreThese step-by-step repair guides will help you safely fix what’s broken on your snowblower.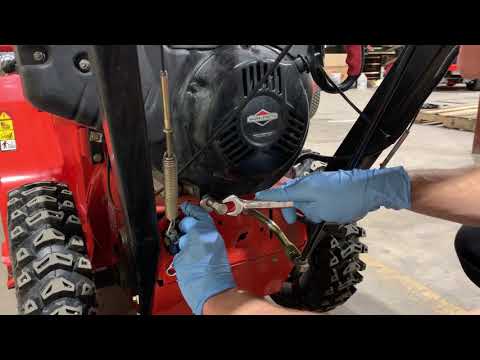
December 1, 2015
By Lyle Weischwill
Rebuild the carburetor on your snowblower if the engine isn't getting fuel.
Repair difficulty
Time required
45 minutes or less
Read moreDecember 1, 2015
By Lyle Weischwill
Replace the 4-way chute control assembly on your snowblower if it’s damaged.
Repair difficulty
Time required
30 minutes or less
Read moreDecember 1, 2015
By Lyle Weischwill
Replace the stop switch on your snowblower if your engine won't start.
Repair difficulty
Time required
15 minutes or less
Read moreUse the advice and tips in these articles and videos to get the most out of your snowblower.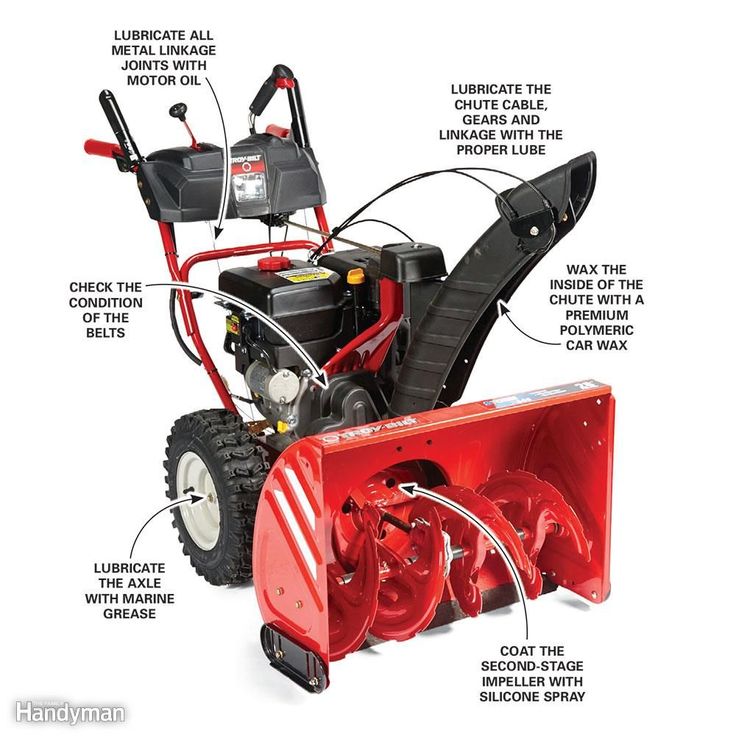
August 5, 2022
By Lyle Weischwill
Learn about Sears Technical Institute and the advanced technical content being developed for aspiring appliance techs.
Read moreJune 29, 2022
By Lyle Weischwill
Get answers to frequently asked questions about Sears and Sears PartsDirect.
Read moreRadiant Bracket WB02T10480 partsRange Felt Washer WB1X560D partsWasher Support Motor Bracket DC61-03307A partsGenerator Circuit Breaker, 30-amp 706178 partsLock Washer, 8-pack STD852008 partsShield 316222715 partsRange Surface Burner Knob 318905204 partsFloor Polisher Buffer Pad 45-0150-8 partsRoom Air Conditioner Front Grille 61811112 partsSnowblower Electric Starter 435-611 partsRange Oven Door Outer Panel AGM73012801 partsRefrigerator Freezer Glass Shelf 241711213 partsRefrigerator Deli Drawer Slide Rail, Left 242156404 partsRefrigerator Shelf Support Rail, Center DA61-04175A partsWall Oven Broil Element 00144648 partsLawn & Garden Equipment Engine Oil Filter 248-65801-10 partsRefrigerator Defrost Thermal Fuse DA47-00301B partsWasher Agitator Drive Shaft WP389231 partsLawn & Garden Equipment Engine Blower Housing 795397 partsCooktop Burner Skirt 316241601 parts
With the development of tire fitting, many novice drivers, unlike experienced drivers of the older generation, do not know how to seal the tube, or how to change it, or how to separate the tire from the wheel to do this - that is, the disassembly process itself. They don’t know while they are driving around the city, but it’s worth going somewhere far to the sea, or at least to the country, and then an inexperienced driver can lie in wait for a surprise lying on the road, in the form of a nail. And the spare tire has been punctured for a long time. And any driver immediately becomes interested in how to separate the tire from the rim, especially if over the years it has thoroughly stuck to the edge of the rim. In this article, we will look at several ways to peel a tire from a rim - stripping, and when using them, you will not need to wave a sledgehammer.
On motorcycle wheels, the effect of “growth” of the tire bead to the edge of the rim is very rare, although it also happens, especially when using a wide tubeless tire, but on cars, the tire is always glued, and the stronger the longer the wheel has not been disassembled.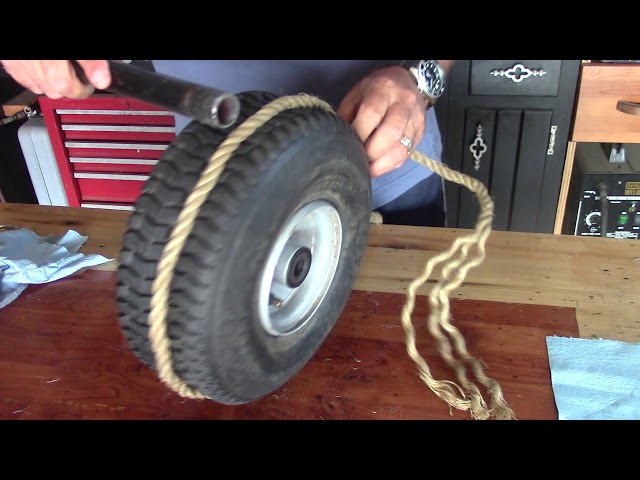 And the process of "welding" the tire to the rim depends on the composition of the rubber, the surface of the rim flange, how much the tire was heated during operation, what pressure it had, and on the design of the rim itself.
And if the rim is designed for a tubeless tire, that is, it has bulges (humps) on the edges to hold the tire and seal the joint during inflation, then such a tire is even more difficult to separate from the rim. In tire shops, there is a special machine for this, which develops a fairly large force to separate the tire from the rim. Naturally, on an autonomous journey, somewhere in the outback, you may not meet a tire service with such a machine, but instead Uncle Vasya can meet you with open arms, with a sledgehammer and a couple of cut corners.
Of course, there are kits for repairing tubeless tires on the road, but many drivers even install a tube in a tubeless tire if the rim is slightly damaged and the tire does not hold pressure. Although a tubeless tire can be repaired with high quality, if only to separate it from the rim. To separate the tire bead from the rim flange, many try to use their own weight by standing on a lying wheel.
But 80 kg weight rarely achieves anything, especially if the tire is normal and has not lost its elasticity. And a high-quality fresh tire, especially a tubeless one, can be torn off by its own weight even at 90 - 100 kg is not always possible. After all, force must be applied at the very edge of the rim and tire, and the foot slips here, and the shoe deteriorates.
There are several non-impact methods (I'll just remind you about impact methods that spoil the rubber), easy separation of the glued tire from the wheel rim. And the most common way, which by the way has several disadvantages, is a car hitting a board laid on a wheel tire, as in the photo on the left.
It is not always possible to put it into practice, because firstly you need a solid board, and secondly, in order to run into a punctured wheel, you need to replace this wheel on the car with a spare wheel, and if it is also punctured. Moreover, if there is a spare wheel, then by installing it, you can safely get to the nearest tire service.
The most common method (impact), which, by the way, was also used in tire mantage, until a disassembly machine appeared, is to separate the tire from the rim with a sledgehammer and a piece of a metal corner, as in Figure 1 a, or a piece of spring - Figure 1 b.
Although the sharp edges of the corner or spring should be naturally blunted, this method can still spoil a quality tire a little, and even the paint on the rim. Therefore, it should be used in rare cases, and why, if there are other unstressed methods that do not require swinging a sledgehammer and which we will consider below.
Other non-impact methods of wheel disassembly are based on the use of a regular jack of domestic cars. The use of a jack with the participation of the machine can be seen in the photo on the left. But most of the methods using a jack can be used without the participation of the machine (or rather, its weight).
And one of the best ways can be seen in figure 1. And compared to the common way shown in figure 2, this way has a great advantage.
With this method (as in Fig. 1), the overturning force acts on the jack much less, that is, it is much easier to hold it vertically (perpendicular to the wheel). In addition, this method allows the use of almost all car jacks (hydraulic, angular, diamond-shaped, etc.).
And with this method, you do not need to carry any additional devices in the trunk, except for a jack and a strong rope or webbing. And the role of the lower stop will be successfully performed by a large open-end wrench or mounting blade. Well, if you are going to disassemble the wheel in your garage, then you can make a special recess in the wall into which a piece of the profile pipe is concreted, and then use it to stop the jack (as shown in Figures 5 and 4).
If, for example, you came to your country house and found a punctured wheel, then after finding suitable thick boards, you can use another way to disassemble the wheel, shown in Figure 6.
With this method, the peeling force of the tire will depend on the ratio of the shoulder A and B, so the length of the boards matters. By the way, now on sale you can find very useful lever devices for easy shockless disassembly of the wheel.
One of these useful devices is shown in Figure 7. It is quite effective and its only drawback is that it is rather large due to the length of the lever, although it depends on what kind of trunk the car has.
But if you have a small trunk, then the lever can be shortened (cut off), and to lengthen it, use a suitable pipe, which will be put on before work, lengthening the lever. You can search for sale or make your own and other spectacular devices, for example, as in Figures 9and 8. If you make the device shown in Figure 9, it will take up very little space in your trunk, but will be very useful.
The dimensions on the drawing can be changed slightly, according to the diameter of the wheels of your car. And finally, one more piece of advice. Before you start disassembling the wheel, it is useful to spray a penetrating liquid into the joint of the tire bead and rim, for example, a common “weed” (WD-40) or Unisma, wait about five minutes and then start working. And the tire will peel off the rim flange much easier.
By the way, it has been verified that these fluids do not have a bad effect on rubber. Well, I hope everyone will be able to seal the camera or repair a tubeless tire, and if someone is going to do it on their own for the first time, I advise you to read this article, which describes in detail the repair sequence for both tubeless and tube tires.
In addition to commercially available 12 volt vulcanizers, there are now many cold bonding kits for both tube and tubeless tyres. Each set comes with instructions for use.
In conclusion, I advise you to watch an interesting video under the article about a simple device for shockless wheel breaking, which you can make yourself from very affordable pipe cuts that can be found on any scrap metal.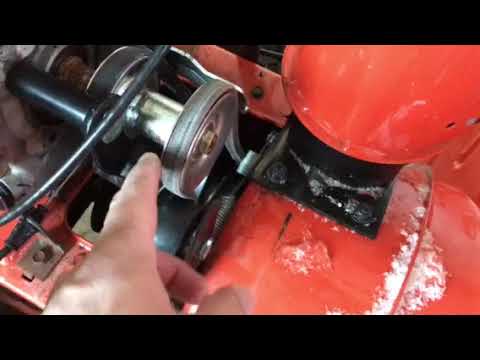
Tags: How to easily peel off a tire from a wheel rim?, Several ways to disassemble a wheel tire.
The snow blower is an indispensable tool for owners of private houses. If you want your equipment to serve you faithfully for many years, you need to take care of its proper storage. Particular attention should be paid to conservation - long-term storage in the summer.
In order for the components and parts to remain in working condition, the mechanism must be properly processed. Then by the beginning of the working season you will not have any problems. In this article, we will look at the preventive measures taken for fuel, battery and electric snow blowers.
The first thing to do before storing the snow blower for a long time is to clean it thoroughly, removing dirt and excess grease.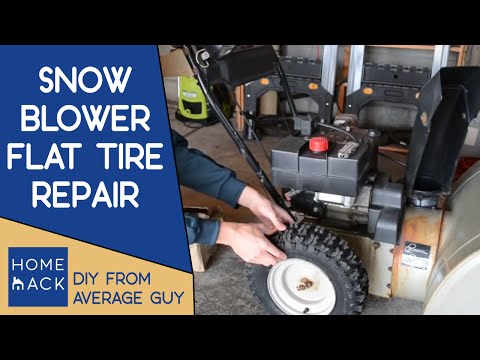 Next, you need to check the condition of the belts. If they are worn out, replace them with new ones. The moving parts of the mechanism are lubricated, and the bolts, nuts and screws are tightly tightened.
It is also important to check the rotating parts. If any element is broken or worn, it must be replaced. In the presence of scuffs (as a result of corrosion or mechanical damage), the parts are painted after rubbing them with sand.
Now you can start conservation. First, drain the fuel and carefully inspect the float chamber. It is necessary to remove the remaining gasoline from it. Some snowblower models are equipped with a drain bolt located next to the camera's center mounting bolt. In its absence, it is necessary to unscrew the central bolt of the float chamber. The mechanism must be started and stopped, wait for the final fuel consumption in the chamber. Change the oil to avoid corrosion and chemical attack.
Remove the spark plug to prevent rust on the combustion chamber.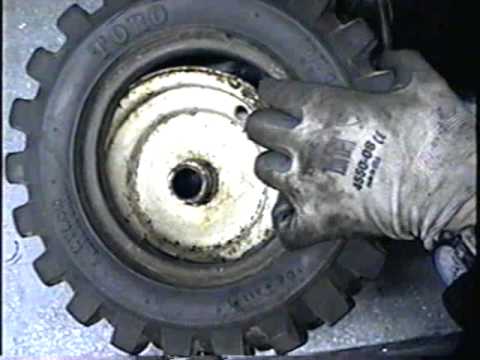 Pour 10 grams of oil into the chamber (about 1 teaspoon). After making several jerks with the starter handle, wait for resistance. Close the valves and stop moving the handle. The oil will be evenly distributed in the chamber.
If grease fittings are not available, oil must be injected into the pin holes. The bolts are unscrewed, and grease is placed in the gap between the screws and the holes from the bolts. Then the screw scrolls, and the procedure is repeated again.
The next step is to lubricate the attachment area of the ejection chute to the augers. This must be done using the same materials in several stages.
The snow blower gearbox is then machined.
At the end of all preparatory procedures, the machine is put into maintenance mode. After unscrewing the bolts, remove the rear cover of the housing or pallet. Using lithol or graphite grease, the friction-type disc shaft is removed.
Drive gears must be lubricated with thick oil. And for the chain drive, it is necessary to use liquid formulations (in particular, engine oil). Drive cables are checked. At the final stage, it is necessary to lubricate the core.
Electric snow blowers are a lot easier. Preparing for conservation will take less time and effort.
First, inspect the shear bolts to make sure they are properly tightened. If necessary, replace them with new ones. Inspect the belts, and if they are worn, also replace them.
For electric snowplows, all you need is a secure storage location. It can be a change house, a barn or a garage. The main thing is that the room is clean and dry. In this case, the mechanism will be protected from corrosion. However, as with a fuel powered snow blower, the machine must be cleared of dirt and debris.
The electric snow blower has its own summer storage features. First of all, you need to inspect the contacts and check their integrity. If they are oxidized or rusted, they must be replaced with new ones. The body of the snow blower is also cleaned of dirt.