$13. 46
Product Description
Customer Reviews
There are no reviews for this product at this time.
Write a Review
Rating Required Select Rating1 star (worst)2 stars3 stars (average)4 stars5 stars (best)
Name
Email Required
Review Subject Required
Comments Required
Related Products
Shipping & Returns
We understand that online ordering can be difficult and at times merchandise needs to be returned for either a refund or an exchange. Please read through our Return/Exchange Policy before starting the return process. If you have any questions, please contact our Customer Service Center.
Our Price: $11. 66
66
Our Price: $17.95
Our Price: $16.83
Our Price: $16. 88
88
Our Price: $14.58
Our Price: $16.83
Our Price: $17. 95
95
Find Parts For Your ATV:
Find Parts For Your ATV:
Categories
Careful periodic maintenance helps keep your vehicle in the safest and most reliable condition. Control, cleaning, lubrication, adjustment and replacement of parts and components must be carried out according to the regulations and / or as necessary.
How often is maintenance required?
First service on a new ATV - after the first 500 km
Next maintenance - every 1500 km
Performing maintenance procedures requires certain knowledge and qualifications, therefore it is recommended to carry out periodic maintenance in official dealerships that have all the necessary equipment and qualified specialists. The procedures for performing periodic maintenance in this manual are for reference only and may not fully reflect the entire list of tasks to be performed.
| CAUTION |
|
SERVICE DEPARTMENT IN MOTOR SHOWROOM MOTOPOLE
Serves and repairs ATVs since 2007. On an area of 1200 sq. m. spacious parking lot, where you can easily park with a trailer.
We carry out the following types of work:
HARD SERVICE.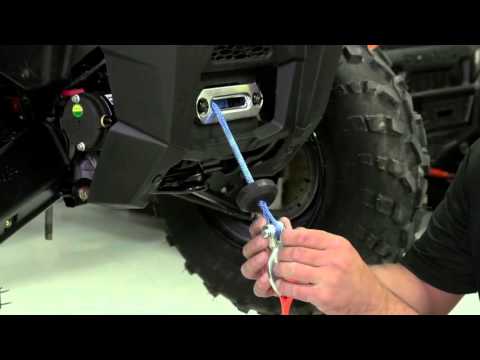
The service intervals indicated in the maintenance schedule below are given taking into account the average operating conditions of the equipment. If the ATV is operated in difficult conditions, the frequency of maintenance of the equipment should be increased.
| CAUTION |
Check the engine oil level before every ride. An increase in oil level during operation in cold weather may indicate that deposits are accumulating in the crankcase. If the oil level starts to rise, change the engine oil immediately.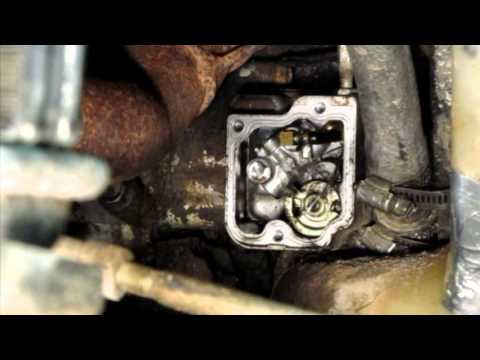 If the oil level continues to rise, stop operating the vehicle and contact your authorized dealer for diagnosis and repair if necessary. If the oil level continues to rise, stop operating the vehicle and contact your authorized dealer for diagnosis and repair if necessary. |
| MAINTENANCE SCHEDULE | |||||
| A: Adjustment | First MOT: 400-600 km | ||||
| C: Shoe | Every 1500 km | ||||
| I : Check | Every 3000 km/1 year | ||||
| L: Lubrication | Every 6000 km / 2 years | ||||
| R: Replacement | Remarks | ||||
| ENGINE | |||||
| Oil and filter | R | R | But at least once a year | ||
| Valve clearances | I, A | I, A | |||
| Condition of glands and seals | I | I | |||
| Engine mounts | I | I | |||
| Air filter | I,C | R | |||
| Coolant | I | I | R | Replacement every two years | |
| Cooling system | I | I | Check tightness | ||
| Radiator of the cooling system | I,C | I, C | Press if necessary | ||
| coolant hoses | I | I | |||
| Spark plug | I | I | R | ||
| GEARBOX | |||||
| Oil | R | I | R | ||
| BRAKE SYSTEM | |||||
| Brake Fluid Levels | I | I | R | Replacement every two years | |
| Wear of brake pads and discs | I | I | |||
| Lever adjustments, pedals | I | I | |||
| FUEL SYSTEM | |||||
| Throttle assembly | I | I,L | |||
| Throttle cable | I,L | I,L | |||
| CVT | |||||
| Belt | I | I | R | ||
| CVT pulleys | I,C | ||||
| Reliability of fastening of air ducts | I | I | |||
| CHASSIS, FRAME | |||||
| Checking the levers | I | I | |||
| Checking the condition of the frame | I | ||||
| Ball joints, condition | I | ||||
| Drives, CV joints, anthers | I | I | |||
| shock absorbers | I | I | |||
| FRONT AND REAR GEARS | |||||
| No leaks or damage | I | I | |||
| Oil | R | I | R | ||
| DRIVE SHAFTS | |||||
| Spline gaps, lubrication | I | I | |||
| crosses | I | I | |||
| STEERING | |||||
| Reliability of fastening of the amplifier of a wheel | I | I | |||
| Tie rod ends, other components | I | I | |||
| WHEELS | |||||
| Fastening | I | I | |||
| Play in wheel bearings | I | I | |||
| ELECTRICAL EQUIPMENT | |||||
| Battery, condition, charging circuit | I | I | |||
| Cable routing | I | I | |||
| Connector Status | I | I | |||
| Light fixtures, switches | I | I | |||
| Sensors | I | ||||
| OTHER SYSTEMS AND UNITS | In case of detection of abnormal work | ||||
CHECKING THE ENGINE OIL LEVEL
Check the engine oil level regularly and change it according to the maintenance schedule. It is recommended to use CFMOTO G-Motion 10W40 4T semi-synthetic oil in the engine; semi-synthetic oil CFMOTO G-Motion 5W40 4T; SAE 15W-40 API SG, in cold weather SAE 5W-30/40 or SAE 10W-30/40 API SG oils can be used.
| | | | | |
|---|---|---|---|---|
| Oil engine dipstick | | Left Engine Trim (Inspection Cover) | | Maximum and minimum oil levels |
1) Place the vehicle on a level, level surface;
2) Start the engine and let it run at idle speed for 20-30 seconds;
3) Stop the engine;
4) Wait a few minutes, allowing the oil to drain into the crankcase;
5) Remove the plastic inspection cover by pulling it from the lower left side, be careful not to break its fasteners;
6) Unscrew the oil dipstick, wipe it with a clean cloth;
7) Insert the dipstick into the oil filler hole, do not twist it;
8) Remove the dipstick again and check the oil level;
9) If necessary, top up the oil level. The engine oil level should be between the upper and lower marks on the dipstick;
10) Install the oil dipstick in place, tighten it;
11) Replace the plastic inspection cover.
| NOTE |
|
ENGINE OIL AND OIL FILTER CHANGE
1) Place the ATV on a flat, level surface. If the engine has recently been running, then it is necessary to wait a while until the oil cools down and drains completely into the crankcase;
2) Place a container of sufficient volume suitable for collecting oil under the engine drain hole;
3) Remove the plastic inspection cover by pulling it from the lower left side, be careful not to break its fasteners;
4) Unscrew the engine oil dipstick;
5) Remove the engine drain bolt located on the bottom of the engine;
6) Completely drain the oil;
7) Install a new sealing washer on the engine drain bolt;
8) Reinstall the engine drain bolt and tighten to the recommended torque: 30 N•m
9) Remove the three bolts securing the oil filter cover;
10) Remove the oil filter cap;
| | | | | |
|---|---|---|---|---|
| Engine drain bolt | | 1) Oil filter 2) Oil filter cap O-ring | | 3) Oil filter cover 4) Oil filter cover bolts |
11) Remove the oil filter;
12) Install a new oil filter;
13) Install the oil filter cover in place and fasten it with three bolts, the recommended tightening torque.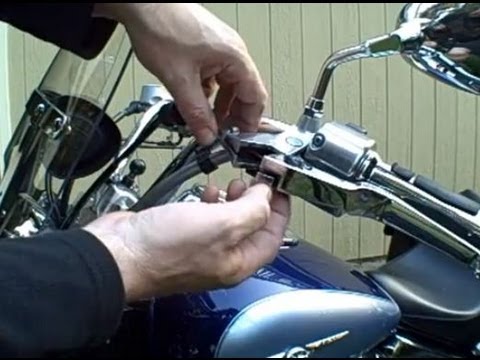
14) Fill with oil bringing its level to normal;
15) Install the oil dipstick in its original place;
16) Start the engine and warm it up for a few minutes. Check for oil leaks. If a leak is detected, immediately stop the engine, find out and eliminate the cause of its occurrence;
17) Stop the engine and check the oil level, if necessary, top up the oil level;
18) Replace the plastic inspection cover.
| CAREFULLY |
If oil leaks are found, immediately stop the engine and find out the cause of their occurrence. If the problem persists, contact your authorized dealer. |
| NOTE | |
| ENGINE OIL CAPACITY | |
| Changing the engine oil without changing the oil filter | 2.4 l |
| Engine oil change with oil filter change | 2.5 l |
| Full volume of oil in the engine (during overhaul) | 2.6 l |
Contents
Adjust the motorcycle throttle cable.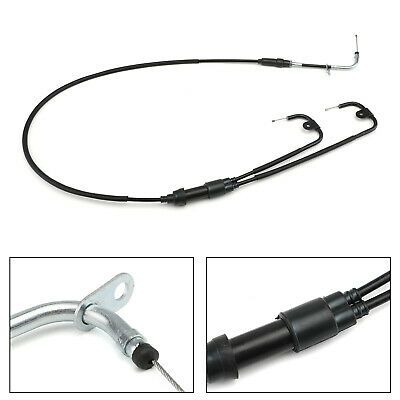 is one of the easiest tasks. If you have the necessary tools, namely open-end wrenches, you can adjust it in about ten minutes.
Where can I find the accelerator cable? How to know if the cable is faulty? How to make the necessary adjustments? Check out our tips on how to properly adjust your motorcycle throttle cable.
Motorcycle throttle cable is easy to find. It turns out that the is in the gas grip, which is the correct grip that you obviously use for acceleration. If this pen only contains one cable, this is the one you are looking for.
However, it is possible that it contains two. In this case, the throttle cable is usually at the top. Another cable, that is, the lower one, performs the role of security. It's there to make sure the throttle will snap back into place when you let it go. For this, he was nicknamed the reverse cable.
First of all, note that it is not necessary to adjust the throttle cable if it is not dangerous. Before touching anything as a result, first make sure there is a malfunction. After that, you can make the necessary settings.
Normally the throttle cable is activated when the handle is turned. This action will actually pull on the cable, which will cause the bike to accelerate. However, this reaction does not occur almost instantly. If you've been riding for a long time, you'll notice a slight delay between the moment you turn the knob and the moment the bike actually hits the gas pedal. This is completely normal.
However, it fails when this timeout becomes unusually long . If you feel like the throttle doesn't respond for a long time, if you feel like you're cranking it right out of bad response, that's a problem. And this is especially when cornering or when driving in a roundabout. This usually means that the throttle cable is worn and the guard needs to be adjusted.
It's very easy and hopefully you won't even have to touch the throttle.